Part 5? How many “parts” are there going to be? Given the progress made this week, it is my fervent hope that there will be ONE more part. We’re that close. The end is near, er, a road test is imminent.
The week started with assistance from my step-son who worked with me to bolt the right side spindle/control arm assembly into place. Once that was hung, install of the backing plate and steering link was quite straightforward.
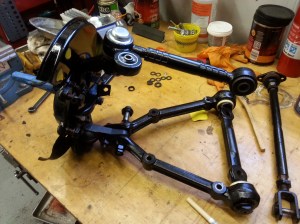
Right side spindle/control arm assembly about to be reinstalled.
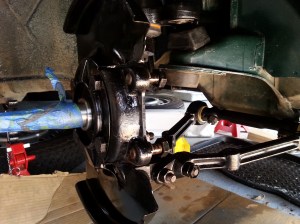
Right side spindle/control arms installed on car.
Close-up of right side spindle/control arms immediately after re-installation.
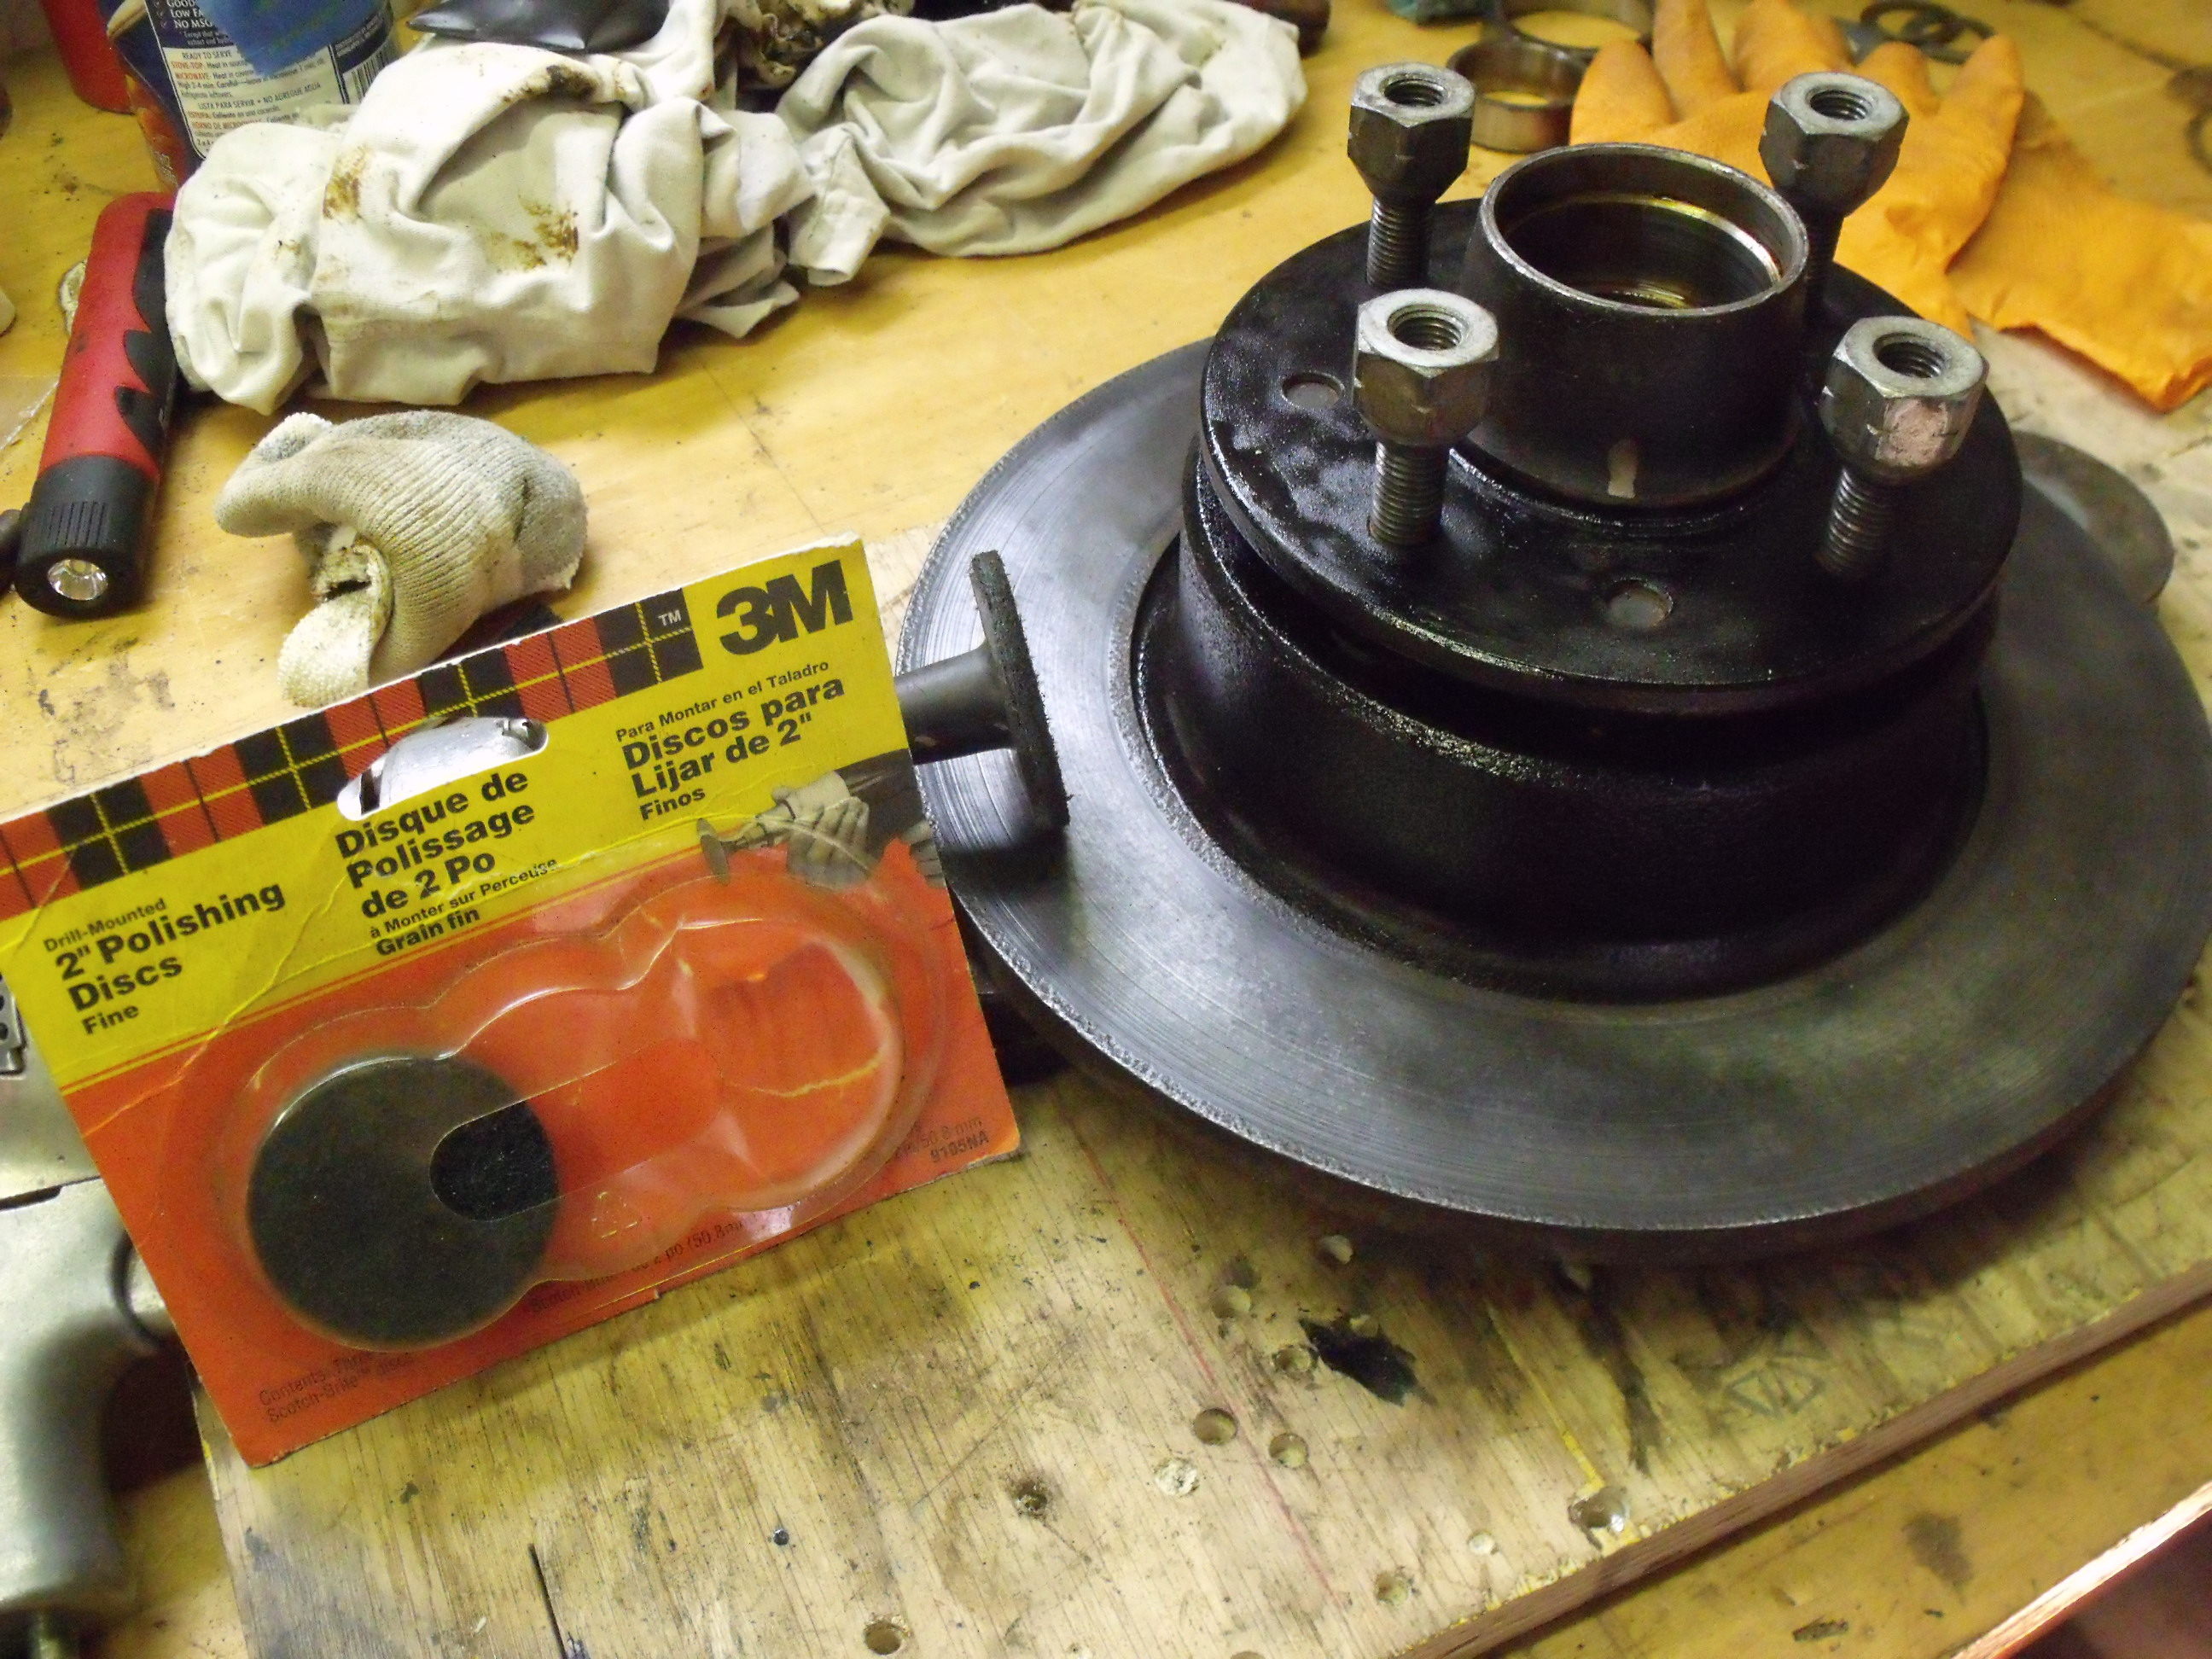
It was time to pay attention to the hub/brake disc assemblies, both of which have sat, ignored, since I removed them. In quick succession, the old bearings and seals were removed, the races knocked out, new races hammered in, the hub surfaces painted, new bearings packed and dropped in, and the bearing seals installed.
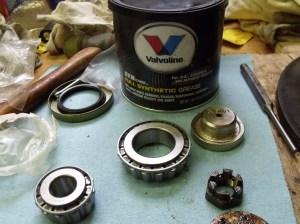
I used Valvoline full-synthetic wheel bearing grease for the first time. The stuff is black, and if possible, even nastier than the dino-based grease. It is supposed to tolerate higher temps (for those times when I’ll be driving the Death Valley 1000 old-car rally).
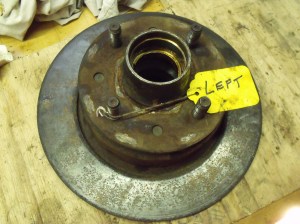
Left side hub/rotor before work on it began.
Hub after painting with Eastwood Chassis Black.
New bearings and seals laid out and about to be smothered in grease.
As an additional step, I used a 3M fine polishing disc in my trusty Black & Decker electric drill to remove the fine layer of rust on the rotor surfaces. Doing this removed no metal, and left the surface ready for the new brake pads.
The 3M fine polishing disc was used to clean up the rotor surface.
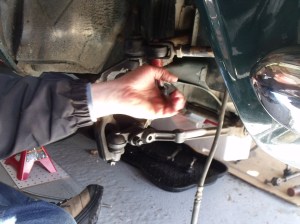
The hub/disc assemblies were reinstalled on the spindles, and a preliminary seating of the new bearings was done by spinning the hub and tightening the spindle nut, then backing off and repeating that process two or three times. I had forgotten that the LEFT side spindle nut has LEFT-HANDED threads. Once I relearned that, we were good. The brake calipers were then bolted back on. On the left side, the new hose was connected, and new pads and hardware put into the caliper.
New pads and hardware installed in the left side caliper.
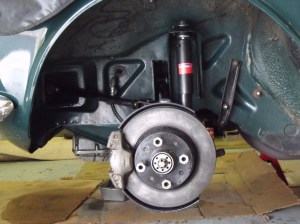
Left side suspension with hub/rotor and caliper installed.
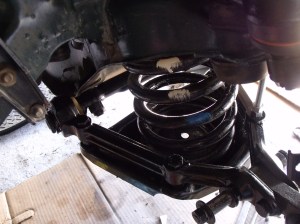
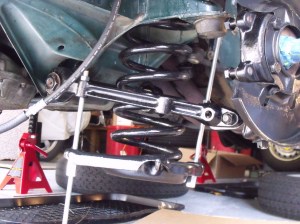
There are some jobs for which you need that second set of hands. My brother-in-law Kevin happened to be visiting this past weekend, and I pressed him into service to help me install the coil spring on the right side. Just like the left side, a series of threaded rods were used to join the lower control arm and the spring seat. By alternately tightening the nuts under the spring seat, we were able to safely compress the spring to the point where the proper bolts could be installed.
Threaded rods used to bring lower control arm and spring seat together by compressing coil spring.
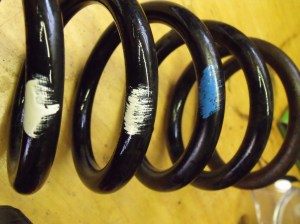
Correct bolts between lower control arm and spring seat reinstalled. Note factory paint marks on coil spring which were not painted over.
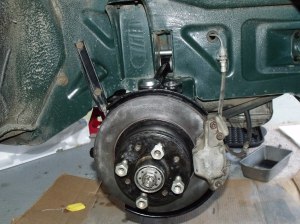
Right side hub/rotor assembly and caliper back in place.
What’s left? The devil is in the details: right side brake hose and pads, bleeding of both front brakes, right front shock, sway bar, and steering links. Bolt the tires on. Torque the suspension with the vehicle’s weight on the ground. That’s it. I think. Then we drive.
Another productive week has gone by, and with most of the painting finished, some reassembly has begun. It certainly feels like huge progress has been made.
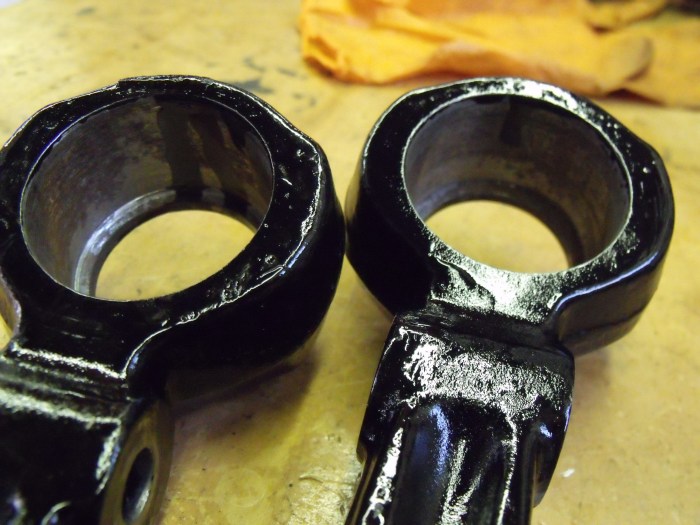
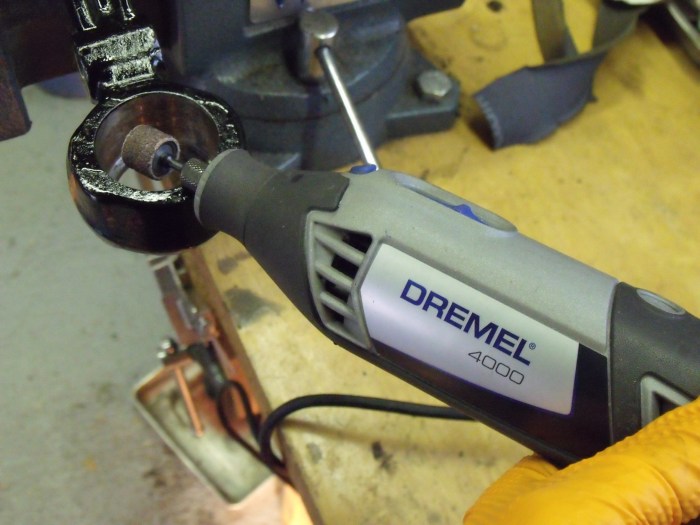
In our last installment (Part 3) just about all of our right side suspension components had been painted. I patiently waited the recommended 48 hours for the Chassis Black to dry, and then it was time to have some fun. First order of business was the installation of the new lower control arm bushings. “Bushings” is actually misleading, as I have attempted to describe before. These more closely resemble bearings, as there is a grease-filled spherical joint inside the casing. (The price reflected this too, as these were about $40 for the pair.) My Dremel tool was used with a sanding drum to clean up the inside of the control arm. A light coating of wheel bearing grease was applied to all surfaces, both to ease the installation and to also make it easy for the poor guy who will take these apart for the car’s restoration in 2067.
Control arms had rust and paint on inside surfaces
Dremel tool with sanding drum gets the job done
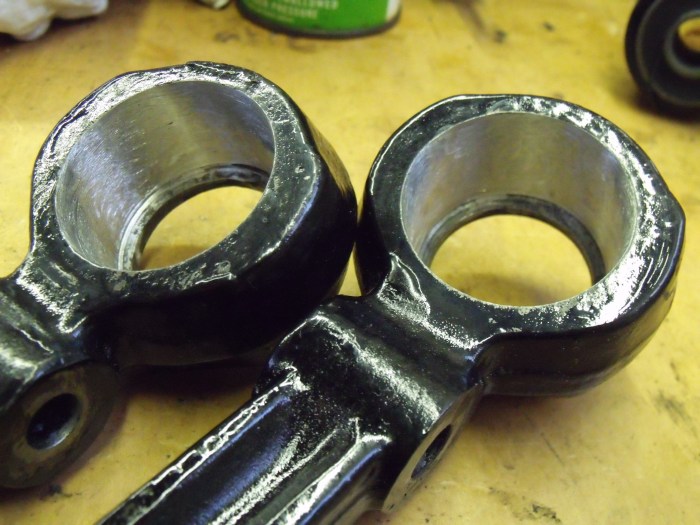
Nice and shiny and ready for new bushings
The bushings/bearings are not symmetrical; a foam ring fits on one side to help prevent the ingress of water and dirt, so I needed to pay attention when pressing these in. The hydraulic press did a beautiful job of driving them home into the control arms.
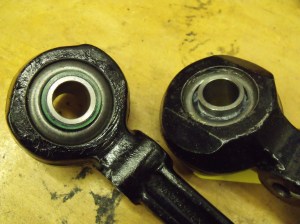
Bushings old and new, side by side
Appropriate-sized sockets were used to press the bushings into place
New bushings installed into the control arms
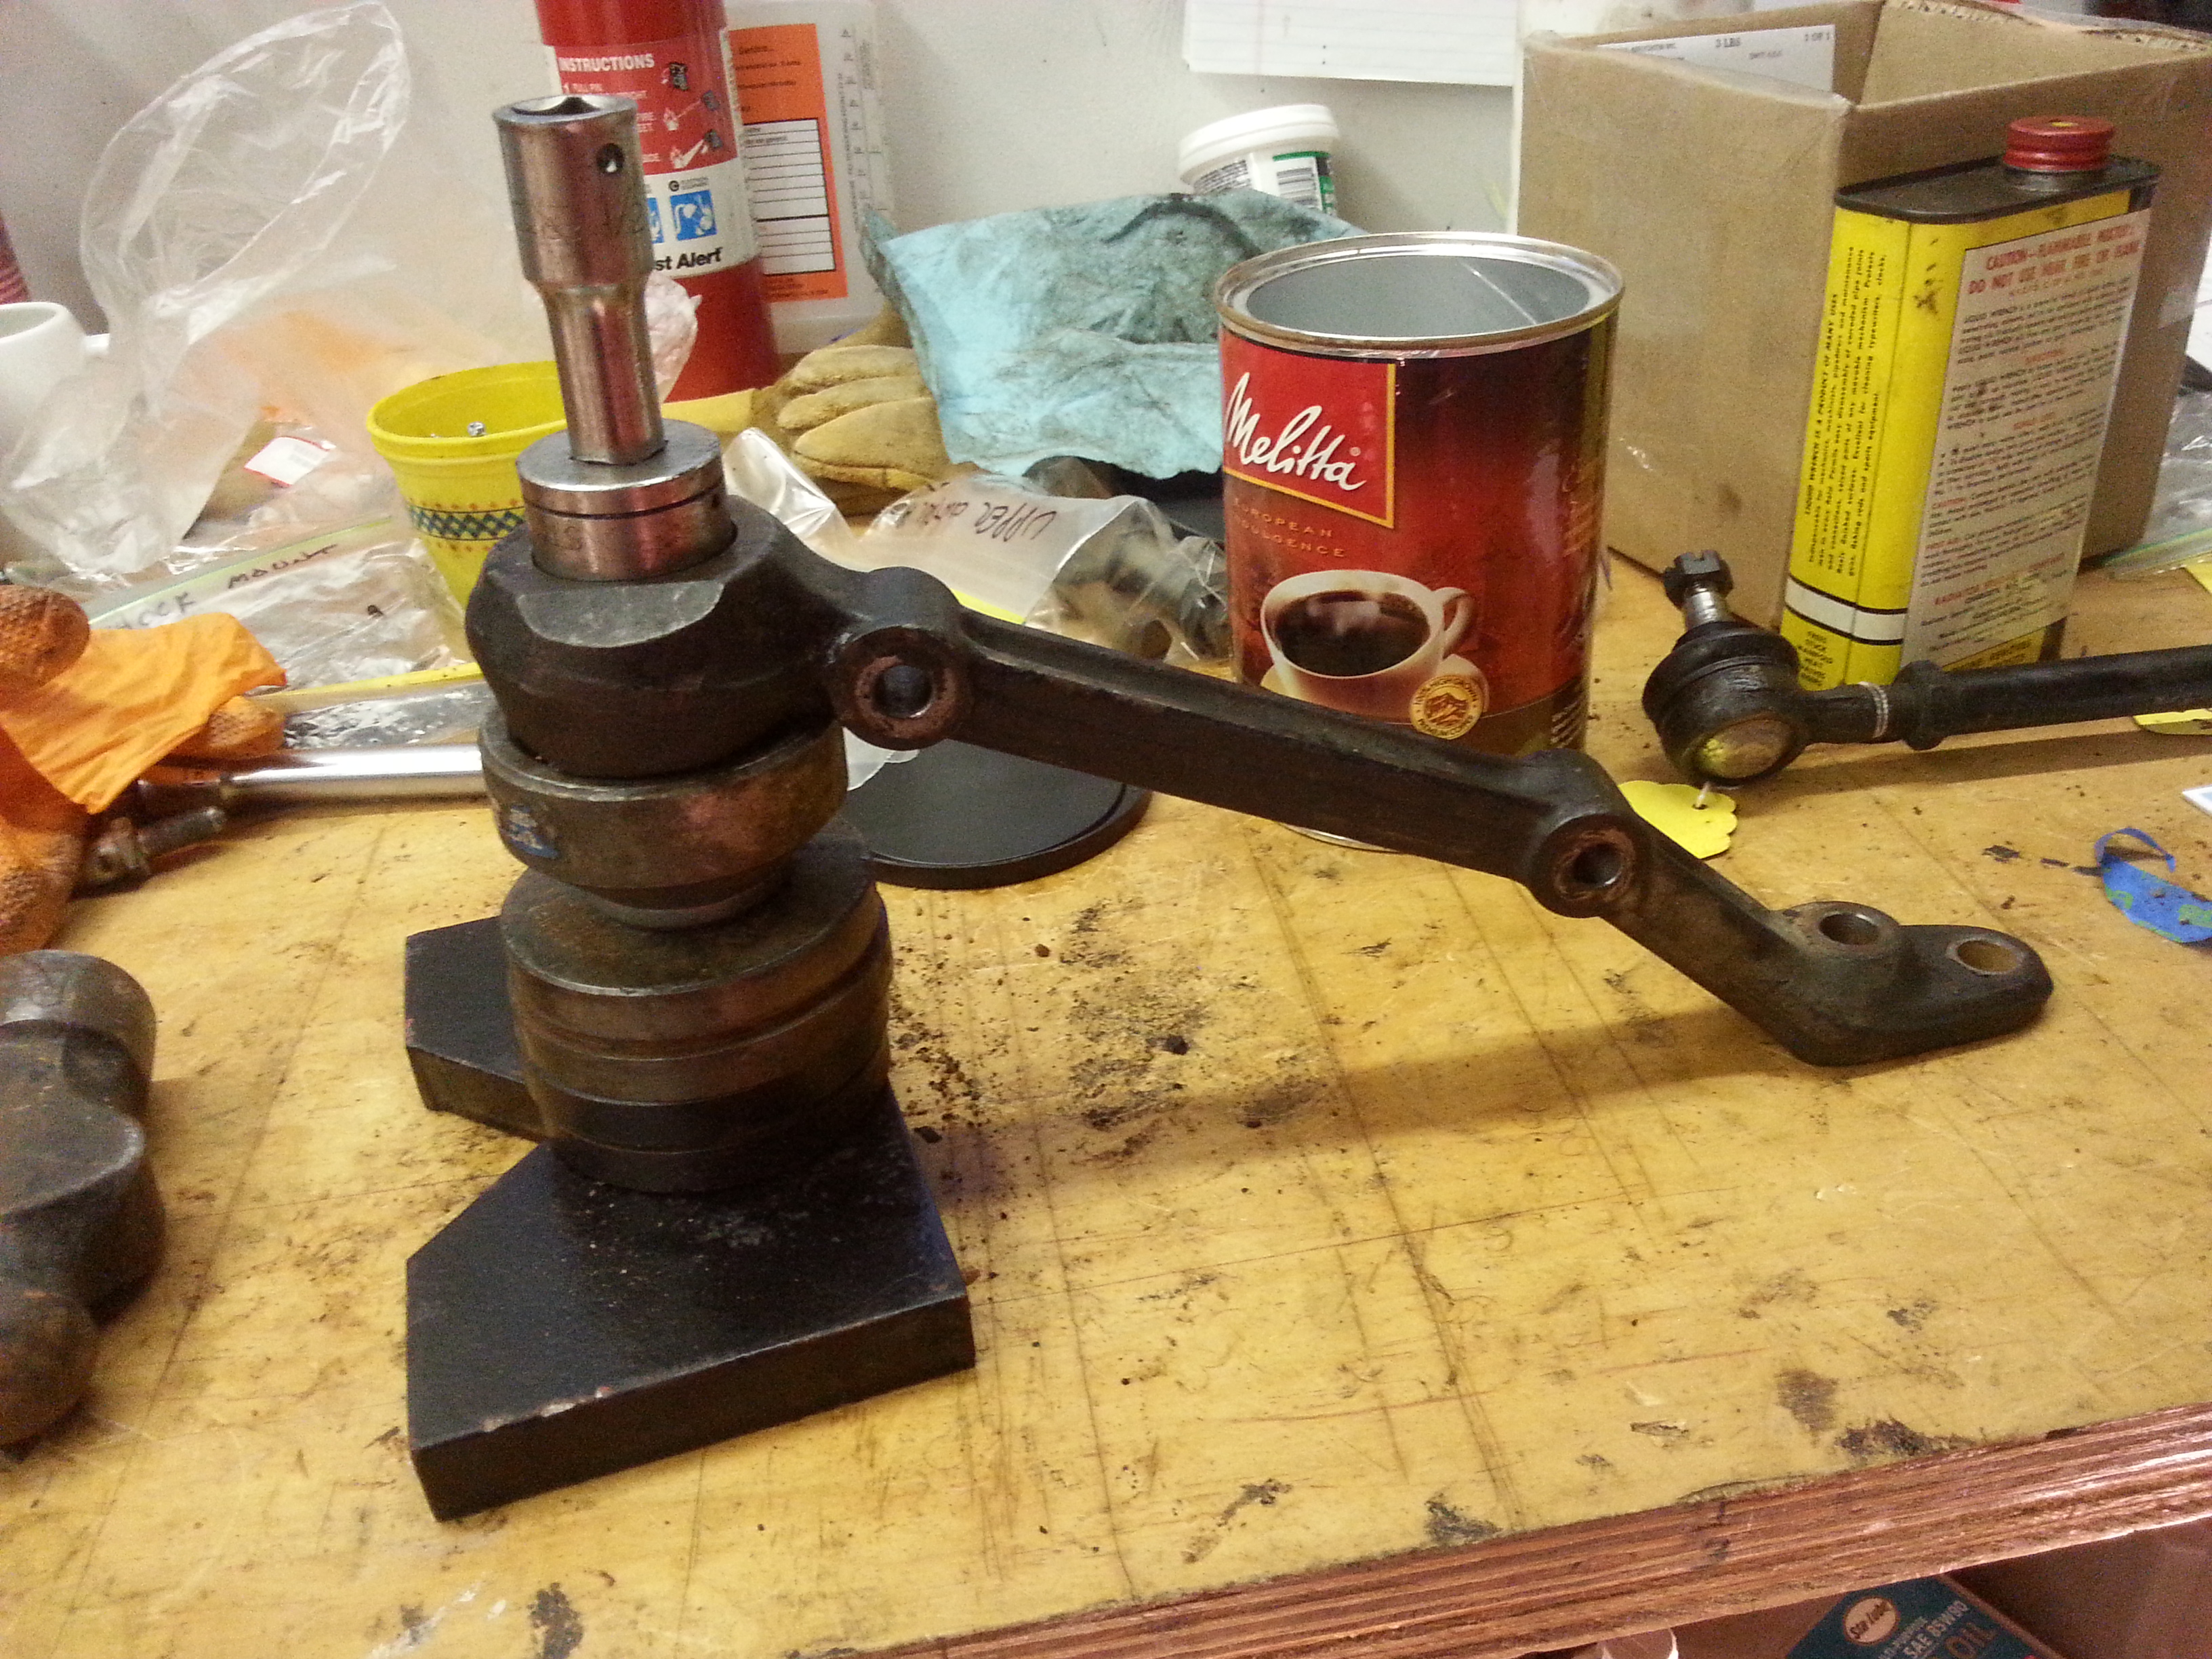
Next, the spindle was prepped for the upper and lower ball joints to be similarly pressed into place. I recalled from the left side work that one must press the lower ball joint in first, as the drift to do that needs to pass through the opening for the upper joint. The upper ball joint is actually integral with the upper control arm.
Using the bench-top press to drive the upper control arm/ball joint into the spindle.
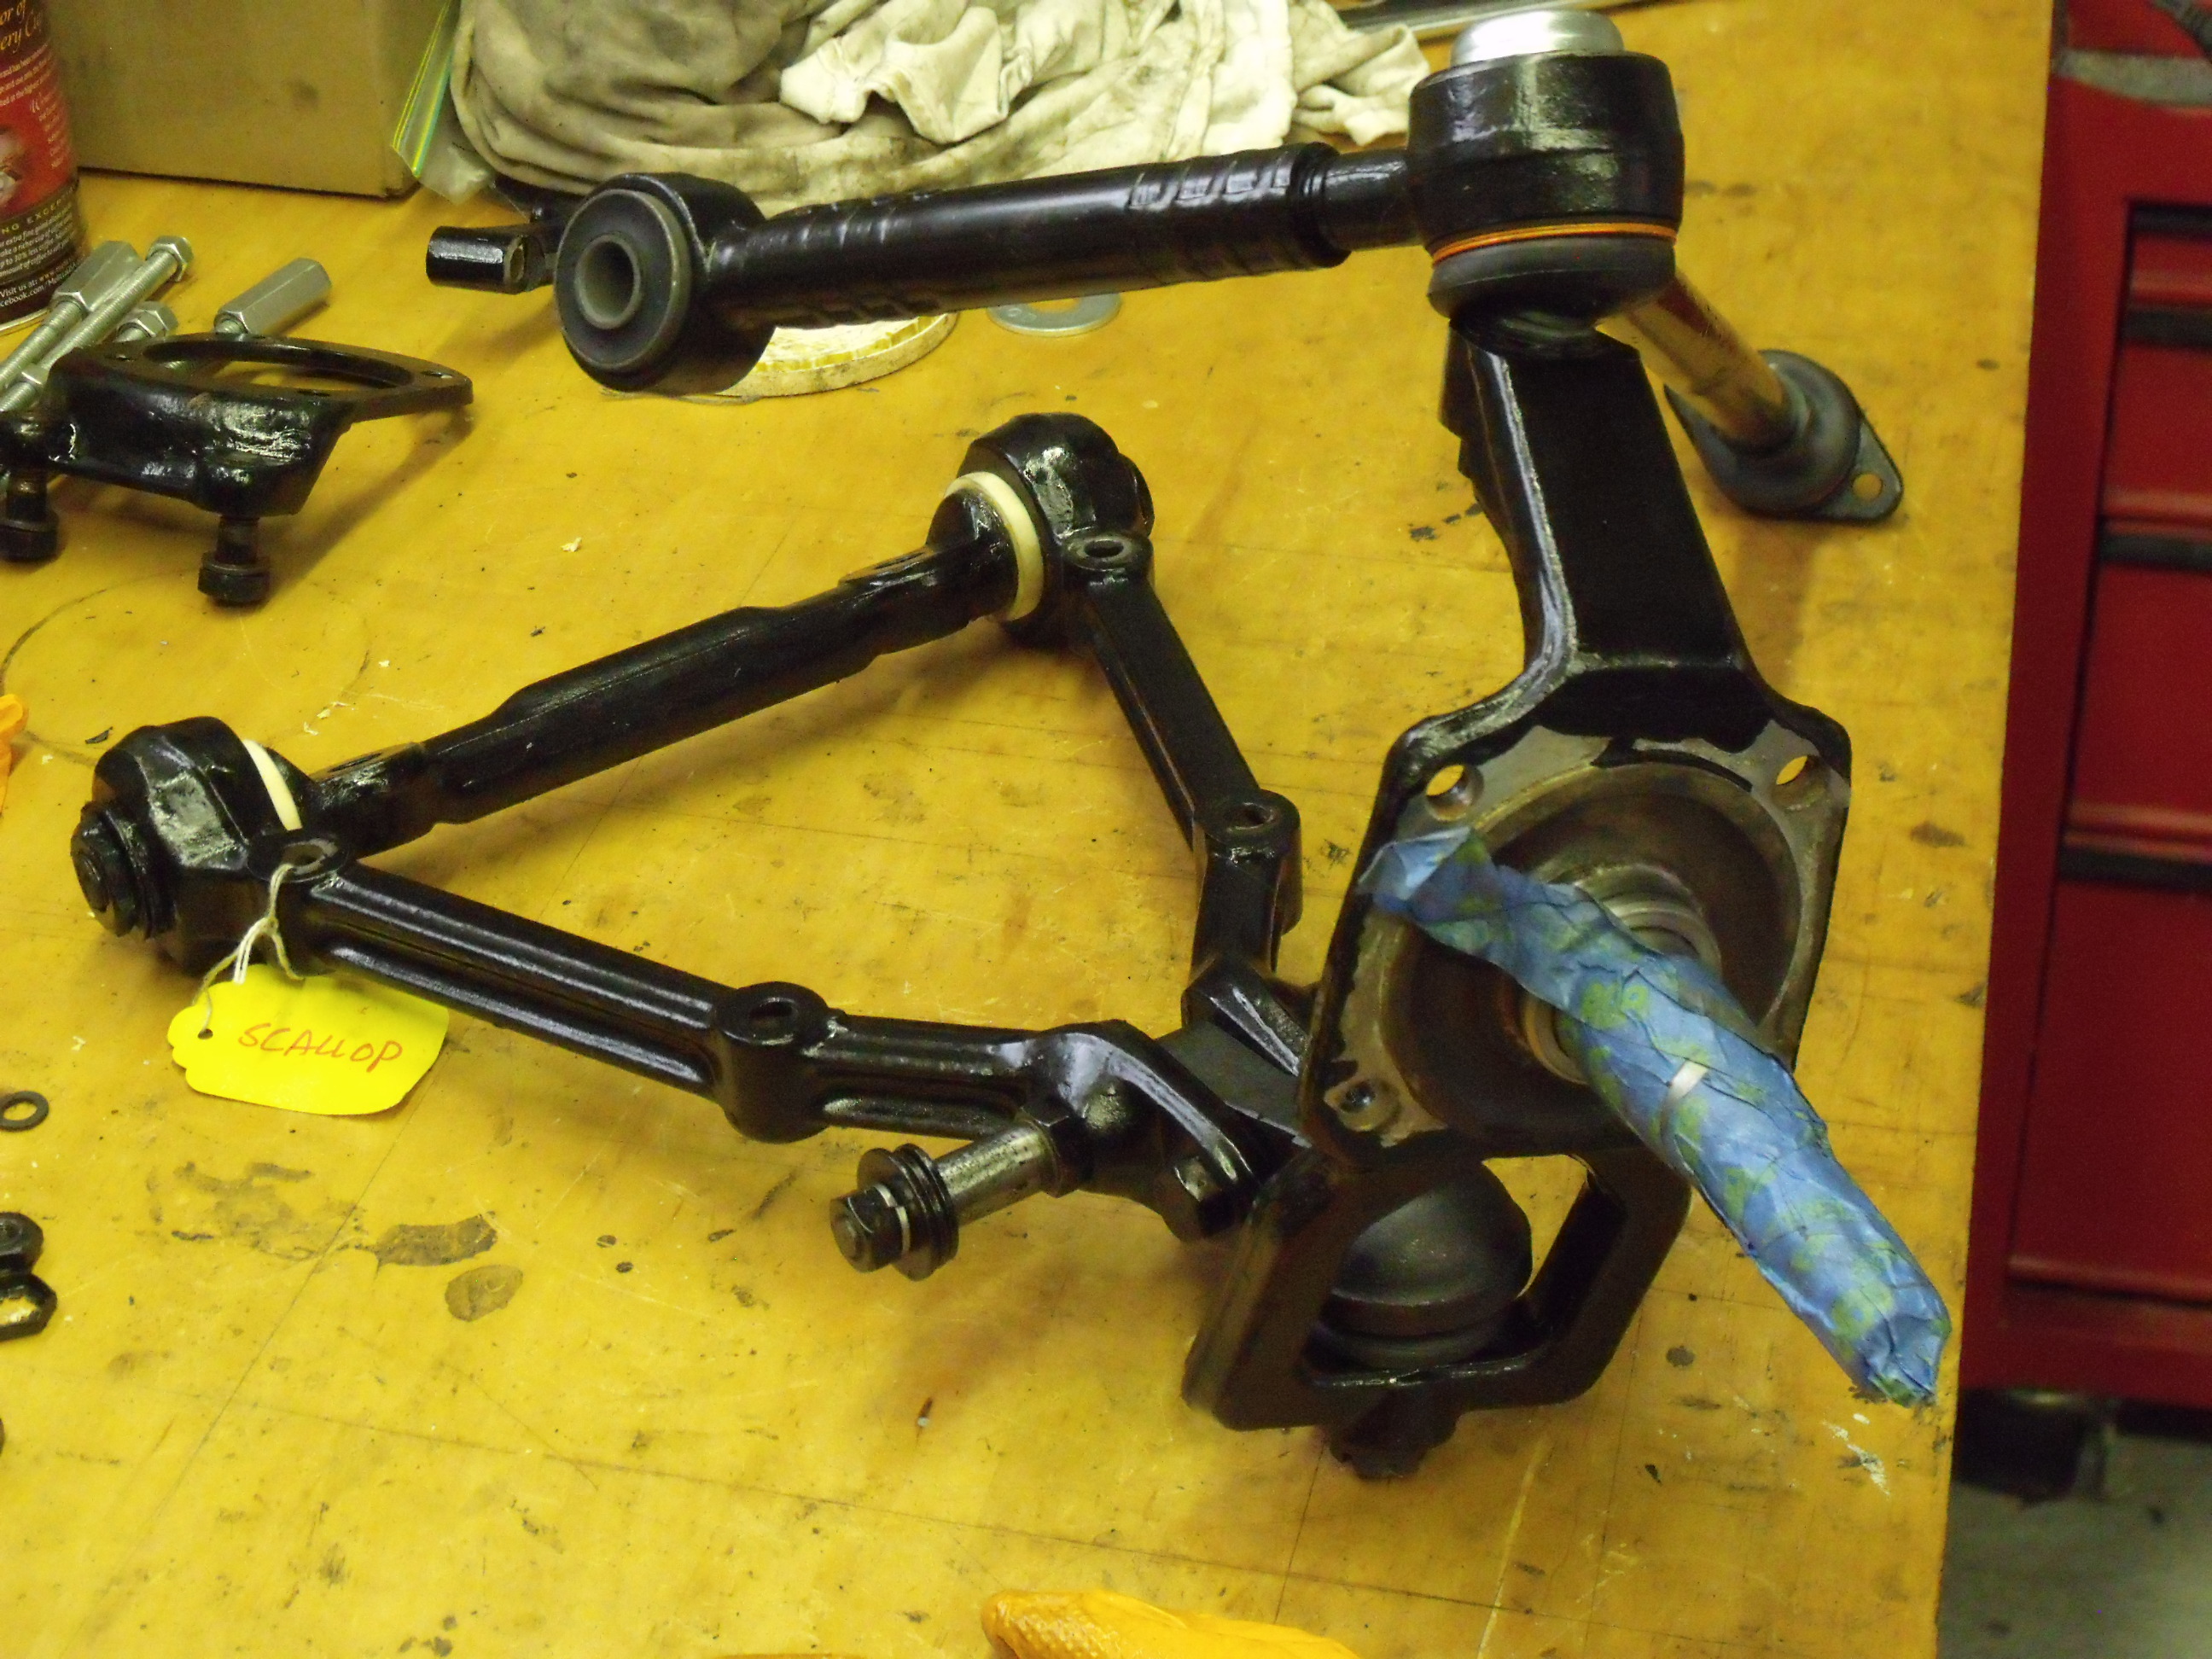
Once these pieces were pressed into place, completion of the spindle/control arm subassembly was a simple matter of bolting the lower ball joint to the control arms, and control arms onto the dogbone. The bushings slide onto the dogbone, so no press-fitting was required. In the photo below, note the foam rings (in white) between the control arms and dogbone.
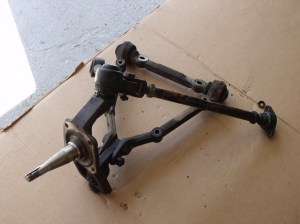
Spindle, upper and lower control arms, and caster arm all bolted together and ready to go back onto the car.
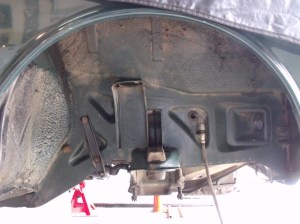
With this subassembly ready to be reinstalled, I needed to wash the inner wheel housing while everything was removed. Using Oil Eater and a cleaning brush, I did the best I could. At some point in the future, I’d like to do a more thorough job on the underside, probably when the car is outside and I can use a hose.
Right side wheel housing before washing.
Right side wheel housing after washing.
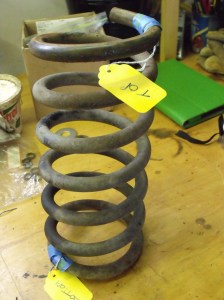
The final job for this week was the cleaning and painting of the right side coil spring. As on the left side, the factory paint marks were found and masked so that they would not be obliterated during the repaint. The spring was washed, dried, and given one coat of Chassis Black with a disposable foam brush. Earlier, I had built a spring holder from a 2×4, a couple of L-brackets, and a piece of plywood. It worked like a charm, keeping the spring upright while I dabbed on the paint. And to think it was less than two weeks ago that we took this spring out!
The unwashed spring, tagged “top” and “bottom”.
The factory paint marks. I also know that the top coil gap is 5mm larger than the bottom coil gap.
Grunt work. That’s what I call what I’ve been doing with the car the last seven days. It’s the degreasing, cleaning, sanding, and painting of all the various components while they’re apart, to prepare them for reassembly. It’s mindless, repetitious work. However, it’s not difficult, it moves along quickly, and it has a beginning, middle, and end which are quite close together, so there is large sense of satisfaction for me in its accomplishment.
In Suspension Rebuild Part 2, we left off with just about all the right front pieces broken down to their individual elements. Just about, but not quite. There remained the task of driving out the two large bushings from the lower control arms. Just like the left side, these bushings were shot, perhaps worse than the others. The only way these were coming out was with that specialty tool, the BFH (Big Frank’s Hammer). The shape of the control arm dictated building up support under it, with a metal cup large enough for the bushing to be able to be driven down into it. An appropriate sized socket and short extension bar were used. It took many dozens of blows with the BFH before the bushings would begin to move. The sound changed: at first, it was a high-pitched clang; once the bushing was on the move, the sound shifted to a lower-pitched thud. Finally, both were out, but not before I mushroomed the head of the 1/2″ extension!
Lower Control Arm In Position for Bushing Removal
Now all the parts were ready for the grunt work. As I have no running water in the garage, and the garden hoses have yet to come out from winter slumber, the various components were washed in the kitchen sink. I did this in front of my spouse, and somehow got away with it. Perhaps she understands the sense of urgency under which I’m working. Here are the ‘before’ and ‘after’ cleaning shots of the spring seat, control arm cross bar, and steering linkage. BTW, Dawn brand dish detergent, a powerful degreaser, is one of the best solutions I’ve used to clean car parts.
Spring Seat, Control Arm Cross Bar, and Steering Knuckle Before Washing
Spring Seat, Control Arm Cross Bar, and Steering Knuckle After Washing
Although a vehicle’s steering system is, strictly speaking, separate from the suspension, the two are closely linked. Since I had both tie rod ends off anyway, I decided to replace all 6 steering ball joints. The Alfa uses a conventional recirculating-ball steering system, with a Pitman arm off the steering box, and an idler arm on the passenger side. The center drag link has a ball joint at each end, and so do both tie rod ends. Each of the 3 tubes has one right-hand-thread ball joint and one left-hand-thread ball joint. In this way, toe can be set, with each tie rod acting like a turnbuckle, either increasing or decreasing in length as it’s rotated.
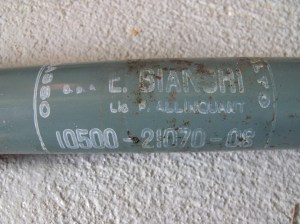
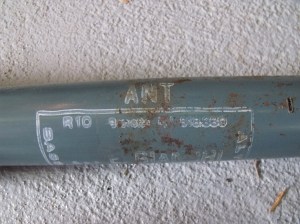
Before removing all these ball joints, I took macro photos so that I can count the threads on reassembly and approximate the alignment setting before taking the car to Eddie, my front end guy, for a proper alignment.
The three steering linkages
A close-up of one of the tie rod ends
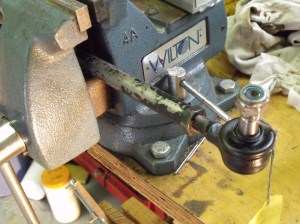
Aside from the locknuts being tight, I needed to be mindful that half of them would loosen when turned to the RIGHT. Having a table-mounted vise with a pipe clamp (my trusty Wilton bench vise) was handy. Once everything was apart, it was back to the sink.
Steering linkage in bench vise.
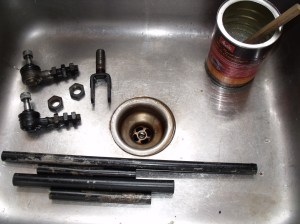
Various steering components to be washed in the sink.
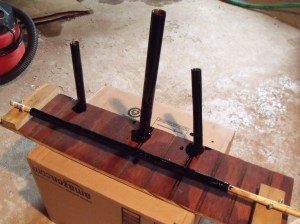
See the ball joints in the above right-side photo, each with 3 nuts threaded onto them? These are the old, to-be-discarded ball joints. By doing this, I can paint the nuts without getting paint on their threads, and have no worries about the threads on the ball joint. A large part of the fun this week was devising ways to suspend the parts for painting.
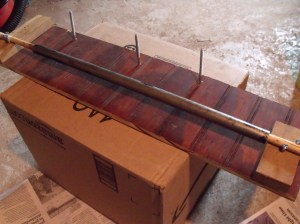
When it came time to paint the tubes, I decided that long wood screws could support the 3 shorter ones upright. The longest tube had a dowel passed through it, which was then attached to two scraps of wood. All the tubes could be spun while painted.
Building the board to hold the steering tubes for painting.
The steering tubes, painted with Eastwood’s Chassis Black.
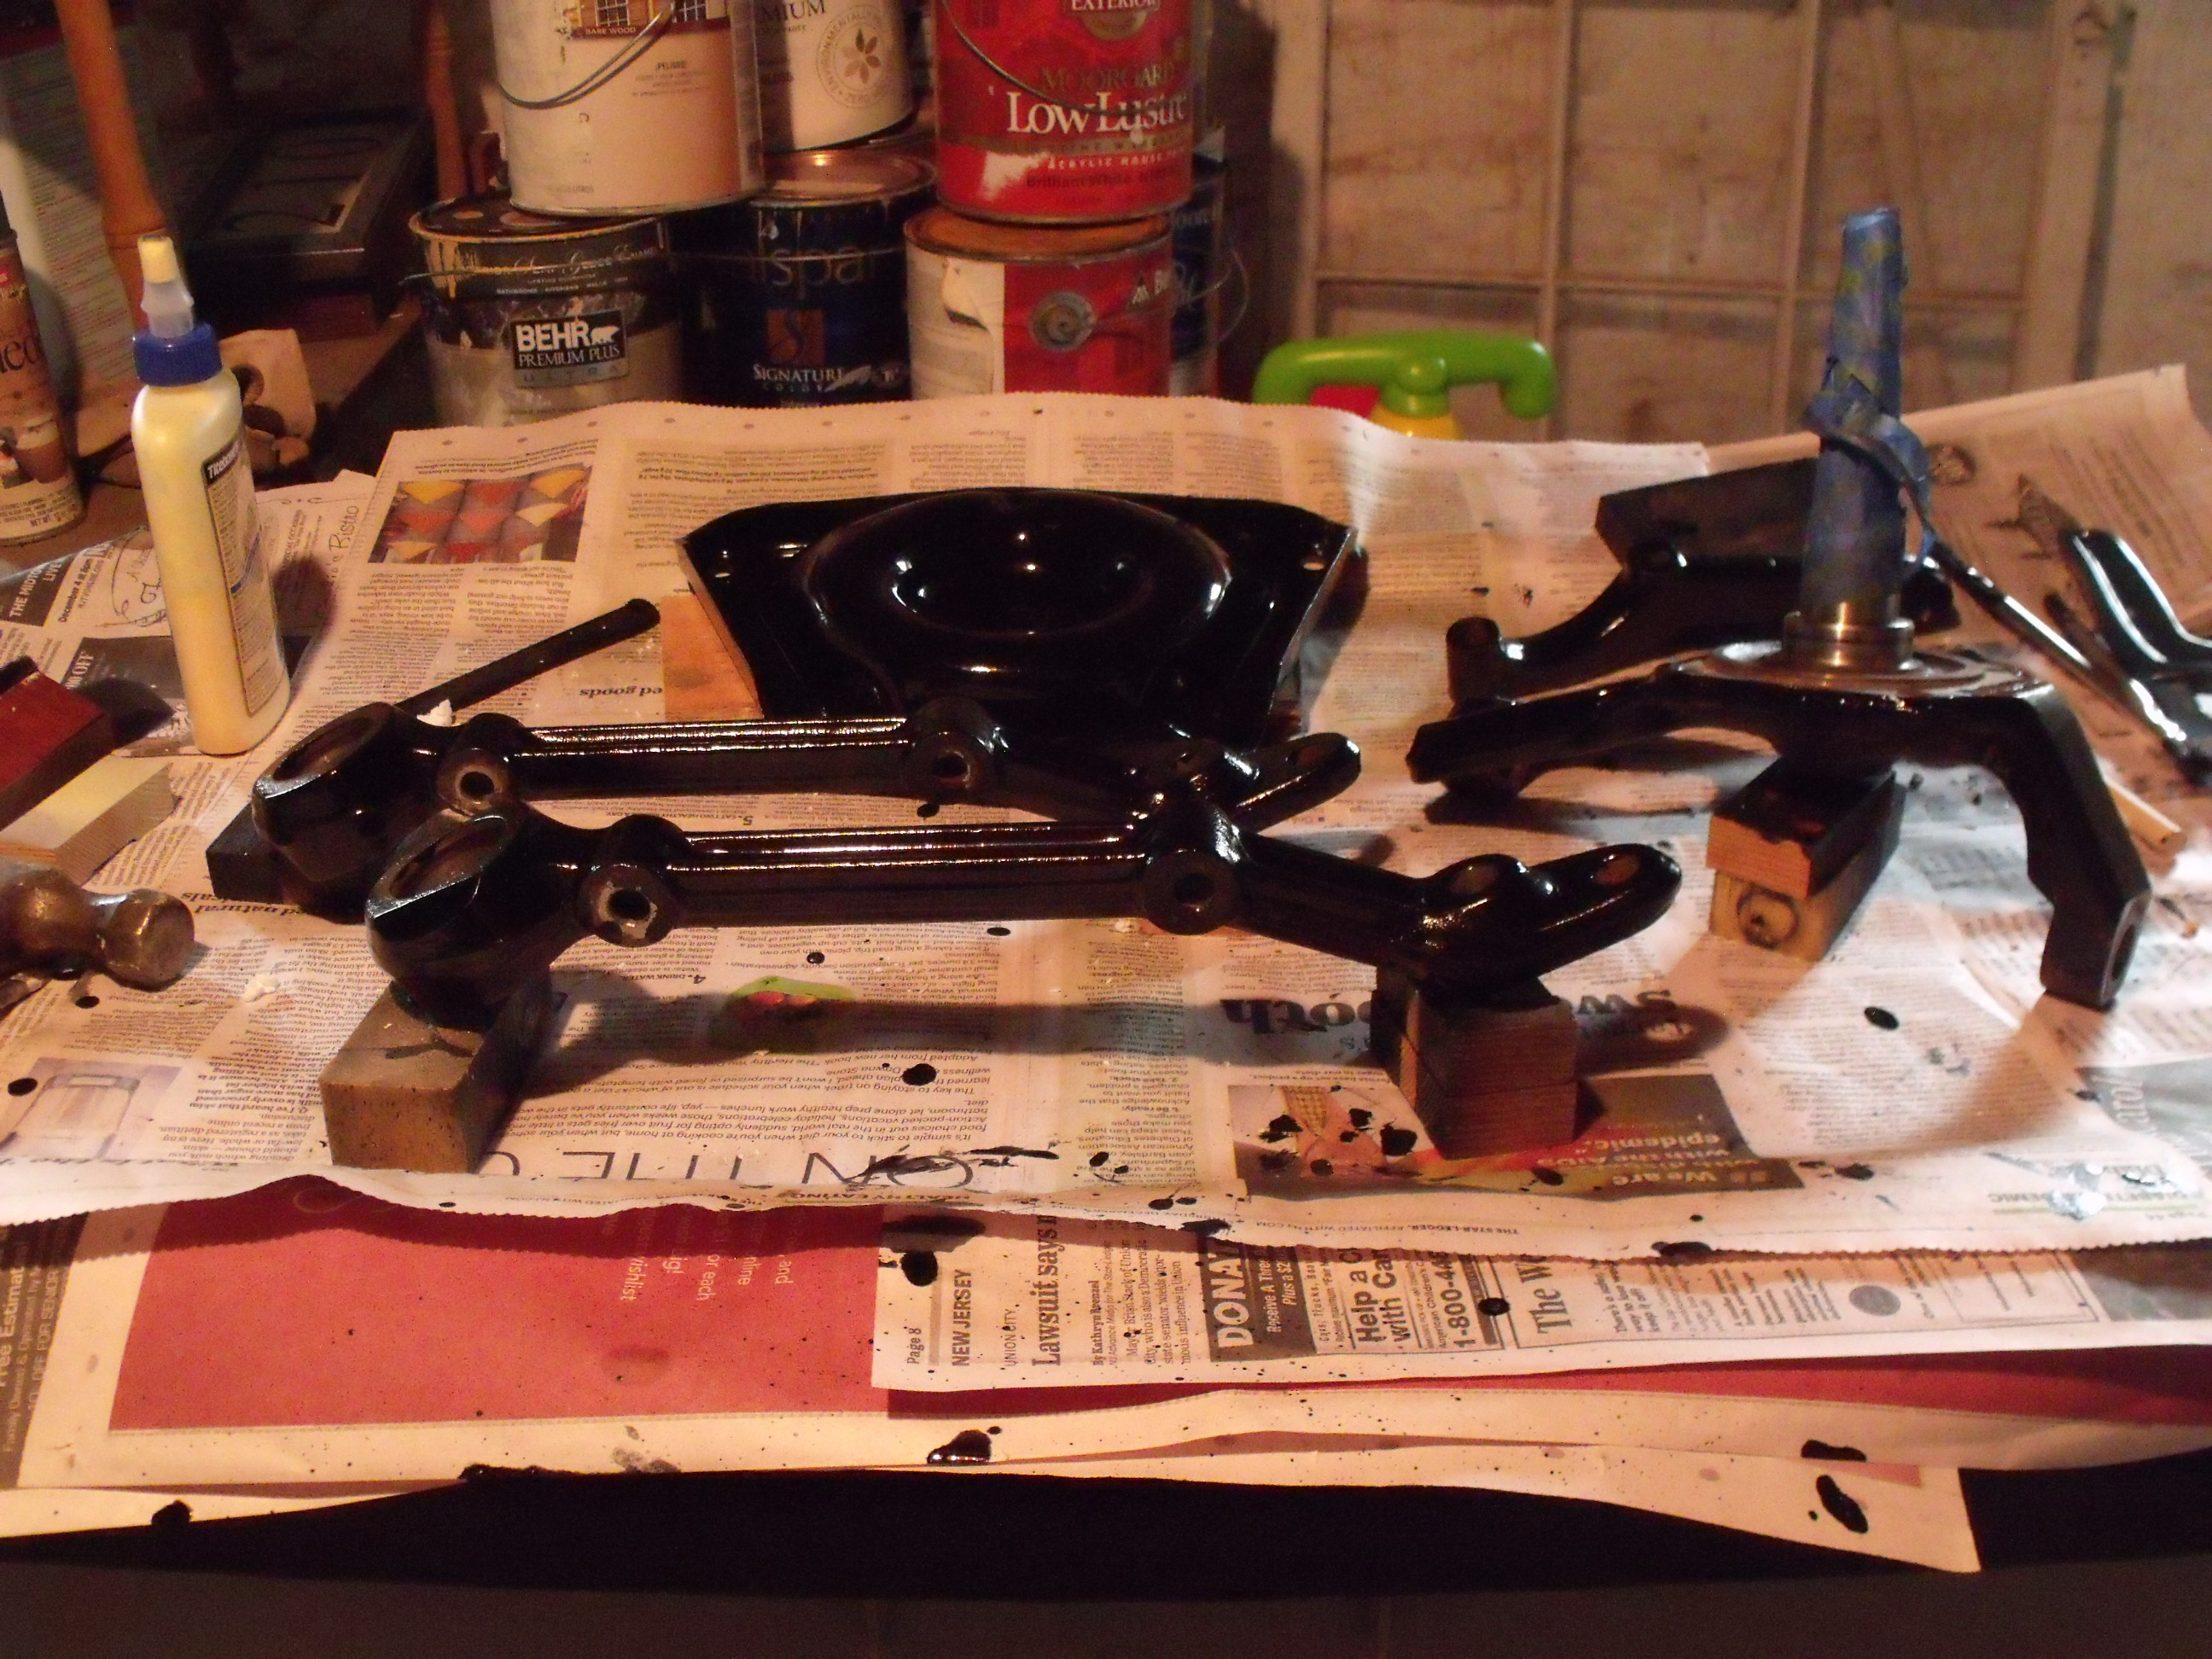
Another nice element about grunt work is that I can do 30-60 minutes in the evening, such as put a coat of paint on several parts, and progress is made. Below you can see the table set-up in my basement, with various parts arrayed. I will typically paint one side of a component, wait a day, then flip it to paint the other side.
Alfa suspension pieces in various stages of paint
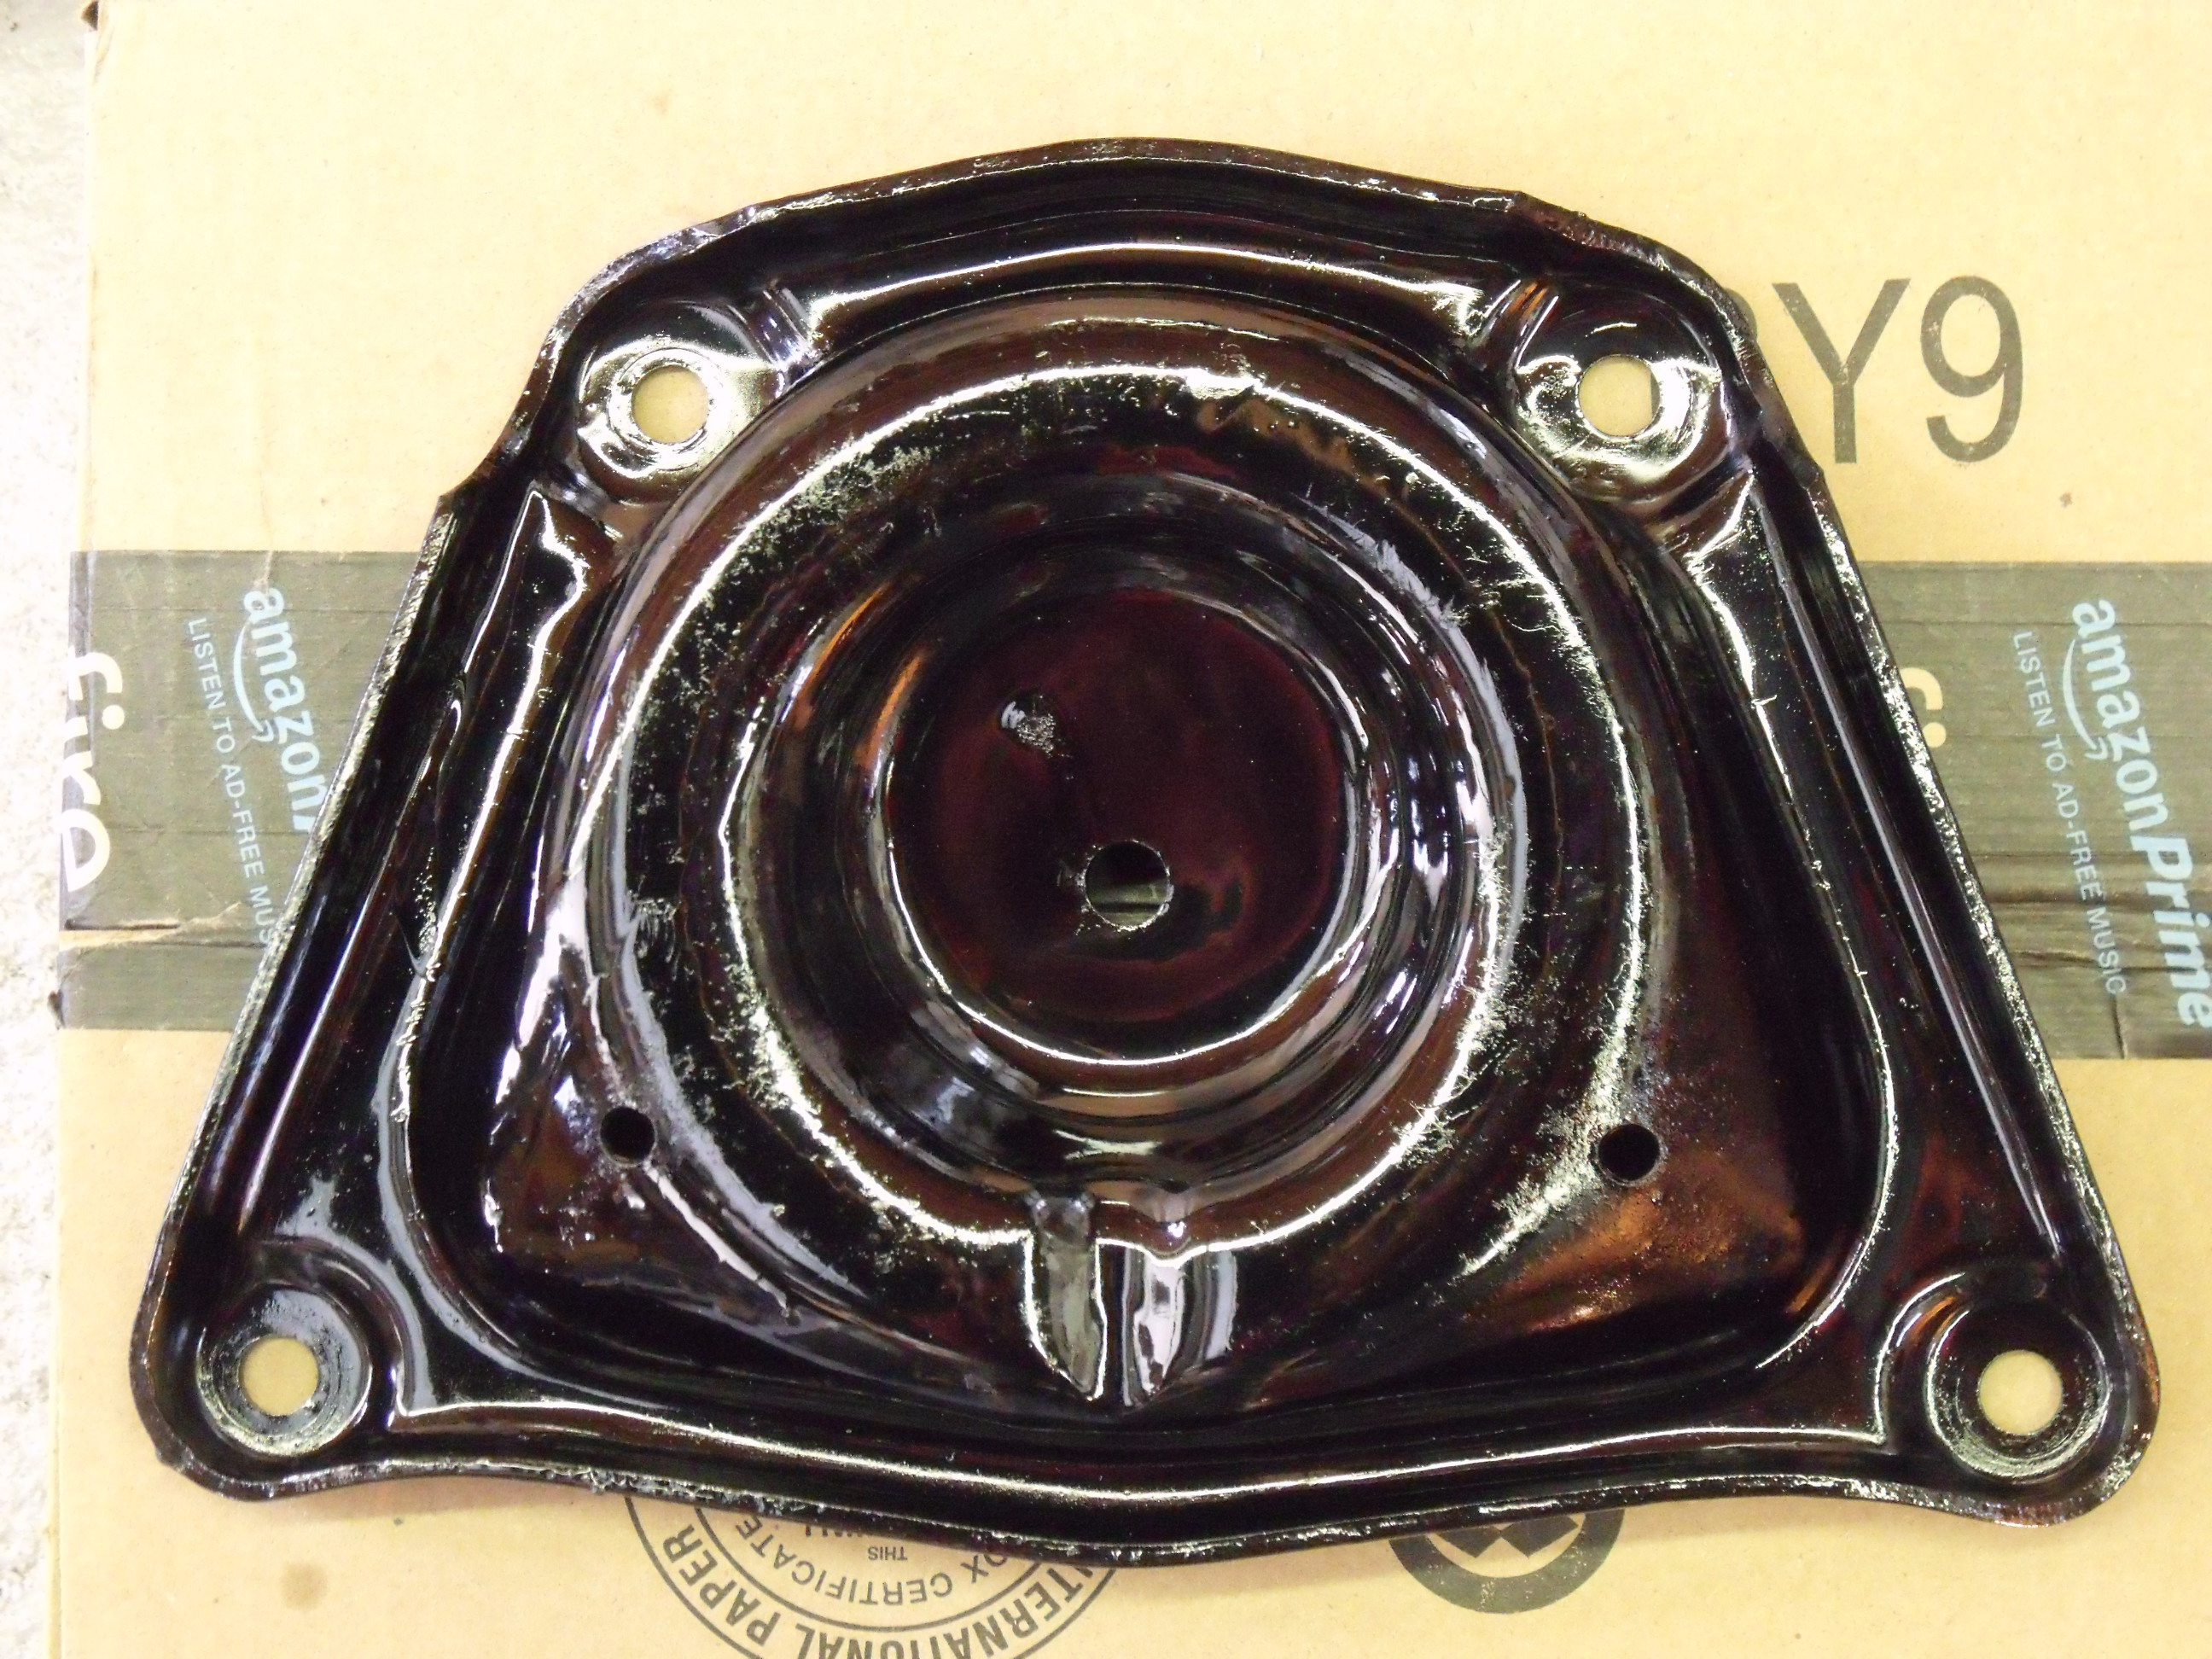
The Eastwood Chassis Black is being brushed on with disposable brushes, either foam or ‘acid’. They’re cheap, and lots of time is saved by skipping brush clean-up. As my friend Larry says, “this is not being done for Pebble Beach, these cars are drivers!”. Yet the Chassis Black, even brushed on, does have a smooth, high-gloss finish. Look at this spring seat.
Spring seat after brush painting with Eastwood Chassis Black.
Two more words from our sponsors (kidding, there’s nothing in it for me by mentioning products I’m pleased with): when parts are particularly dirty, before I bring them inside (or for parts which will not be washed in the sink), I like this Oil Eater cleaner-degreaser. Easy to use, safe, biodegradable, and water-soluable.
Oil Eater Cleaner Degreaser
As I reassemble parts, threads get a light coating of “Kopr-Kote” by Jet Lube. If this can looks old to you, it’s because it is old. My dad gave me this stuff 35 years ago, and I thought the can was old then! I looked them up on the Internet; Jet Lube is still around, and they still make this stuff among other things. However, the formula has changed. If you look at the bottom right of the label below, you’ll see “metallic lead” listed as one of the ingredients. For some reason, they’re dropped that from the current formulation. It’s true, they don’t make ’em like they used to.
Jet Lube Kopr-Kote, with metallic lead.
Eastwood states that Chassis Black fully dries in 48 hours. Once all the paint is dry, reassembly begins.
Today was a big day: the first Sunday of spring, with temps in the low 40s (almost balmy!), and two good friends willing to travel a distance to come to my garage and help with the front suspension work.
Mike G. and Larry M., veteran car guys with collector cars of their own, gave up a good chunk of their Sunday to help me turn wrenches. No progress had been made on the Alfa in over two weeks, and the unofficial start of the 2015 driving season is four weeks away. Time to kick it into high gear.
The first order of business was to install the coil spring on the left side of the front suspension. As you may have read in Part 1 of this project, the left side was rebuilt first. Except for the spring and shock, it is complete. Following along with a forum entry on the Alfa BB, I had purchased some threaded rod and nuts. The concept was to connect the lower control arm and spring seat via the rods, and with spring in place, slowly and alternately tighten the nuts, thereby compressing the spring. Once the spring seat met up with the control arm, the rods could be removed one at a time, and the factory bolts could be installed. It took some time, but it worked like a charm.
With that under our belts, we moved to the right side and reversed the process. The factory spring seat bolts were removed one at a time, the threaded rod was installed and tightened with nuts, then the nuts were alternately loosened, lowering the spring seat until there was no tension on the spring. This seemed to go twice as fast as the spring install. And to be efficient, while Mike and I (mostly Mike) worked on the spring, Larry tackled removal of the steering tie rod ends and drag link, as I had just purchased six new tie rod ends to install.
Alfa left front suspension: spring about to be reinstalled
Alfa right front suspension removal
Alfa right front suspension, spring removed
A word here about our sponsor. I have almost exclusively been purchasing my spare parts from a UK vendor, Classic Alfa. Their website is user-friendly, their prices are fair, their parts quality is very good, and their shipping speed is unbelievable. Most recent case in point: this past Wednesday night, at about 9pm EDT, I ordered the tie rod ends and wheel bearing kits from them online. Thursday morning, I received a confirmation email that my shipment was on its way to Heathrow Airport. Friday afternoon at 5:30pm, DHL had the package at my front door. That is less than 48 hours, from across the big pond! With service like that, they will continue to get my business.
Back to our front end. As Mike began removal of the first spring pan bolt, he said “Uh oh, Richard, we forgot to install the spacers on the other side”. I said “what spacers?” Mike then showed me that all 4 spring pan bolts had thick spacer washers between the pan and control arm. At first I thought I had made a mistake, but a check of my hardware bags showed that no spacers came off the left side. Mike and Larry almost didn’t believe me, and this is where photos are invaluable. A glance at the pictures I took late in 2014 confirmed that the left side did not use spacers while the right side did. Who can figure out those Italians?
With the spring and spring seat out, we had only the upper and lower control arms, spindle, and caster arm in place. The approach would be to unbolt these from the unibody and remove them as one assembly. Two bolts at the lower arm (impact gun), one at the upper (with tricky access from inside the engine compartment), and two at the caster arm-to-body, and we gave birth to all the remaining pieces.
Alfa front suspension, upper control arm bolt removal
Alfa right front suspension completely removed
Alfa right front wheel housing
Mike and Larry needed to move on, and after profusely thanking them, I continued a bit on my own. The 3-piece lower control arm was separated, and the arms with bushings as well as the caster arm were left soaking in penetrating fluid, so that the next steps in the disassembly could be accomplished. From here, it enters the phase I call “grunt work”: simple, almost mindless tasks that need to be done, and can be tackled an hour at a time after work during the week. Bushings need to be pressed out, threaded connections broken, then all components will be washed, prepped, and painted. Once that is done, it’s on to reassembly.
When I took the Alfa off the road at the end of the 2014 driving season last November, I decided that this year’s winter project would be a complete rebuild of the front suspension. Although the car drove and handled remarkably well, there were clunks and squeaks from the front which left me uncomfortable. A quick check with Pete, the previous owner, confirmed that he had not rebuilt the front end during his stewardship. Convinced that all bushings and ball joints were original to the car, I decided it was time.
Having done this kind of work on previously-owned collector cars, most recently my 1968 Mustang, the same approach was used: disassemble only ONE side of the suspension, so that in the worst-case scenario of “how the #$&% does this go back together again?”, I would always have the assembled OTHER side to use for reference. With the Alfa, there was also the admittedly minor concern that since the shop manuals I owned did not describe the procedure in detail, some or most of the work might fall to “figuring it out as I go”.
Some technical words about the 1967 Alfa Romeo Giulia Sprint front suspension: on the surface, this is a conventional suspension design, with upper and lower control arms, coil springs situated between the lower arm and crossmember, tube shocks, caster arms, and sway bar. The spindle rides on upper and lower ball joints connected to the respective control arms. In detail, there are some unique and fascinating design elements. The lower control “arm” is actually three pieces, joined by bushings and a ball joint. The bushings are not conventional rubber bushings, but are heim joints (like a ball and socket) enclosed in a steel casing and pressed into two of the arms. The lower spring seat bolts to the lower control arm and so can be removed and reinstalled separately. The caster arm serves as a fore-aft locating arm for the suspension, and is attached to the body of the car with a heim joint. The overall effect is a suspension which has an almost perfect combination of suppleness and control, with very little lean.
As I write this in March of 2015, let me explain that the first side I tackled (left side) is now almost completely done. That was the side to learn on – components were not always disassembled in the best order, I did not always give complete attention to the way things came apart, and so on. This is typical for old-car work that stretches out over a number of weeks. This blog entry, entitled “Part 1”, will pick up for the most part at the beginning of the second (right) side of the suspension. In this way I hope to better capture the logical order of performing the rebuild, now that I’m making my sophomore effort.
Early in the month of March, we finally had a winter day of temperatures reasonable enough to spend a few hours in the garage. One habit I’ve practiced with all my restorations is to take as many ‘before’, ‘during’, and ‘after’ photos as possible. In today’s digital world, it’s too easy to accomplish. So on Day One of this suspension rebuild, I dutifully took as many photos as I could of the pieces I was about to remove. I also decided it would be prudent to remove the brake caliper, disc, backing plate, and hub as a first step (I had left them in place when working on the first side, and they only got in the way).
Alfa right front suspension before disassembly, from the side
Alfa right front suspension before disassembly, from the front
Alfa right front suspension before disassembly, from the rear
Alfa front shock, off the car
Alfa front shock, off the car
Alfa right front suspension, brake lines
Alfa right front suspension, caliper, disc, hub, and backing plate removed.
Alfa right front hub and wheel bearing
The impact gun made short work of this effort. Once those were off, the front shock was unbolted, and I photographically documented the markings on it, as I believe these shocks are original to the car. At this point I had some components which could be cleaned and prepped for painting. The next step would be the somewhat tricky removal of the front spring. This would wait until one or two friends could join the party and provide some needed assistance.
Sometime during 2012, my friend “Pete”, the owner of the 1967 Alfa Romeo which I desired to purchase (read up about Pete and me in Part 1 and Part 2), had gotten more serious about his readiness to sell the car. Allow me to explain. Pete had started to tell me that “other people” who knew of the car were expressing interest in it. While Pete did not explicitly state that he would sell the Alfa out from under me, I did realize that if the moment I had been waiting for since 2005 were here, I was not ready! I had neither the garage space nor the spare coin to make the Alfa mine. Action was needed.
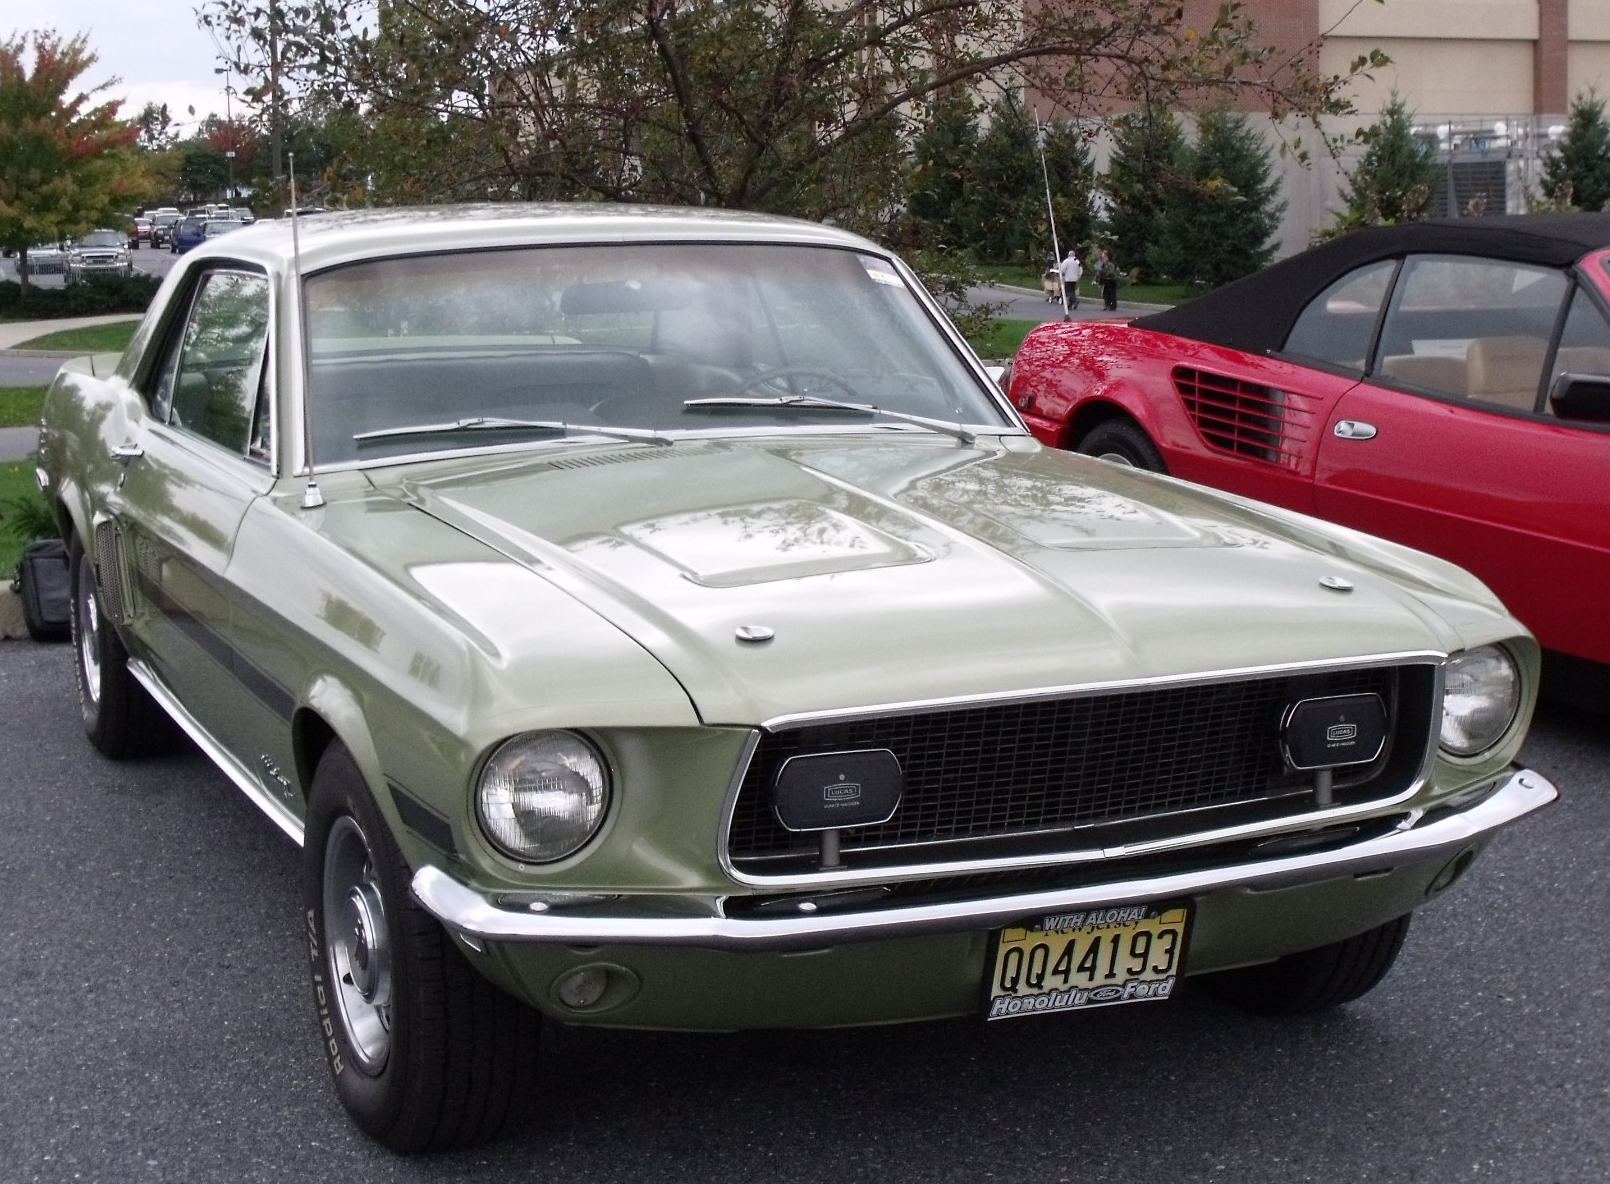
At that time, there were five motor vehicles in our household: my wife’s 2012 Ford Focus, my 2003 Volvo V70 (both daily drivers), and my three collector cars: the 1957 BMW Isetta, 1968 Ford Mustang California Special, and 1993 Mazda Miata. One of the collector cars would need to go. To be fair, I had made some half-hearted attempts to sell the Isetta. A few years prior, I ran ads in national collector car magazines offering the car for a price in the high teens. No takers. Instead of the Isetta, admittedly an acquired taste, it seemed that the Mustang would be easier to sell, as it would appeal to a broader audience. I had owned it for nine years and was ready to let someone else enjoy it. The details regarding preparing the Mustang for sale will be saved for another blog entry. The decision was made that I would drive the Mustang to Hershey in October of 2012 and put it up for sale in the car corral. That was done, and the sale completed.
The 1968 Ford Mustang California Special in the Hershey Car Corral, Oct. 2012
Two weeks after Hershey, Superstorm Sandy struck the East Coast of the U.S. Immediately after that storm, Pete and I began an email exchange that over a period of several months led to some incredible decisions. I will let the emails themselves tell the story.
Date: Mon, 5 Nov 2012 Subject: Rain rain go away
Hi Richard,
I am not sure how you fared in Sandy. I know Pam has talked to Margaretanne and she said you did get some water rise. Hope nothing was damaged.
We had minimal storm damage here although the wind was enough to uproot some trees in the woods behind us.
Alfa is protected! Still has your name on it.
Pete
Sent: Sunday, November 11, 2012 Subject: RE: Rain rain go away
Hi Pete,
Amazingly, and thankfully, we “survived” Sandy. We never got the expected flooding (thank goodness) with only one inch of rain. However, like in many other areas, the wind knocked down literally hundreds of trees. We were without power for 4 days; work was shut for 2; and even after power came back, we had no internet or cable for another week. So I’ve not been on the computer much.
All my cars did fine. Of course, I’d still like to get the Alfa. Here’s my request: I’d like to buy the car in the spring, if you are so willing to hold onto it for one more winter. Let me know, since winter is almost here, if we can arrange a purchase at first thaw next year.
Best wishes,
Richard
Date: Mon, 12 Nov 2012 Subject: Re: Rain rain go away
Richard,
Happy to hear you received minimal damage. I spent hours picking up limbs and tree debris. We were only out of power for about 6 hours.
There are several people who have expressed an interest in the Alfa…. I can think of no one who I would rather transfer title to the Alfa than you.
You need to give me a price that you are willing to pay for the Alfa. Money is not the reason for selling as you well know. The Alfa needs to go. Can I wait? I suppose so.
Take care, it was great seeing you at Hershey,
Pete
Sent: Sunday, November 18, 2012 Subject: RE: Rain rain go away
Hi Pete,
Thanks for the update on the Alfa; I went back and looked at my photos. We first visited you in 2005! I cannot believe that it was 7 years ago when I first drove that car. Of course, you would have others interested in it, and I deeply appreciate the fact that you understand that I would keep it and treasure it (and drive it!). Not totally certain of values myself, I did some research, and want to offer you a number which is fair to you and to me – $XX,XXX seems right for its condition and value. Can we make a gentlemen’s agreement (deposit is no problem) that I will finalize the deal by April 2013?
Best,
Richard
Sent: Sunday, November 18, 2012 Subject: RE: Rain rain go away
Greetings Richard,
If you are comfortable with that offer than it is acceptable to me. I would like to see you have it sooner, but let us say whenever you have the room or sold the Isetta or by end of March 2013, whichever comes first. There is no need for a deposit.
Next were several phone calls to verify details, as this series of emails starts in January 2013:
Sent: Tuesday, January 15, 2013 Subject: next steps
Hi Pete,
Happy New Year! I want to get the ball rolling on the Alfa business, as we’re having a mild winter so far. I am ready to send you a check for $XX,XXX. Once you get the check, I’d ask you to send me the title, properly endorsed, so that I can get license plates and insurance. At that point, once we have a clear dry weekend, we’ll come out for the car, and I’ll be able to drive it home legally.
Let me know if this all sounds good to you. Thanks.
Richard
Date: Tue, 15 Jan 2013 Subject: Re: next steps
Richard, Greetings and Salutations,
I would be happy to comply but I had been planning on bringing the car to you when you were ready. I have numerous extras that go with the car and if I can “borrow” my car carrier from the person to whom I sold it, I could transport it all to you at one time.
I would hate to see you drive away from here only to have the car break down before you get it home. Shit happens with antique autos as you are well aware!
Thanks,
Pete
Sent: Wednesday, January 23, 2013 Subject: RE: next steps
Hi Pete,
As they say, “the check is in the mail”. You may even have it by now. I also mailed 2 copies of a Bill of Sale; one for each of us. I’ll need a completed one to register the car.
Let’s stay in touch re: the weather and a free weekend, and we’ll see what comes up!!!
Thanks for everything,
Richard
Good evening Richard,
This weather is brutal, I will certainly need a decent day to load and transport it, providing I can borrow the trailer when I want it.
I know you say the check is on the way but do you want me to wait on the title transfer (and check cashing) and let me cover the car until it is in your hands? You had best make sure your insurance would cover me transporting the car. I am just being ultra cautious.
You friend,
Pete
Sent: Friday, January 25, 2013 Subject: RE: next steps
Hi Pete,
I have not thought this through as thoroughly as you have – perhaps it is better that you keep your insurance on the car during the transport – however, can you still go ahead and cash the check? In my opinion, you can, as the ownership does not transfer over to me until I have a signed title in my hands. I don’t want you to hold up your money.
Let’s hope things get milder weather-wise. I’ll write more in a few days.
Richard
Date: Sat, 26 Jan 2013 Subject: Re: next steps
Hello Richard,
Check arrived today, thanks. I can still borrow the car carrier but certainly now is not the time. I have asked my insurance Co. for coverage info and this is what they said – the car carrier is covered by the insurance policy for the tow vehicle. The car being transported is covered by the owner’s policy. Would you prefer to proceed with the title transfer now?
Call me if you want to discuss this further,
Pete
Sent: Saturday, February 2, 2013 Subject: RE: Your thoughts
Dear Pete,
I’m still very open to the option of coming out with Margaretanne and driving the Alfa back here! You’ve driven it round-trip to Hershey, which is about the same time and distance as a one-way trip for me. We just need a clear dry day with no salt on the roads. Is there anything about the car that you know of that would prevent it from making that trip?
If I were to do that, I’d want to be 100% legal. That would mean getting the title from you so that I could register the car, and come out with the correct plates. In a lot of ways, this solution is the “cleanest”. February has some open weekends for me, however, March weather may be more favorable. Let me know what you think.
Thanks so much!
Richard
Sent: Saturday, February 2, 2013 Subject: RE: Your thoughts
Dear Richard,
The Alfa has always been a fair weather car for me. The car was put in hibernation last November and I have had it out twice since then to exercise it when the temperature was a balmy 50-60 degrees. The Alfa has a respectable heater but I am concerned about starting and running it at extended highway speeds over 60/65 when it is very cold out.
My longest trip last year was to Reading PA for an AACA meet and that was in April/May and on Route 30 to Lancaster and North to Reading at speeds of 55/60 max with no problems. That was the weekend I had planned on borrowing “my” car carrier but at the last moment it was not available.
Regards,
Pete
Another phone call to iron out details, and we are in the final stretch of deciding how to move the car:
Date: Fri, 8 Feb 2013 Subject: your Alfa
Hi Richard,
Nice chat last night. Last weekend, anticipating your reply regarding the title and bill of sale, I did deposit your check. Hope that is O.K. with you. Do you want the title now or do you want me to keep the car covered under my insurance policy until you get it? A lot depends on whether you will actually drive it away or we transport the car either on an open carrier or enclosed.
If you want the car now, I would gladly split the cost for an enclosed transport.
Regards,
Pete
Sent: Monday, February 18, 2013 Subject: RE: your Alfa
Hi Pete,
Intercity said that they would work with us.
I’m ready to pull the trigger if you are. Questions:
• You said you had some extras to go with the car. Are these things you’d put in the car, or should I plan on making a trip out to you separately?
• Any tricks to starting the car?
• We still need to figure out title and insurance. Should we both have insurance on it during transport?
Let me know your thoughts on all this. Thanks!
Best,
Richard
We had agreed to let a known collector car carrier (Intercity) ship the car, with Pete and I splitting that cost 50/50. I then got this very nice and very unexpected email from Pete, summarizing what drove him to purchase the car in the first place:
Hello Richard,
I was enamored with Alfas back in the late 60’s when two of my close friends had Alfas. I was married with 3 children and they were both single. It took a lot of convincing before I made the purchase. I first drove a ’66 Alfa 1600 TI sedan. I put a deposit on it and subsequently the owner informed me that the Alfa had an engine fire. Not wanting to deal with that calamity, I pulled my offer and kept looking. I drove a Mercedes 200 sedan, new ($3000.) I took a BMW 2002 TI sedan home for the weekend and almost went with that. Then I answered a classified ad in the Washington Post for the GT Jr. One of my Alfa friends went with me and after a test drive he said if I don’t buy it he would! That was 45 years ago.
Take care,
Pete
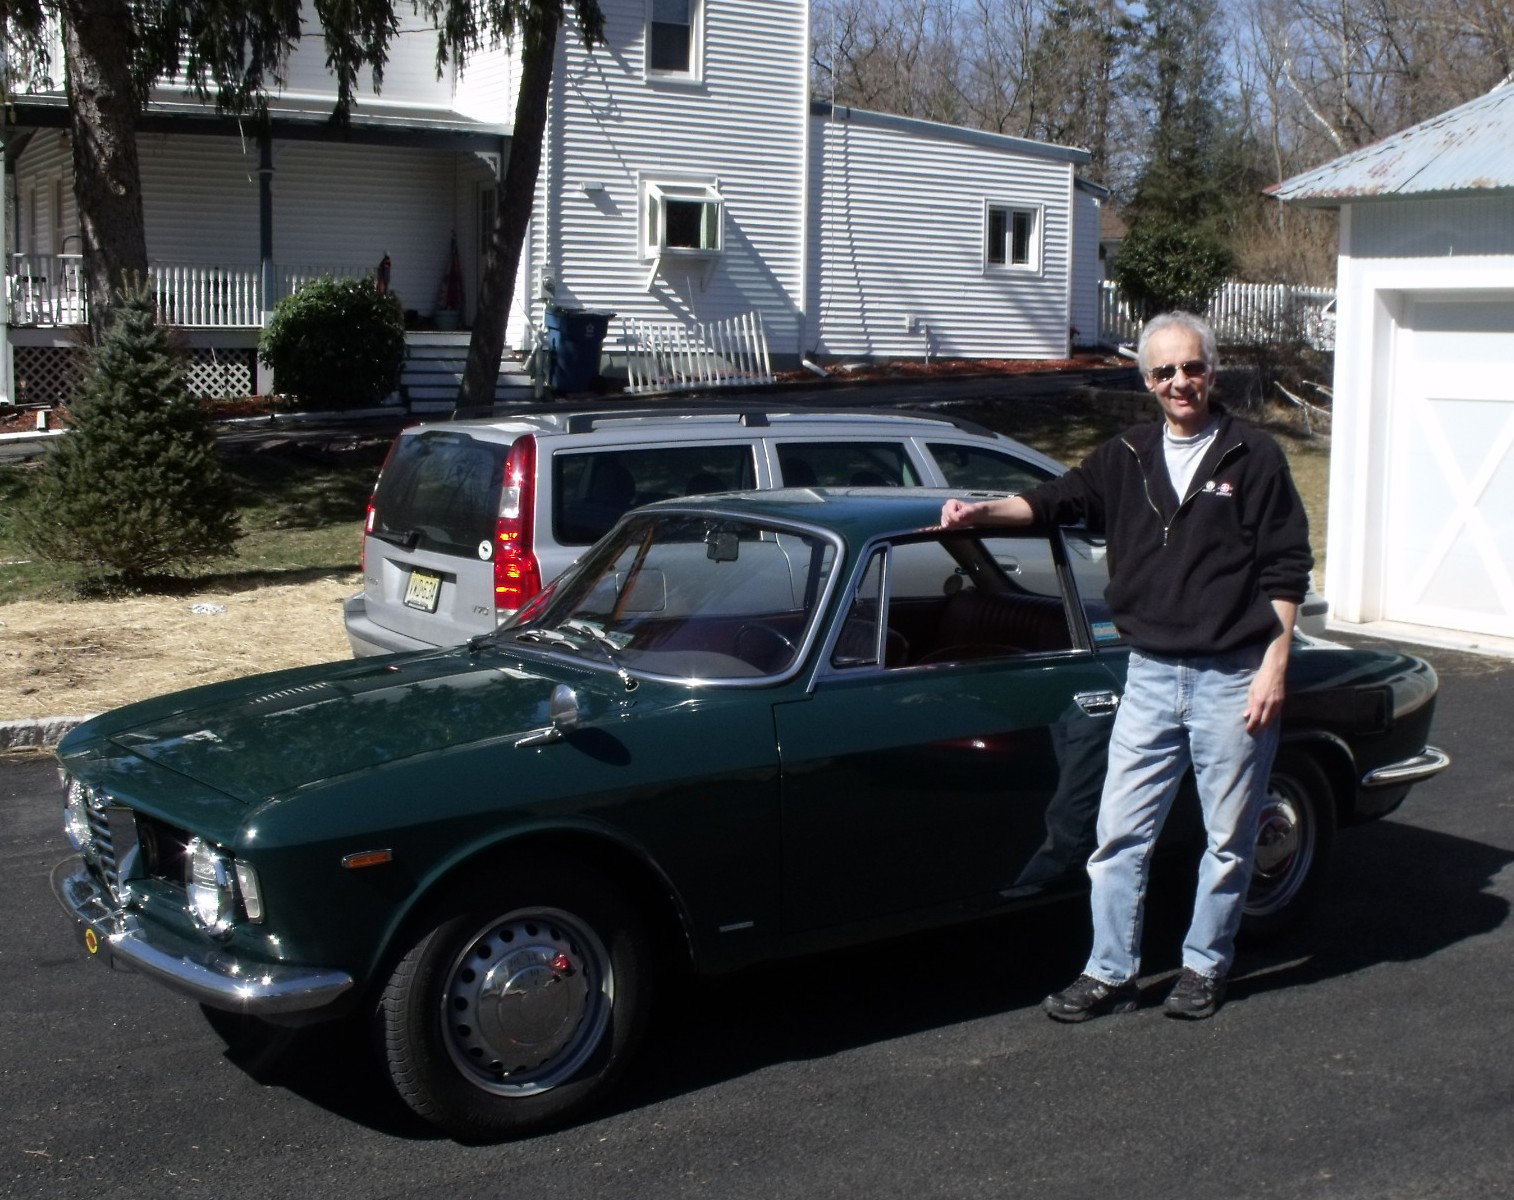
On Saturday, March 9, 2013, an Intercity Lines transport truck pulled into the parking lot of the Wawa convenience store (yes) two miles from my home. The Alfa was unloaded, and I drove it back to my house. The grin on my face says it all.
March 9, 2013: The Alfa Romeo GT 1300 Jr. arrives in my driveway.
The process of purchasing a valuable collector car from a family friend was done at such a high comfort level that I wish it could be this way for all future transactions. This was a car that I had known about for eight years; I had numerous opportunities to drive it; the owner provided me with its full ownership history; he allowed me to select and pay the car’s “fair market value”; and he covered 50% of the transport cost.
I was the proud owner of my first Alfa Romeo, and the fun was truly about to begin.
After seeing the Alfa during that initial visit to Pete’s home in 2005, we stayed in touch. Emails were exchanged, and we always made a point to get together at Hershey in October, an annual pilgrimage for both of us. Every time I (gently) asked about purchasing the Alfa, Pete would (gently) tell me that he was back to enjoying the car and it was not for sale.
My job had been keeping me quite busy, and a few years went by without a trip to visit him. In 2009, Pete asked me if I was available to do some work on one of his cars for him. I was only too happy to lend him a hand, and made plans to head out there (by myself this time) in September. Pete and his wife graciously offered to put me up in a spare bedroom.
Pete needed the heater control valve replaced on one of his older cars, a job I had done many times before, but had not done in years! He had the correct parts, and we got it done. While I glanced admiringly at the Alfa, I did not drive it this time.
New heater valve on its way into the car.
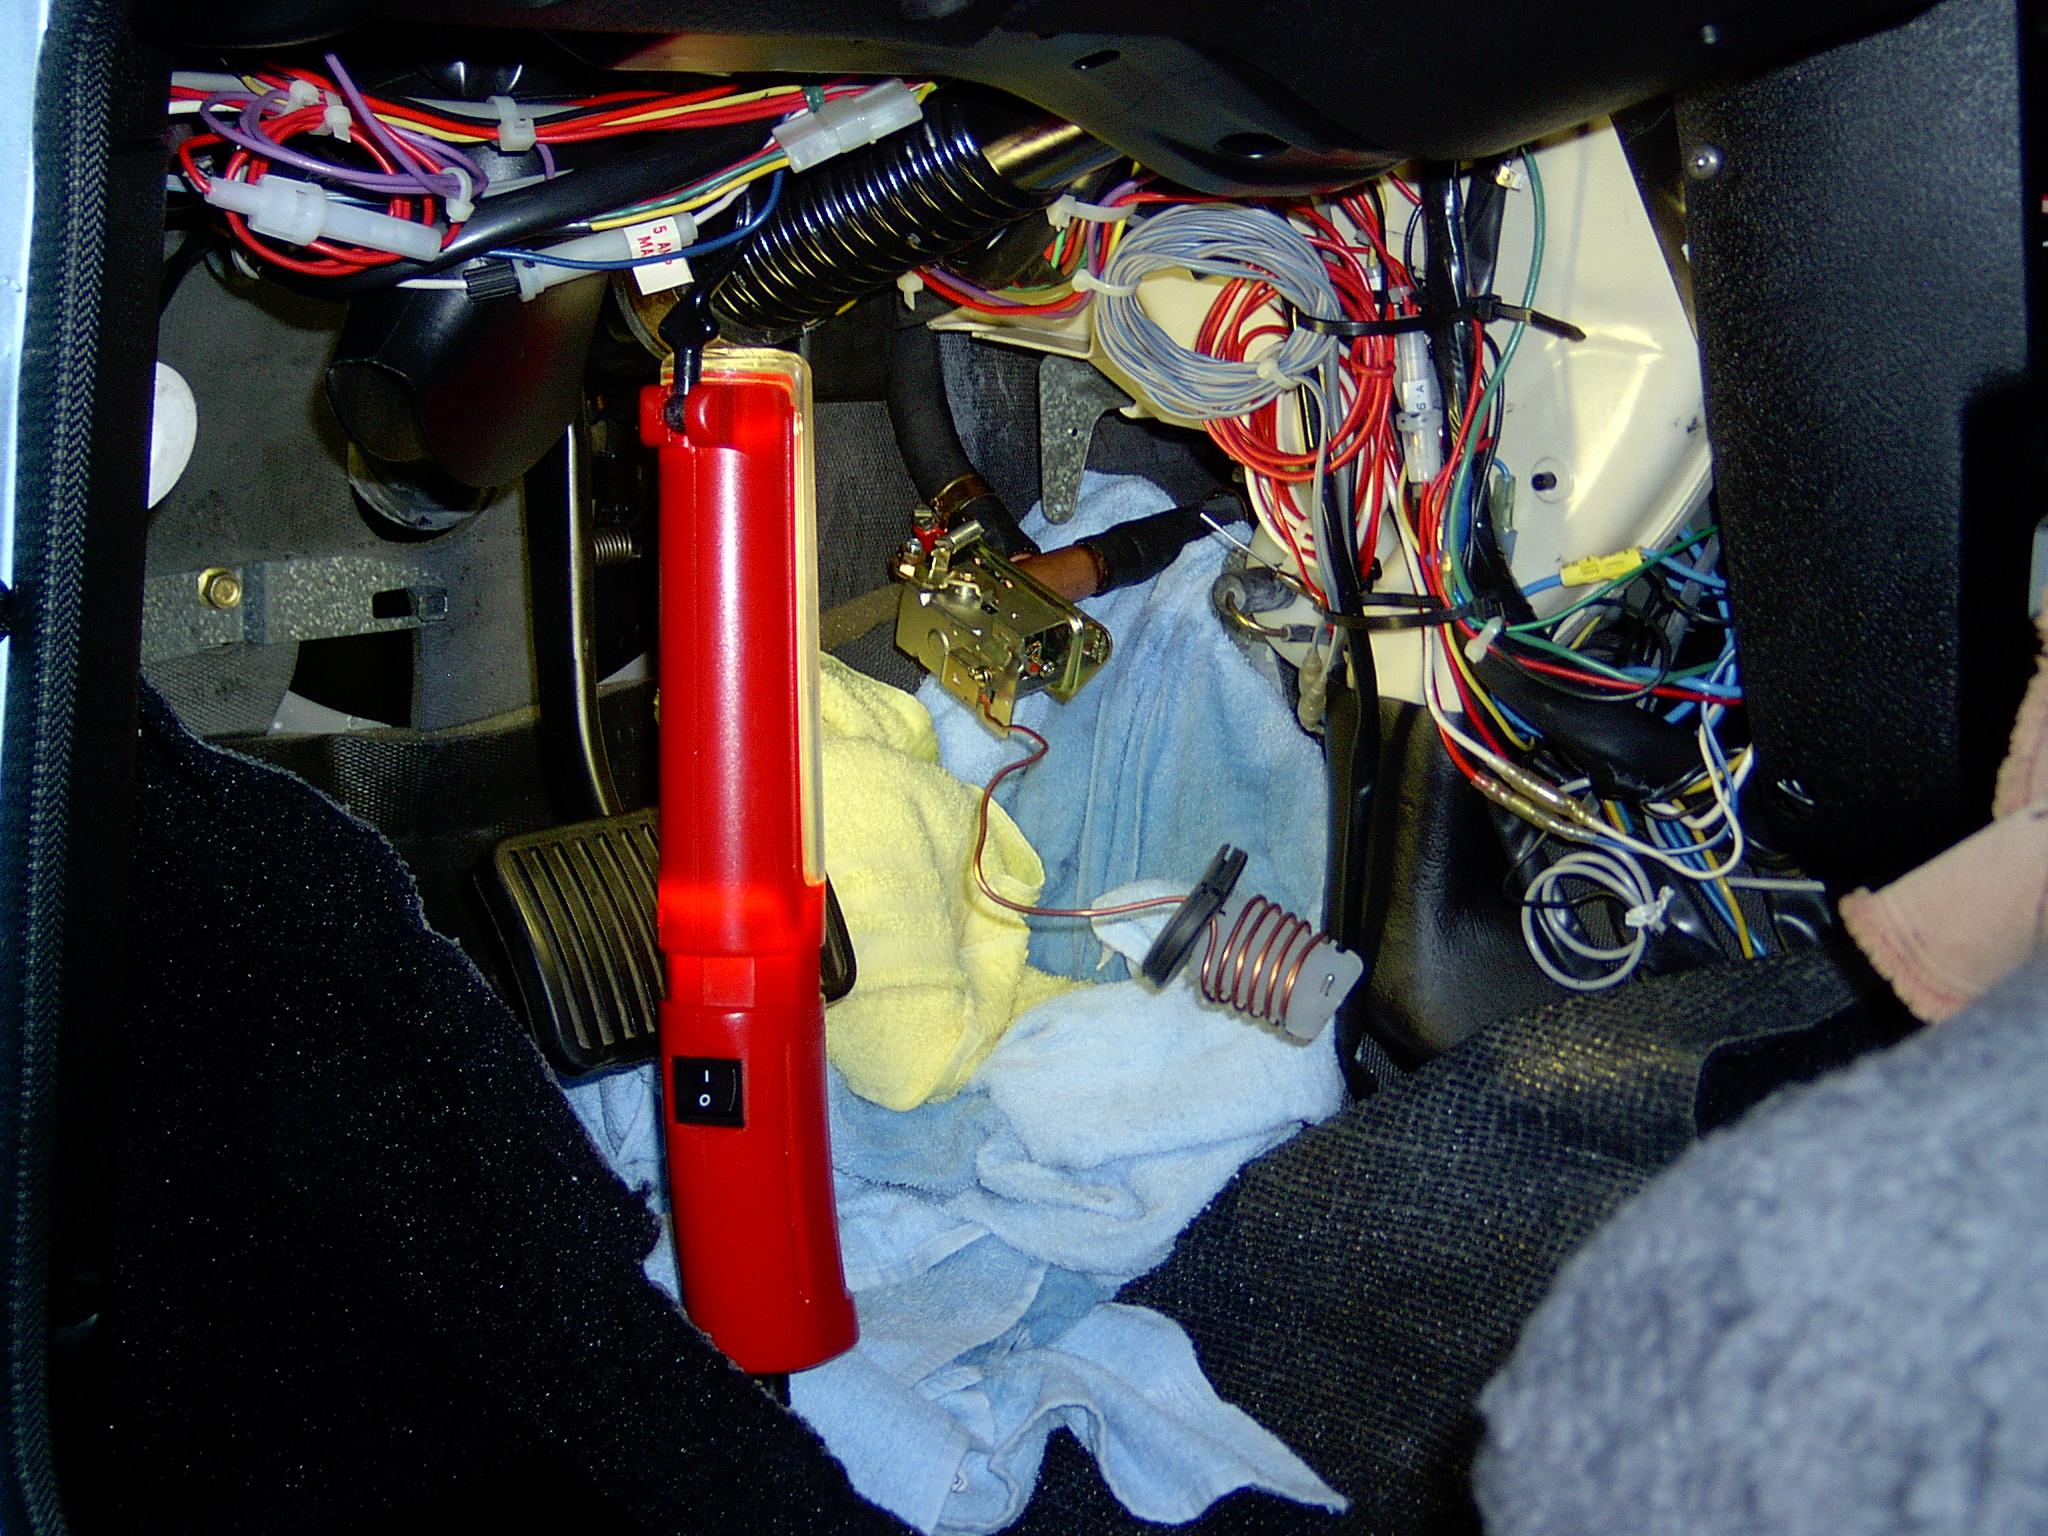
A few months later, in March 2010, Pete again invited me out, this time to work on the Alfa. Newly retired from Volvo corporate life, I had a bit more free time. Frankly, I also saw an opportunity to engage Pete in a more candid conversation about a sale. Like the previous job, it was the Alfa’s heating system which needed attention. Pete had plans to remove the heater core and replace some hoses. We did just that, and I got to drive it again. Doing that only reinforced how badly I wanted to own this very special vehicle.
Tearing into the Alfa’s heating system. Look at that beautifully original interior!
“Hi NAPA guy, I need some hoses for a ’67 Alfa.” We were in fact able to find what we needed at the local NAPA store.
We did talk about a sale, and it was on this trip that Pete first used words like “perhaps” and “some day” and “when I sell”. My understanding from that conversation was that he was not ready to let go of it just yet, but when he was ready, I could have first shot at it. Elation!
In October of that year, Pete drove the car to the AACA Hershey meet and entered it in the HPOF (Historical Preservation of Original Features) class, where it had earlier won an award. It was great to see the Alfa. It would be a long and eventful two and a half years before I would get to see it again.
Pete’s 1967 Alfa Romeo at Hershey in Oct. 2010. Note the HPOF award on the front.
When Margaretanne and I married and bought our house in 2001, we enjoyed having family and friends visit. As happens in any relationship, I would meet and get to know her friends, and she would do the same with mine. One such friend of my wife’s was Pam. Margaretanne and Pam knew each other from work, and although they no longer worked together, they remained (and still remain) good friends.
One warm summer day, a year or two after moving in, Pam came by to visit. I happened to be out in the garage, tinkering with the 1957 BMW Isetta. Pam noticed me and the old car through the open garage door, and in a most casual tone said, “you should meet my father, he likes old cars too”. Pam had no idea what that one comment started.
A year later, while attending a party at Pam’s house, I finally did meet her dad. “Pete” was a very soft-spoken and gentle sort, in his late 70’s and long retired. Upon meeting, we both wanted to learn what we could from each other about our passion and our collections. By this time I had acquired the 1968 Ford Mustang California Special, so with a new toy in the garage, I proudly told Pete about my most recent efforts with this rather rare car.
During the first half of that decade, Pete and I saw each other frequently enough. We met several times in New Jersey, both at Pam’s house and at my place, where Pete saw my two collector cars. We would also meet to exchange pleasantries if we were both at Hershey. The more I got to know Pete, the more I enjoyed his company, and the more I learned about his incredible knowledge on many topics.
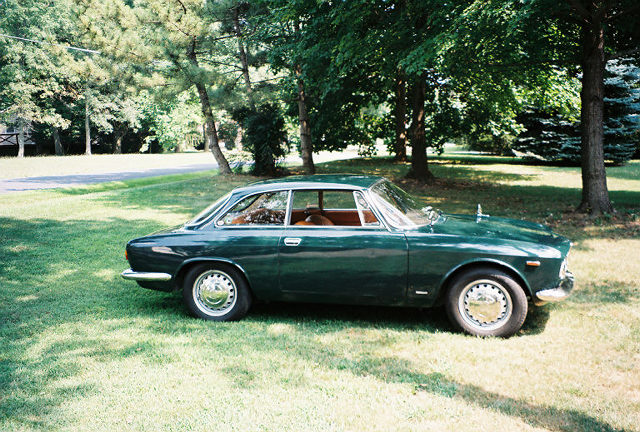
Pete had several times extended an invitation to visit him and his wife. During the summer of 2005, we took him up on his offer and made a day trip to their place. The original plan was to drive the Mustang (with an inoperative air conditioning system), however, the day was so hot and humid that we took our Volvo – we needed that A/C! Arriving at Pete’s house, the first car to catch my eye was his Alfa Romeo. The dark green Giulia coupe, a Bertone styling masterpiece, was a model I had coveted for decades. Pete’s car was in stunning shape, not perfect, but an obviously well cared-for automobile.
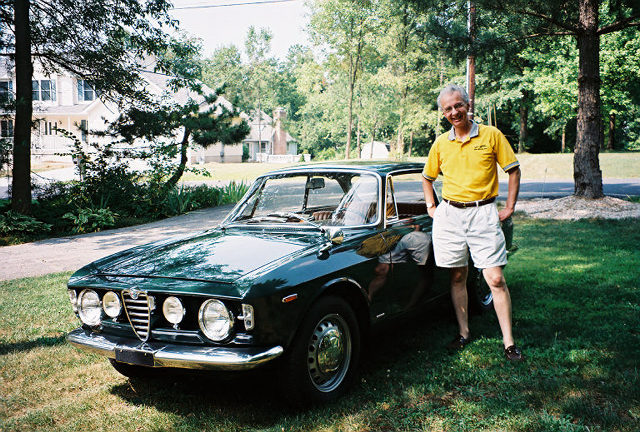
My first-ever view of Pete’s 1967 Alfa Romeo, on his front lawn.
We exchanged hellos in the yard. The next words to pass my lips were to be frequently repeated during the following eight years:
Richard: “Pete, sell me this car.”
Pete: “No, it’s not for sale. I’m getting it back on the road after a long slumber.”
It was then that I first heard the story of how he acquired the Alfa. The car had been purchased new in Germany by an American working for the U. S. State Department. That individual brought the car back to his home in the U.S. when it was a year old, and soon sold it to Pete. Pete drove the car regularly as his “fun” car throughout the late ‘60s and most of the 1970s. The car was then mothballed for about 20 years, to be resurrected again starting in the late 1990s. Brakes, fluids, battery, and tires were some of the more obvious items needing attention. But by 2001, Pete had begun driving the car again, first to local shows, then to Hershey, where it won its HPOF (Historical Preservation of Original Features) award. The Alfa I was admiring had never been painted, disassembled, or restored. It was truly an original car.
Pete: “C’mon, let’s go for a ride. You can drive the Alfa.”
He didn’t need to ask twice. While the ladies stayed home, Pete and I took a spin in the Alfa (officially a European spec “GT 1300 Junior”), and it was sublime. With 100 horsepower pulling 2,000 lbs., it wasn’t fast, but was not slow. Light on its feet, the steering, brakes, shifter, and suspension all felt directly connected to each other and to the driver. In some ways, it reminded me of my 1993 Mazda Miata. Although I didn’t ask again that day, I knew I would keep working at Pete to someday sell me this car.
Pete got a chance to drive my 2005 Volvo S60, and as a Volvo owner himself, marveled at how different it was (mostly in good ways) compared to his older Volvo.
My wife and I had a long ride home in front of us, and Pete said that I was welcome back at any time.
Not mine, not yet anyway.
Made a mental note to myself: next time, bring checkbook.