In Chapter 8, the front half of the chassis got back on its feet, er, wheels, while patiently waiting for some engine machine work to be completed. In Chapter 9 below, we make serious progress on one engine, while also making serious progress on the gearbox and rear axle.
We last visited our engine progress in Chapter 7, which concluded with me leaving one crankshaft / connecting rod assembly in the hopefully-capable hands of Isetta restorer Ron Krause in PA. Ron said that he would take “a few weeks” to rebuild my crankshaft. I wasn’t exactly sitting around waiting for the phone to ring; I resumed work on the chassis, and as we saw in Chapter 8, got it up onto its two front tires again.
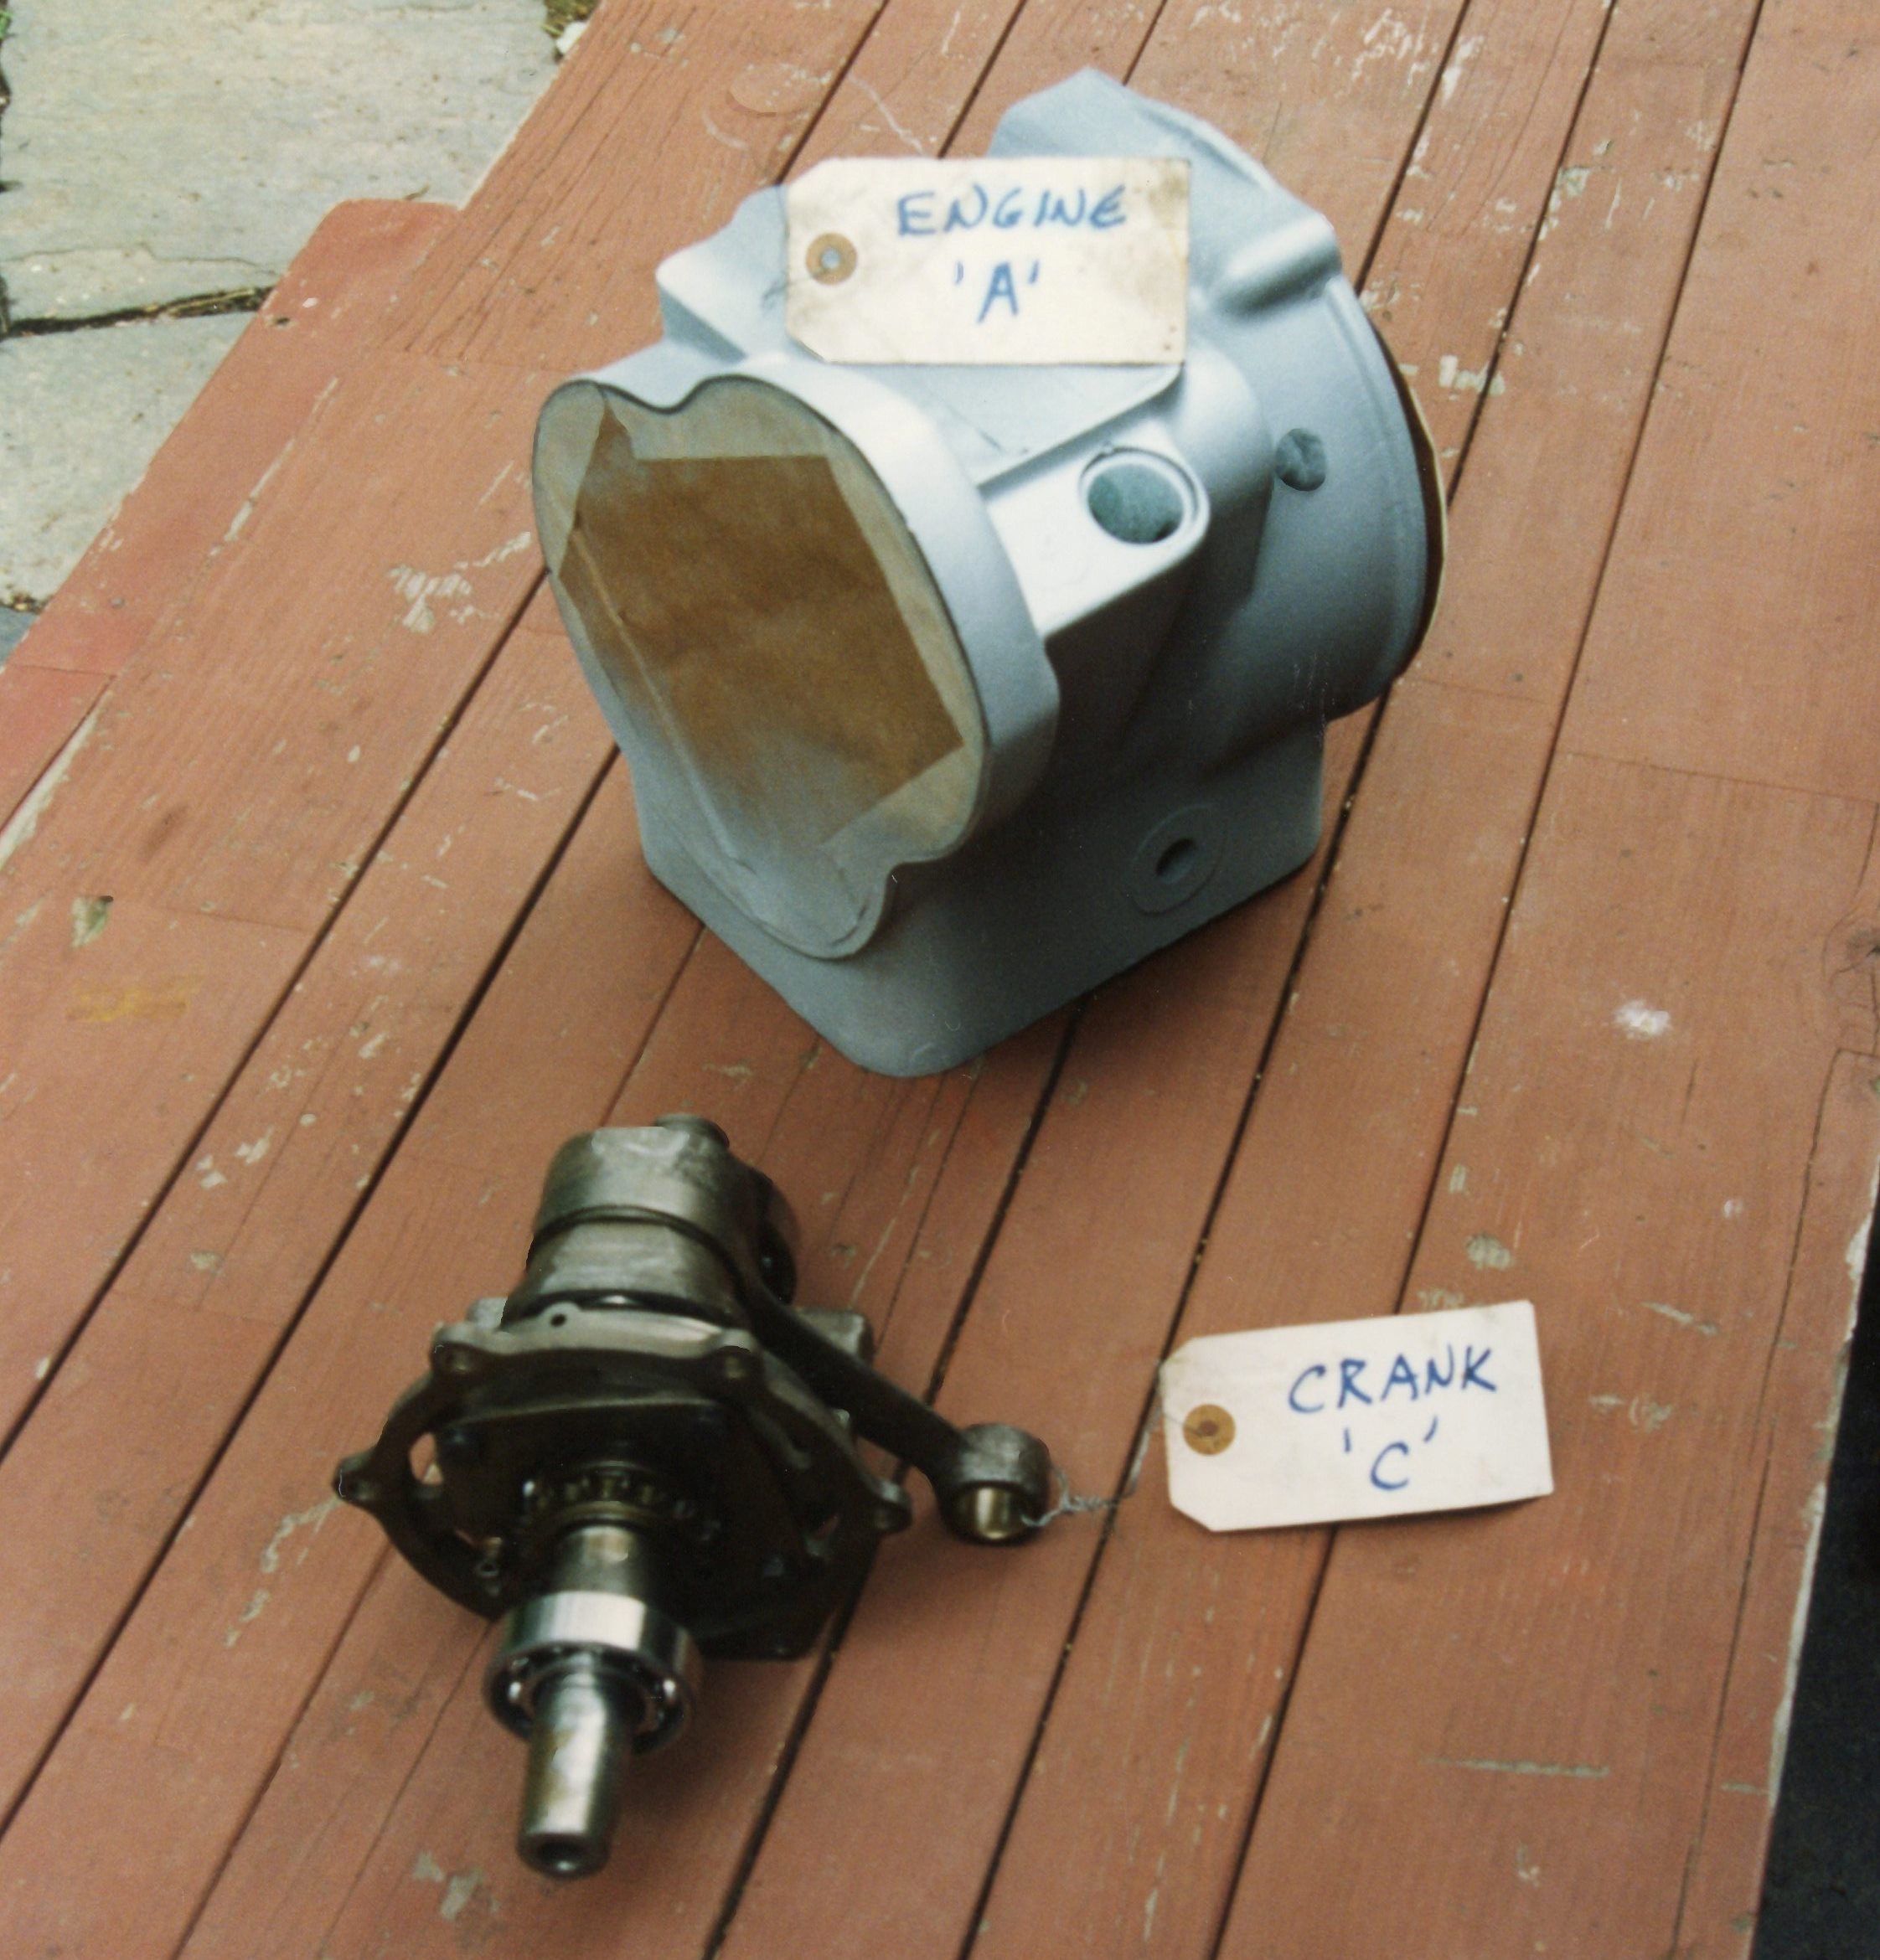
Sure enough, after a few weeks, Ron Krause called. My rebuilt crank/conrod was ready. I asked him if I could drop off a second one. He said he wasn’t one to turn down business. I drove to Emmaus once more, to pick up one assembly, and drop off another. I was becoming a regular. After a few days, Ron got back to me, stating that there was a problem. It seemed that BMW used both aluminum and steel connecting rods. The aluminum rods were notoriously weak. My second assembly used an aluminum rod, and it wasn’t rebuildable. Ron said that he could offer me an exchange unit for the same price. It wouldn’t be original to my car, but for such an internal part, it didn’t matter. I told him that I would go that route. He said he would have it ready for me in a few weeks.
With one rebuilt crankshaft in hand, I could begin reassembly of an engine. Of course, as the repair guides love to state, “installation is the reverse of removal”, so the crankcase needed to be cooked again. But first, the bare case was cleaned as best as possible using solvents, was given an abrasive cleaning with a wire wheel in an electric drill, and was then painted with high-temperature aluminum paint out of a rattle can (as the store-bought spray paints are derisively called). In today’s world of high-end, no-expense-spared restorations, this kind of approach would be looked at as amateurish at best, and below-standard at worst. However, this was what I could afford while still keeping to a DIY standard. My Isetta was SUPPOSED to be a hobbyist restoration.
Allowing the paint to dry, I waited for an evening when my wife was not home, and turned on the kitchen oven to 400F. I put the crankcase in the oven and waited for 20 minutes. Oven mitts at the ready, I pulled out the superhot case, ran downstairs, picked up the crank/conrod assembly, and reinserted it. It went in like the book said it would. It was one of those moments in the journey where the progress felt profound.
With the crankshaft back in place, the front of the engine could be reassembled. New timing chain, tensioner, and bearings were fitted. The camshaft was reinstalled, and new seals were used on the front of both crank and cam. The oil pump was reinstalled, and the oil pan was bolted in place, but not before hand-cutting an extra-thick cork gasket. John Jensen pointed out that when full, the engine oil is at a level ABOVE the oil pan gasket. I did not want this thing to leak if I could help it, so the cork gasket got silicone sealer on both sides, making for a nice sandwich between the crankcase and oil pan.
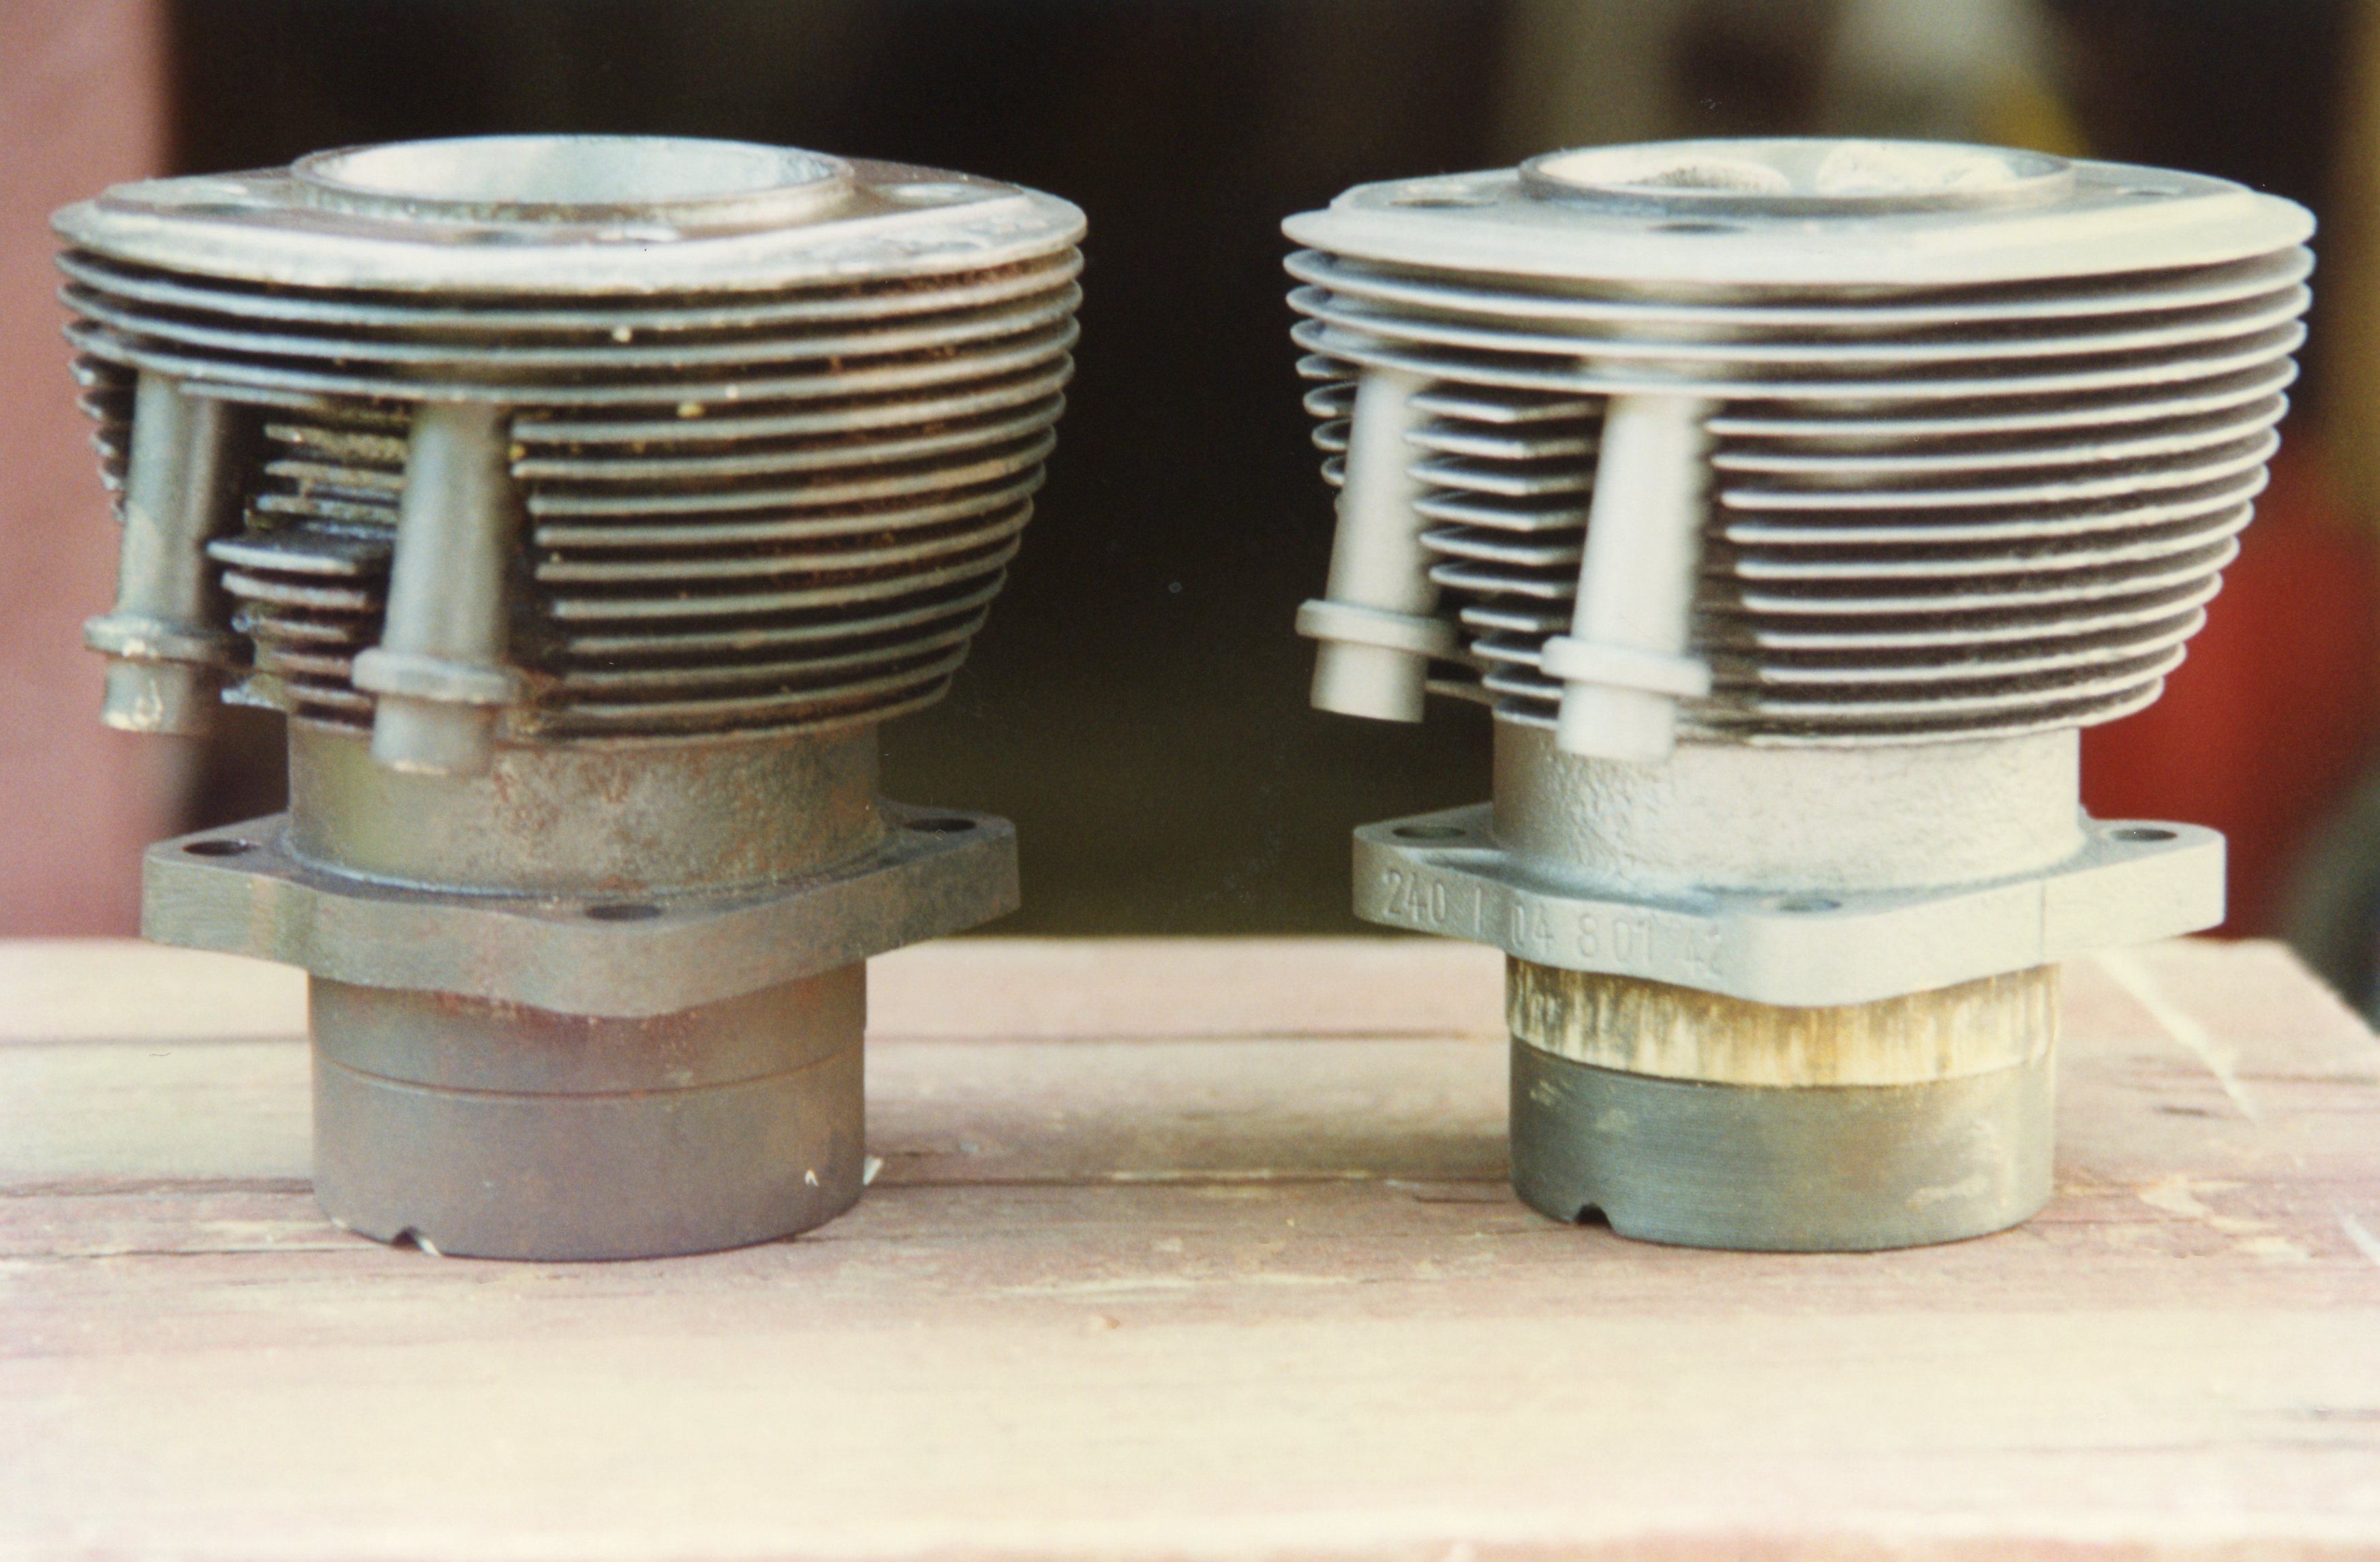
The cylinder barrels, surprisingly, did not show signs of broken fins. The two barrels were measured and were not out of spec. I bought a “small engine hone”, one designed for lawn mowers, and gave each barrel a light honing. These were cast iron and were painted with the appropriate paint. Pistons were reused (again, after measurements determined they were OK), and were fitted with new rings. Next in line: the cylinder head(s). I needed a good machine shop for that.

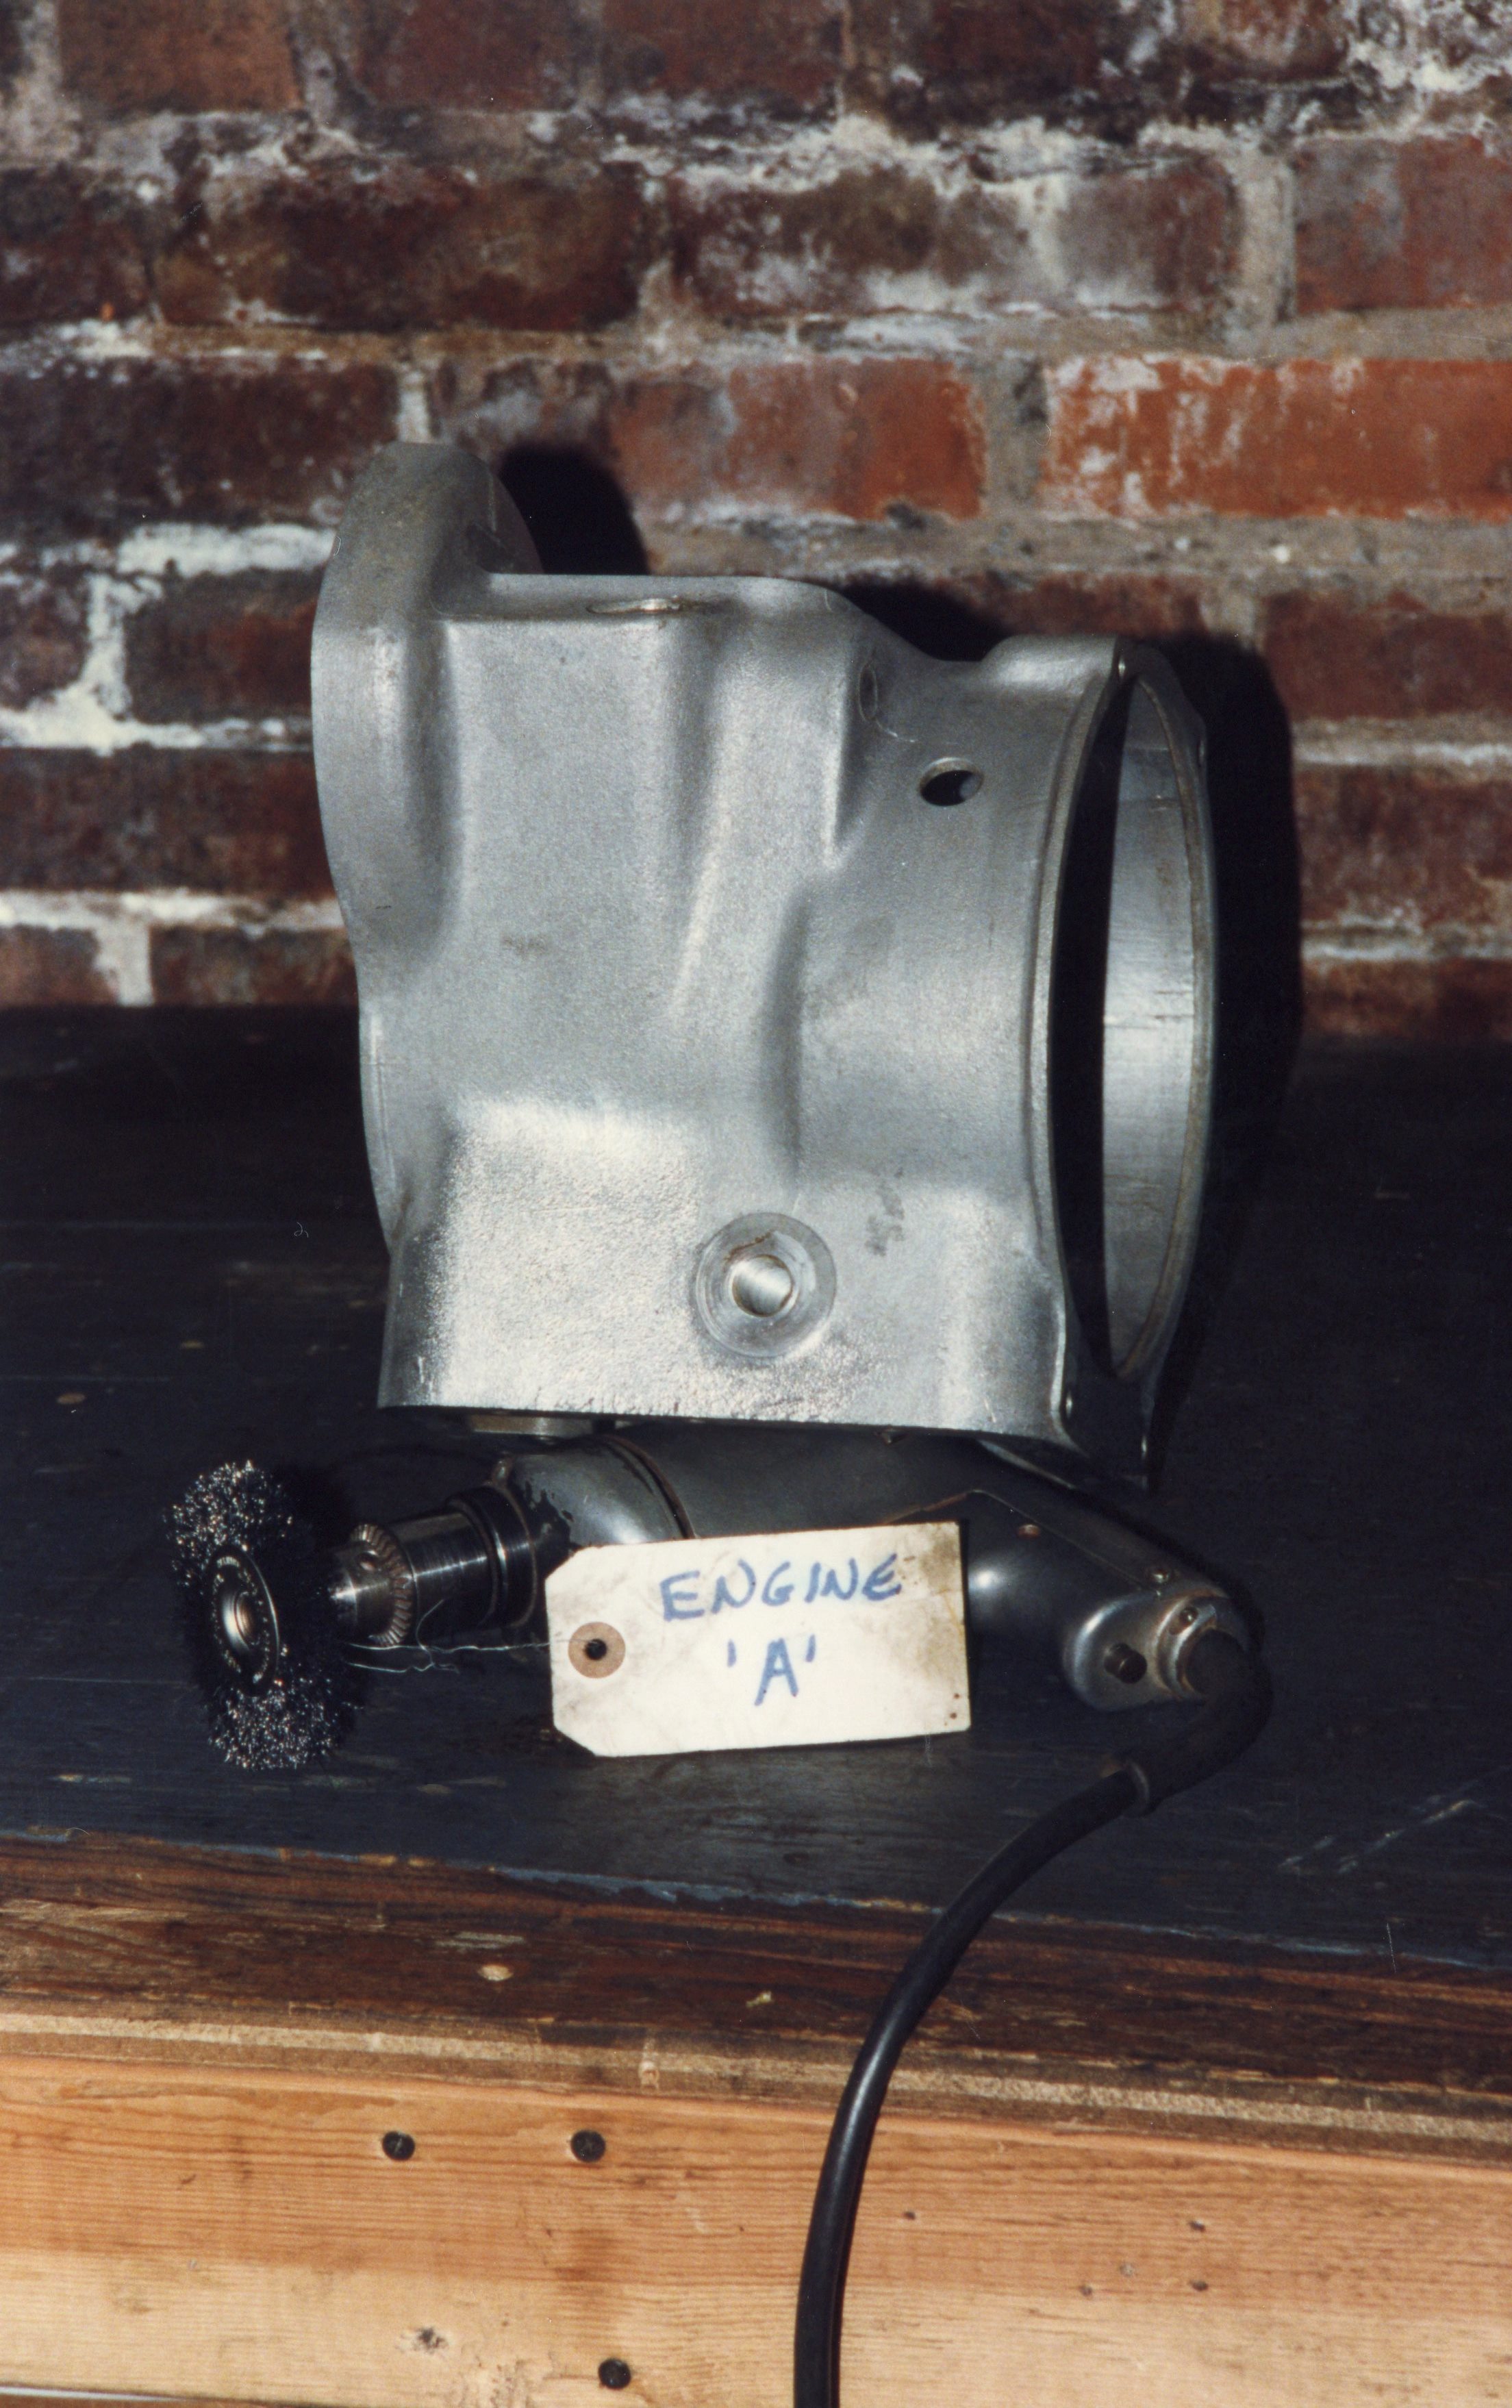
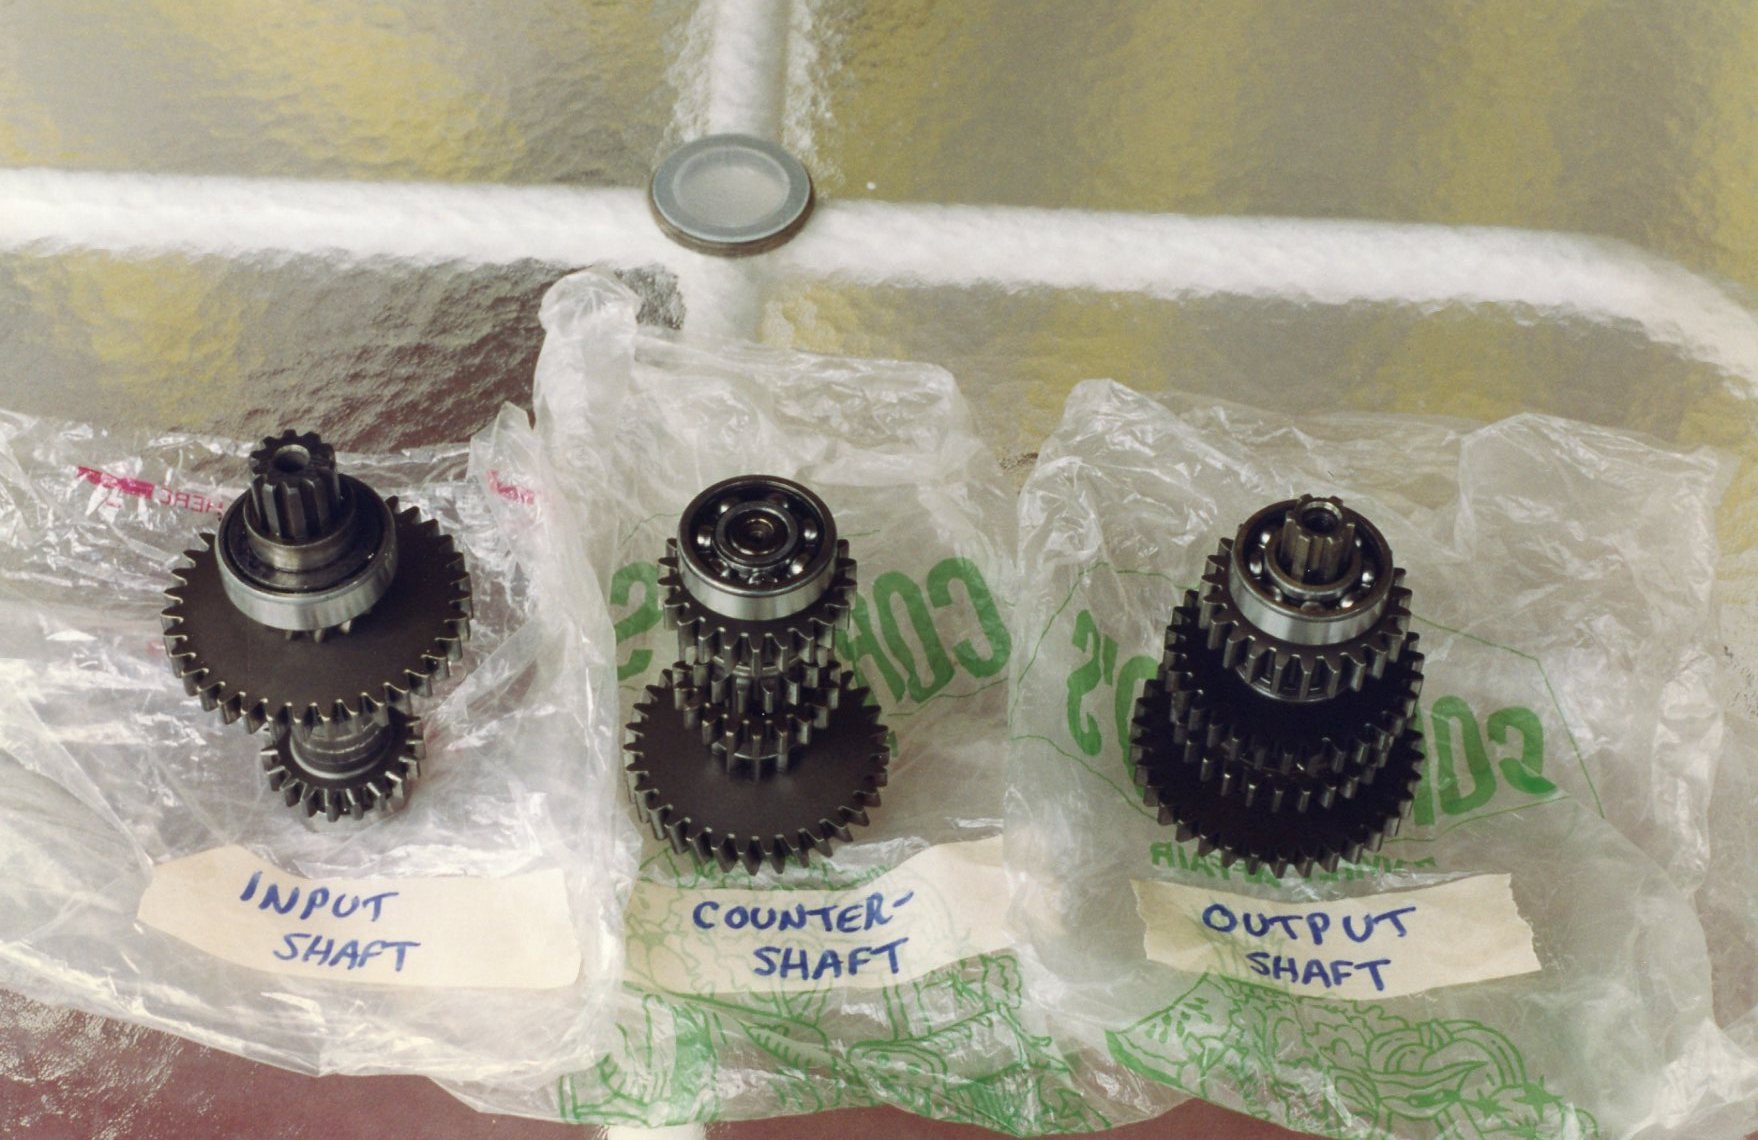
While waiting for crank #2, and while researching machine shops, I grabbed the next part in line: the four-speed manual transmission. Of course, I had two, and from the outside, they looked identical. I chose one and ran with it. The other would be saved for my step-son. The transmission could be mounted to the same wooden engine stand as was used for the engine, once a few extra mounting holes were drilled (into the stand, not the tranny).

(It has long been folklore in Isetta circles that their transmissions lack a reverse gear. I believe this bit of “fake news” came about because of the drivetrain’s motorcycle origins. However this falsehood began, it is simply not true. All Isetta manual transmissions were four-speed, fully synchronized on all forward speeds, with a reverse gear. A very, very, small number of Isettas were equipped with the Saxomat semi-automatic transmission.)

I had never rebuilt any kind of transmission before, manual or automatic. As a tech, I had replaced clutches and shifter mechanisms, and had serviced valve bodies, so it wasn’t something I feared. Here again, the John Jensen Isetta Restoration book was the go-to publication. The tranny, like much of the drivetrain, relied on roller bearings. Provided that no gears were broken, a rebuild consisted of replacing the bearings, seals and gaskets.
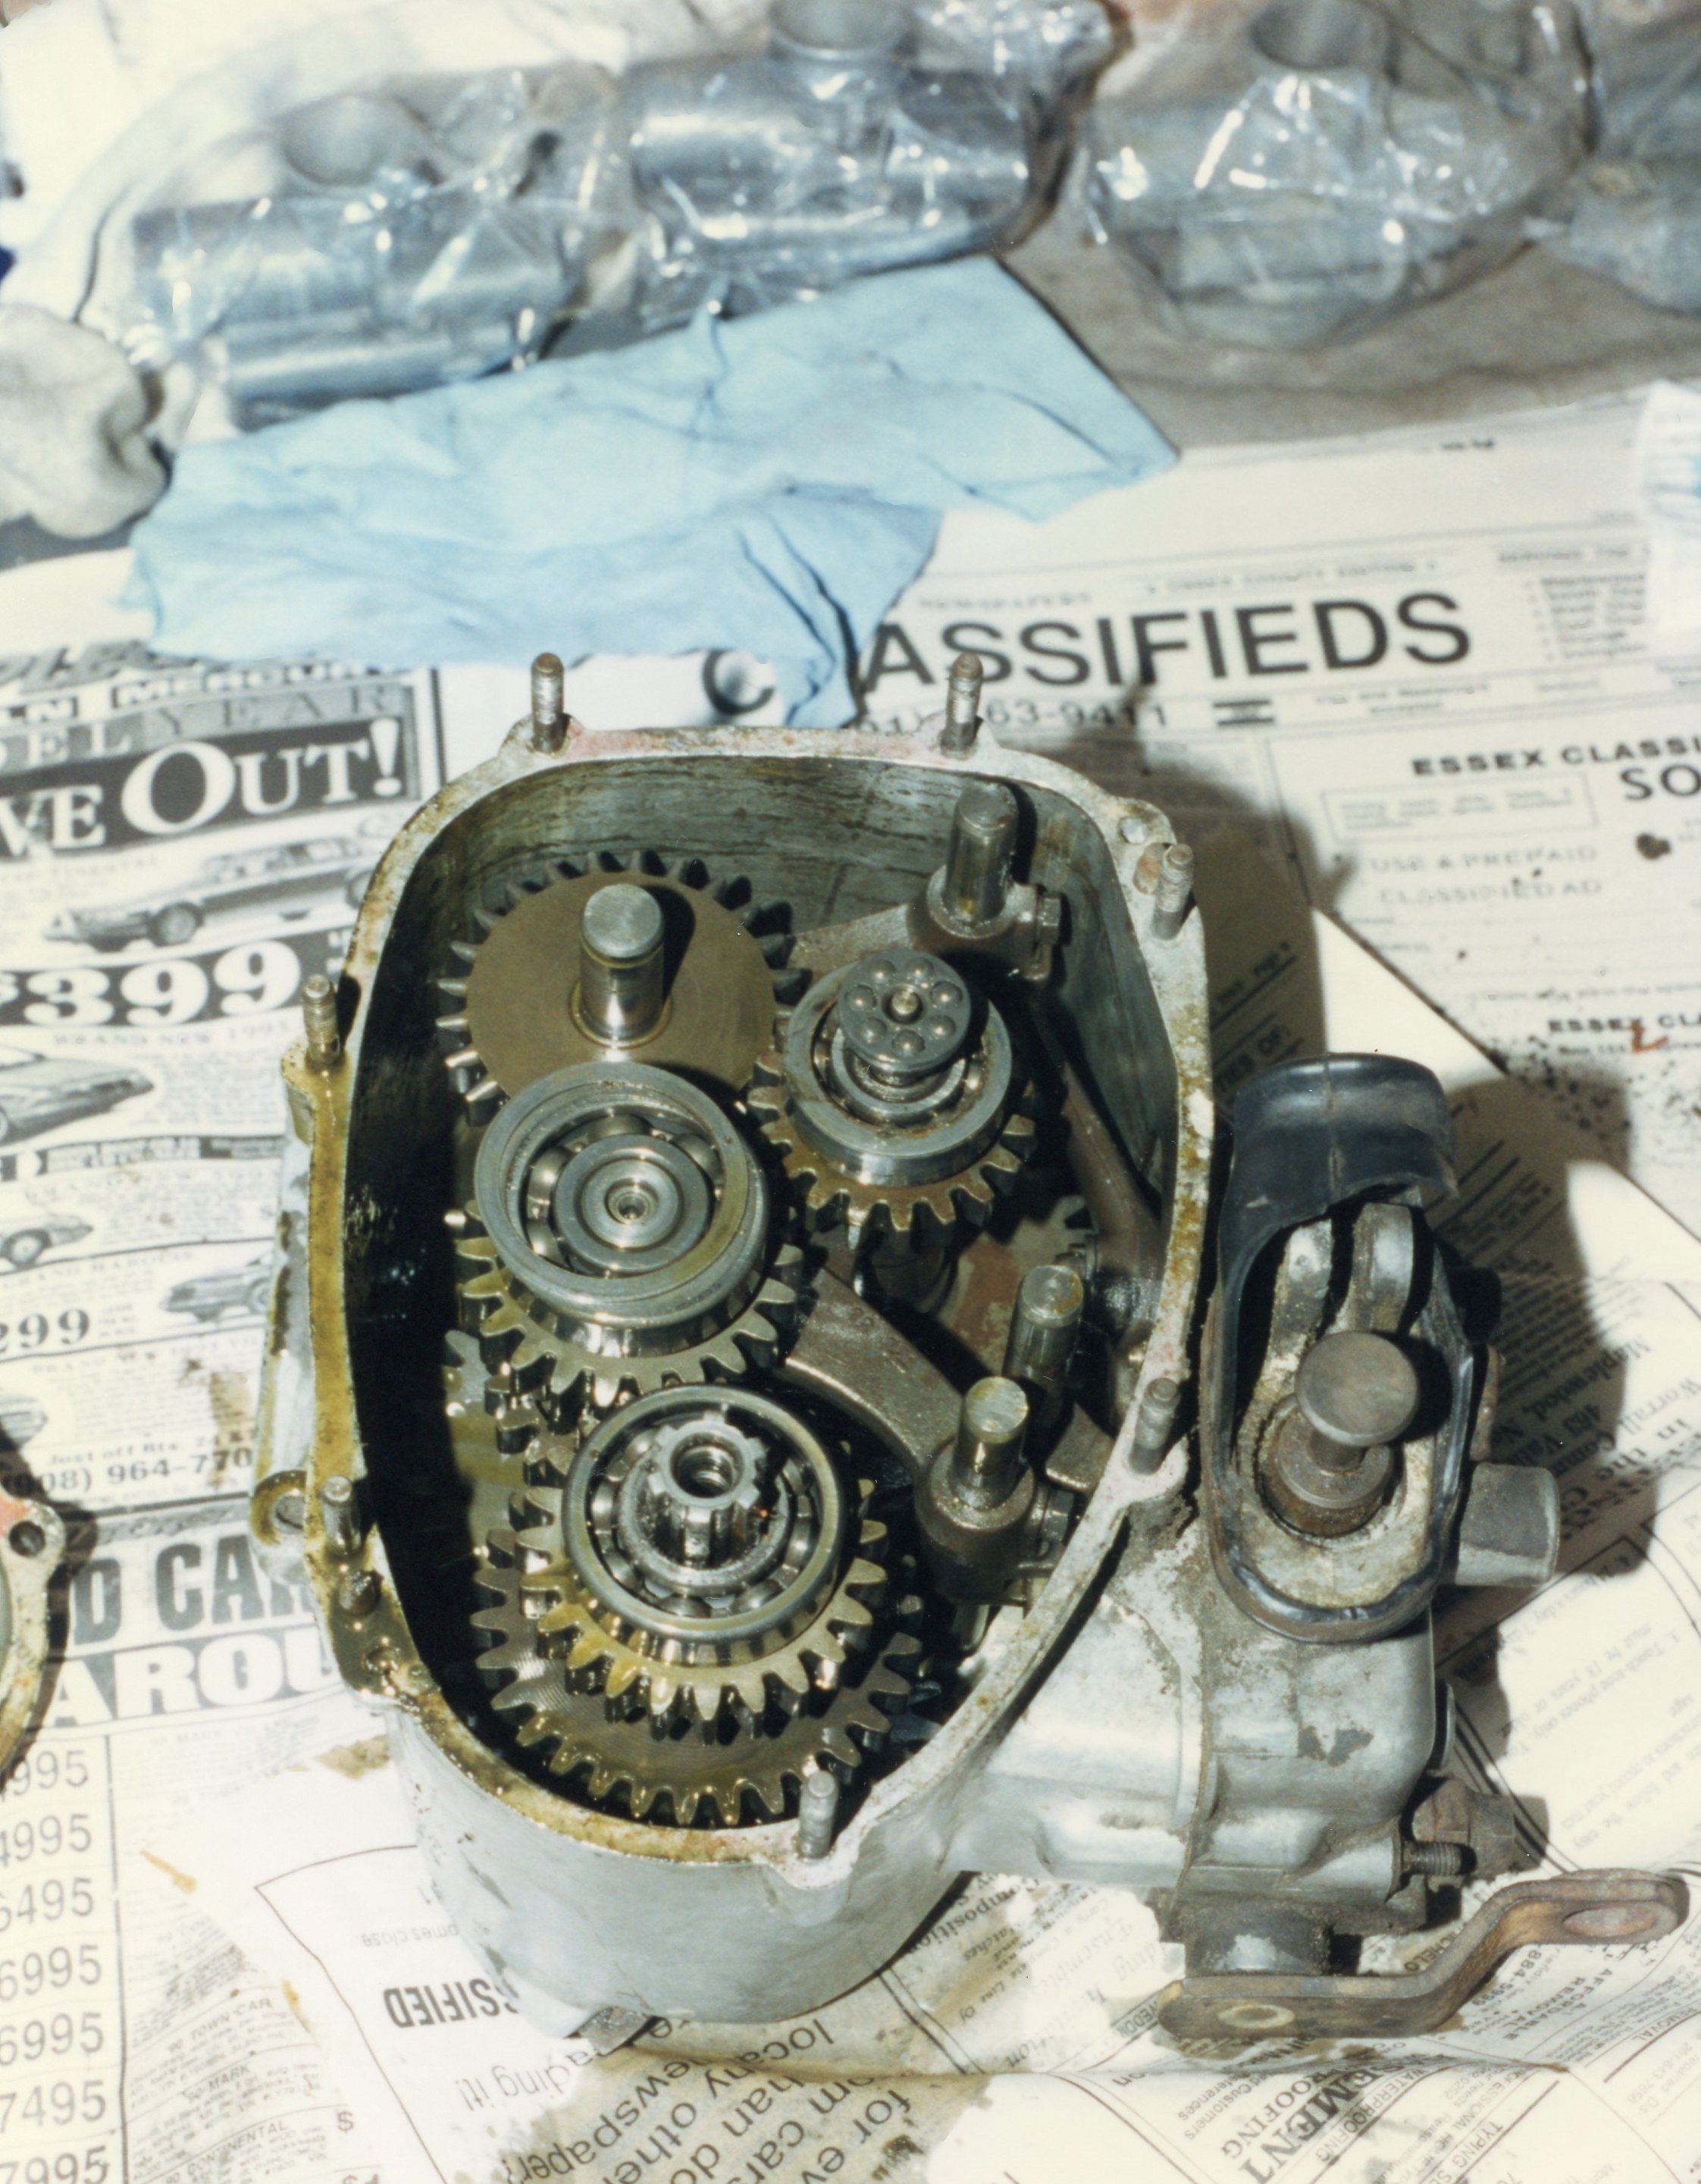
Once the front cover was off, the contrast with the innards compared to the engines’ was striking. Of course, transmissions do not normally circulate combustion by-products among their moving parts. The initial inspection showed clean and intact gears riding in rather clean oil.
This gearbox was conventional in using three shafts: input, counter, and output. Each shaft was labeled as it was removed (they looked awfully similar outside the case). Roller bearings were standard metric sizes. The Jensen book provided the dimensions, and I was able to procure SKF bearings locally. (More about SKF and its connection to a certain Swedish car company is below under ‘FUN FACT OF THE WEEK’.)

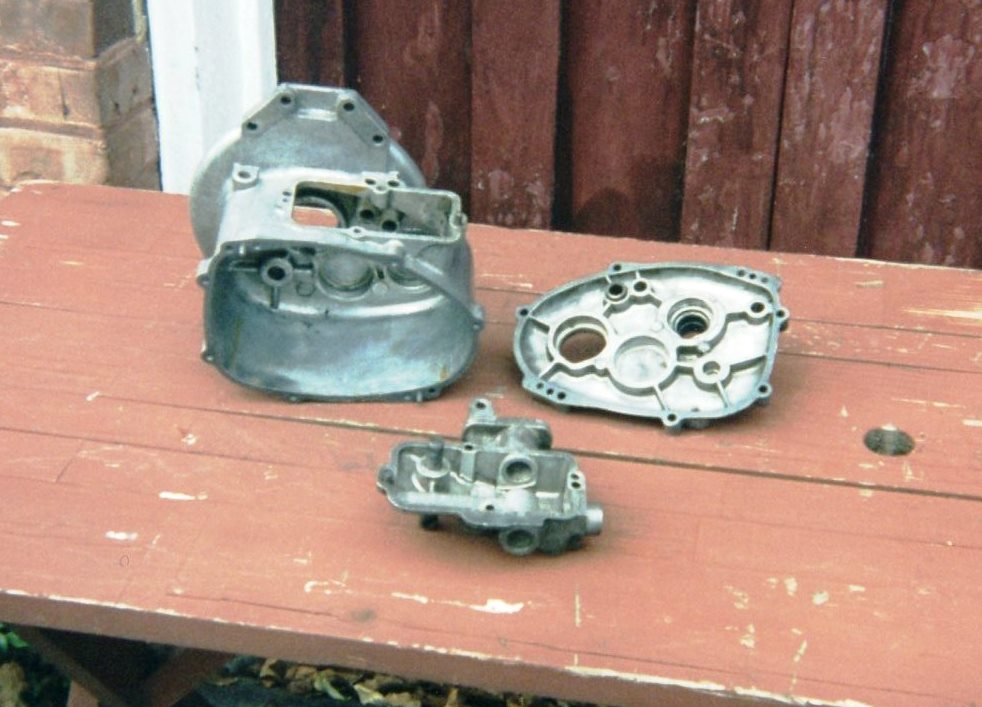
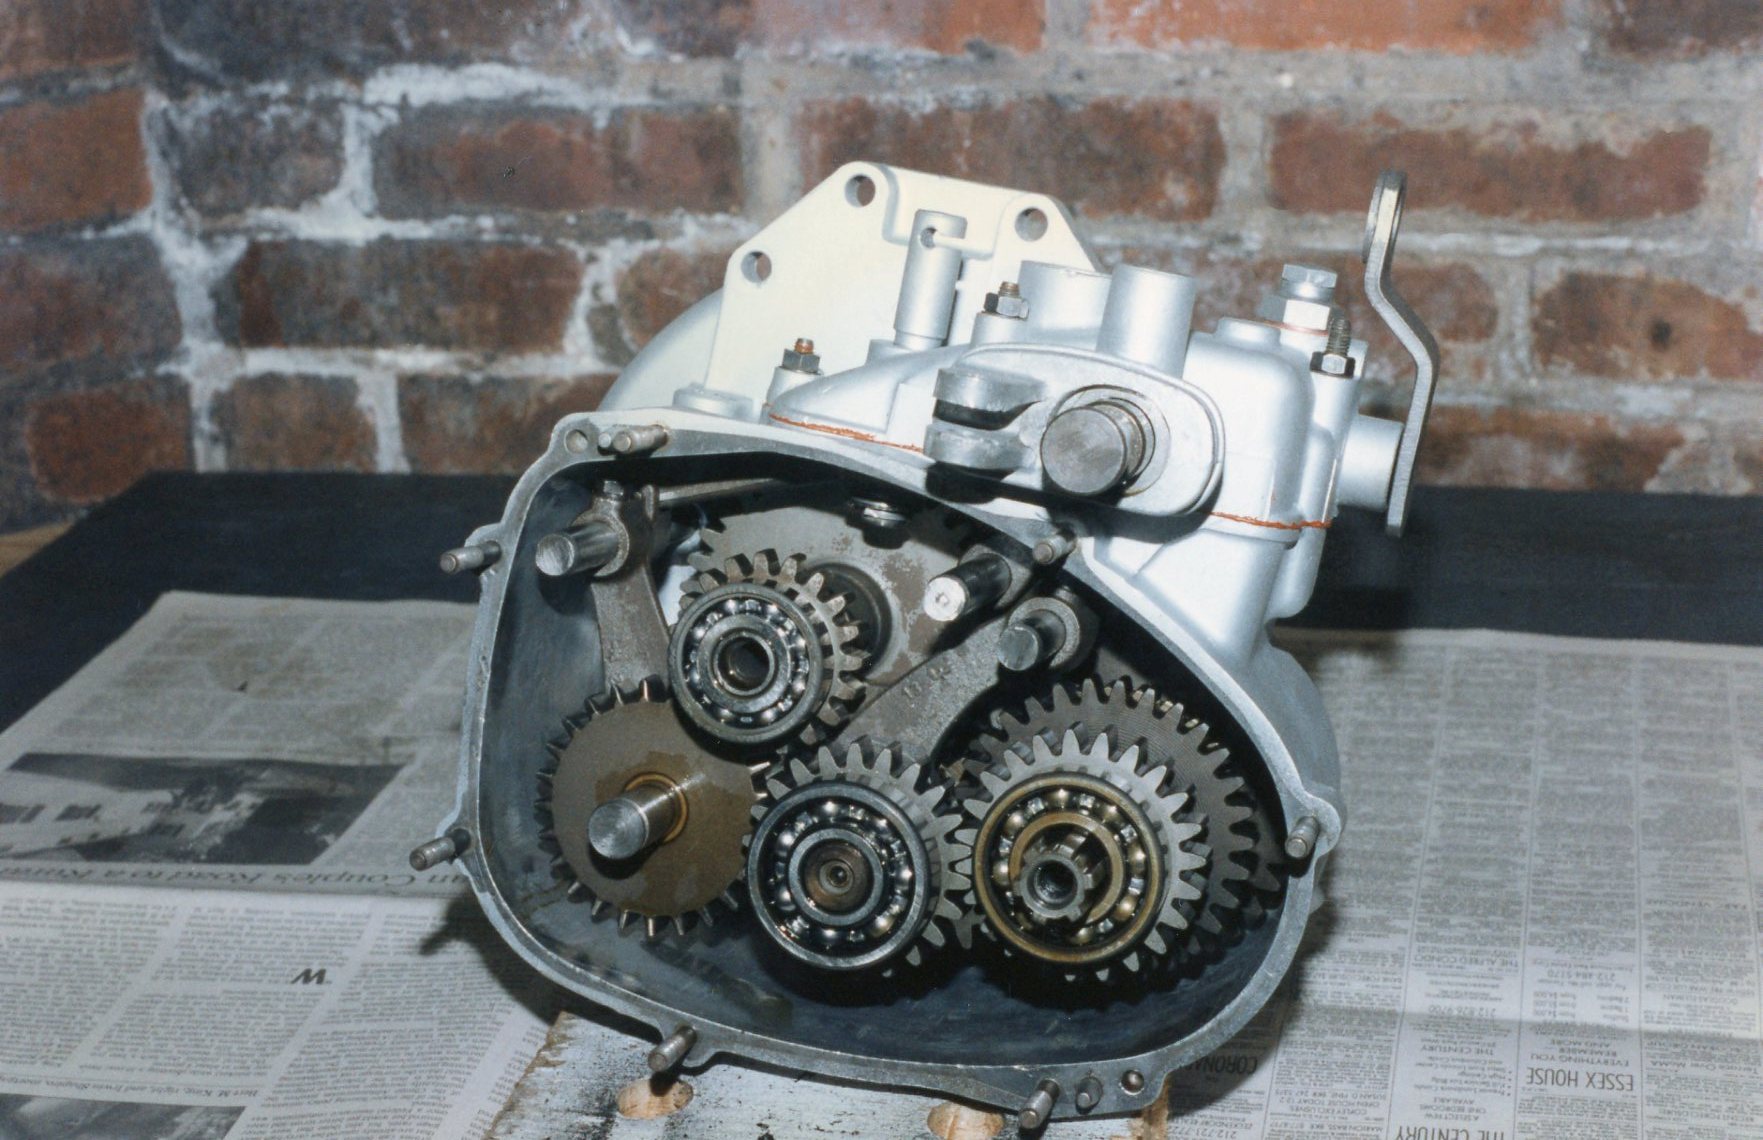
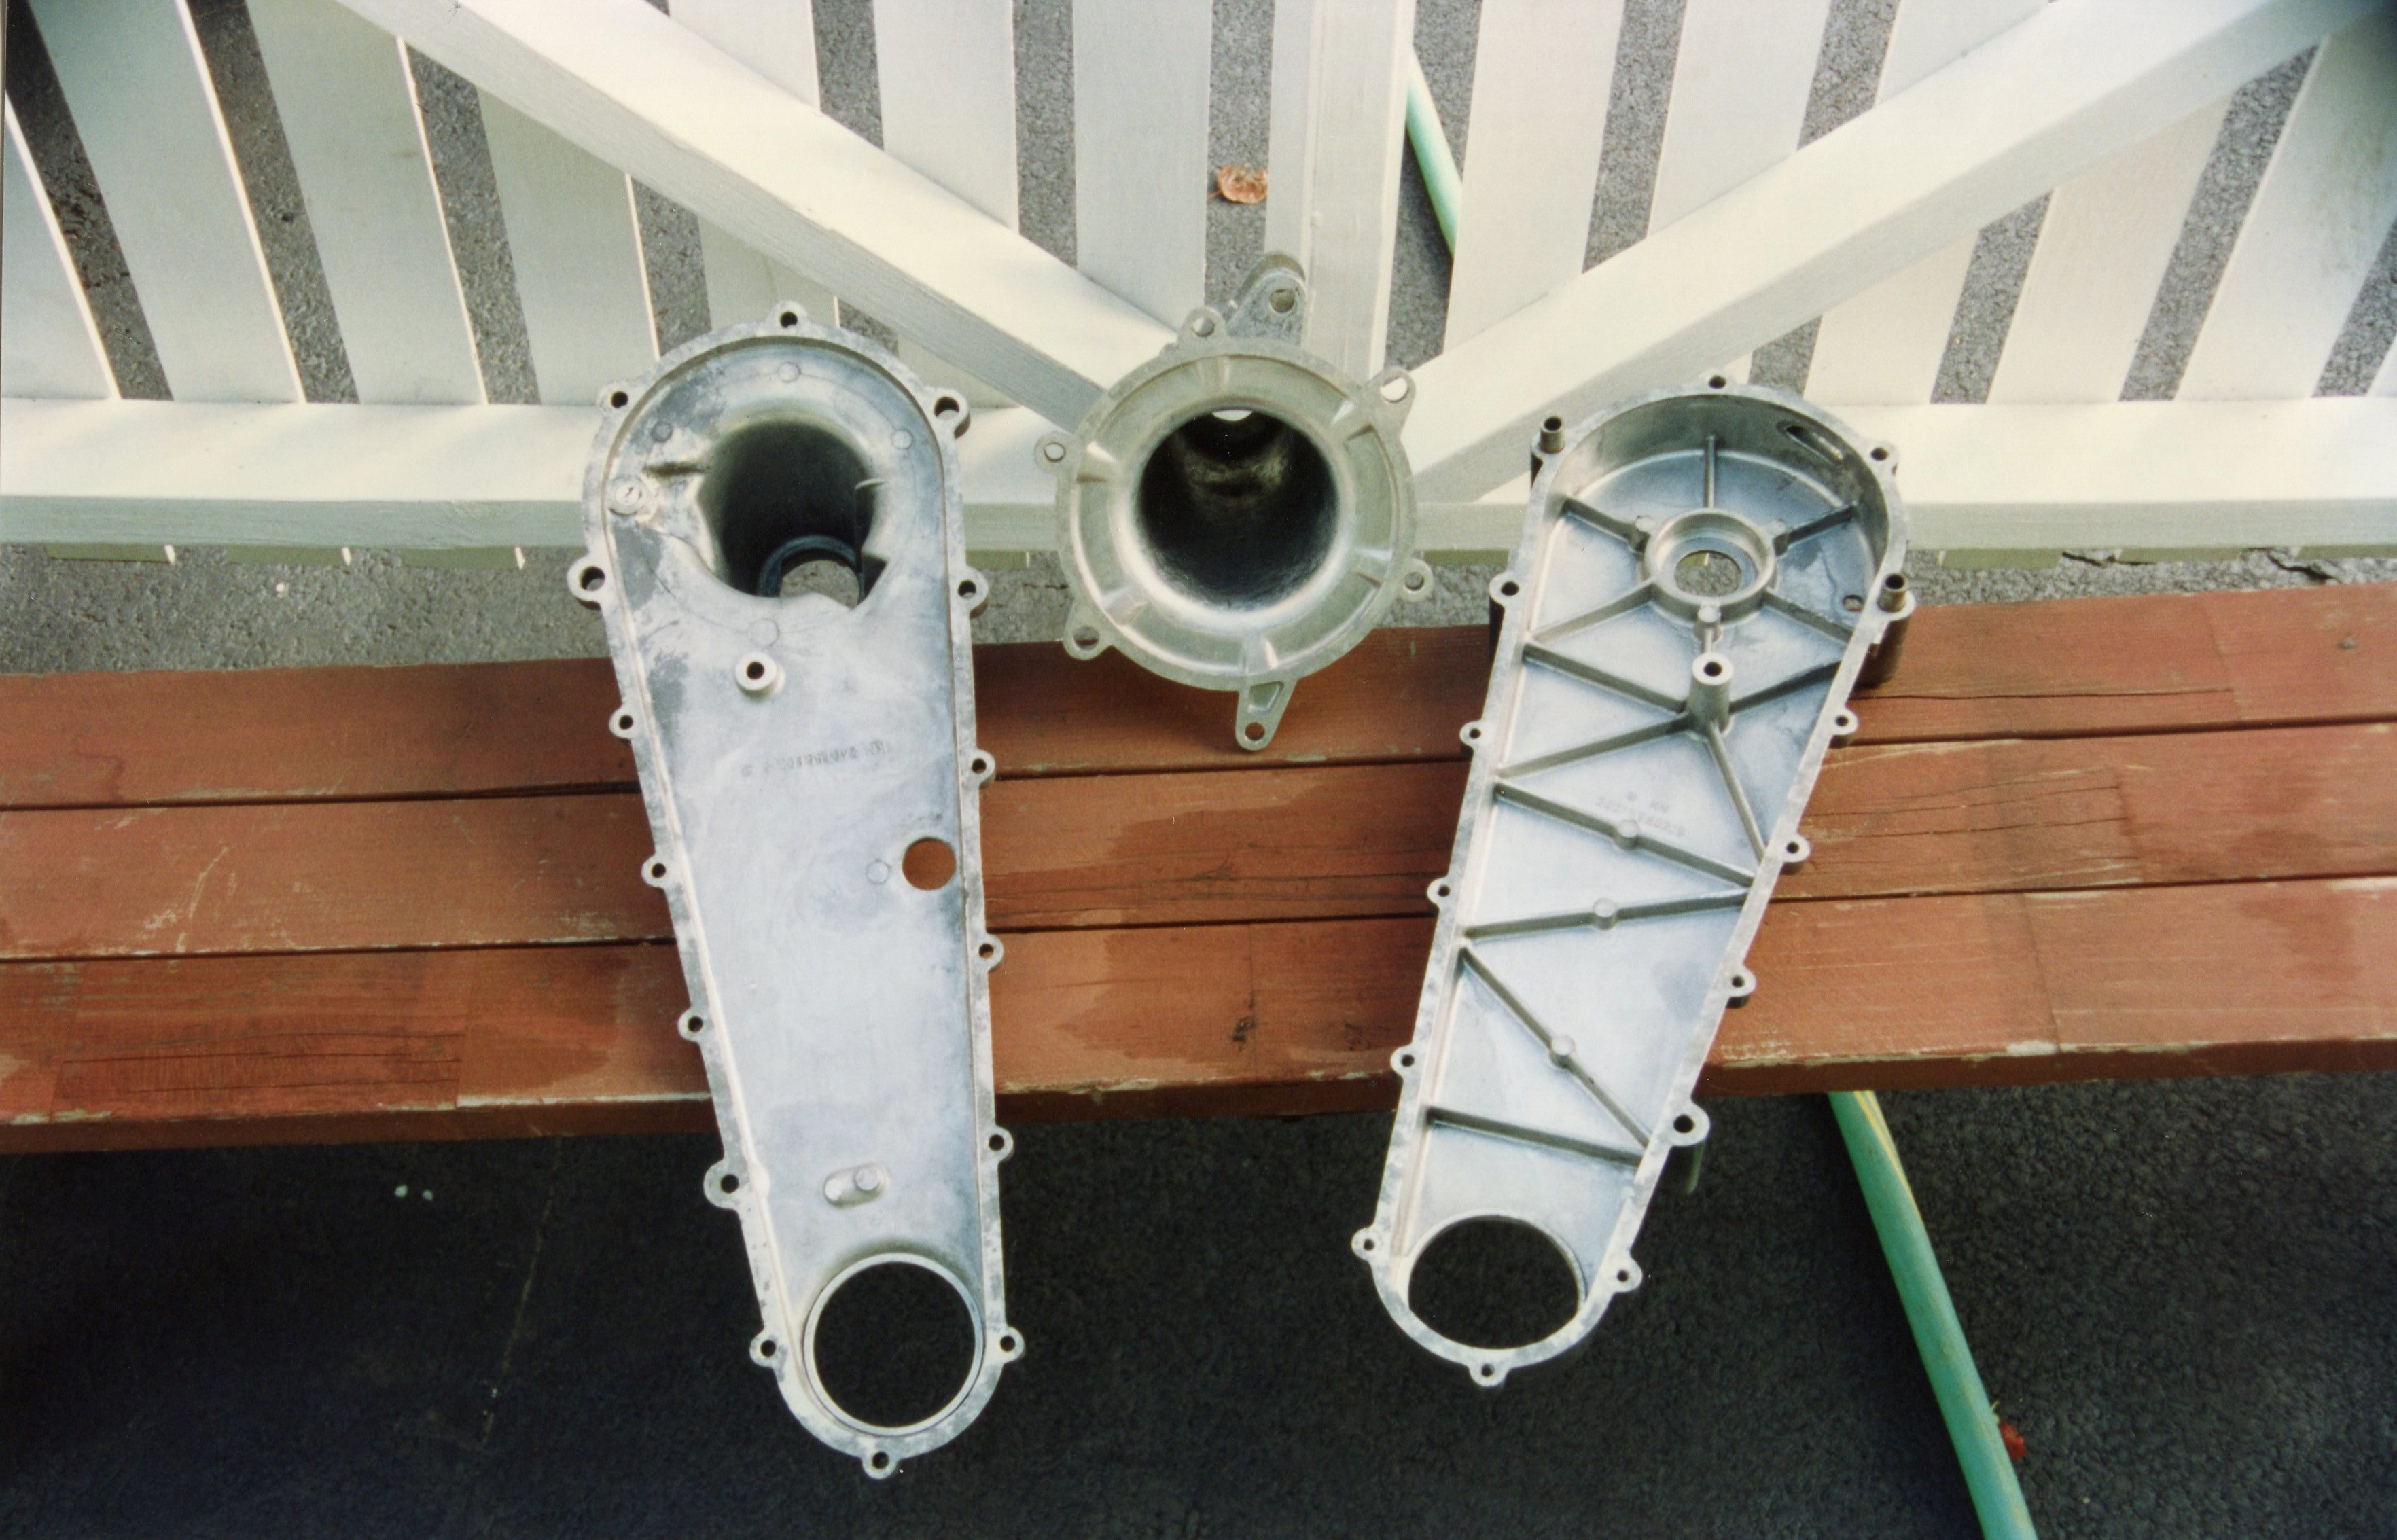
As was done with the crankcase, the transmission case and cover were cleaned, abraded, and painted. The three shafts were reinstalled into the freshly painted case. I made my own gaskets for the covers, and all seams that needed to seal against oil were slathered with copper goop. Jensen warned that the Isetta drivetrain, with its aluminum mating surfaces, could be a real leaker.
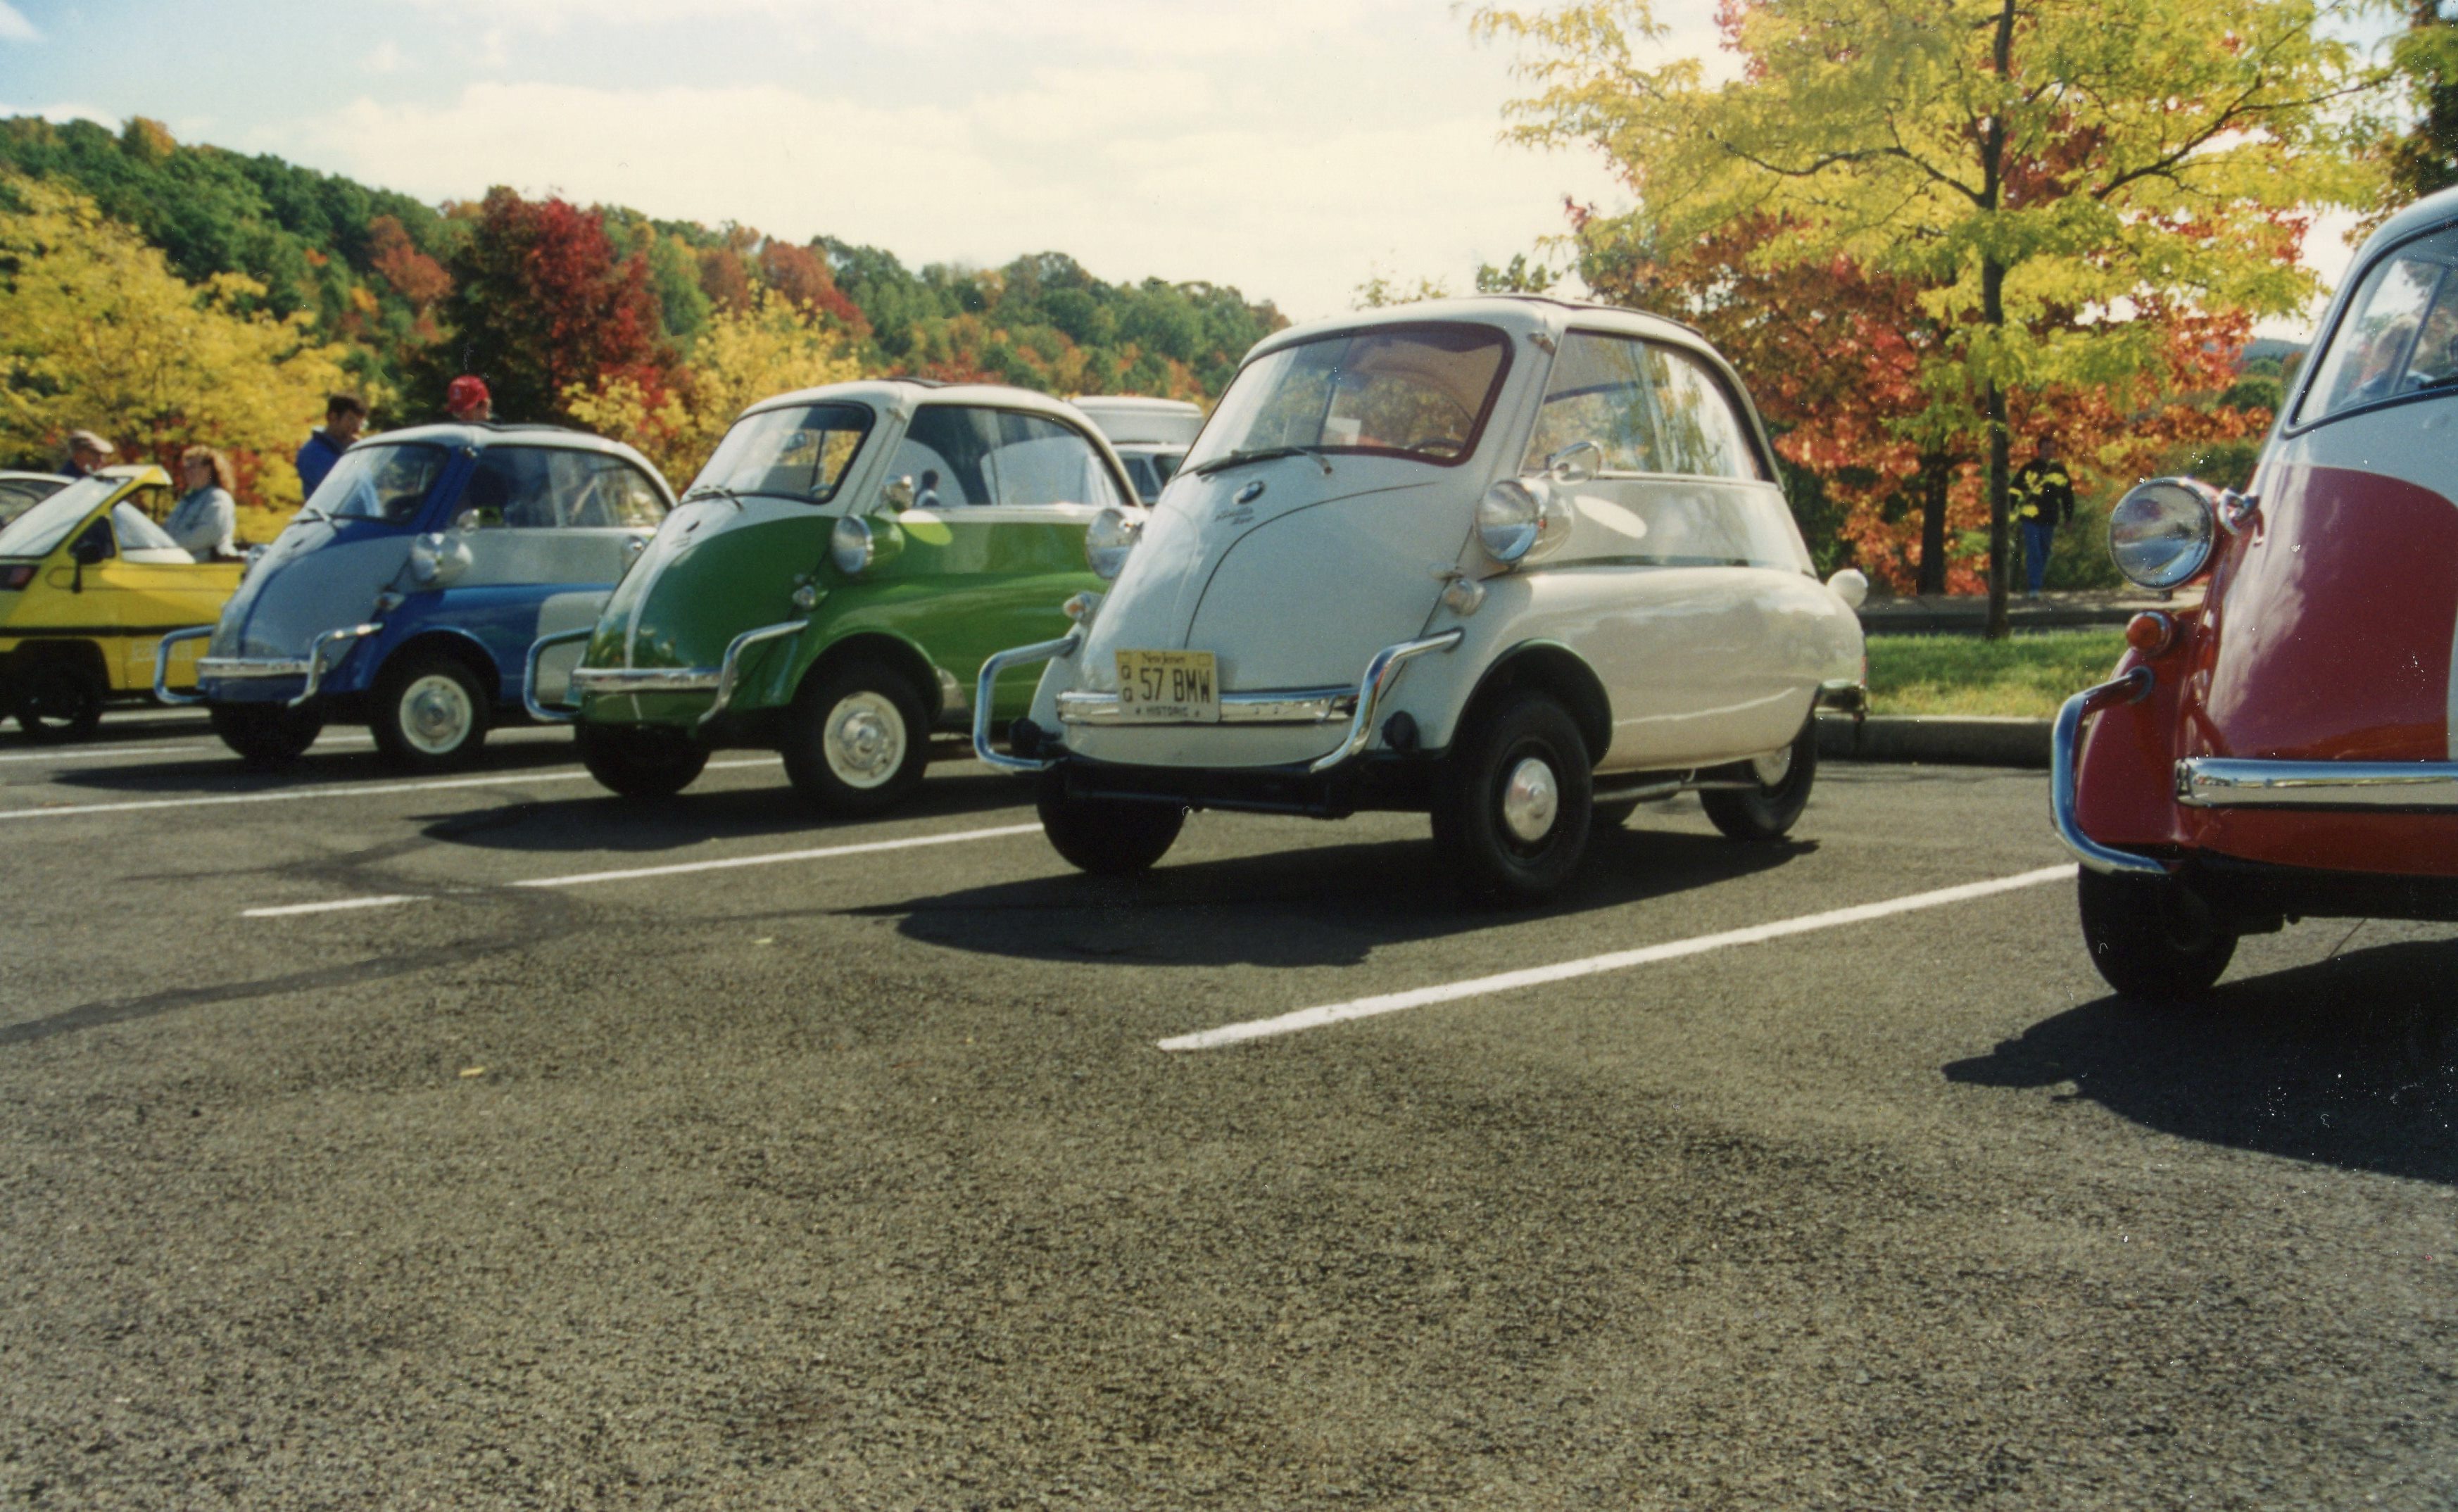
Motivated by my success with the transmission, I continued to the rear axle assembly. Let’s again dispense with a so-called fact spewed by the know-it-alls: “Isettas have only three wheels, with two in the front and one in the back”. Some have stretched this yarn to include the outrageous idea that it was the rear wheel that did the steering.


Here’s the truth: ALL U.S. spec Isettas had four wheels and tires (as did the original design). When viewing the car from the rear, it could appear that there was only one rear wheel, as the two rear wheels were only 20 inches apart. They rode on a solid axle, without a differential. This meant that there was no “differential action” on turns. (In a turn, the inner wheels travel a shorter distance than the outer wheels. A differential allows each rear wheel to rotate at a different speed to account for this.) In an Isetta, this lack of differential action meant that there was some tire scrub in turns, hardly noticeable to the driver when 13 horsepower are providing motive power.
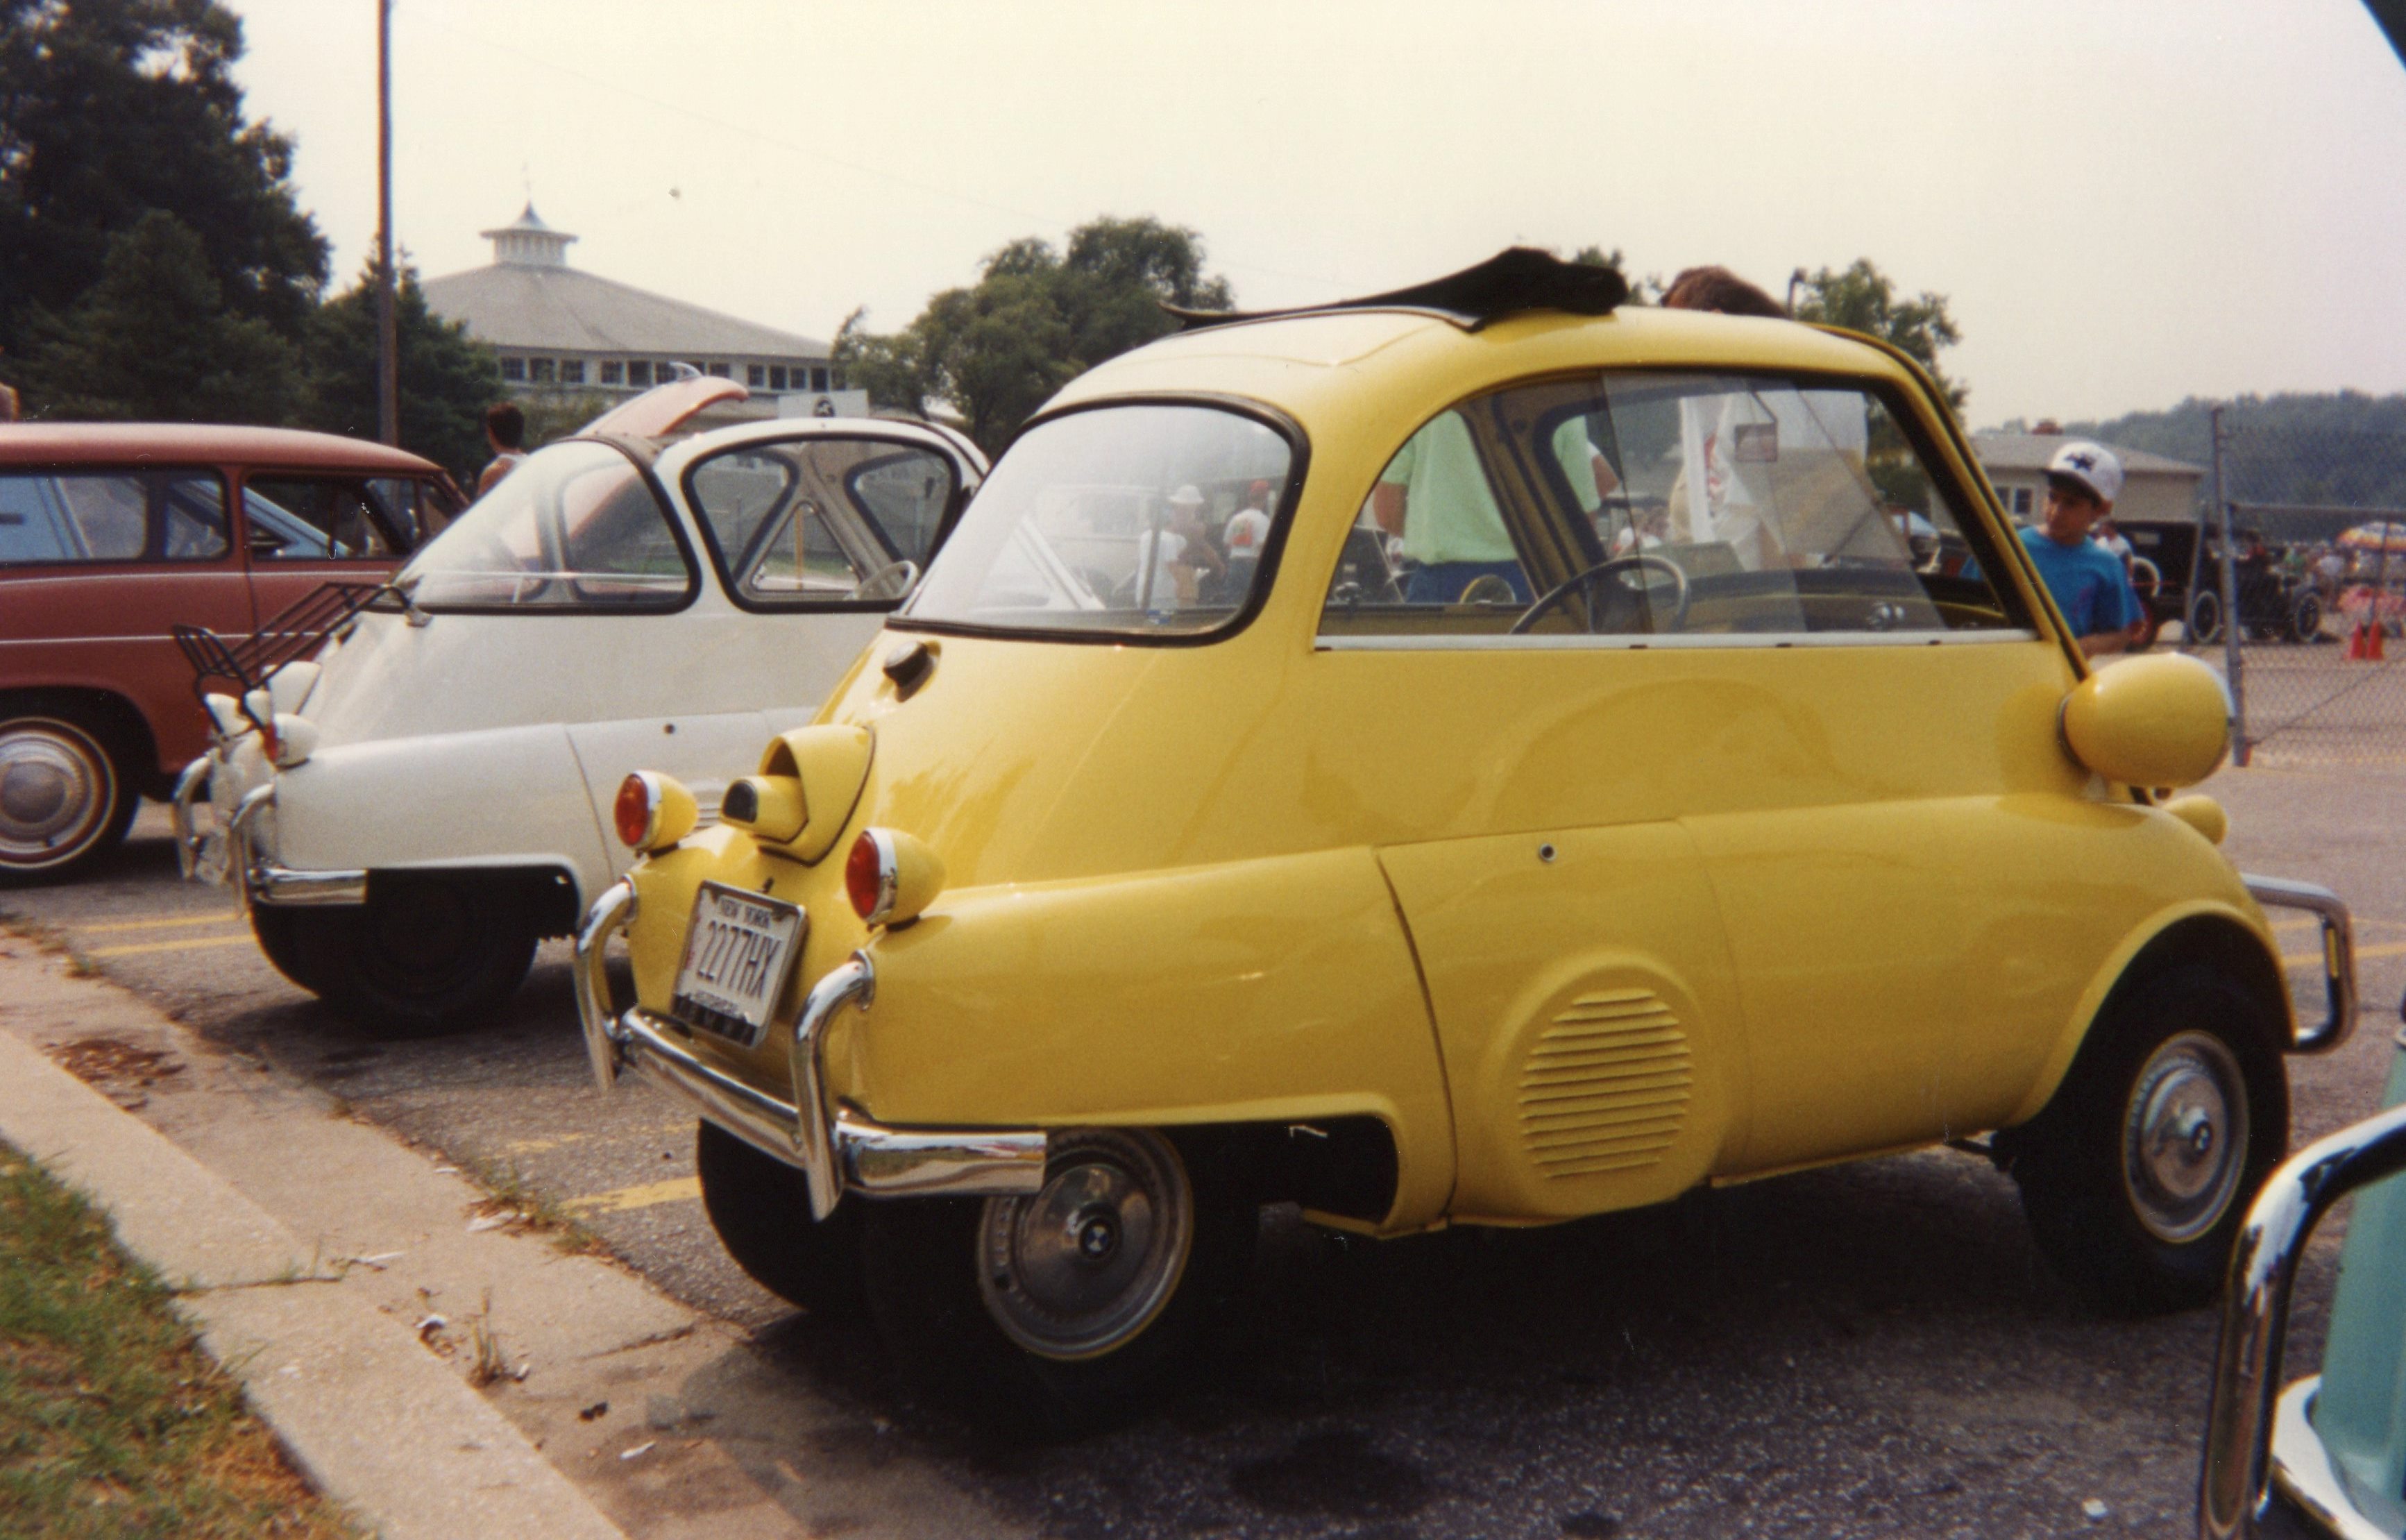
Unlike the transmission rumor, though, there was a nugget of truth regarding the 3-wheelers. In Great Britain, Isettas were built locally under license (as they were in France, Brazil, and other countries). The UK had a motor-vehicle structure that labeled 3-wheeled vehicles as motorcycles. Such vehicles only required a motorcycle license to operate on public roads, and were taxed at a lower rate. The Brits took advantage of these loopholes and created a 3-wheeled version of the Isetta. I’ve never seen one in the metal, but in photos, it looks like the thing is about to tip over. And you thought the versions with two rear tires only 20 inches apart looked unstable….

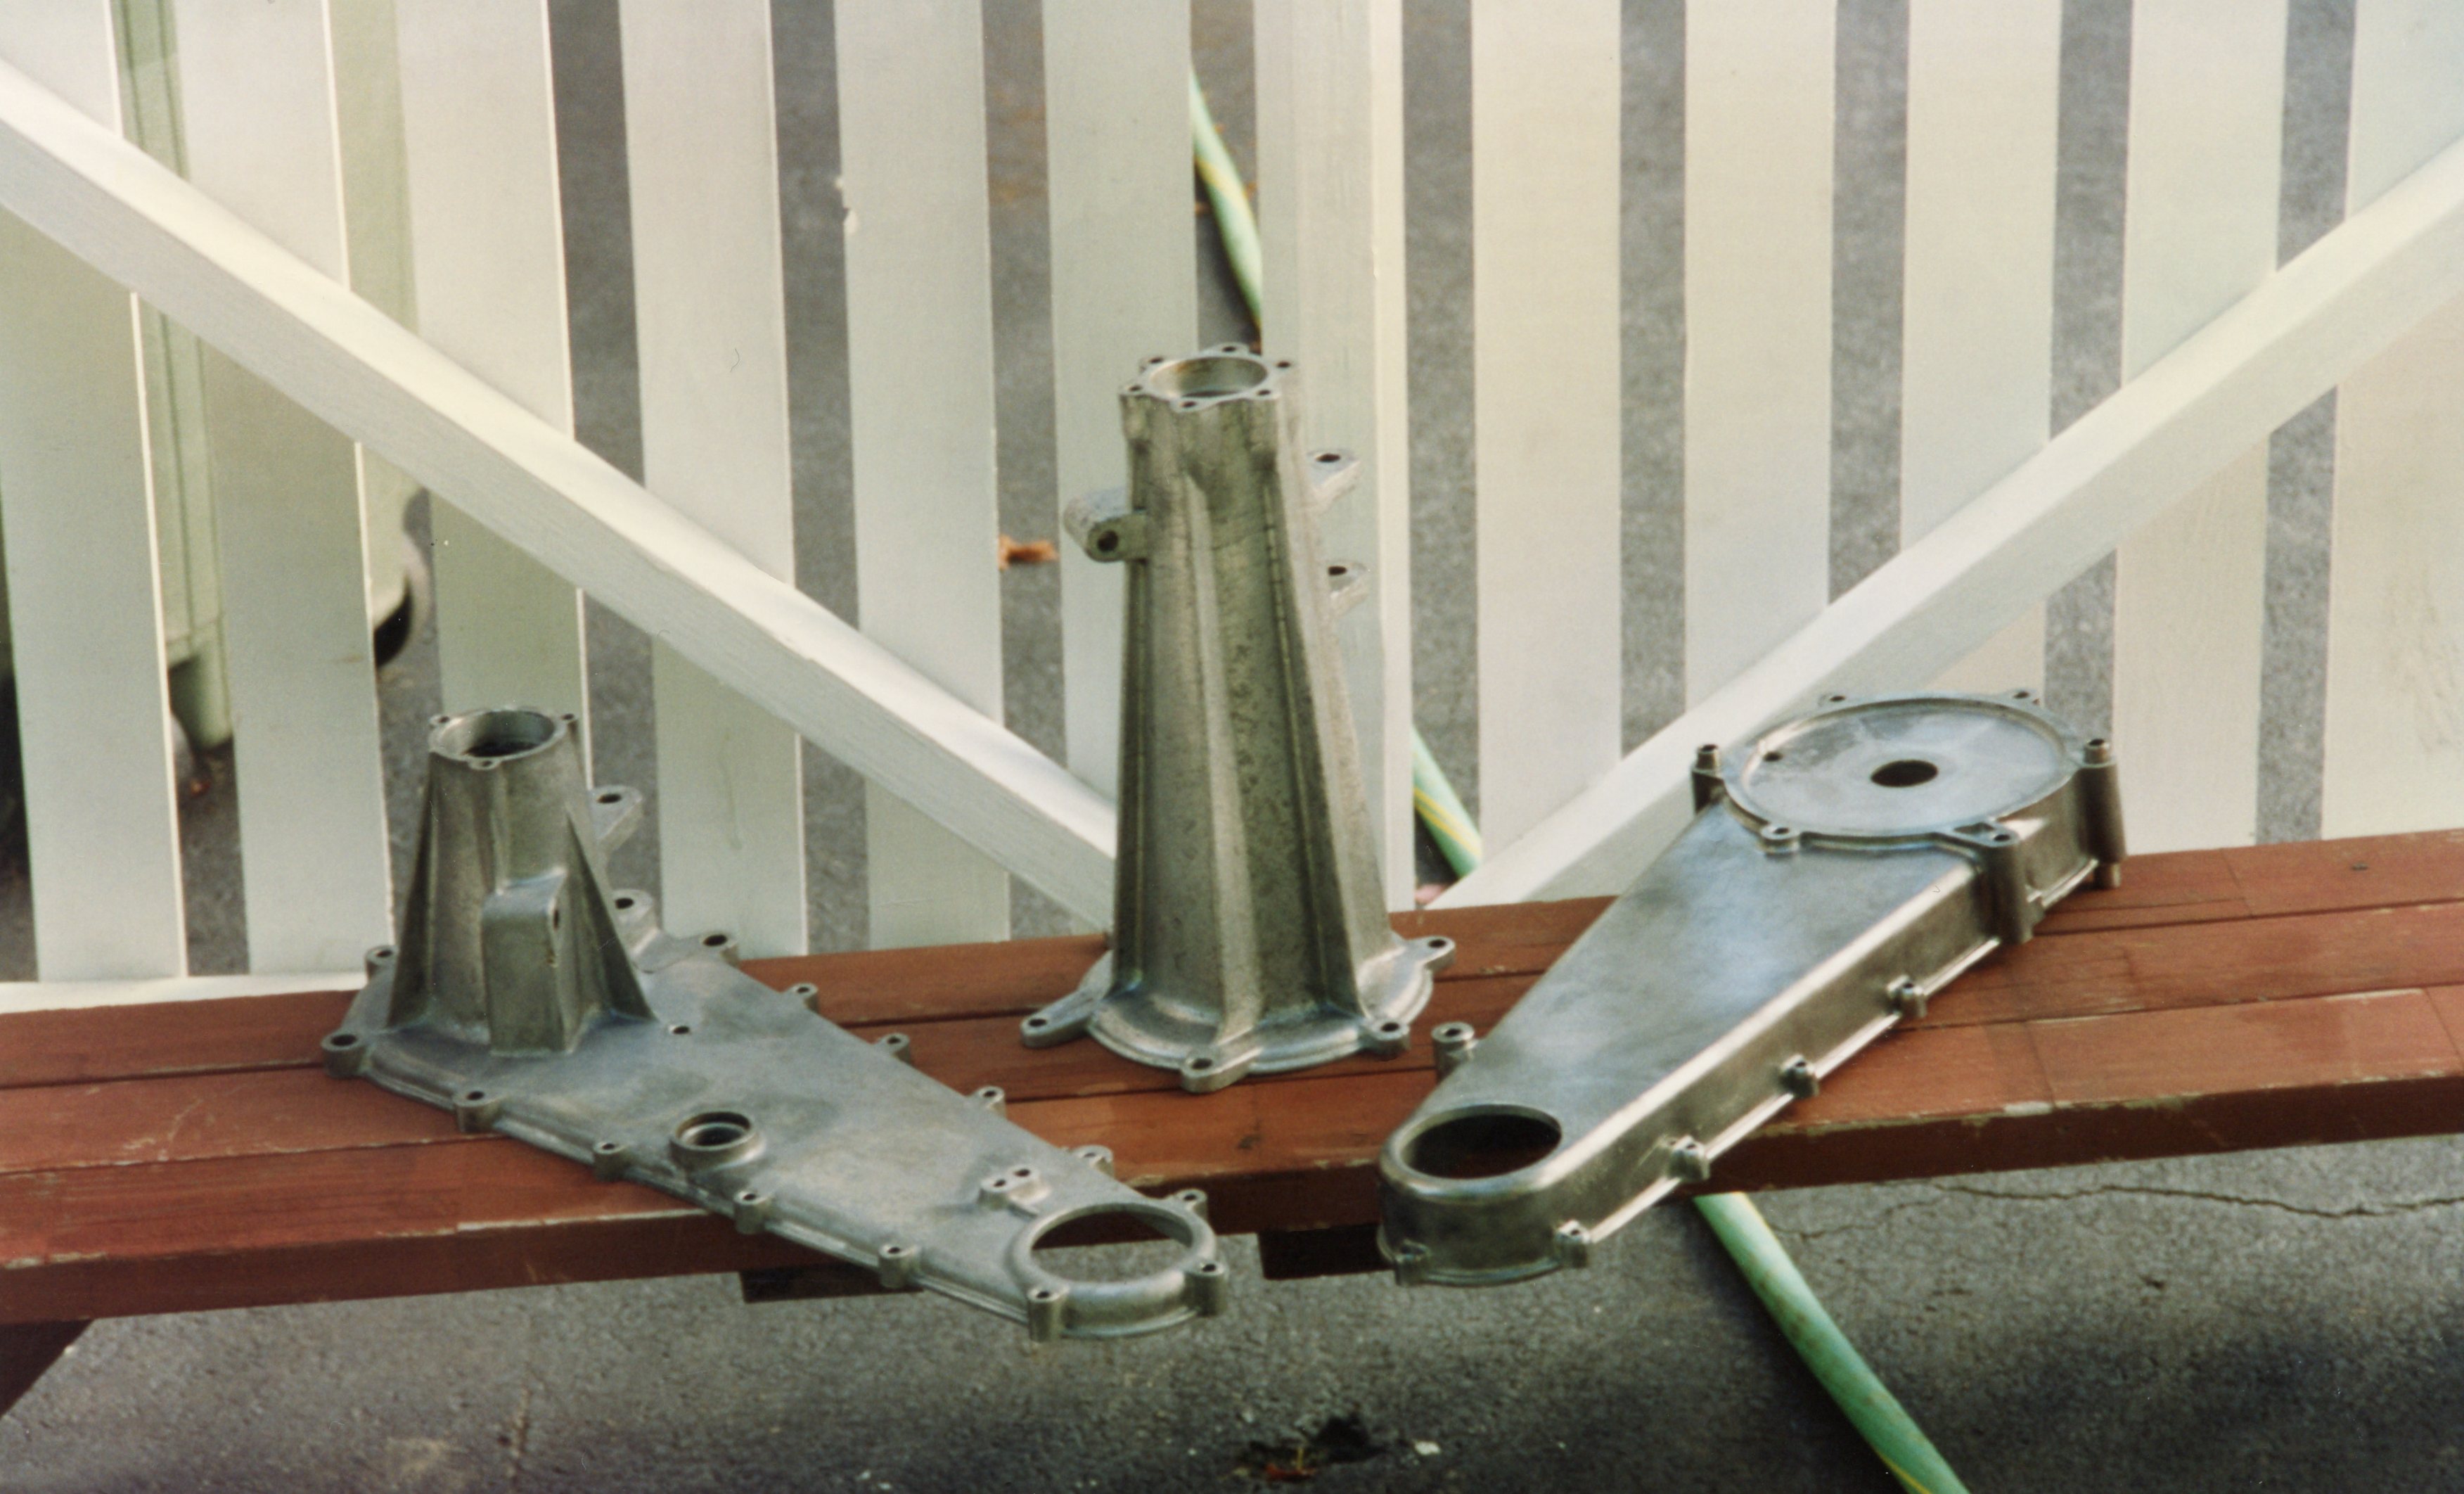
The Isetta drivetrain included the following: a one-cylinder engine, with a four-speed transmission bolted directly to it; an extremely short driveshaft, with a Giubo joint at each end to allow for flex, connecting the gearbox to the rear axle; and a rear axle assembly with a chain drive enclosed in an aluminum housing. The chain drove a solid rear axle, with a 10-inch wheel & tire assembly at each end. The solid axle meant that only one brake drum was needed at the rear. Overall, this drivetrain was light, took up little room, and easily fit into the rear of the chassis.

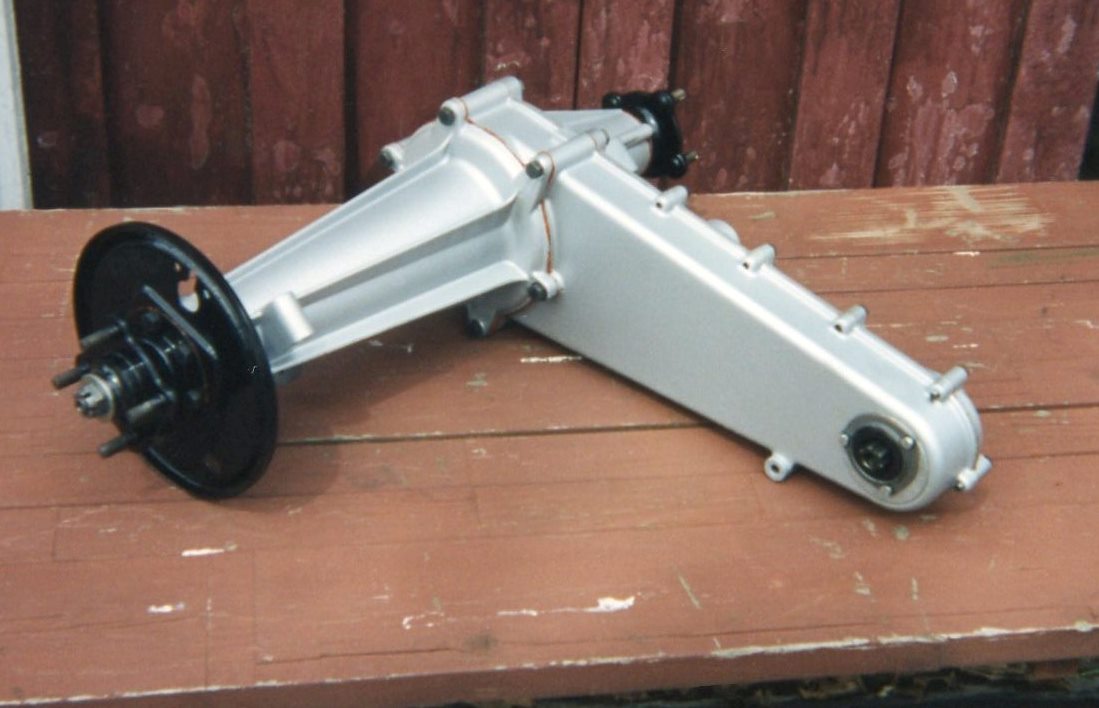
My chaincase was opened, disassembled, and cleaned. Roller bearings were replaced, and the bare case was sprayed with the same high-temp aluminum paint as was used on the engine and gearbox. The chain showed no sign of wear, so I reused it. The case was reassembled, with the freshly painted black brake backing plate making a nice contrast to the silver. The quarter-elliptic leaf springs were treated to the same routine: disassemble, clean, paint, and reassemble. I became aware that except for complex assemblies like the engine, much of the remainder of my car was undamaged, and suffered only from disuse and poor storage.


Depending on the state of my garage (which housed my ’67 Dodge Dart convertible, and also was used for various house projects), the Isetta bodies would occasionally need to be moved out of the garage, then back into the garage. The bodyshell with glass can easily be lifted by three people. It became an inside joke among my neighbors when I came knocking, asking for their help to relocate a body.

All of this drivetrain work took place throughout 1993 and 1994. What was left? As mentioned earlier, I was on the hunt for a qualified machine shop for the cylinder heads. The finished rear axle meant that the chassis was close to rolling on its own four wheels, after which, there were still brake lines and pedal connections to contend with. Even though I didn’t plan to perform my own body and paint work, I thought that I could restore the driver’s controls (steering wheel & column, pedal assembly, and other interior components) myself.
The year 1993 also afforded me the chance to attend two different car shows featuring Isettas. One show was the now-famous Bubble Car Show in Laurel MD, where I had been in attendance in the early ‘80s. I got reacquainted with my microcar buddy John Malcolm there, and followed up my visit by placing a parts order with him.


Later that year, and a bit closer to home, the annual TVR car show, held in western NJ, included a special class for microcars (what connection they have to TVRs is lost on me, but it was nice to find Isettas within a 45-minute drive). Both shows provided further motivation to keep pushing myself.

The goal hadn’t changed: “The Isetta will drive in ‘95”. The unanswered question remained: “While I’m making progress, is the progress moving fast enough?”
Next time in the Isetta Saga: further engine progress is made, and we host the first of what will be several parties, to celebrate a certain milestone. It’s kind of corny, but hey, any excuse to pop open a bottle of champagne.
All photographs copyright © 2018 Richard A. Reina. Photos may not be copied or reproduced without express written permission.
FUN FACT OF THE WEEK:
SKF, a leading manufacturer of ball bearings, was founded in Sweden in 1907. According to Wikipedia, they are the largest bearing manufacturer in the world. In the 1920s, SKF decided to begin automobile manufacturing. For the car’s name, the company used a word for which they already held the trademark. The word is Latin for “I roll” (as in, roller bearings). That Latin word is “Volvo”.

This whole endeavor blows me away, not just because of all the work involved but because of the size of the parts and the fact that this is a truly unique vehicle. I do love the license plate as well! Thanks for sharing all of your hard work.
LikeLike
Hi Fred, and thanks for the comment! This “saga” with my Isetta goes back over 20 years, so the blog posts are a bit of a catch-up. Come April, and the start of the 2018 car show season, there will be a return to posts based on current and very recent adventures.
Glad you’re following along! Thanks again.
Richard
LikeLike
[…] Chapter 9, the transmission and final drive got overhauled, and the chain-driven axle was ready to be […]
LikeLike