The last post on this topic was three weeks ago. What have I been doing? The remaining tasks seemed easy; they were easy. But they took time to do correctly. And several events occurred in the interim (like our first breakfast run of the year, and the Carlisle auction) which I refused to ignore in spite of the looming deadline – more about THAT below.
Remember that clicking on the photos enlarges them.
By sub-assembly:
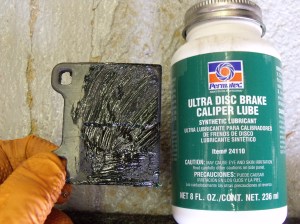
BRAKES: Truth be told, I love working on brakes, especially disc brakes. Deceptively simple. Brakes were the first real mechanical job I did on my own, on my 1970 Fiat, while I was in college. On the Alfa, once both front hoses were bolted into place, the new pads were installed, and the two front calipers bled. I saw no need to bleed the rear brakes, even though the master cylinder reservoir had drained dry. My wife agreed to enter the garage just long enough to endure the oft-repeated litany of “press; hold; release”. She actually inquired this time as to “what exactly are you bleeding when you say you’re bleeding the brakes?”. I tried to explain. She left the garage. I went back to work.
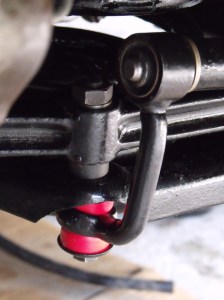
FRONT SWAY BAR: Once the end links were pressed on, it was just nuts and bolts to get this bad boy back into its rightful location. Except the sway bar is heavy. And it’s balanced in such a way that it does not want to behave when you need to run the bolts up. Jack stands were enlisted to serve as an alternate set of hands. Which sort of worked. A pry bar was engaged too. Once the bolts were started, it went back on nicely.
CASTER ARMS: Perusing an online Alfa spare-parts catalog shocked me into the realization that I never had ordered the rubber bushings which fit in the junction between the caster arm and upper control arm. The real reason I had not ordered them at the same time I ordered everything else is that there were NO RUBBER BUSHINGS when I disassembled the parts. The rubber left the car long ago. The parts were inexpensive; fitting them involved another opportunity to use a BFH to bring everything in line. I also find that use of the BFH increases in direct proportion to the anxiety one feels as one nears the end of a project.
STEERING LINKS: In an earlier blog post, I mentioned that the 6 steering link tie rod ends were replaced as a “might as well do this while I’m here” job. It seemed simple enough, and if the front suspension were to be like new, the steering rods should be too. Six steering ends were duly ordered and threaded into the sleeves. The sleeves were then bolted back onto the Pitman arm, idler arm, and spindles.

In my haste, I reinstalled them without giving a thought to steering wheel location. This was a mistake. (Isn’t this what I’m supposed to do in a blog? Confess my sins?) I found that A) with front tires pointed straight ahead, the steering wheel was upside-down; B) I had a different number of turns to left lock compared to right lock; and C) the two front tires had toe-out of about 30 degrees (probably 5 degrees, but I was so frustrated that it may as well have been 90 degrees).
As I learned during the Isetta restoration, when you get to this point, get the largest BFH you have walk away from the car and return to it the next day. Not only did I do that, I consulted my more-knowledgeable friends (thanks, Mike and Larry), and the next day, was able to disconnect the Pitman arm linkage, center the wheel, rotate all the sleeves in the correct direction, reconnect everything, and perform an approximate front alignment. Hooray, as it was time to drive the car.

FIRST TEST DRIVE: This past Saturday, for the first time in five months, the Alfa left the garage, and was driven several miles. The steering felt great, ALL prior knocking and squeaking noises from the front end were gone, the car tracked straight, and the steering wheel was almost centered. Brakes worked too. Upon return, I performed a final torque, complete with insertion of cotter pins in all the ball joints. Ed at my corner garage does alignments, and I will endeavor to get that done this week.
THE UPCOMING RALLY: Two weeks from today, I leave in the Alfa to begin this year’s running of the New England 1000 old-car rally. Home base for the rally this year is Mohunk Mountain House in New Paltz, NY, a scant two hours from my home. I would still like to put about 100 maintenance miles on the car, but I’m fully confident that the Alfa will get me there, run the rally, and get me home. My rally brother Steve Hansen is flying east AGAIN to co-drive with me. This marks the 7th time we will have shared a car in this event.
So I got it done just in time – isn’t that how it’s supposed to work?
All photographs copyright © 2015 Richard A. Reina. Photos may not be copied or reproduced without express written permission.


Nicely done! However, in the true spirit of “just in time” you would be finishing it up about 12 days from now. Looking forward to the Rally reports.
LikeLike
Indeed, Mr. Appleton! I was counting the 12 upcoming days as opportunities to put some maintenance miles on the car. We never want to cut it THAT close, do we?
LikeLike