As you read in “Alfa Romeo Valve Adjustment, Part 1” (or if you skipped your reading assignment, you can find it here), the valve gaps on my 1300 engine were out of whack, especially on the intake side. With cams temporarily removed, I measured all the existing shims, did the algebra to calculate the sizes of the needed shims, and placed my order with Classic Alfa in the UK. I was not the least bit surprised when the order I placed at 10 p.m. on a Saturday night landed on my front stoop before I got home from work on Tuesday. (I need to email them and enquire what happens after Brexit, presuming that Brexit happens.)
This magnet was very helpful in encouraging the slippery follower to come out
The following weekend, all the old shims came out, and the new shims went in, again following the “one cylinder at a time” rule I established so as not to cross-install the followers which must remain with their original cylinders. When reinstalling the cams, I could not get the timing marks between the cams and front bearing caps to line up. It made me nervous enough that I removed and reinstalled the cams a second time (remember that the timing chain remained attached to the sprockets). I finally convinced myself that once I released the bolt holding back the spring tension in the timing chain tensioner, all would return to sync, and that is exactly what happened. With the tensioner pressing against the chain, I rotated the crank and cams through two complete revolutions, and then tightened the bolt in the spring tensioner. The marks were still aligned, thankfully.
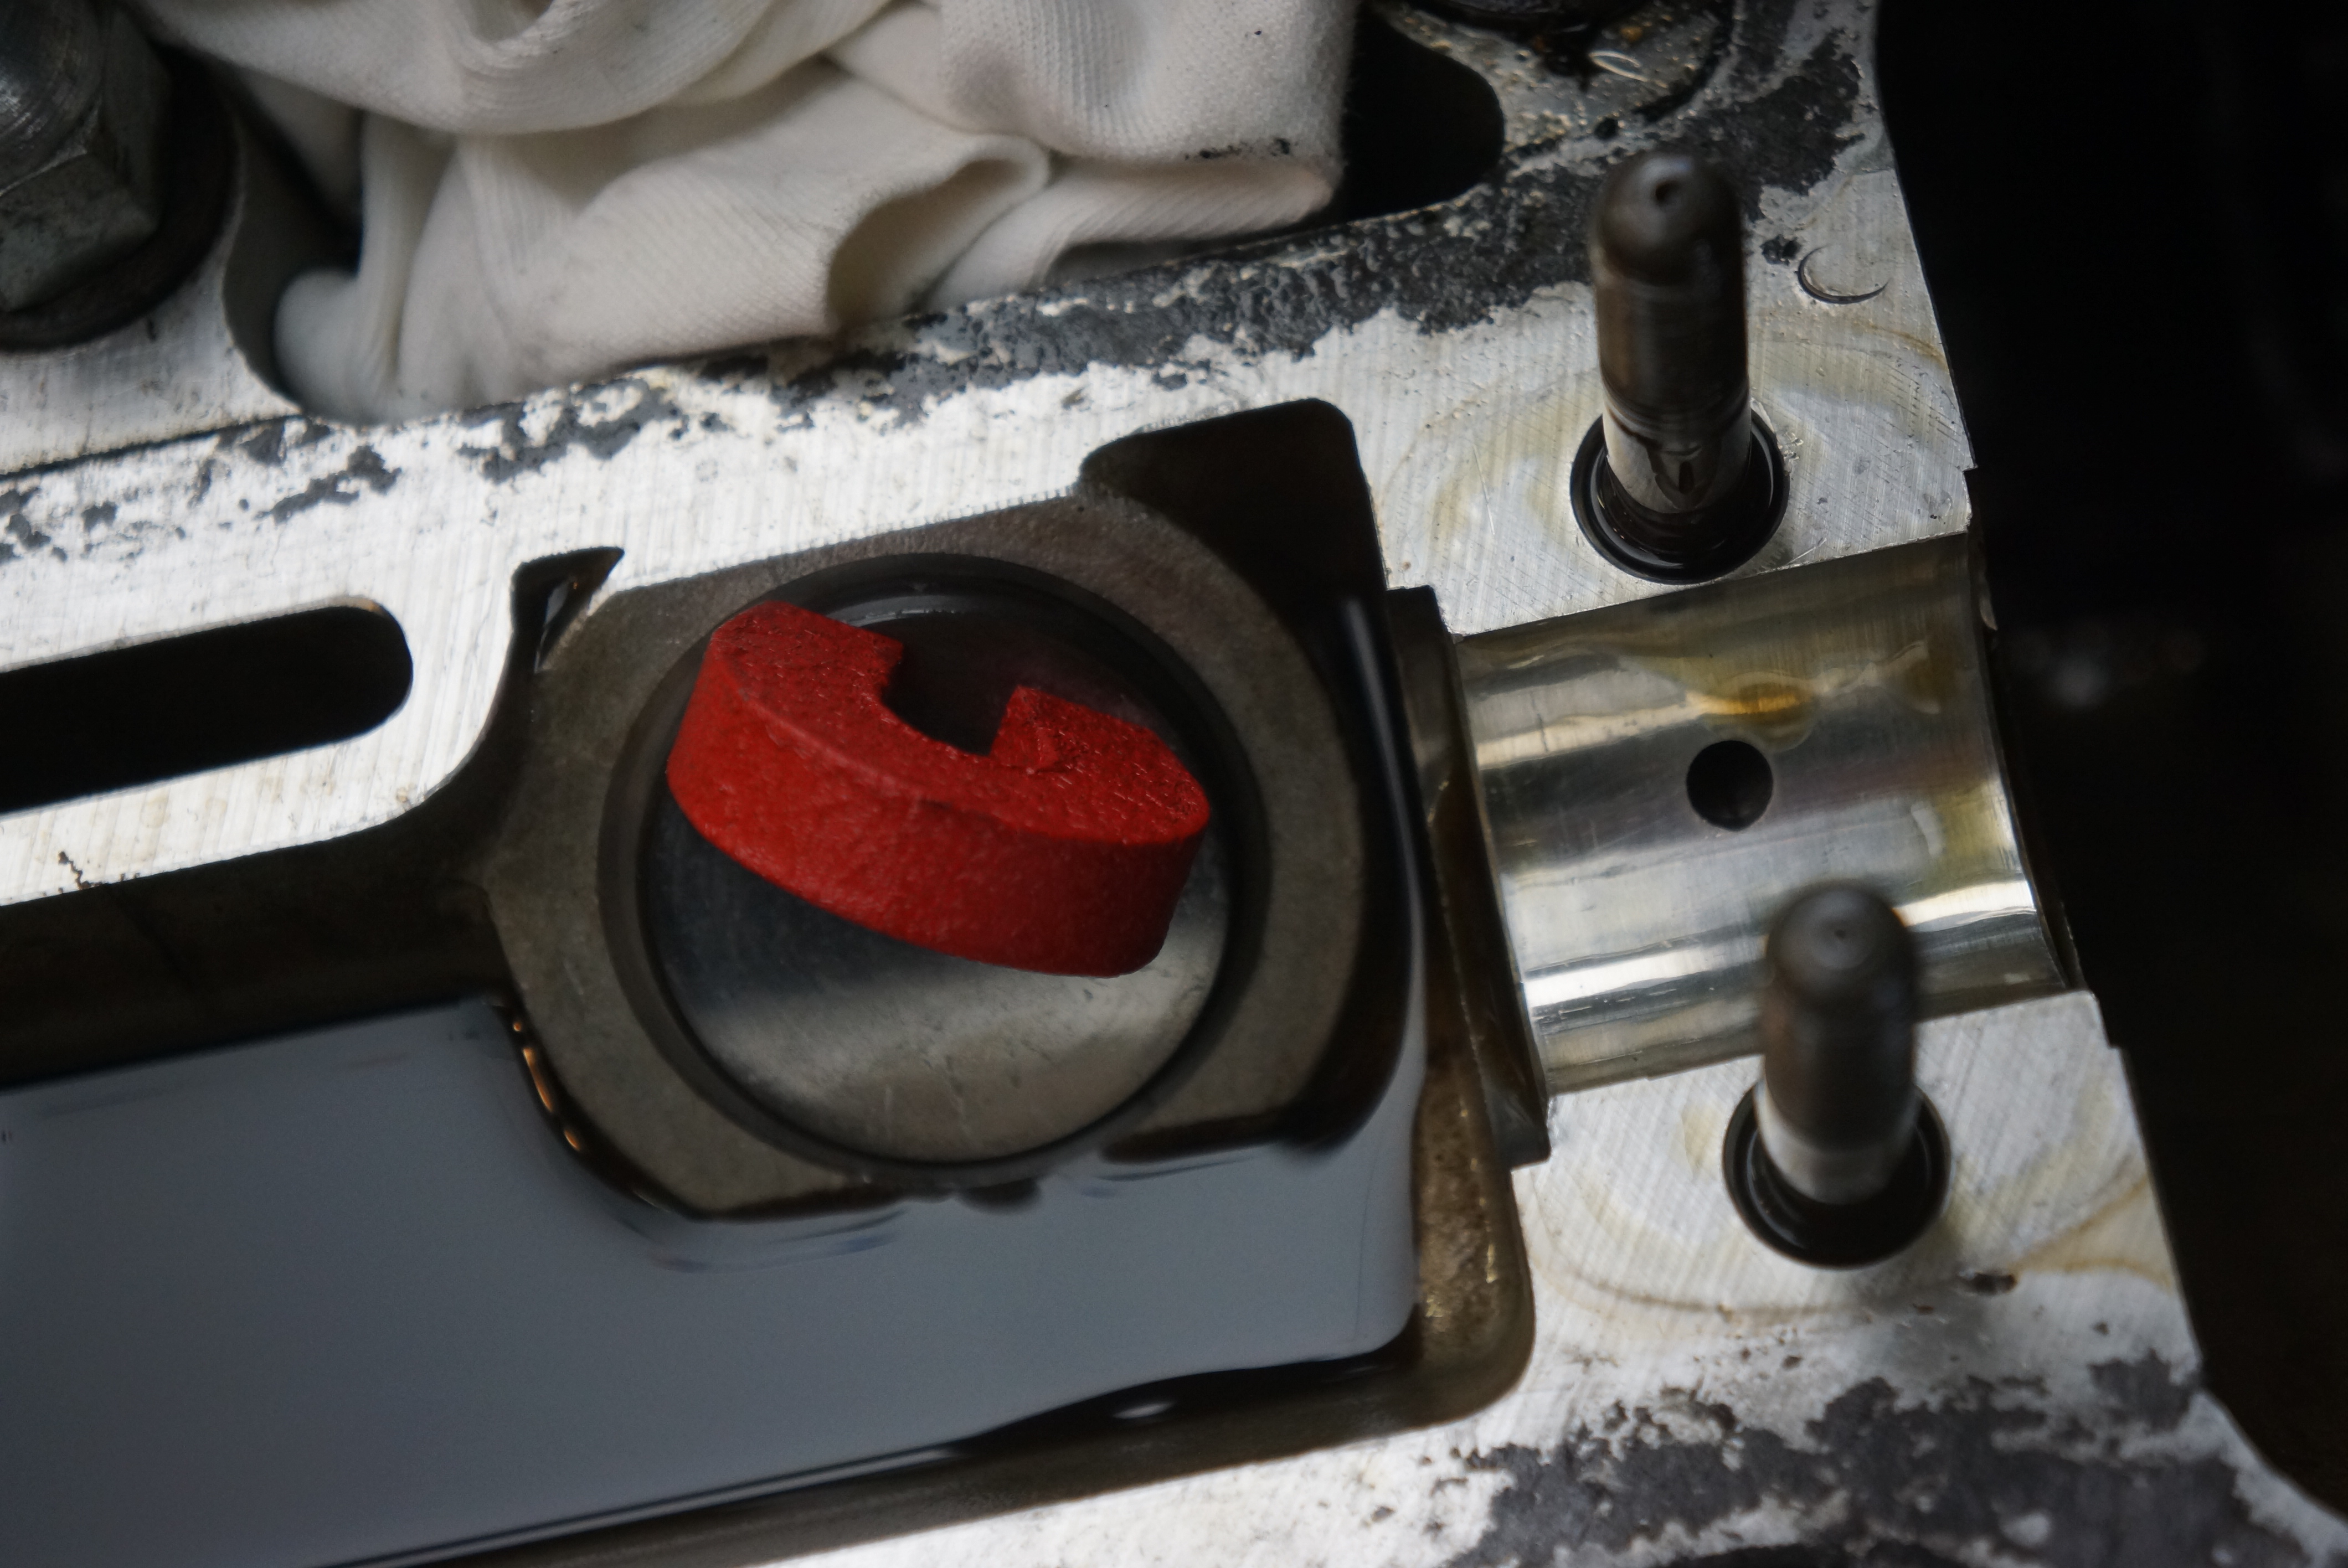
Valve stem without shim
and with shim in place
I double-checked and wrote down all the new valve clearances, and all seemed good (but read on). Since I had the spark plugs out, a new set of NGK B7ES plugs, which are in stock at my local Advance Auto Parts store, went in. With plug wires, intake plenum, and air filter hose back in place, it was time to attempt to start this baby, remembering that the engine had not been run since the car went to sleep the previous autumn. The engine started on the second try, however, there was an unhealthy miss at idle. I shut it down, and made plans for a complete tune-up, which was next on the Alfa’s to-do list anyway.
Never-seize coating on plug threads
Postscript: I jotted down all the “new” valve clearances, and really didn’t give them a second glance, undoubtedly presuming that everything was done correctly. Today, while composing this blog post, I noticed that my spec for intake valve #3, .450mm, was unchanged from its original measurement, yet I have no doubt that the 2.15mm shim which had been in there was replaced with a 2.10mm shim, which means that the new measurement should have been .500mm. For now, I’m leaving this alone for several reasons: valve #3 was the closest to spec of all the intake valves during the original check; testing the thicknesses of the new shims revealed that how tightly I cranked on my micrometer made a difference in the measurement (including the effect of residual oil on the shim); and I’m not yanking that cam again for 0.05mm!
The owner’s manual for my 1967 Alfa Romeo GT 1300 Junior calls for the engine valve clearances to be checked every 18,000 kilometers. According to Google Calculator (before Google Calculator I would have used my slide rule), that’s every 11,185 miles. Coincidentally, I’ve put almost exactly 11,000 miles on the Alfa since purchasing it in March 2013. So in part to prepare for what is anticipated to be a very busy 2019 driving season, and in part because I really don’t know when this was last done, I decided to check all 8 valve clearances (4-cylinder engine, 2 valves per cylinder equals 8 valves).
The Alfa engine, before any disassembly
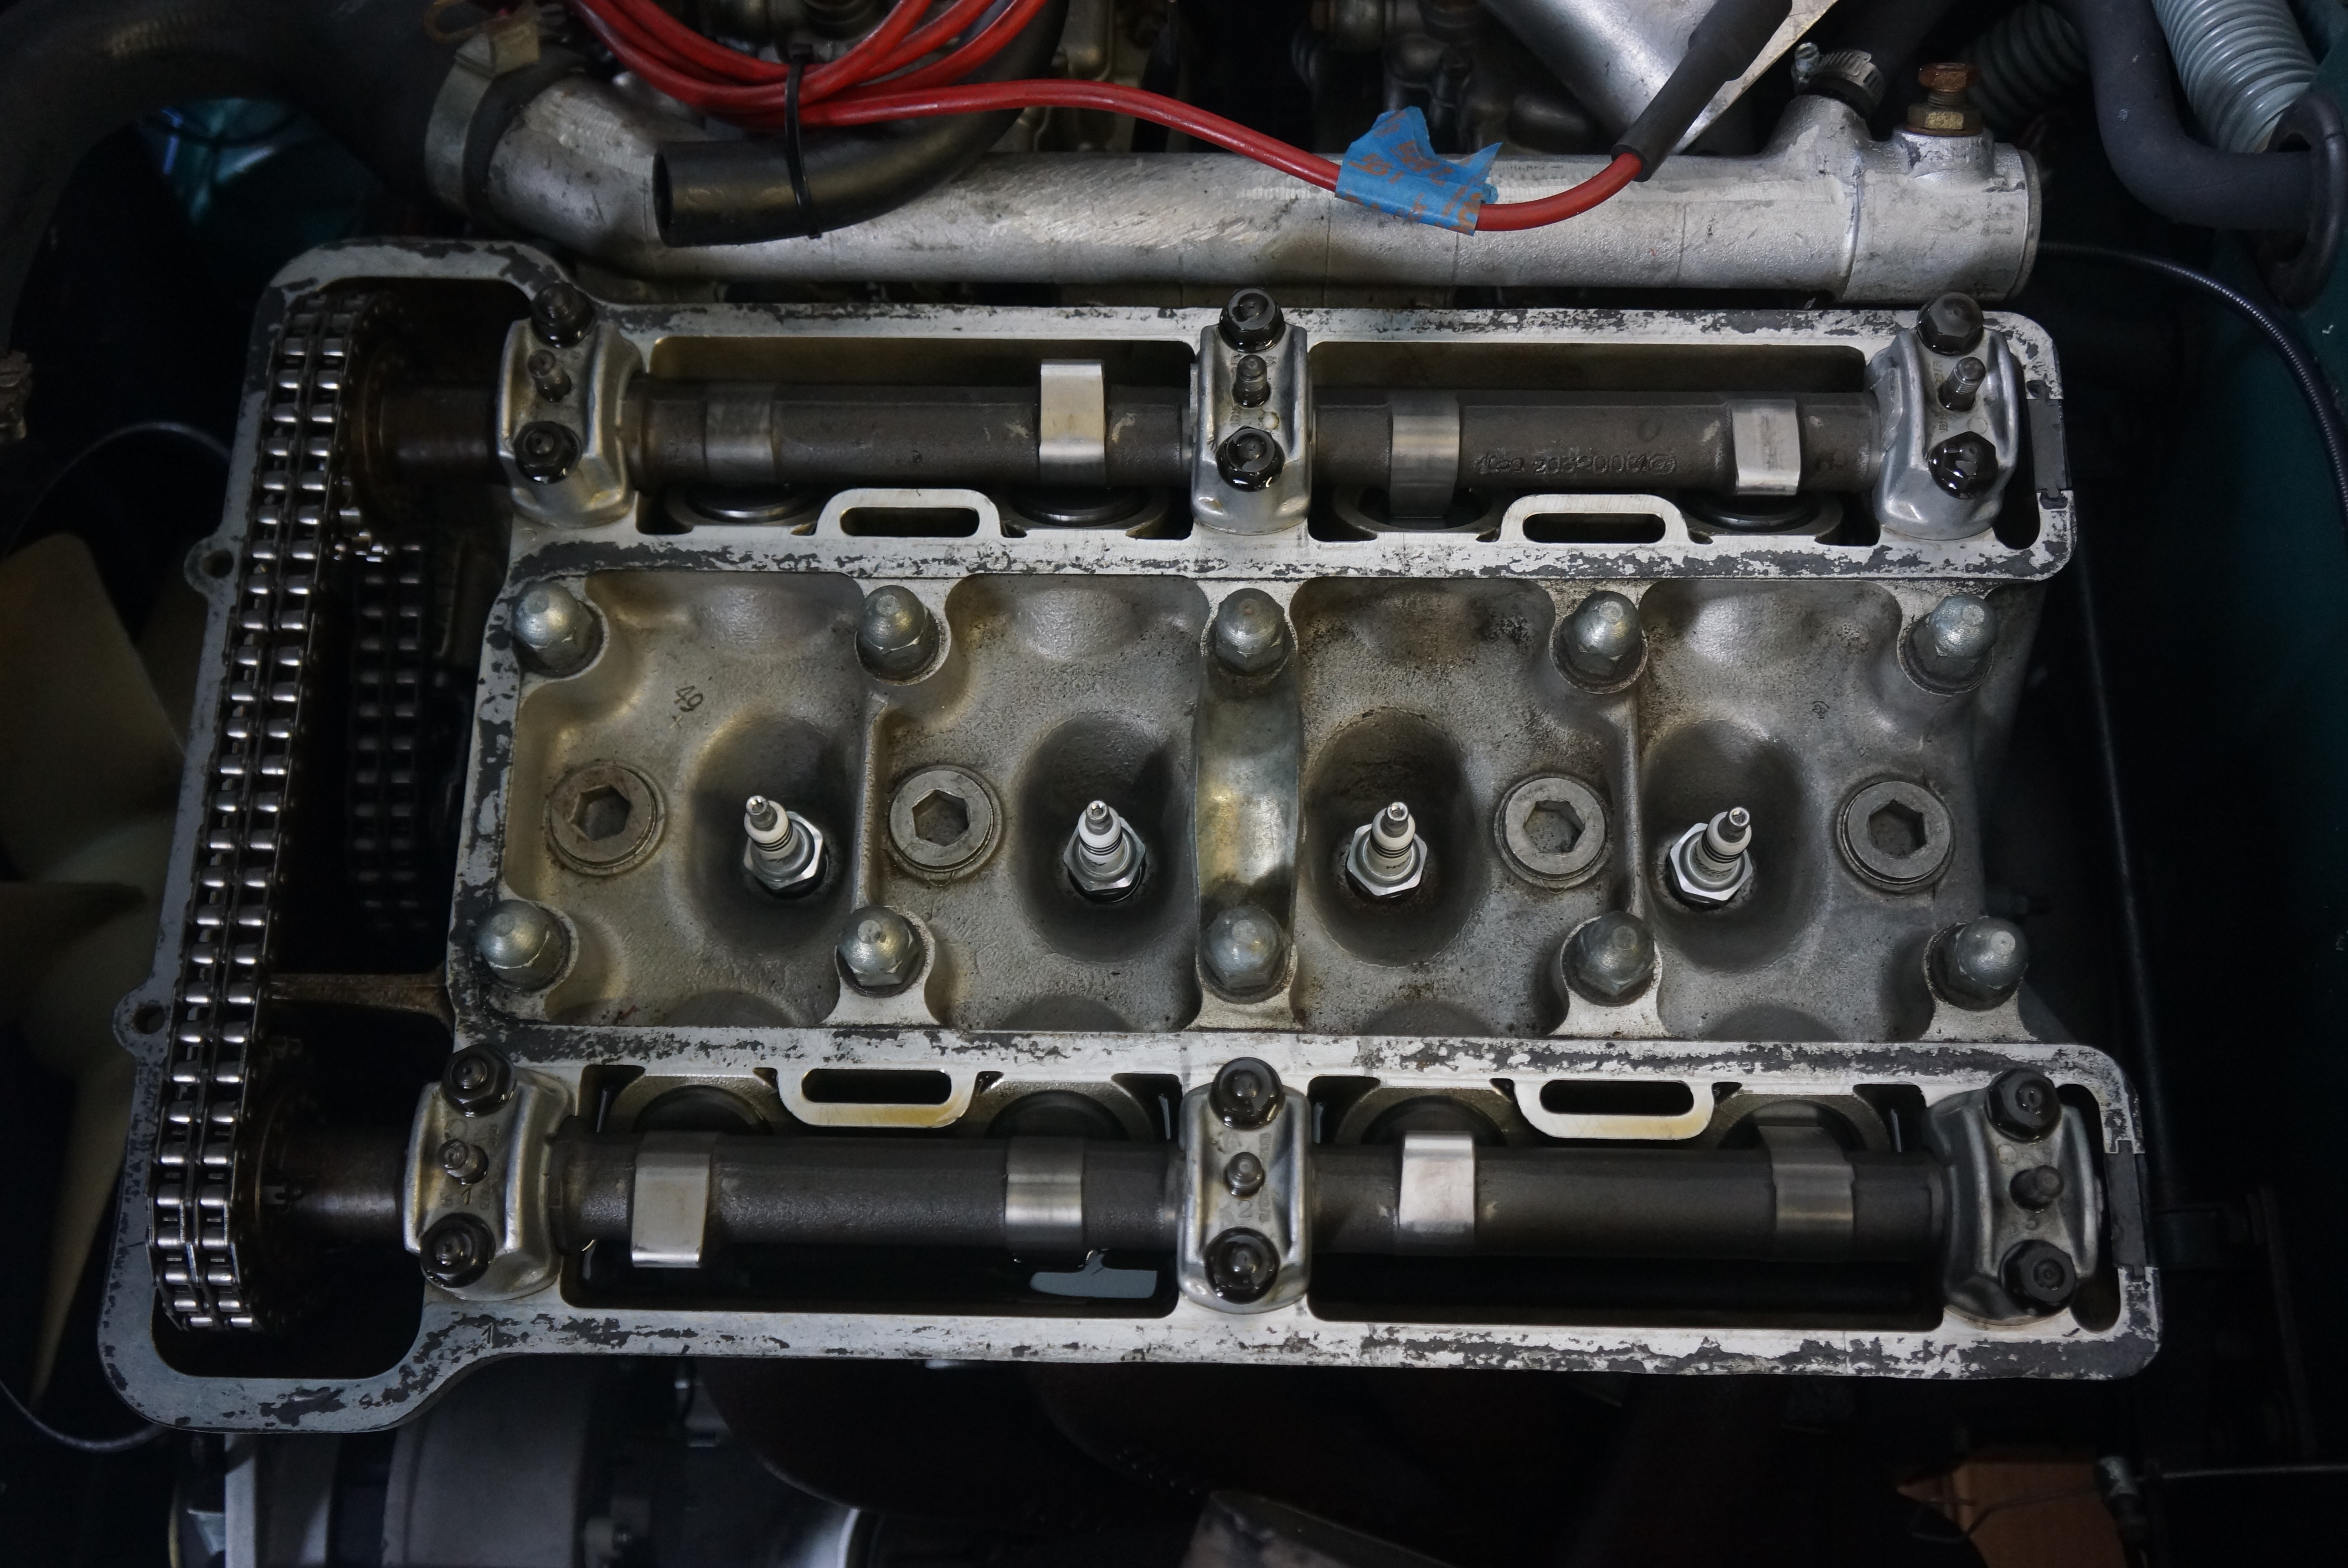
Accessing the valves and followers is the simple part. This overhead-cam engine has its two camshafts at the very top. The valve cover can be removed once the spark plug leads, air hose, and the top of the intake plenum are out of the way, which is a 10-minute affair. The valve cover is held in place by 6 large Allen screws along the top, and two bolts at the front. I had never had the valve cover off this engine before, and my first reaction was one of pleasant surprise at how clean the engine looked.
Valve cover removed
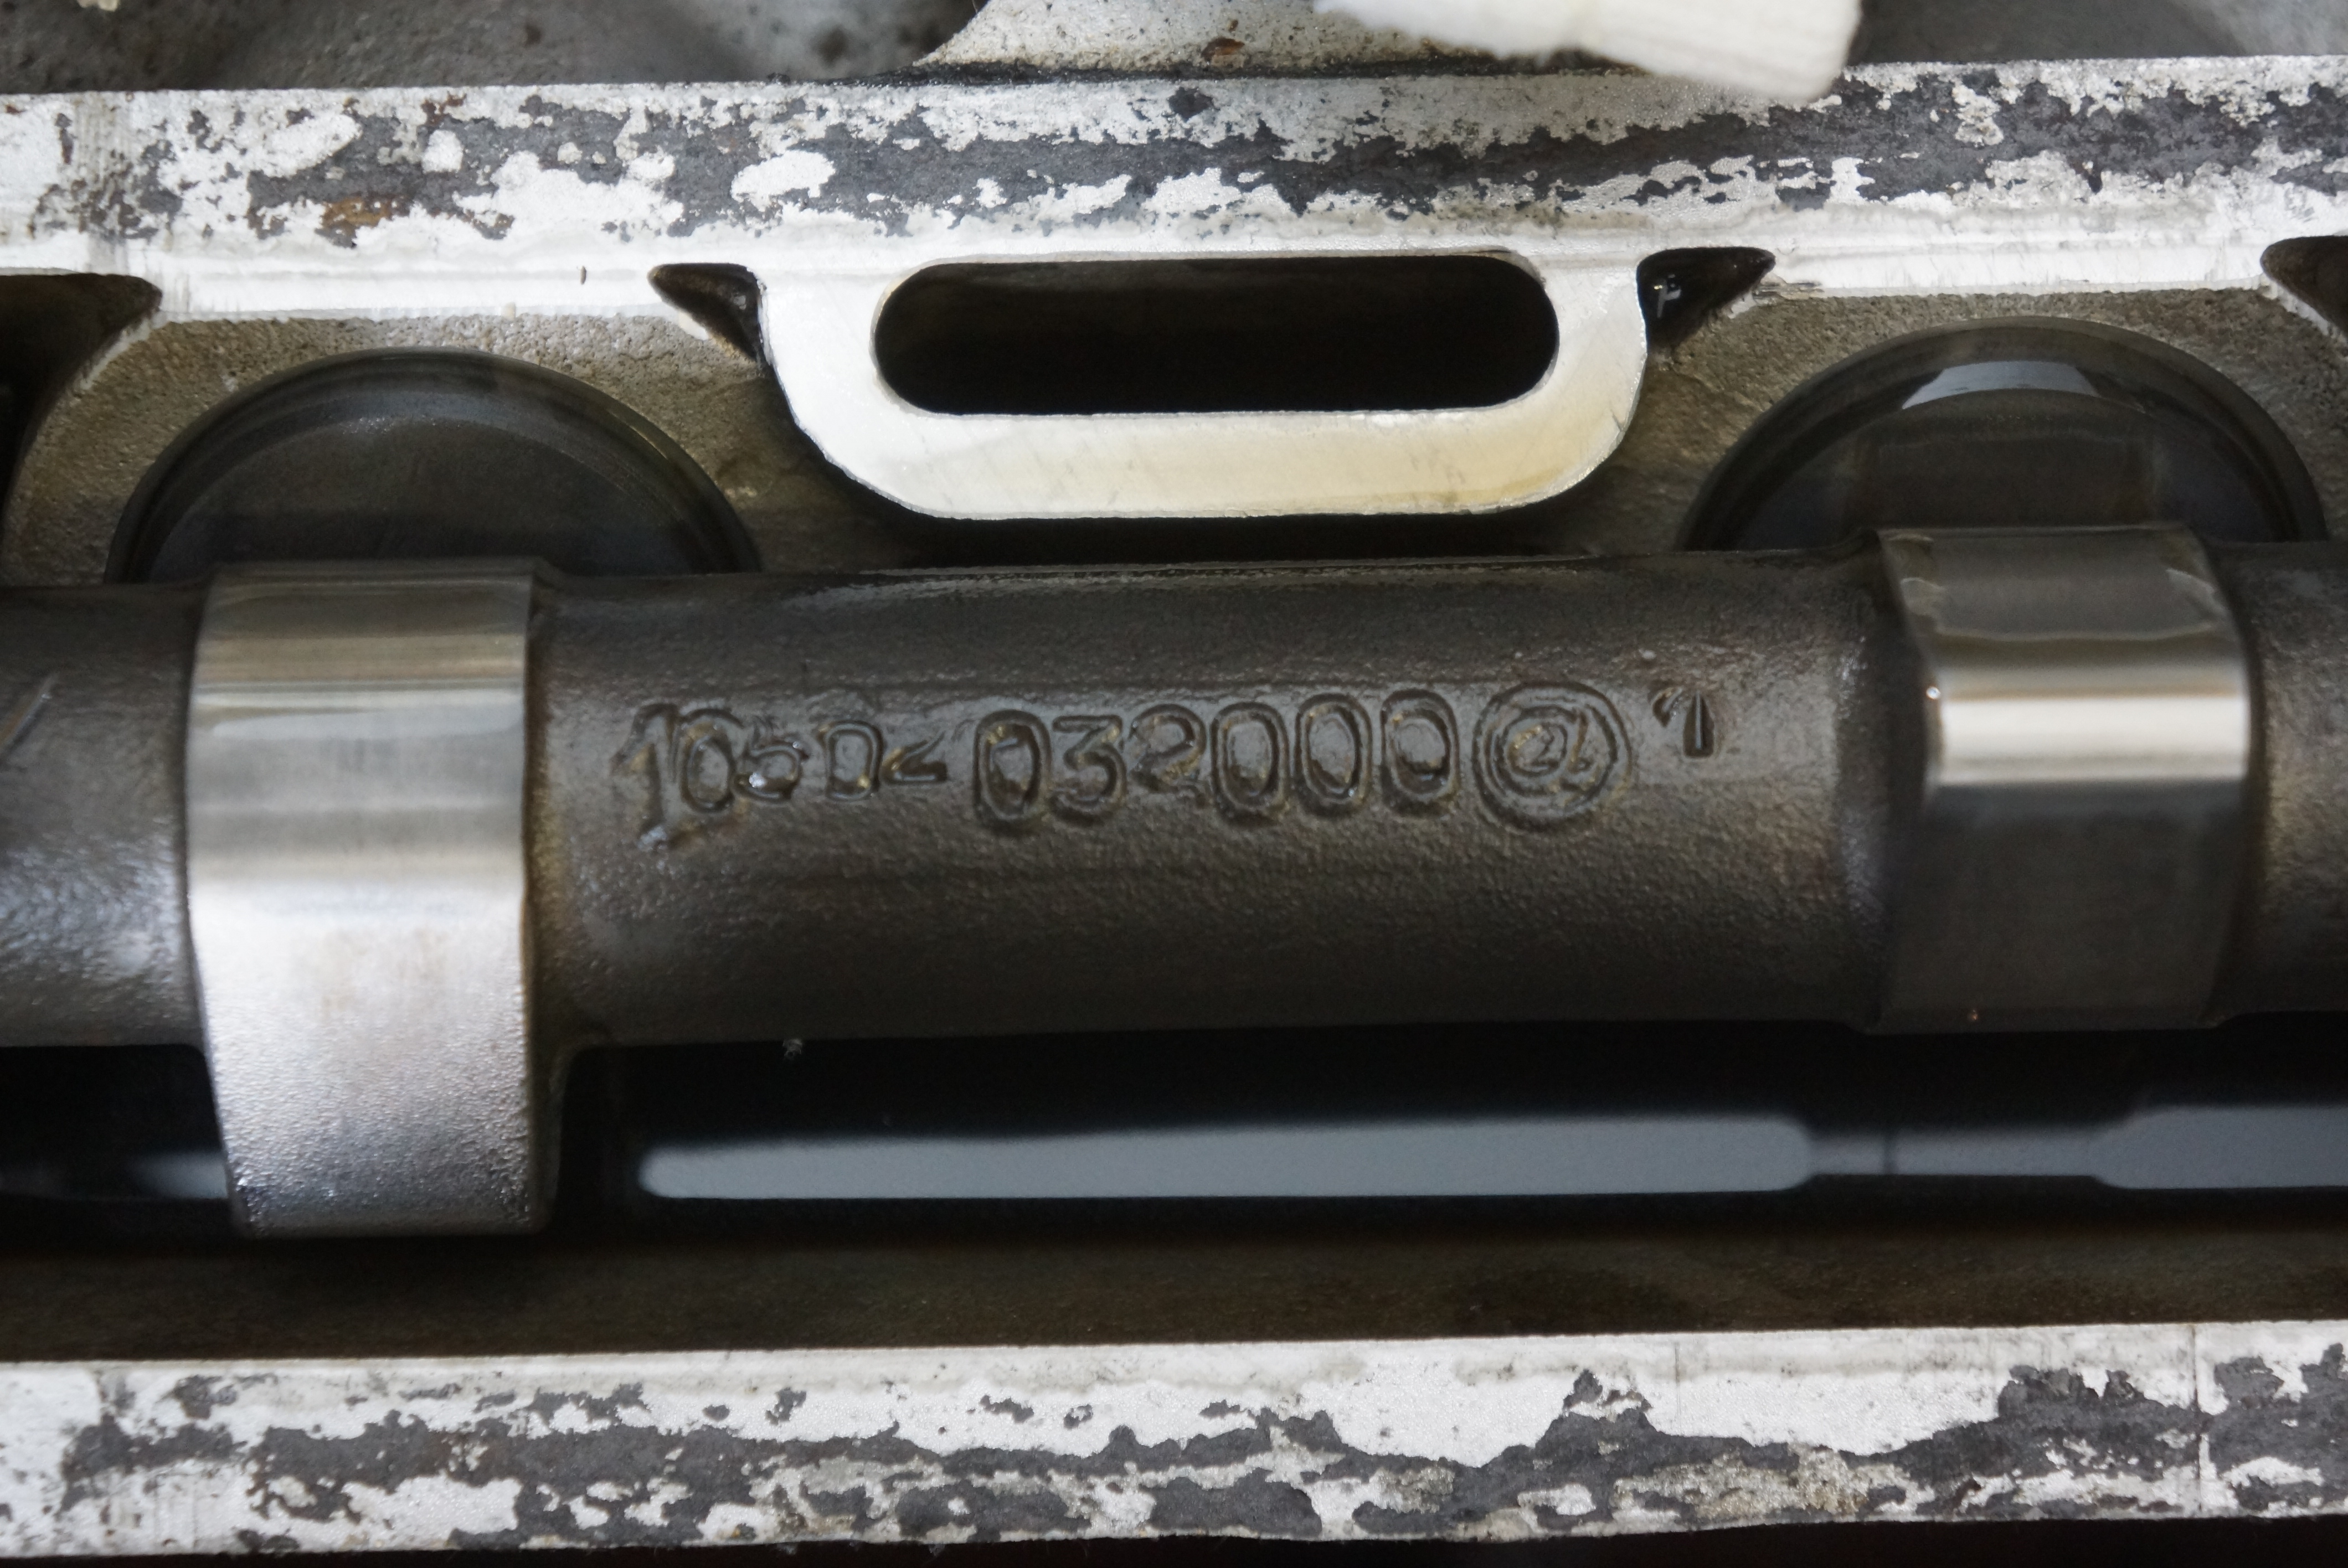
My first task was to find the camshaft part numbers, to verify that these were Alfa Romeo cams and not some hot aftermarket replacements (in which case the clearance specs would be different). A prior conversation with Pete, the family friend who sold me the car, revealed that he wasn’t sure what cams were in it. The part numbers of both cams were readily visible, and verifying them against my technical literature confirmed that these are indeed the factory cams.
This is the correct part number for a 105-platform 1300 Junior engine (105020320001)
Now it was onto the actual clearances. To rotate the engine, I first tried getting a socket on the crank pulley bolt, but the fan shroud blocked that. The next-easiest way to spin the engine was via the nut on the front of the alternator. Popping out the plugs provided less compression resistance, and some moderate thumb pressure on the alternator belt was all that was needed to get the crank and cams to spin.
Paper and pencil at the ready, the valve clearances were checked in firing-order order (1-3-4-2) and recorded. While my owner’s manual provides specs in both millimeters and inches, I decided to stick with the metric measurements – I have metric feeler gauges, and the needed shims are sold in metric sizes.
The spec for the intake valves is 0.475-0.500 mm, and the exhaust spec is 0.525-0.550 mm. Six of the eight valves were out of spec: all 4 intakes and 2 exhausts, and, all 6 showed too little clearance, meaning the valves were not seating completely, subjecting them to less cooling since they were not making full contact with the valve seats.
The worst measurement was #4 intake: 0.350 mm, meaning it was 0.150 mm too tight compared to a correct outer range of 0.500 mm. Yes, we’re talking fractions of a millimeter, but specs are specs, and I felt that the clearances should be corrected.
Here is where it got interesting. My Alfa engine was originally designed in the early 1950s. It’s a very sophisticated layout, with not only overhead cams, but all-aluminum block, wet cylinder liners, hemispherical combustion chambers, etc. However, like most other OHC engines of its time, adjusting the valves requires removing the cams to allow access to the followers (buckets) and shims which are under the buckets. Most friends to whom I mentioned this procedure looked at me with a combination of horror and pity. “It’s really easier than it sounds” I would retort, which did nothing to alleviate their sympathy for me.
(As a complete aside, the first OHC engine to incorporate a valve design which allowed for adjustments with cams in place was the Fiat twin-cam engine, introduced in 1966. My 1970 Fiat 124 Coupe used this design, although I never did adjust those valves!)
The timing chain’s master link is to the left of center
The official Alfa procedure calls for locating the timing chain’s master link, disconnecting it, and swinging the two chain ends out of the way. This method opens the possibility that the cam timing would need to be adjusted at reassembly. Of course, some very clever people have devised a work-around. One of the service books I own is the Alfa Romeo Owner’s Bible, written by the late Alfa expert Pat Braden. He describes a method that does not involve unhooking the chain. Instead, he suggests loosening the chain tensioner, pushing the tensioner all the way IN (making for a loose chain), locking the tensioner in this position, and then lifting the cams toward the center of the engine without disturbing the cam sprocket/chain connection. In this way, on reassembly, the cam timing does not change at all. Ideally, this is done with both cam timing marks lined up with the bearing cap marks.
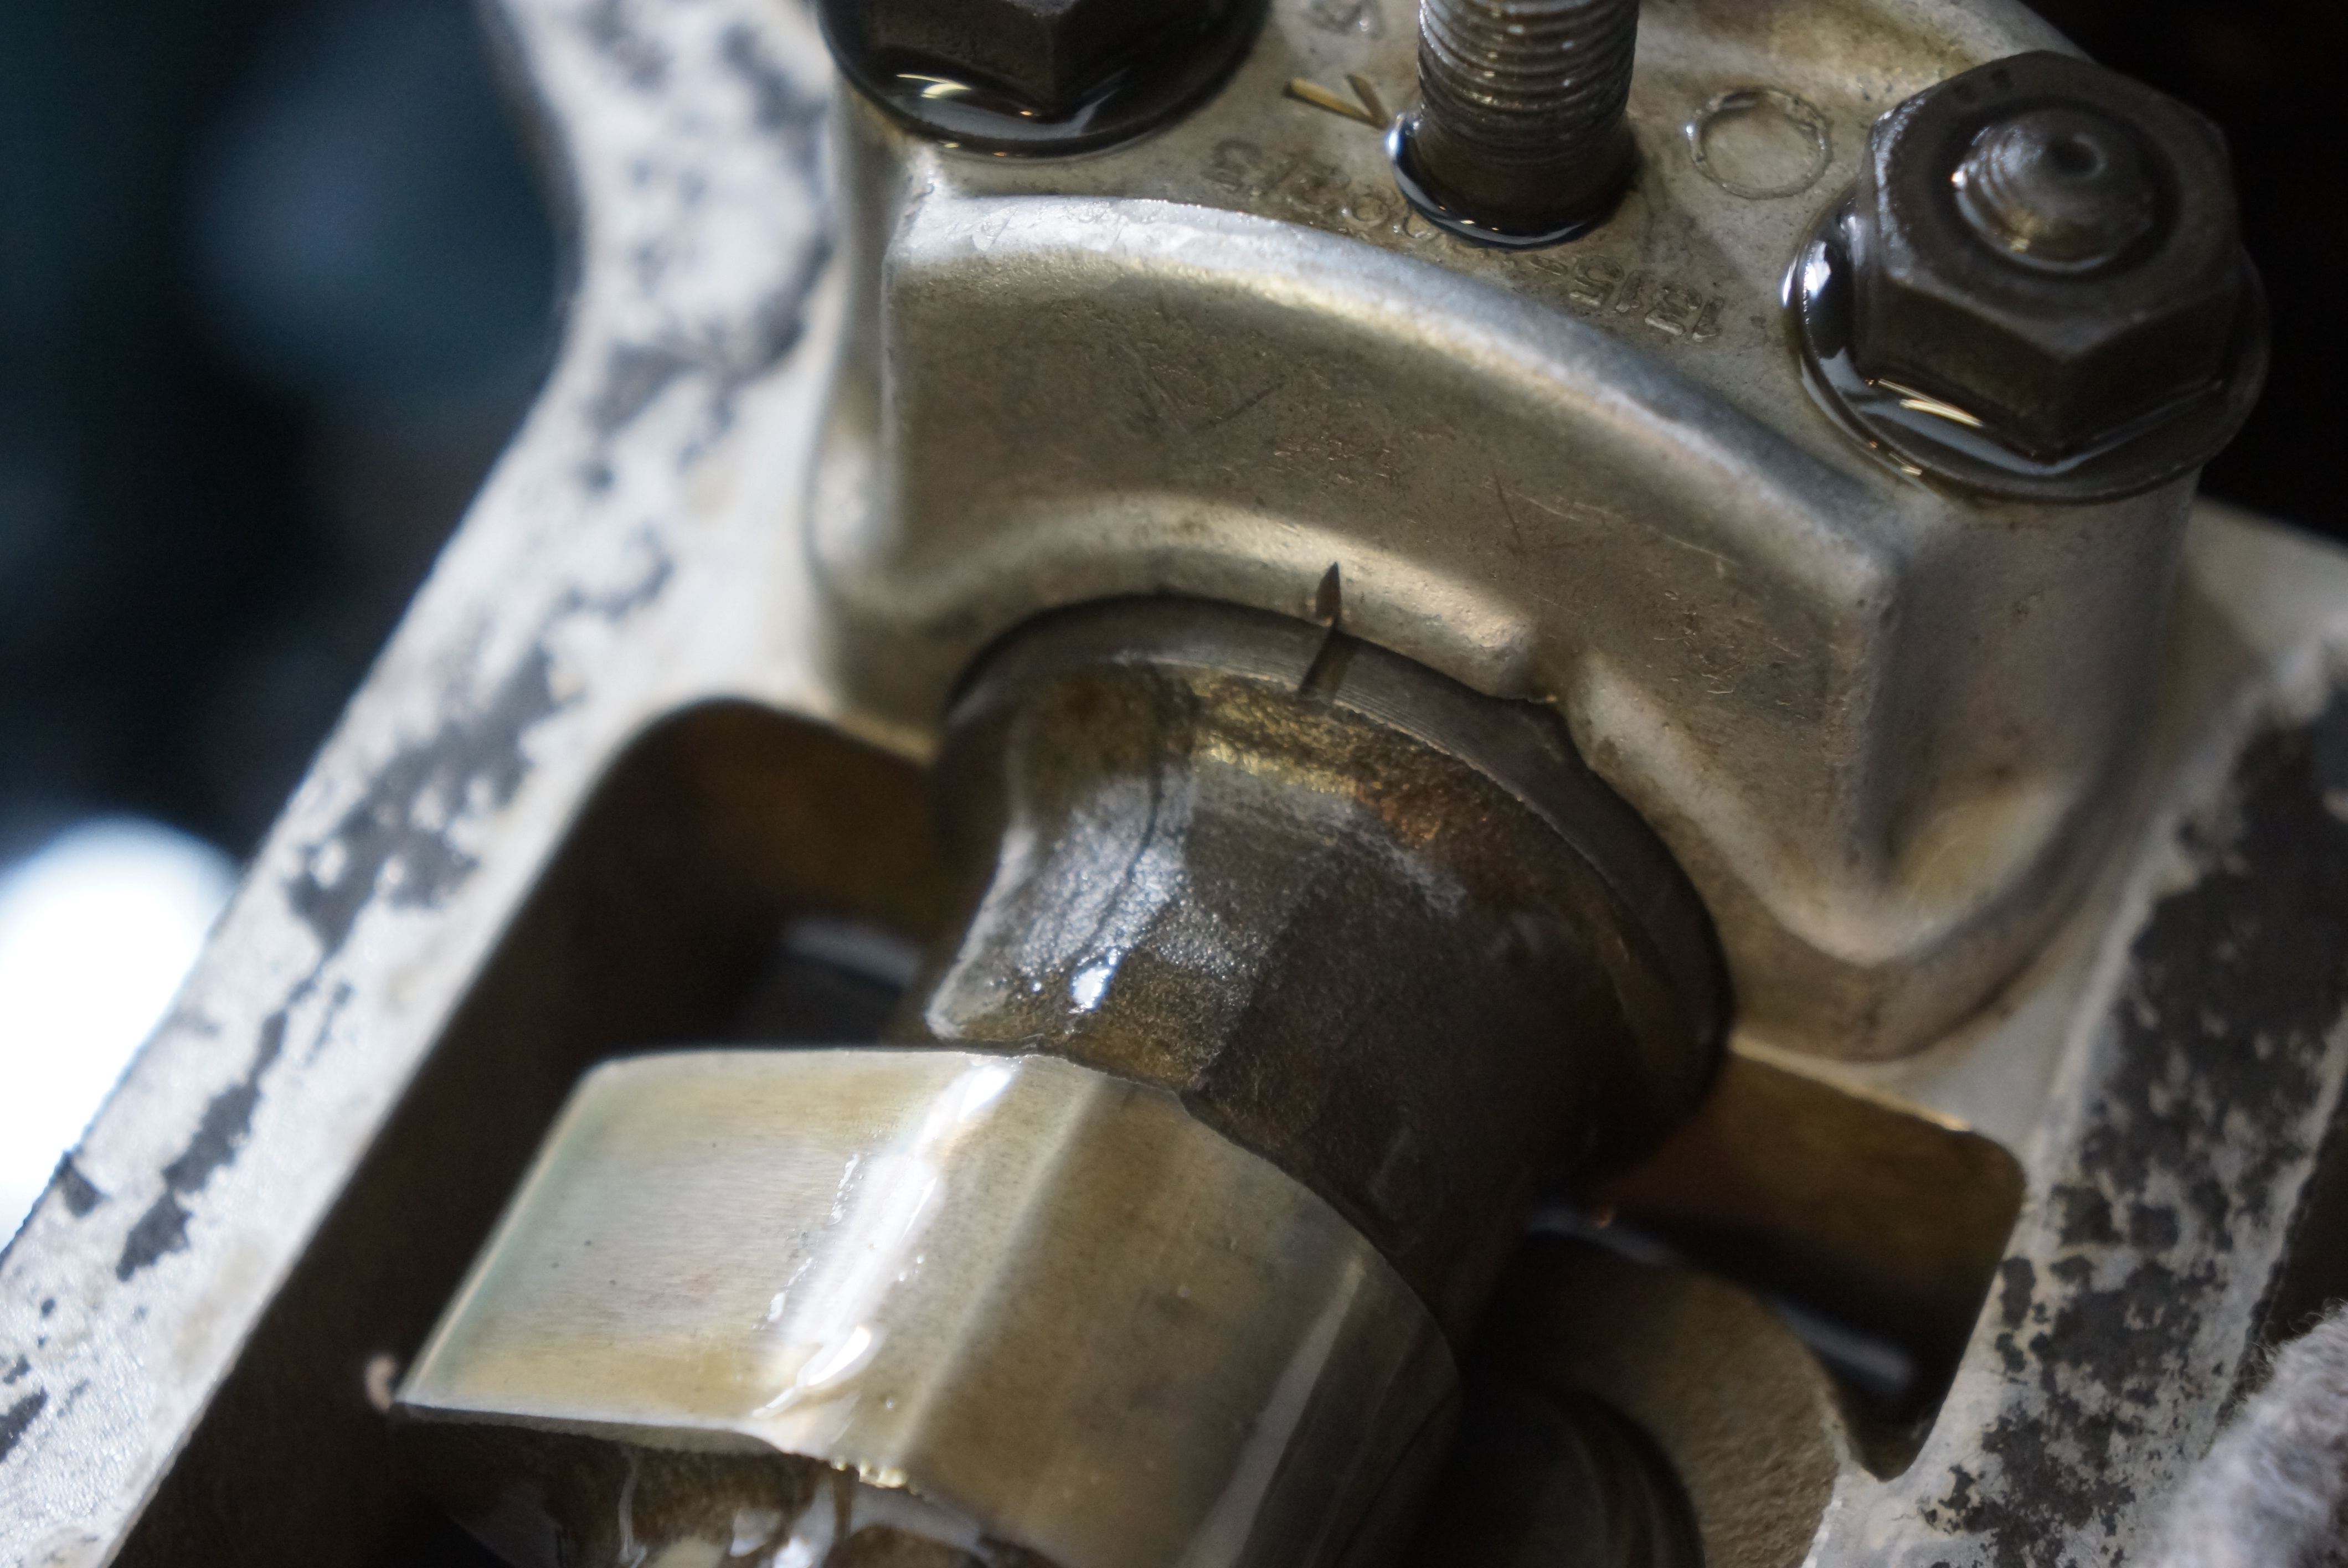
Exhaust cam timing mark
and intake cam mark
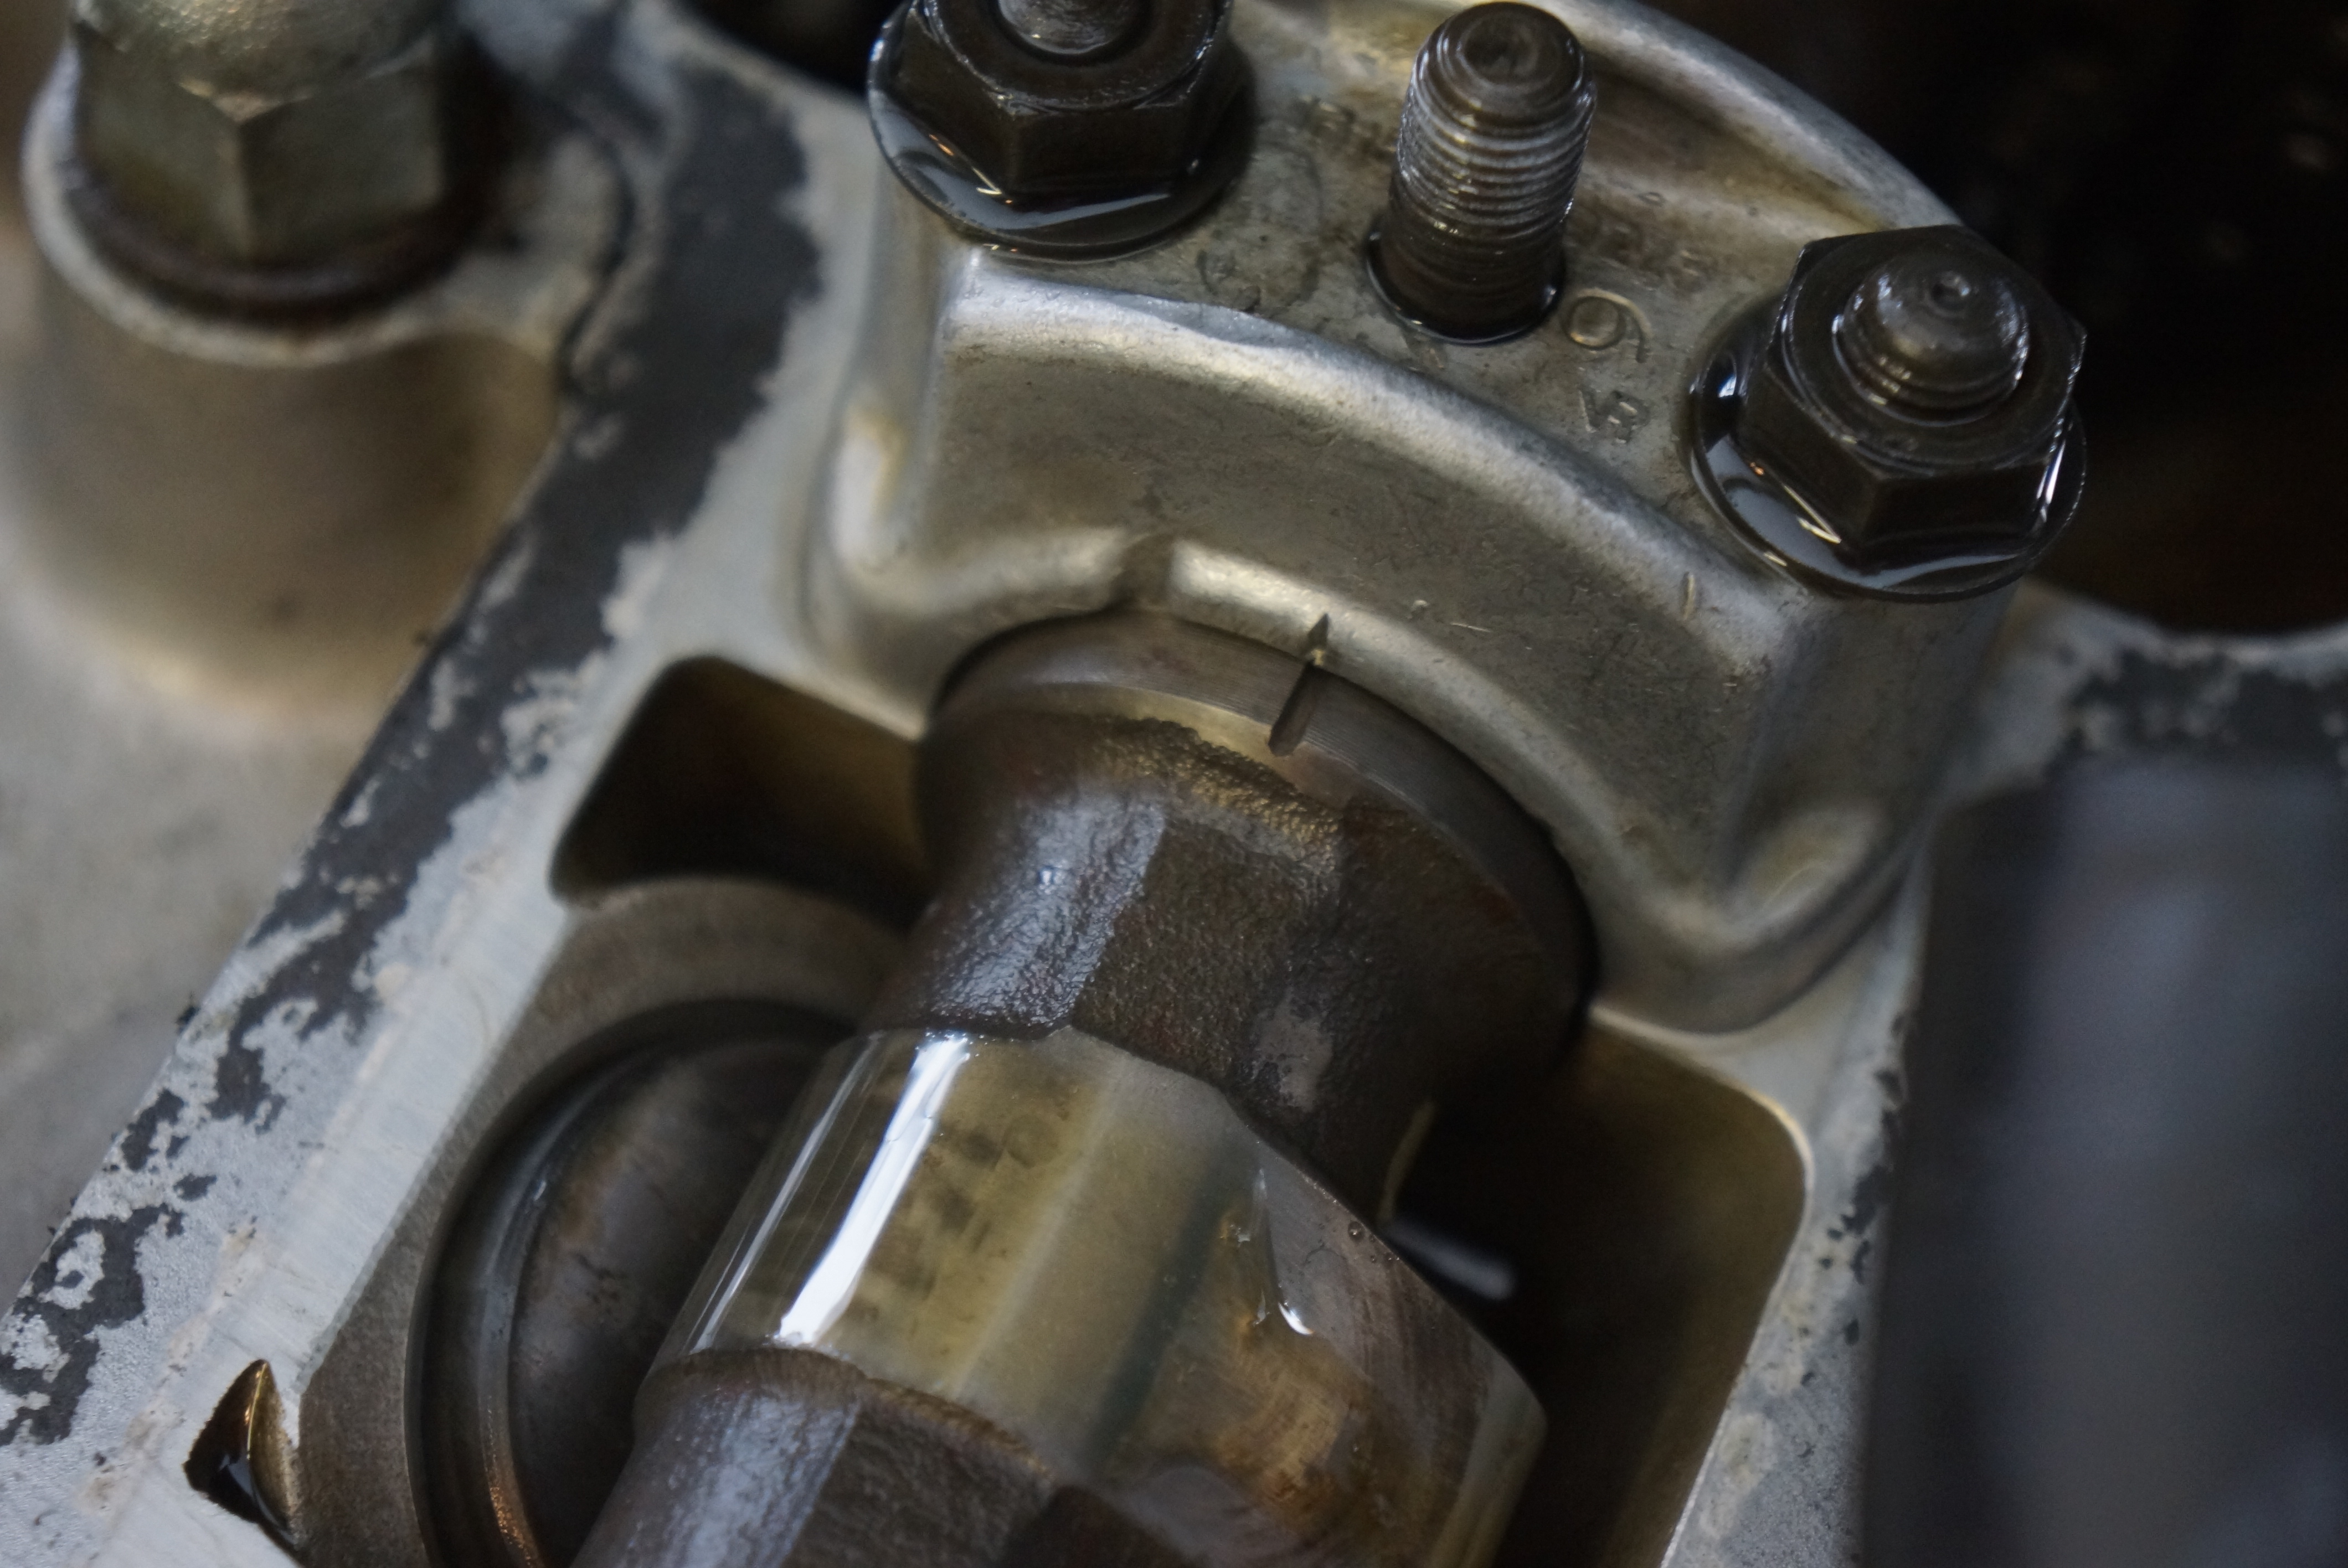
This is exactly what I did. With the tension off the timing chain, I started on the intake side and removed the 3 cam bearing caps (Alfa thoughtfully numbers the caps 1 through 6, and I documented everything with photos before turning the first nut). The intake cam was lifted and placed over the spark plug holes (which were protected with clean rags). The chain remained on the cam sprocket.
Cam bearing cap #3 – cap nuts were loosened gradually
Intake cam lying over spark plug holes- note timing chain still on cam sprocket
The next trick was getting the buckets out, as they were oil-covered and lacking a way to grab them. I realized that a magnet might do the trick, and it did. The bucket came out, and under it was the shim, which was also removed.
These slippery guys were tricky to remove!
Working on just one cylinder at a time so as not to mix up any of the locations, I measured each shim with a digital metric micrometer. The value was recorded on the same sheet of paper as the clearances. I started on the #1 intake valve, went down the line to the #4 intake valve, then did the same thing on the exhaust side. Once all these measurements were taken, the shims and buckets were back in place on the engine. I gently placed the valve cover on top of the engine, lowered the hood, and took my measurements inside so that the ‘new’ shim sizes could be calculated.
Bucket/follower (top) and shim (left) pose with micrometer
Starrett No. 216 records a shim value of 2.15 mm
I knew that all the out-of-adjustment valves were tight, so I needed greater clearance, so all the new shims needed to be thinner than the current shims. I found an online “Alfa shim calculator” someone built in Excel, and I used it, but I also checked all my numbers two more times. I aimed for the higher end of the spec, figuring that if the valves are tightening up over time, I had best start by providing the maximum clearance while remaining in spec.
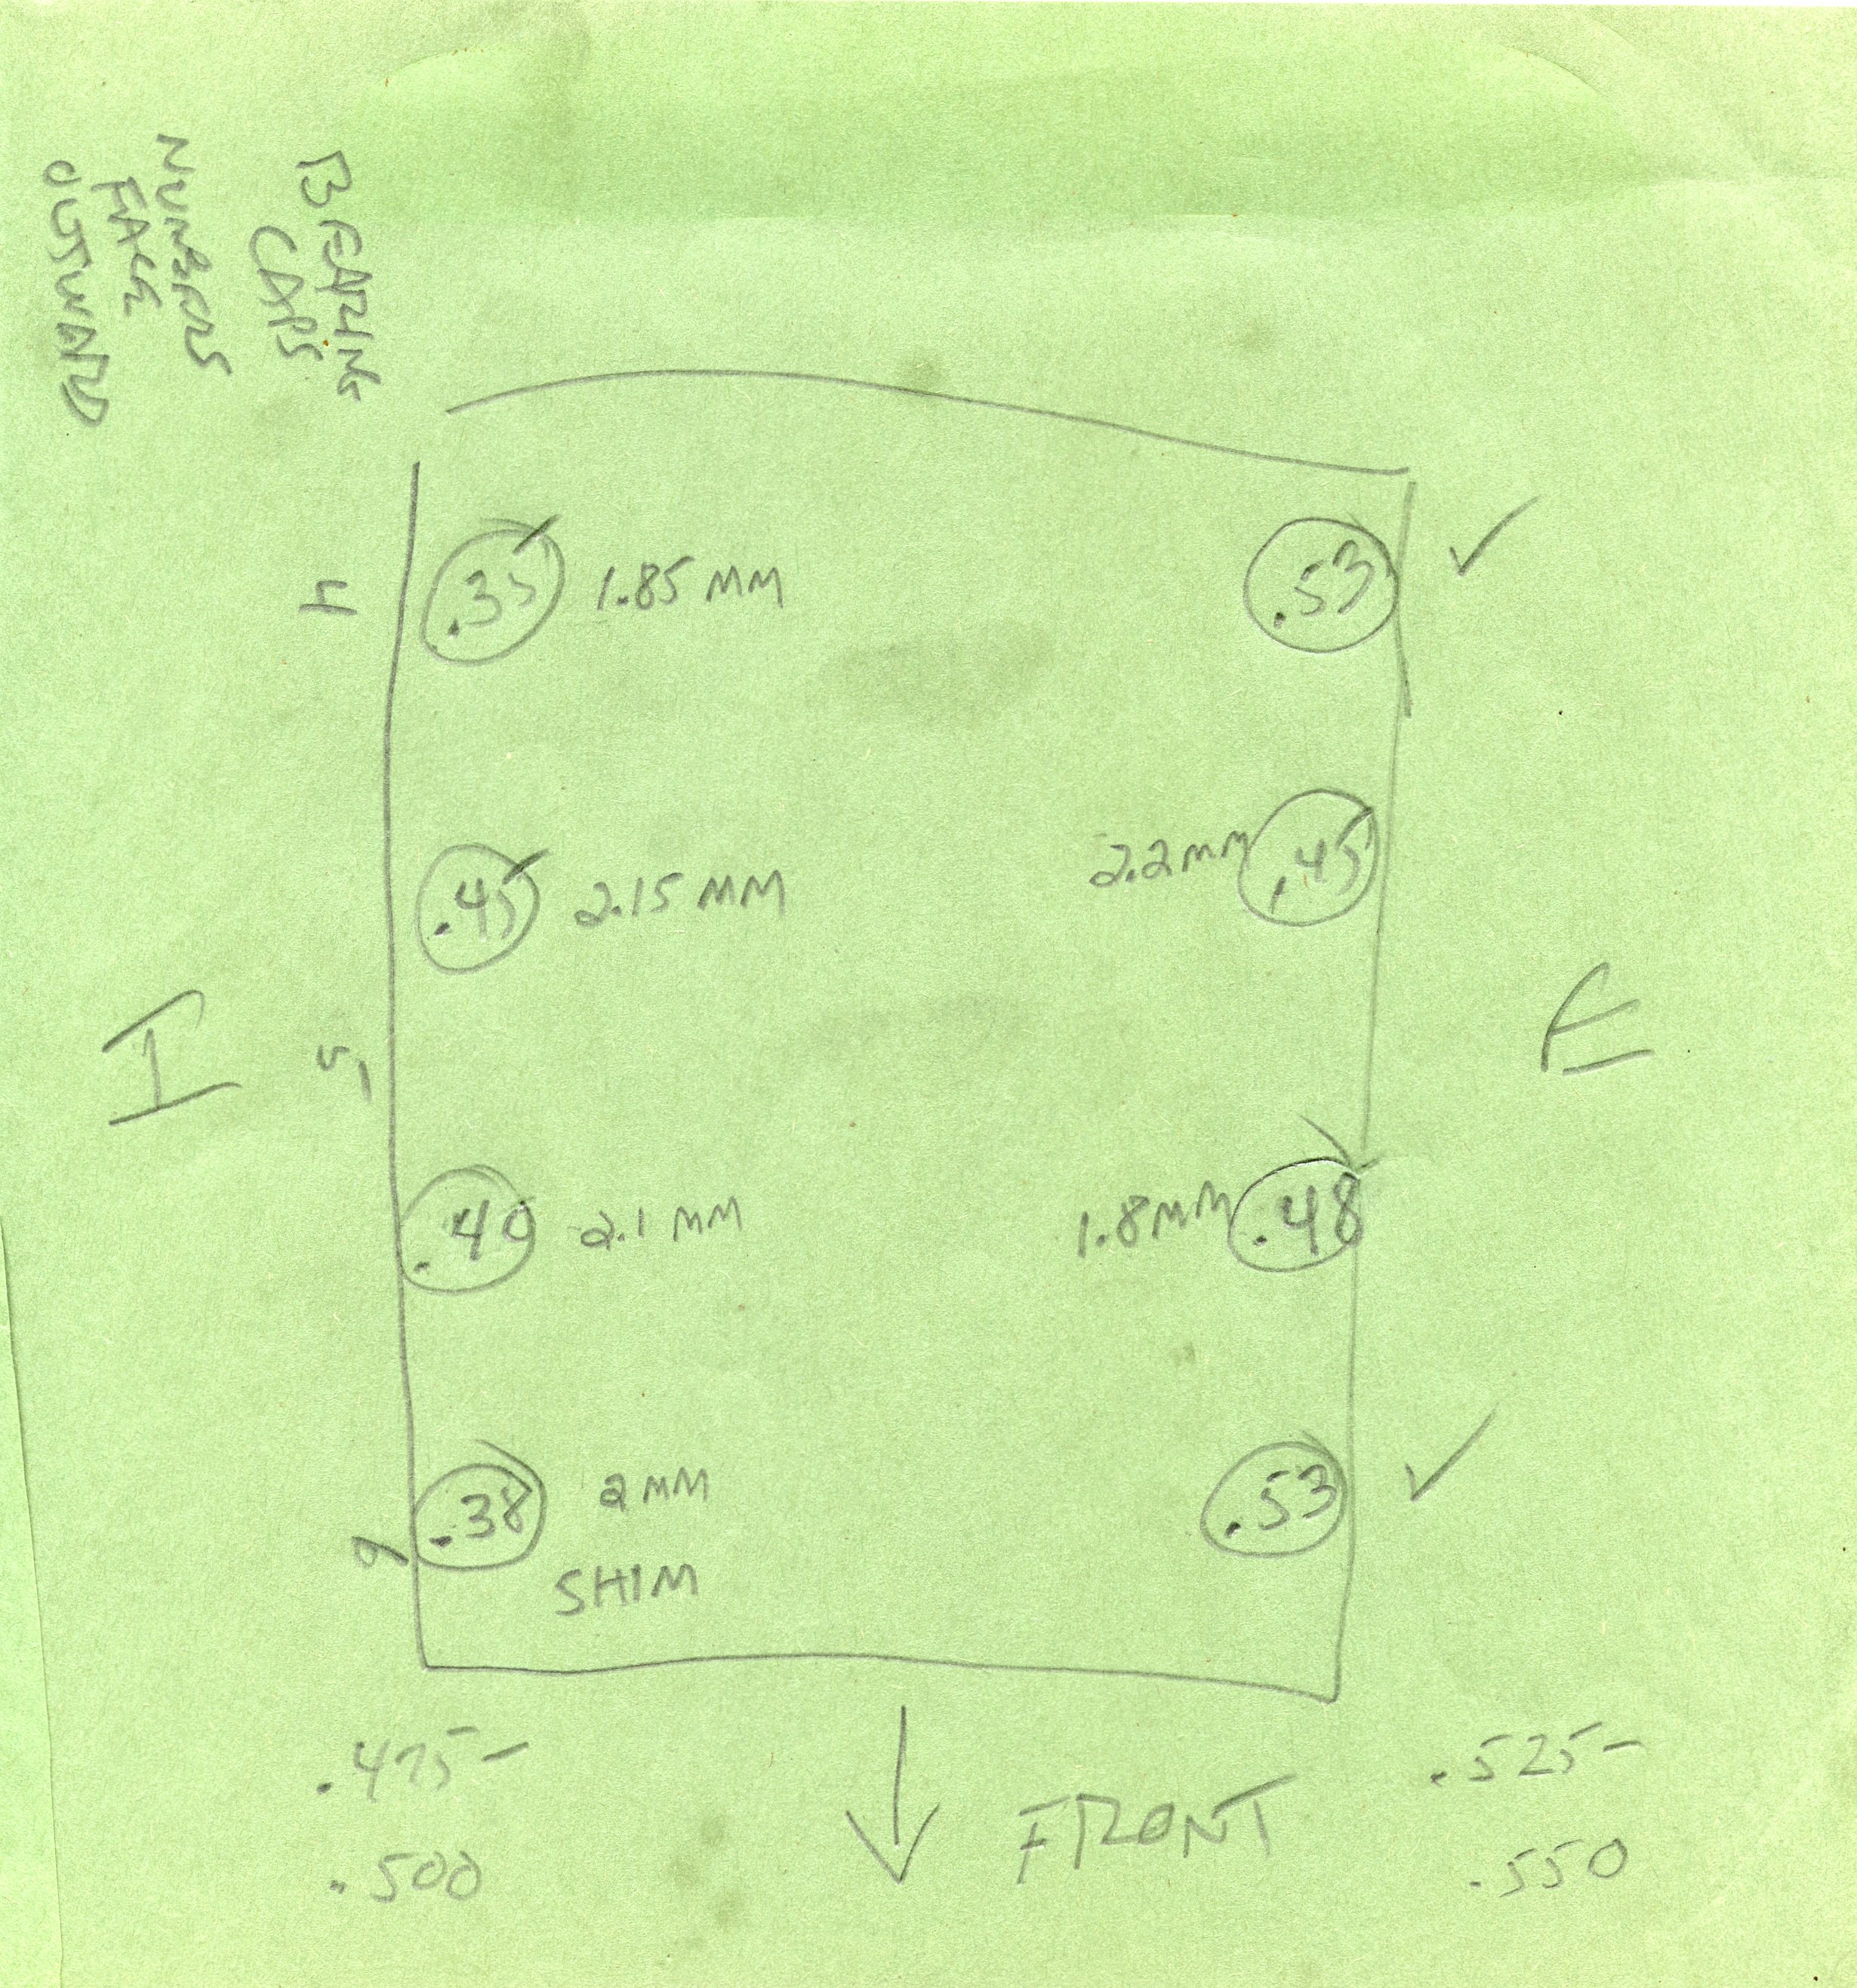
Documentation of initial clearances and shim thicknesses
My go-to Alfa supplier, Classic Alfa in the UK, sells shims in increments of 0.125 mm, so it was a fairly easy task to calculate my needed shim sizes. The order was placed, and now I just needed to wait for the shims to show up. But it certainly felt like the hard work was behind me!
The Bubble Party was intended to serve as a grand celebration of a singular automobile. The Bubble Party was meant to be a culmination of many years’ effort. The Bubble Party was an excuse to smile, and laugh, and cheer, and have fun. The Bubble Party was a (gentle) poke in the eye to those who thought that the concept of restoring a 13 horsepower car was a silly exercise. The Bubble Party was an excuse to have a party.
The Bubble Party was all this and more.
For once, it wasn’t about the car; well, of course it was about the car, but really it was about the human endeavor. Sometimes I thought that a celebration centered on reaching the finish line was selfish, and egotistical, and boastful, and perhaps there were elements of that. There was honest effort, though, to take the focus away from me, and away from the fact that “the Isetta did drive in ‘95”.
What I knew then, and what I know more than ever now, is that this could not be accomplished by one person. There were so many people, individuals who were already friends, and those who became friends through my dealings with them, who needed to be counted among the co-achievers. And not all of them necessarily touched the car. My father, to name one significant example, had been a lifelong inspiration to me, and helped me in uncountable ways with my technical knowledge and understanding.
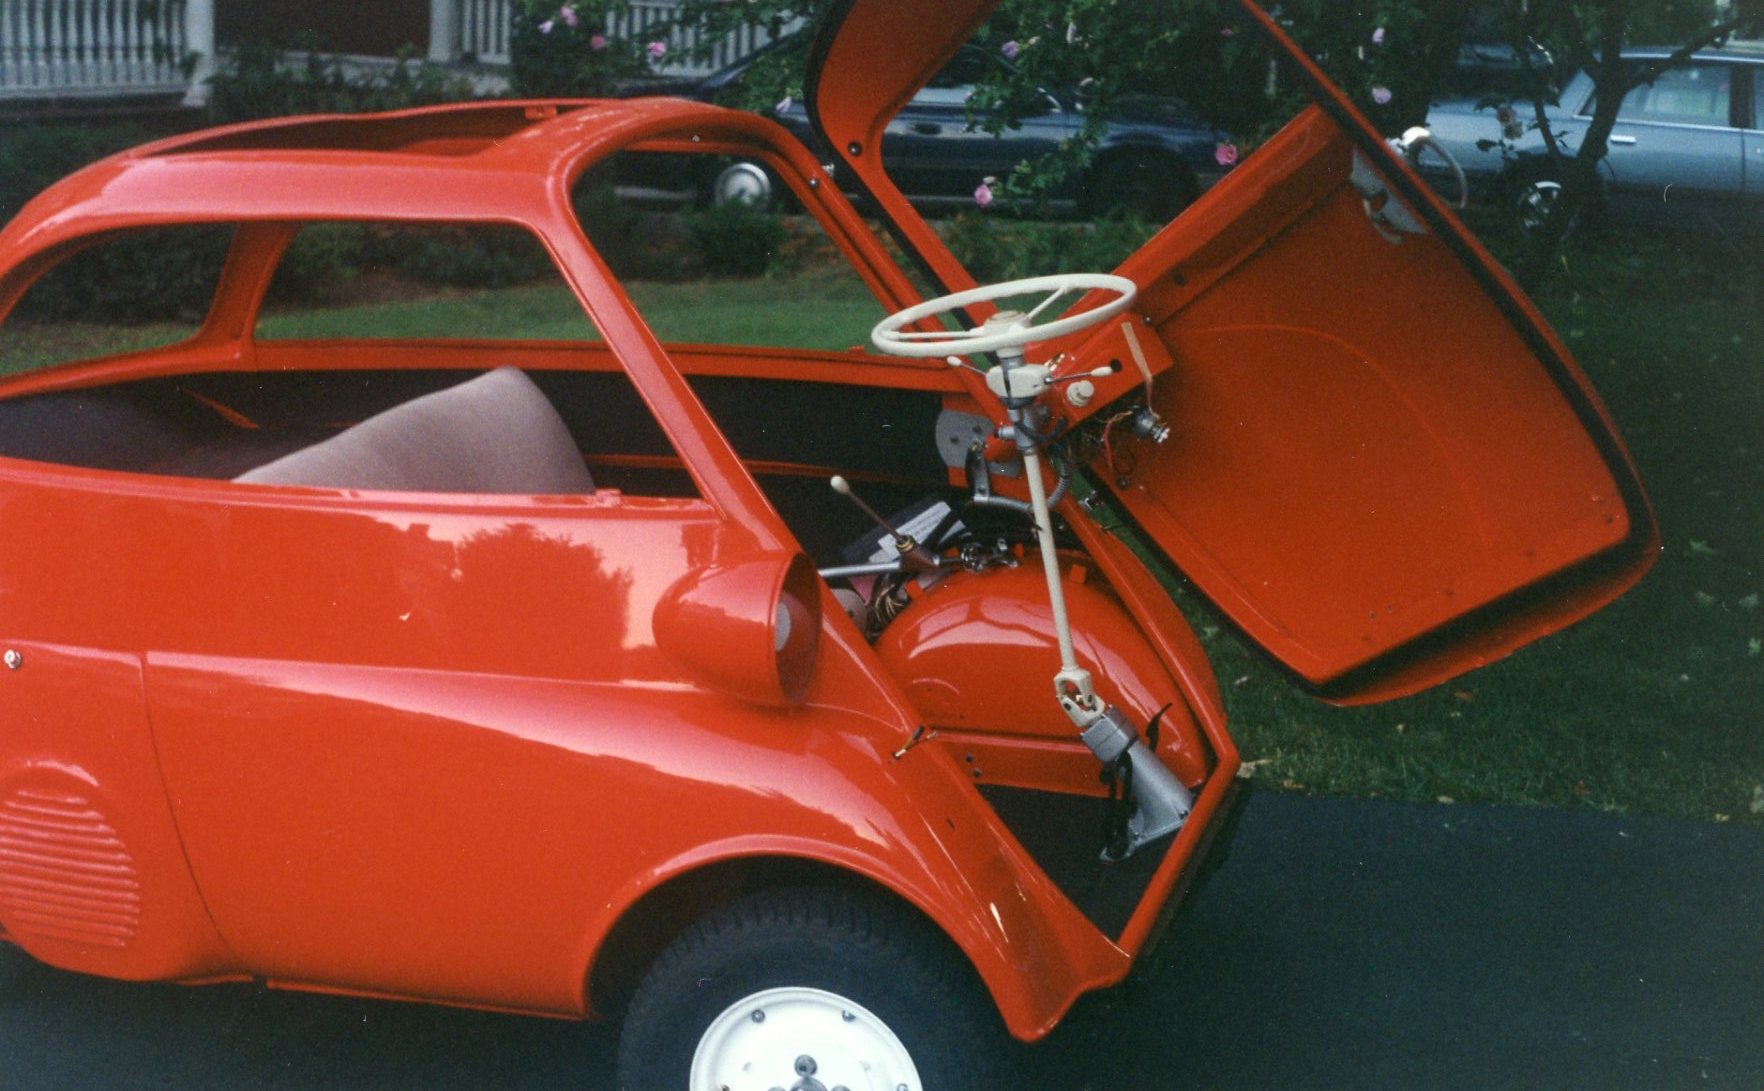
So we spent most of September in planning mode. The house was cleaned; the yard was trimmed. Food and drink aplenty were brought in. Bubble Party invitations were sent. We invited everyone: neighbors, co-workers, relatives, friends. We made a point of ensuring that children were included. The town agreed to close the street for the afternoon. The car was set on the front lawn, and covered with a red cloth.
We asked for a beautiful day, and we were given that too. The car was unveiled, and it was the children, more than the adults, who oohed and aahed (after all, it’s sized like a kid’s plaything). I was more than happy to let the parents watch while I offered rides to every child in attendance. I can only hope that some of them remember, and perhaps some of them grew to appreciate old machinery.
This 3-minute video highlights the moment the Isetta was revealed to the crowd:
Then it was over. And autumn arrived, and I was exhausted from the mental effort of getting the Isetta to this point. It wasn’t finished, but it certainly was close. By the end of 1995, I had accomplished what I set out to accomplish.
After the Bubble Party, the car was not touched for four years. Final restoration work began anew in 1999, and the car was entered into its first shows in 2000. We will resume the Isetta Saga later this year.
In the meantime, with spring literally a few days away, Richard’s Car Blog will turn its attention to what promises to be a very busy 2019 show season. The next blog post will be a technical treatise on the Alfa Romeo valve adjustment procedure. Stay tuned!
With its initial drive event behind me, further work on the Isetta slowed. The notebook I kept to track my progress has very few entries for September 1995. The notes which are there make scant reference to exterior lighting and door adjustments. My time and effort was directed to planning a party.
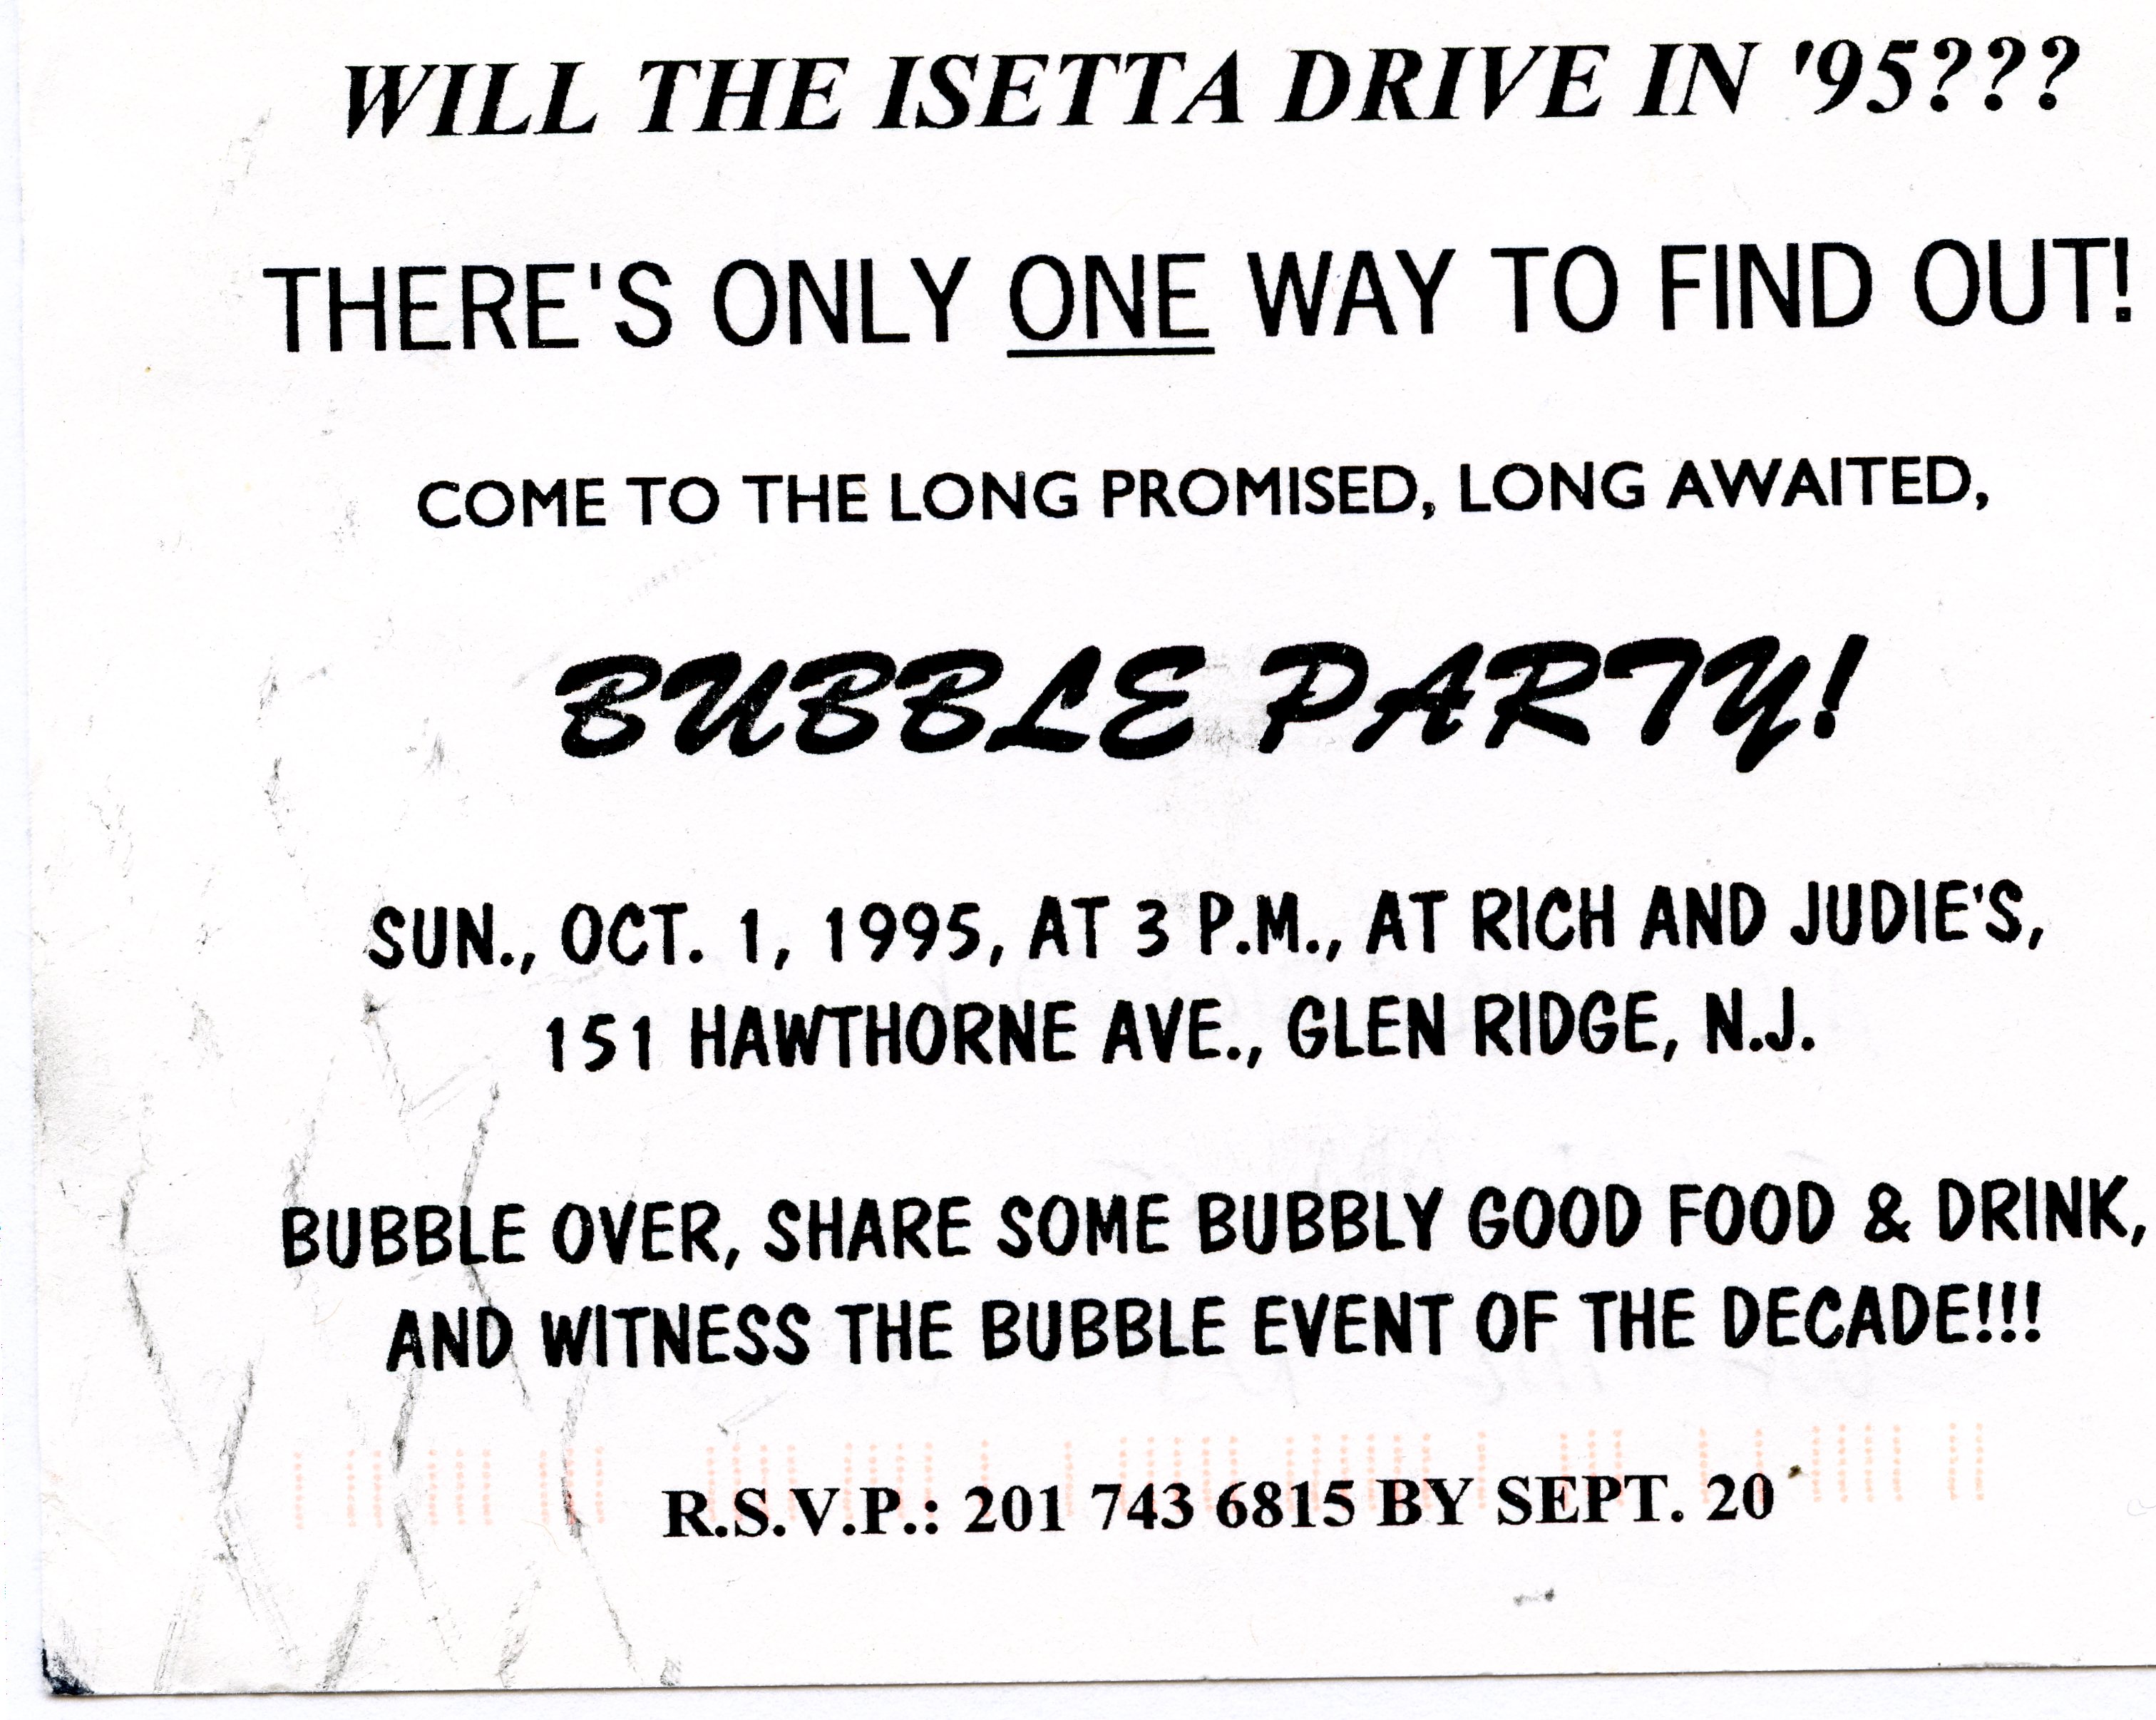
Every milestone of the Isetta’s progress had been marked with a celebration: the first running of the engine, and the body and chassis wedding, to cite two examples. This time, the festivities would be on a much larger scale. The car was as ready as it was going to be for its public unveiling, known as The Bubble Party. The date was set: Sunday, October 1, 1995. We went so far as to petition the town to close our street to vehicular traffic so that the bright red Bubble Machine could be buzzed from one corner to the next without interference. The mayor agreed (I think a small donation helped).
I did take the car out for several more reconnaissance runs, and my ear-to-ear grin gave it away every time: I never imagined that a 13 horsepower car could be so much fun to drive. The only variable not in our control, the weather, was simply ignored. The Isetta was ready, and we would be too.