A big part of this brake project has always been the intention to replace all the hard lines. It was back in the fall of 2019 (days we’ll forever remember as “pre-coronavirus”) when I purchased a 25’ roll of new CuNiFer (copper/nickel/iron) brake line (from FedHill) and all new line fittings (from Classic Alfa), knowing that the day would come when I’d need them.
Well, that day did come, and I’ve spent a somewhat enjoyable last few days in the garage making up the new lines. The rear rotors and calipers have been bolted back in place, so with the old lines as templates, I cut the first two new lines for the two rear calipers to the appropriate lengths.
The creation of new brake lines requires that the ends be flared, which requires a special tool. I have one of those cheap old flaring yokes, a tool I’ve had for so long that I couldn’t tell you the last time I used it. Maybe never. My good friend Mike G owns a high-end brake flaring tool kit made by Eastwood, which he generously loaned to me. I’m going to walk you through the step-by-step process, which on an old Alfa like mine can be a bit tricky! You’ll see in a moment.
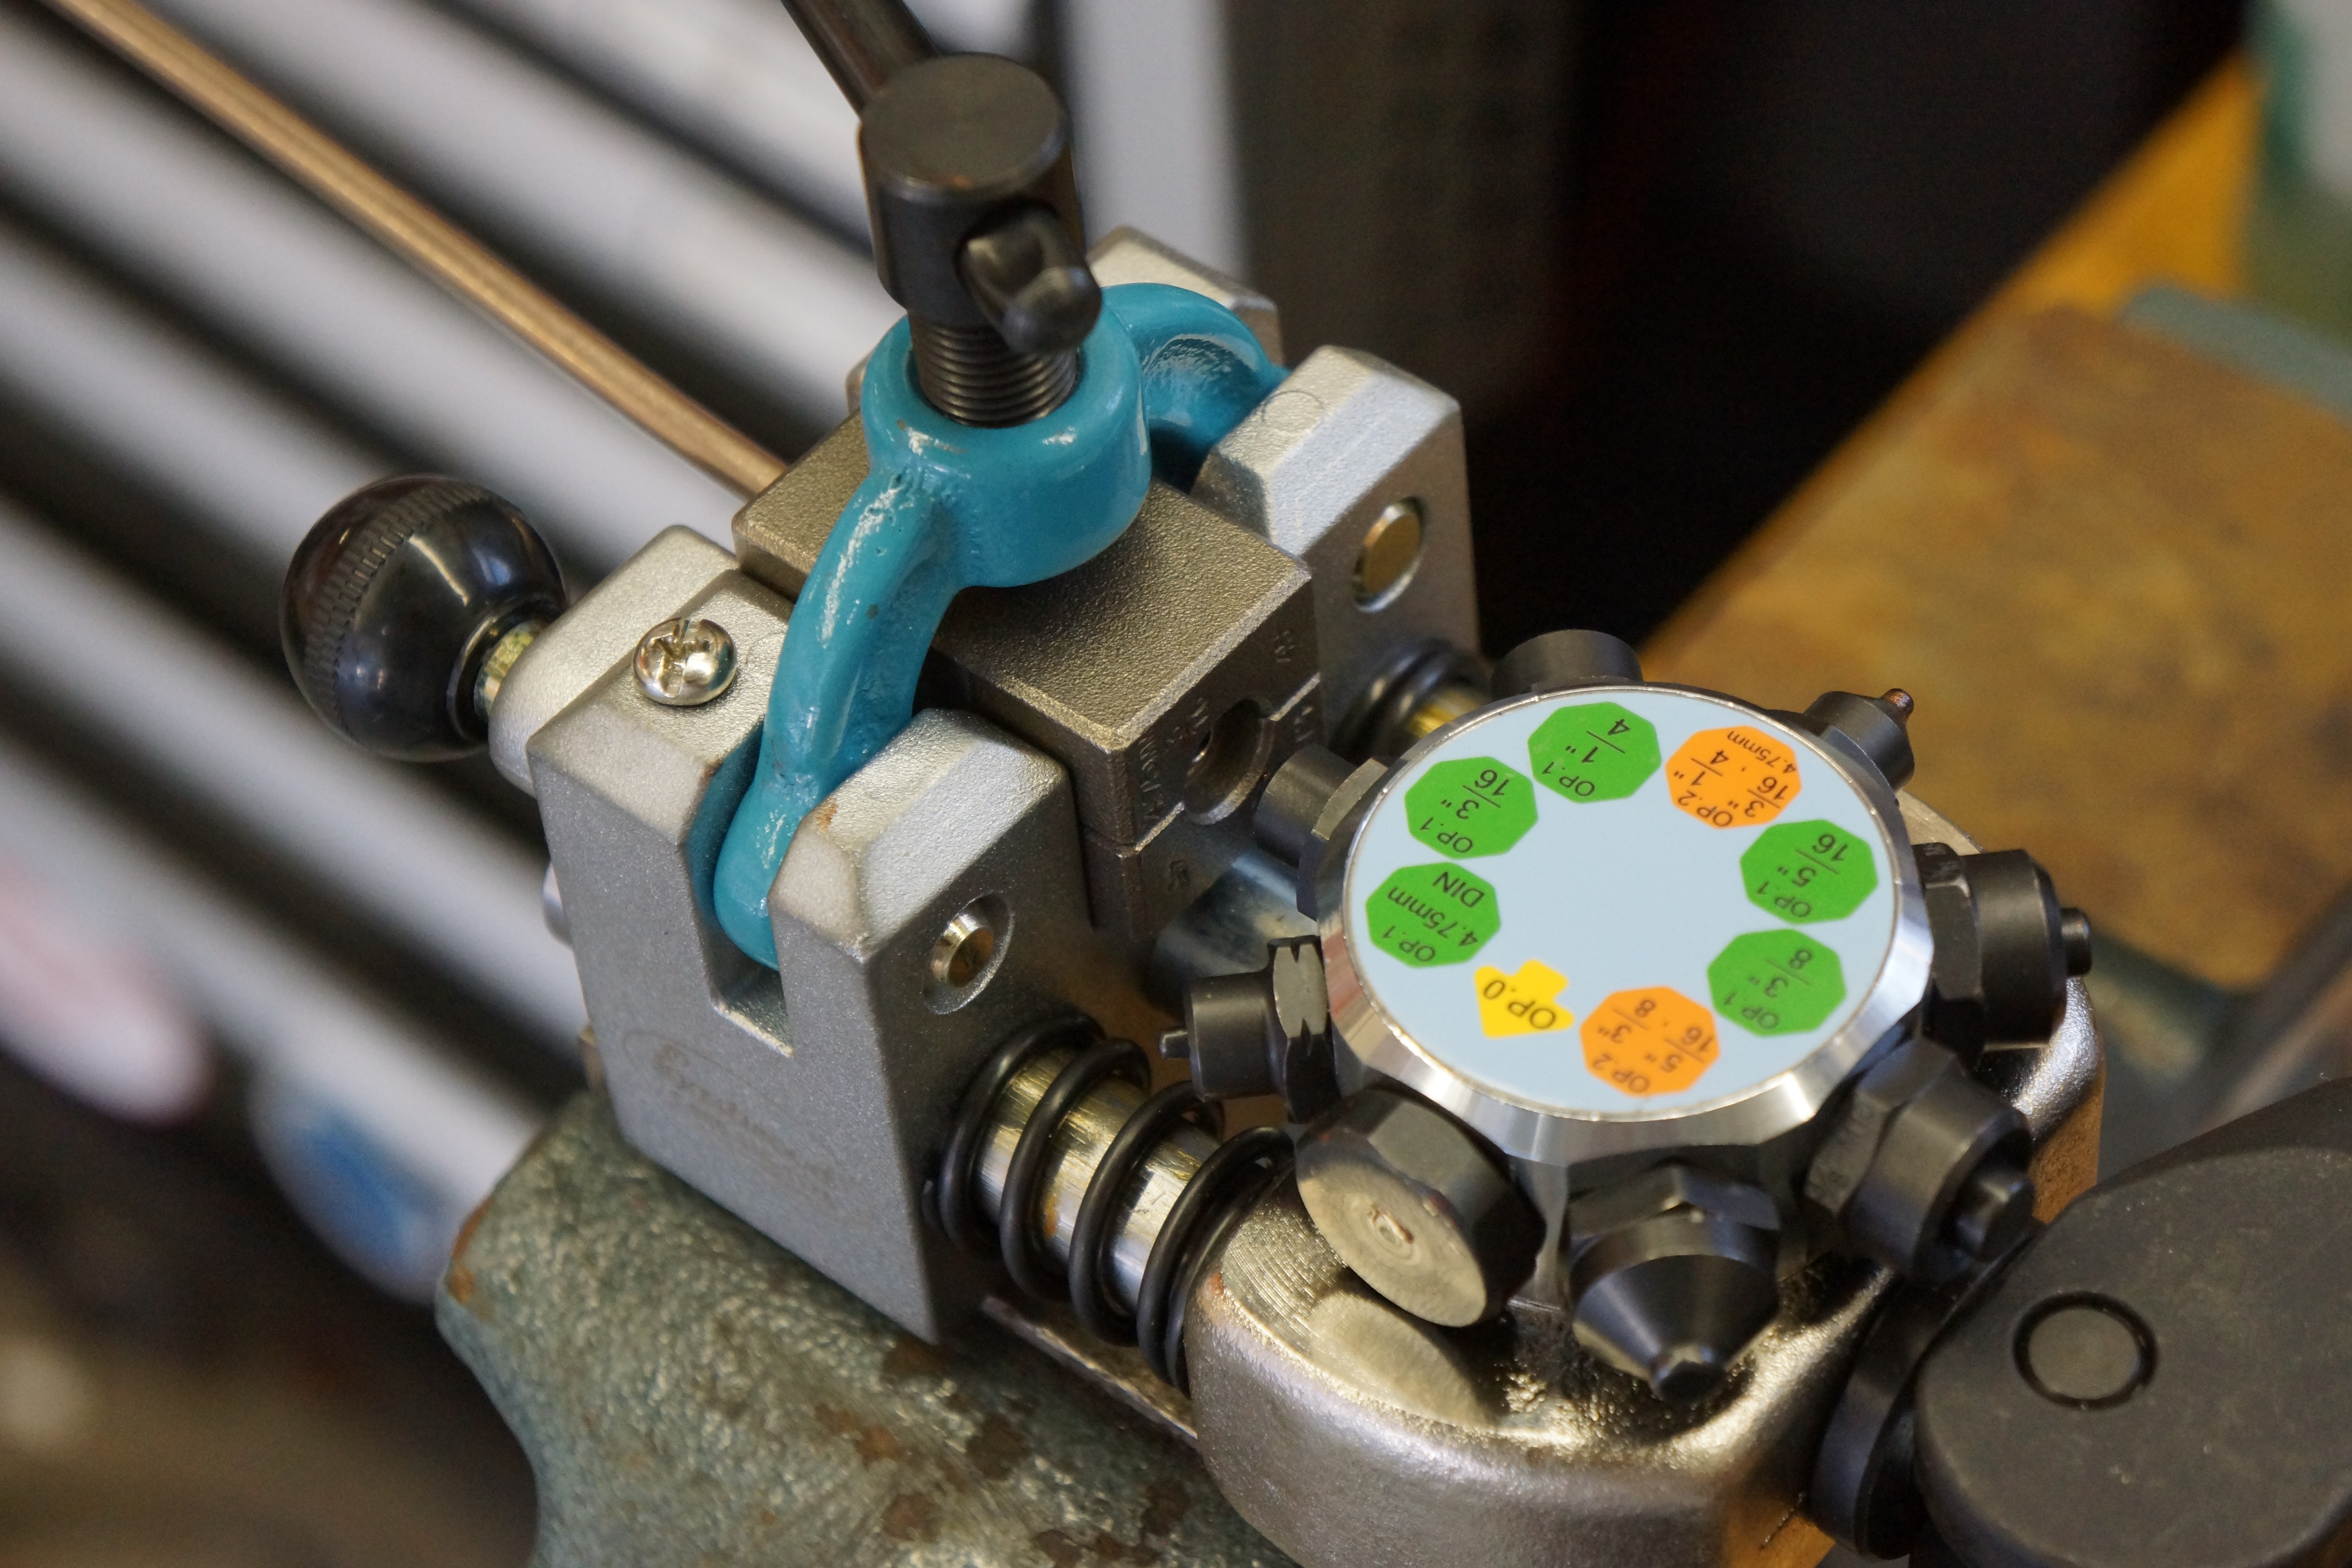
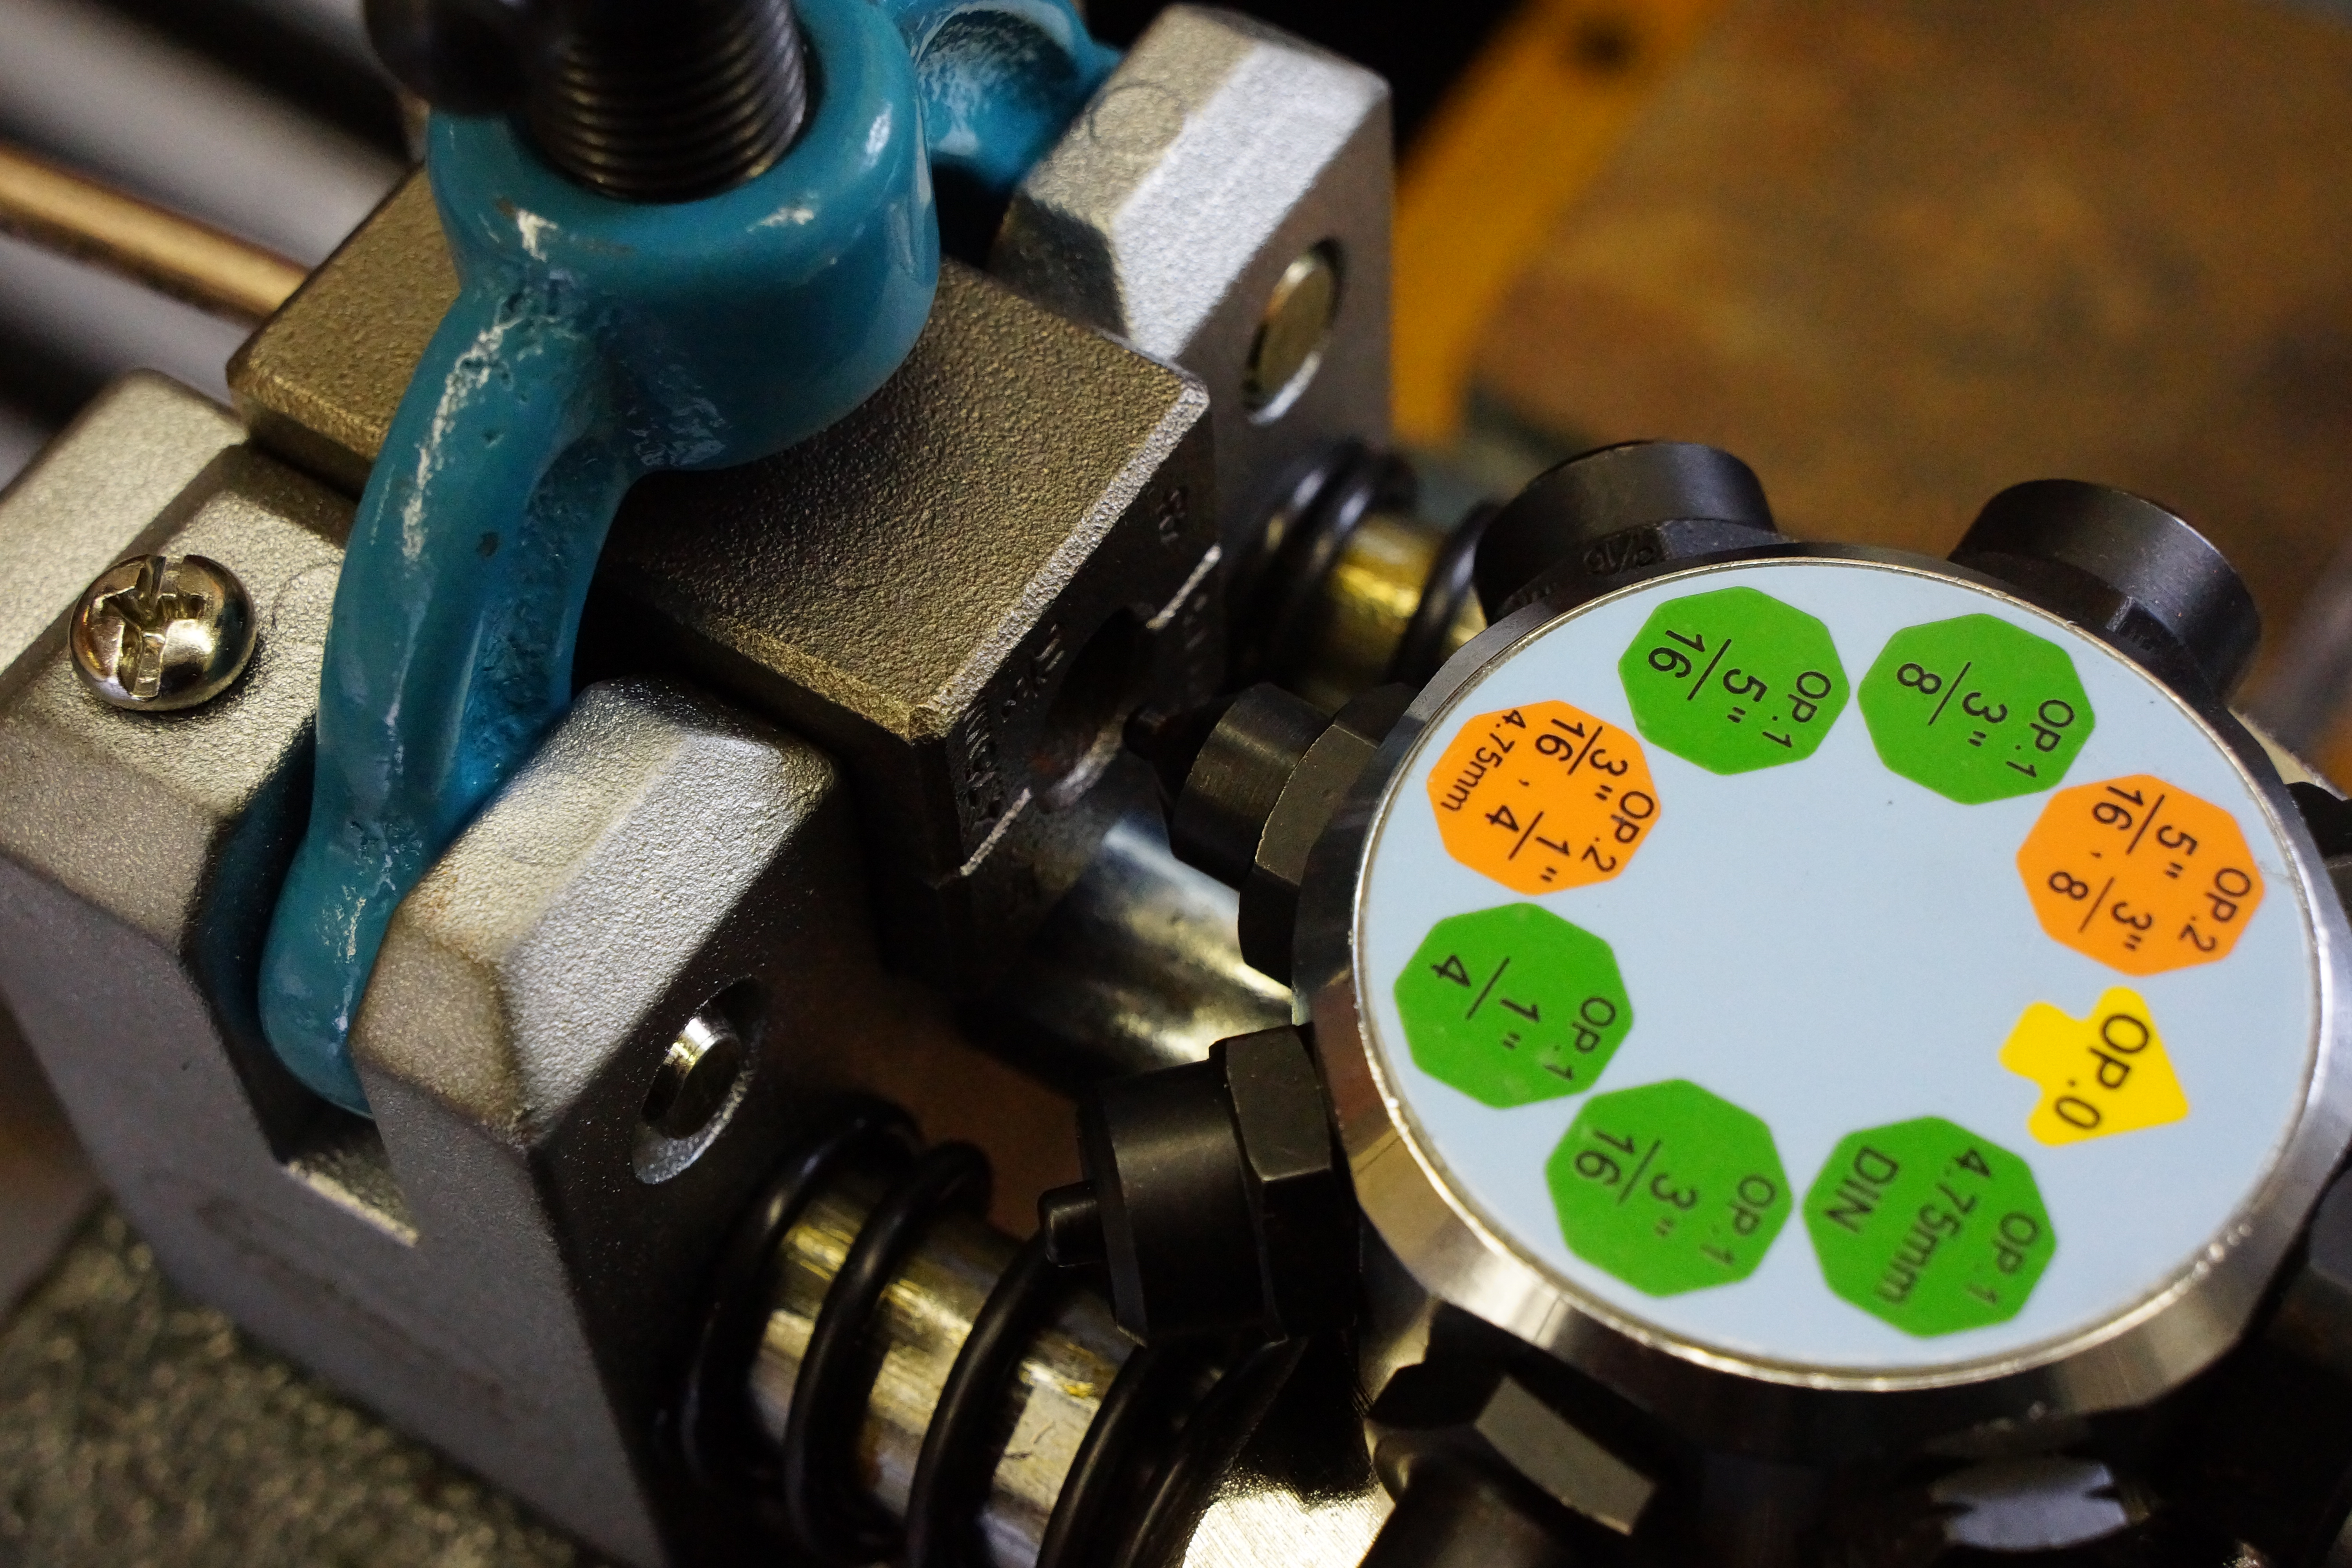
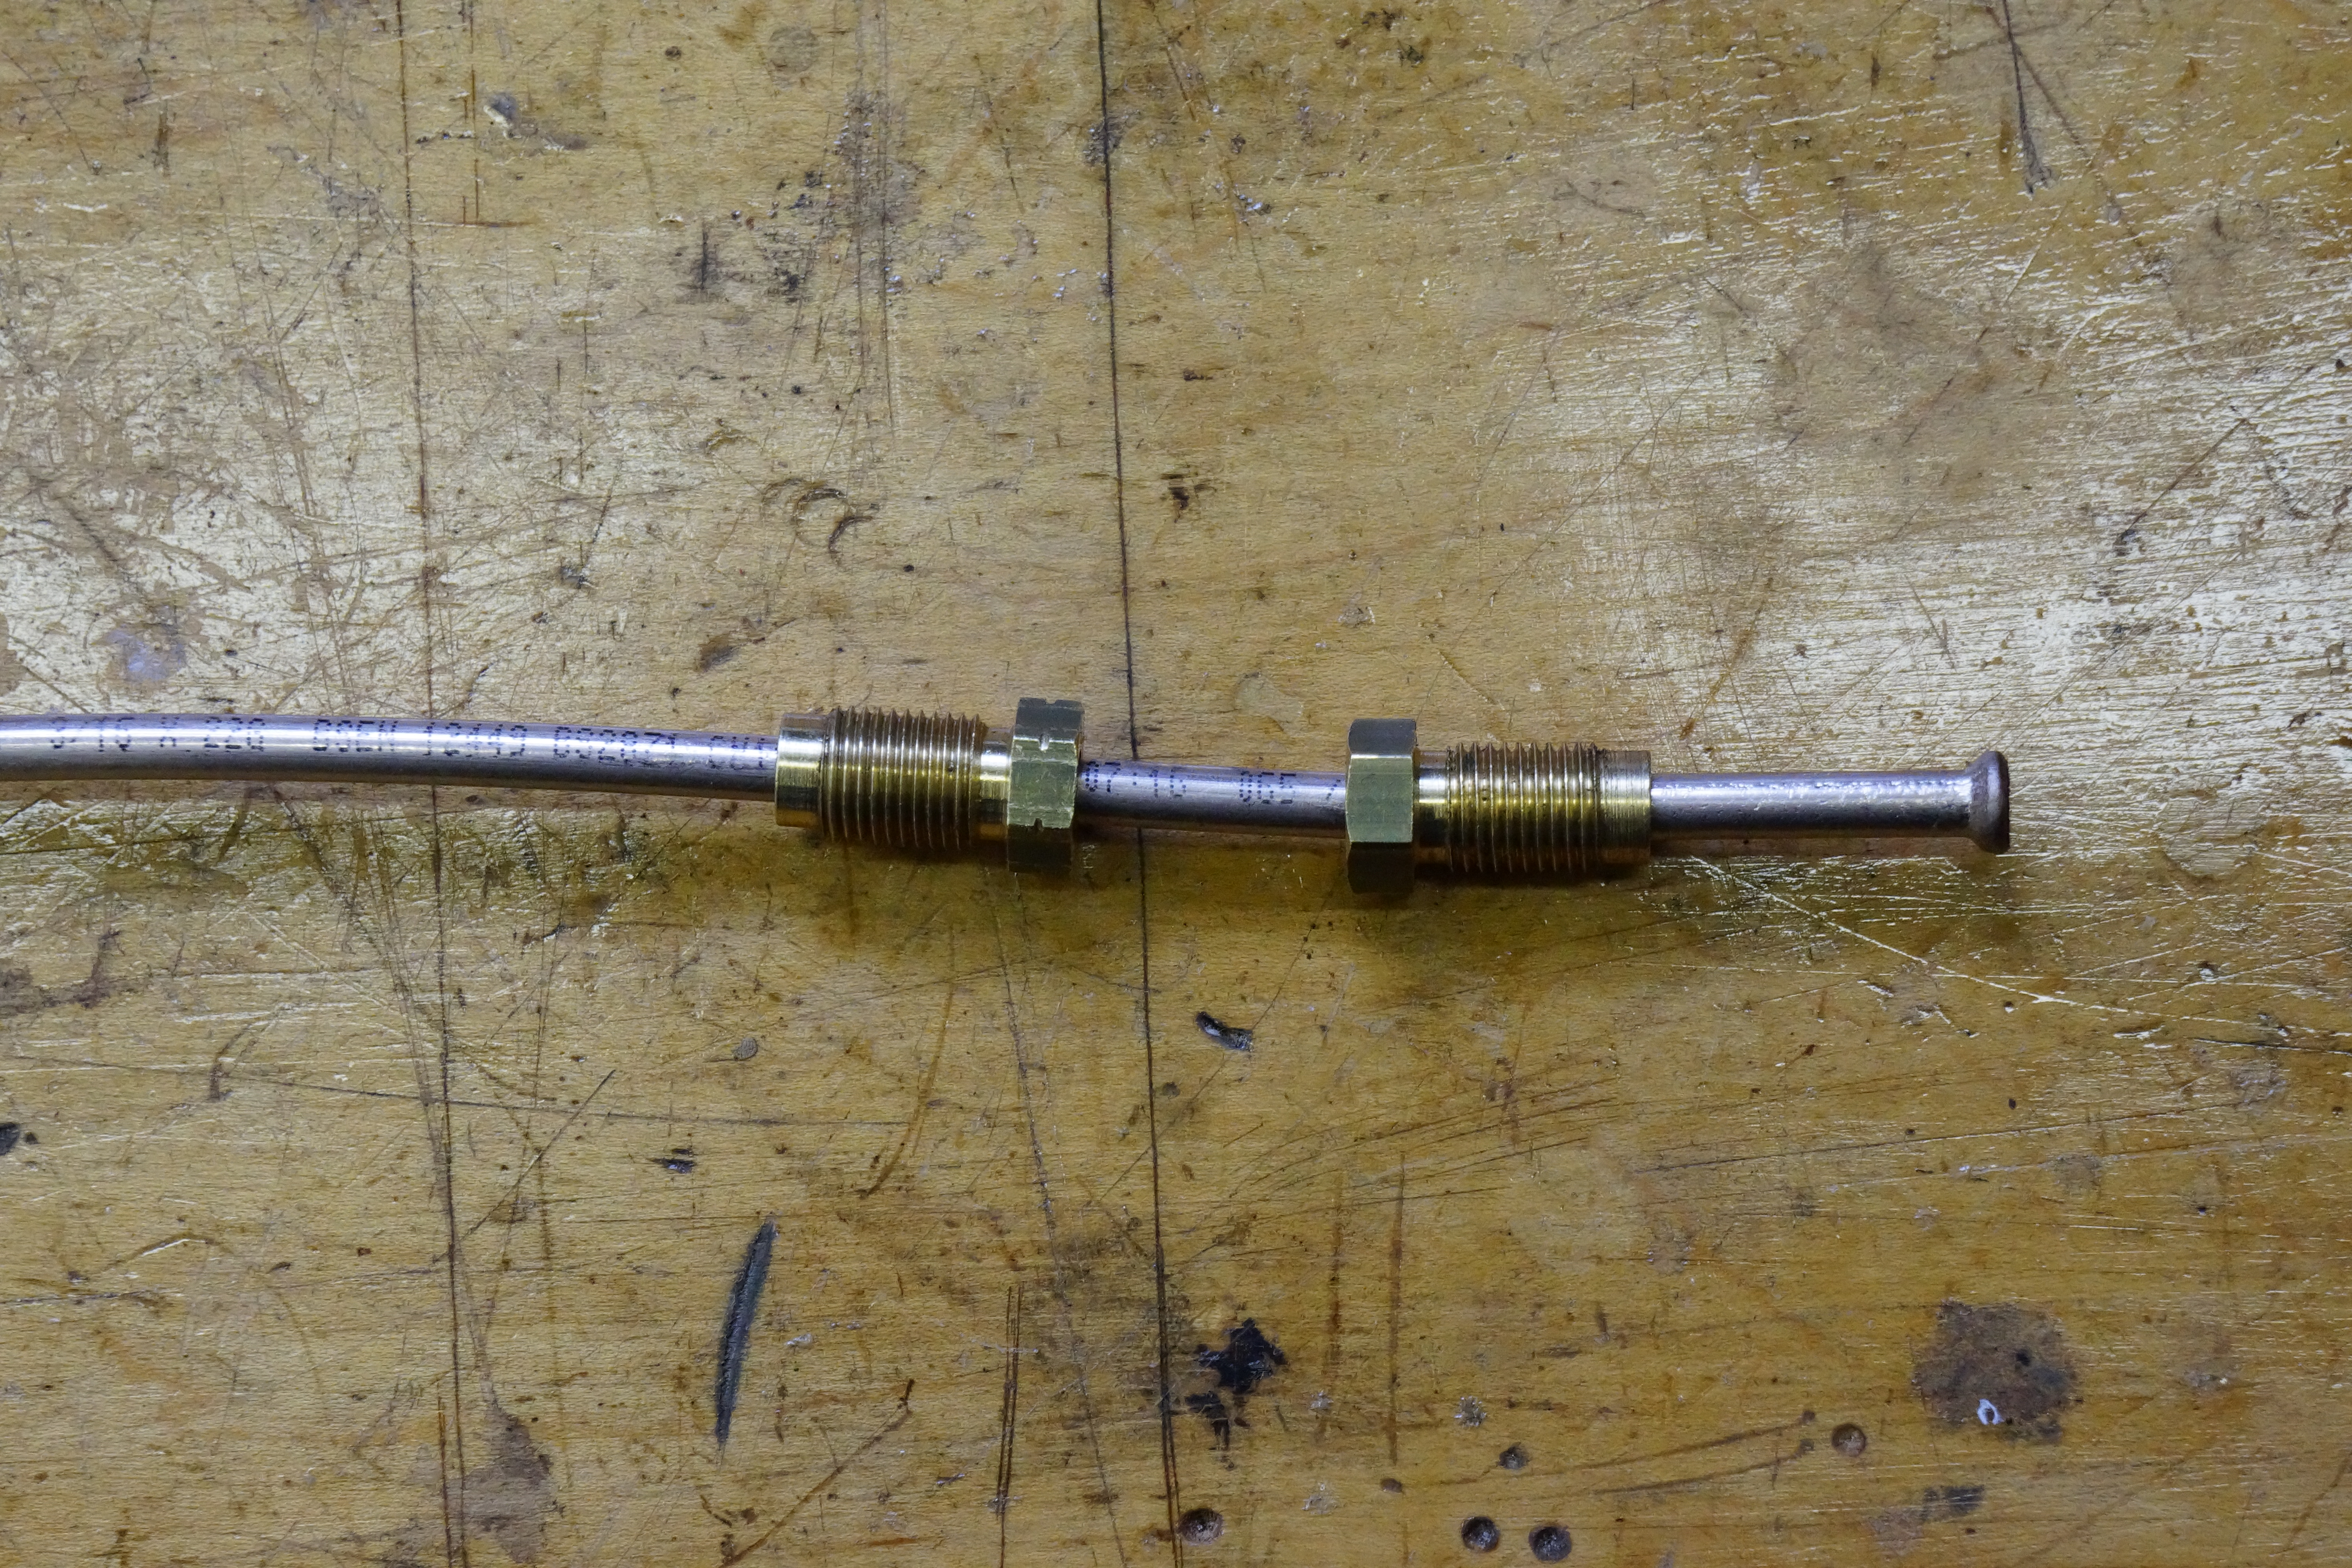
With the exception of the ¼” hard line from the brake fluid reservoir to the master cylinder, all the other hard lines on the car are 3/16”. That’s the easy part. The fittings, on the other hand, are a mixed bag. The car’s four-wheel ATE calipers use metric M10x1 threads, while most of the remaining connections, such as at both front and rear T-fittings, use UNF 3/8”-24 threads. Further, the M10 end requires an ISO bubble flare, and the 3/8” end takes a double 45° flare. Please don’t ask me why – I’ll just point to the car and say “that’s how the Italians did it!”
The Eastwood tool, which I used for the very first time this week, is a bit intimidating at first. The instructions in the box are ok, but I thought it would be wise to cut a few short pieces of pipe and make some test flares (I purchased about 7 feet more brake line than needed, because sooner or later I’ll make a mistake and need to redo a line).
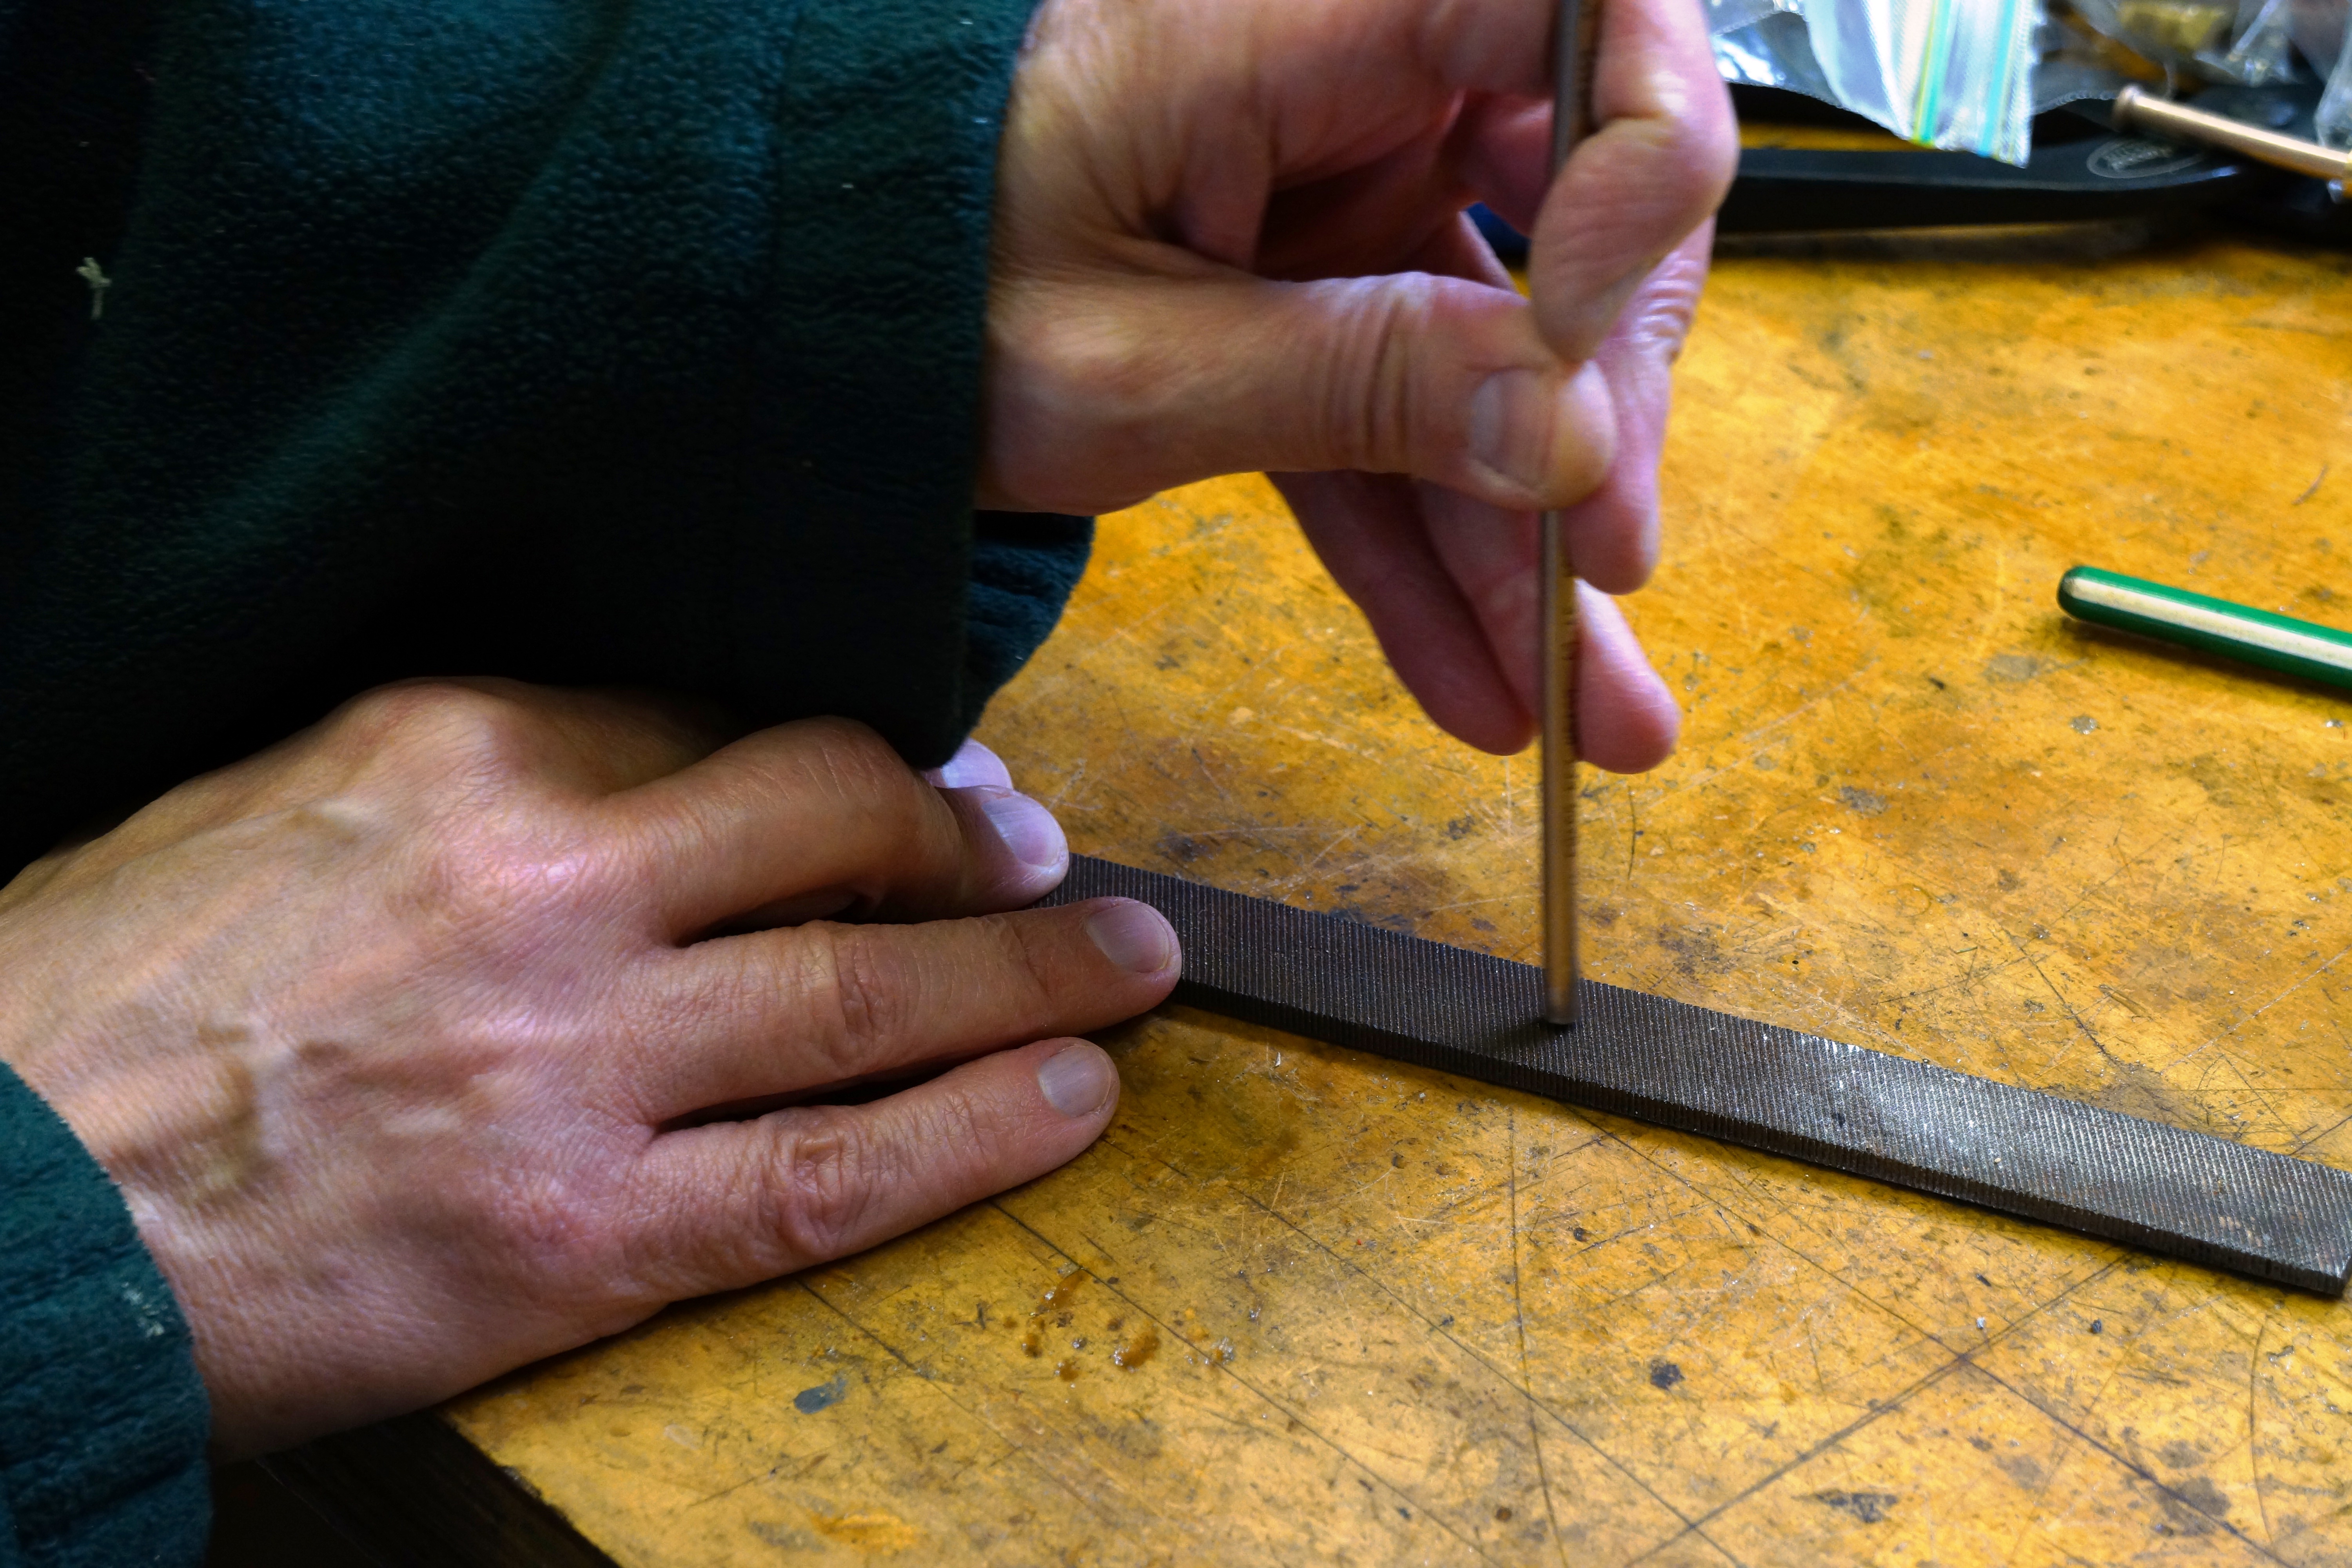
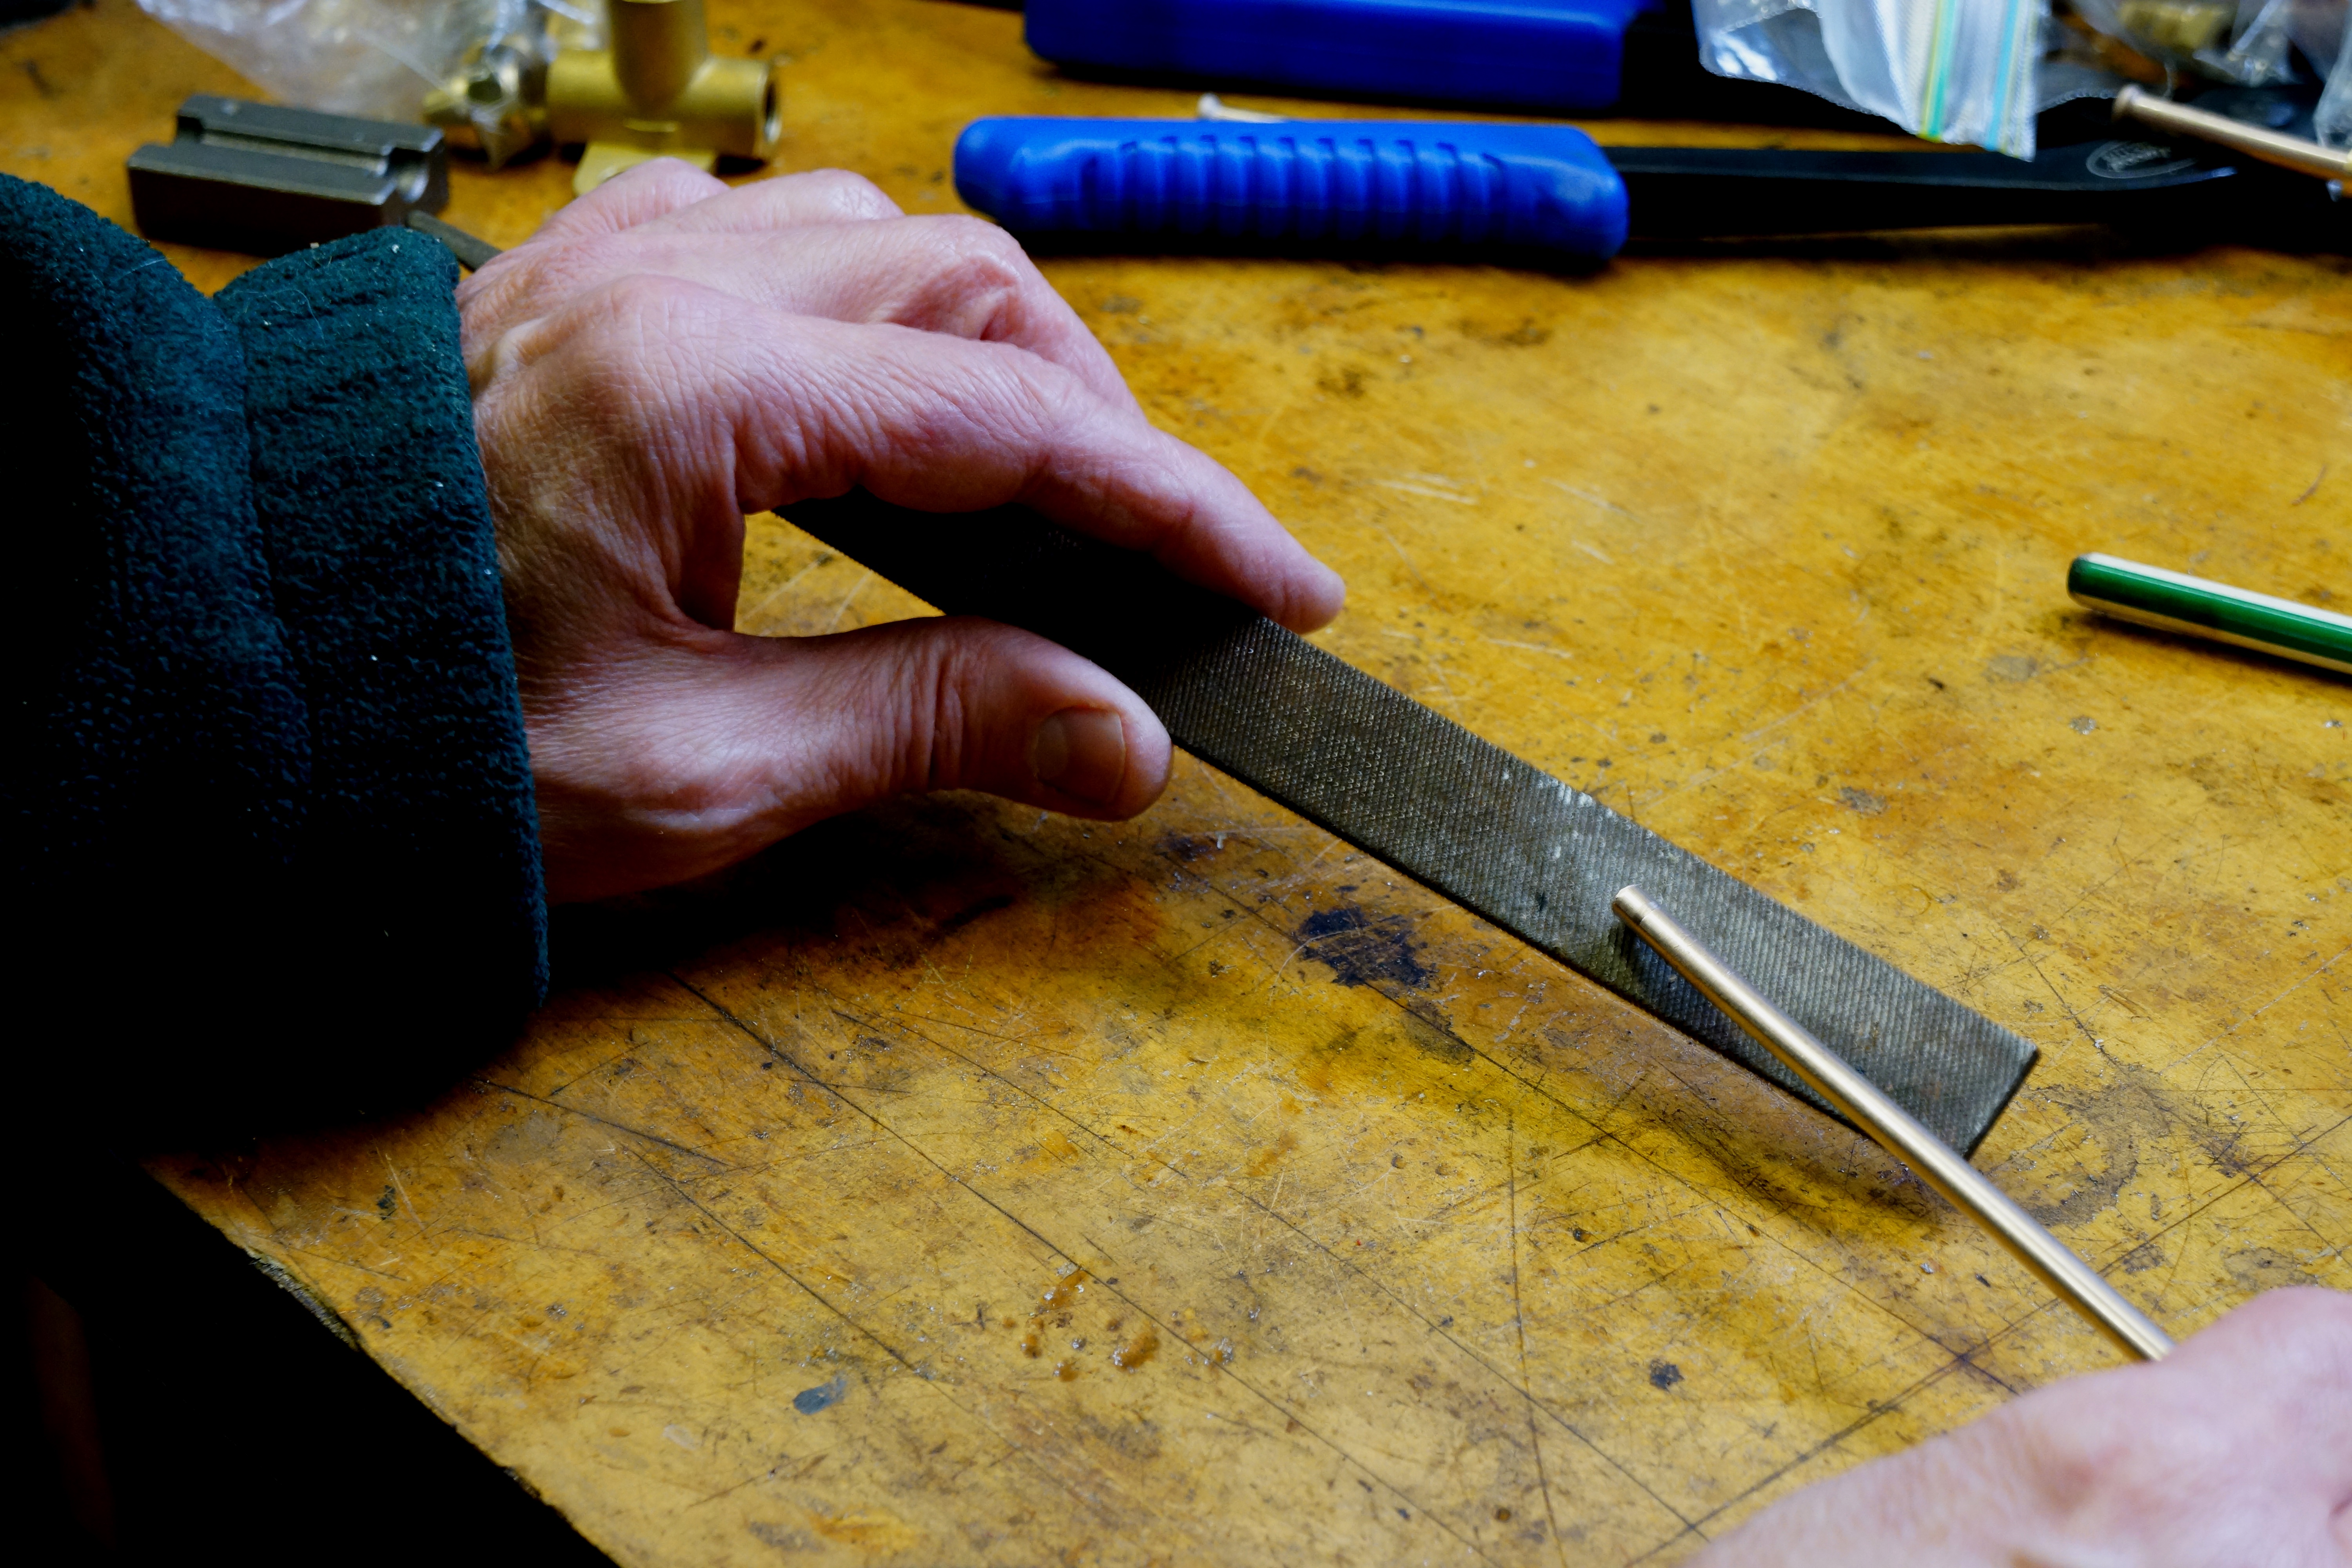
The Eastwood instruction book states that before you make a flare, you should do 3 things with the cut tube: run a file on the inside to remove burrs; run a file on the outside for the same reason; and slightly chamfer the edges. I dutifully followed instructions.

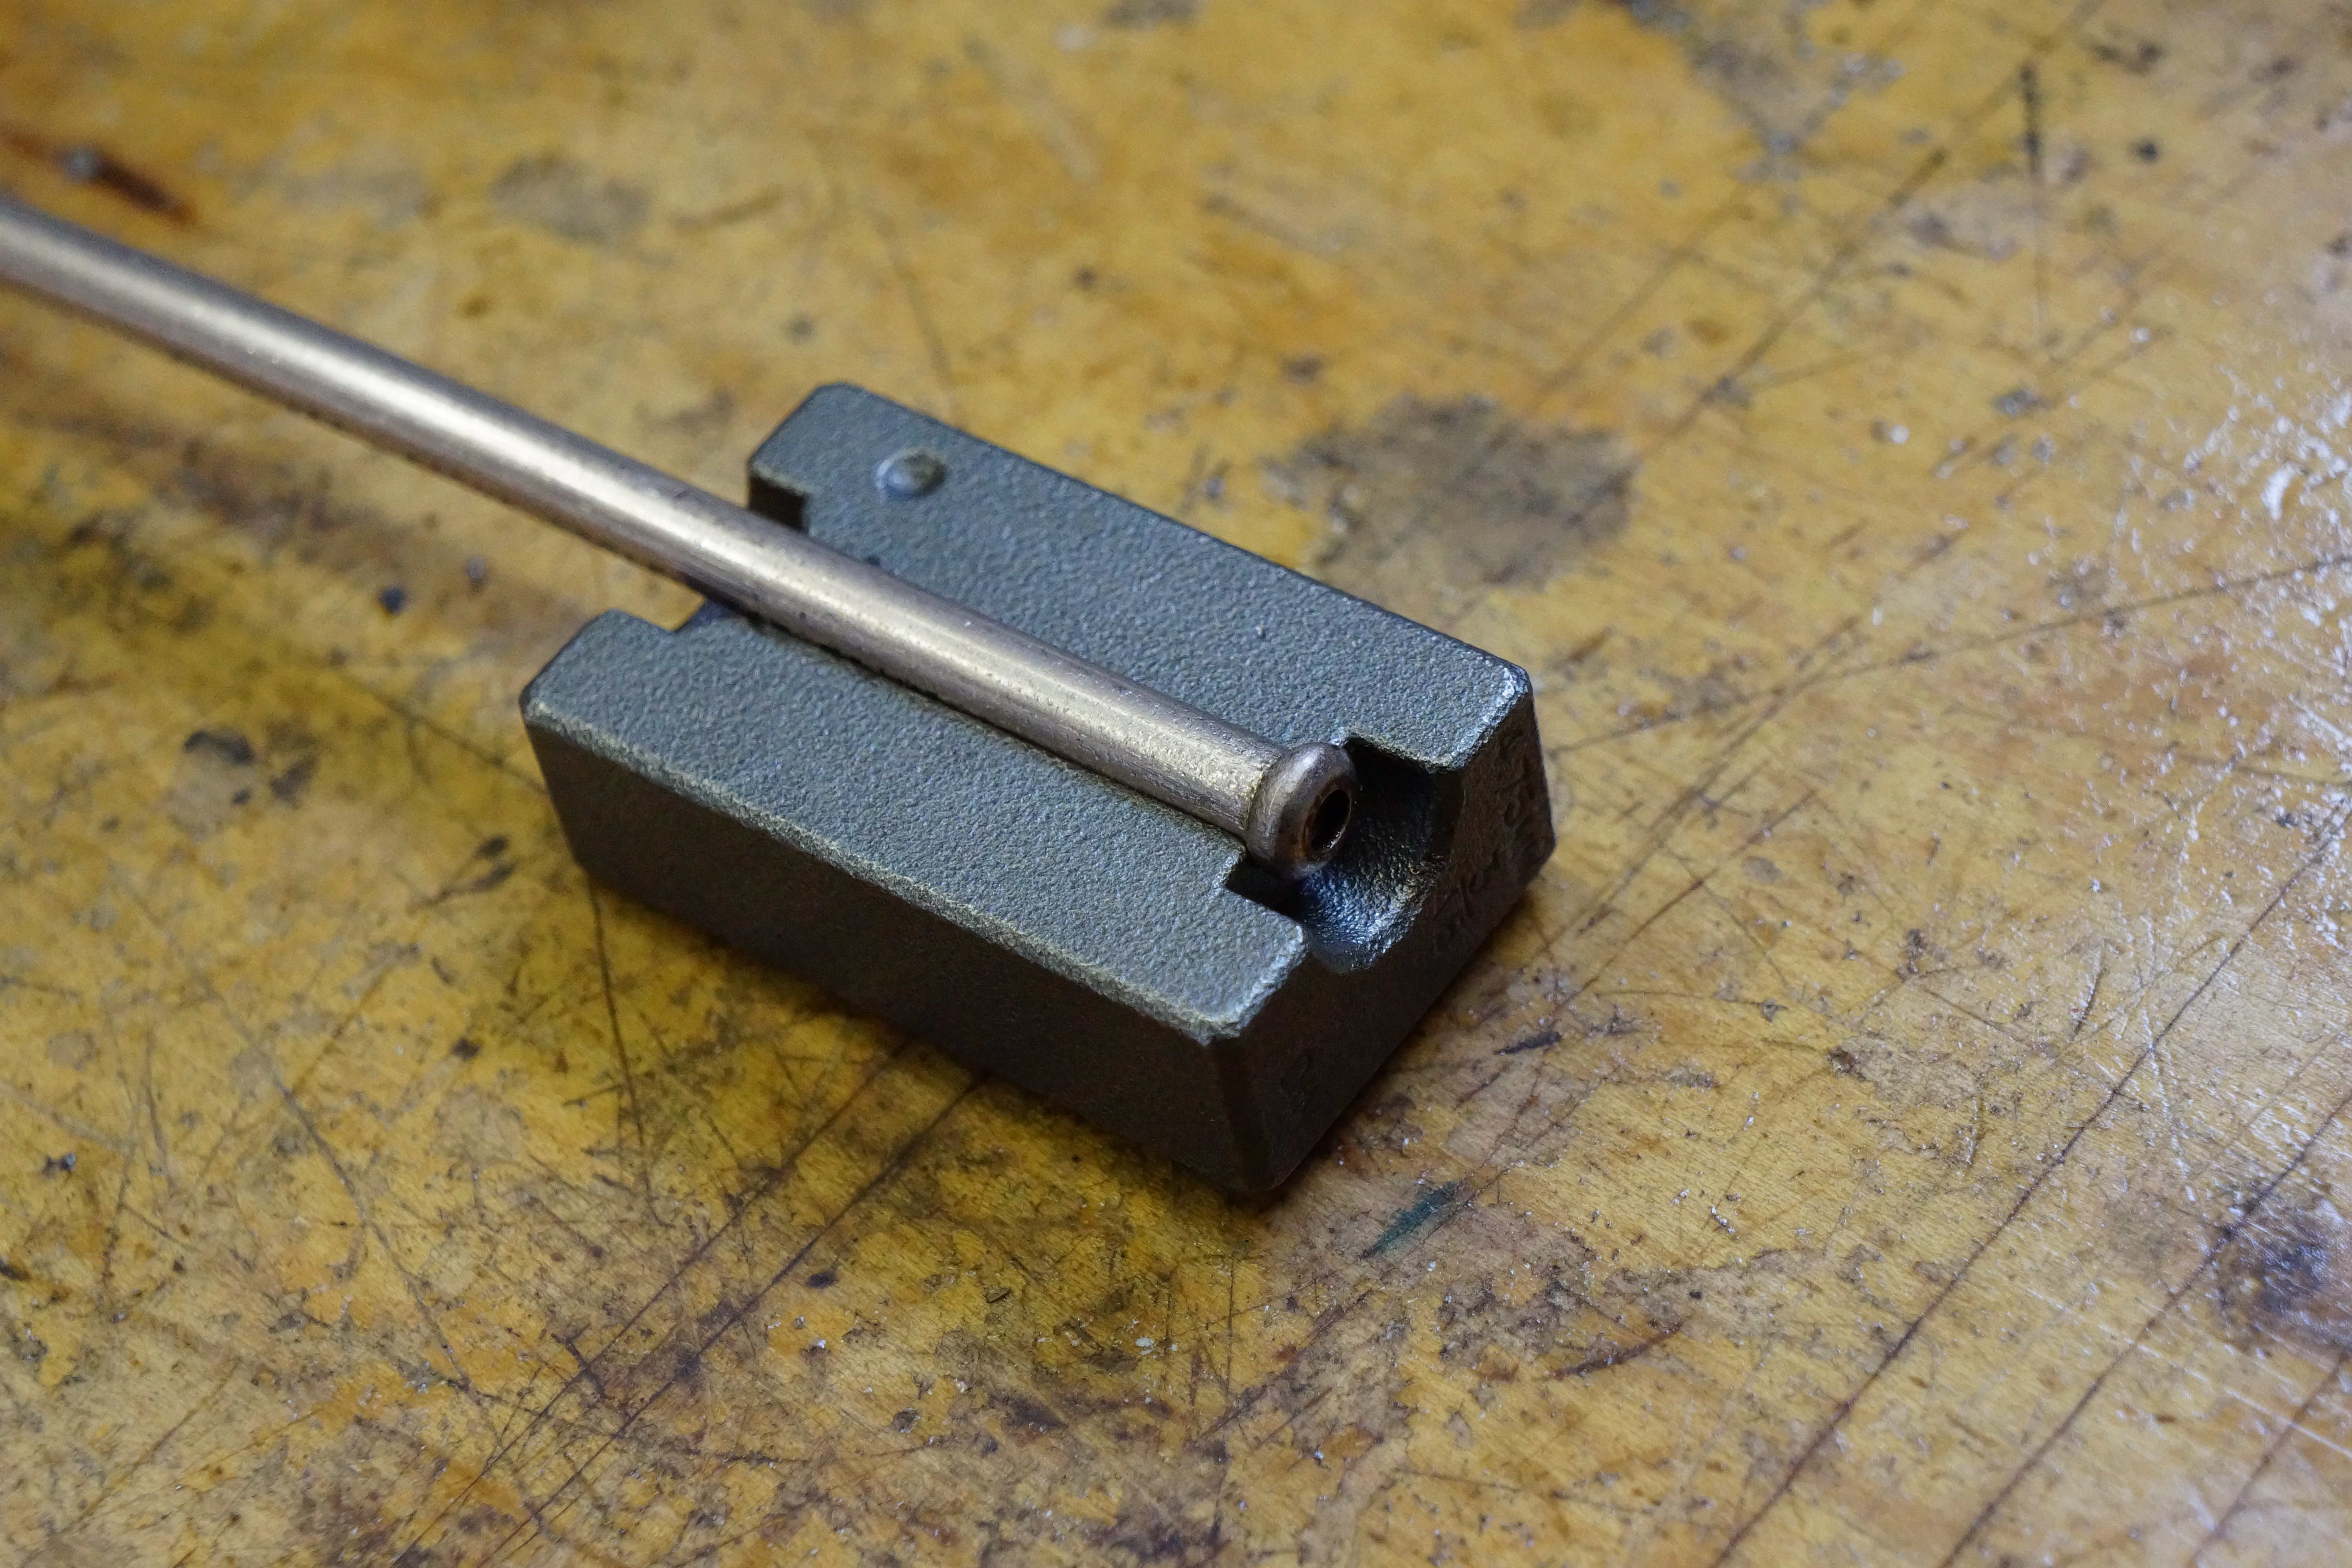
The tool itself is designed to be securely clamped into a bench vise. The two most important pieces which require your utmost intention are the tube-holding dies in 4 different sizes, and a rotatable disc with the various flare-forming dies. This is when I discovered that the 3/16” tube die is double-ended: it says 45° on one side, and DIN on the other. The instruction book didn’t say too much about this.
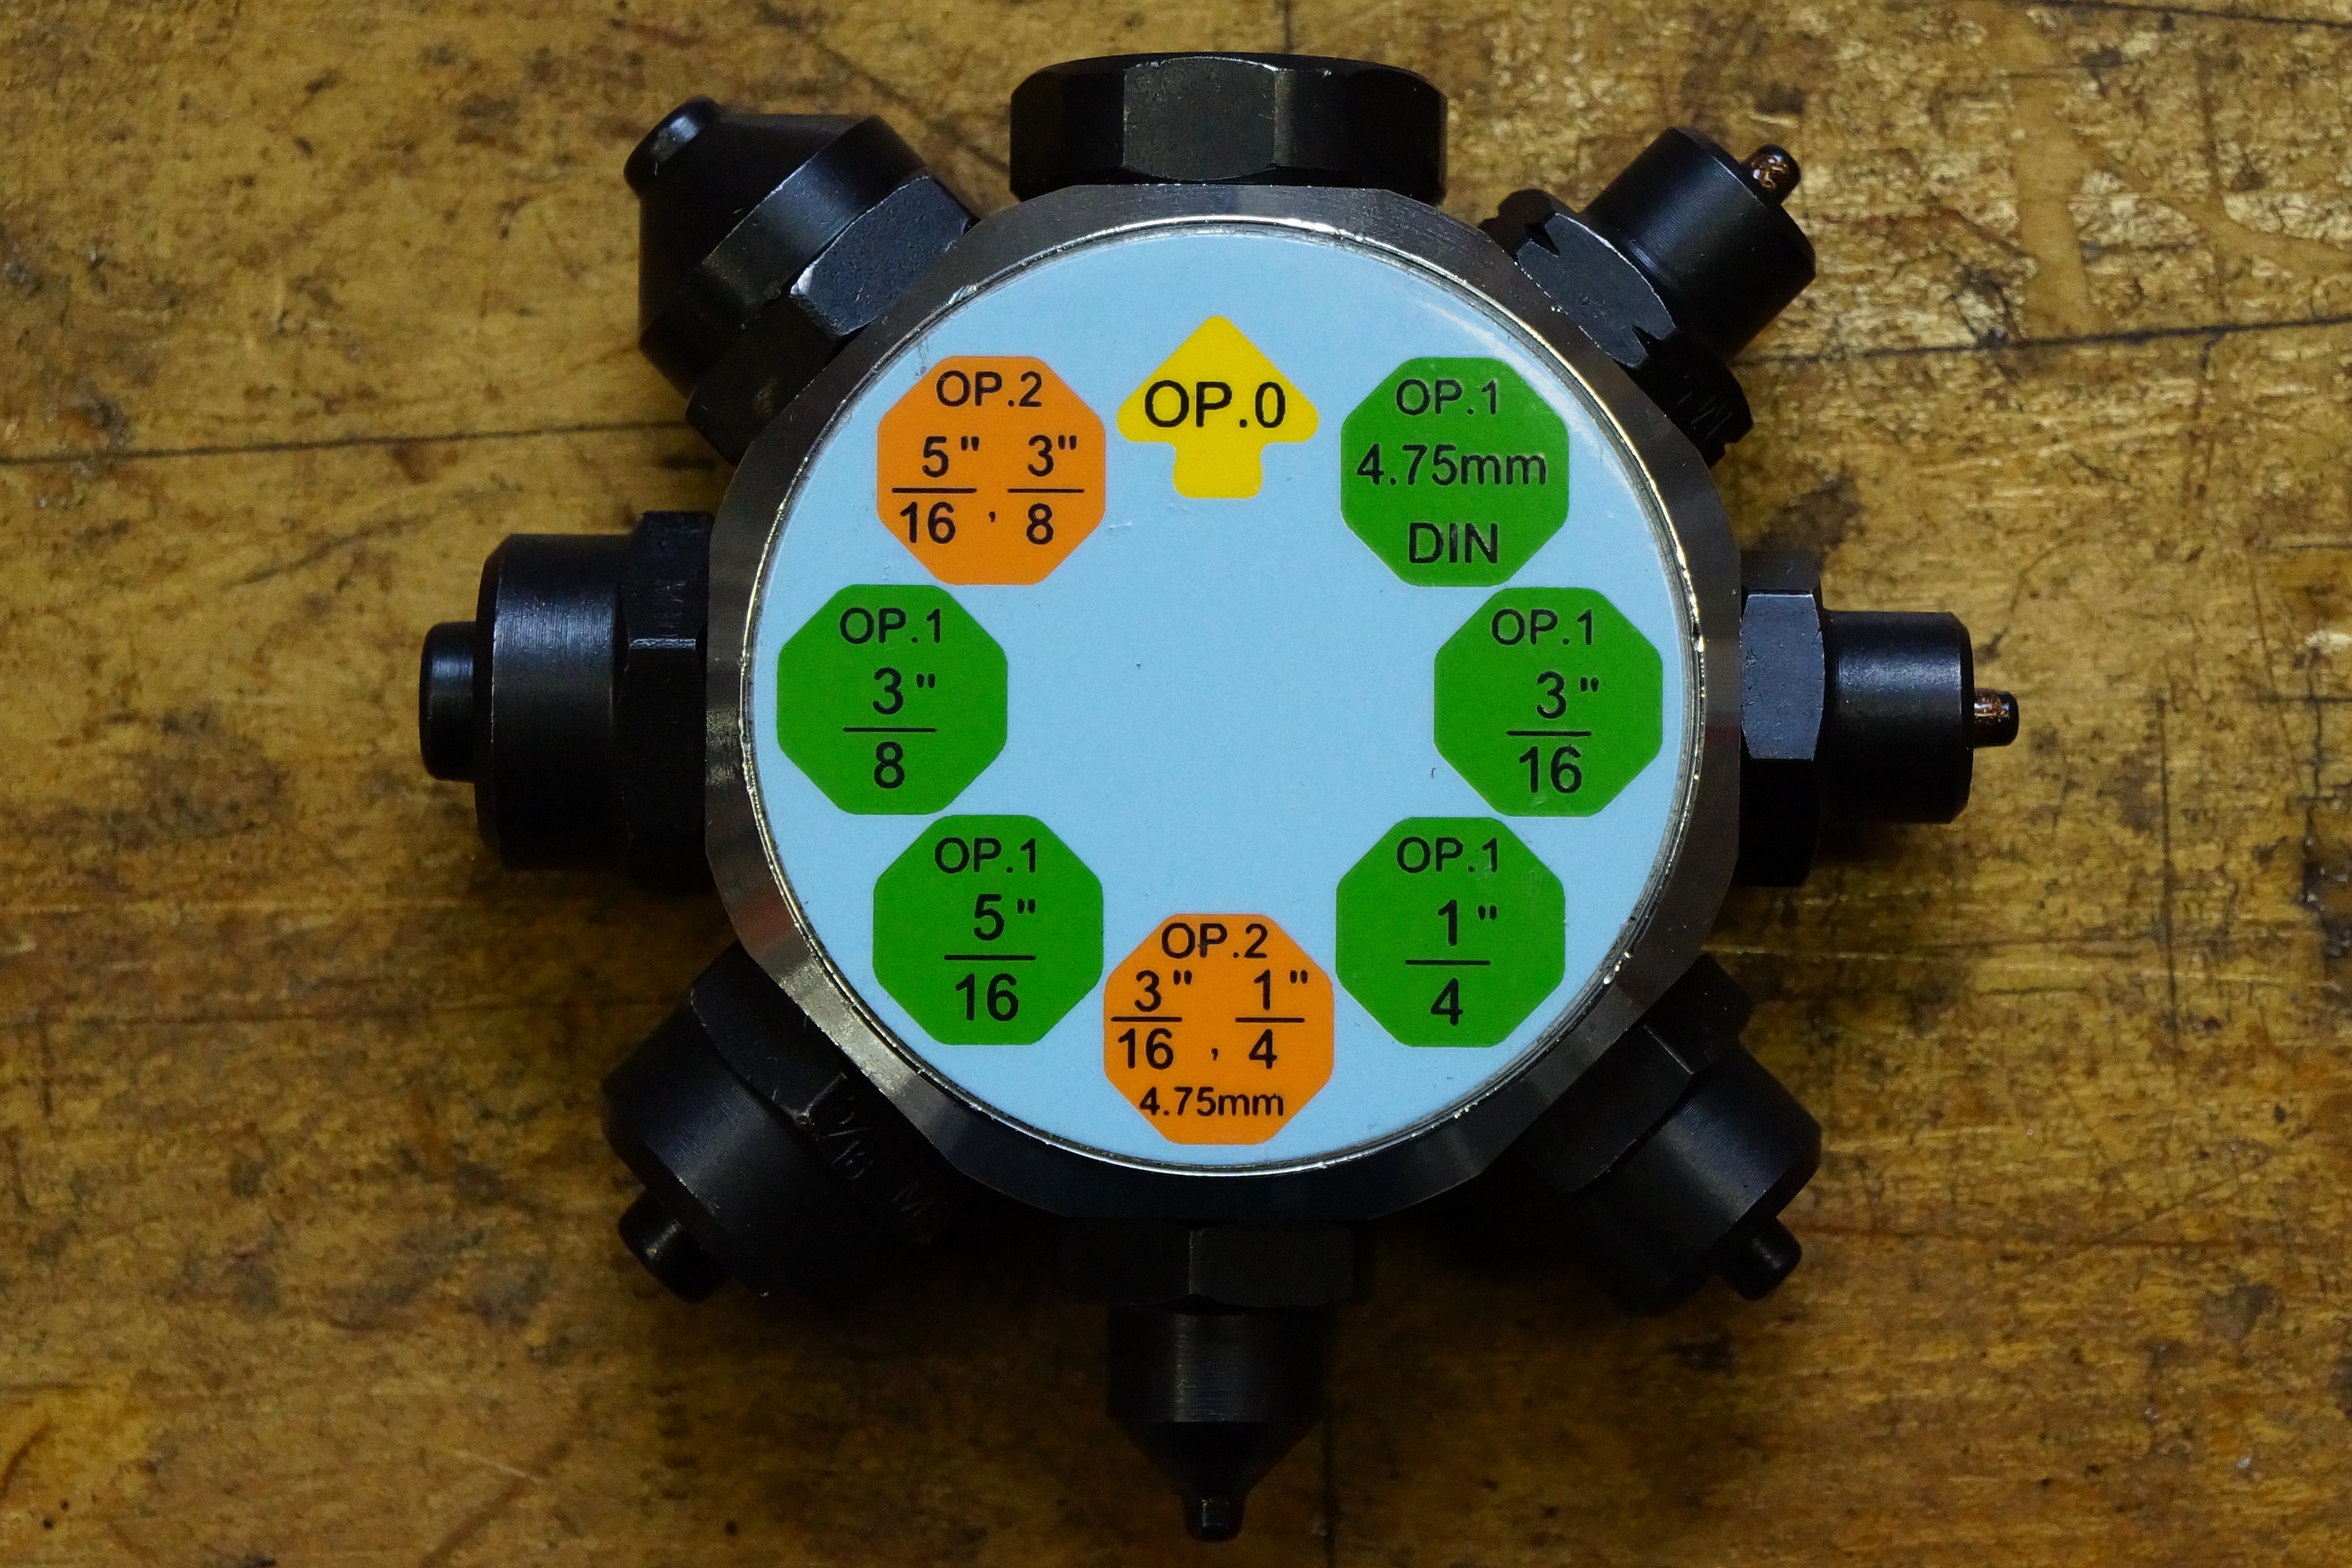


I grabbed the 3/16” tube-holding die and placed it into the tool, with the 45° double-flare at the business end. The tube itself was inserted between the two halves of the die, and with the disc’s “OP. 0” (Operation Zero) facing the tube, I pulled the handle. This step simply squares up the end of the tube with the end of the die. Once done, I made sure the clamp was tight.


Rotating the disc to “OP 1, 3/16”, I again pulled the handle. As a final step, the forming die disc was rotated to “OP 2, 3/16”, the handle was pulled, and I removed the tubing to examine my work. It looked good! I had a nice, neat 45° double flare.


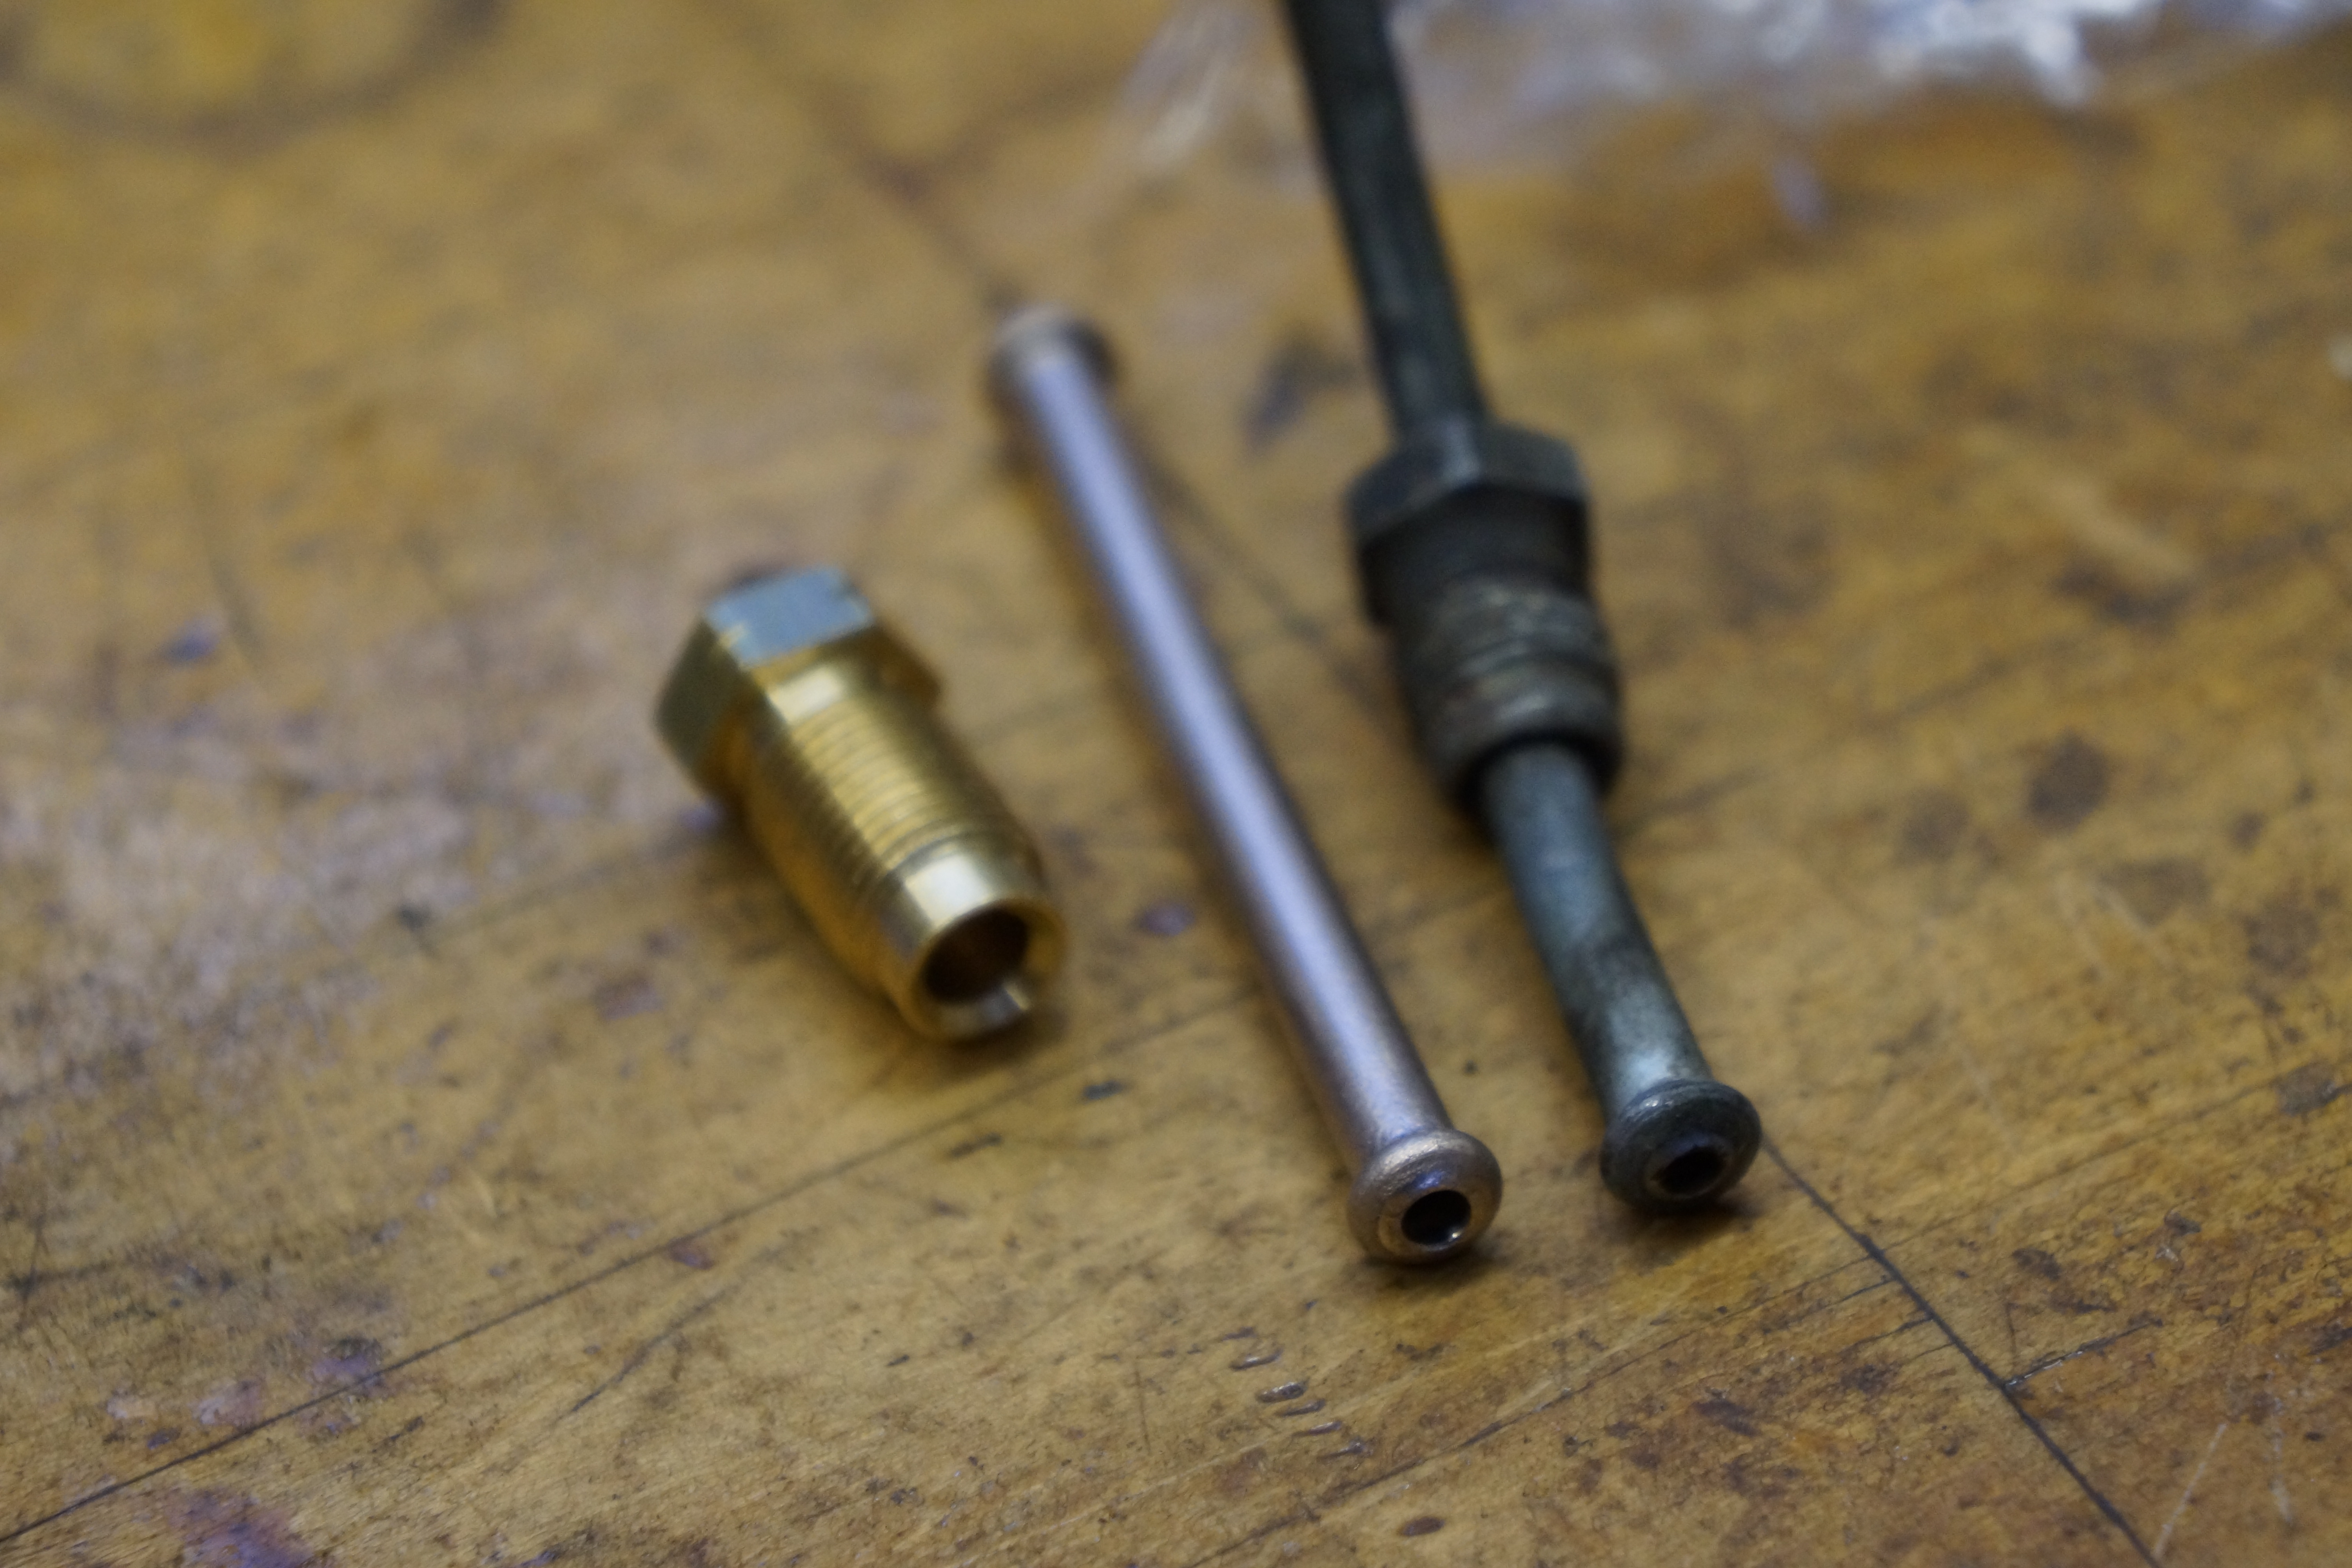
Before you flare the other end of the tube, you MUST slide on the two flare fittings; once both ends are flared, you’ll never get them on. In my case, not only did they need to face the correct way, they needed to be the correct threads! With the 45° double flare done, the 3/8” fitting went on first, and then the M10 fitting. It is highly recommended to delay the celebratory glass of vino until AFTER these steps are completed.
It was a good thing that I had made some test pipes, which is when I discovered that the DIN end of the tubing die would make the needed ISO flare. I further discovered via experimentation that while the forming die does have an “OP 1” and “OP 2” for the DIN flare, I needed only “OP 1” to get a bubble flare that matched my old brake line.
I’ve made two lines so far, and am quite pleased with the progress. It’s a nice feeling to have rounded the curve and to have begun reassembly. With most collector car events cancelled for the spring, the pressure is off, but the progress continues.
All photographs copyright © 2020 Richard A. Reina. Photos may not be copied or reproduced without express written permission.

Patience required! Different flares and different threads on the same line. Not a job you want to do in a hurry. You must be chanting some version of the carpenter’s motto: “Measure twice, cut once.”
LikeLike
Yes indeed Bob! As I half-jokingly stated, save the celebratory glass for wine for the END of the job!
Best, Richard
LikeLike
[…] the ongoing lockdown has distorted my sense of time. Brake System Update Part 5 was posted on April 3, and I would have guessed that it was more recent than that. Progress has […]
LikeLike