Winter Storage, and the Start of the Miata’s Next To-Do List

As happens every winter, the collector cars (loosely defined as the cars that don’t get driven in snow) are put away for the winter. The ritual is one that has evolved over the years and is now consistent: fill the tanks with fresh fuel, add Sta-Bil, pump up the tires at least 10 p.s.i. over normal to avoid flat-spotting, put a trickle charger on the batteries, and cover the cars with a dedicated car cover. It’s easy, takes little time, and doesn’t cost very much.

Before going further, let’s take a moment to say a few words about the brands I use, and have continued to use. (I’m a firm believer in finding good products and sticking with them, even if they cost a trifle more. As the cliché goes, ‘you get what you pay for’.)

The Sta-Bil brand of fuel stabilizer, made by Gold Eagle, has been in use in my garage since I’ve owned powered lawn and garden equipment. Many moons ago, I heard stories about lawn mowers and snow throwers, two examples of gas-engine devices which see seasonal use, failing to run because the old gummed-up gas gummed up the works. As soon as I got my first lawn mower, Sta-Bil went into its tank.  The gumming has never happened to me, and I’ve stuck with the brand ever since.

Sta-Bil STORAGE is your basic fuel additive if fuel is going to sit

Yes, I had my doubts about their ethanol treatment after it seemingly made the Alfa run worse (a conclusion which I now doubt since discovering my carbs are running rich and fouling the plugs a bit), but your basic ‘storage’ version of Sta-Bil is the way to go for any fuel tank in which fuel may sit more than 6 weeks or so.

It’s a similar story with battery chargers. I still have my dad’s Sears charger, which looks like it was made in the 1960s. It works great to jump-start a dead battery, but it ain’t no trickle charger. Long-term battery storage requires both a slow charge (the “trickle”) and a volt-sensing cut-out that won’t overcharge the thing and boil it to death.

You know it’s an old charger when there’s a switch for “6V” and “12V”

The Deltran Battery Tender brand came onto the market several decades ago, and they found their niche for the car collectors whose vehicles are stored in the off-season. While many competing brands have since been introduced, I’ve stayed with what I know works. I think I’m up to 3 of these Battery Tenders in the garage.

Green is good! Battery Tender keeps battery charged without overcharging

Car covers are a relatively new accessory to my winter arsenal. Up until a few years ago, frankly, I didn’t believe in them. It was a combination of fear of paint damage from moisture trapped beneath the cover, and frustration with my inability to find a custom-fit cover for the BMW Isetta (my expectations were a bit high with that one).

Since working at CARiD, I’ve learned a lot about the usefulness of good quality car covers, and one thing I learned is that the Covercraft brand is my favorite. The fit is perfect, and the variety of material choices will satisfy any indoor or outdoor cover needs at any price point.

The indoor-rated Dustop from Covercraft fits the Alfa perfectly

The Alfa has a Covercraft Block-It Dustop (yes, they had the ’67 Alfa pattern in stock), and the Miata wears the Covercraft Evolution indoor-outdoor cover. In the garage, both covers do more than keep dust off the paint; they also protect the interiors from sunlight, and provide some protection from wayward nuts and bolts spinning out of control off my workbench. I would never again think of storing a car without a cover. Even in the nice weather, if it’s going to be more than a week or two before one of the cars gets driven again, the cover goes on.

The Covercraft Evolution cover on the Miata is rated for indoor and outdoor use

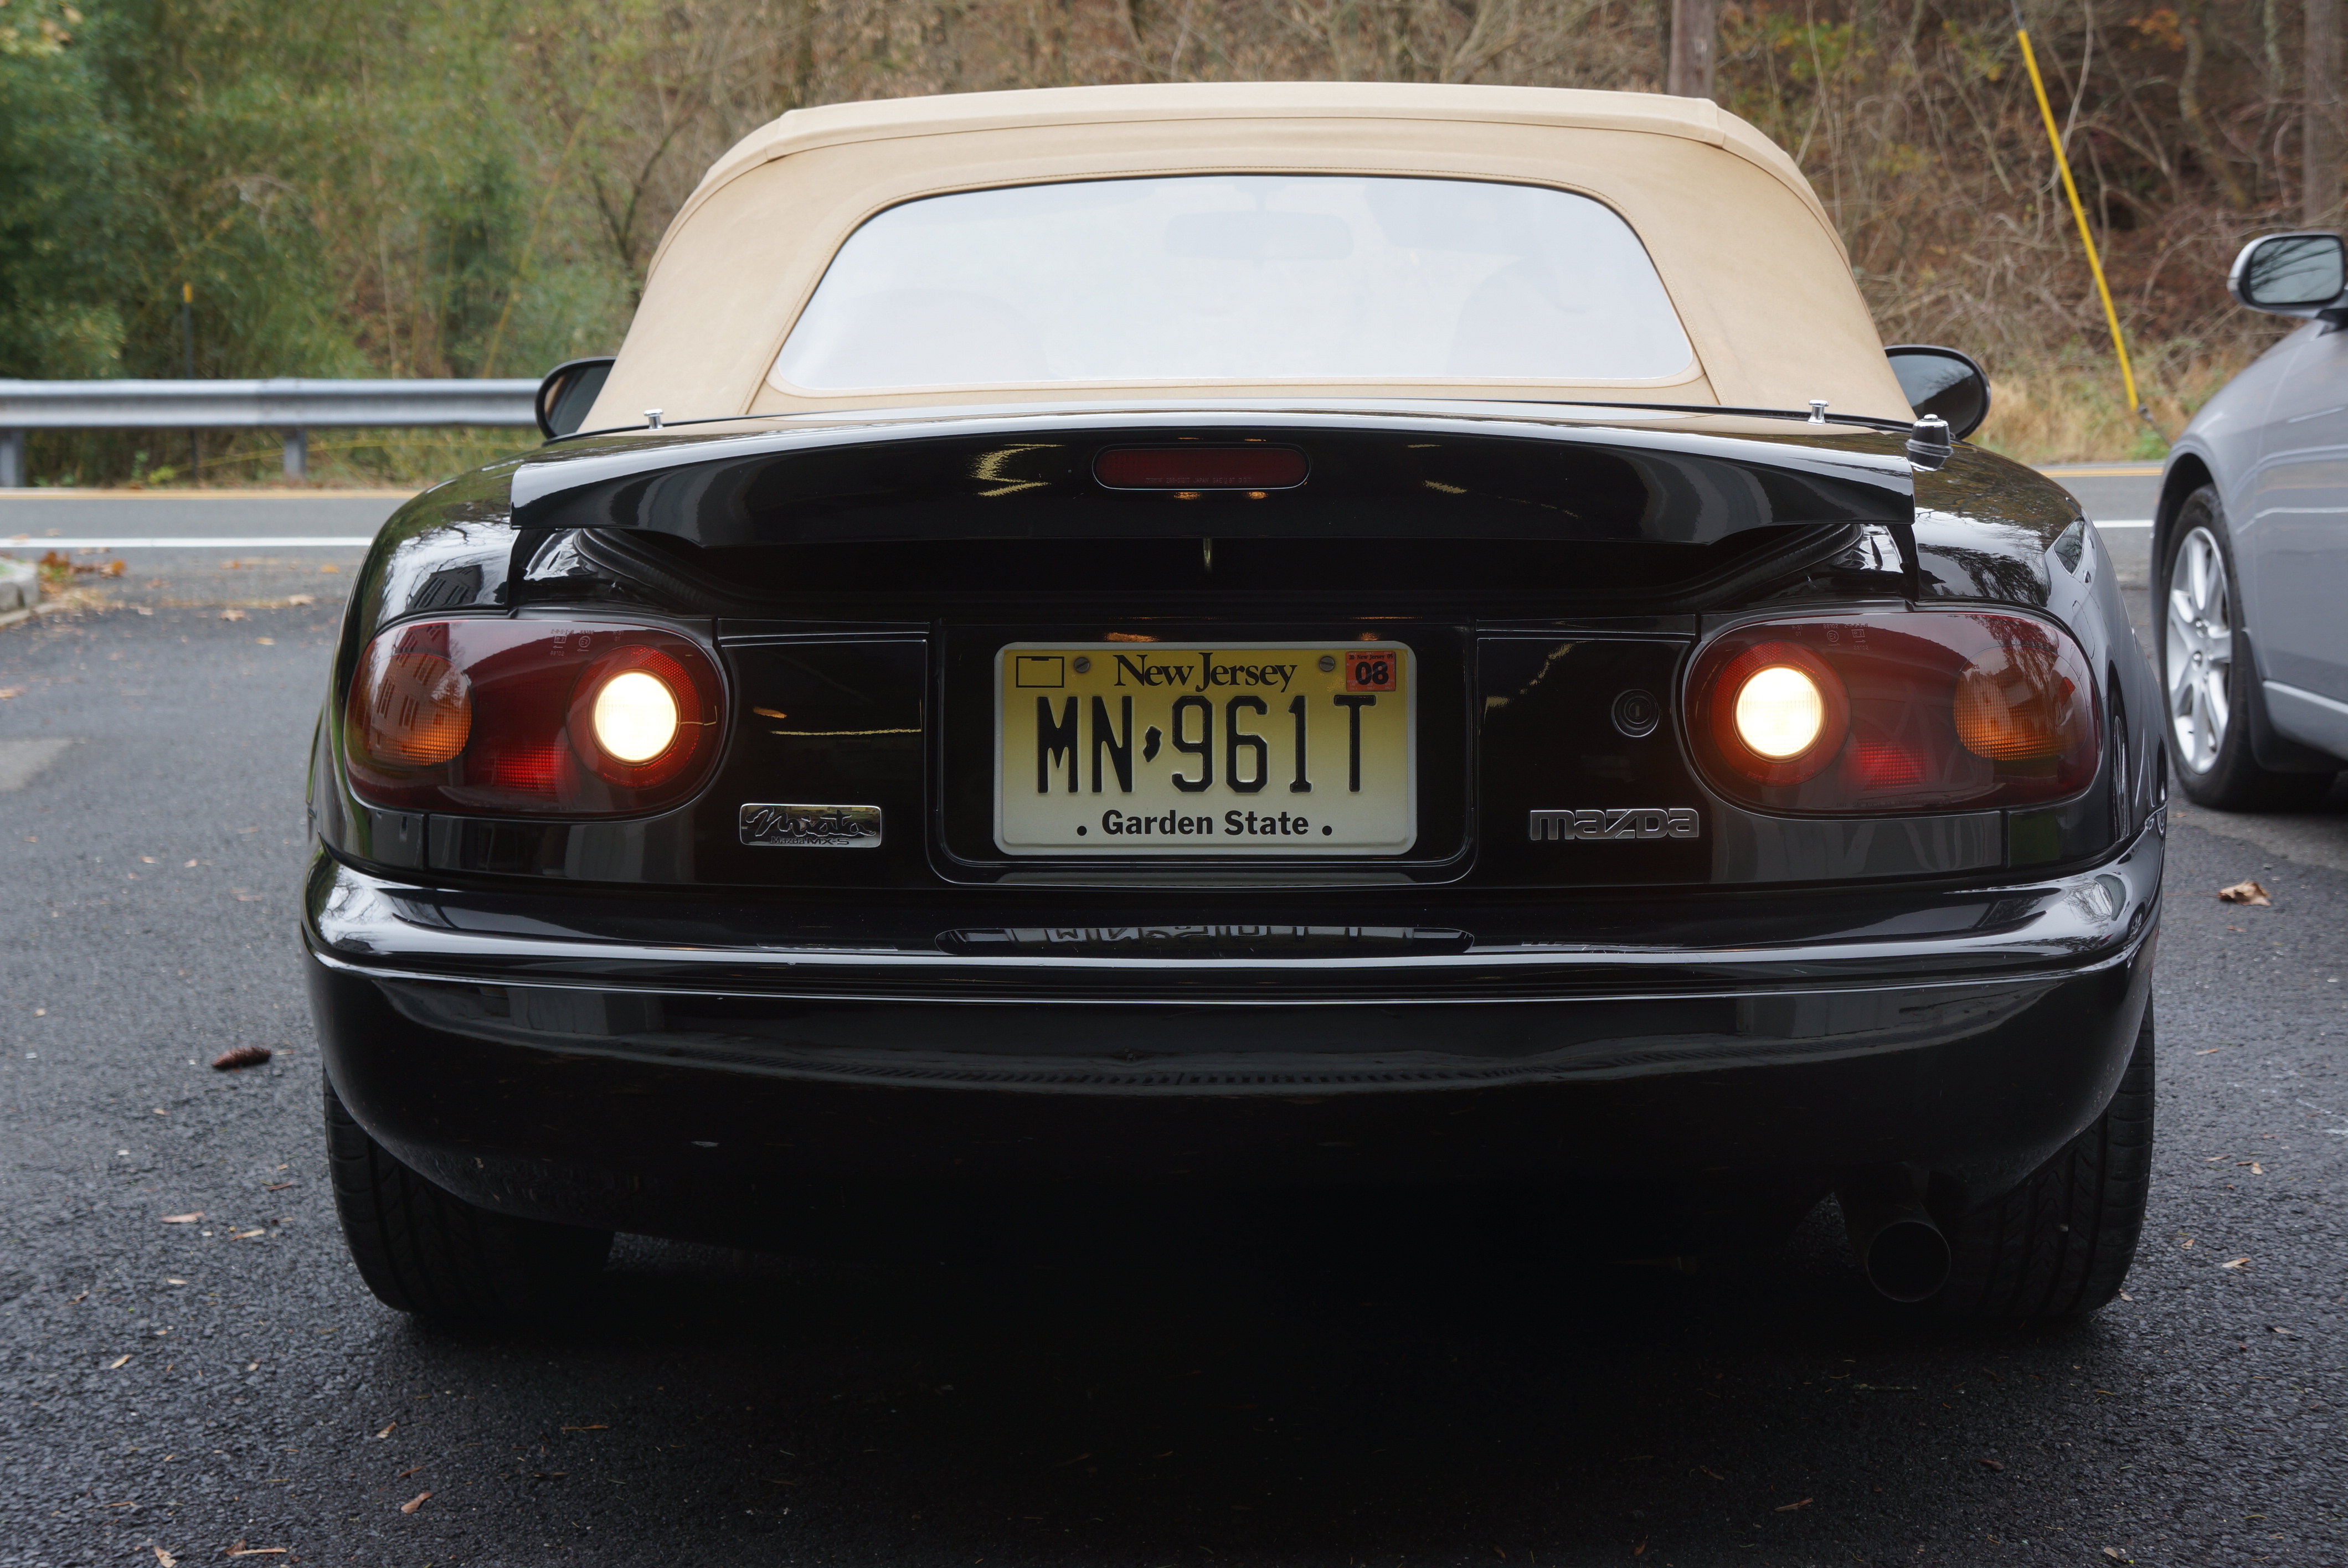
All this is a prelude to an announcement about my Mazda Miata: after giving some thought to selling it, I’ve now decided to keep the car. What’s more, next year, in 2018, this 1993 automobile will be 25 years old, making it eligible for AACA events. So I’m going to turn it into a show car.

The plan is to spend the winter tending to some mechanical maintenance, but also attending to some detail work in order to display the car at shows next year as a 25-year-old original unrestored car.

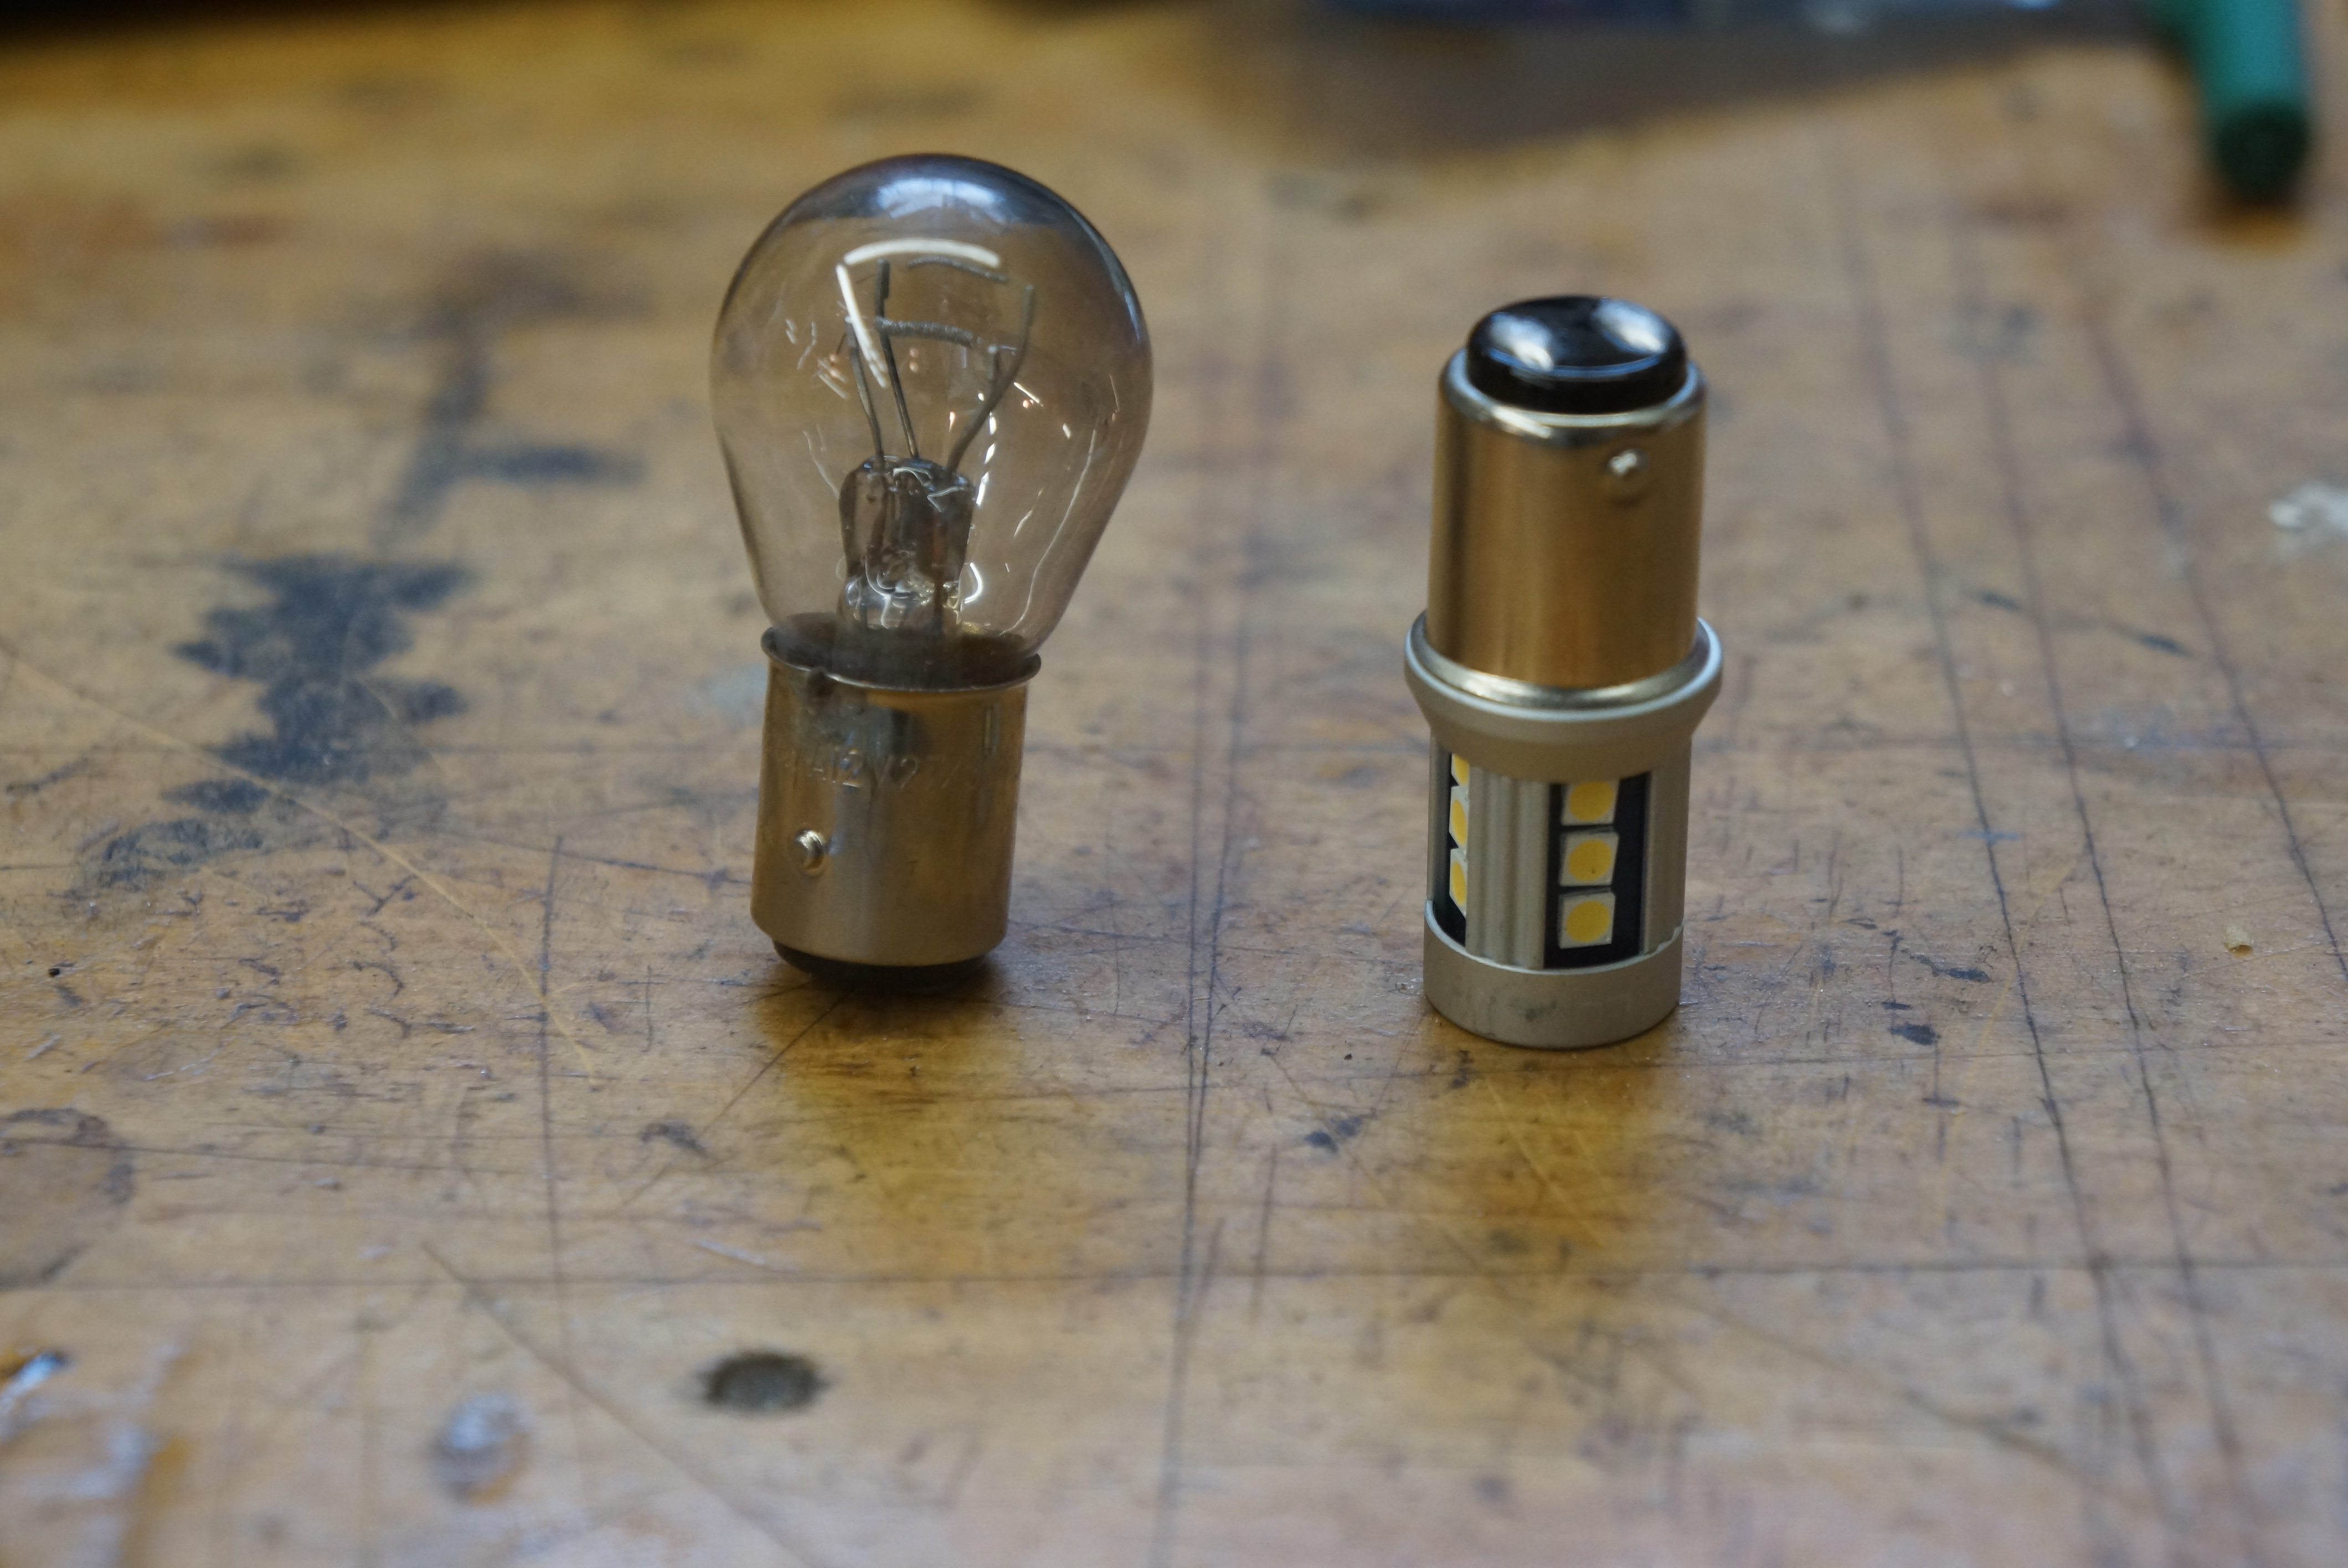
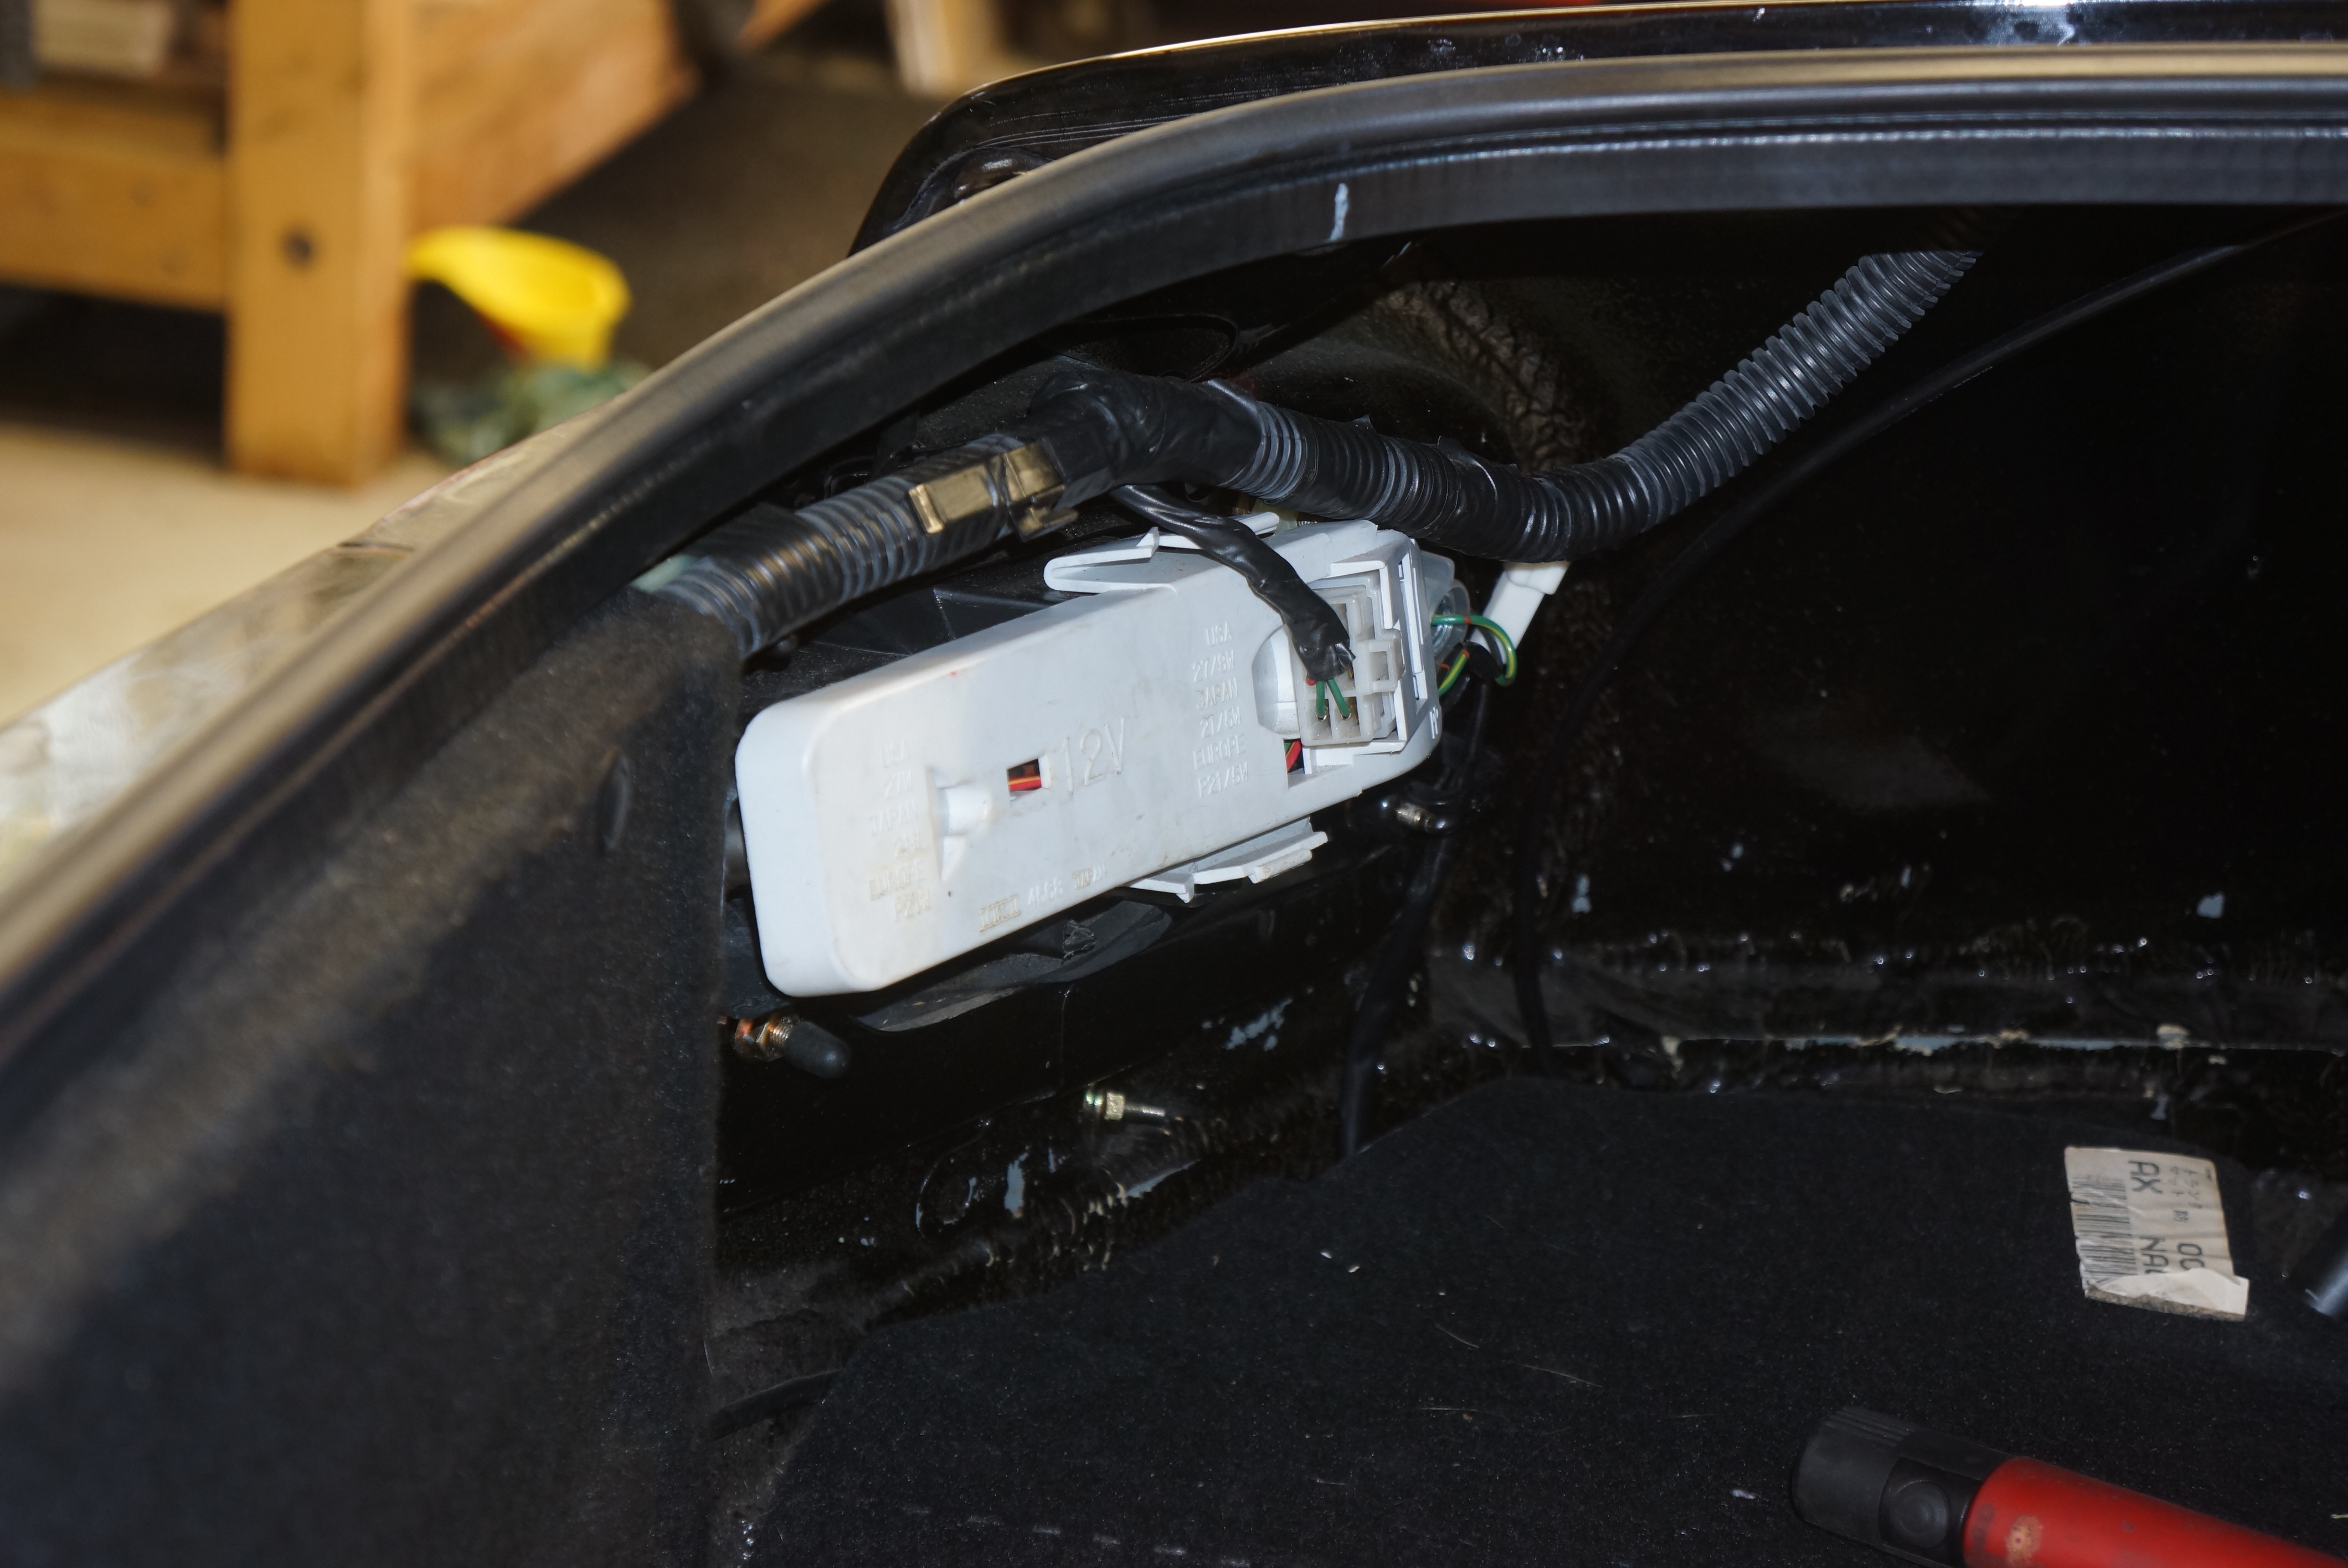
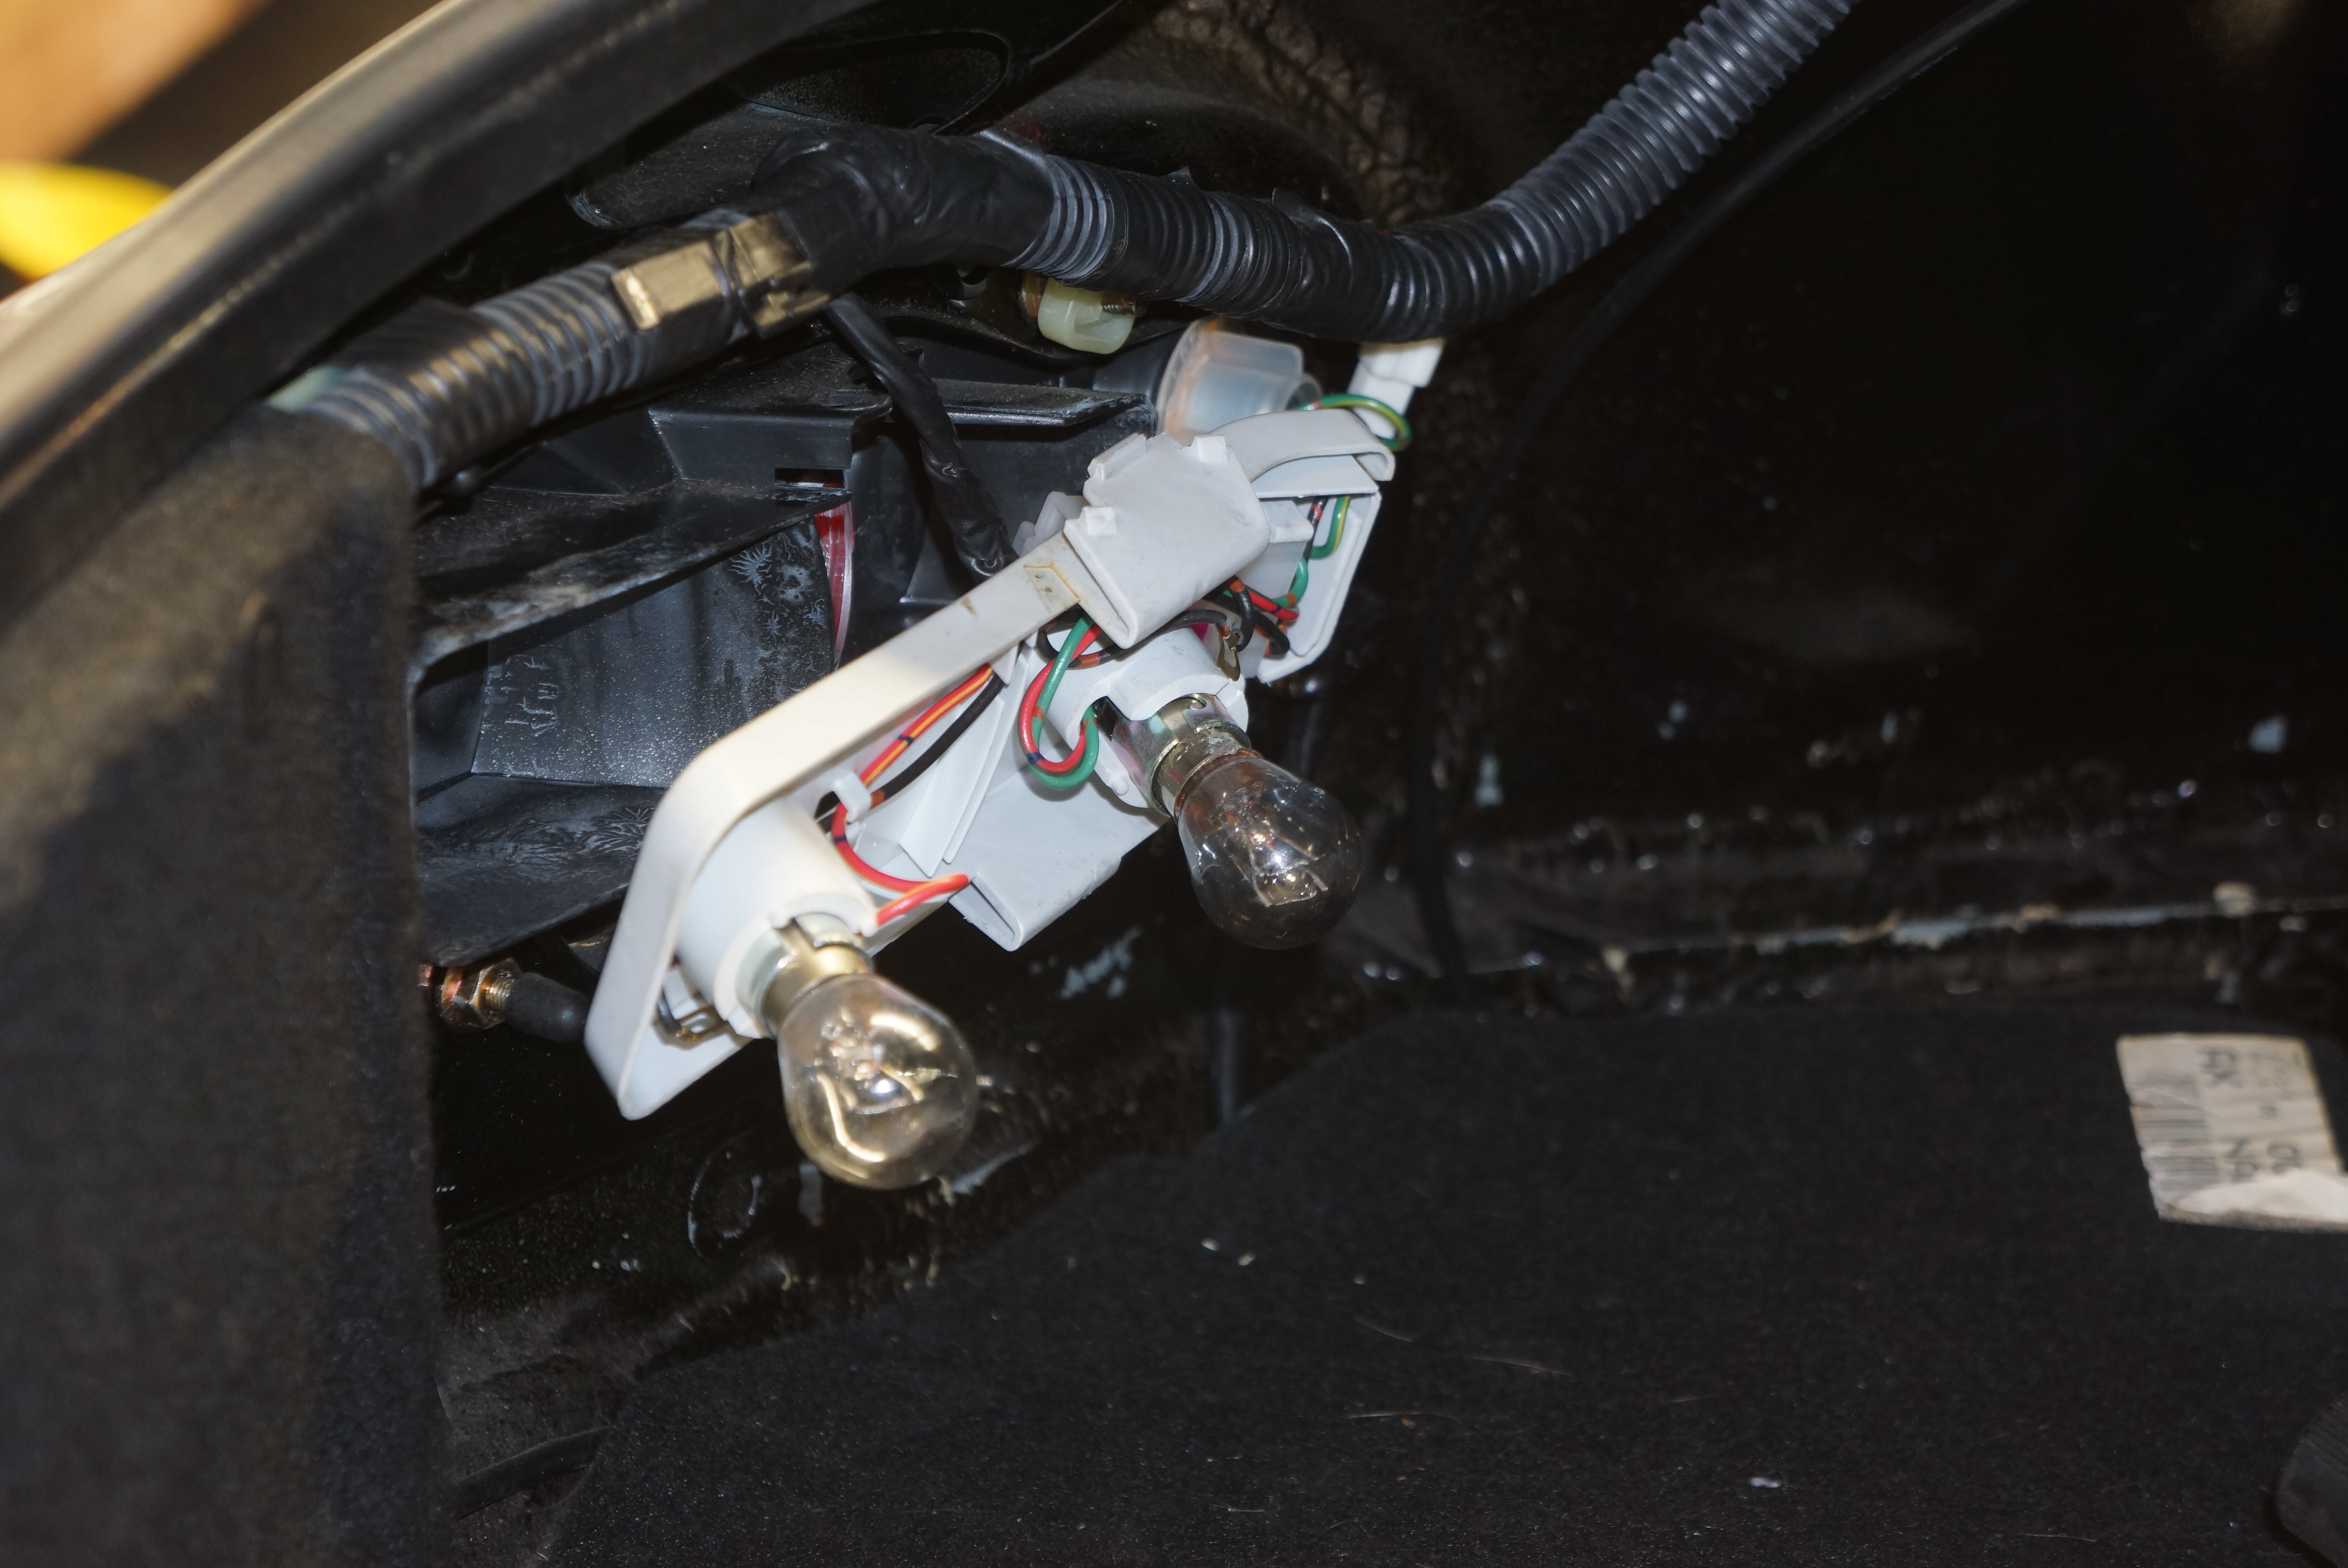
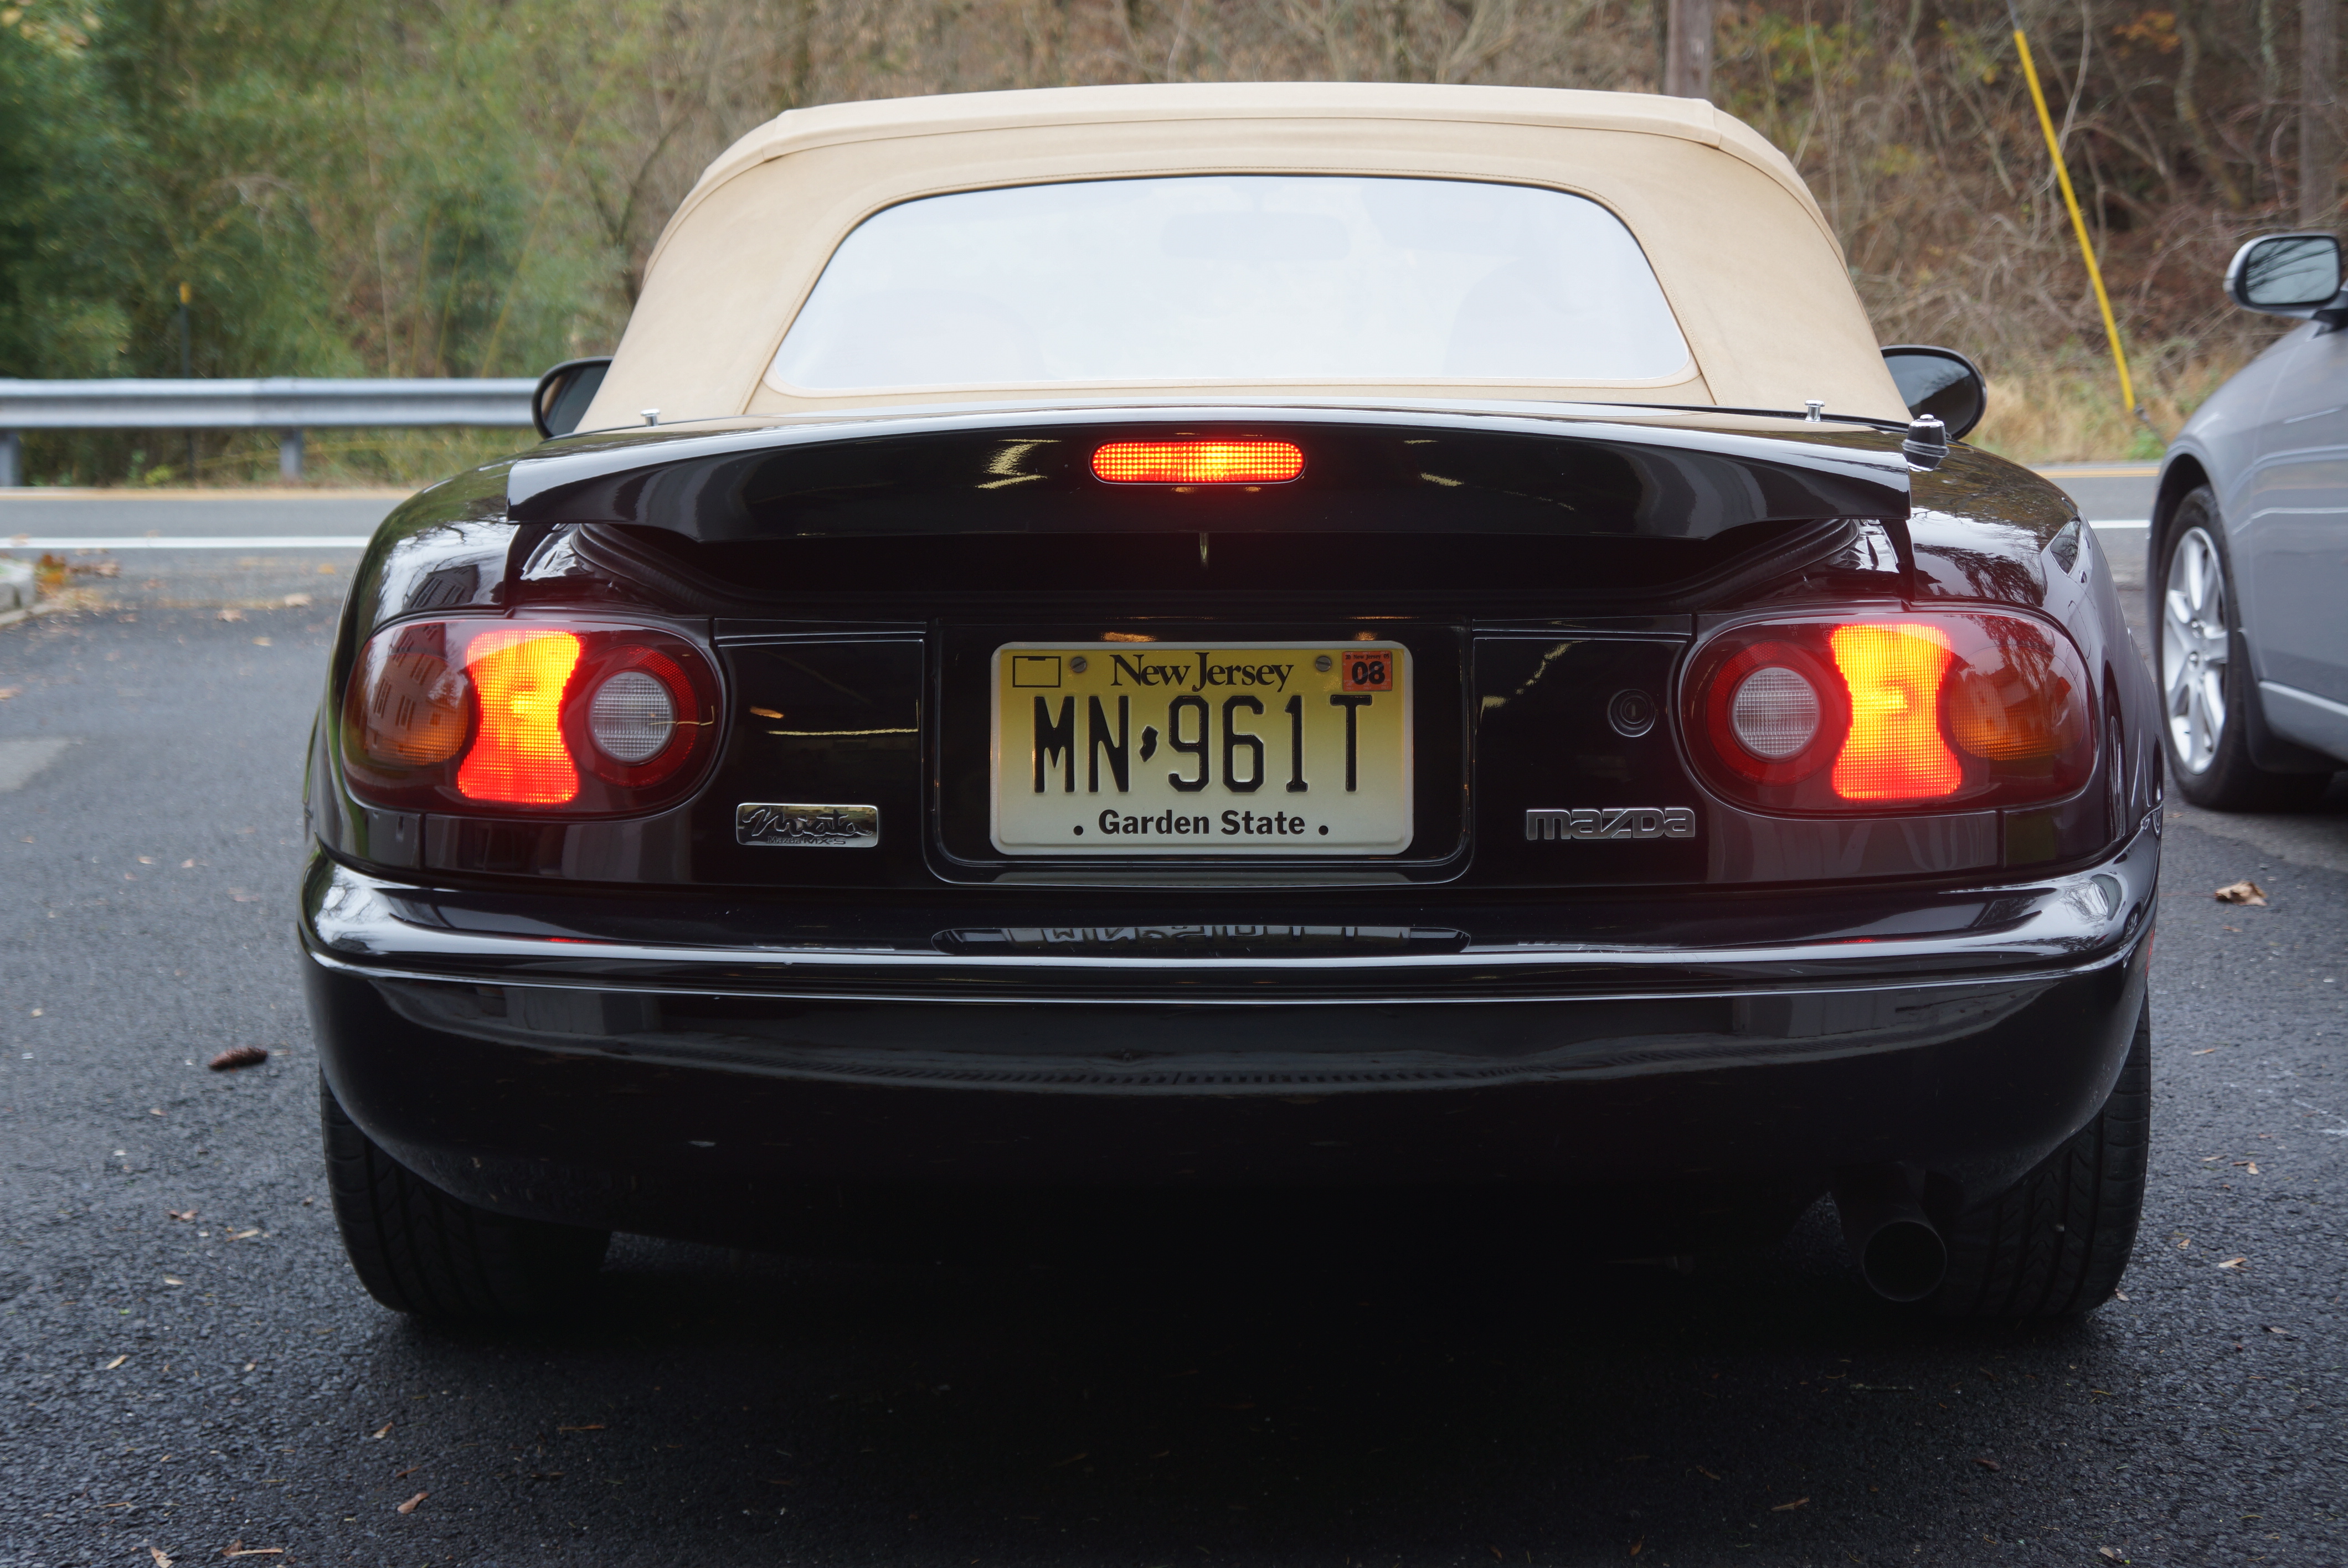
The mechanical list includes new rear brake calipers (one of the parking brake adjusters is stuck), new tires (tread is good, but they’re 10 years old), and a continuation of the LED bulb upgrade. The detail work involves a new convertible top (worn and dirty), an engine compartment detail, Paintless Dent Removal work on some small dings, and a complete polish and wax.

Here’s hoping for a mild winter, which will encourage me to get out to the garage! As long as the temperature is above freezing, I can spend a few hours out there. Watch this blog for updates on my progress with the Miata.


Is it spring yet?


All photographs copyright © 2017 Richard A. Reina. Photos may not be copied or reproduced without express written permission.


Automotive Fuses: A Somewhat Brief Tutorial (with Illustrations)

Have you replaced a fuse on one of your modern daily-driver automobiles recently? It’s likely you have not. Today’s motor vehicles have much more sophisticated electrical systems, and while your typical 2017 four-wheeled 2.5 ton behemoth still uses fuses, the days of fuses just “wearing out” are behind us.

If you have needed to replace a fuse, the first trick may have been to locate the fuse boxes. My wife’s 2017 Honda Odyssey has FIVE fuse boxes: two in the engine compartment, two under the dash, and one at the rear, containing a total of 107 fuses. It makes me pity the shop tech who needs to fault-trace an intermittent electrical problem.

My 1967 Alfa Romeo GT 1300 Junior, by contrast, has one fuse box, located in the engine compartment. Access to it is easy, as it’s mounted high up, on the right-side inner fender. There are a total of 10 fuses: one for ignition, five for exterior lighting, and three which are helpfully marked “other electric devices” (of which there are few; my Alfa lacks the power sliding doors, climate control, and ‘Lane Departure Warning’ of my wife’s minivan).

Ten little fuses, all in a row. Note bi-lingual fuse box cover.

Italian cars get a bad rap for their supposed temperamental electrics. But there’s not been a lick of an issue with mine, save for a battery which died shortly after I got the car (because it was 10 years old at that point). Preventative maintenance goes a long way toward keeping the electrons flowing in the proper direction and in a complete circuit.

With any old car, I will gladly get on my soapbox and preach the ’12-Volt Gospel’: 99% of electrical gremlins are caused by poor connections. Terminals must be clean and tight; ground wires must be securely connected to clean ground; and fuses and their terminals must be clean, tight, and protected with dielectric grease. In no case should an electrical component be replaced without first ensuring that all connections, hold-downs, and crimped or soldered terminals are in the best shape they can be.

Soon after acquiring the Alfa, I removed all 10 of the European-style ceramic fuses, cleaned the spring-tensioned holders with a brass brush, and bent the holders inward to make them tighter. Next, I applied a light coating of dielectric grease. Upon reinstalling the fuses, I ran continuity tests with my multimeter to check that there was minimal (ideally, close to zero) resistance in the connections.

This dielectric grease is magical stuff. It seems counter-intuitive to grease electrical connections, but it prevents corrosion from forming. You still need to have a strong mechanical connection. It should be used on battery terminals and spark plug boots as well as fuses. Don’t waste your $1.99 buying the point-of-purchase 0.001 oz. packet at the retail store checkout counter. I bought a 5-ounce tube about four years ago, and even after multiple applications on multiple cars, I’ve only used about 25% of it.

Dynatex brand dielectric grease – I use it frequently on electrical work

While on the subject of fuses: I recently cleaned out an old shoe box full of automotive miscellany which had belonged to my dad. In it were several tins of glass-style fuses. While none of the cars I own today use this style, my ’68 Mustang did, and I recall how difficult it was to reach the fuse box on that car, as it was mounted above the gas pedal.

Buss brand glass fuses – note old & new style packaging

Some people refer to these as Buss fuses, however, that is a brand name. According to Wikipedia, these fuses were also known as “SFE” fuses because they were developed by the Society of Fuse Engineers.  They varied in ratings between 4 and 30 amps, and in corresponding lengths between 5/8” and 1&7/16”. This was done by design in order to help prevent a fuse of incorrect amperage from being inserted.

Automotive glass fuses


Red Line brand fuses – box states that company is from N.Y.


Opening these is like going on an archeological dig

If you have a newer car, here’s hoping that you never need to replace a fuse (much less find the fuse box). If you have an older car, here’s hoping that you invest in a tube of dielectric grease, and in a half-hour of preventative maintenance. Let me know how it works out.


All photographs copyright © 2017 Richard A. Reina. Photos may not be copied or reproduced without express written permission.

Special photographic note: the 4 photos of the glass fuses were taken with a FILM camera, specifically, my Nikon EM, using Kodak Gold ISO 200 film.


FUN FACT OF THE WEEK

On January 14, 1885, Thomas A. Edison of Menlo Park NJ, applied for a U.S. Patent for his invention of a “fuse-block”, to act as an electrical protection device.


Installing LED lights in my Miata

In the 21 years since I purchased my 1993 Mazda Miata, and during the 70,000 miles of driving enjoyment I’ve had behind the wheel, there is one peculiarity that has come to my attention.

The car has shrunk.

Not really. However, the automotive landscape has gone through tremendous upheavals since 1996. When I bought the Miata, from a young woman in her 30s who had purchased it new, I asked her “what will you be replacing it with?” She replied “a Chevy Blazer”. At that point in time, the concept of voluntarily moving from a two-seat sports car to a Sport Utility Vehicle was a foreign one. But no longer. In 2017, the majority of daily-driven vehicles are classified as “light trucks”: minivans, SUVs, and pickup trucks.

The Miata is small even next to the Alfa

It is in that sense that my Miata has gotten smaller, as without exaggeration, every four-wheel contraption sharing pavement with me towers over my windshield. Pulling up next to a late-model Accord or Camry at a stop light is a lesson in relativity, as I observe that those mid-sized sedans’ beltlines are higher than my roof.

As the title of this blog post is “Installing LED lights in my Miata”, you may wonder what the foregoing has to do with LEDs. Plenty, in fact, and it’s summed up in the word conspicuity.

There are two aspects to vehicular lighting, as I was taught in Automotive Safety 101: being able to see, and being seen. Other than headlights, and perhaps reversing lights, a vehicle’s exterior illumination is designed to help other drivers see you. A few weeks ago, it occurred to me that there was a super simple way for me to make the Miata more conspicuous to other drivers, and that would be by installing some LED lights.

To the automotive purists, aftermarket LED lighting may have a bad rap. Your first thought may be of glare-producing headlights (more likely caused by HID lighting). Perhaps you’ve seen some tricked-out show cars with blue/green/violet LED lighting in front and rear lamp assemblies, even under the car, pulsing along with a 120-decibel sound system.

The upgrade I pursued is much more straightforward than that. The aftermarket has made LED light bulbs available, in standard sizes, as “plug-and-play” direct replacements for incandescent bulbs. With the Miata, I wanted to start small, and at the rear, by replacing the combo tail/brake light bulbs (#1157) and reverse bulbs (#1156).

I obtained several sets of bulbs from CARiD.com (and in full disclosure, this is the company where I’m employed). The LED bulbs are available in different colors. I got the 1157 bulbs in both white and red, and the 1156 bulbs in white.

When replacing incandescents with LEDs, it is extremely important that the LED bulb is the same length, or shorter than, the bulb it is replacing. LEDs are available from different companies, and most companies offer them in different lengths. An LED bulb which is too long may not fit at all, or may press against the plastic lens, causing that lens to melt, or worse.

New Lumen LED bulb (right) is slightly shorter than incandescent (left) it’s replacing

My bulbs are the Lumen brand, available in 3 different lengths. Generally speaking, the larger the bulb, the more light it emits. It therefore becomes tempting to decide on the largest bulb; again, make sure that it’s going to fit inside the assembly!

Today’s LEDs are direct replacements, emit lots more light and less heat

In my case, to be on the safe side, I selected the shortest bulbs. With pieces in hand, I opened the Miata’s trunk and was pleasantly surprised to see the covers behind the tail lamp assemblies were easily accessed.

(Sidenote: in 21 years of ownership, I have never removed one of these covers before this LED bulb swap. The ONLY exterior bulb I’ve replaced on this car since 1996 is one sealed-beam headlight bulb. Darn those Japanese, not giving the bulb makers a chance to sell their wares!)

Tail lamp assembly cover easily accessed from trunk


Push in two clips, and flip cover (no tools needed)

Once the cover was removed (no need to disconnect the harness plugs), I flipped it over, and both bulbs were right there. I did note that the tail/brake light glass (“envelope” in bulb-speak) was darkened, probably dimming its output; however, the bulbs still worked. Wanting to make changes one step at a time, I swapped out the 1157s first, using the Lumen white LED bulb (the tail lamp housing has a red lens).

To document the changes, I took photos, figuring that the camera doesn’t lie (but it might try to make the car look thinner). I put my Sony digital camera on a tripod, and set the controls to full manual. In this way, the camera’s light sensor would not automatically adjust the exposure, which could artificially make the light look either brighter or darker.

With new tail light bulbs in place, I subjectively thought that the light output was brighter. The big improvement, however, was in the amount of illumination: now, the entire lens assembly was lit, compared to prior, when the upper corners remained dark. So far, so good.

Next to be installed were the reverse lights. This was a great improvement, as the light is not only markedly brighter, the color is a pure white, compared to the hazy yellow of the incandescents.

Lastly, I went back and replaced the 1157 LED white bulbs with the same size in red. My expectations were low, as I had run this same experiment at work several years ago with an older Honda Civic, and the red tail lamp bulbs behind a red lens were not as bright as white bulbs.

The Miata yielded a much better result: the light was slightly brighter, and it was redder too. If conspicuity was my goal, the red 1157s and white 1156s allowed me to achieve it.

(For those who want to make the same upgrades, I would suggest trying both red AND white LED bulbs in the tail lamp assembly – provided that the tail lamp lens is red. Vehicles with WHITE lenses for tail/brake lamps MUST use a red bulb.)

Tail AND brakes lamps both on

What’s next for the Miata’s lighting? I had considered upgrading the front and rear turn signals, but LED bulbs introduce a small hiccup: their low resistance causes the flasher relay in many cars to “hyperflash”, or, flash too rapidly. There is a fix in the way of a resistor, but that costs extra, and must be permanently mounted to the car, a modification that I’m not willing to make.

The front and rear side marker lights would be a likely next step for LEDs. On the interior, the footwell courtesy lighting could really stand to get LEDs (the poor passenger compartment illumination is partly caused by lack of any overhead lights).

Was I surprised by the improvement in the Miata’s rear lighting? Not at all. The biggest surprise may only be that I waited this long to make the upgrades. Oh, and the Alfa will definitely be getting similar LED bulbs. Just don’t tell the AACA judges.


All photographs copyright © 2017 Richard A. Reina. Photos may not be copied or reproduced without express written permission.


FUN FACT OF THE WEEK

“Reverse” lights, also known as “back-up” lamps, are wired to illuminate whenever (and only when) the vehicle’s transmission is in reverse. They are designed to both help light the way for the driver, AND, serve as a signal to others of the driver’s intention to move in that direction.
In the U.S., reverse lights became required by law with the passage of the initial Federal Motor Vehicle Safety Standards (FMVSS) in 1968. Before that, back-up lamps were optional equipment for many vehicles, if they were even available. As a boy, I can recall seeing lower-line American cars with steel “blanking plates” in place of reverse lights.

Turning wrenches on your old car: When things go terribly wrong

There are no photos of the crime scene.

The event was too traumatizing to even consider documenting it via photography. Besides, there was a deadline to meet.

It was May of 2007, and to my great delight, rally brother Steve and I were once again registered to drive in the New England 1000 classic car rally. This would be our second time using my ’68 Mustang as the rally car, and our fifth event together as co-drivers and co-navigators.

The previous month, I had again shown my car in the Garden State Region Mustang Club’s annual all-Ford car show. Driving it to the show and back proved that it was in great shape. There was little to do to prep it for the rally other than check its vitals, an easy enough task on a ‘60s-era American car.

My ’68 GT/CS at the GSRMC car show, April 2007

One thing bugged me. It was like an itch I needed to scratch.

Some previous owner, most likely as a repair, had replaced the door lock cylinders. They worked fine. The issue was that I had 3 different keys for the car: one for the doors, one for the ignition, and one for the trunk. The factory gave you TWO keys: the same key was supposed to operate the door locks and the ignition switch.

Every one of the 19 Mustang parts catalogs I had showed new sets of ignition and door lock cylinders for sale. It looked easy enough to do. Best of all, when I was ready to give Steve a set of keys to hang onto for the rally, he’d only have two. As would I. I placed the order.

The only time available for me to do the job was the day before our departure. The door lock cylinders went in first. While I had the door panels off, I did a quick adjust-and-lube of the window regulators and channels. On to the ignition switch.

The instructions said that I needed to insert the existing key into the ignition, and use a paper clip in an access hole to release an internal catch. Once the paper clip was in, it said, turn the key, and pull outward.

I did all the above. The ignition cylinder came right out. At the same time, I saw a puff of talcum powder emanating from the switch area.

It wasn’t powder.

It was smoke.

My car’s wiring harness was on fire.

It took about 30 seconds for me to run into the garage, grab a ½” wrench, and disconnect the negative battery cable (the hood, thankfully, was already open). The smoking stopped.

WHAT in creation had happened?

Two observations: one, in re-reading the instructions, I had clearly overlooked the line which stated “disconnect the battery before proceeding”. Two, it was very typical on a car like this Mustang for the manufacturer to run an unfused B+ wire from the battery directly to the ignition.

Something had shorted out. I didn’t know what, and at that moment, I didn’t need to know. There were fewer than 24 hours before we would be departing for the rally. Frantically, I began to remove the engine compartment wiring harness. The sheathing had melted, but there had been no open flame. With the harness on the garage floor, I cut it open.

Exactly one wire was damaged, the feed to the ignition. All other wires were fine. Racing off to the auto parts store, I bought all the 14-gauge wire they had. Working through the afternoon, evening, and into the following morning, I was able to replace the one damaged wire, re-wrap the harness, and reinstall it in the car.

The car started up without drama (which is to say, without smoke).

Steve arrived at my house and endured the telling of the tale. We left, a little later than planned, and headed for this year’s starting point, the Woodstock Inn in Woodstock VT. Everything seemed to be working well with the car.

On the NYS Thruway, we pulled into a multi-level parking garage to make a quick pit stop. It was dark in the garage, so I turned on the car’s headlights.

They didn’t work.

We checked turn signal and brake lights, which did operate. But we had no headlights or tail lights. Given our tardy departure, we were almost guaranteed to arrive in Woodstock after dark. We hustled as quickly as we dared push the car, which is to say, with its 390 V8, pretty quickly.

We pulled into the Woodstock Inn just as the sky turned from twilight to black. We made it.

I normally stick to wine or beer on the occasions that I do have an alcoholic drink, but I believe I had a scotch on the rocks that first evening in Woodstock.

And how did we do on the rally? That’s for a future post.


All photographs copyright © 2017 Richard A. Reina. Photos may not be copied or reproduced without express written permission.


Removing the Oil Pump on a 1936 Oldsmobile

Yesterday, visited my friend Pete (from whom I bought the Alfa). Pete’s a family friend, and an all-around great guy. He had invited me out to give him some assistance with working on one (or more) of his cars.

A few weeks ago, Pete told me he could use my help with his ’79 Volvo 265, which was exhibiting an intermittent no-crank symptom. He had checked two of the more obvious things: battery health and battery terminal condition. I asked him if he had thoroughly checked the battery ground cable, as I had experienced instances with that cable hiding extensive corrosion under its sheathing.

When I arrived yesterday, he proudly told me that several days ago, he had removed the negative cable, found extensive corrosion at the engine block, cleaned all that up, and has not had a lick of a problem since. So on to the Olds….

One of his prized possessions is his ’36 Oldsmobile L-36 convertible. Here is some background, provided by my copy of The Encyclopedia of American Cars, by the Auto Editors of Consumer Guide:

In 1936, there were two series of Oldsmobiles: the 6-cylinder F-36, riding a 115 inch wheelbase, and the L-36, with an inline-8 on a 121 inch wheelbase. The I-8 displaced 240 cubic inches, and put out 100 horsepower. Pete’s convertible coupe was the most expensive Olds in ’36, at $935. (The base Olds business coupe was $665.) Production numbers for the convertible totaled 931 (compare that to their volume leader 6-cylinder 4-door touring sedan, of which 66,714 were built). Survival rate of the convertibles is unknown, but certainly, Pete’s drop-top is one rare car.


A shot taken a few years ago of the ’36 Olds


Topside of engine. Restoration was done in ’90s, still looks great

When I visited last year, Pete was very concerned about the Olds exhibiting low oil pressure at idle. Yesterday, he reiterated those concerns, informing me that the most recent readings he’s seen showed 20-25 psi at cold start up with high idle, then descending to figures below 10 psi at warm idle. (These numbers are from a quality aftermarket oil pressure gauge screwed directly into a passage in the block.) There was straight-30 weight in the crankcase.

Pete had been conversing online with a self-designated pre-war Olds expert, who opined that the straight-8’s oil pan was NOT coming off until one first dropped the steering linkages. Pete wanted to try it without disconnecting the tie rods. I said that the worst that happens is, we bolt the pan back up and attack the linkages.

The oil was already drained, and drop light, creeper, and tools were waiting for me to get under the car and get to work.

There must have been 30 bolts along the perimeter of the pan. None of them were very tight, and most could be accessed with a ratchet and socket on a short extension. But six at the front were under the steering linkage, and required a box-end wrench, turning each about 1/6 of a turn at a time. It wasn’t difficult, just time-consuming.

I left one bolt in the front and one in the rear, both finger-tight, to prevent the oil pan from crashing down onto my chest. With a putty knife and a hammer, I gently tapped at the two back corners of the pan. At this point, my fight was with the copious amount of orange Permatex all along the edge.

A few taps later, the pan was free of the crankcase. By now, Pete was on the ground under the car with me. We removed the final two bolts. The pan wouldn’t drop further. At the front, the steering linkage was in the way, which we knew. At the rear, the clutch housing stopped us from sliding the pan rearward. We also had to get the pan low enough to clear the oil pump.

Pete suggested rotating it 90 degrees toward the passenger side. With two sets of hands on the pan, we did that. Success! In a matter of moments, the pan was on the garage floor.

The pan is where we want it: on the floor

The oil pump, now out in the open, was held in place by 2 nuts, needing only a 9/16” wrench to remove. The concern here was the possibility of loosening the studs onto which the nuts threaded. But as soon as I broke each nut free, I could see that studs remained stationary. The oil pump was in my hands.

Inline-8 Olds oil pump. Pump is driven by shaft (right) which extends up to camshaft

We both agreed that things looked very clean in there. There was the slightest bit of sludge on the pump’s pick-up screen, but it didn’t make us concerned. Pete’s next challenge is to find a reputable shop to check the pump, and if needed, rebuild it. However, after months of wondering what to do, he was both relieved and thrilled to have the oil pump out, ready to move onto the next steps.

Straight-8 crankshaft. Oil pump mounting boss at lower left. Permatex is not from 1936.

As a parting gift (!), Pete asked me to help him clean out his garage by giving me this front bucket seat from one of his Fiats. Does anyone need a black vinyl seat for a Fiat 124 sedan or wagon?


For sale: one Fiat seat


All photographs copyright © 2017 Richard A. Reina. Photos may not be copied or reproduced without express written permission.


Turning wrenches on your old car: When things go right

My first full year as the owner of a 1968 Mustang California Special was proceeding nicely. In April of 2004, the car successfully completed a 2,200 mile round-trip to Nashville for the MCA (Mustang Club of America) 40th anniversary event.

A month later, on Memorial Day Weekend, the Garden State Region Mustang Club (GSRMC) extended an invitation to attend a Ford Motor Company-sponsored event in Flushing Meadow Park in Queens, NY, site of the 1964-1965 World’s Fair, and site of the introduction of the first Mustang. The response from club members was enthusiastic, so early on Sunday morning of that weekend a large lineup of Mustangs caravanned through midtown Manhattan, arriving at the park by 10 a.m. Besides the GSRMC, the only other Mustang club invited was the Long Island club. Estimates of the total Mustang count was close to 100. My GT/CS was the only one of its kind there.

Waiting for the parade to start


For Ford, this was a marketing and PR stunt, as the all-new 2005 Mustang, which would not enter production until September, was represented by a pre-production prototype. Ford was looking for photo ops, so a ’64 ½ convertible was staged across from the 2005 ‘Stang. The stainless-steel Unisphere, one of the few remaining relics from the ’64-’65 fair, loomed in the background. A photographer, hired for the occasion, perched on a 10-ft. tall ladder.

One at a time, each owner was invited to drive his/her car across the cameraman’s field of view, stop between the two posed cars, lean out the window, smile, and move on. As you might imagine, this took some time. I used the downtime to take some of my own photos as we crawled in the queue. Eventually, I had my picture taken, and headed home.


The official photo; cloudy all day, the rain held off until the drive home

Rally brother Steve and I had started to make some noise about possibly driving the Mustang in next year’s New England 1000 rally. With that on my mind, it seemed that the winter of 2004-2005 would be the ideal time to tackle the leaky heater core. My collector cars are usually off the road for the winter, so I would have the time I’d need to get this done.

On a Mustang with factory air such as mine, the heater core and A/C evaporator reside together in a fiberglass box under the passenger side dash. Following the factory-recommended procedure, I began the disassembly that would grant me access to said box. My A/C was inoperative, with zero pressure in the system, so no further harm was inflicted onto the ozone layer when I broke open the evaporator connections.

Much of the dashboard and instrument cluster needed to be removed, so I used this as an opportunity to replace other worn parts (more about that in a bit). Most of the wrenching was straight-forward. If there was a tricky part, it was keeping track of the various color-coded vacuum lines that operate the blend doors. I knew that new vacuum line kits were available, so that was added to the shopping list.

Heater box birthed from car; dum-dum repair at corner was dumb

With the box out of the car, my heart sank to see that it was cracked; actually, a chunk was missing from one corner. I also knew that boxes were not available in the aftermarket, so the heater box was repaired with fiberglass matting and epoxy glue.

Fiberglass fix didn’t need to be pretty

Along with a new heater core, I was able to order a new foam heater box kit. All blend doors as well as the core itself got new foam seals. Having come this far, I thought better of reinstalling the dash pad, which was warped, and the woodgrain instrument cluster surround, which had lost most of its chrome. These parts were readily available from various suppliers, so new ones were ordered and installed.

Wood and clamps hold foam while glue dries

Near the end, I worked as long as my patience would allow to line up the new aftermarket dash pieces. Of course, they did not fit as well as the originals. Eventually, I got it to the point that only I would notice any misalignment.

Repaired box about to be reinstalled. A/C evaporator was also new

Did the new heater core work? You know the drill: Add fresh antifreeze; turn on the heat; pray that nothing leaks.

Nothing leaked. The car had tremendous heat output, and anyone riding in the front seats would have toasty dry toes. This would turn out to be a huge benefit during the running of the 2005 New England 1000.


All photographs copyright © 2017 Richard A. Reina. Photos may not be copied or reproduced without express written permission.


The Alfa Gets a Tune-Up

A tune-up? Who performs “tune-ups” anymore? Modern cars have spoiled us with their extended service intervals. My 2014 VW Jetta calls for an oil and filter change every 10,000 miles, and spark plug and air filter replacement every 60,000 miles. That’s about it. There are other new vehicles for which the manufacturer recommends spark plugs every 100,000 miles. You might forget they were in there if you wait that long.

It’s different, of course, with an older car. The ’67 Alfa Romeo GT 1300 Junior taking residence in my garage still uses an ignition distributor with a cap, rotor, points, and condenser (ask any person under 30, even an auto buff, what are points and condenser, but be prepared to ‘splain).

GT 1300 Junior used Bosch electrics. Other Alfas used Marelli.

When I obtained the Alfa in March of 2013, with 54k on the clock, I did what I normally do with any used car that’s new to me – I attended to all the normal maintenance items as a proactive measure, no matter how meticulous the previous owner may have been. In my case, the Alfa’s 1.3L engine got new plugs, wires, cap, rotor, points, and condenser. There was peace of mind knowing the tune was good for a while.

Remove air hose (2 clamps) and all 4 plugs are readily accessible

Right now, the car barely has 62,000 miles on it, so it’s only been eight thousand miles, but it’s been three and a half years. Earlier this year, I ordered a full complement of tune-up items, just to have them on hand. My plan was to revisit the tune at the 10,000 interval, or at 64,000 miles.

For some reason, last weekend, I decided to pull the plugs. First of all, I can’t think of an engine on which it’s easier to change the four spark plugs. Yes, I need to remove the air filter hose to access the #4 plug, but that takes 30 seconds. Once that’s out of the way, the plugs are RIGHT THERE. So out they came.

The 4 old Bosch plugs

Plugs numbers one, two, and three looked almost identical. That’s not to say that they looked good. All three of them had significant carbon deposits on them. They were not wet from gas, nor oily, nor sooty with unburned fuel, which was some good news.

The shock was the fourth and final plug, which had so much material deposited on it that I seriously questioned how this thing was firing. (The engine mostly ran fine before I pulled the plugs, with the very infrequent high-speed miss. I was still attributing the miss to a fuel issue.)

I've been working on cars for 40 years. I can't believe this plug fired.
The #4 plug. I’ve been working on cars for 40 years. I can’t believe this plug fired.

Before proceeding further, I went into the house to pull my invoices on the car. When I bought the plugs, early in 2013, I had not yet settled on an Alfa supplier which I felt met my needs. The plugs were purchased from a U.S. supplier with whom I no longer conduct business. They were Bosch plugs, and from everything I’ve since researched, no one today recommends these plugs for Alfa engines. My principal supplier, Classic Alfa in the U.K. exclusively recommends NGK plugs, and that’s what went in as replacements.

Photo documents rotor direction, for correct orientation when reinstallling
Photo documents rotor direction, for correct orientation when reinstallling distributor

While I was under the hood, I removed the distributor (one 10mm hold-down bolt), and replaced the points and condenser. I lubed the distributor in three places, put on the new cap and rotor, and put it all back together. She fired right up, of course! – unlike three years ago, when I accidentally grounded the points….

Service book recommends distributor removal for points replacement
Service book recommends distributor removal for points and condenser replacement

Taking the car for a test drive, I was not expecting any significant power improvement. I mean, we’re starting with 100 hp, so, who’s going to feel a 5% increase? What was noticeable was the difference in throttle response. Touching the accelerator pedal gave an immediate jump in RPM. The car was such a joy to drive that I stayed out for about 30 minutes, taking it through the gears, and bringing that rev-happy Italian engine up to 6 grand on the tach. Oh, and no high-speed miss.

So, lesson learned. European sports cars which get driven infrequently need to have their state of tune checked more frequently. It’s easy enough to do, so there’s no excuse. This ain’t no 2014 VW. Thankfully.


All photographs copyright © 2016 Richard A. Reina. Photos may not be copied or reproduced without express written permission.


Heater Core Replacement in the ’93 Mazda Miata: Third and final part

My Mazda Miata workshop manual is an aftermarket publication, not the official factory book, but it’s been very helpful. It’s well researched and written, and the photography is adequate. It’s written in the style of “we’re in a shop with an example of this car, and we are documenting our actual repair procedures”. This approach certainly lends an air of credibility to the book.

In reading the section on heater core replacement, this service manual states (and I’m paraphrasing): “the entire dashboard must be removed from the car. We know of no work-around”. The manual was published in the mid-1990’s, at the dawn of the public’s access to the Internet, and it is obvious that were it to be updated today, information gleaned from various online forums would be incorporated, including a heater core work-around.

I was able to remove and reinstall my Miata’s heater core WITHOUT removing the entire dashboard. In fact, an underdash panel held in place with two screws, a heater box cover held in place with two screws, and several hose clamps were the totality of what was removed for successful heater core retraction. (The driver’s seat was also unbolted and taken out, only to provide greater comfort when working under the dash.)

Old (foreground) and new (background) heater cores. Old one has been cut; new one, not yet.

The secret to this success came from an online forum, www.miata.net. For those who dismiss the Internet (especially automotive forums) as a waste of time, populated by flamers and trollers, one must wade through the waste to find the gems. And this was a gem: a poster at the Miata forum had discovered that cutting one heater core pipe would reduce total work time by hours (in my case, days). I used a Dremel tool to cut the pipe, and I had the old core out and in my hands, dashboard intact.

The concept is this: Mazda built this heater core with one short pipe and one long pipe, soldered to the core itself. The short pipe uses a piece of hose and a clamp to connect to a pipe running through the firewall. The long pipe goes directly through the firewall, and it’s this long pipe which necessitates dashboard removal, so that you have room to swing the core around and maneuver the long pipe out.  However, if you cut this long pipe, then join the two pieces together with a hose and clamps, there’s no need for the major disassembly and reassembly.

Hoses and clamps on pipes will be connected once core is in place

(Interesting sidenote: for the NB (2nd generation) Miata which started in 1998, the factory switched to TWO short pipes, for easier removal of the core.)

The tricky part during reinstallation was determining the EXACT best place to cut the new pipe. First, it is not in my nature to take a hacksaw to a new $150 part. Should that part be defective, its warranty would be, as they say, over. The goal was to cut the pipe as short as possible while still leaving room for two hose clamps. I temporarily installed one hose clamp to ensure that I’d have room for it, then drew a line along it, which became the cut line. It worked.

Permatex 300: non-hardening sealant designed to work with antifreeze

In the interest of doing this job so that it would not ever leak, I spent an additional $4 on another factory heater hose so that I would have the perfect ID hose for the job. I also bought a $3 jar of Permatex sealant designed to work with cooling systems (and waited 12 days for its arrival) to be absolutely sure that I’d get no drips. I hate drips. It was overkill, but I’m glad I used it.

Auxiliary drive belt, in spite of looking pristine, was replaced

The new heater core slipped into place easier than I anticipated. Working in the tight quarters under the dash was a pain, but a #2 Philips screwdriver bit in a ¼” ratchet wrench (instead of a screwdriver) was the trick to get to all the Philips screws. While this was going on, all the underhood work was wrapped up, including all new coolant hoses, new thermostat, and two new auxiliary drive belts. As recommended in the forum post, the car was started and run before buttoning everything up, to make sure it was all dry. It was.

Friday of last week, the job was completed, and I drove the Miata for the first time this season. It welcomed me like an old friend. It’s nice to know that I can look forward to a summer’s driving season without worrying  about cleaning the windshield after every drive.

All photographs copyright © 2016 Richard A. Reina. Photos may not be copied or reproduced without express written permission.

New Tie Rod Ends for Enzo’s Alfa

My good friend Enzo (“EC” to his buddies) bought his first collector car, a 1991 Alfa Romeo spider, last autumn. This was not Enzo’s first Italian car, as he had Fiats as daily drivers, albeit 30 years ago. But upon retirement, he decided to treat himself, and found this pristine low mileage beauty locally. Like any other 25-year-old vehicle, it needed attention to some small details, but EC has been fastidious about staying on top of needed repairs.

When I had had the chance to go over the car with him late last year, we found that one of the tie rod end boots was torn. It didn’t require immediate replacement, but over the winter he ordered parts, then invited me to his home for a day to be spent swapping out tie rod ends.

One of the outer tie rod ends, about to meet its demise

Upon arriving one day last week, I saw that he had ordered ALL SIX tie rod ends. I was under the now-mistaken impression that we were replacing only the two outer. (All 4-cylinder Alfas on the 750-, 101-, and 105 platforms use recirculating ball steering, with a center link and two tie rods. Each rod has two ball joints, one with right-hand thread, and one with left-hand thread, to allow for toe adjustment.)

One of the tie rods is out, with parts and parts bags strewn on the bench
One of the tie rods is out and is measured

We got to work. First order of business was to pull out the cotter pins, but these pins were so thin and rusted that half of them broke before we could retract them. We ended up forcing the socket over the castle nuts and using an impact wrench to remove all six nuts.

Part numbers marked on each end to keep track

A trick I had remembered from doing the same repair on my Alfa was to rotate the steering wheel to bring the center nuts to an exposed position from within the engine compartment. Then, using a long extension, we could gun the nuts loose from up top, which was much easier than trying it while on our backs.

Next came out the pickle fork. Persuasion from a two-pound hammer was all it took to get the links to drop.

We were cranking the tunes in the garage!

With the three links off the car, we counted threads AND measured overall length, as our best attempt to reassemble the car without changing the alignment too much. We matched up old and new parts (with EC marking part numbers on each component using a Sharpie), and had all six tie rod ends installed into their respective links within minutes.

This may have been the point when we took a lunch break. Prosciutto, Parmesan, salami, olives, and wine (!) were on the menu. Lunch concluded with a nice cup of coffee (to wake me up after the wine), and we were back to the garage.

Masking tape helps keep identification straight (wine does not)

The new parts, bought from Classic Alfa in the UK (the author’s favorite Alfa parts supplier) used castle nuts and cotter pins for the four outer ends, and locking nuts for the two inner. We did not have the correct-sized cotter pins on hand, so the ever-resourceful EC made his own from coat hanger wire. The temporary pins will be replaced with authentic pins once he gets to the store.

Much to my surprise and satisfaction, all six nuts tightened right up without giving us any trouble. I had concerns that the ball joints might spin and prevent us from reaching the proper torque, but that didn’t happen. With everything buttoned up, Enzo took the car for a test drive, and came back to report that the only issue was a steering wheel which was slightly off center. The car will need an alignment after this work anyway.

Front wheels remained attached during driveaway
Front wheels remained attached during test drive

At the rate my friend EC is moving, there is very little else that needs attention on this gorgeous drop-top. It’s running great, and he’s got the summer to enjoy it! I know that we’ll see him and his Alfa out with us on our weekend jaunts.


All photographs copyright © 2016 Richard A. Reina. Photos may not be copied or reproduced without express written permission.


My First Collector Car: The 1957 Ford Skyliner

September of 1977 was a month of new beginnings: I began my first post-college job, working in NYC for the U.S. Department of Labor, and purchased my first new automobile, a 1977 VW Rabbit. Commuting from Staten Island to Manhattan, though, did not involve driving. As it is for the vast majority of New Yorkers, public transport was the way to go. In my case, the one-way journey was a 90-minute ride on bus, ferry, and subway, giving me plenty of time to read.

One day at lunchtime, I wandered into a bookstore. On the bargain table sat a book entitled “Ken Purdy’s Book of Automobiles”. While I had never read anything by Mr. Purdy, I knew the name because David E. Davis, editor of Car and Driver magazine, had extolled the virtues of Ken Purdy’s writing in numerous columns. Perhaps best of all, the book was marked down from $9.95 to $1.99. I bought it.

This was not a book of new material; rather, it was a compendium of previously published short stories and articles. (Unbeknownst to me at the time, Ken Purdy had died in 1972.) Nevertheless, it was all new to me. The brevity of each chapter made it an easy read; I devoured the book in a matter of days. As soon as I finished it I had an epiphany: automobiles were something that I could enjoy as a hobby! No matter what daytime job I had, car collecting would allow me to indulge in my true passion. I decided to consider buying a collectible car, and that is when I remembered the Manna family.

Lou Manna was a college friend whom I had met through mutual friends. Unlike most of us in the dorms whose homes were several hours away, Lou’s home was about a 15 minute drive from campus. One day, Lou invited me to have Sunday dinner with his parents. This starving college kid said ‘yes’ before the invite was finished.

Mrs. Manna cooked a wonderful Italian meal, and I probably got some leftovers to help get me through the week. Mr. Manna (Louis Sr.), it turned out, was a bit of a car enthusiast. He drove a Fiat 128, and his wife drove a 1957 Ford Skyliner (retractable hardtop convertible), which the family had owned since new.

The Ford brochure for '57 featured the Skyliner on the cover (from the author's collection)
The Ford brochure for ’57 featured the Skyliner on the cover (from the author’s collection)

Mr. Manna Sr. told me that he always had convertibles. After the war, he bought a new 1948 Ford convertible. But he said he always hated dealing with soft tops which were noisy, leaked, required replacement, and didn’t offer enough security. When Ford announced mid-way through the 1957 model year that they were introducing a convertible with a steel roof, Mr. Manna told me he was hooked, and he purchased one. The car they bought was black with a white top and red interior. I thanked them for the meal, and did not think much more about the Skyliner.

The NY registration in Louis Manna's name (NY did not use titles at this time)
The NY registration in Louis Manna’s name (NY did not use titles at this time)

After college, I had not seen much of Lou, but in November of 1977, I reached out to my college buddy, and as luck would have it, his parents had realized that it was time to let the car go. They told me that the asking price was $1,000; my offer of $900 was accepted. The car had 140,000 miles on it, the rear quarters were rusty, but the vehicle was in otherwise decent original condition.

I took the Long Island Rail Road out to Kings Park, and drove the big Ford home to Staten Island. Mrs. Manna was so upset at her car’s departure that she cried, and went back into the house rather than watch the car leave her driveway for the last time. Even though the car was “only” 20 years old, it drove like an old car. My Rabbit with rack and pinion steering was a model of directional accuracy and stability. This Ford had so much freeplay that I could rotate that big wheel 90 degrees left and right before my inputs had any influence on vehicular direction. The Belt Parkway was a quite the challenge that night, but we safely made it.

Now that the car was home, I really didn’t know what to do with it! The Ford sat semi-enclosed in a carport my father had built next to our 2-car garage. I didn’t bother registering or insuring the car, as I had no intention of driving it that much. Fast forward to the summer of 1978, when I left my cushy Manhattan office job to begin employment as an apprentice auto technician, and my tool collection and confidence both grew. It was time to overhaul the Ford’s engine.

This was my first engine rebuild. I purchased the factory service manual, and with a rented cherry picker and borrowed engine stand, yanked the block with the vehicle in the carport. The cylinder heads and ancillaries were removed, and I had the nerve to put the bare block into the back of the Rabbit so that I could drive it to a machine shop.

Dig those labor prices!

The cylinders were bored 0.030” over, which necessitated eight new pistons. The heads were sent out for a complete valve job. In addition to the machine shop’s parts and labor costs, I spent money for new gaskets, motor mounts, water pump, and camshaft. It felt like every spare cent I earned was going into this engine rebuild, which likely was close to the truth.

The rebuild came together, the engine was reinstalled, and the Ford was roadworthy again, but still not legally so. The interior needed to be reupholstered, the tires and brakes were poor, and there was the matter of the rusty rear quarters. But other changes were coming first.

In January of 1980, I moved out of my parent’s house and into an apartment in Somerville NJ, a mile from the dealership where I worked. The Ford stayed on Staten Island, at least until 1982, when my father retired and my folks decided to sell the house and move to a retirement community.

The Skyliner was moved into a public storage garage, really a converted chicken coop, in Readington NJ. The rent at “Van’s Storage” was $18 a month, and the owner said that there were strict rules against working on the cars on site. My Ford was on the 2nd floor of a two-story cinder block building, nestled among 50 other collector cars in various states of disrepair. The storage facility also had trucks, school buses, and loads of printed material stored among the classic and not-so-classic old cars.

The years were rolling by, and no work was being performed on the Ford. It had ceased to become a priority. With no garage access, I had no place to work on it. In the back of my mind, this was a “one day I’ll get to it” project, with the reality that “one day” could be a long way off.

One evening in the summer of 1984, enjoying a quiet weeknight in my apartment, the phone rang. It was “Van” of Van’s Storage. The voice said “I have bad news. We’ve had a fire out here. Everything’s in bad shape. You need to come out and see what you can salvage of your car.” I was upset, but not that upset, thinking I could rebuild the car or at worst, sell off the car for parts.

I waited until the weekend to drive out to the site. Four days after the phone call, the pile of ashes was still smoldering. The building was gone, and so were all 50 cars. Amazingly, I could spot my Ford. The fact that it was on the 2nd floor meant that as the building collapsed, my car was on top. But I was horrified at what fire can do: the glass, engine, wiring, and much of the sheet metal were consumed. The only component potentially salvageable was the rear bumper. It was all I could do to snap a few photographs and walk away.

Newark Star Ledger article
Newark Star-Ledger article

As reality sank in, I was angry only at myself for my own immaturity: I never had bothered with insurance on the Ford. The fire was investigated by the local Police Department, and was ruled accidental. Van’s was not responsible; in fact, the rental agreement I signed absolved Van’s of any responsibility for theft, fire, etc. My total monetary investment in the Skyliner was about $4,000, now literally all up in smoke. At the age of 30, I felt foolish for fancying myself a “car restorer”.


Letter from local police department


This was a tough way to learn some difficult lessons. One lesson was to ensure that my first order of business needed to be attending to my legal and financial obligations. Insurance exists for a reason. There was the more subtle lesson that letting a restoration project “sit” for years is not a workable approach. If I wanted to succeed in the restoration of collector cars, I’d need to do better. Losing the Ford was a wake-up call. I’d like to think it helped me as I moved forward with my other projects in this hobby.


All photographs copyright © 2016 Richard A. Reina. Photos may not be copied or reproduced without express written permission.