Alfa Romeo brake system overhaul, Part 2

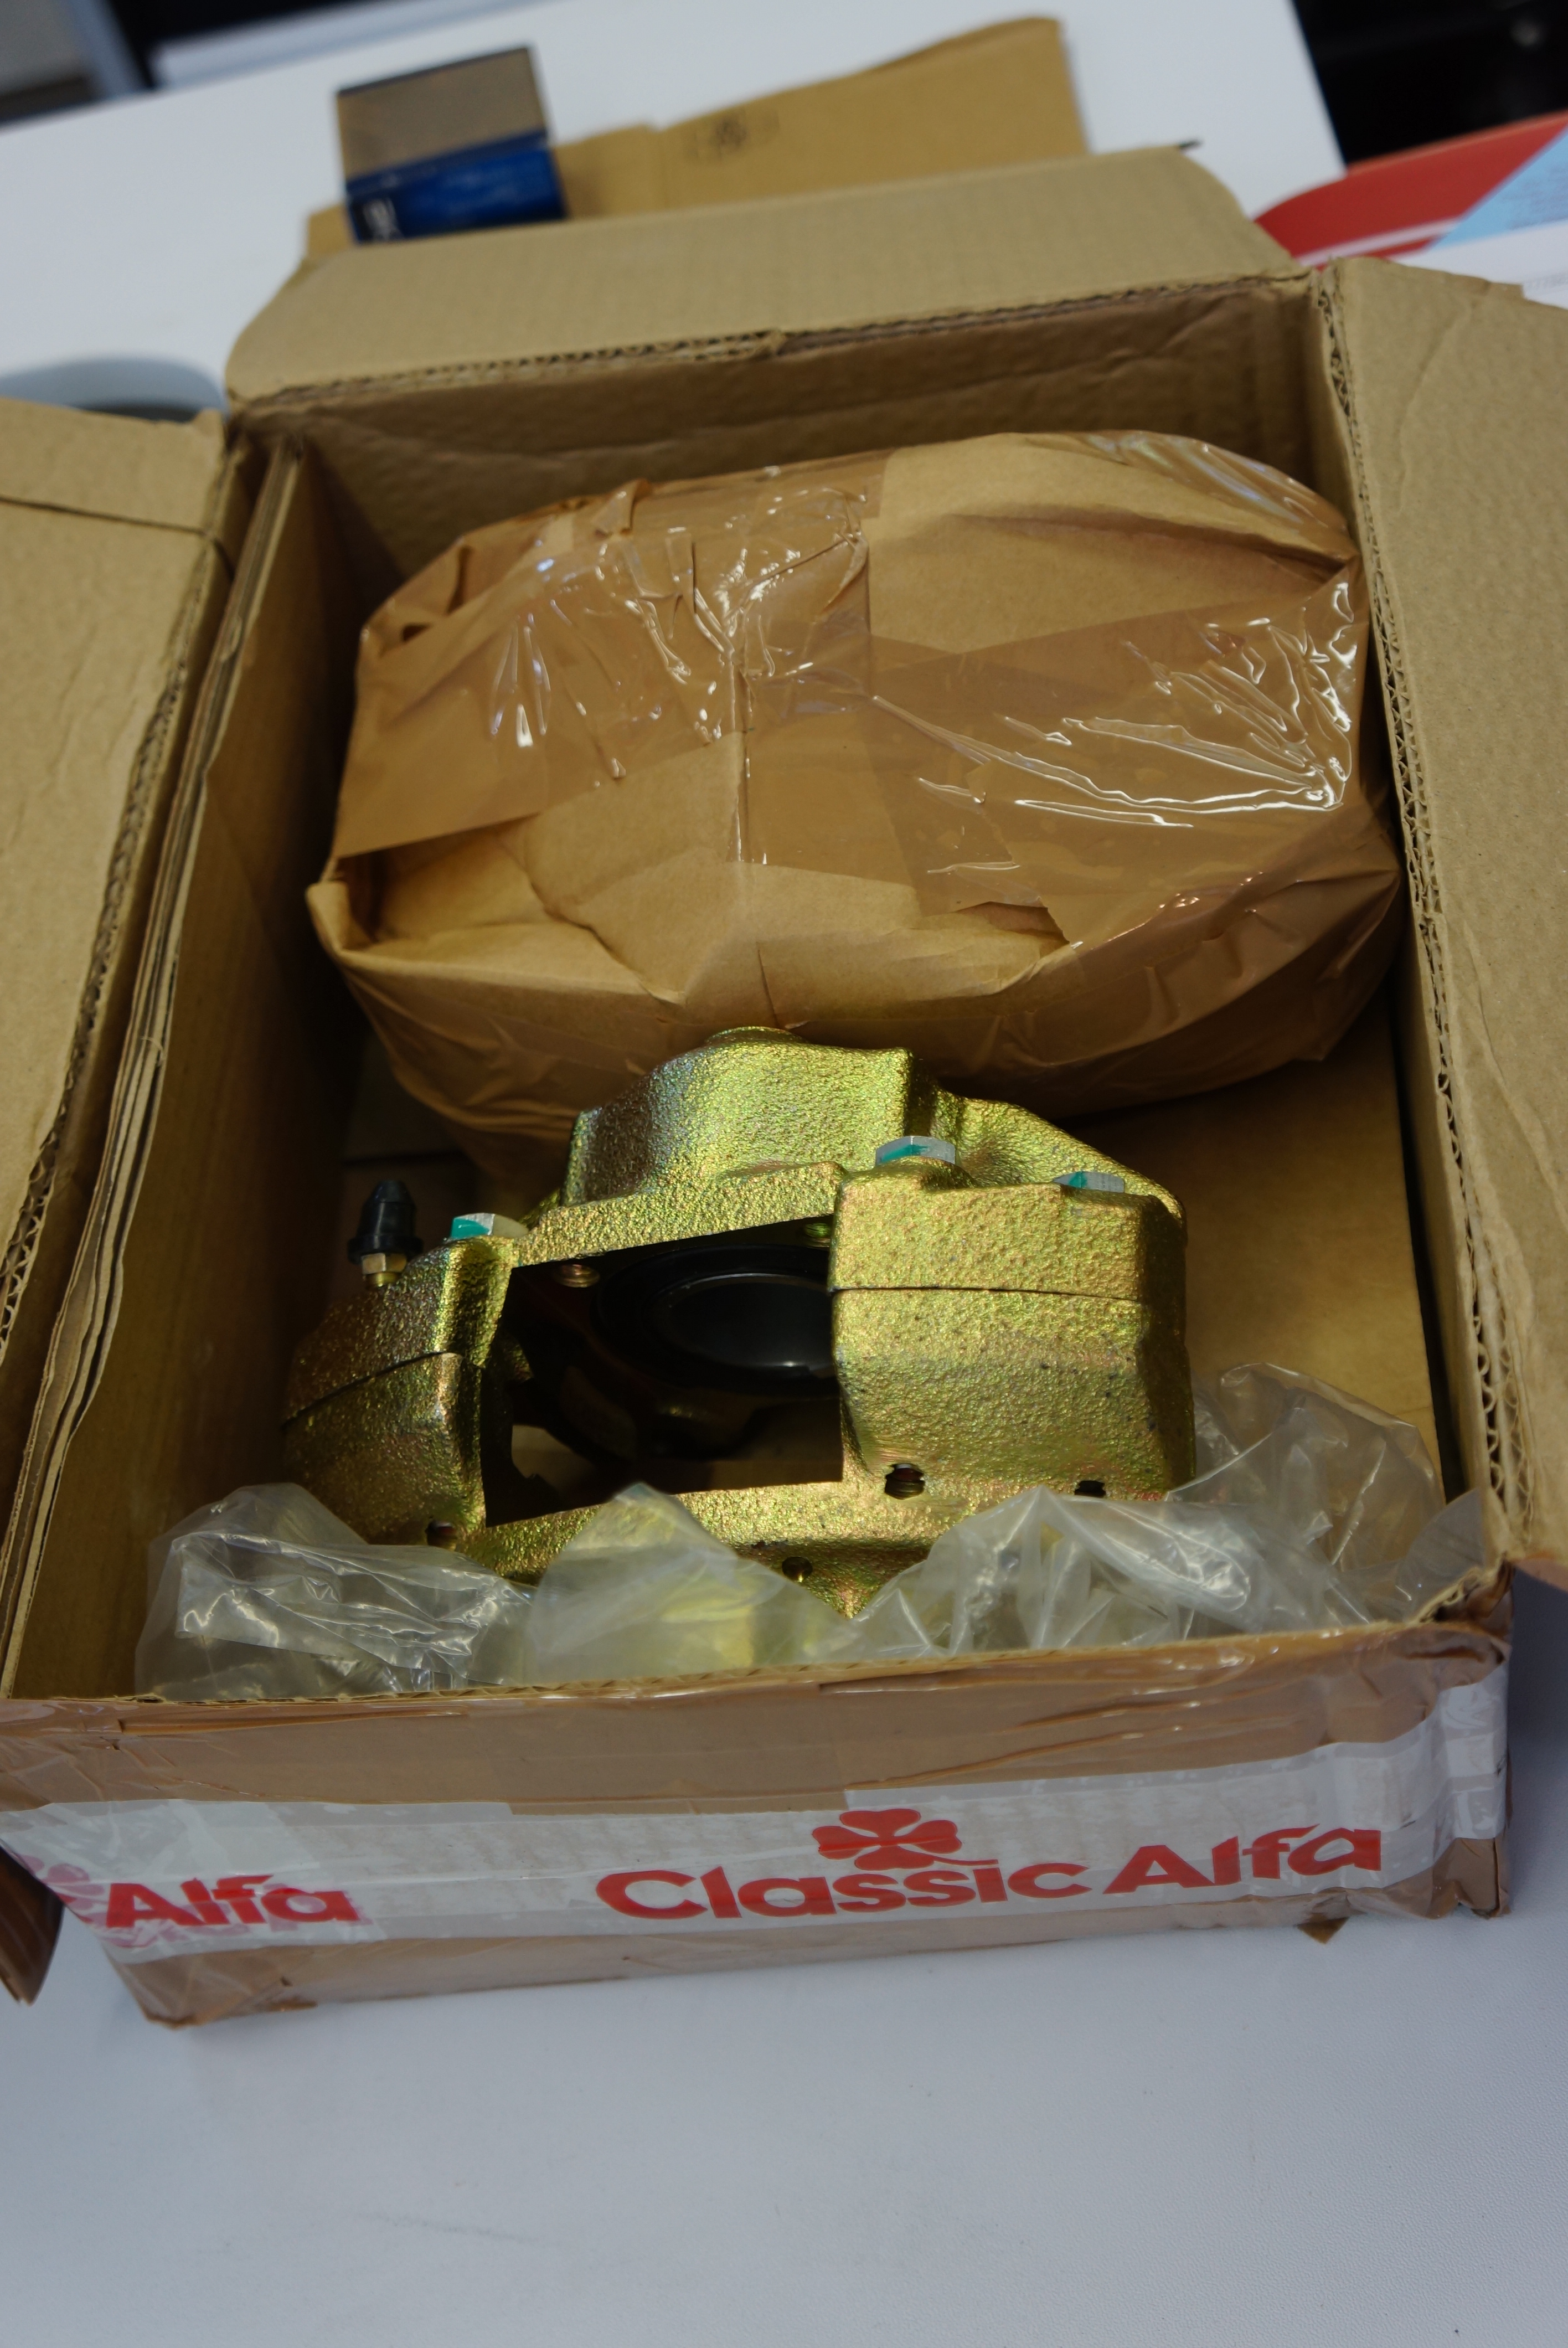
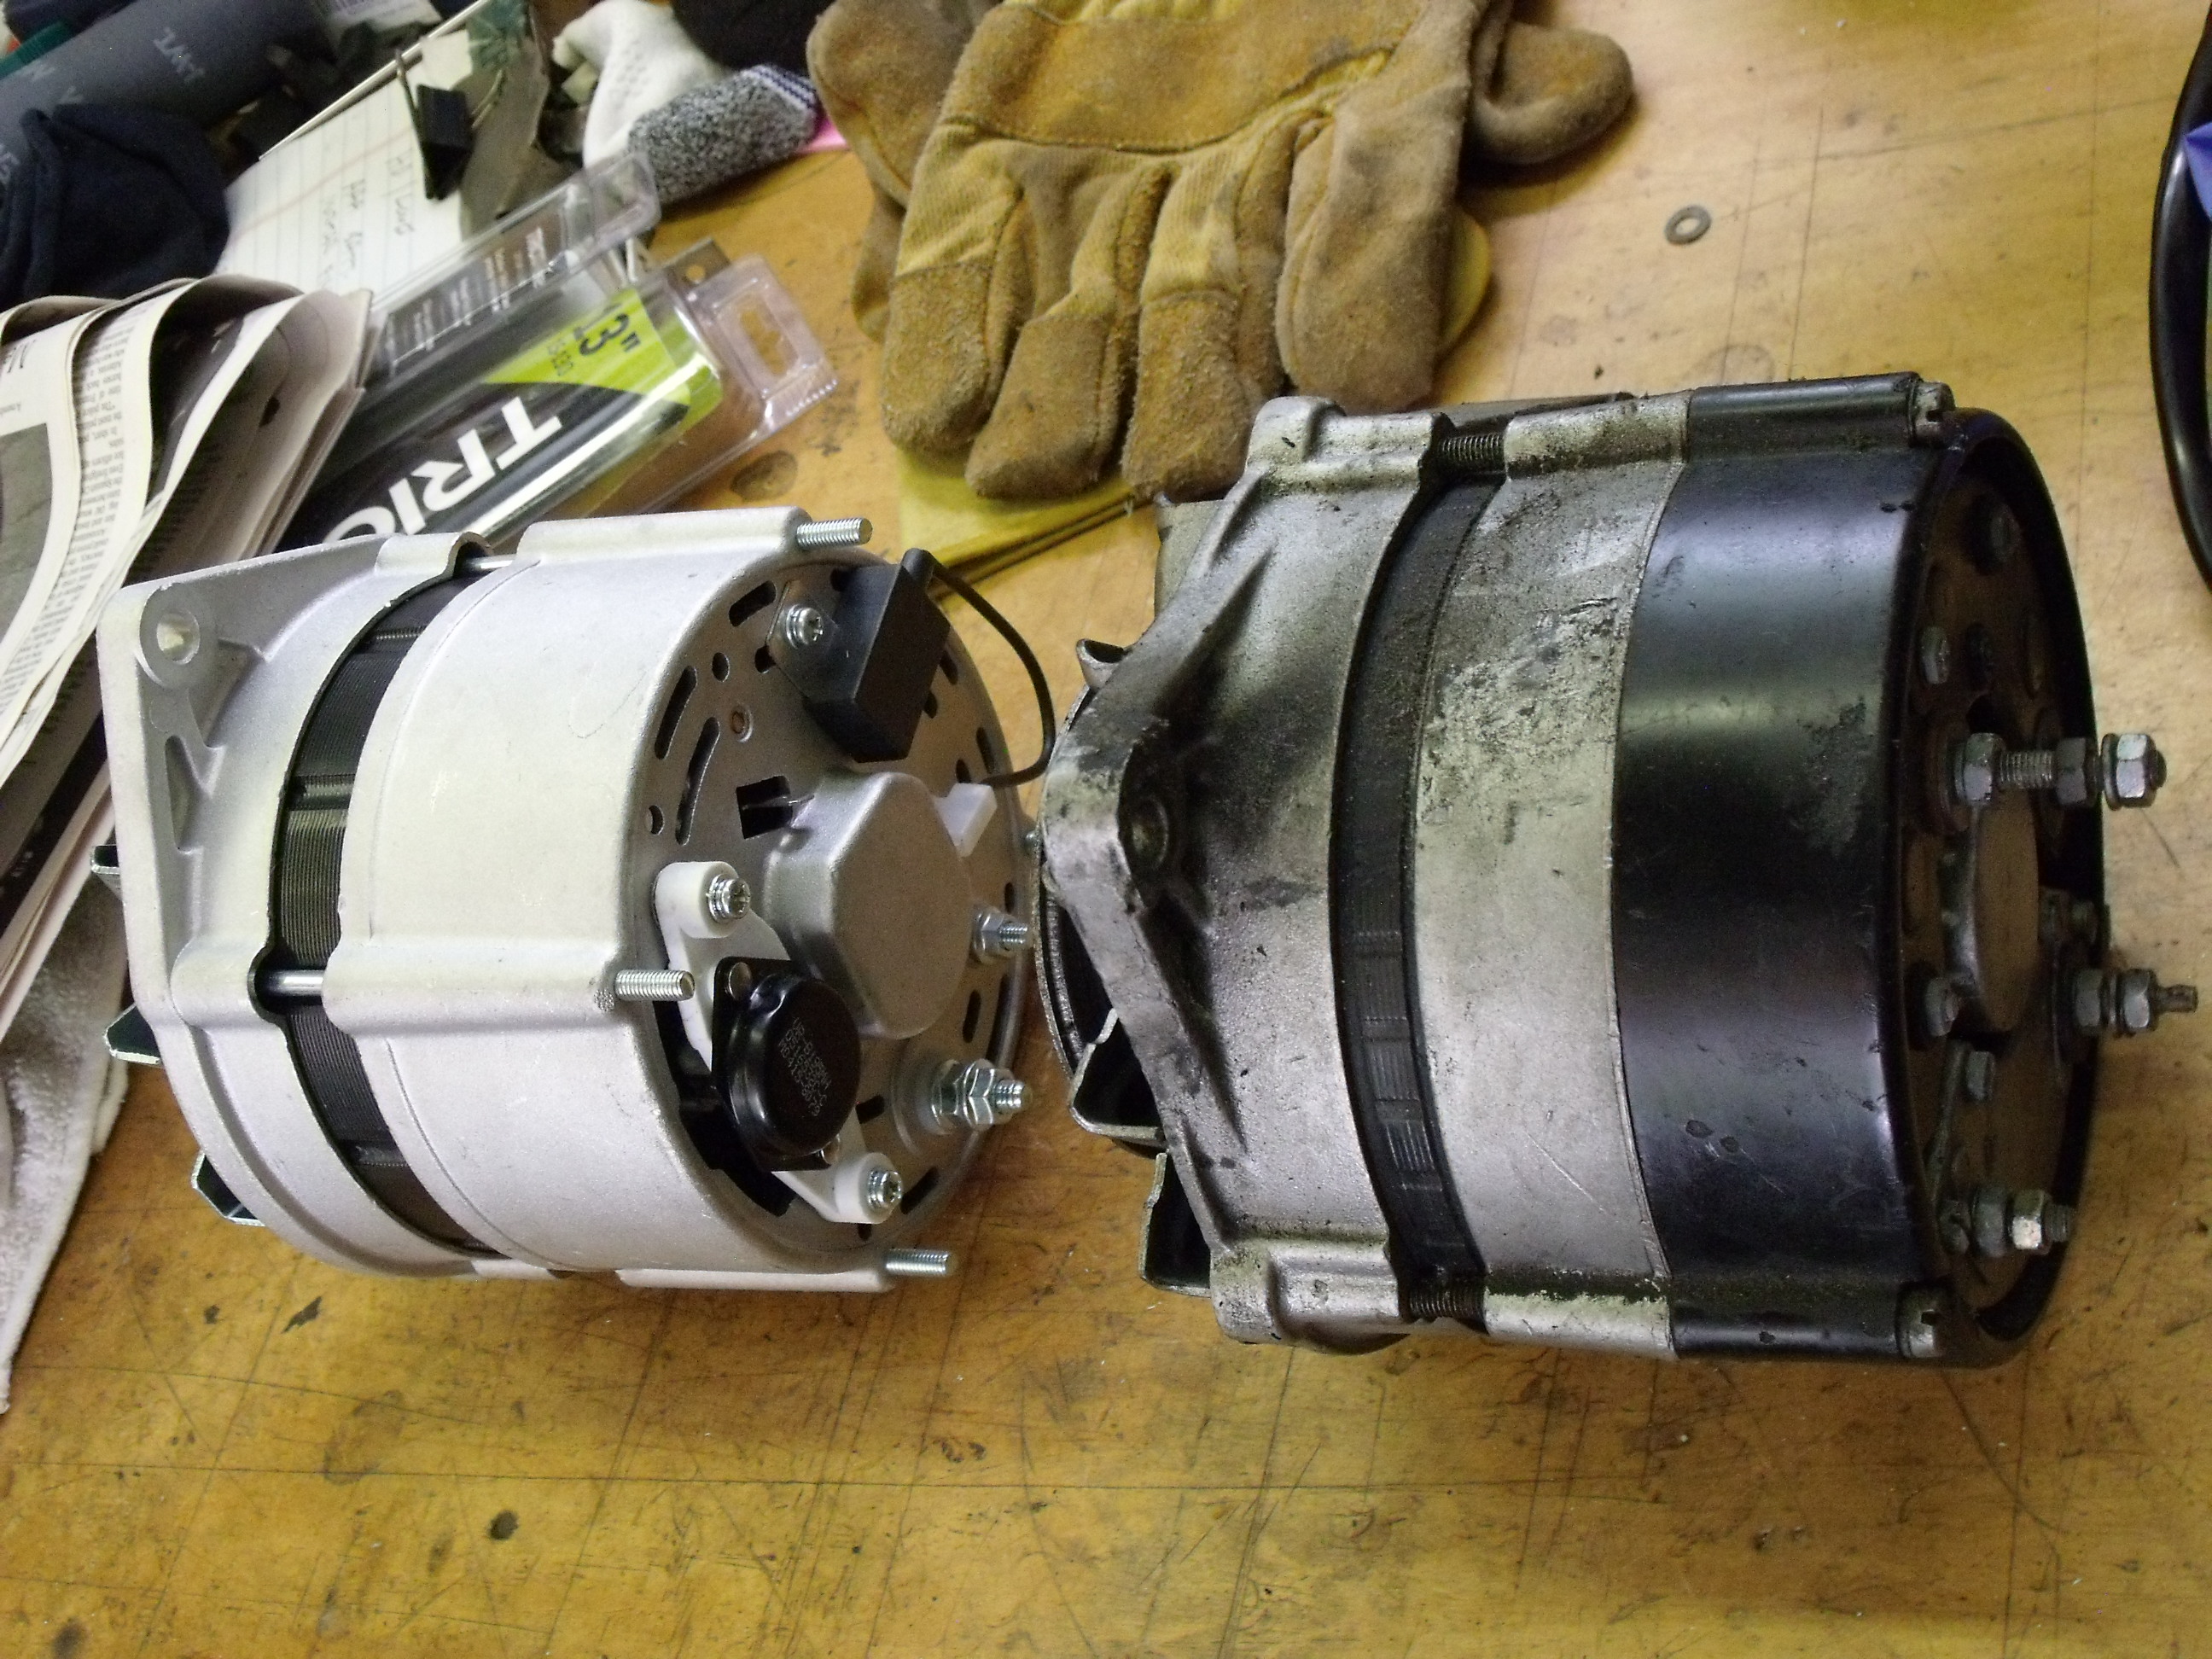
As you read in Part 1 of the Alfa Romeo brake system overhaul, the new front calipers I had purchased, through no one’s fault, didn’t get the job done. It was just as well; in an attempt to get my car ready to drive to the AROC Convention in Pittsburgh, I was hurrying through the job, which is no way to work on a braking system. If anything, the inability to make the car roadworthy gave me just the excuse I needed to do the right thing.


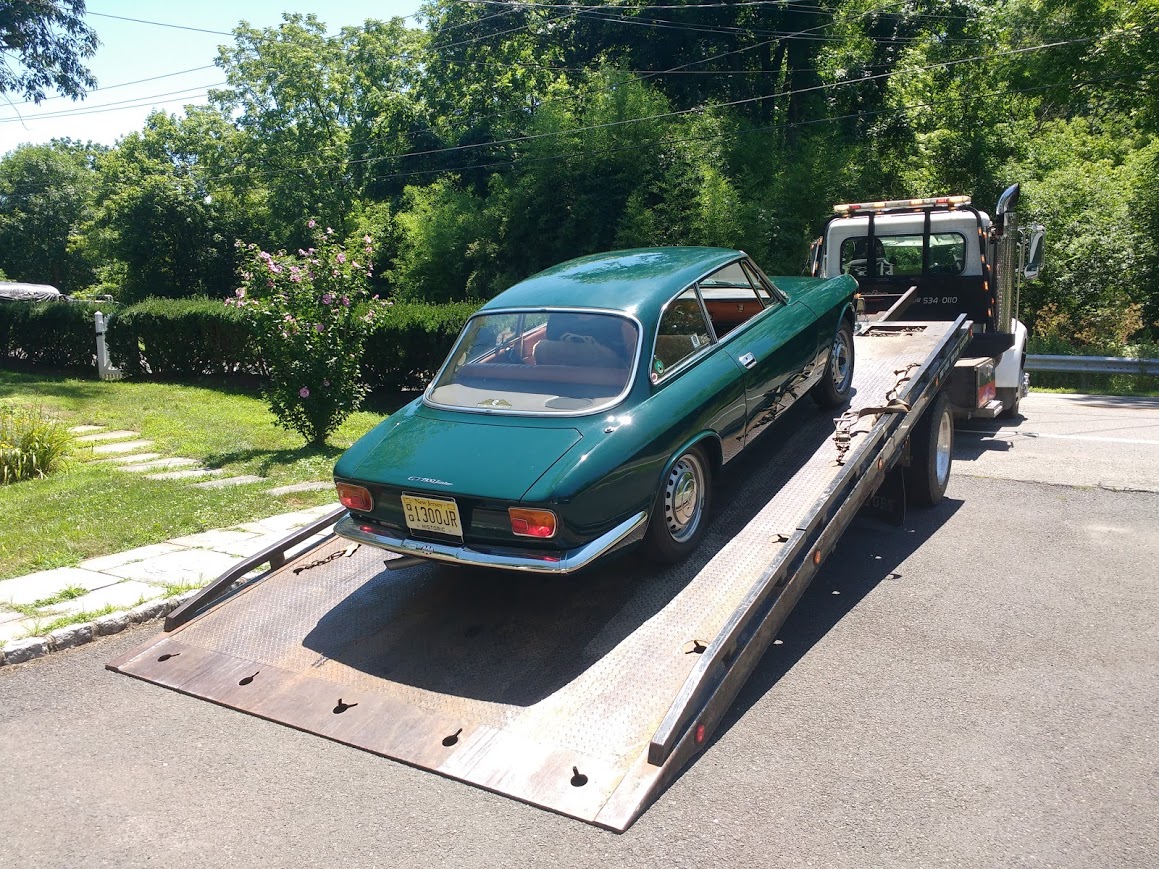
I had purchased this car in 2013 from my friend Pete. He bought it in 1968, drove it for perhaps five years, mothballed it for over 20 years, then took it out of long-term storage. After refreshing various systems, including the brakes, Pete enjoyed the car for about 10 years before handing over the keys. In my mind, this Alfa had been “recently” refurbished. However, once I added up the years and the miles, I realized my own miscalculation. At best, Pete worked on the brakes around the year 2003, meaning, the brake fluid alone was now 16 years old. Shame on me! Since I loved driving the car, I wanted 100% confidence in its brakes, so The Right Thing meant a complete overhaul: rebuilt calipers, new or rebuilt master cylinder, and new lines and hoses. I got all 4 wheels up off the ground, drained what little fluid remained, and brought both front calipers to the workbench.

Caliper with piston, dust boot and spring in place before removal

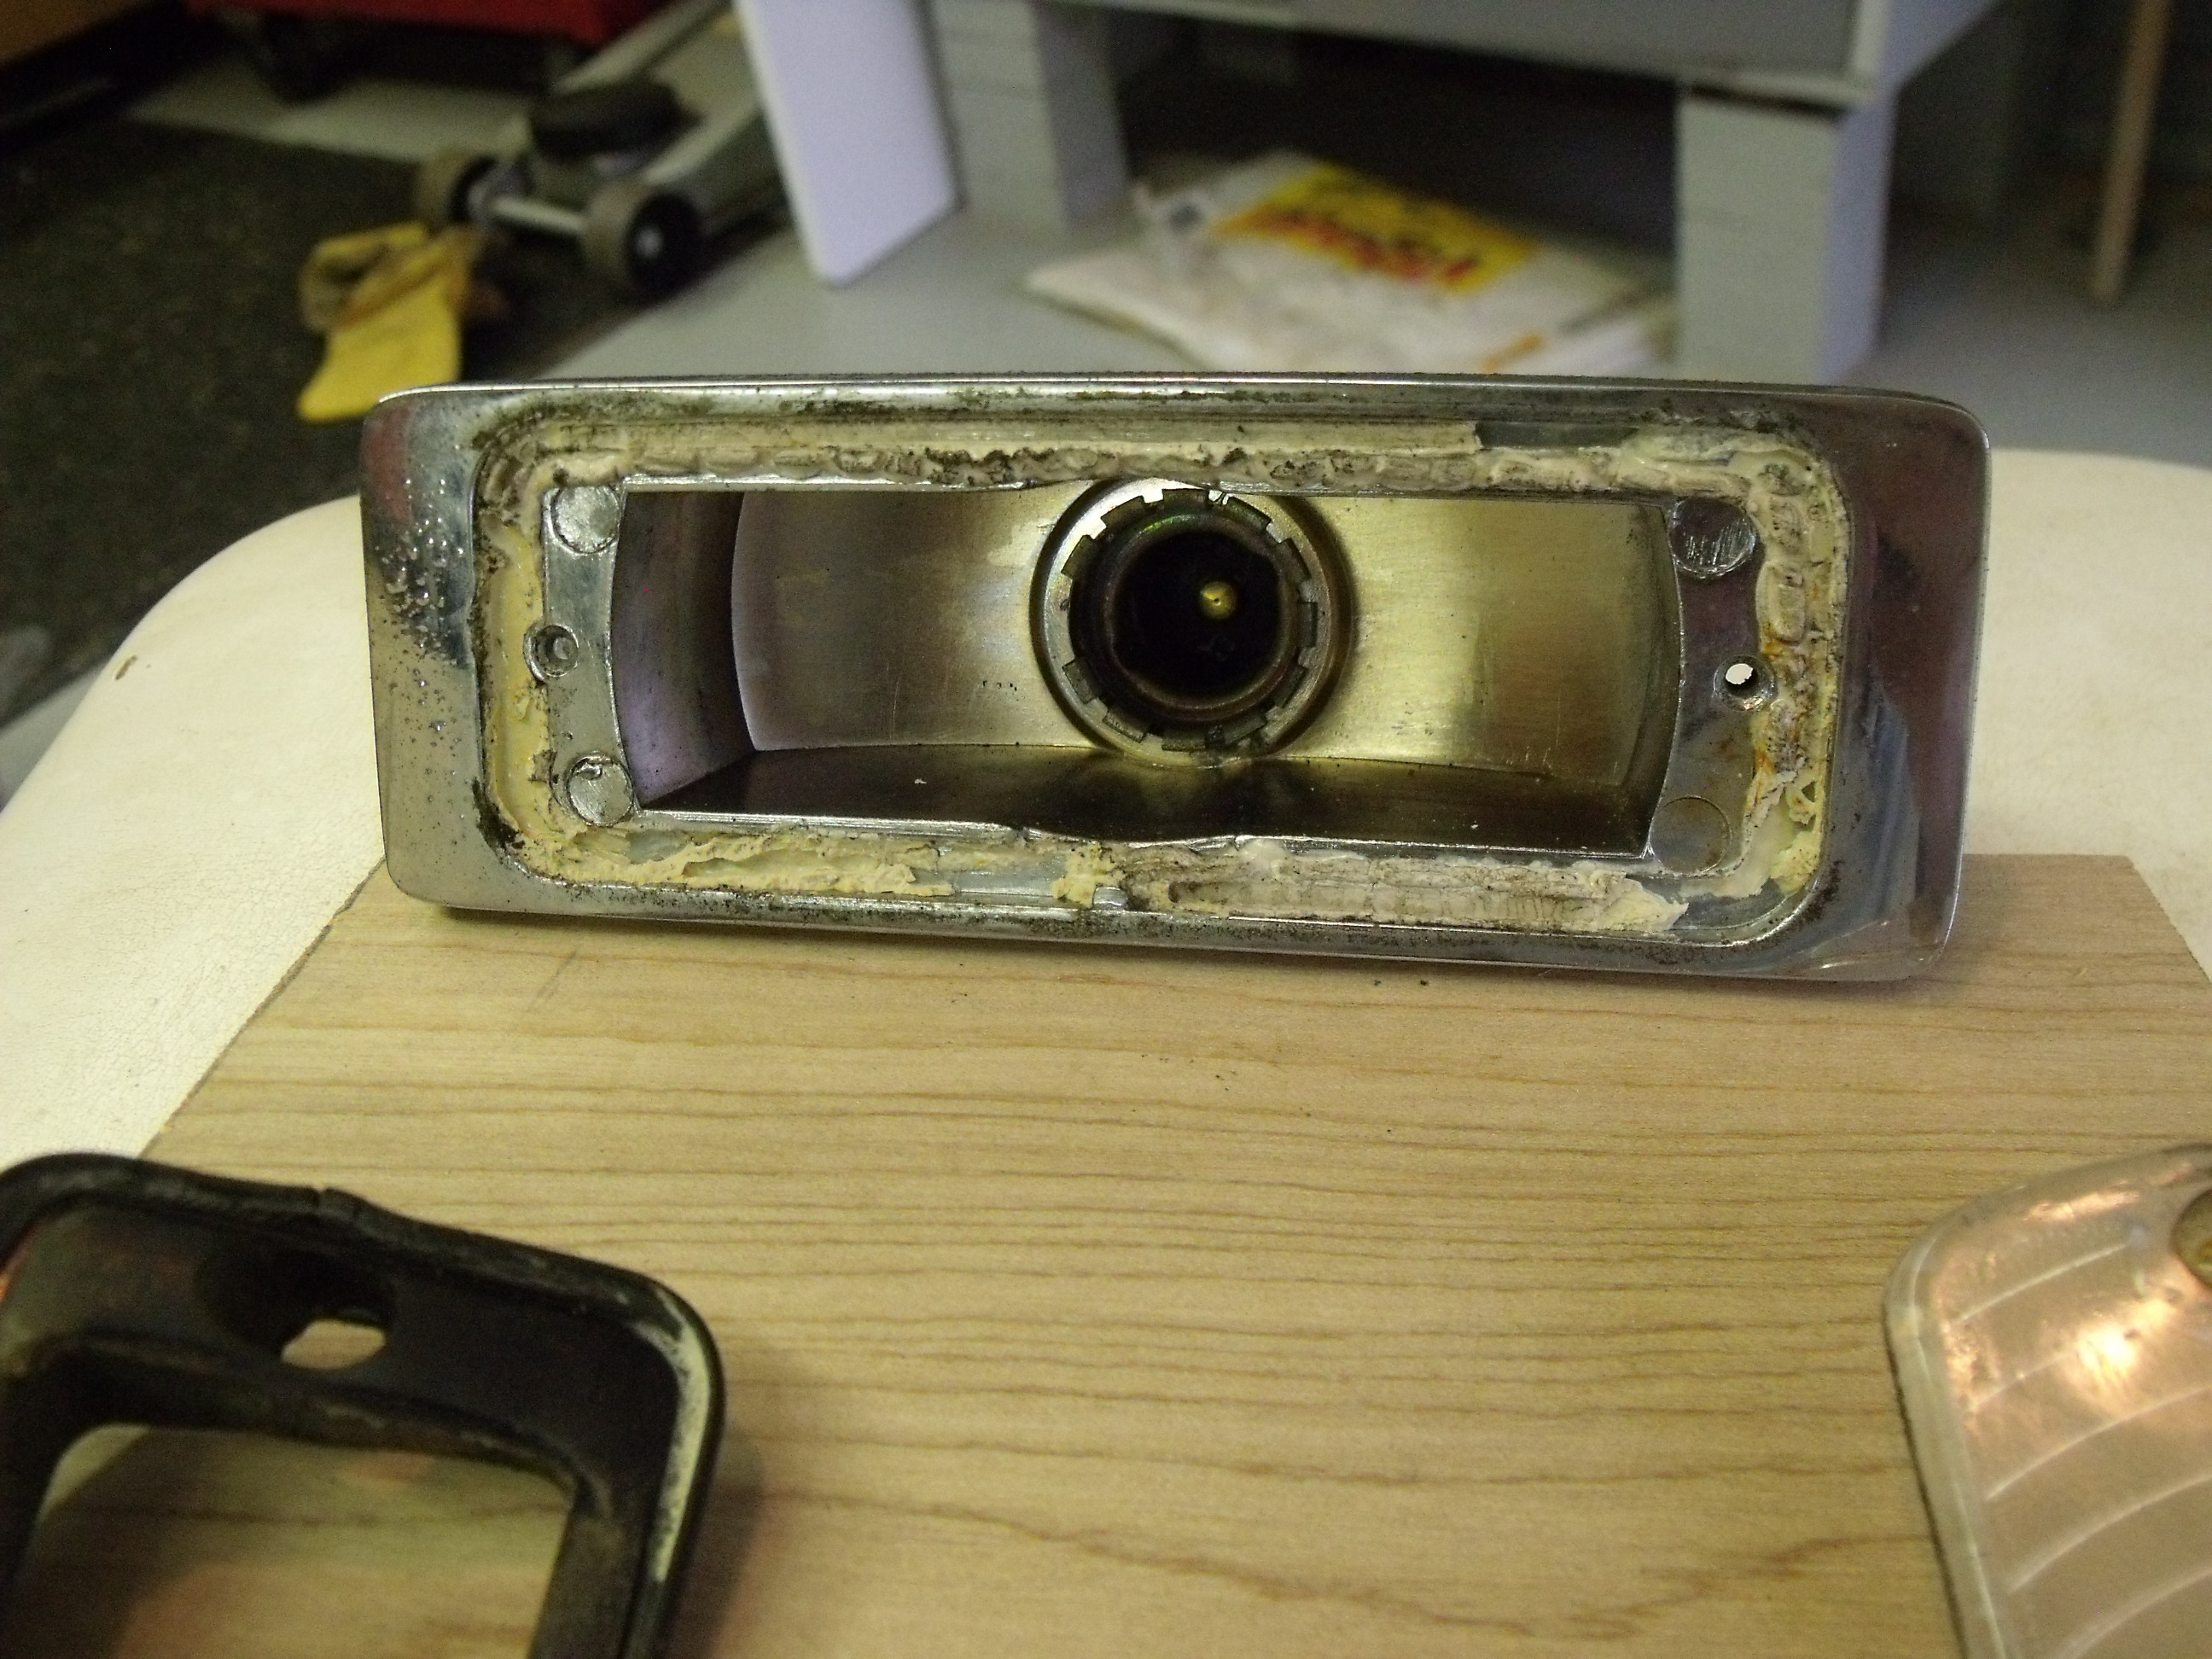
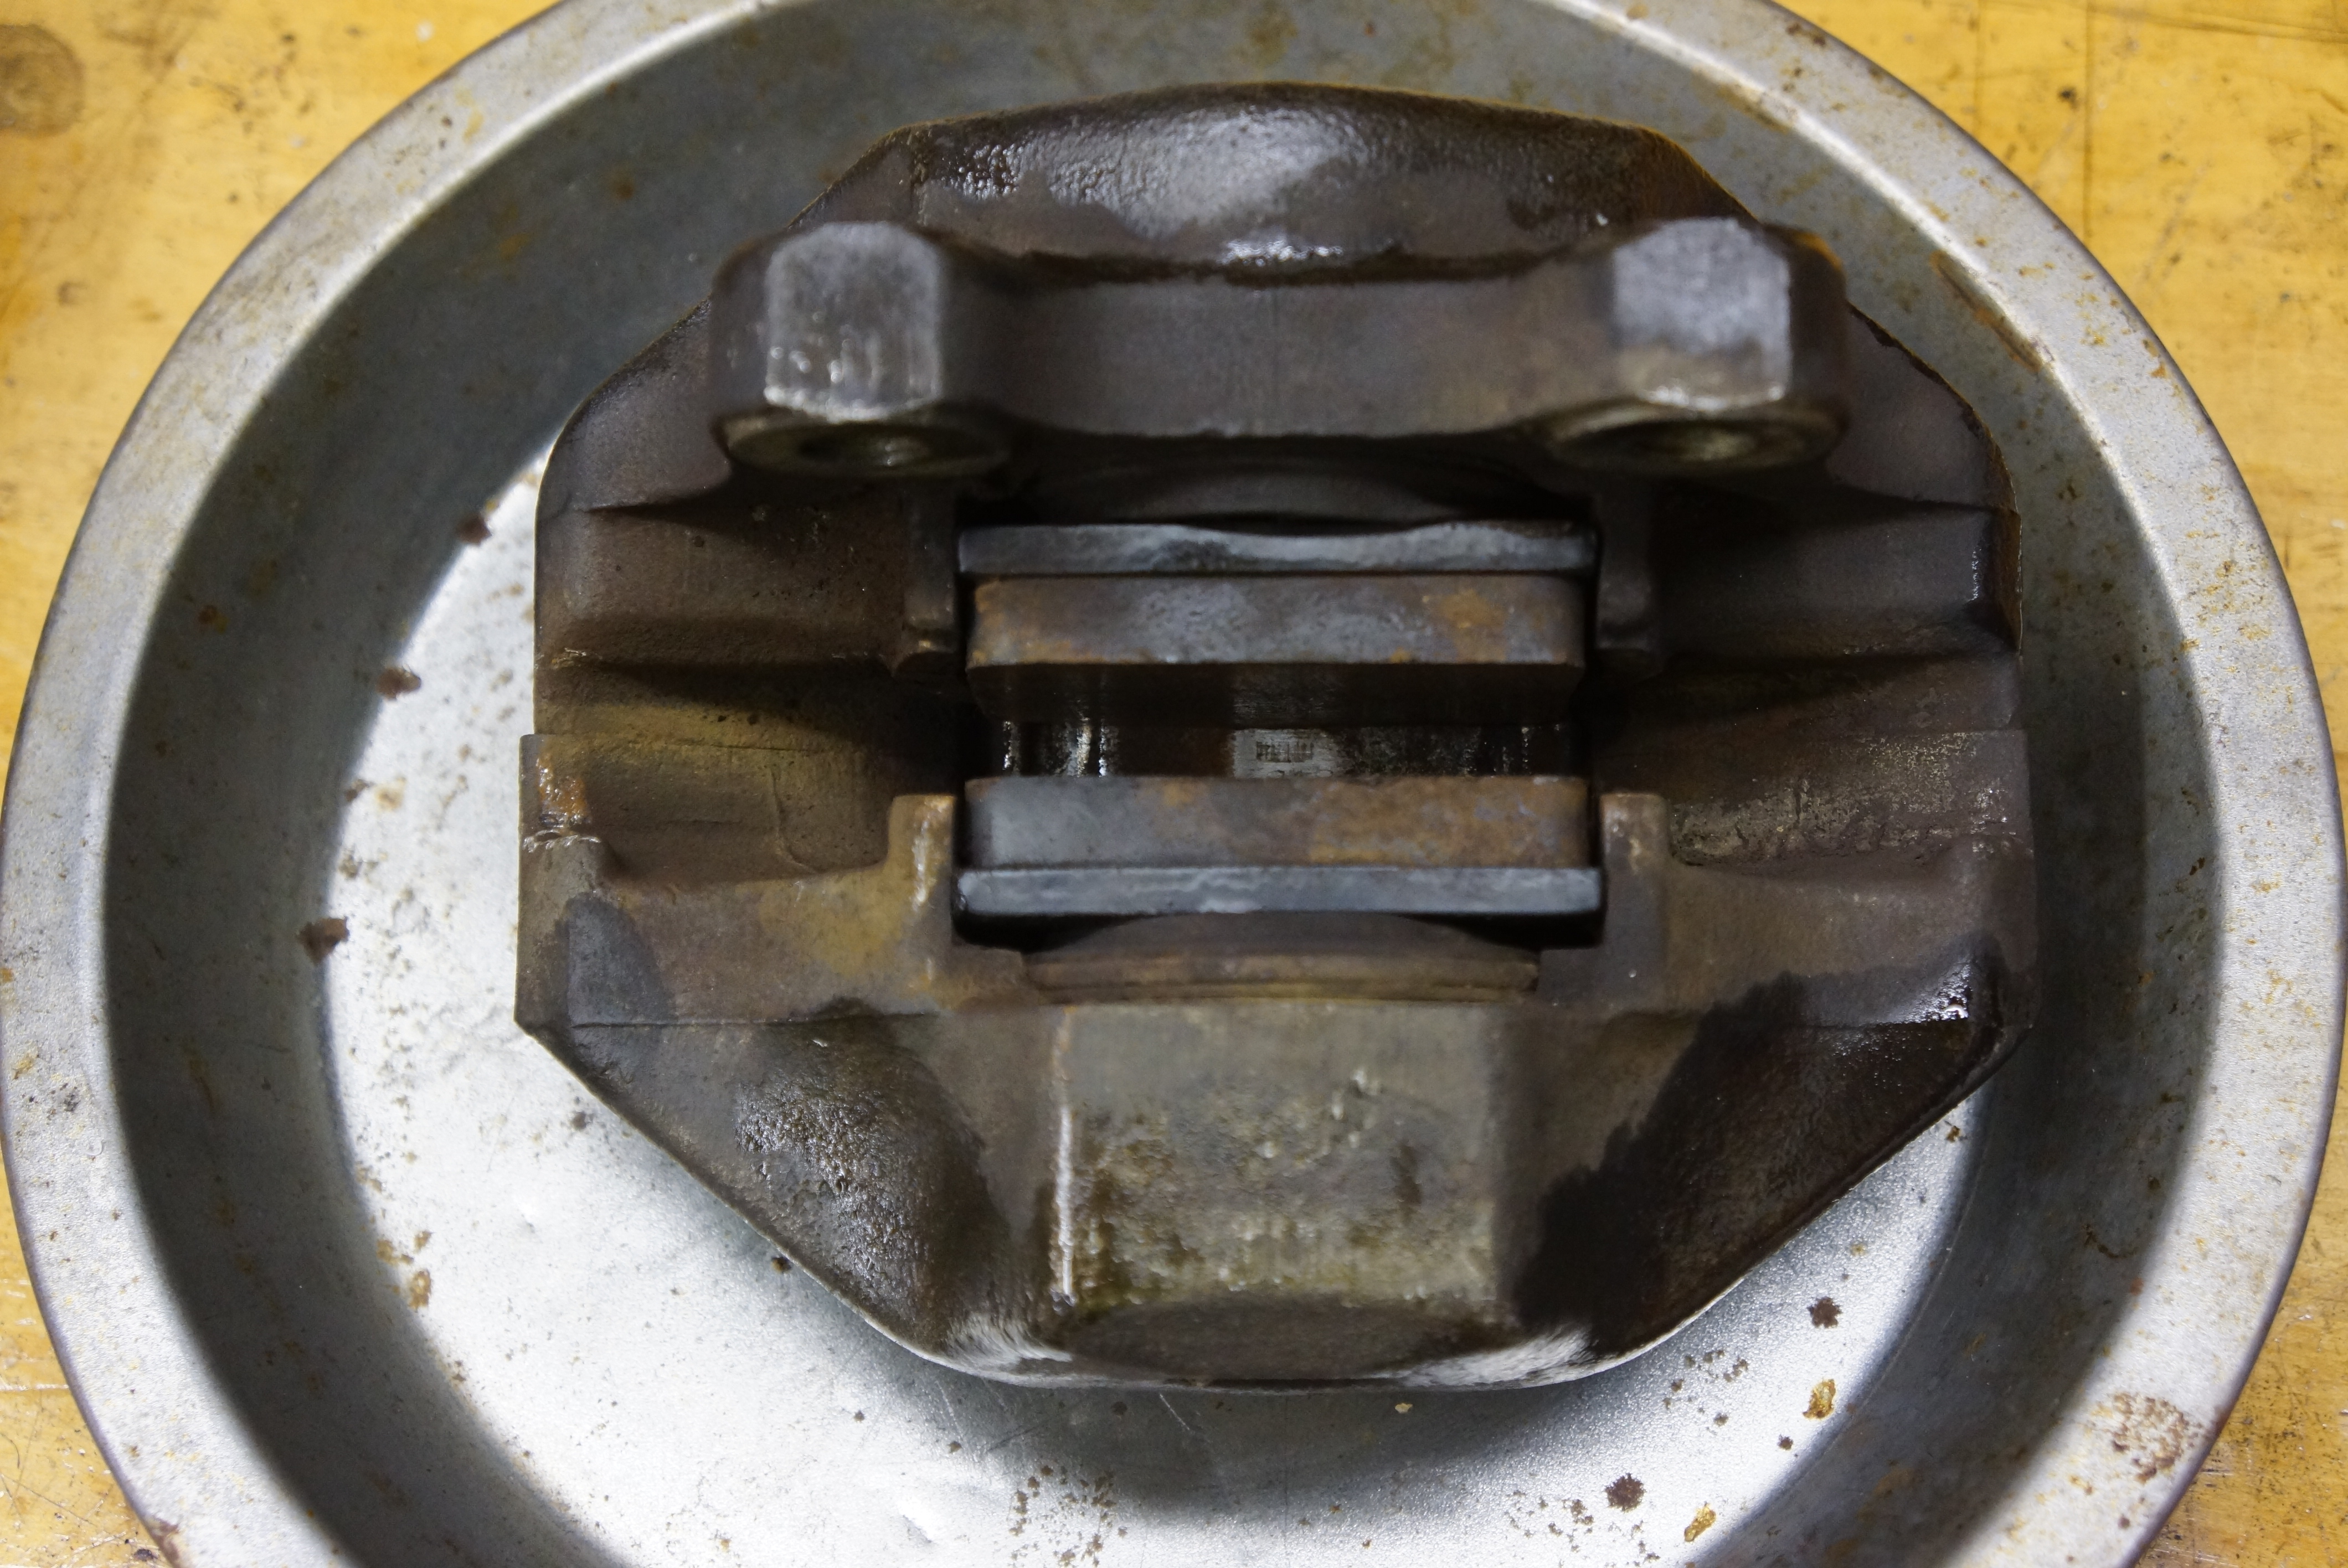
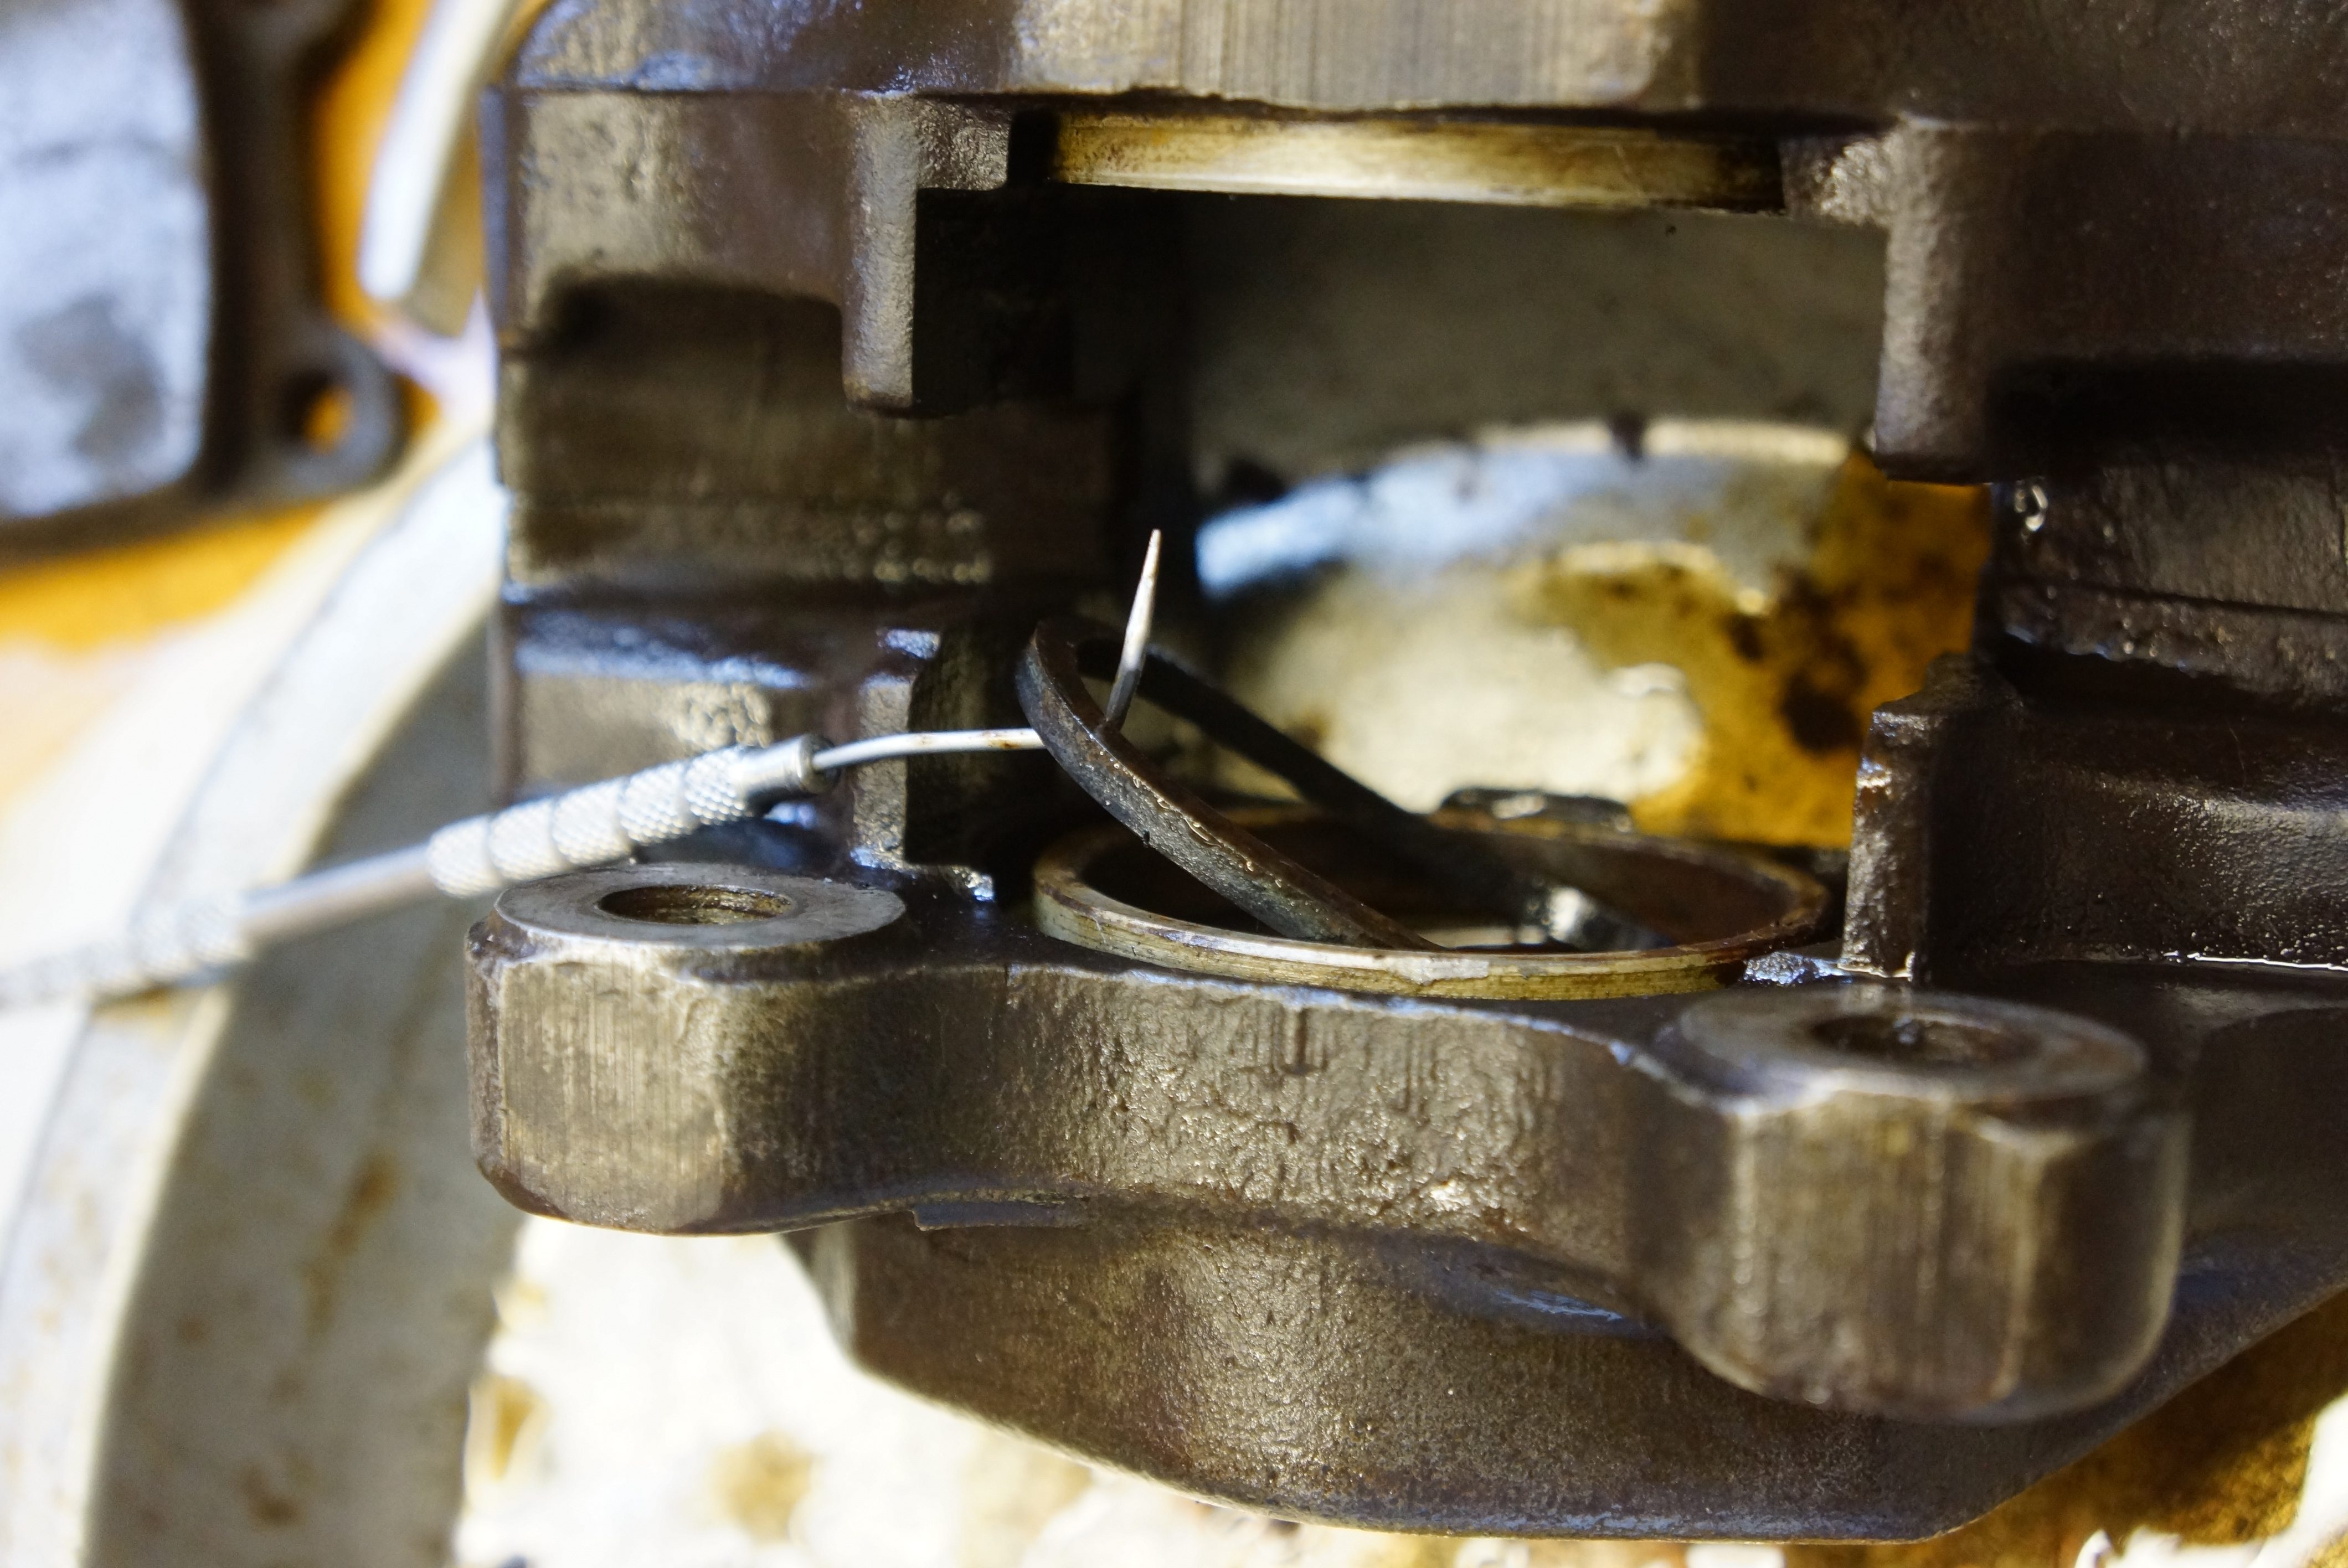
First, the dust boots and their retaining springs had to be removed. The springs were so rusty that it was difficult to see them against the boots, but with a little urging from a dental pick, they popped off. The boot for the seized piston looked like it had been on fire (it almost was), and this early discovery reinforced that this overhaul was necessary and overdue.


Dust boot and rusty old spring on their way off


This dust boot is ready for the trash can


I’ve rebuilt calipers before, as a Volvo tech, but it wasn’t a job we did very frequently. All 4 of my car’s calipers are of the two-piston fixed type, and research from my Alfa library led me to conclude that there was no need to split the calipers. The pistons could be removed with compressed air, and the bores cleaned up as necessary.


This 2-piston caliper has 1 piston behind each pad. It is “fixed”: the two halves are bolted together.

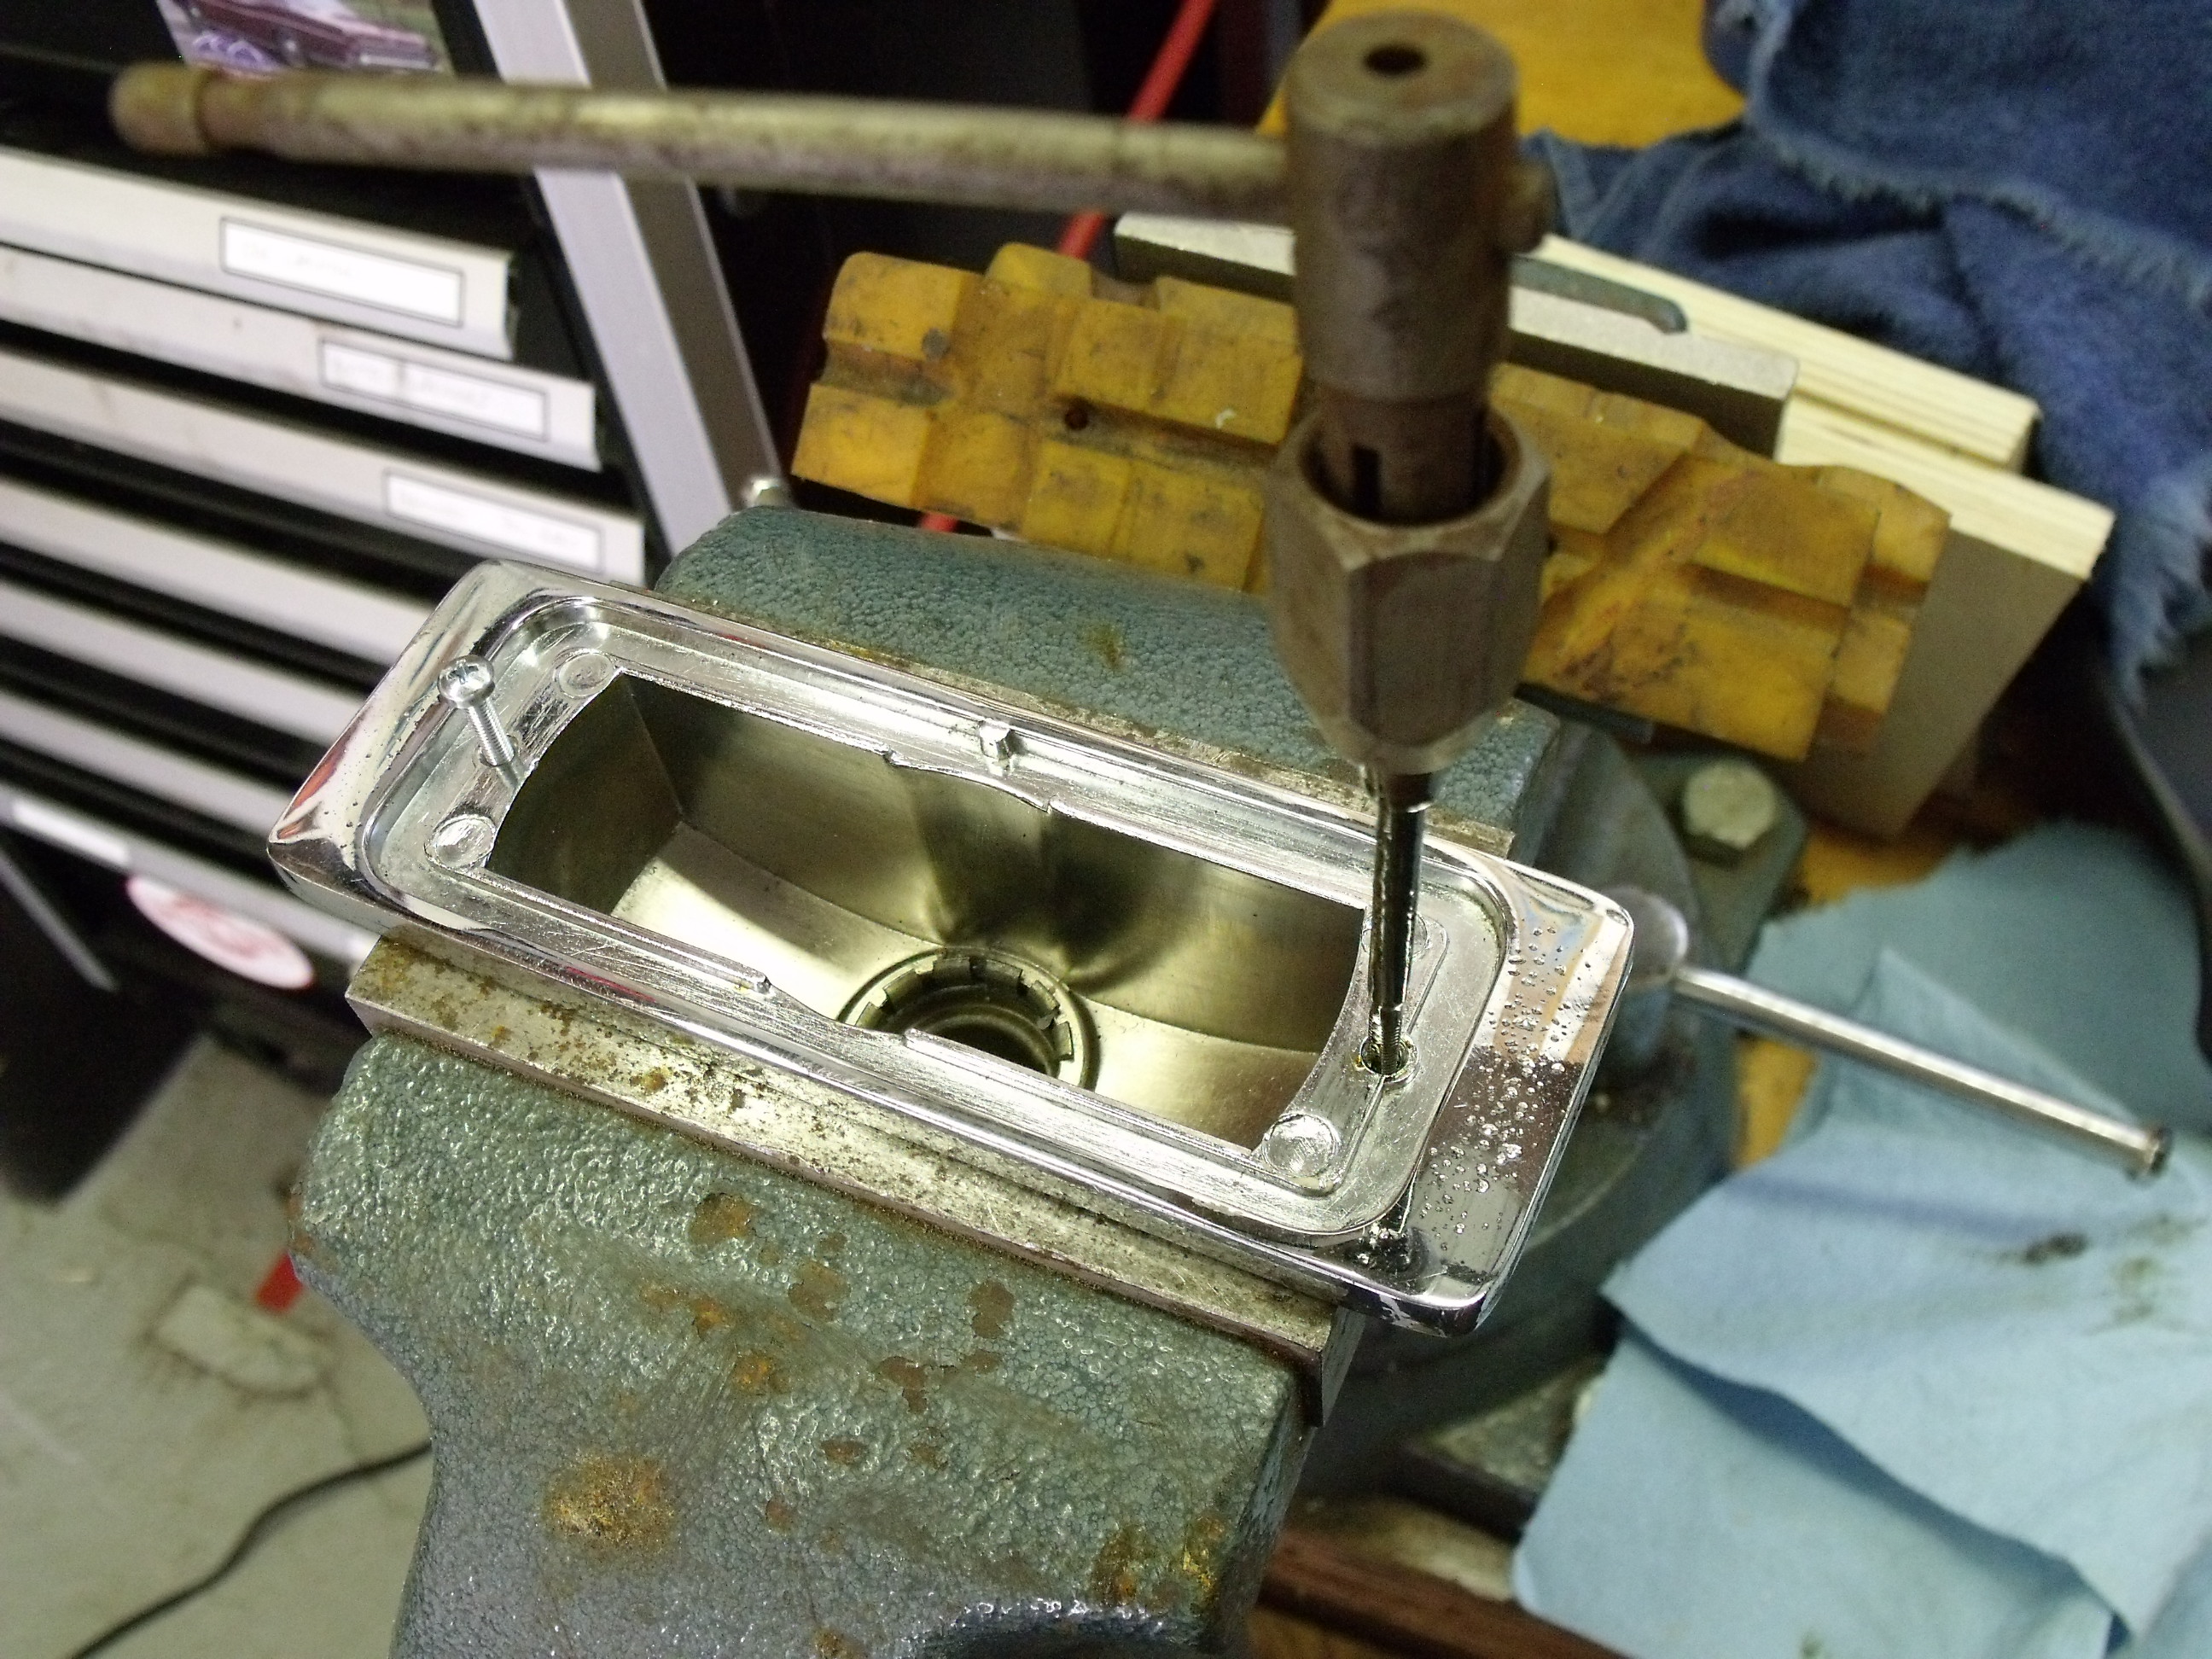
Starting with the seized right front unit, my technique was to start by pushing the pistons back into their bores with a piston compression tool. The reasoning is that any movement is good movement. Once they were fully retracted, I hit the fluid passage with compressed air, and both pistons moved outward a few millimeters. The cycle was repeated: retract pistons, apply air; retract pistons, apply air. Finally, one piston popped free.

At the start, piston retraction tool was used to push pistons all the way back


Compressed air is good stuff


But now I had a problem: the compressed air escaped from the now-empty bore, and did nothing to move the piston still in place. I reinstalled the removed piston, but the same thing happened: one piston came out, and one stayed in. I needed a way to block the fluid passages without fully reinstalling the first piston. Stuffing rags into the bore did nothing.

C-clamp is employed to hold 1st piston while compressed air dislodges 2nd one

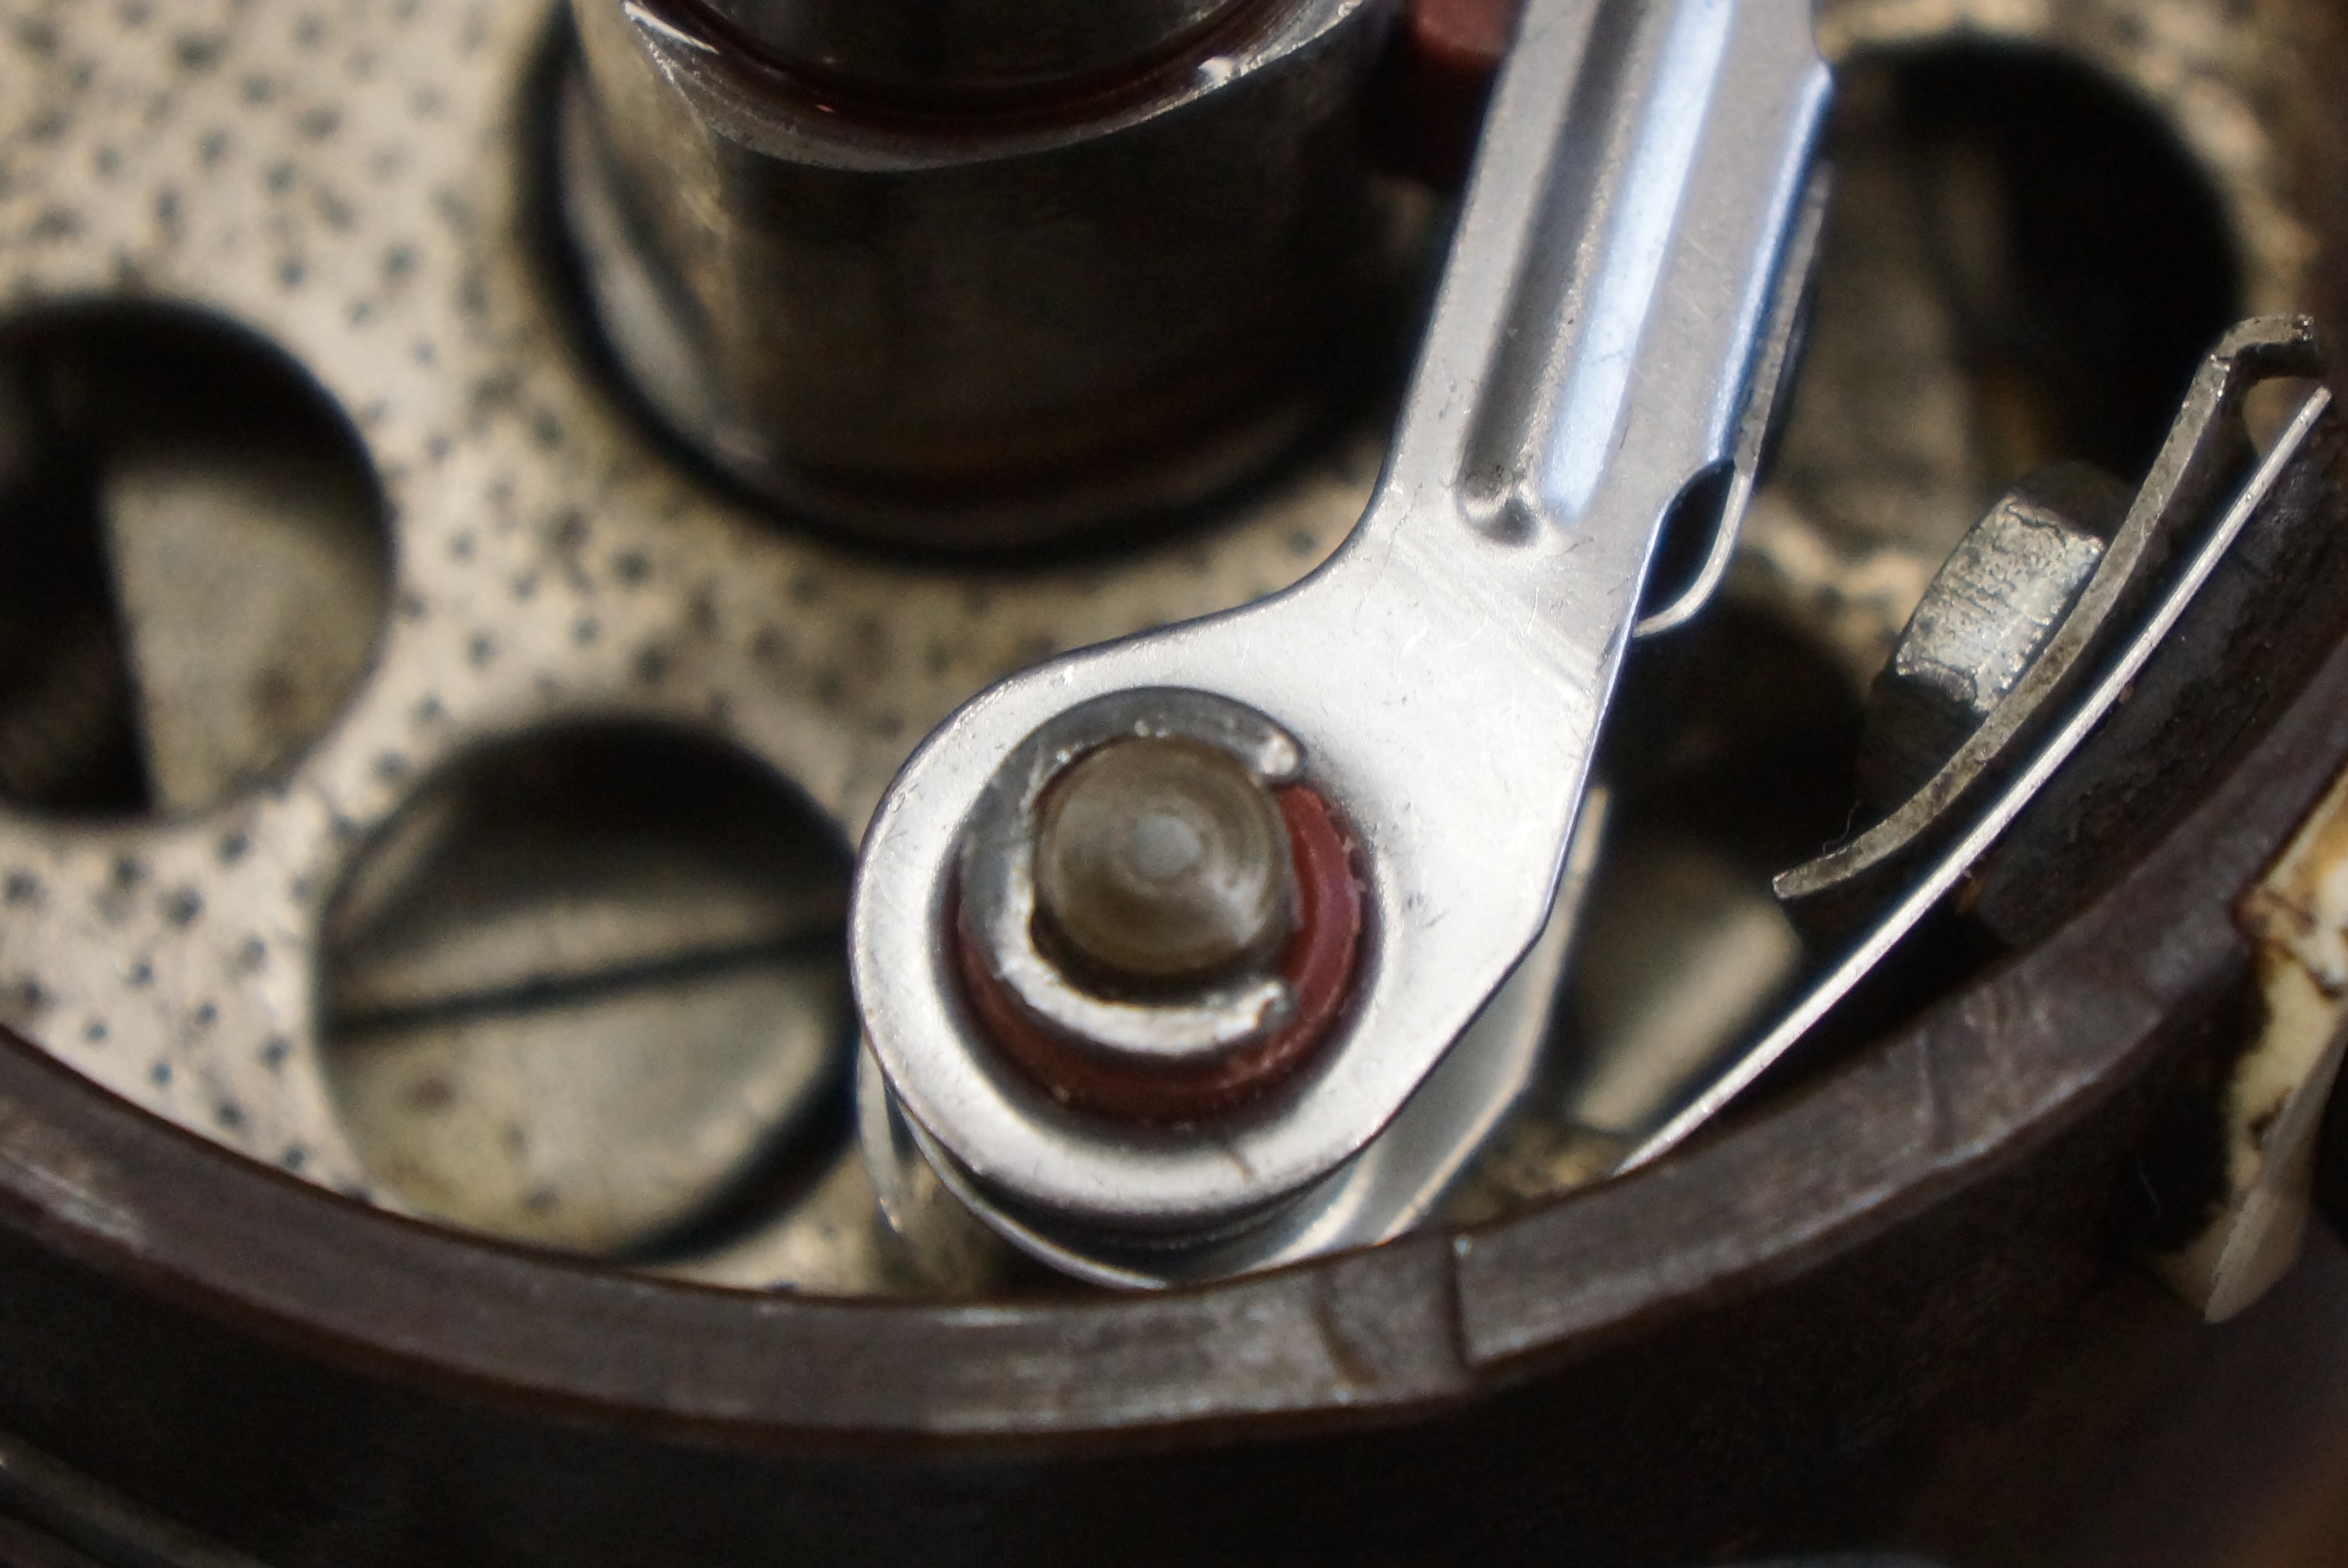
Here’s how I did that: lubing up the piston with brake fluid, I reinserted it just a few millimeters back into its bore, enough to block air flow, but not so much that I couldn’t pull it out by hand. I held this piston in place with a C-clamp, so the force of the air would blow out the 2nd piston. It worked! The 2nd piston shot out, and once I removed the C-clamp, the 1st piston could be worked out with my fingers. With the pistons out, the inner seals were easily coaxed out with a dental pick.

Removal of the inner seal

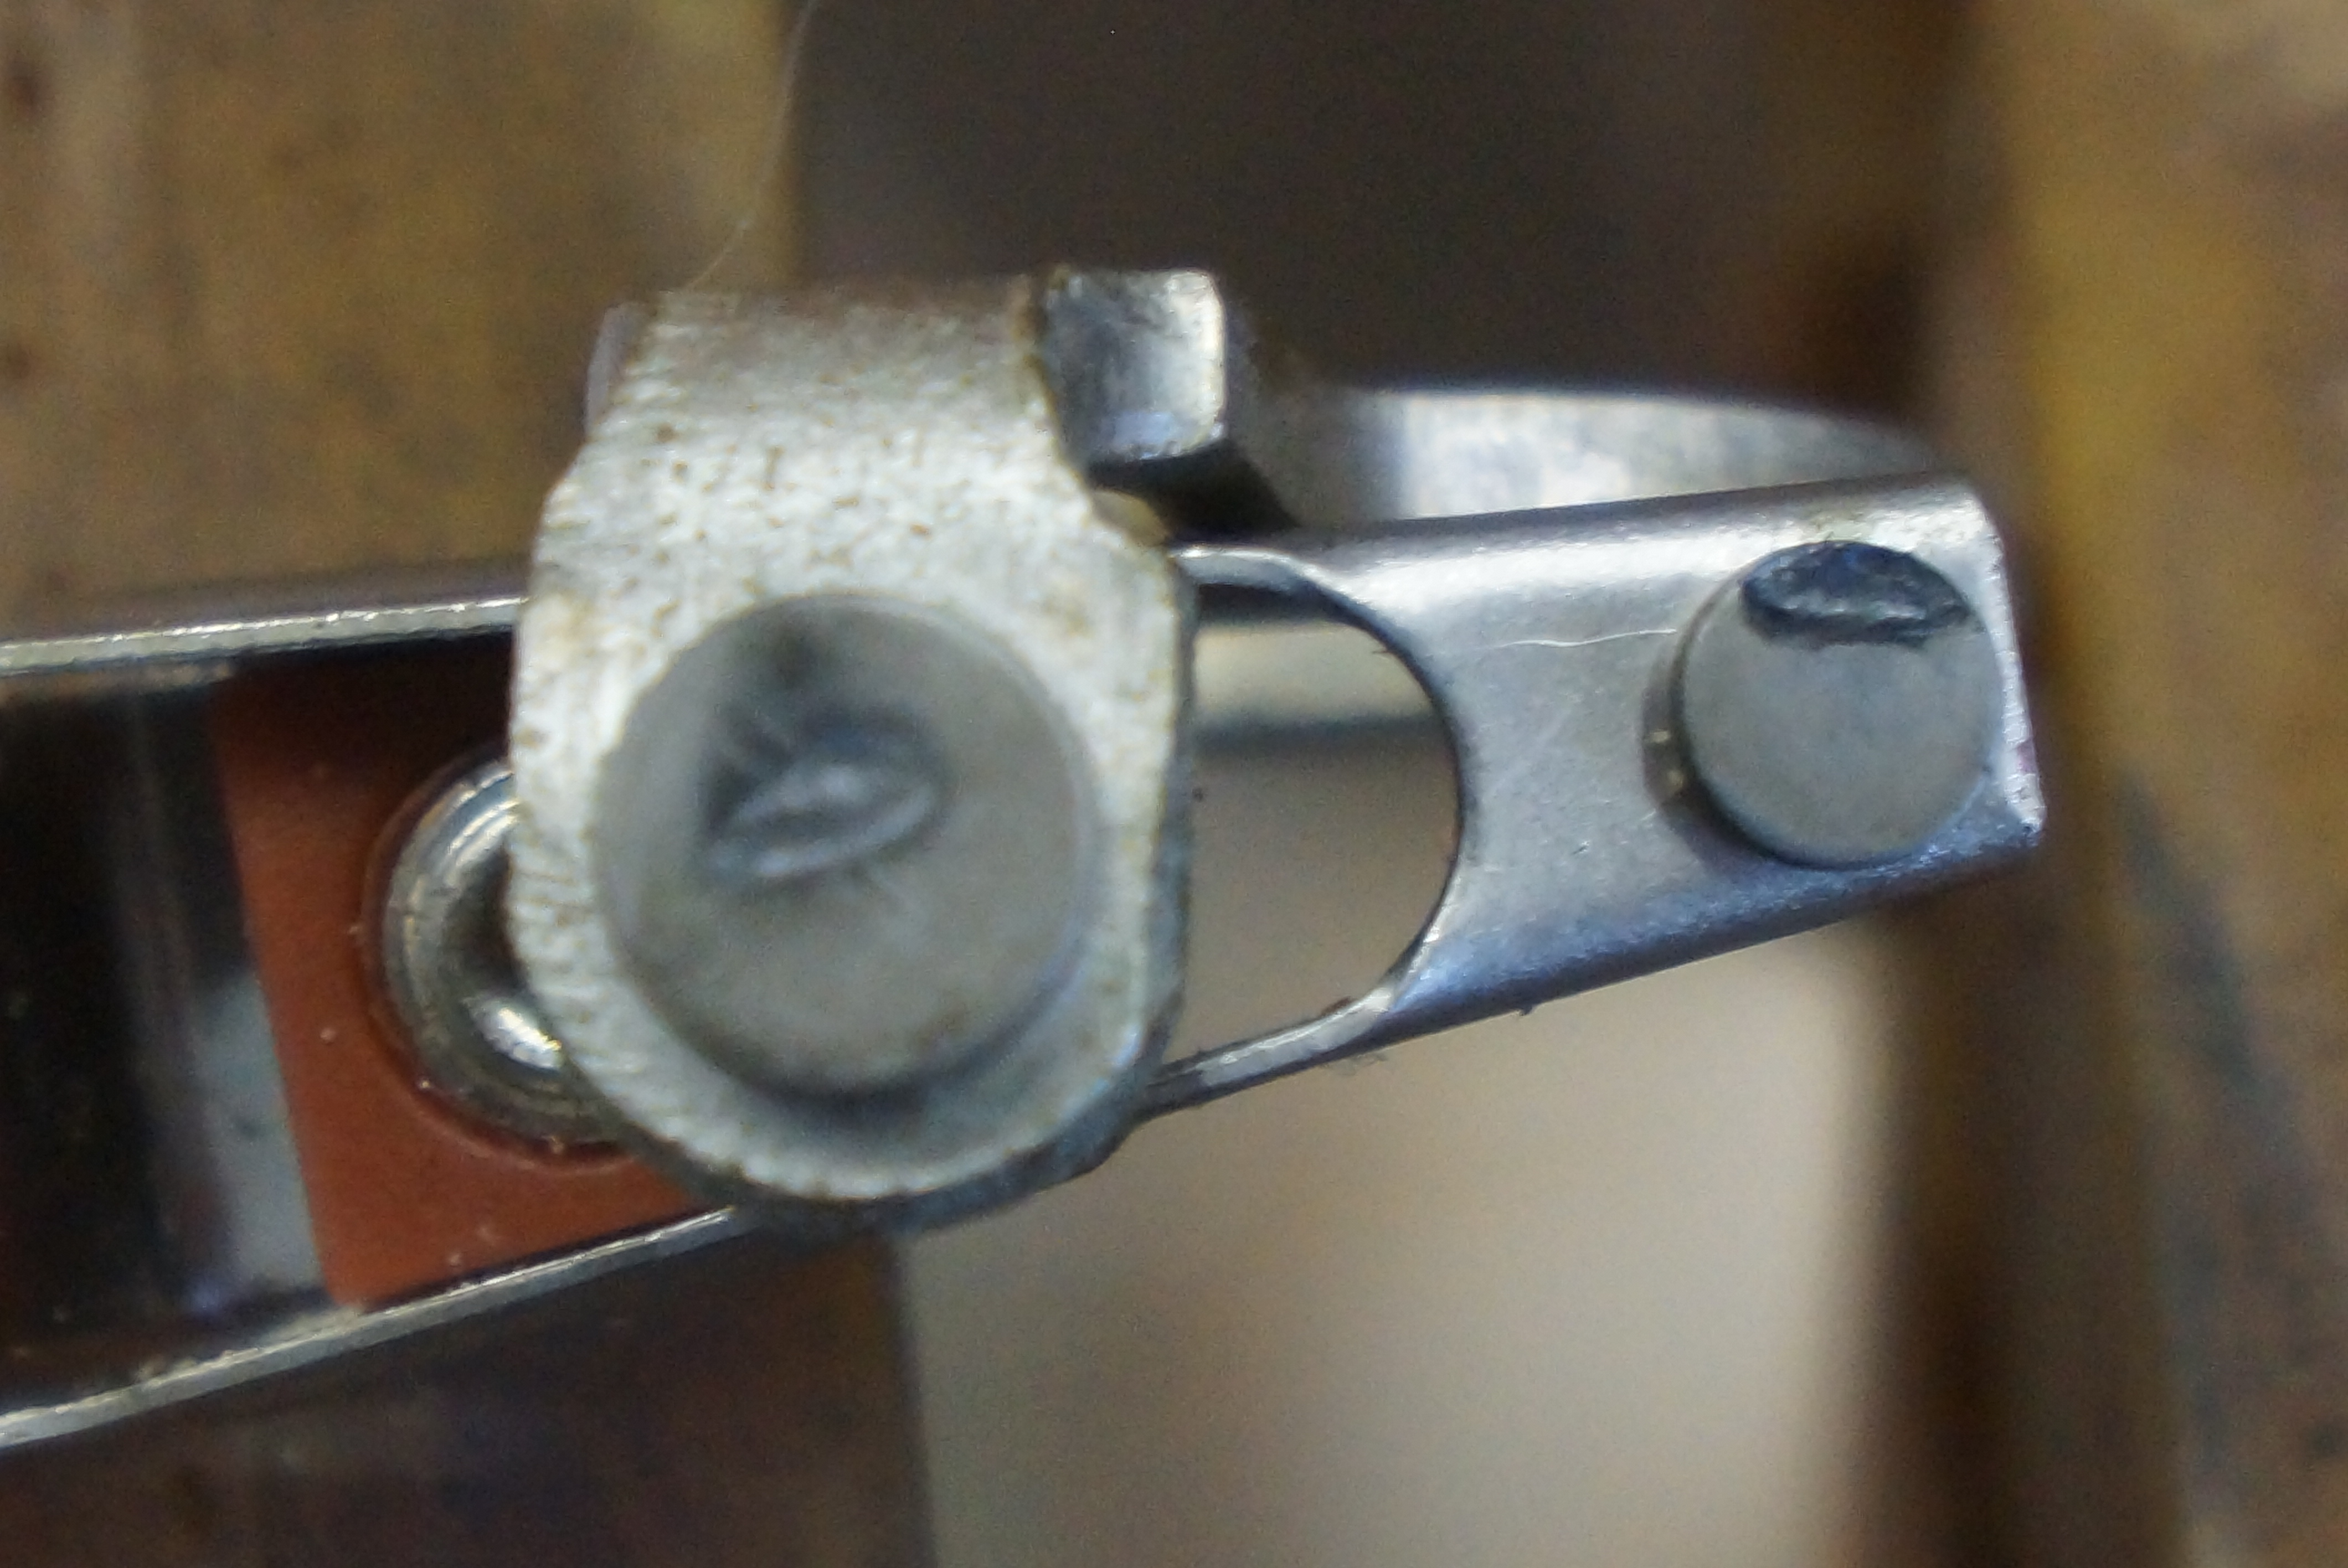
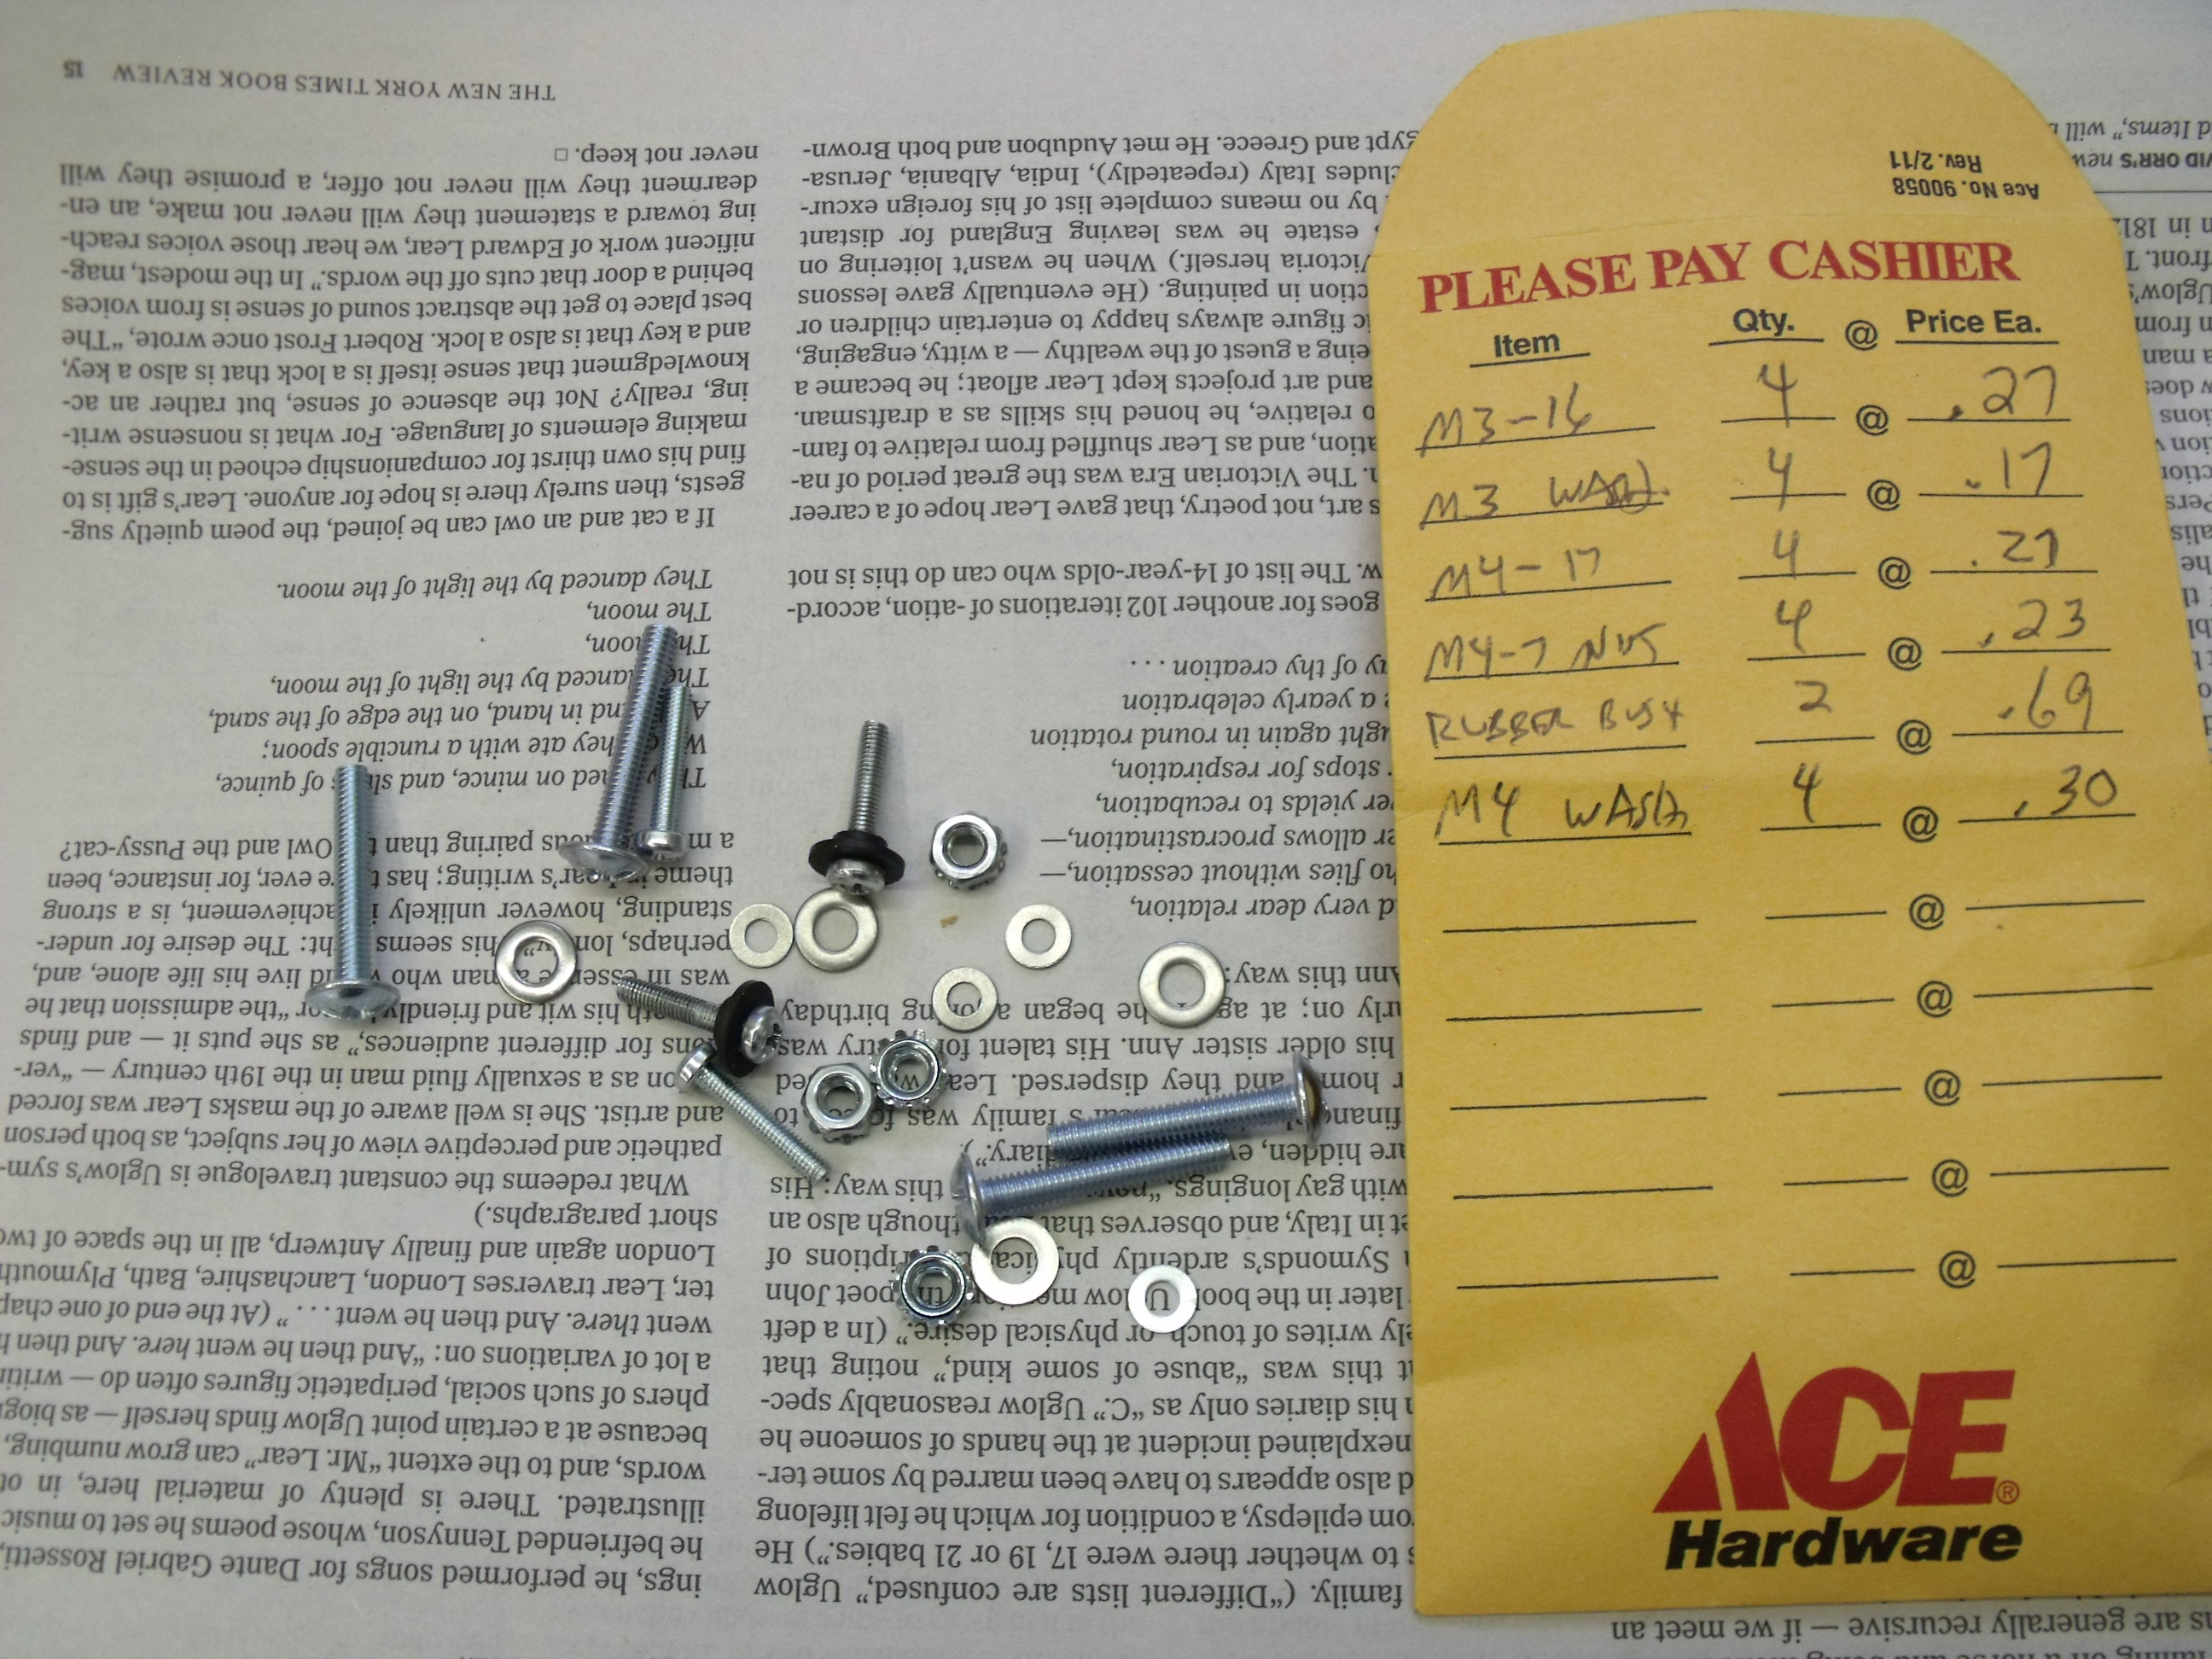
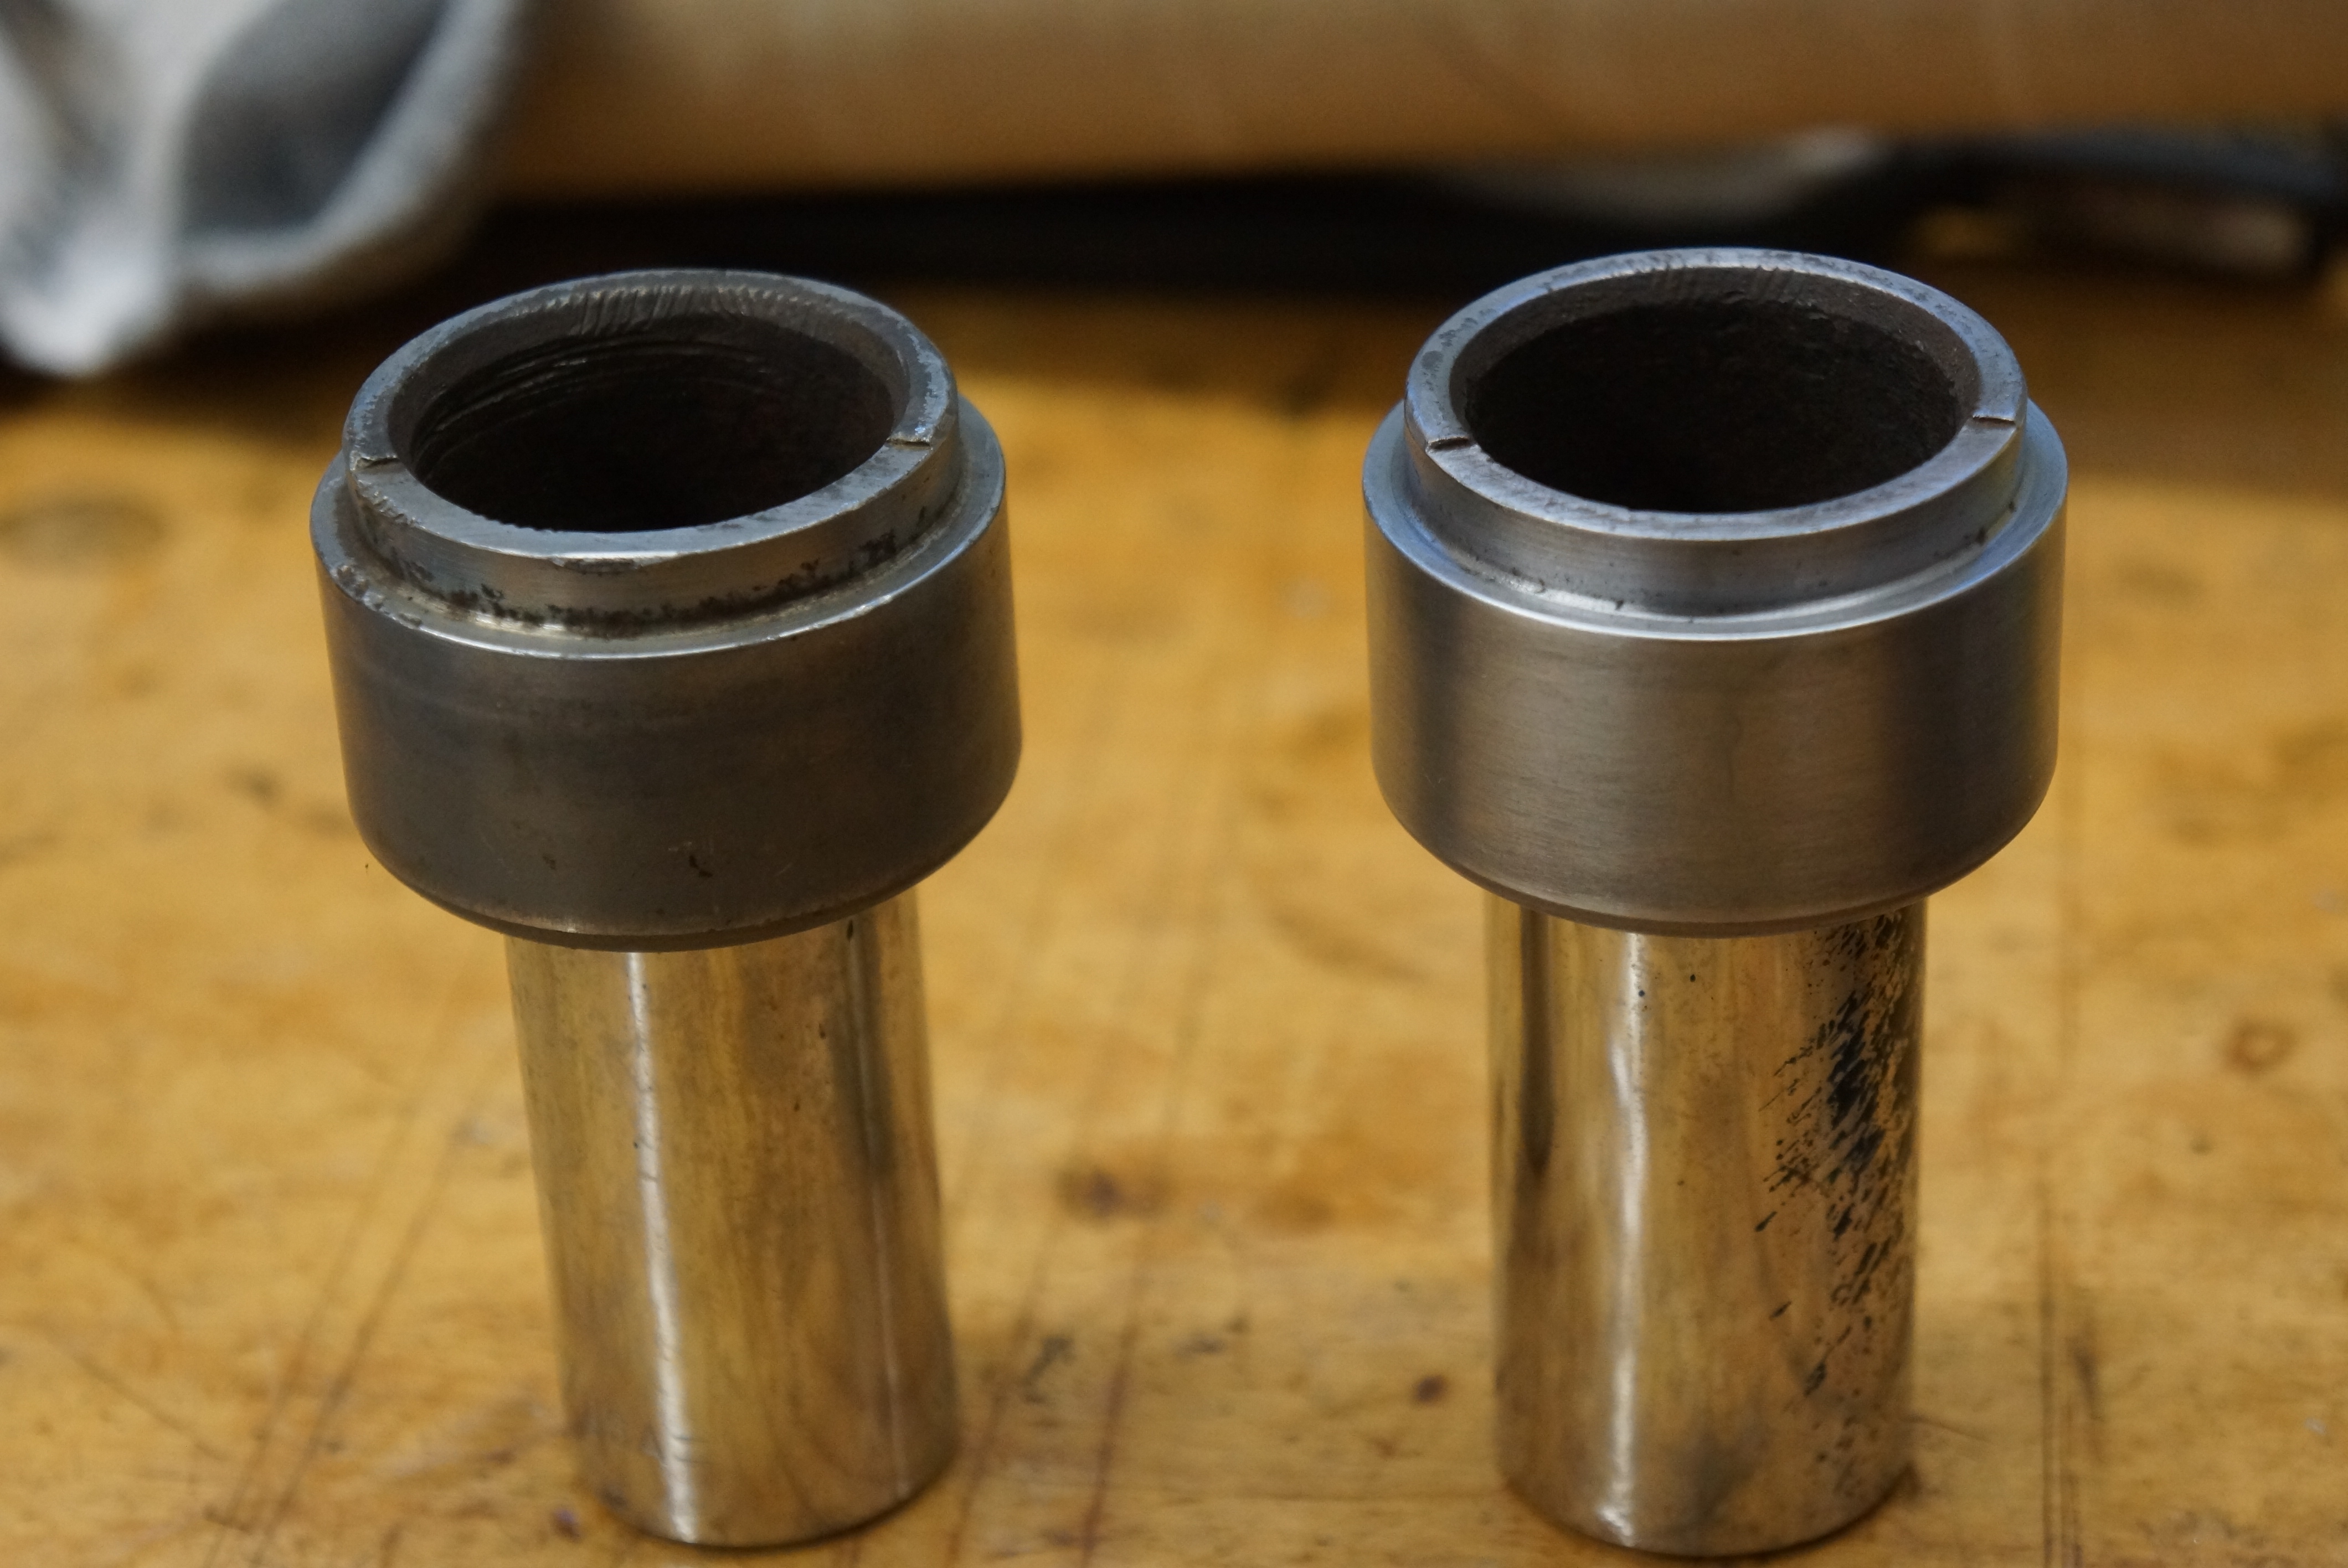
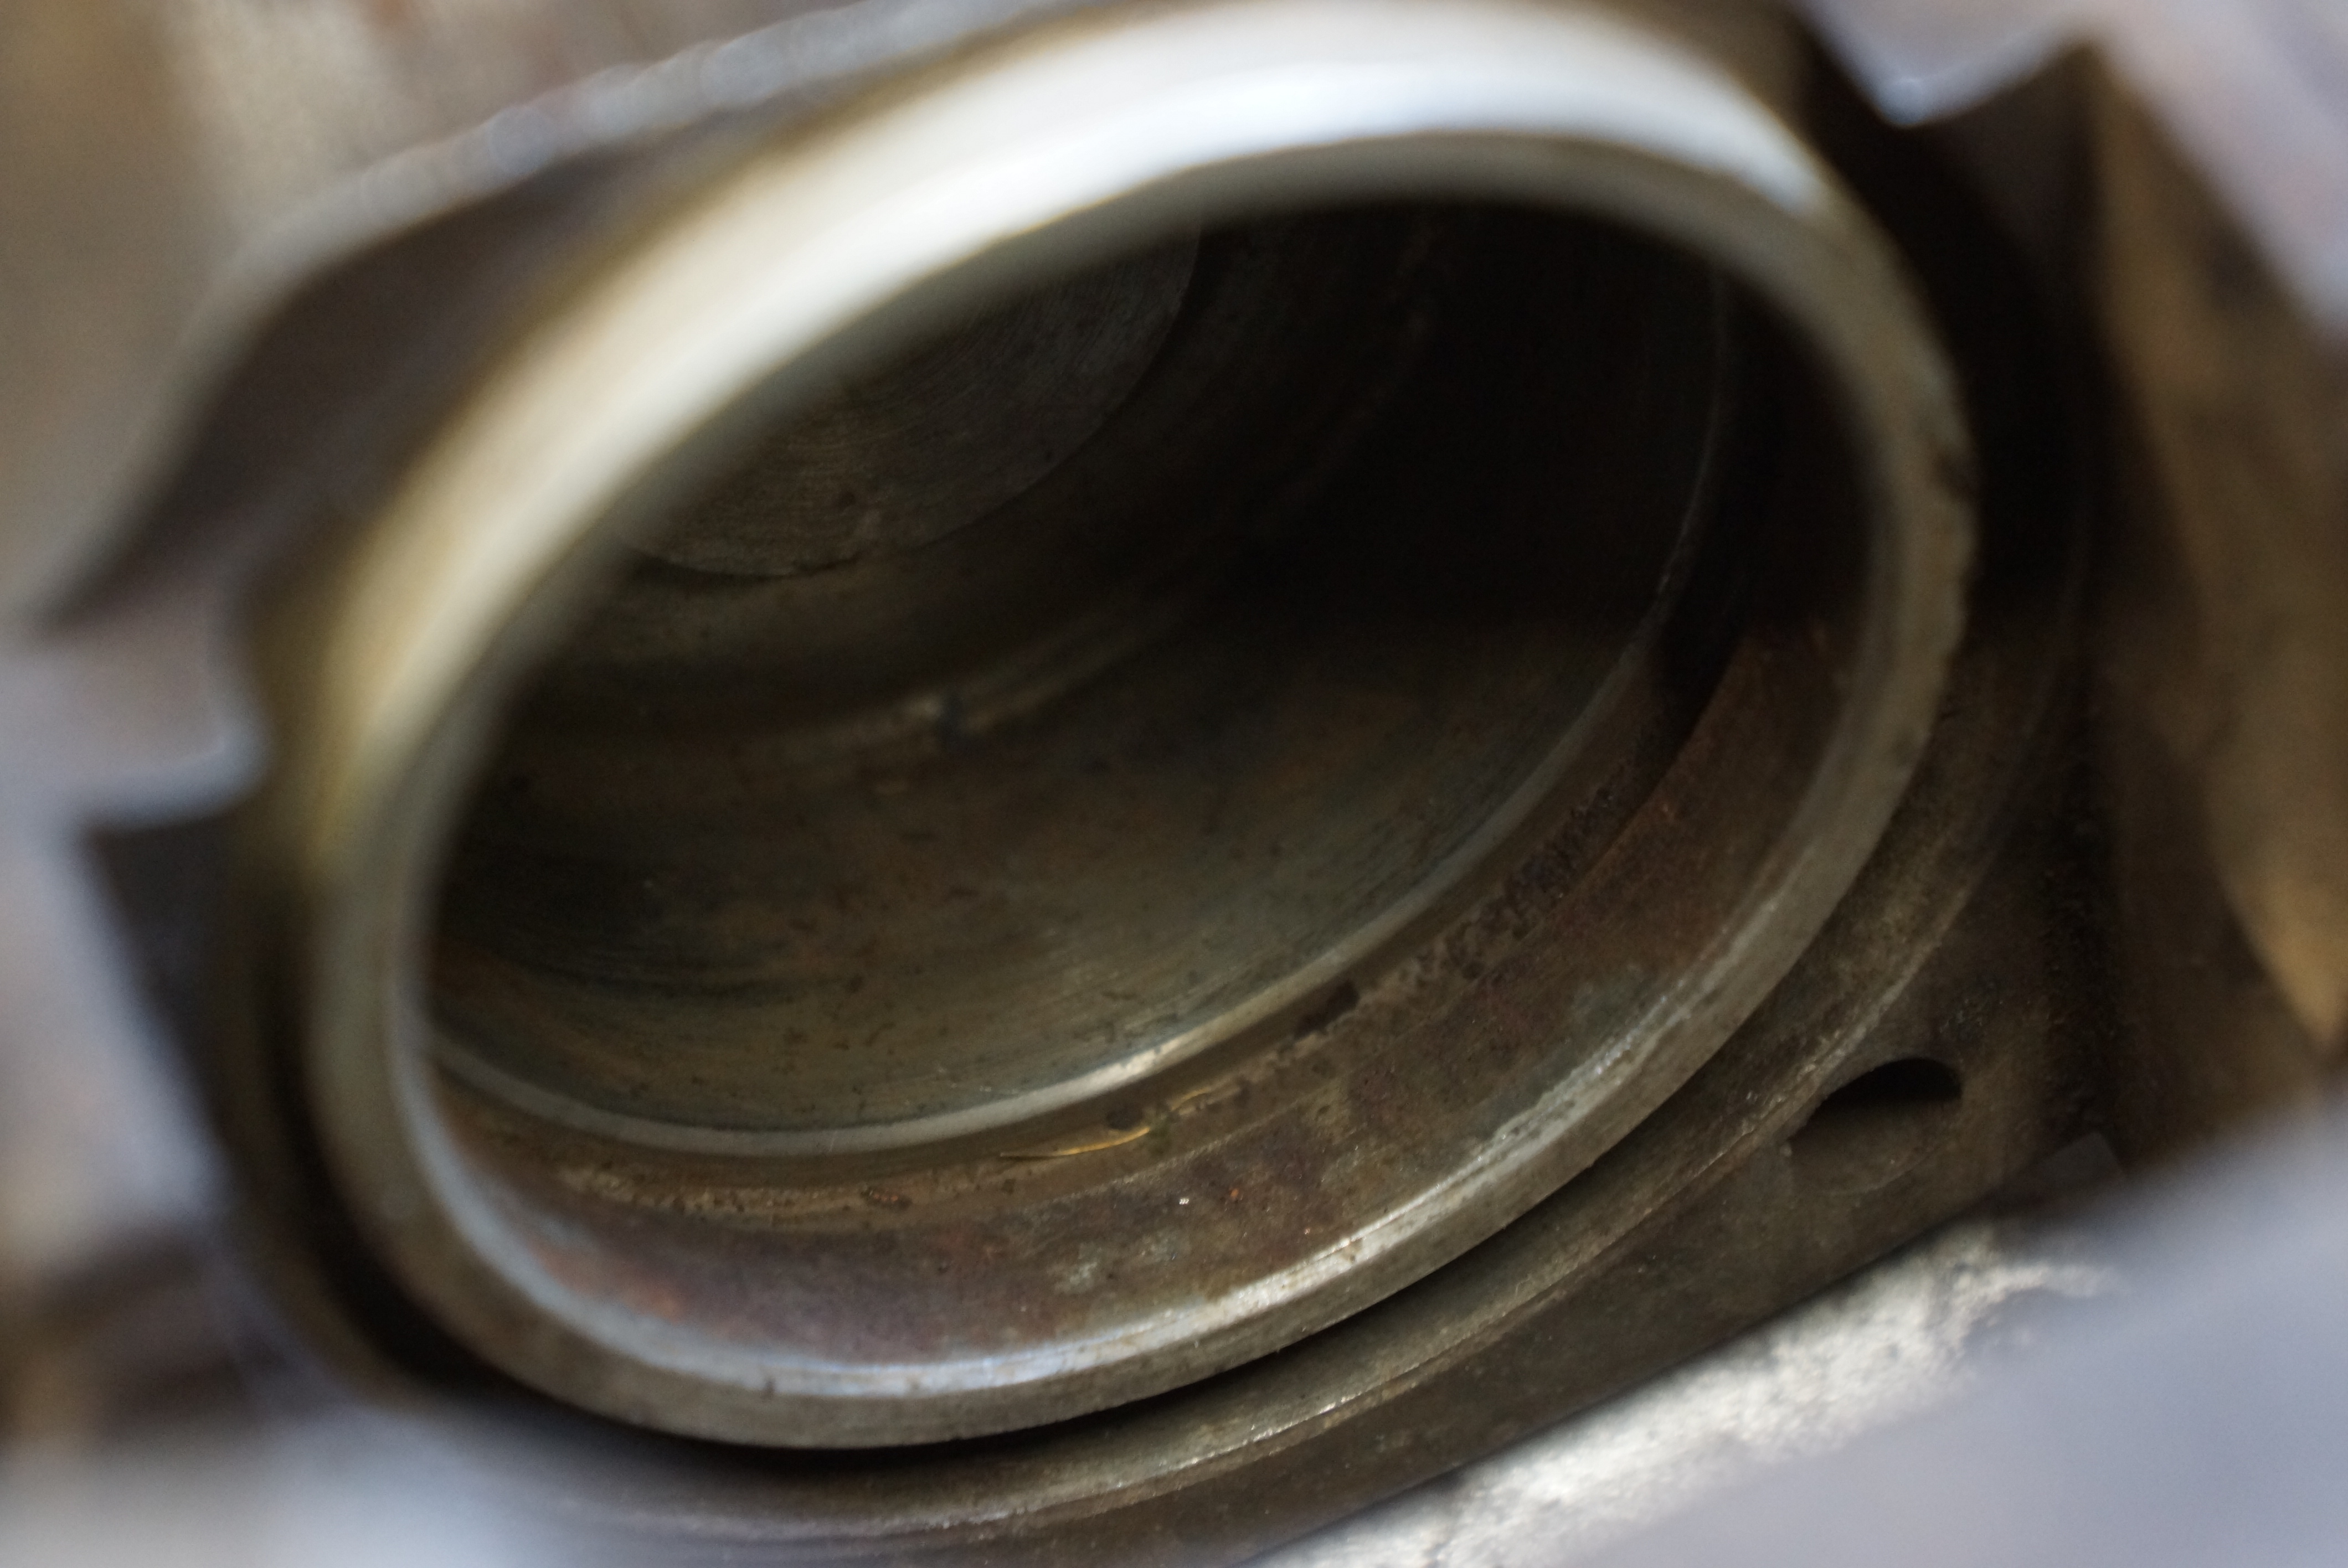
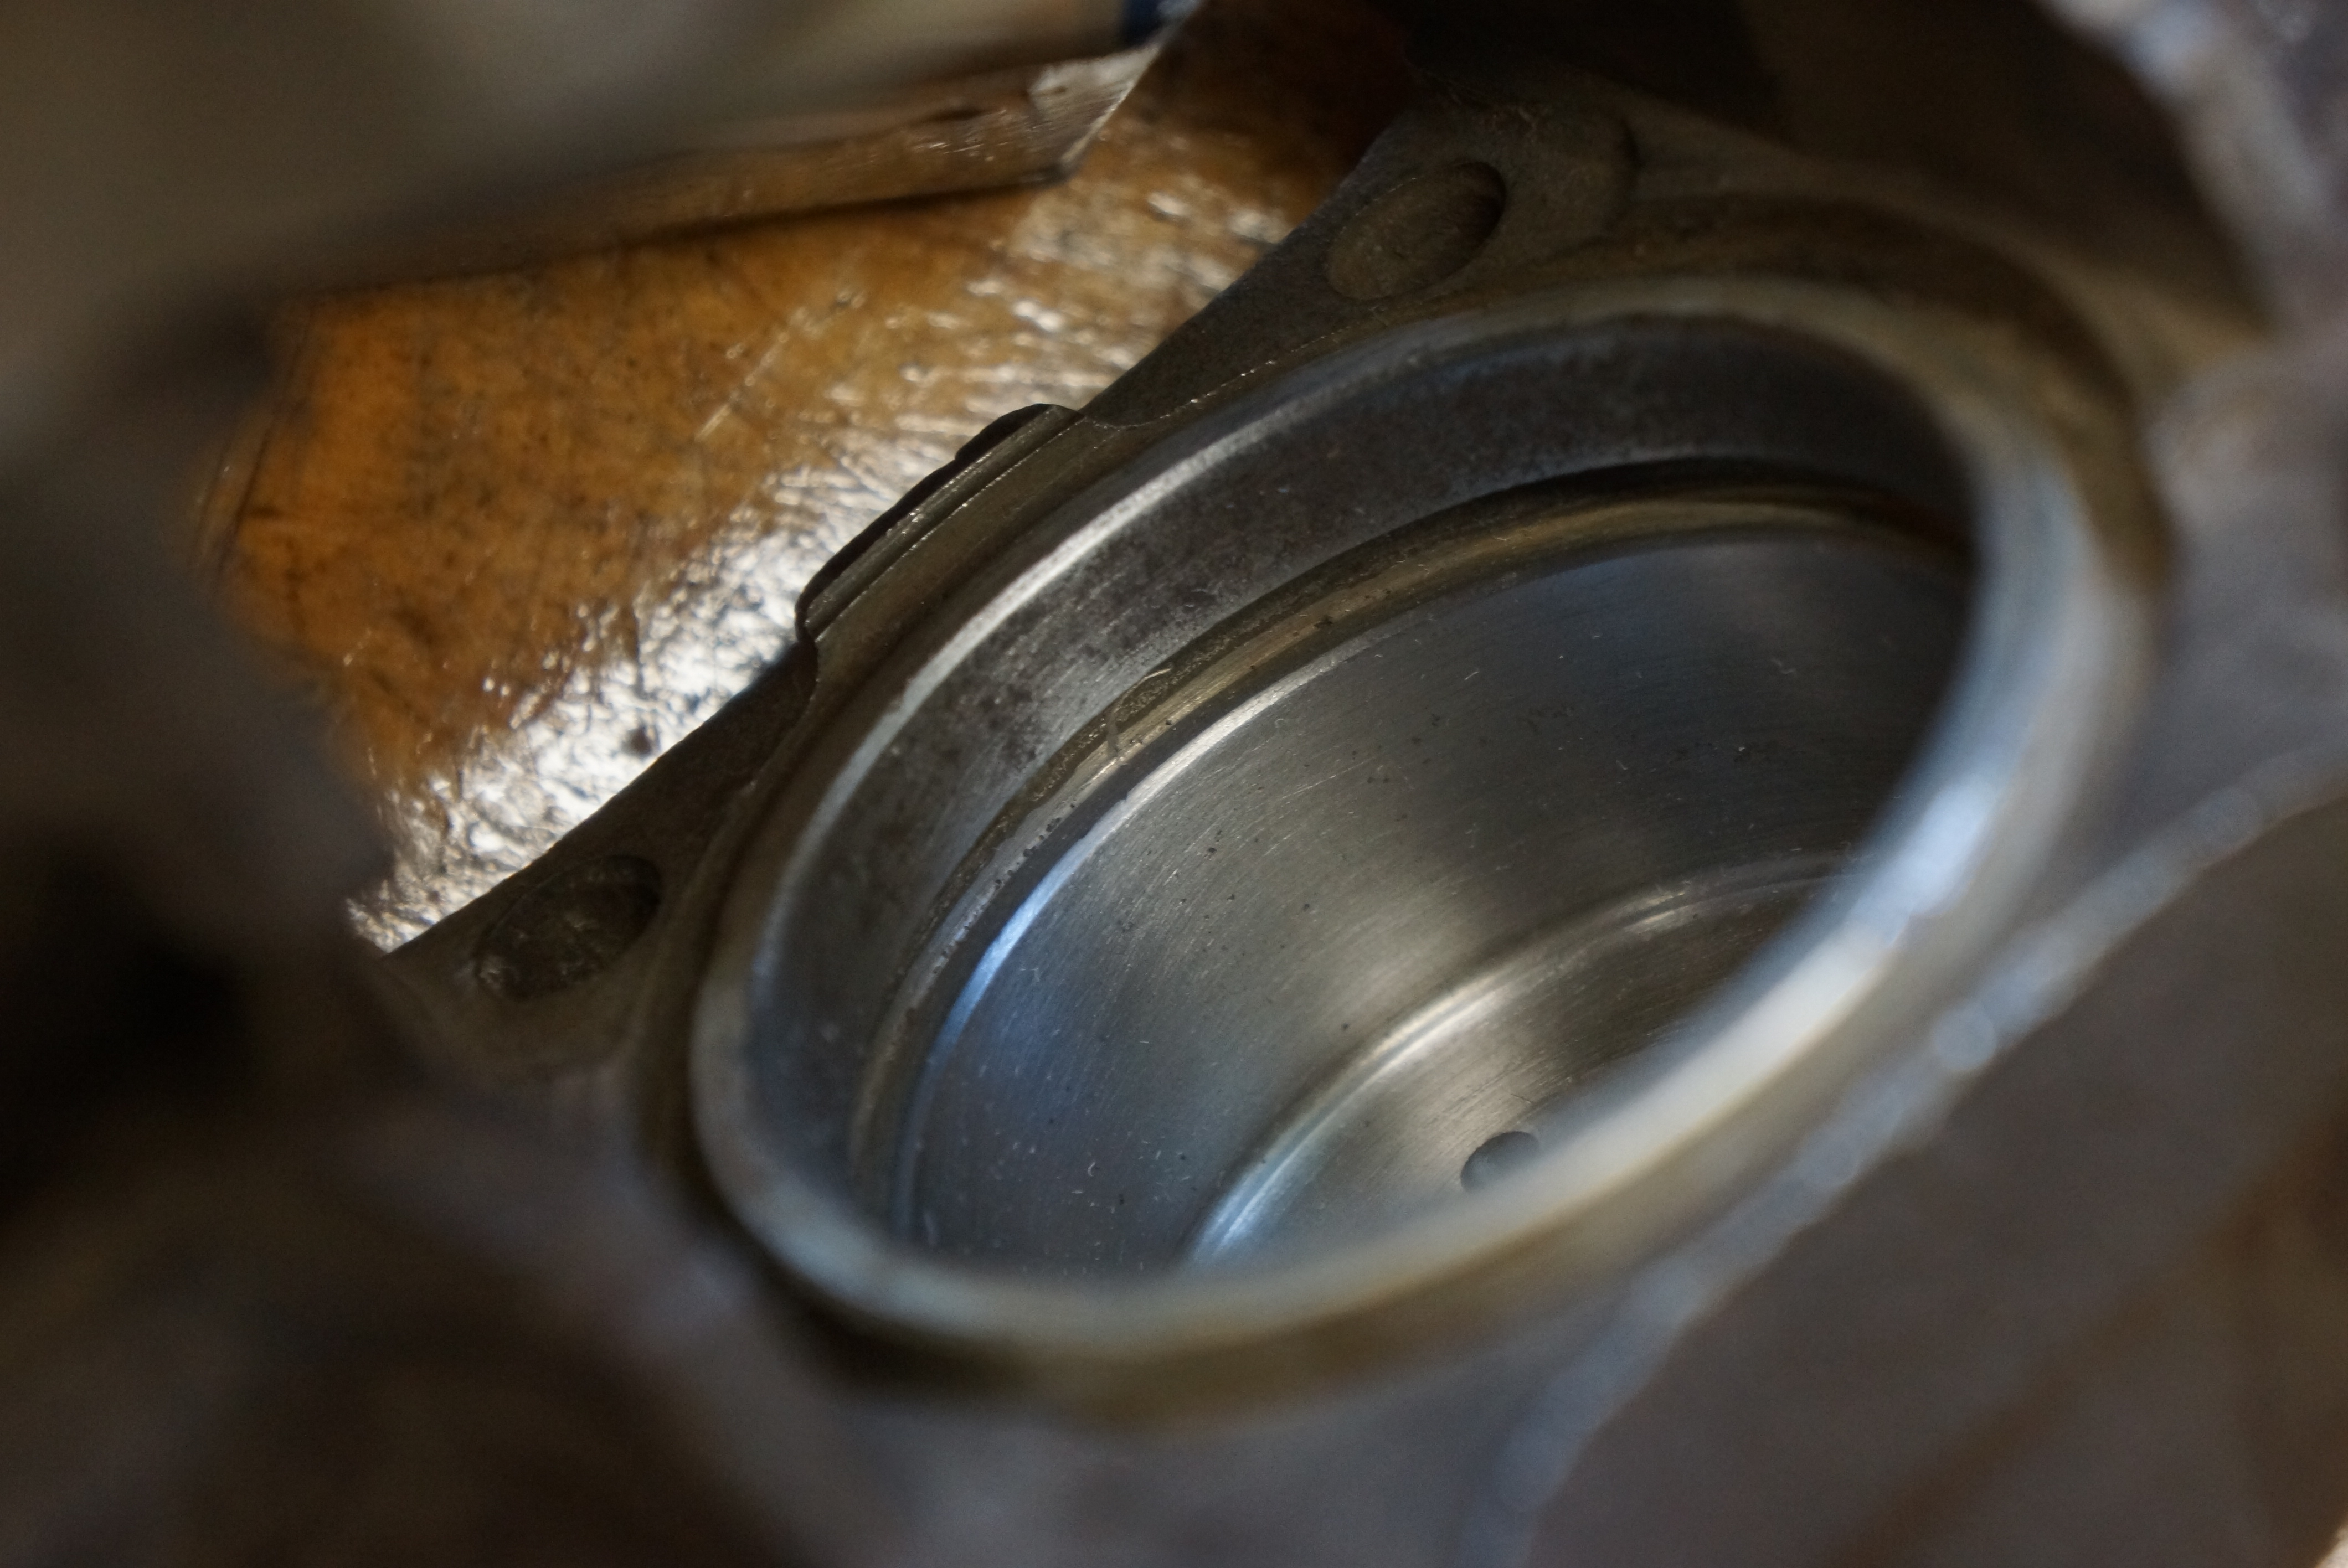
A close examination of the pistons revealed that one had a mark along its surface. My local Ace Hardware store had 3M brand emery cloth which I bought in medium, fine, and super fine grit. While I couldn’t completely remove the nick, I smoothed it out so that it couldn’t be felt. The front lips of the pistons showed marks from pliers or Vice-Grips, so someone (not me) got aggressive with a prior piston removal attempt. Thankfully, the marks would not affect the braking performance.

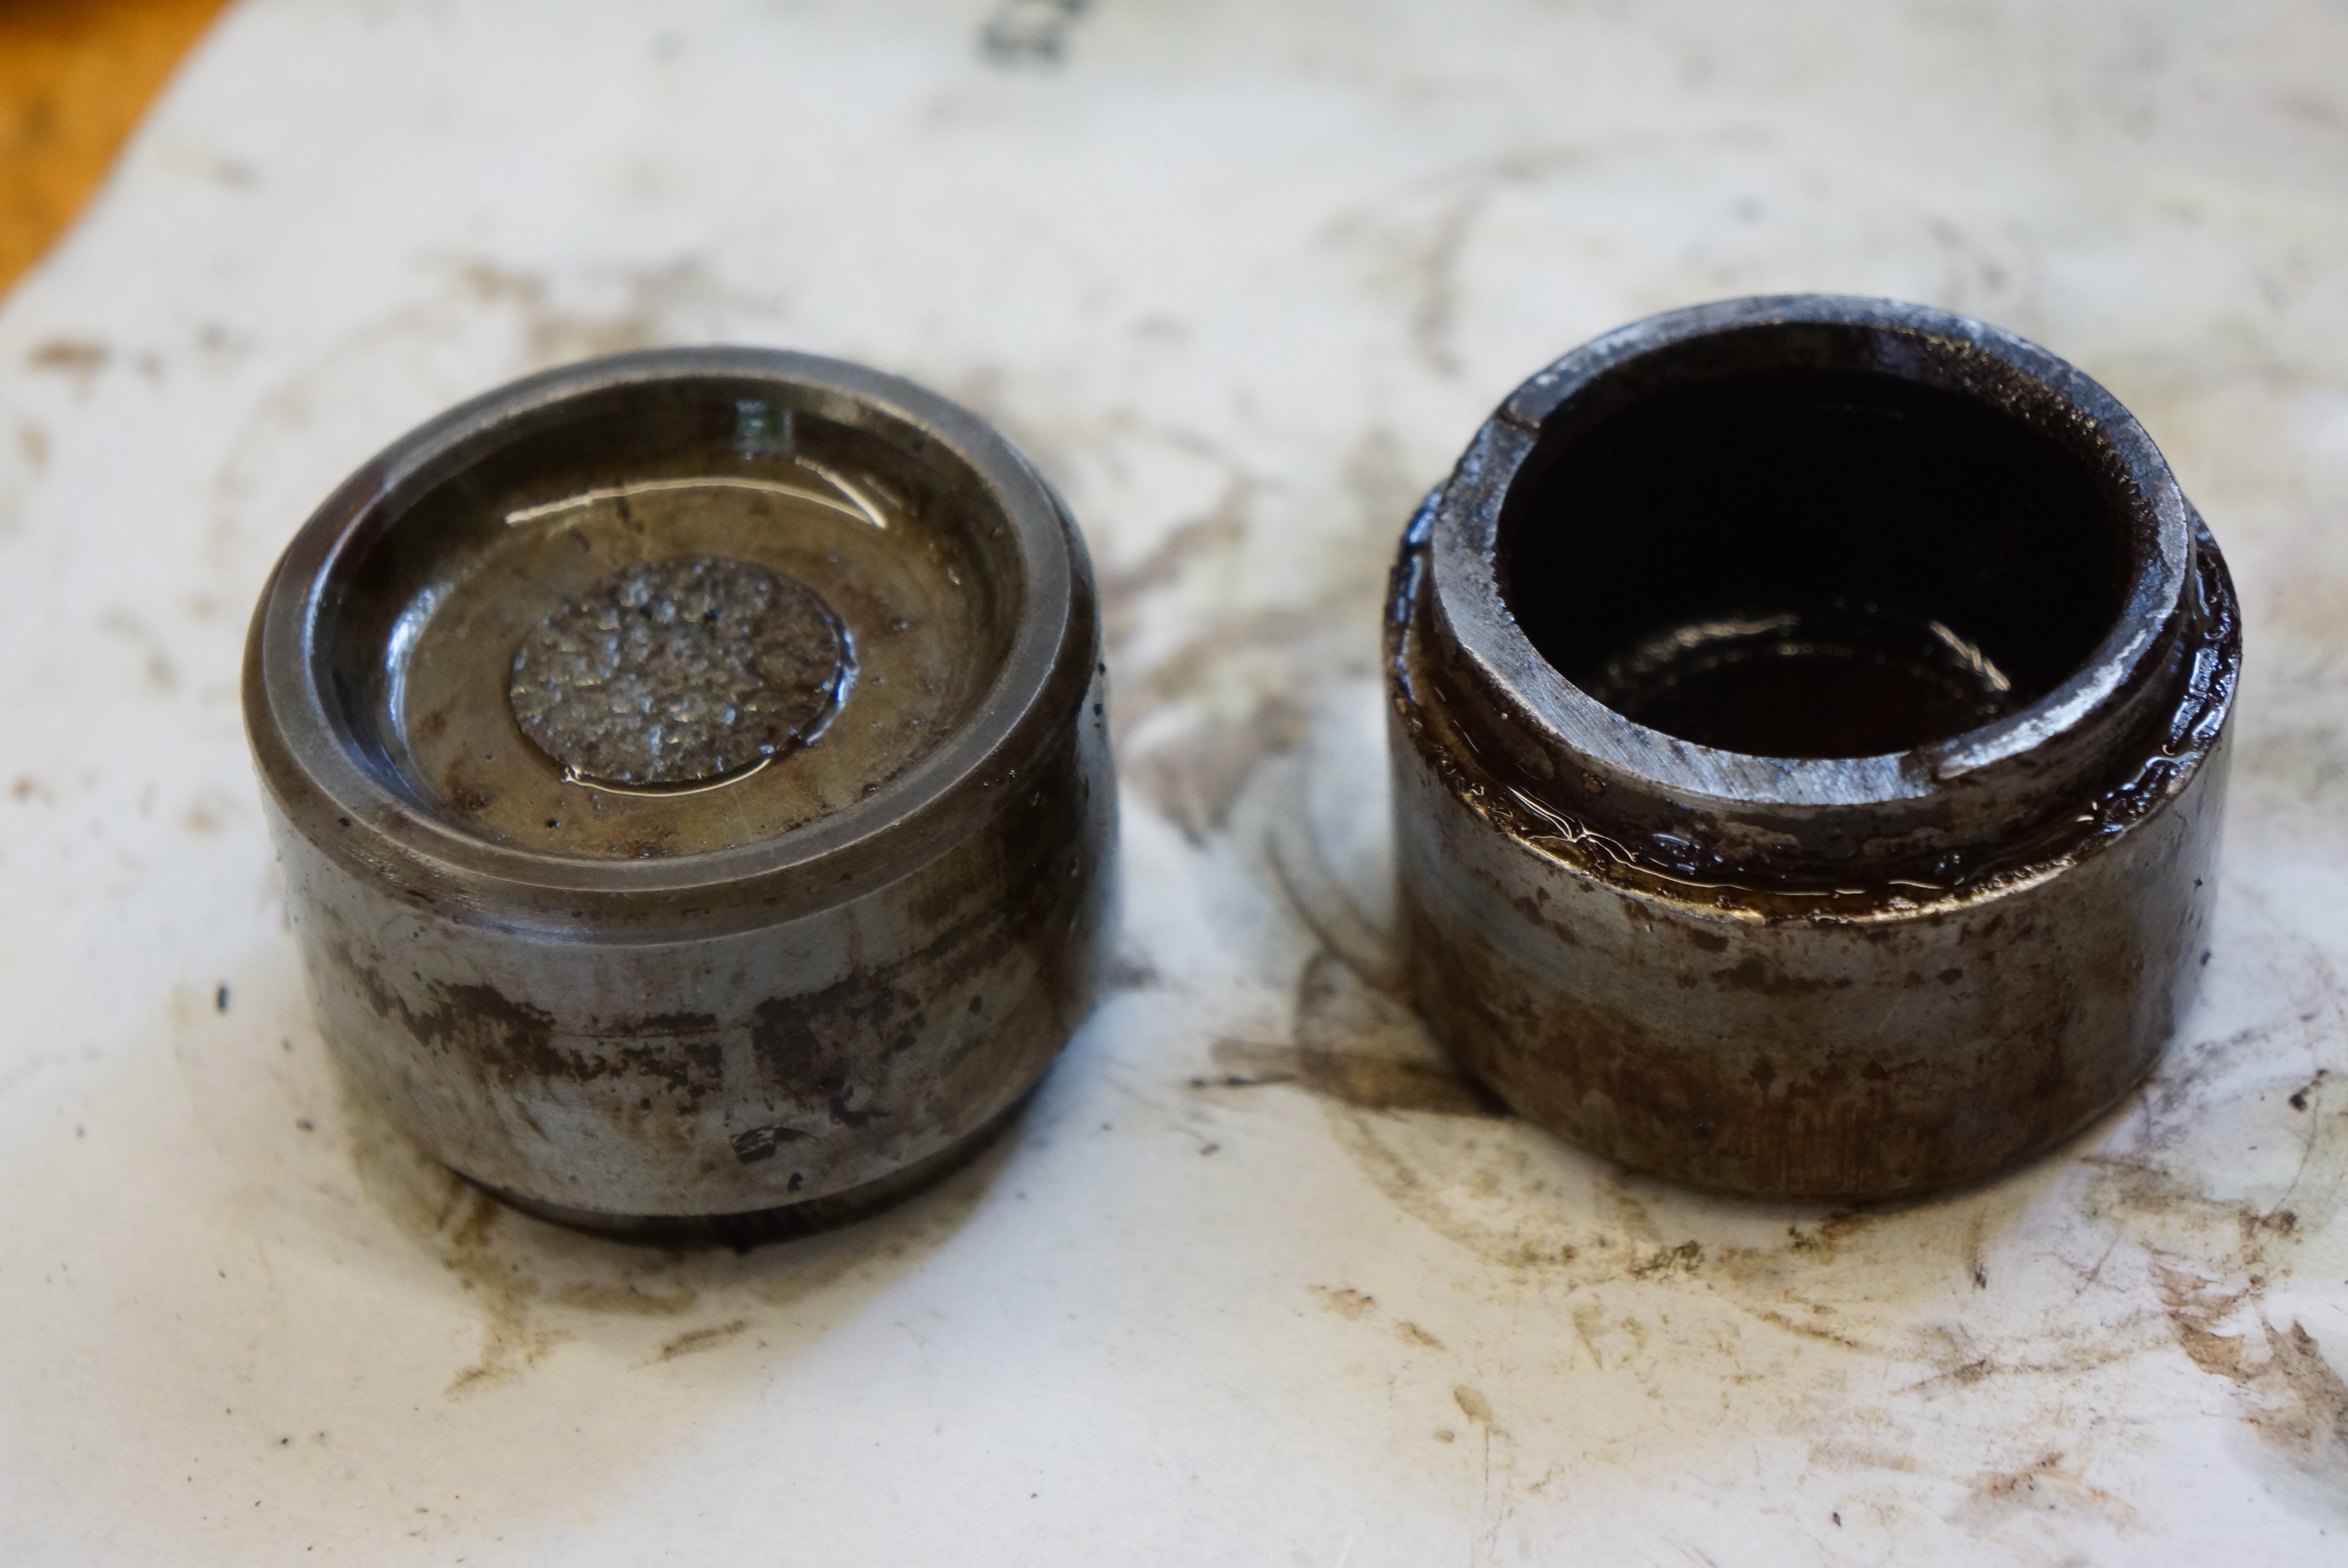
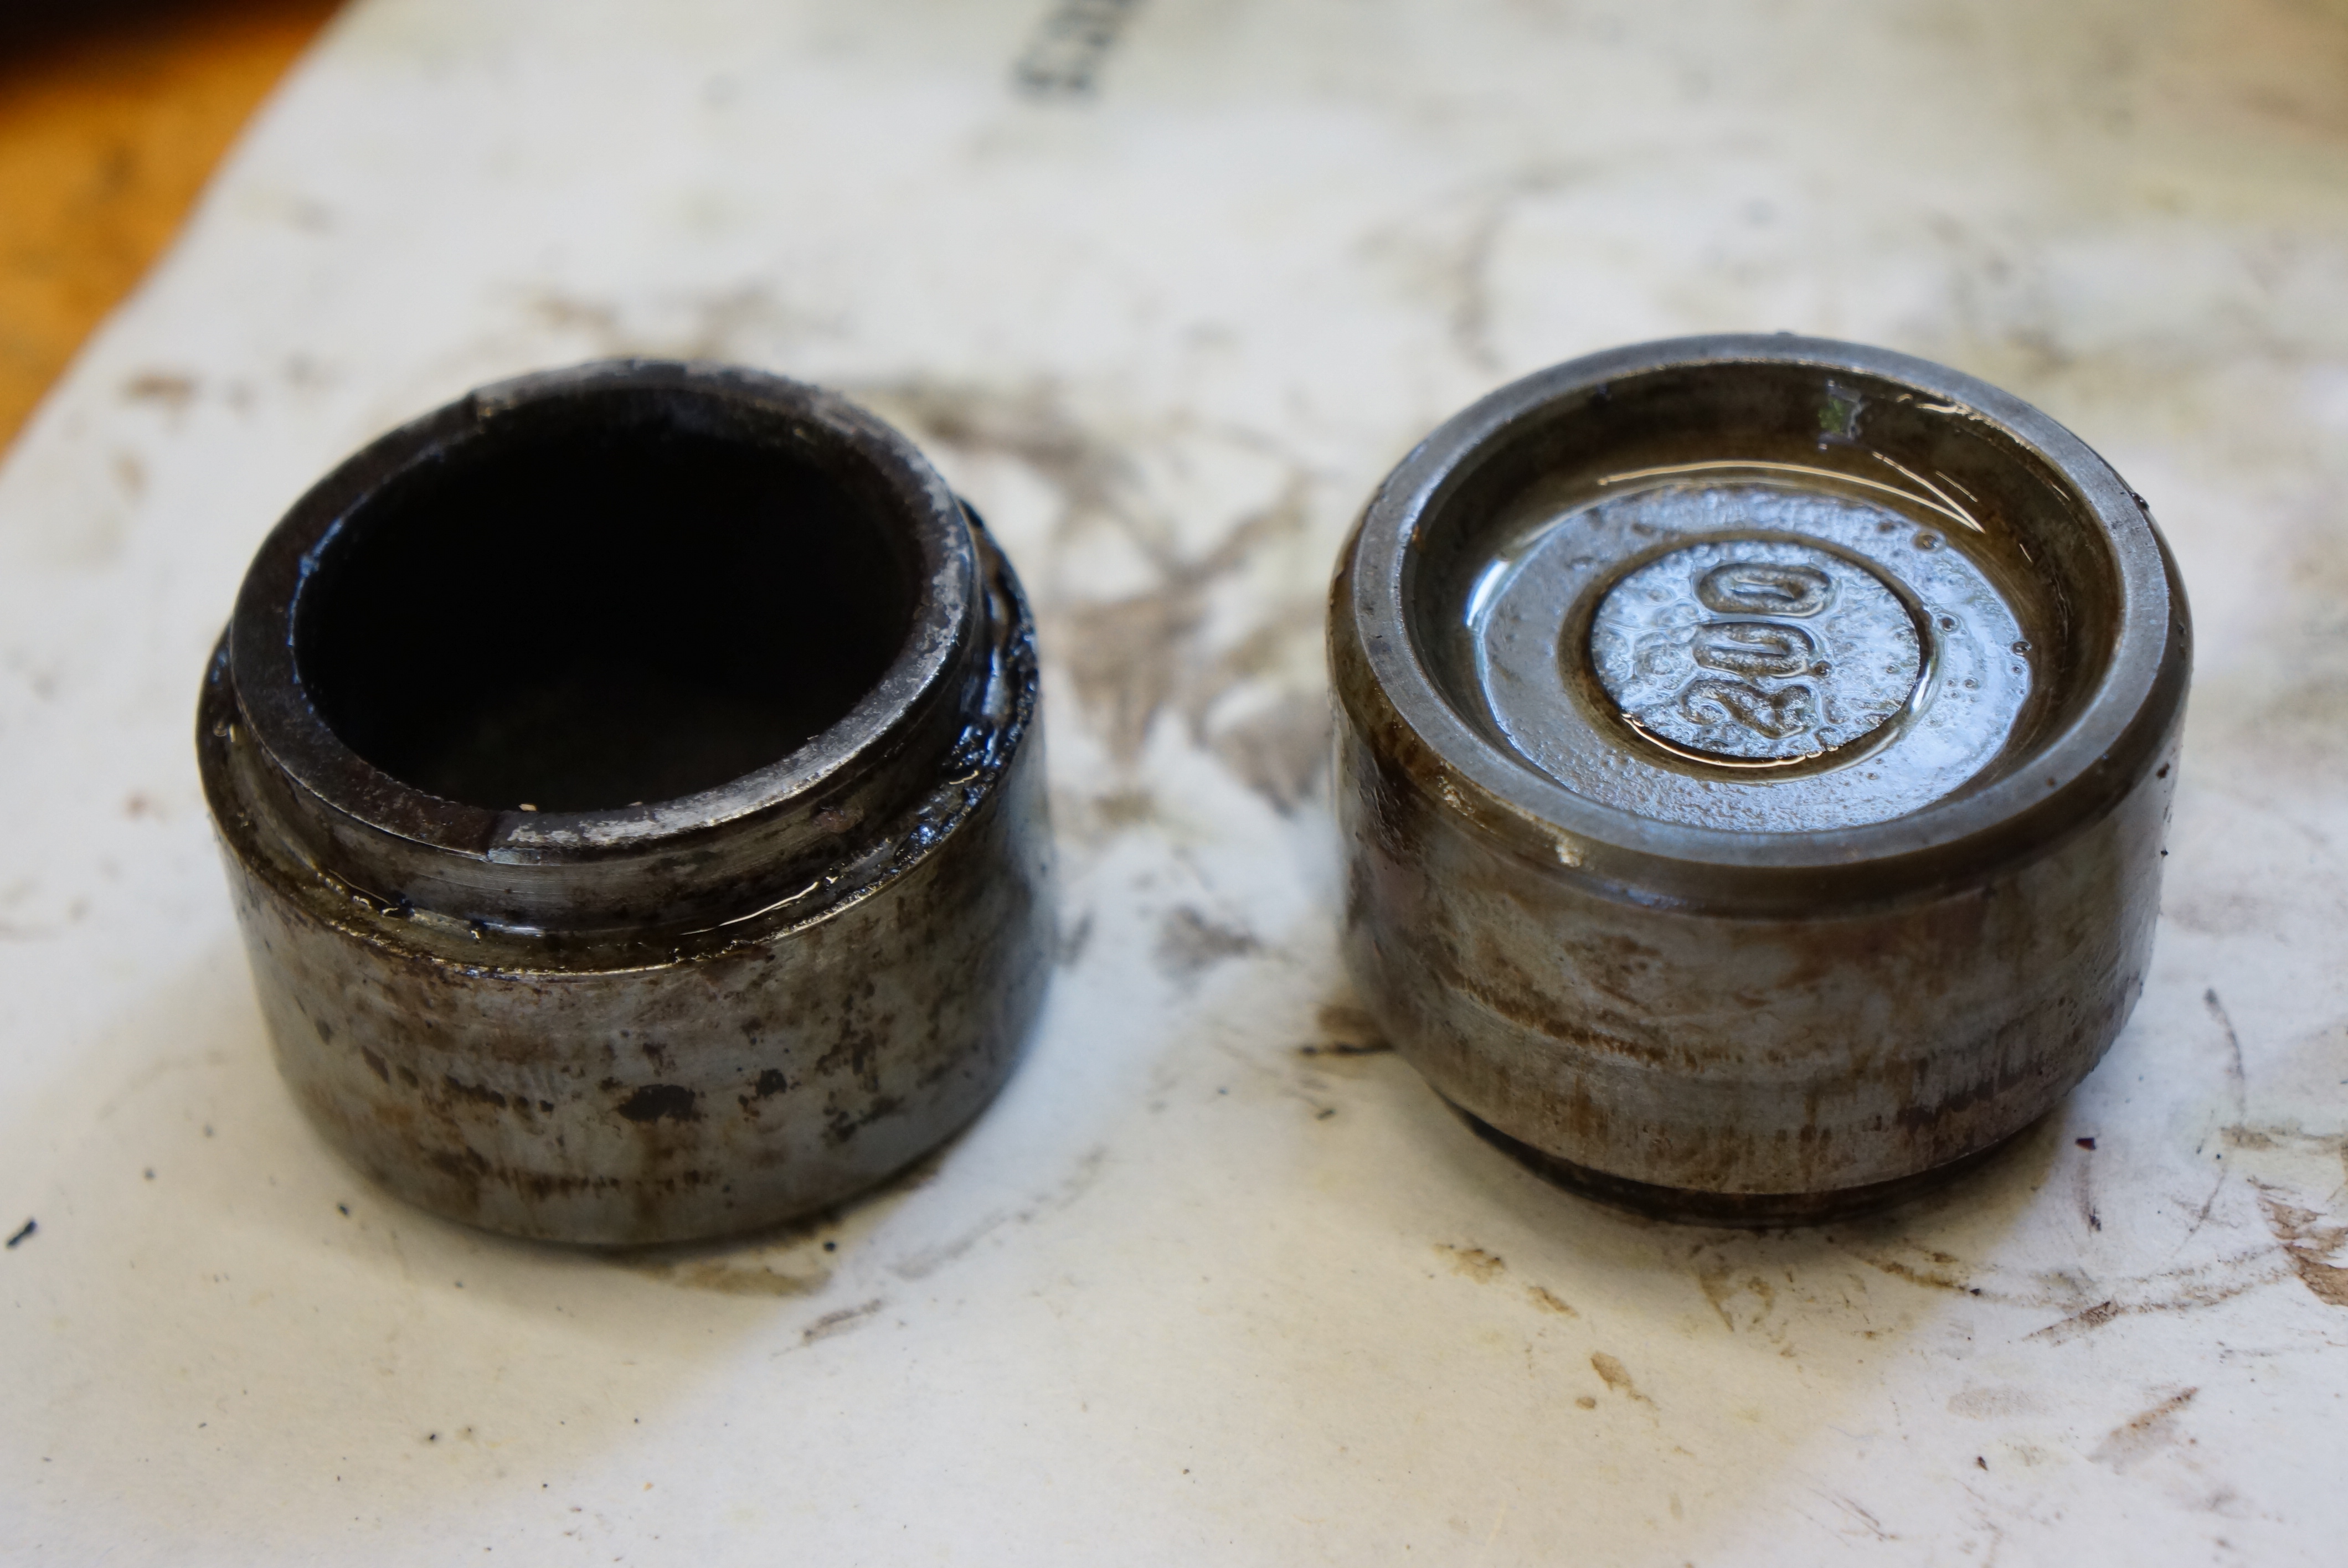
The bores themselves showed some minor corrosion along the outer edges, but the insides (below the inner seals) weren’t bad, and the super-fine emery cloth made them even better. While this was going on, the rear calipers were unbolted and disassembled so that I could measure the piston diameter. According to my supplier, Classic Alfa, this generation Giulia used either 30mm or 36mm rear pistons, and of course, one needed to know before ordering parts. It turned out that my car has 30mm pistons. I placed my order with my favorite Alfa supplier, knowing that I’d have the parts within 48 hours or so.


Pistons before (left) and after (right) emery cloth treatment


Nick in surface could not be removed, but was minimized. Note pliers marks.


Rear caliper piston confirmed as 30mm


… to be continued …


All photographs copyright © 2019 Richard A. Reina. Photos may not be copied or reproduced without express written permission.


Alfa Romeo brake system overhaul, Part 1

Now, the full story as to why I was not able to drive my Alfa to this year’s AROC (Alfa Romeo Owner’s Club) annual convention in Pittsburgh can be told. In my initial post about the convention, I wrote:

Let’s get this bit of disappointing news out of the way: while this Alfista was in attendance, his ’67 Alfa GT Junior was not. Four days before the scheduled departure, the car’s right front brake caliper locked up, and although repair parts were obtained, there wasn’t enough time to effect a safe and sufficient repair. So the green stepnose stayed home.

This is what happened: Four days before we planned to leave for Pittsburgh, I drove the Alfa to my friend George’s house. George (Geo to his really close friends) lives just five miles away, and while he was excited to join in the weekend’s festivities, he had never driven my car before. I thought it only fair that he have a crack at it before we commenced on a 6-hour journey.

As soon as I pulled out of my garage that morning, I sensed that something was amiss. The car seemed a little down on power, and it pulled to the right. Other than that, it drove OK, so I pushed onward. The moment I entered Geo’s driveway and killed the engine, smoke emanated from under the closed hood. I popped the hood but saw nothing obvious. When Geo came out, I explained what had happened, and we both decided to let him drive the car, if only for 2 or 3 miles.

Once Geo got the car back to his place, the smoke returned, only this time, the source was clear: it was pouring off the right front brake. Hindsight made the drifting and low power obvious: this brake caliper was seized. I was lucky we weren’t seeing flames.

We pulled the wheel and there was nothing visibly wrong that we could try to fix on the spot. Putting the wheel back on, I reasoned that I could “carefully” drive the 5 miles back home, and work on it there. As soon as I bade Geo ciao, I started the car, put it in first, and headed down his driveway to the street, where I would need to turn left. Hitting the brake pedal, it sank to the floor. Thankfully, my parking brake (sort of) works, and I used it to stop at the bottom of the driveway. I backed the car up the drive, and started to figure out what Plan B looked like.

Geo couldn’t understand the loss of the pedal. I reasoned that the heat had caused the fluid to boil. Sure enough, 15 minutes later, a firm pedal returned. But I wasn’t driving this car home. There’s a reason I carry an AAA card. I called, they said one hour, and the truck was there in 90 minutes. In seven seasons of ownership, and in over 11,000 miles of driving, this car has never ridden on the back of a flat bed – until this brake failure. But the risk in driving it wasn’t worth it.


There’s a first time for everything

While waiting for the truck, I had time to calculate how I was going to get this repaired by Friday morning, just a few hours shy of four days away. My go-to Alfa parts supplier, Classic Alfa in the UK, was still open, if barely. I had always placed my orders via their website, never by phone, and this seemed like a most valid reason to spend the money for an international call. Given their stellar shipping reputation, I could have the parts by Wednesday, which I reckoned would still allow enough time to make a repair.

I called. ‘Chris’ answered. I explained my dilemma and asked him about my options. He quickly offered the choice of either remanufactured (reman) ATE calipers, or brand new ones. I asked him for the price difference, and he replied about 20 British pounds (approximately $25 thanks to the Brexit-depressed value of the pound). I figured that the small differential between new and reman made the new ones a deal, so I ordered a set. Since a core return wasn’t required, I asked Chris to include a caliper rebuild kit, thinking that I would eventually refurbish the old ones. It was now close to noon on Monday in New Jersey, and Chris said I should see the parts by late Wednesday.

Chris was wrong. The parts were in my hands at 5:30 pm ON TUESDAY. This was a miracle, and I presumed that the boys in the UK pushed the order through, having heard that I was planning on driving this thing to the U.S. Alfa convention in 4 days. So far, so good.

Shiny new caliper, ATE-like

Opening the box, the first disappointment was to discover that while these were certainly new calipers, they were not marked ATE, and I had to conclude that they were ATE copies. I unbolted the offending caliper, and an eyeball comparison proved that the new one was identically shaped. All I had to do was swap over the pads, connect the hard brake line, and bleed the system.

Right front rotor shows slight scoring, looks salvageable

With the existing pads and pad hardware installed, I knelt at the right front knuckle, held the 11 pound caliper in my right hand, and began to thread the brake line fitting into the new caliper with my left hand. The threads would not start. I tried every trick I knew; after perhaps 20 minutes, it felt like the threads had started, but I was unable to turn the fitting by hand more than half a turn. Of course, the dreaded fear is that I might cross-thread it, and ruin the caliper and/or the brake line fitting. After another 20 minutes, with blisters forming on the pads of my fingers, it felt again like it started. I picked up the flare nut wrench, and slowly, carefully, brought the fitting all the way down. It was about 8pm on Tuesday night. I was drenched, from both the 100% humidity and the nervous energy.

Flare-nut wrenches (this fitting is 11mm) indispensable for brake line work

The next evening, I removed the (good) left front caliper, and, convinced that the previous night’s issues were behind me, went through the same routine: swapped the pads, held the caliper up to the knuckle, and began to thread the pipe fitting. SAME PROBLEM. Desperate, I removed the hard line from the car, and brought it and the new caliper to the workbench, where I wouldn’t need to struggle with the caliper’s weight. I never came close to getting the threads to start.

New caliper looks great, too bad it leaks

I rationalized: I have the new caliper on the right front, to replace the known bad caliper. Certainly, I can keep the existing left front caliper in place and drive the car a few hundred miles. The left front caliper was reinstalled. Geo stopped by to assist. We were ready to bleed (the brakes, not us). I filled the master reservoir, asked Geo to climb in, and we began the “pump, hold, release” routine of manual brake bleeding.

There was a drip at the fitting at the right front caliper.

Reluctantly, I put a wrench on it and got another 10-15 degrees in clockwise motion. The bleeding resumed, and so did the dripping. I told Geo that we were done. While I did have the rebuild kit, it was now after dark on Wednesday, and I was out of time, patience, and confidence. Working on a car under such duress only encourages poor decision-making, unnecessary shortcuts, and botched repairs. My only desire was to enjoy the AROC convention, knowing that I would resume this wrenching at an unhurried pace upon my return. The new calipers would go back to Classic Alfa as defective or unusable.

… to be continued …

All photographs copyright © 2019 Richard A. Reina. Photos may not be copied or reproduced without express written permission.

Prepping the Alfa for the AROC Convention in Pittsburgh

The Alfa Romeo Owners Club (AROC) is holding its 2019 Annual Convention (“Cortile Della Corsa”) in conjunction with the Pittsburgh Vintage Grand Prix (PVGP). The events actually began this past weekend; however, most of the AROC-specific goings-on will be held from Wednesday July 17th through Sunday the 21st.

For varying reasons, we (the “we” being my buddy George) and I are departing Friday morning.  It’s about a 350-mile one-way trip, and while my 51-year-old Italian car is more than up for it, there’s still all that last-minute stuff to attend to. Since it got a full tune, valve adjustment, and oil change earlier this year, most of what I’ve put effort into these last few weeks has been cosmetic. After all, it will be on a show field with many of its siblings and cousins, and it needs to look it best!

Here are some of those recent efforts:

  1. Floor mats

When I got the car in 2013, there were custom-fitted carpet floor mats in place. Pete, the previous owner, had had them made, and they fit well and looked good. But during my time with the car, the driver’s side mat had started to bunch up near the pedals. Looking at replacement mats online, the biggest challenge was finding a set that could properly deal with the “standing pedals” (hinged through the floor) on my Alfa. The set in the car had a rubber panel, cut to allow the clutch and brake pedals to pass through. I was looking for similar, and was not satisfied with what I was finding.

The good folks at Coco Mats (www.cocomats.com) offered to make a custom set for me, and went so far as to send me a template for a hanging pedal car, which I could customize. But during my email exchanges with them, they seemed reluctant to deal with a mat that would be slotted for the standing pedals. While I liked the idea of coco mats, I continued to search.

My usual UK supplier, Classic Alfa, didn’t carry floor mats at all, but Alfaholics did (www.alfaholics.com). While the mats appeared able to adapt to the pedals, the image on the screen was less assuring. The Alfa logo AND script were rendered in bright red, and took up a large chuck of real estate on the mat; perfect perhaps for a car with some red on the outside or inside, but my GT Junior has neither. I decided to keep looking.

Centerline, based in the states, possibly had a good-looking mat, as the screen shot showed the Alfa logo done up in proper colors. The issue for me was the entire mat wasn’t shown, and I wanted to see how they handled the pedals. So I called and asked if someone could perhaps take a photo or two and send that to me. The nice chap I spoke to said, “well, it’s Friday, but we could do that for you next week”, to which I replied, “great!”. When “next week” came and went, I called again, and got a different, somewhat less-nice chap. His first question was “who did you speak to?” and I replied “I have no idea”. When I again asked for pictures, he said “well, we’re kind of busy filling orders”. Hmm. Guess I’ll just look somewhere else then, shall I? (I never did receive photographs from them.)

Driver’s mats: old mat on left, Mr Fiat mat on right

Out of frustration, I Googled “Alfa Romeo mats made in Italy” (U.S.-made mats were for hanging pedal cars only). This brought me to the website of Mr. Fiat, where I saw good-looking mats for standing pedal cars. The Alfa logo was in all-red, but it was small and subtle. I called. Mrs. Fiat answered the phone, and verified that they had my mats in stock (the company is in Atlanta GA). She transferred me to Mr. Fiat, who took my order over the phone. I had the mats in 3 days.

Juniors left factory with rubber mats, but you got the cross & snake logo!

The look is good; the fit is just so-so, but about what I would expect for aftermarket mats. Their main purpose, after all, is to protect the original rubber mat flooring, so these will get the job done!

Mr Fiat’s Alfa mat installed; not bad


  1. Sheepskin seat covers

Blame Bring A Trailer for this one. Several years ago, a buyer bought an Alfa sedan in Greece, toured Europe with his family in it for several weeks, then had the car shipped back home to the states. He wrote a blog about his journey, and in it, he highly recommended sheepskin seat covers.

I will admit that on 90-degree summer days, the vinyl upholstery in my car becomes a bit unbearable. So the idea of sheepskin covers, with their “cool in the summer, warm in the winter” advantages, appealed. I’m also lucky to work for a company which sells aftermarket car parts and accessories, and I bought my covers, through www.carid.com, from U.S. Sheepskin.

Sheepskin covers are for travel only; big help on hot days

They are universal fit, and while the fit on the seat back is excellent, they are quite big on the seat cushions. The color is complementary at best, but that’s OK, because these are for travel only. Once I get to a show, the covers are coming off to expose the original upholstery. I’ve made some short local trips with the seat covers in place, and so far, pretty comfy.

US Sheepskin doesn’t carry pigskin brown; tan was closest match


  1. Polish and wax

The Alfa has single-stage paint, meaning, no clear coat on top. Not sure that any 1967 cars had two-stage paint, probably not. I’m also guessing that its paint is lacquer, as it has that “soft” feel to it. Whenever I apply any kind of wax, the cloth quickly turns green, so I know I’m removing paint.

Since buying the car in 2013, I’ve put over 10,000 miles on it. When it goes on one of the New England 1000 rallies, it spends a full week outside, and that quickly takes its toll on the paint. In my garage, the car stays covered, but the paint still needs frequent attention.

Meguiars products have been my favorites for over 10 years now, and I’m 99% exclusive with them. For the Alfa, having tried several different combinations of products, I’ve settled on two: Show Car Glaze #7, and Liquid Yellow Wax #26.

#7 and #7 available in the Mirror Glaze Professional line

The Show Car Glaze is a polish, designed to rejuvenate the paint by nourishing it and adding essential oils back into it. It has some compounding effect, but very little. I’ve read articles which refer to Meguiars #7 as “Queen For A Day”, meaning that it may be short-lived, but it will quickly bring back a deep shine.

Yellow Wax #26 is a blend of carnauba and other waxes. It’s easy to apply; there’s no rush to remove it; and it doesn’t dry white, so if you get a little in some nooks and crannies, it’s no big deal. It also seems to sit nicely on top of the #7 Glaze.

Microfiber cloth shows results from polishing entire car

I started with the horizontal surfaces, which had the most hazing on them, and they cleaned up nicely. I was able to go lighter on the sides, and finished up with the front and rear. By the way, the #26 wax works beautifully on my stainless bumpers, frankly, better than the metal polishes I have. We’ll see how well the car does when it’s judged on Saturday!


The Alfa Convention in Montreal in 2017 was my first visit to an AROC event, and I was knocked out. I missed 2018 in Washington state, and am thrilled that the 2019 Convention is so close. Watch this space for updates and a full report!


All photographs copyright © 2019 Richard A. Reina. Photos may not be copied or reproduced without express written permission.


The Alfa Gets Its 2019 Tune-up

When I bought my Alfa Romeo GT 1300 Junior in March of 2013, it was for the express purpose of using it to participate in automotive events. There’s no denying that I have piled on the miles. The four New England 1000 rallies of 2013, 2014, 2015, and 2018, the Alfa National (International) excursion to Montreal in 2017, and two trips to the Greenwich CT Concours have accounted for the bulk of the mileage. Add to that the innumerable local breakfast drives and car shows, and you can understand how in 6 years of ownership I’ve managed to spend 11,000 miles behind the wheel of this fine Italian automobile.


Bosch rotor, unlike ones I serviced on Volvos, uses a set screw to hold it in place.


Old rotor showed tip wear, but appeared normal to me


Alfas, and Italian cars in general get a bad rap as “unreliable”. That’s not been my experience. Except for a dead battery right after purchase, and a failed alternator on the ’18 NE1000, those 11,000 miles have been trouble-free. I’ve mentioned to those who ask that the more I drive the car, the better it seems to run. The other side of that coin is that, as a ‘60s European thoroughbred, the car’s mechanical state of tune must be strictly looked after; indeed, the Alfa maintenance schedule, which requires more frequent service than an American car of similar vintage, should be followed as closely as possible. This is where ability to work on your own vehicle becomes a significant advantage compared to needing to pay someone to do what is in essence straightforward service work.

C-clip holds points in place; tricky to remove and hold onto


Points showed rather severe pitting

After I finished the valve adjustment a few weeks ago, I noted that the idle was terrible, and in fact, it was difficult to get the engine to consistently respond to accelerator inputs. My first suspicion was the car’s ignition system, so an order was placed with Classic Alfa for the suite of tune-up parts. (And they spoiled me again, with the package on my front porch is less than 48 hours.)

Bosch rotor is different part number for 1300 compared to US-spec cars- note German “OEL” (oil)

The service books recommend removal of the distributor for service work, and it’s held in place by a single 10mm-headed bolt, so it’s easy to pop it out. Checking the usual suspects for wear, I didn’t see anything severely out of the ordinary, although the points were badly pitted, and the gap was too small.

Freshly-serviced distributor, with new points, condensor, and rotor

I ended up replacing the spark plugs, plug wires, cap, rotor, points, condenser, and, for the first time under my ownership, the coil, which looked original. The car fired right up, and as I’ve noticed immediately after prior tunes, the tip-in is magnificent. I took the car for an all-too-brief run around the neighborhood, and felt infinitely better about all the driving I’ve got planned for the Alfa for this year, especially the Alfa Club Convention in Pittsburgh in July.

In addition to replacing coil (old one here), I fabricated a new coil-to-distributor wire

The one remaining item on the tune-up to-do list is the ignition timing. If I’m reading the books correctly, the best way to set the distributor timing for utmost performance is by checking it at 5,000 rpm. At that engine speed the “M” (for “massimo” or maximum) should line up with the timing pointer. The books also recommend NOT adjusting the distributor while at 5,000 rpm, and that’s good advice.

Note to self: every year, the ignition system needs to be checked, adjusted, and renewed as necessary at the start of every driving season.


All photographs copyright © 2019 Richard A. Reina. Photos may not be copied or reproduced without express written permission.

Alfa Romeo Valve Adjustment, Part 2

As you read in “Alfa Romeo Valve Adjustment, Part 1” (or if you skipped your reading assignment, you can find it here), the valve gaps on my 1300 engine were out of whack, especially on the intake side. With cams temporarily removed, I measured all the existing shims, did the algebra to calculate the sizes of the needed shims, and placed my order with Classic Alfa in the UK. I was not the least bit surprised when the order I placed at 10 p.m. on a Saturday night landed on my front stoop before I got home from work on Tuesday. (I need to email them and enquire what happens after Brexit, presuming that Brexit happens.)

This magnet was very helpful in encouraging the slippery follower to come out

The following weekend, all the old shims came out, and the new shims went in, again following the “one cylinder at a time” rule I established so as not to cross-install the followers which must remain with their original cylinders. When reinstalling the cams, I could not get the timing marks between the cams and front bearing caps to line up. It made me nervous enough that I removed and reinstalled the cams a second time (remember that the timing chain remained attached to the sprockets). I finally convinced myself that once I released the bolt holding back the spring tension in the timing chain tensioner, all would return to sync, and that is exactly what happened. With the tensioner pressing against the chain, I rotated the crank and cams through two complete revolutions, and then tightened the bolt in the spring tensioner. The marks were still aligned, thankfully.

I double-checked and wrote down all the new valve clearances, and all seemed good (but read on). Since I had the spark plugs out, a new set of NGK B7ES plugs, which are in stock at my local Advance Auto Parts store, went in. With plug wires, intake plenum, and air filter hose back in place, it was time to attempt to start this baby, remembering that the engine had not been run since the car went to sleep the previous autumn. The engine started on the second try, however, there was an unhealthy miss at idle. I shut it down, and made plans for a complete tune-up, which was next on the Alfa’s to-do list anyway.


Never-seize coating on plug threads
Postscript: I jotted down all the “new” valve clearances, and really didn’t give them a second glance, undoubtedly presuming that everything was done correctly. Today, while composing this blog post, I noticed that my spec for intake valve #3, .450mm, was unchanged from its original measurement, yet I have no doubt that the 2.15mm shim which had been in there was replaced with a 2.10mm shim, which means that the new measurement should have been .500mm. For now, I’m leaving this alone for several reasons: valve #3 was the closest to spec of all the intake valves during the original check; testing the thicknesses of the new shims revealed that how tightly I cranked on my micrometer made a difference in the measurement (including the effect of residual oil on the shim); and I’m not yanking that cam again for 0.05mm!


All photographs and video recordings copyright © 2019 Richard A. Reina. Photos may not be copied or reproduced without express written permission.


Alfa Romeo Valve Adjustment, Part 1

The owner’s manual for my 1967 Alfa Romeo GT 1300 Junior calls for the engine valve clearances to be checked every 18,000 kilometers. According to Google Calculator (before Google Calculator I would have used my slide rule), that’s every 11,185 miles. Coincidentally, I’ve put almost exactly 11,000 miles on the Alfa since purchasing it in March 2013. So in part to prepare for what is anticipated to be a very busy 2019 driving season, and in part because I really don’t know when this was last done, I decided to check all 8 valve clearances (4-cylinder engine, 2 valves per cylinder equals 8 valves).

The Alfa engine, before any disassembly

Accessing the valves and followers is the simple part. This overhead-cam engine has its two camshafts at the very top. The valve cover can be removed once the spark plug leads, air hose, and the top of the intake plenum are out of the way, which is a 10-minute affair. The valve cover is held in place by 6 large Allen screws along the top, and two bolts at the front. I had never had the valve cover off this engine before, and my first reaction was one of pleasant surprise at how clean the engine looked.

Valve cover removed

My first task was to find the camshaft part numbers, to verify that these were Alfa Romeo cams and not some hot aftermarket replacements (in which case the clearance specs would be different). A prior conversation with Pete, the family friend who sold me the car, revealed that he wasn’t sure what cams were in it. The part numbers of both cams were readily visible, and verifying them against my technical literature confirmed that these are indeed the factory cams.

This is the correct part number for a 105-platform 1300 Junior engine (105020320001)

Now it was onto the actual clearances. To rotate the engine, I first tried getting a socket on the crank pulley bolt, but the fan shroud blocked that. The next-easiest way to spin the engine was via the nut on the front of the alternator. Popping out the plugs provided less compression resistance, and some moderate thumb pressure on the alternator belt was all that was needed to get the crank and cams to spin.

Paper and pencil at the ready, the valve clearances were checked in firing-order order (1-3-4-2) and recorded. While my owner’s manual provides specs in both millimeters and inches, I decided to stick with the metric measurements – I have metric feeler gauges, and the needed shims are sold in metric sizes.

The spec for the intake valves is 0.475-0.500 mm, and the exhaust spec is 0.525-0.550 mm. Six of the eight valves were out of spec: all 4 intakes and 2 exhausts, and, all 6 showed too little clearance, meaning the valves were not seating completely, subjecting them to less cooling since they were not making full contact with the valve seats.

The worst measurement was #4 intake: 0.350 mm, meaning it was 0.150 mm too tight compared to a correct outer range of 0.500 mm. Yes, we’re talking fractions of a millimeter, but specs are specs, and I felt that the clearances should be corrected.

Here is where it got interesting. My Alfa engine was originally designed in the early 1950s. It’s a very sophisticated layout, with not only overhead cams, but all-aluminum block, wet cylinder liners, hemispherical combustion chambers, etc. However, like most other OHC engines of its time, adjusting the valves requires removing the cams to allow access to the followers (buckets) and shims which are under the buckets. Most friends to whom I mentioned this procedure looked at me with a combination of horror and pity. “It’s really easier than it sounds” I would retort, which did nothing to alleviate their sympathy for me.

(As a complete aside, the first OHC engine to incorporate a valve design which allowed for adjustments with cams in place was the Fiat twin-cam engine, introduced in 1966. My 1970 Fiat 124 Coupe used this design, although I never did adjust those valves!)

The timing chain’s master link is to the left of center

The official Alfa procedure calls for locating the timing chain’s master link, disconnecting it, and swinging the two chain ends out of the way. This method opens the possibility that the cam timing would need to be adjusted at reassembly. Of course, some very clever people have devised a work-around. One of the service books I own is the Alfa Romeo Owner’s Bible, written by the late Alfa expert Pat Braden. He describes a method that does not involve unhooking the chain. Instead, he suggests loosening the chain tensioner, pushing the tensioner all the way IN (making for a loose chain), locking the tensioner in this position, and then lifting the cams toward the center of the engine without disturbing the cam sprocket/chain connection. In this way, on reassembly, the cam timing does not change at all. Ideally, this is done with both cam timing marks lined up with the bearing cap marks.

This is exactly what I did. With the tension off the timing chain, I started on the intake side and removed the 3 cam bearing caps (Alfa thoughtfully numbers the caps 1 through 6, and I documented everything with photos before turning the first nut). The intake cam was lifted and placed over the spark plug holes (which were protected with clean rags). The chain remained on the cam sprocket.

Cam bearing cap #3 – cap nuts were loosened gradually


Intake cam lying over spark plug holes- note timing chain still on cam sprocket

The next trick was getting the buckets out, as they were oil-covered and lacking a way to grab them. I realized that a magnet might do the trick, and it did. The bucket came out, and under it was the shim, which was also removed.

These slippery guys were tricky to remove!

Working on just one cylinder at a time so as not to mix up any of the locations, I measured each shim with a digital metric micrometer. The value was recorded on the same sheet of paper as the clearances. I started on the #1 intake valve, went down the line to the #4 intake valve, then did the same thing on the exhaust side. Once all these measurements were taken, the shims and buckets were back in place on the engine. I gently placed the valve cover on top of the engine, lowered the hood, and took my measurements inside so that the ‘new’ shim sizes could be calculated.

Bucket/follower (top) and shim (left) pose with micrometer


Starrett No. 216 records a shim value of 2.15 mm

I knew that all the out-of-adjustment valves were tight, so I needed greater clearance, so all the new shims needed to be thinner than the current shims. I found an online “Alfa shim calculator” someone built in Excel, and I used it, but I also checked all my numbers two more times. I aimed for the higher end of the spec, figuring that if the valves are tightening up over time, I had best start by providing the maximum clearance while remaining in spec.


Documentation of initial clearances and shim thicknesses

My go-to Alfa supplier, Classic Alfa in the UK, sells shims in increments of 0.125 mm, so it was a fairly easy task to calculate my needed shim sizes. The order was placed, and now I just needed to wait for the shims to show up. But it certainly felt like the hard work was behind me!


All photographs and video recordings copyright © 2019 Richard A. Reina. Photos may not be copied or reproduced without express written permission.


Alfa Romeo Reverse Lamp Assembly Refurbishment

My Alfa is a mostly completely original car, meaning that it’s never been “restored”, not in the sense that classic cars are restored with all-new cosmetics and completely overhauled mechanicals. Yet with 65,000 miles on it (and counting), there have been maintenance and wear items needing attention.


The car is wearing about 90% of the paint and 100% of the interior with which it left the factory. The engine, gearbox, and rear axle are likewise the same assemblies that Tony, Vito and their fellow factory workers installed. During the past 51 years, the car has gotten new tires, brakes, belts, hoses, bulbs, shocks, clutch, tune-up parts, and fluids. I’m very conscious of my role as “steward” of this car, and hope that when it eventually moves to its next owner, the preservation efforts will continue.


As you may know from reading this blog, I’m not shy about putting several thousand miles a year on it, and if the paint gets a little worn or slightly chipped from my enjoyable time behind the wheel, so be it. But I would never consider repainting the car. Likewise, should a major engine component fail, I’ll repair it as necessary, but I’m not going to seek out a larger engine from another Alfa. I’m continually striving to maintain that balance whereby I get to enjoy the car while only fixing what needs fixing.


Earlier this year, I discovered that the reverse light didn’t work. The truth is, in the 5 years I’ve owned the car, I don’t think I had ever checked the back-up light. Its inoperative status gave me the impetus to remove the light assembly (there’s only one, below the rear bumper) and get it working again. The overall goal was not to replace it, but refurbish it, reusing as many of the original components as possible.

Bezel, housing, lens, and broken hardware after removal from car

The first challenge presented itself when two of the four fasteners snapped during removal. The clear lens was held in place by two Philips head screws, and half of one stayed in the housing. The housing itself used two studs with nuts, and one stud broke in half. Unlike the recessed screw for the lens, the broken stud projected far enough above the housing that a pair of locking pliers got it out the rest of the way.

Closeup of housing. Note broken screw on left, and hardened white gasket.

The gasket beneath the lens had been some kind of rubber that had turned to stone. It’s likely that it had never been disturbed until now. The chrome housing was somewhat pitted, and looked like it would respond to some metal polishing. The rubber bezel, mounted between the housing and the painted rear valence, would be treated to a trick I successfully deployed during the Isetta restoration: using Meguiar’s #40 Rubber Reconditioner, the bezel would be submerged and soaked for several days, hopefully returning some of the rubber’s pliancy.

I had my doubts about salvaging the lens; the old gasket was that hard.

While that sat in its bath, I tackled the removal of the old gasket. This was more of a fight than I anticipated. Not wanting to damage either the housing or the lens, I started with a plastic scraper, but made little progress. Next, I tried various solvents, attempting to soften the material. WD-40 had a minor effect on it, so I kept at it with that, fearful that anything stronger would also harm the lens. The most effective removal tool turned out to be a single-edge razor blade, but this took time. Eventually, both surfaces were rid of the hardened white material.

The lens did clean up nicely

Instead of purchasing a replacement gasket, I fashioned one from sheet cork which I keep just for such purposes. I tacked it in place using non-hardening gasket glue. Three days in the conditioning bath brought the rubber bezel mostly back to its former glory.

I’ve had great success with Permatex #2 non-hardening sealant; note LED bulb in place

My best shot at finding the metric hardware I needed was the local ACE Hardware store, Post Hardware on Route 22 in Somerville NJ. They had the correct screws for the lens, but not the studs. So instead, I bought bolts with the right thread pitch, and hacksawed off the bolt heads. Viola! Metric studs.

There’s a reason they say that ACE is the place

The broken screw was drilled out, and retapped with my metric tap and die kit. The studs were installed with a dollop of thread-locking compound. The old incandescent bulb was replaced with an LED bulb from CARiD.com. As the repair books state: “reassembly is the reverse of disassembly”.

I may use the tap & die set infrequently, but it’s great to have

As you can see, the back-up lamp burns brightly. There’s just one more thing to report, but before I do, I must ask you to think like an Italian. You see, when I first tested the refurbished assembly, it still didn’t work. And that’s when I remembered: in 1967, as far as the Italians were concerned, a driver didn’t need the back-up light to illuminate every time you put the car in reverse! After all, it would provide little or no help in daylight. But if the headlamps are on, indicating it’s dark out, THEN a reverse lamp would prove helpful. So the back-up light is wired to come on only when the light switch is on. I’ll be taking a night cruise just to confirm how well I can see behind me….

Nice and bright (as long as the headlights are on)


All photographs copyright © 2018 Richard A. Reina. Photos may not be copied or reproduced without express written permission.


Replacing the Alfa’s Alternator

I just recently came across these photos, which I had frankly forgotten about, which is why this technical procedure, performed in May, is only getting its own blog post now.


If your memory is good, then you’ll recall reading back in May’s report on this year’s New England 1000 that the Alfa’s alternator failed us in the middle of the rally. If your memory is not so good, or if you’re just joining us, you can read about it here.

The truth is, I should have been wise to an impending failure, as even with the Red-Top Optima battery on trickle charge, the car would still occasionally need a boost. Alternator output measured at the battery was barely 13 volts, a weak statistic which I rationalized to a low idle.

As mentioned in the rally write-up, the drive to our starting destination was done in a steady rain, with lights blazing and wipers flailing. It’s likely that was enough to seal the fate of the battery.

Tuesday morning, we bought a NAPA-brand battery, and leaving the Optima in its place in the trunk, we simply swapped the cables onto the new unit, using bungee cords to keep it from sliding around. The alternator wasn’t completely dead, just on life support. With the new battery, we had zero starting issues the rest of the week, and coasted home on Friday.

Once again I must give a shout to my friends at Classic Alfa in the UK. A new alternator, ordered Tuesday afternoon after they had closed for the day, arrived at my house on Thursday evening. I dare say that most U.S.-based suppliers would not have been able to get me one with such speed. So Memorial Day weekend was spent in part performing the alternator-ectomy.

Old alternator and attendant wiring connections

Access to the unit in the engine compartment was quite good, improved by the battery’s relocation to the trunk, performed by the previous owner (PO). The PO had also removed the factory generator (which I still have) and installed this alternator plus an external voltage regulator. My new replacement alternator has an internal regulator, and it’s a so-called one-wire job.


Old one again. Note alignment of upper bracket.

I photographed the wiring to help with any reinstallation questions, then removed the two components. I noted that the alternator’s upper mounting bracket was at a slight angle, and vowed to focus on improving that geometry when putting it all back together.

With everything hooked up, I measured a steady 13.8 volts at the battery (yet another new Red-Top that I purchased to be on the safe side). I was able to recover the old Optima by very slowly trickle-charging it, and both that battery and the barely-used NAPA one were sold to a young man in my office who is always working on 3-4 project vehicles at a time. (And for the record, both the old alternator and regulator were put in the trash. I don’t keep worn-out parts around.)

New alternator in place, and better aligned too

The only issue, and it’s the smallest of nits to pick, is that the one-wire alternator needs to be ‘excited’ after initial start before it will charge (much the same can be said about me). The ammeter reads zero until I bring engine revs above 3,500 rpm (waiting a few minutes so that oil circulates), at which point, the amp gauge needle jumps to life. It’s a small price to pay to be secure in the knowledge that the battery’s got the juice to crank that 1300cc monster to life.


A good number


All photographs copyright © 2018 Richard A. Reina. Photos may not be copied or reproduced without express written permission.

The AACA Mileage Award Program (MAP)

It’s been over ten years since I first joined the Antique Automobile Club of America (AACA), even though I have been attending the club’s Hershey events since the late 1970s.

In my opinion, the club sometimes gets undeserved criticism for being set in its ways, an organization whose membership is only focused on perfect show cars. As evidence to the contrary, I cite the introduction of the HPOF (Historical Preservation of Original Features) award, which recognizes vehicles which are in essentially original unrestored condition. Another recent addition was the creation of the Driver’s Participation Class (DPC), which has brought many previously-excluded vehicles onto the showfields. And to battle the image of “old guys and their old cars”, great strides have been made to get our youth into the club and involved in this hobby.

Along these lines, I accidentally stumbled across something called the Mileage Award Program (MAP) on the AACA website. Seemingly started in 2012, its purpose is to reward those who actually drive their antiques. I had not heard of it before discovering it online about a year ago.

Busy front end, what with personalized plate, HPOF award, and Mileage award

I sent in my application, and received an emblem and a mileage-tracking form. Once I pulled my Alfa Romeo out of the AACA Museum earlier this year, I noted the odometer reading, and began driving the car. The year 2017 saw plenty of use for the Alfa, the highlight of which was the almost-900 mile round trip to Montreal for the AROC (Alfa Romeo Owners’ Club) annual convention.

As I was putting the car away for the winter in mid-November, I recorded that the car had been driven just over 2,000 miles. I noted that fact on the MAP form, and mailed it in. Several weeks later, my “2” pin arrived, and today, I fastened it to the MAP plaque above the front license plate.

“2” is for two thousand. Additional holes are for future mileage pins.

The MAP recognition awards are given out at 2,000 and 5,000 mile intervals. (It is not clear to me if the mileage segments are cumulative or not; in other words, when I drive another 3,000 miles, am I then eligible for my 5,000-mile pin? Or must I now drive an additional 5,000 miles? I need to reach out to the club and ask.)

If you’re an AACA member (and if you’re not, please consider joining this wonderful club; old-car ownership is NOT required!), check out this relatively new feature. If you regularly drive your AACA-eligible car, it’s a great badge of honor, as well as a conversation starter if your car has the Mileage Award Program recognition on it.


All photographs copyright © 2017 Richard A. Reina. Photos may not be copied or reproduced without express written permission.


FUN FACT OF THE WEEK

In 2012, the AACA published its first-ever “Membership Album and Roster”. The hardcover book is in two sections: the bulk of the book contains color photos of hundreds of members’ cars. The final third is a phone directory-like alphabetical list of every AACA member. The book runs 919 pages.


Winter Storage, and the Start of the Miata’s Next To-Do List

As happens every winter, the collector cars (loosely defined as the cars that don’t get driven in snow) are put away for the winter. The ritual is one that has evolved over the years and is now consistent: fill the tanks with fresh fuel, add Sta-Bil, pump up the tires at least 10 p.s.i. over normal to avoid flat-spotting, put a trickle charger on the batteries, and cover the cars with a dedicated car cover. It’s easy, takes little time, and doesn’t cost very much.

Before going further, let’s take a moment to say a few words about the brands I use, and have continued to use. (I’m a firm believer in finding good products and sticking with them, even if they cost a trifle more. As the cliché goes, ‘you get what you pay for’.)

The Sta-Bil brand of fuel stabilizer, made by Gold Eagle, has been in use in my garage since I’ve owned powered lawn and garden equipment. Many moons ago, I heard stories about lawn mowers and snow throwers, two examples of gas-engine devices which see seasonal use, failing to run because the old gummed-up gas gummed up the works. As soon as I got my first lawn mower, Sta-Bil went into its tank.  The gumming has never happened to me, and I’ve stuck with the brand ever since.

Sta-Bil STORAGE is your basic fuel additive if fuel is going to sit

Yes, I had my doubts about their ethanol treatment after it seemingly made the Alfa run worse (a conclusion which I now doubt since discovering my carbs are running rich and fouling the plugs a bit), but your basic ‘storage’ version of Sta-Bil is the way to go for any fuel tank in which fuel may sit more than 6 weeks or so.

It’s a similar story with battery chargers. I still have my dad’s Sears charger, which looks like it was made in the 1960s. It works great to jump-start a dead battery, but it ain’t no trickle charger. Long-term battery storage requires both a slow charge (the “trickle”) and a volt-sensing cut-out that won’t overcharge the thing and boil it to death.

You know it’s an old charger when there’s a switch for “6V” and “12V”

The Deltran Battery Tender brand came onto the market several decades ago, and they found their niche for the car collectors whose vehicles are stored in the off-season. While many competing brands have since been introduced, I’ve stayed with what I know works. I think I’m up to 3 of these Battery Tenders in the garage.

Green is good! Battery Tender keeps battery charged without overcharging

Car covers are a relatively new accessory to my winter arsenal. Up until a few years ago, frankly, I didn’t believe in them. It was a combination of fear of paint damage from moisture trapped beneath the cover, and frustration with my inability to find a custom-fit cover for the BMW Isetta (my expectations were a bit high with that one).

Since working at CARiD, I’ve learned a lot about the usefulness of good quality car covers, and one thing I learned is that the Covercraft brand is my favorite. The fit is perfect, and the variety of material choices will satisfy any indoor or outdoor cover needs at any price point.

The indoor-rated Dustop from Covercraft fits the Alfa perfectly

The Alfa has a Covercraft Block-It Dustop (yes, they had the ’67 Alfa pattern in stock), and the Miata wears the Covercraft Evolution indoor-outdoor cover. In the garage, both covers do more than keep dust off the paint; they also protect the interiors from sunlight, and provide some protection from wayward nuts and bolts spinning out of control off my workbench. I would never again think of storing a car without a cover. Even in the nice weather, if it’s going to be more than a week or two before one of the cars gets driven again, the cover goes on.

The Covercraft Evolution cover on the Miata is rated for indoor and outdoor use

All this is a prelude to an announcement about my Mazda Miata: after giving some thought to selling it, I’ve now decided to keep the car. What’s more, next year, in 2018, this 1993 automobile will be 25 years old, making it eligible for AACA events. So I’m going to turn it into a show car.

The plan is to spend the winter tending to some mechanical maintenance, but also attending to some detail work in order to display the car at shows next year as a 25-year-old original unrestored car.

The mechanical list includes new rear brake calipers (one of the parking brake adjusters is stuck), new tires (tread is good, but they’re 10 years old), and a continuation of the LED bulb upgrade. The detail work involves a new convertible top (worn and dirty), an engine compartment detail, Paintless Dent Removal work on some small dings, and a complete polish and wax.

Here’s hoping for a mild winter, which will encourage me to get out to the garage! As long as the temperature is above freezing, I can spend a few hours out there. Watch this blog for updates on my progress with the Miata.


Is it spring yet?


All photographs copyright © 2017 Richard A. Reina. Photos may not be copied or reproduced without express written permission.