Alfa Romeo brake system overhaul, Part 3

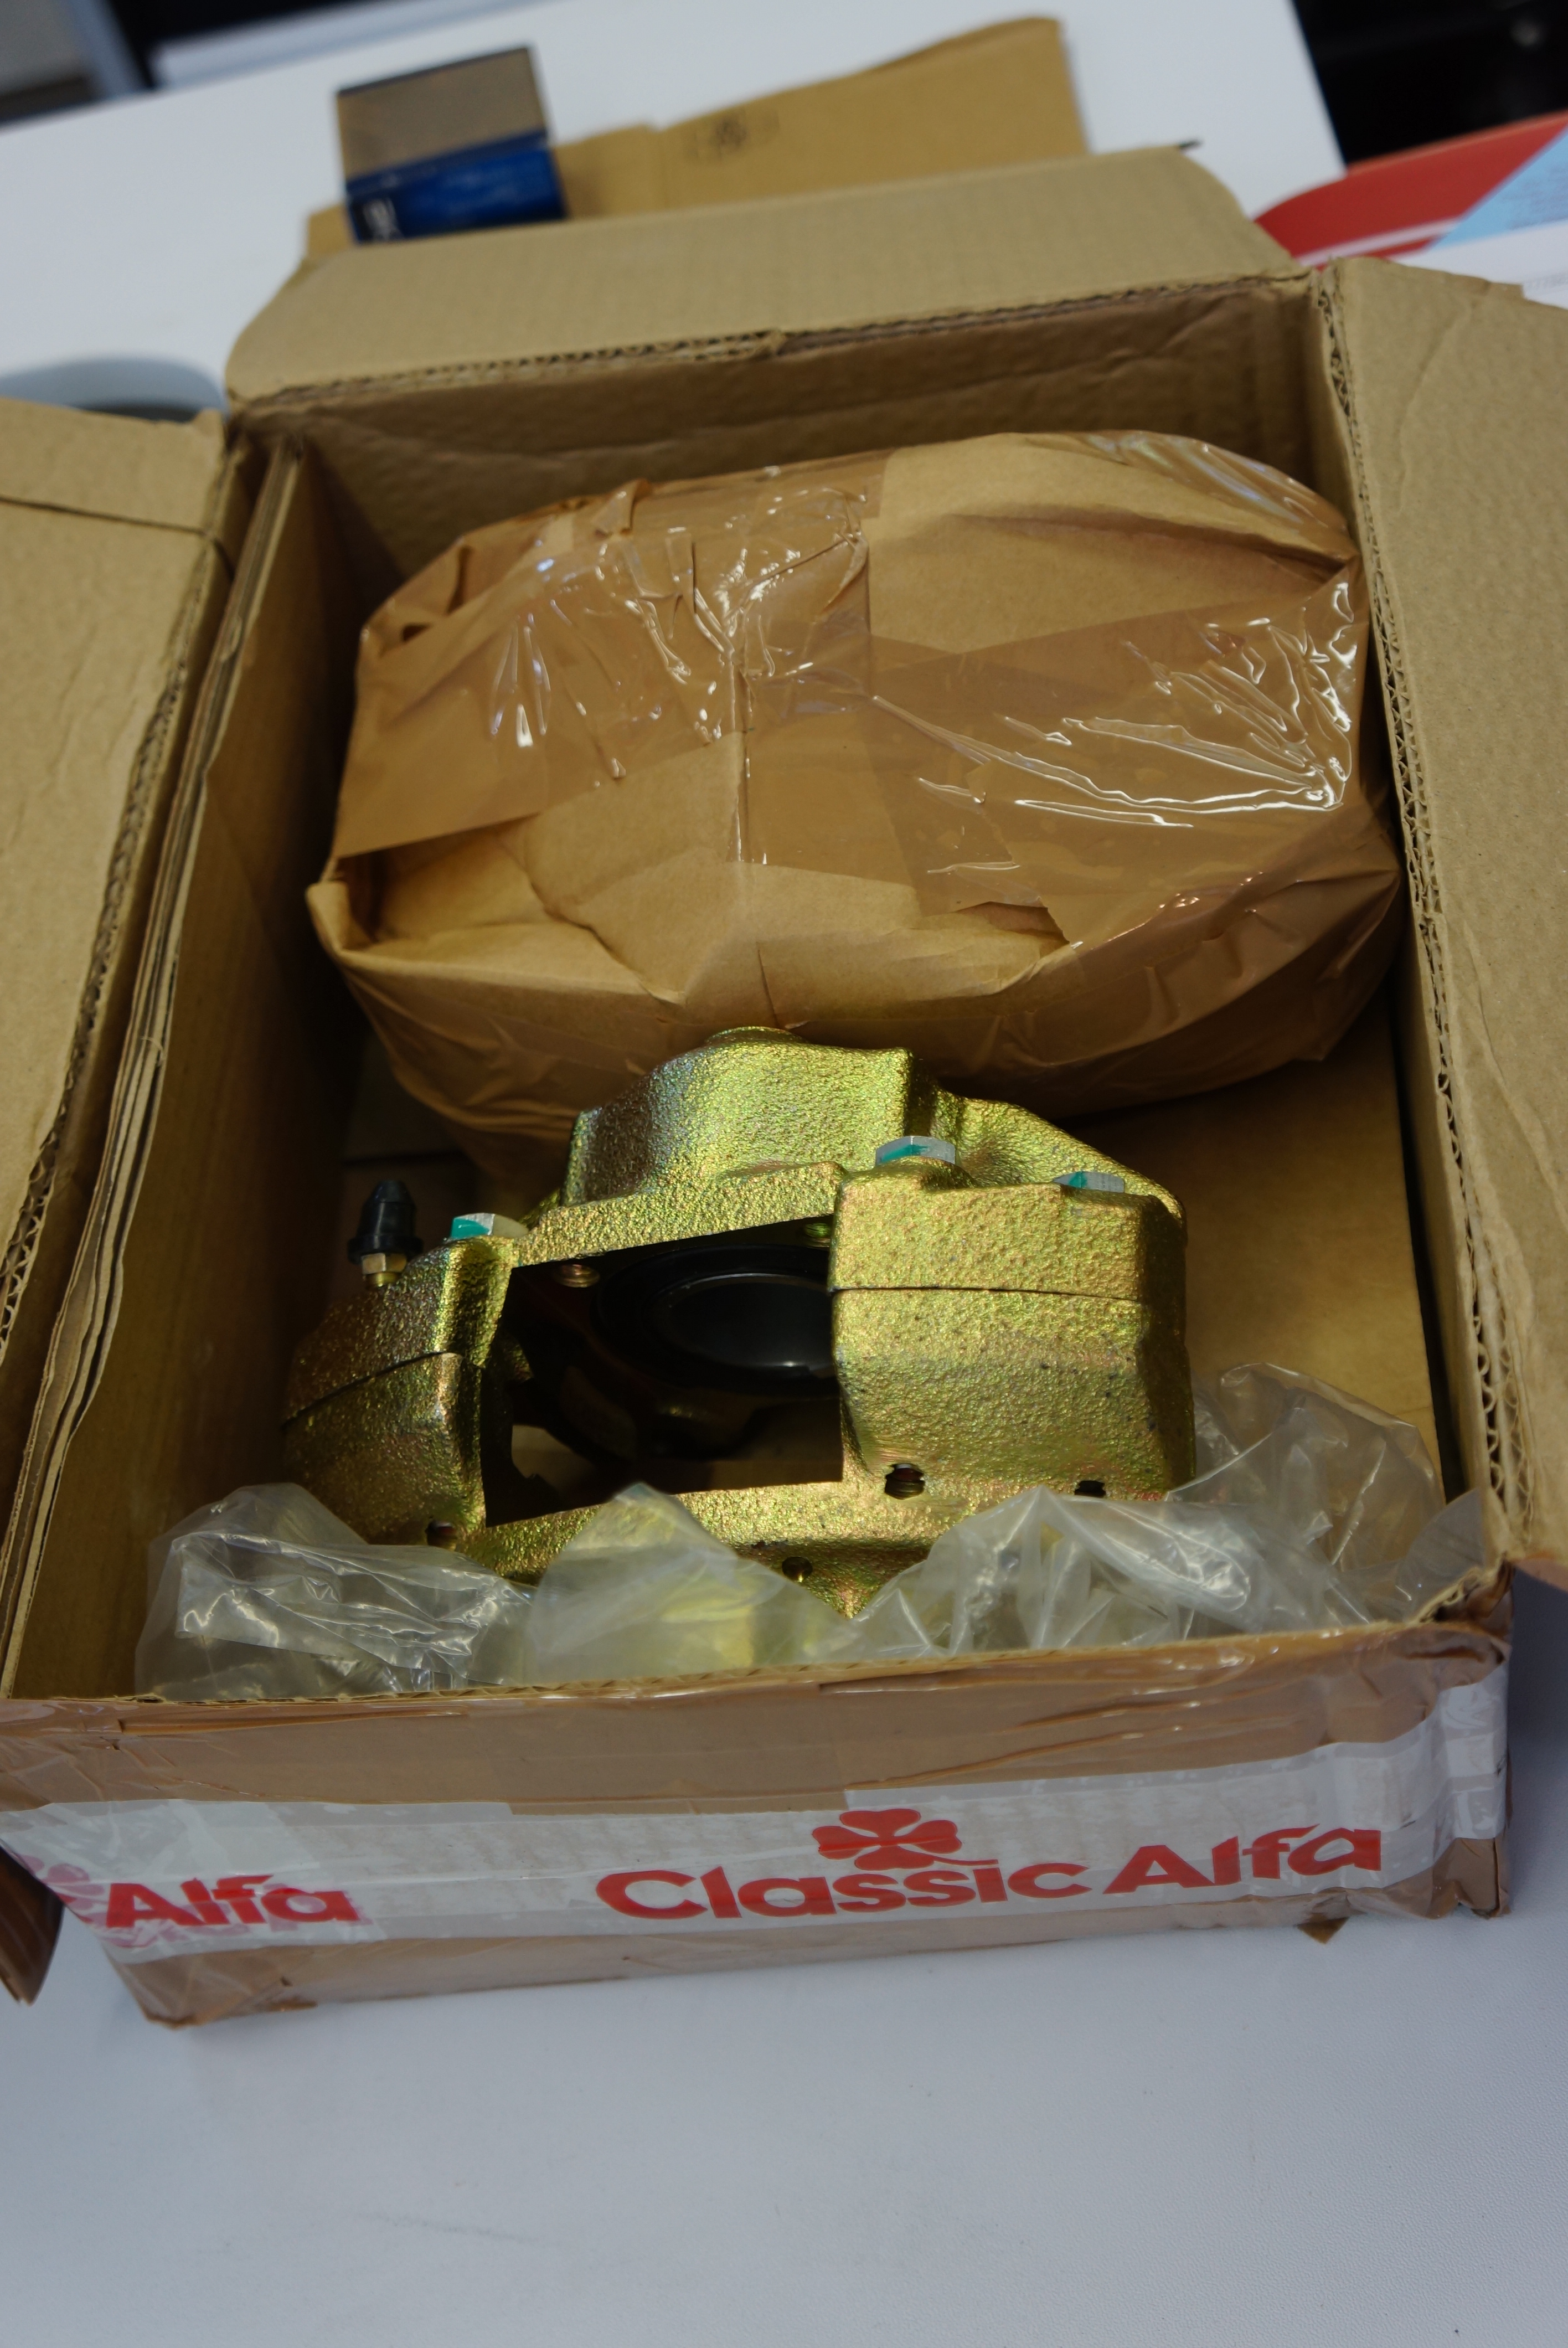
In Part 2, we covered the ongoing caliper overhaul, both front and rear. While waiting for the caliper rebuild parts to show up, I decided to remove the rear rotors and inspect the parking brake set-up.

Left rear disc, caliper, and brake line

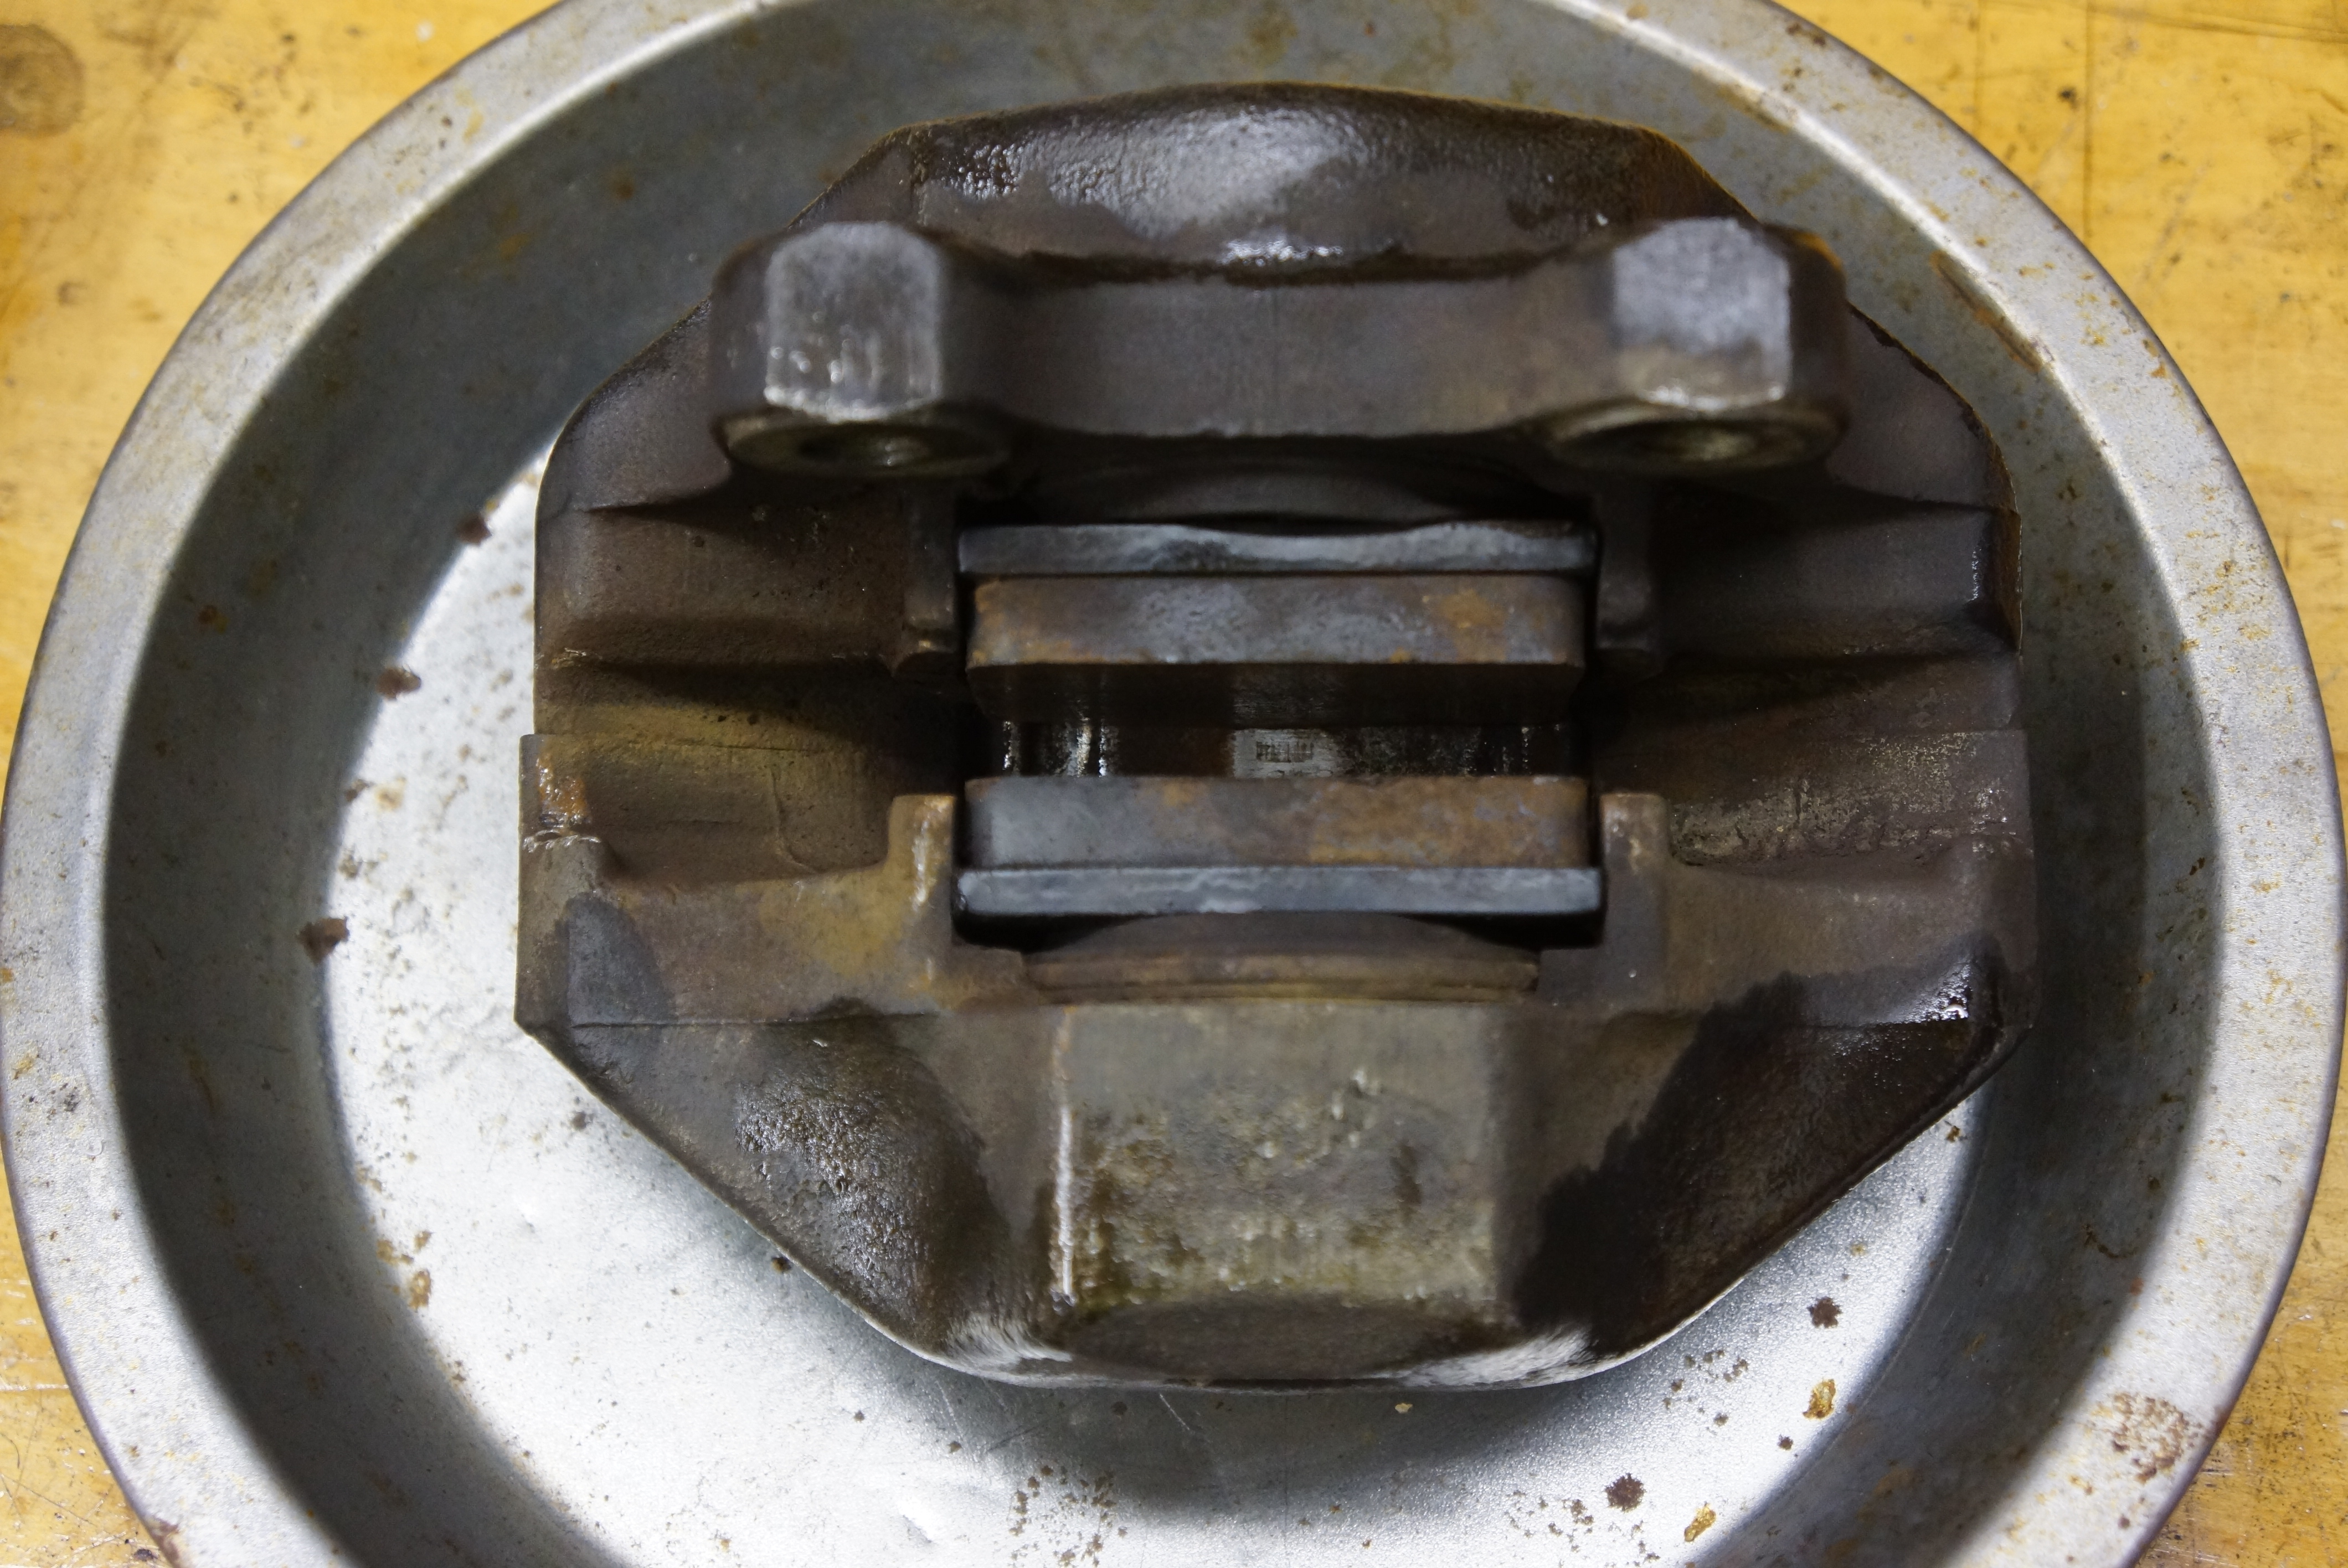
Similar to what Volvo has used for decades, the rear rotors sit over a set of drum brake shoes which apply to the inside of the rear disc “hat”. On the Alfa, these are cable-operated. It was always gratifying that my car’s hand brake worked, but it required a significant tug of the handle to engage.

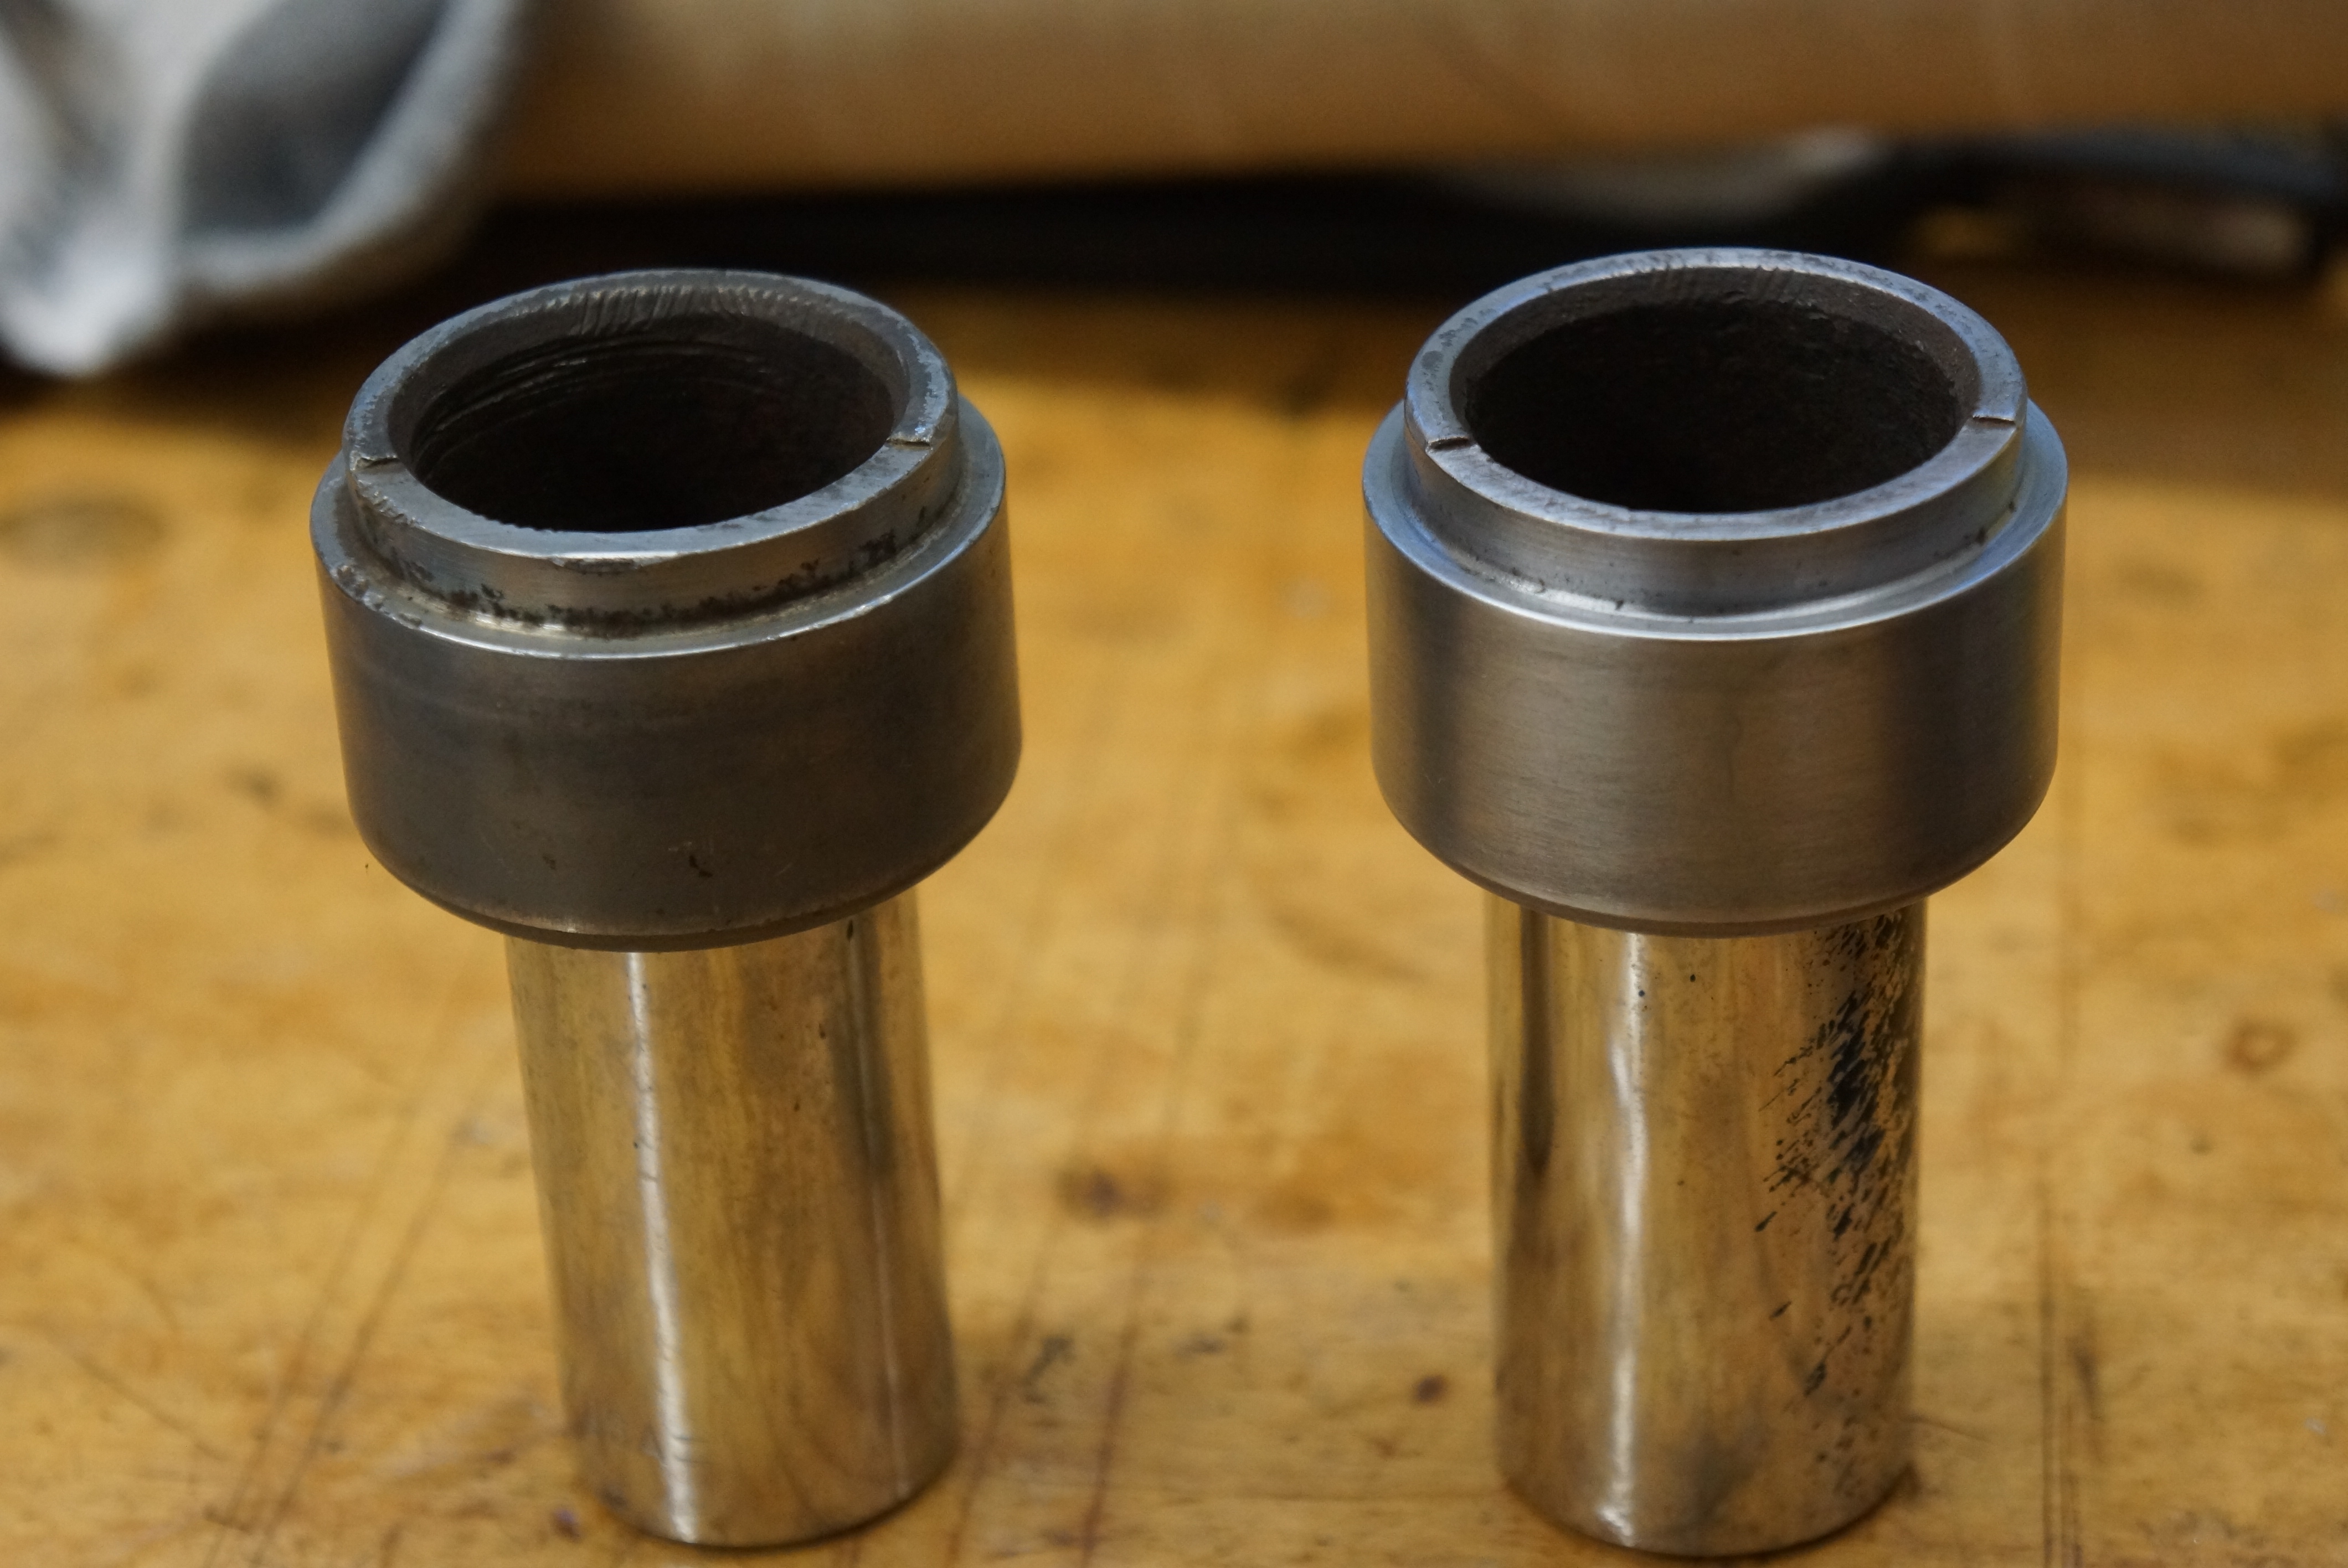
First challenge was removing the two slotted-head screws holding each rear rotor to the hub. An ordinary screwdriver wasn’t getting the job done, so I resorted to one of my favorite tools: my Snap-On hammer-driven impact driver. A long time ago, Andy Finnegan, the shop foreman at the first Volvo dealer that employed me, suggested this tool to me. While I infrequently use it, it’s one of those tools that makes you glad you have it for the occasions you really need it. This was one of those occasions.

The right tool at the right time can save hours of time and frustration – note slotted screw in rotor face

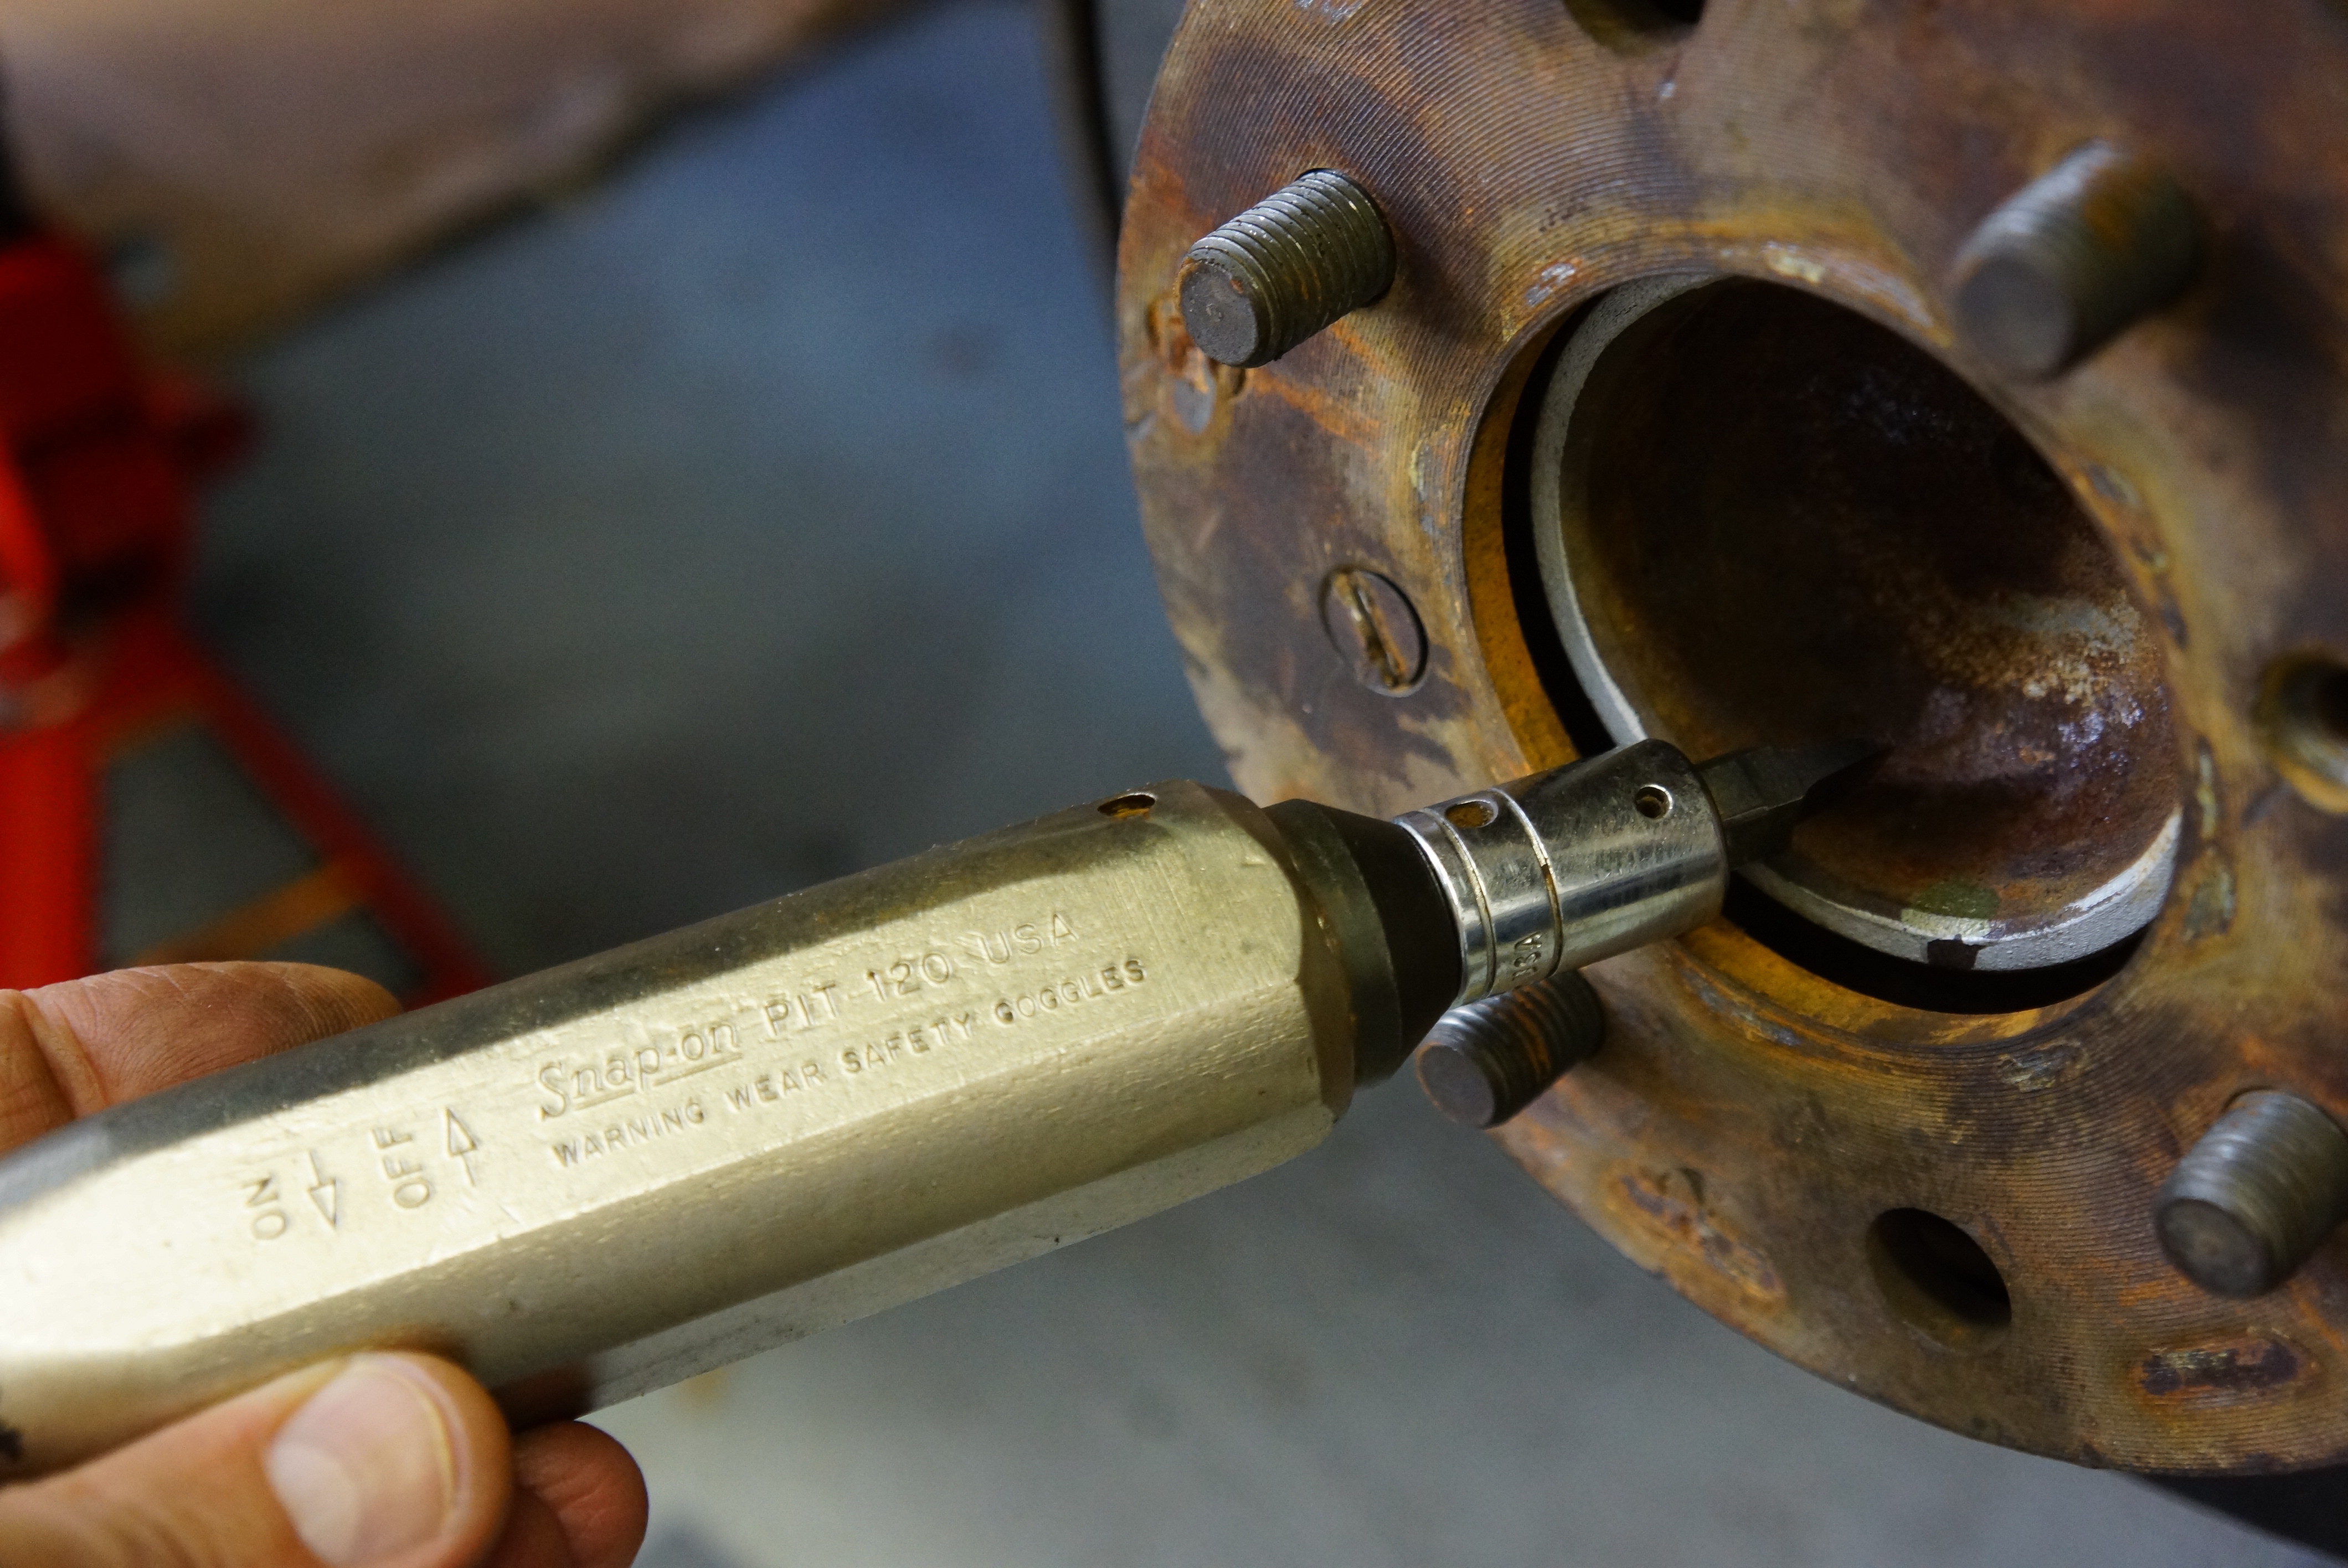
A few taps with a hammer, and the screws were loose (I also bought new replacements on the chance that I would mangle the heads during removal.). But getting the disc off also required a few heavier hammer blows. Eventually, the rotors were off, first on the driver’s side, then the passenger side.

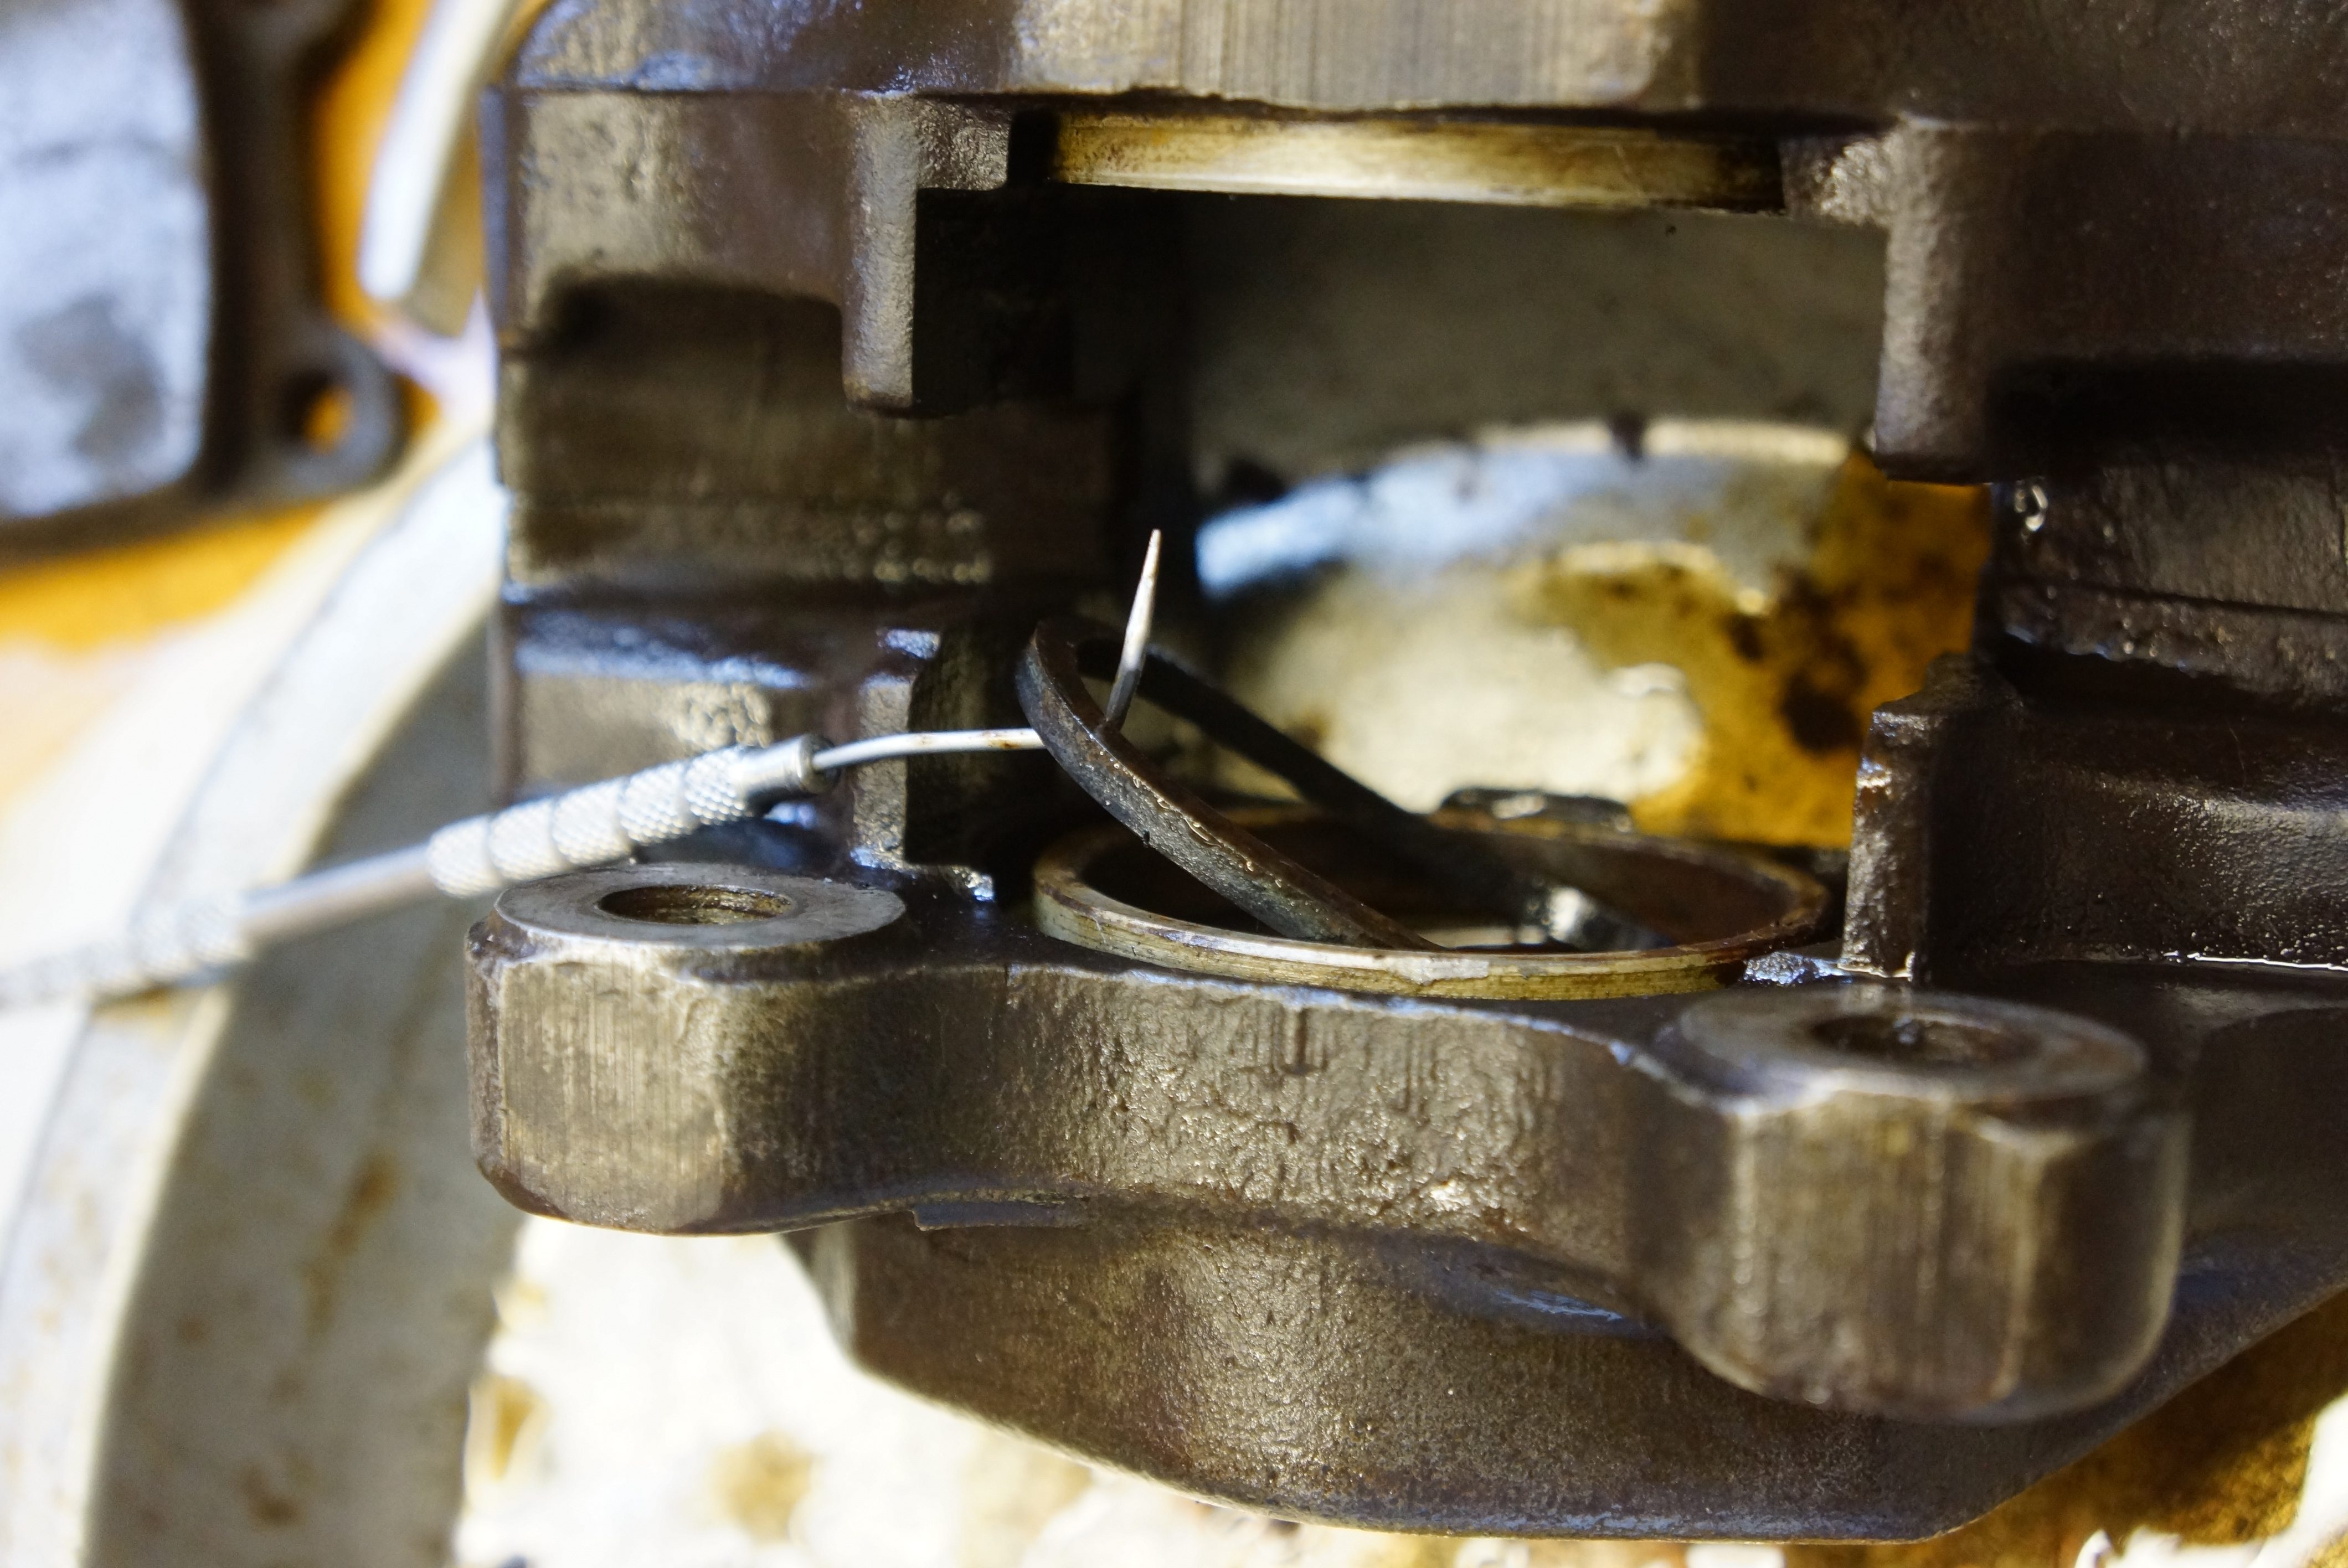
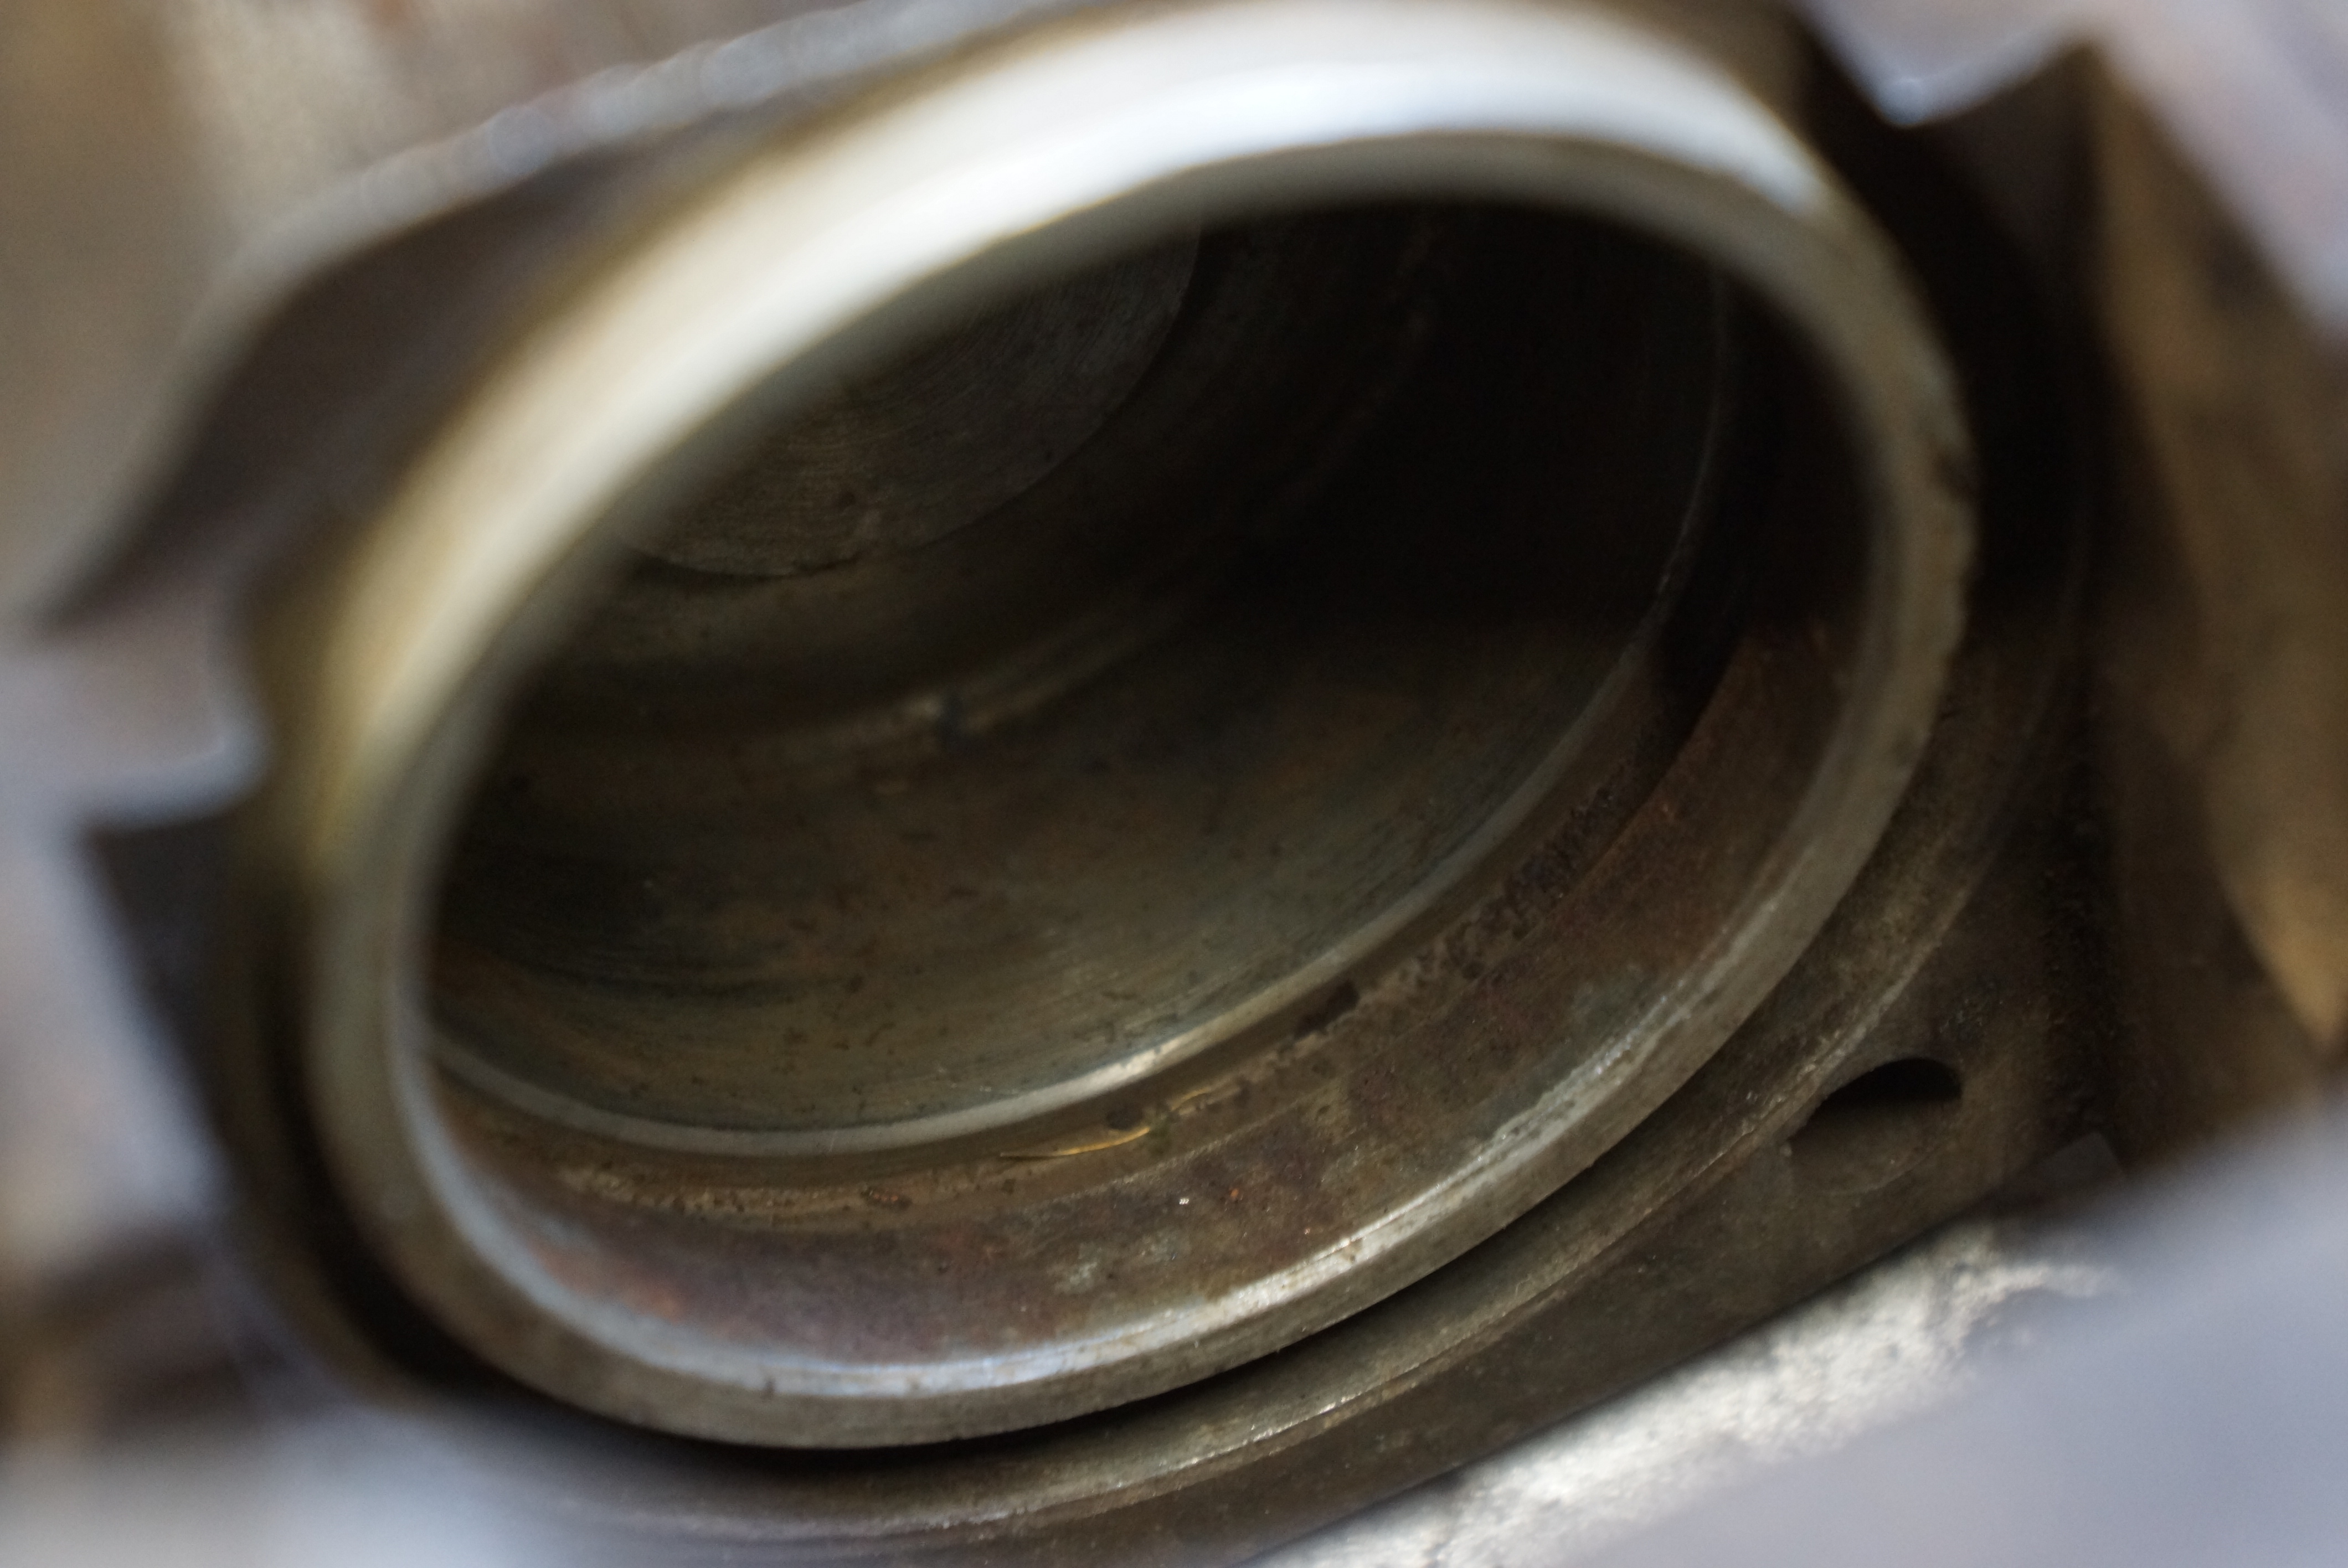
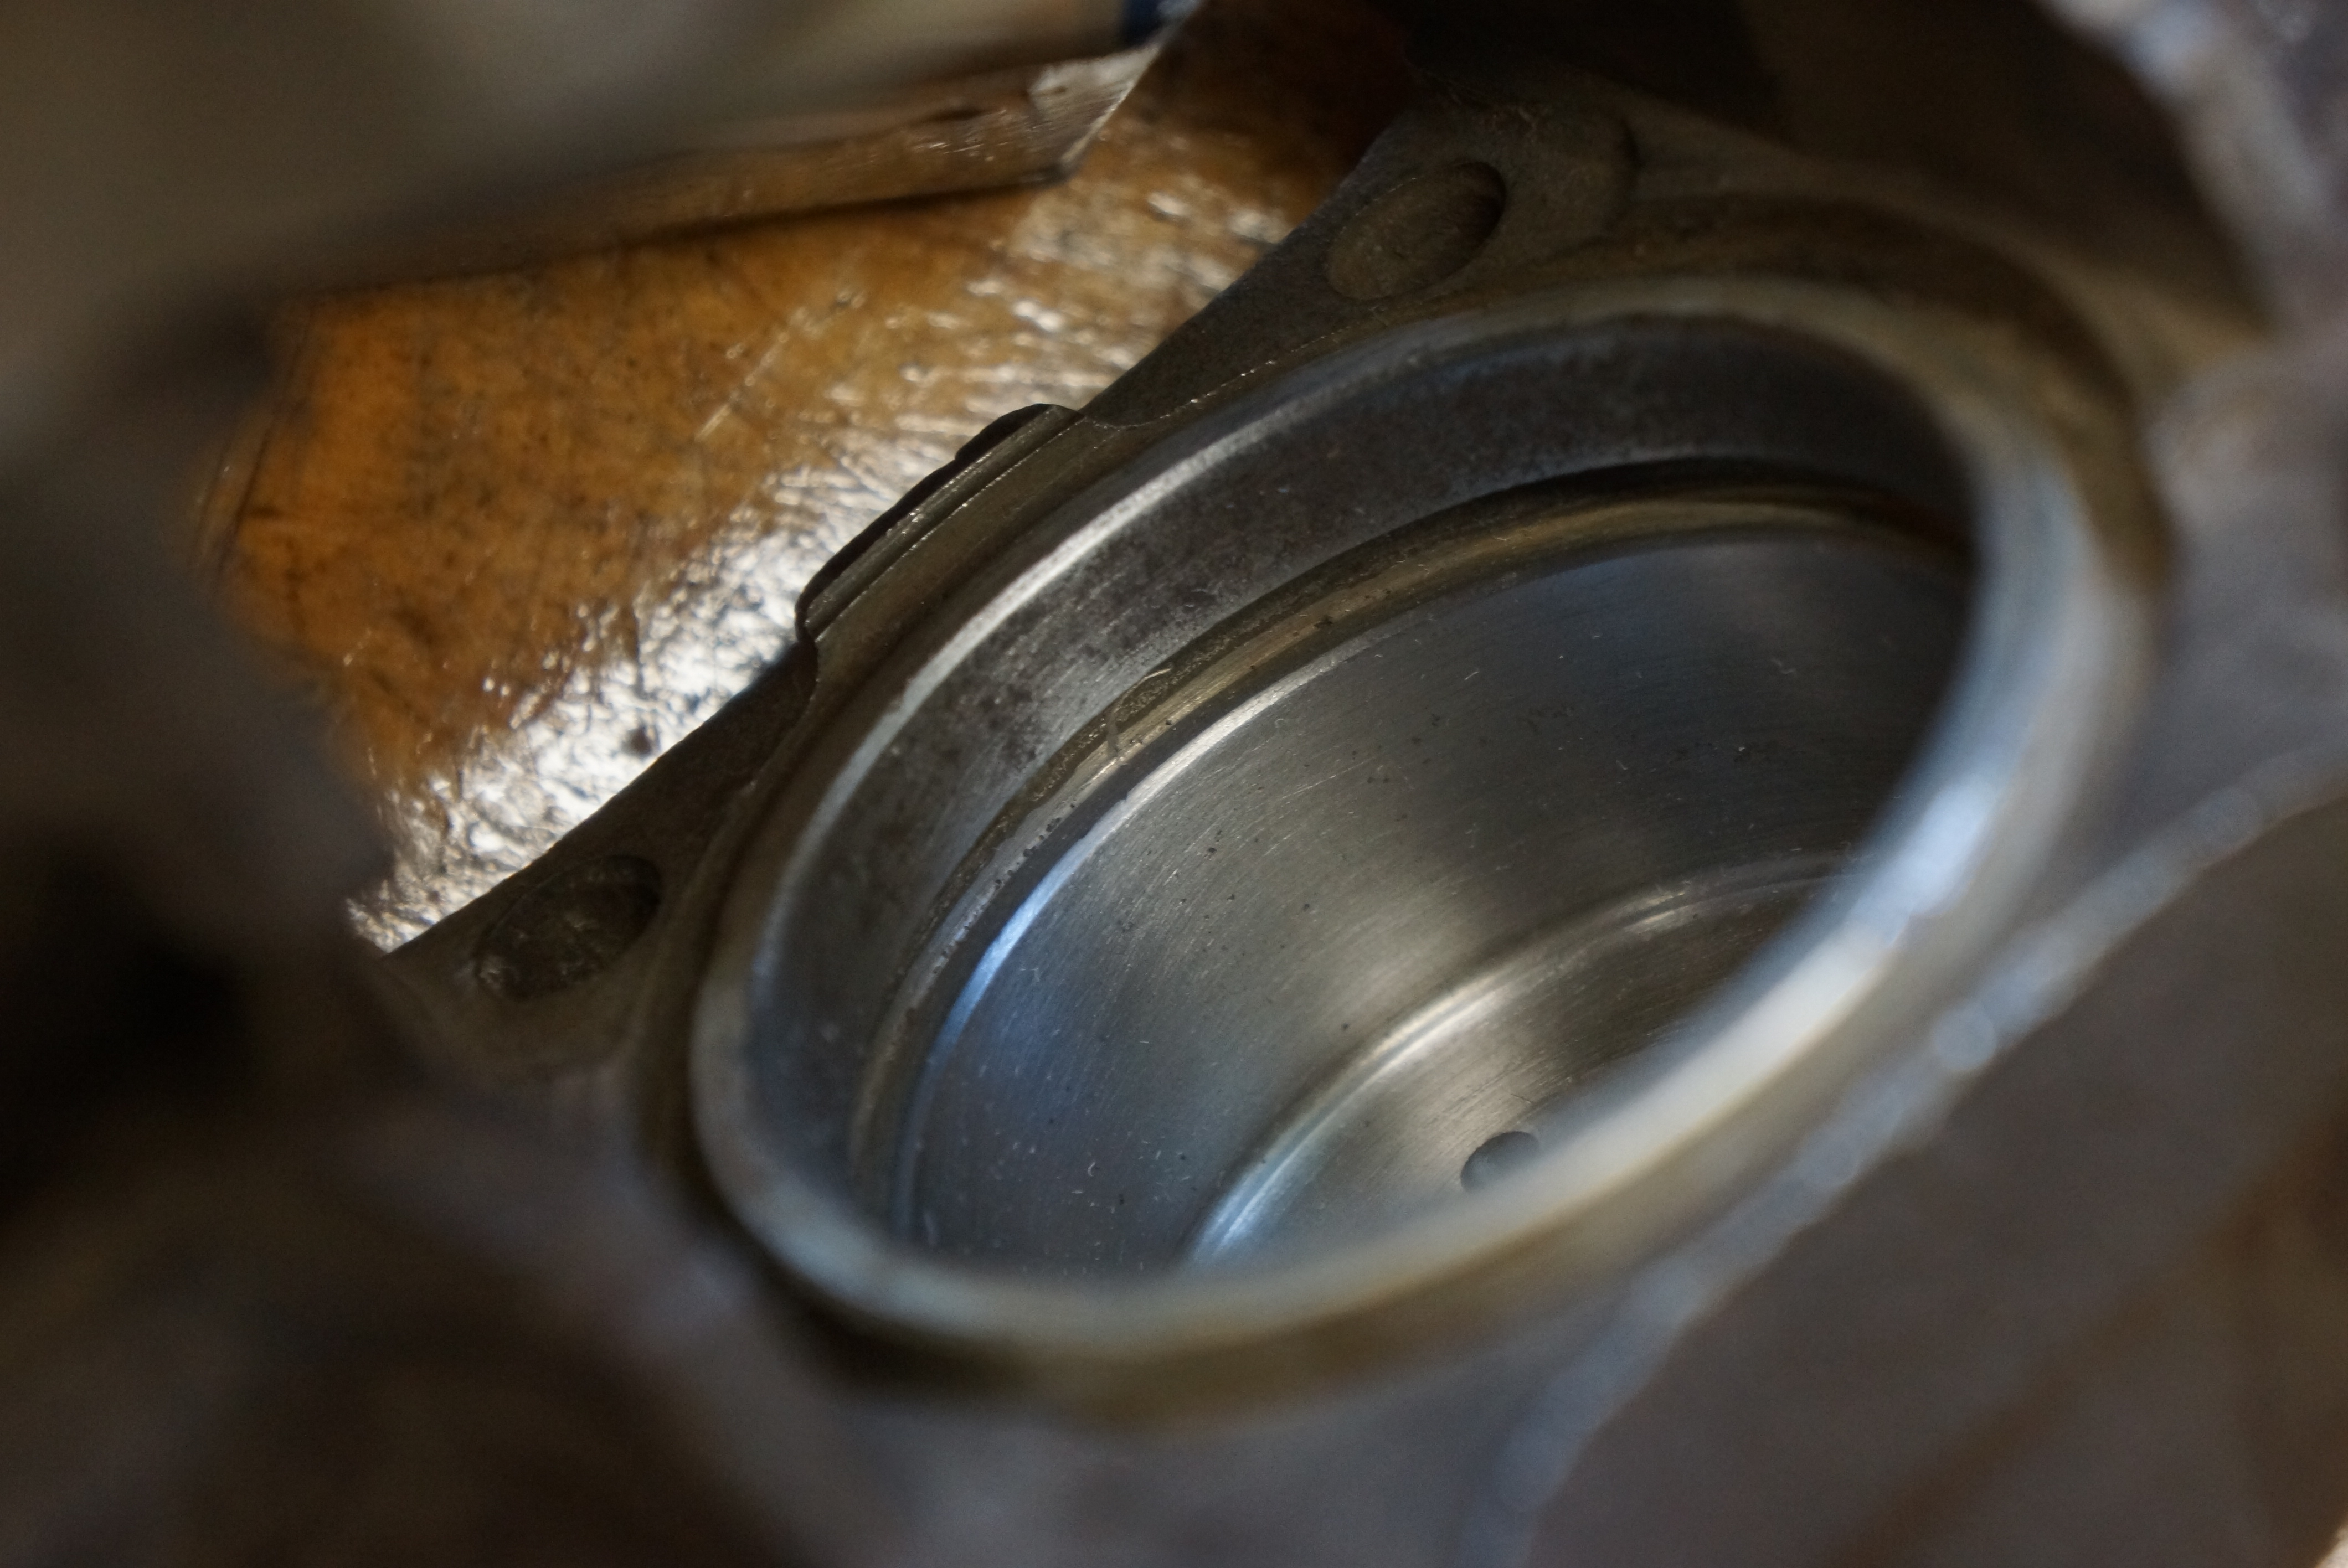
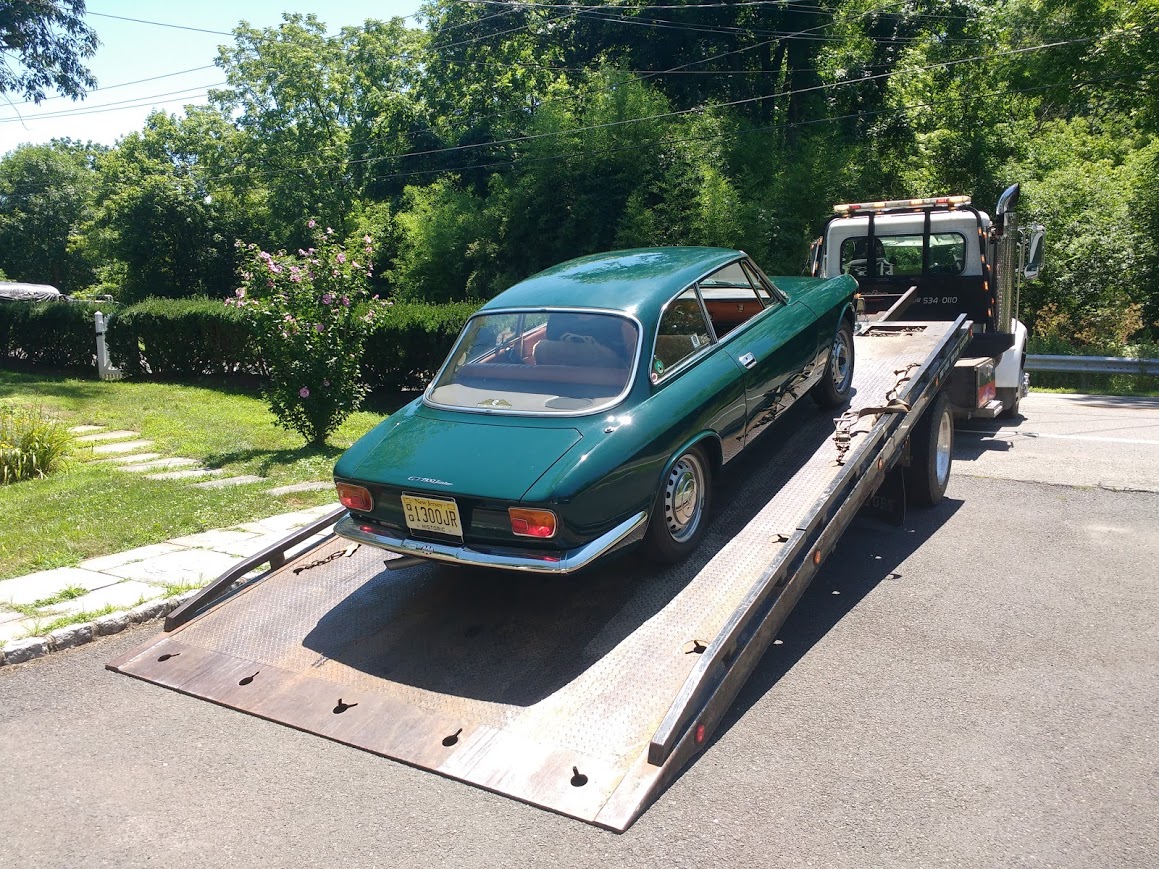
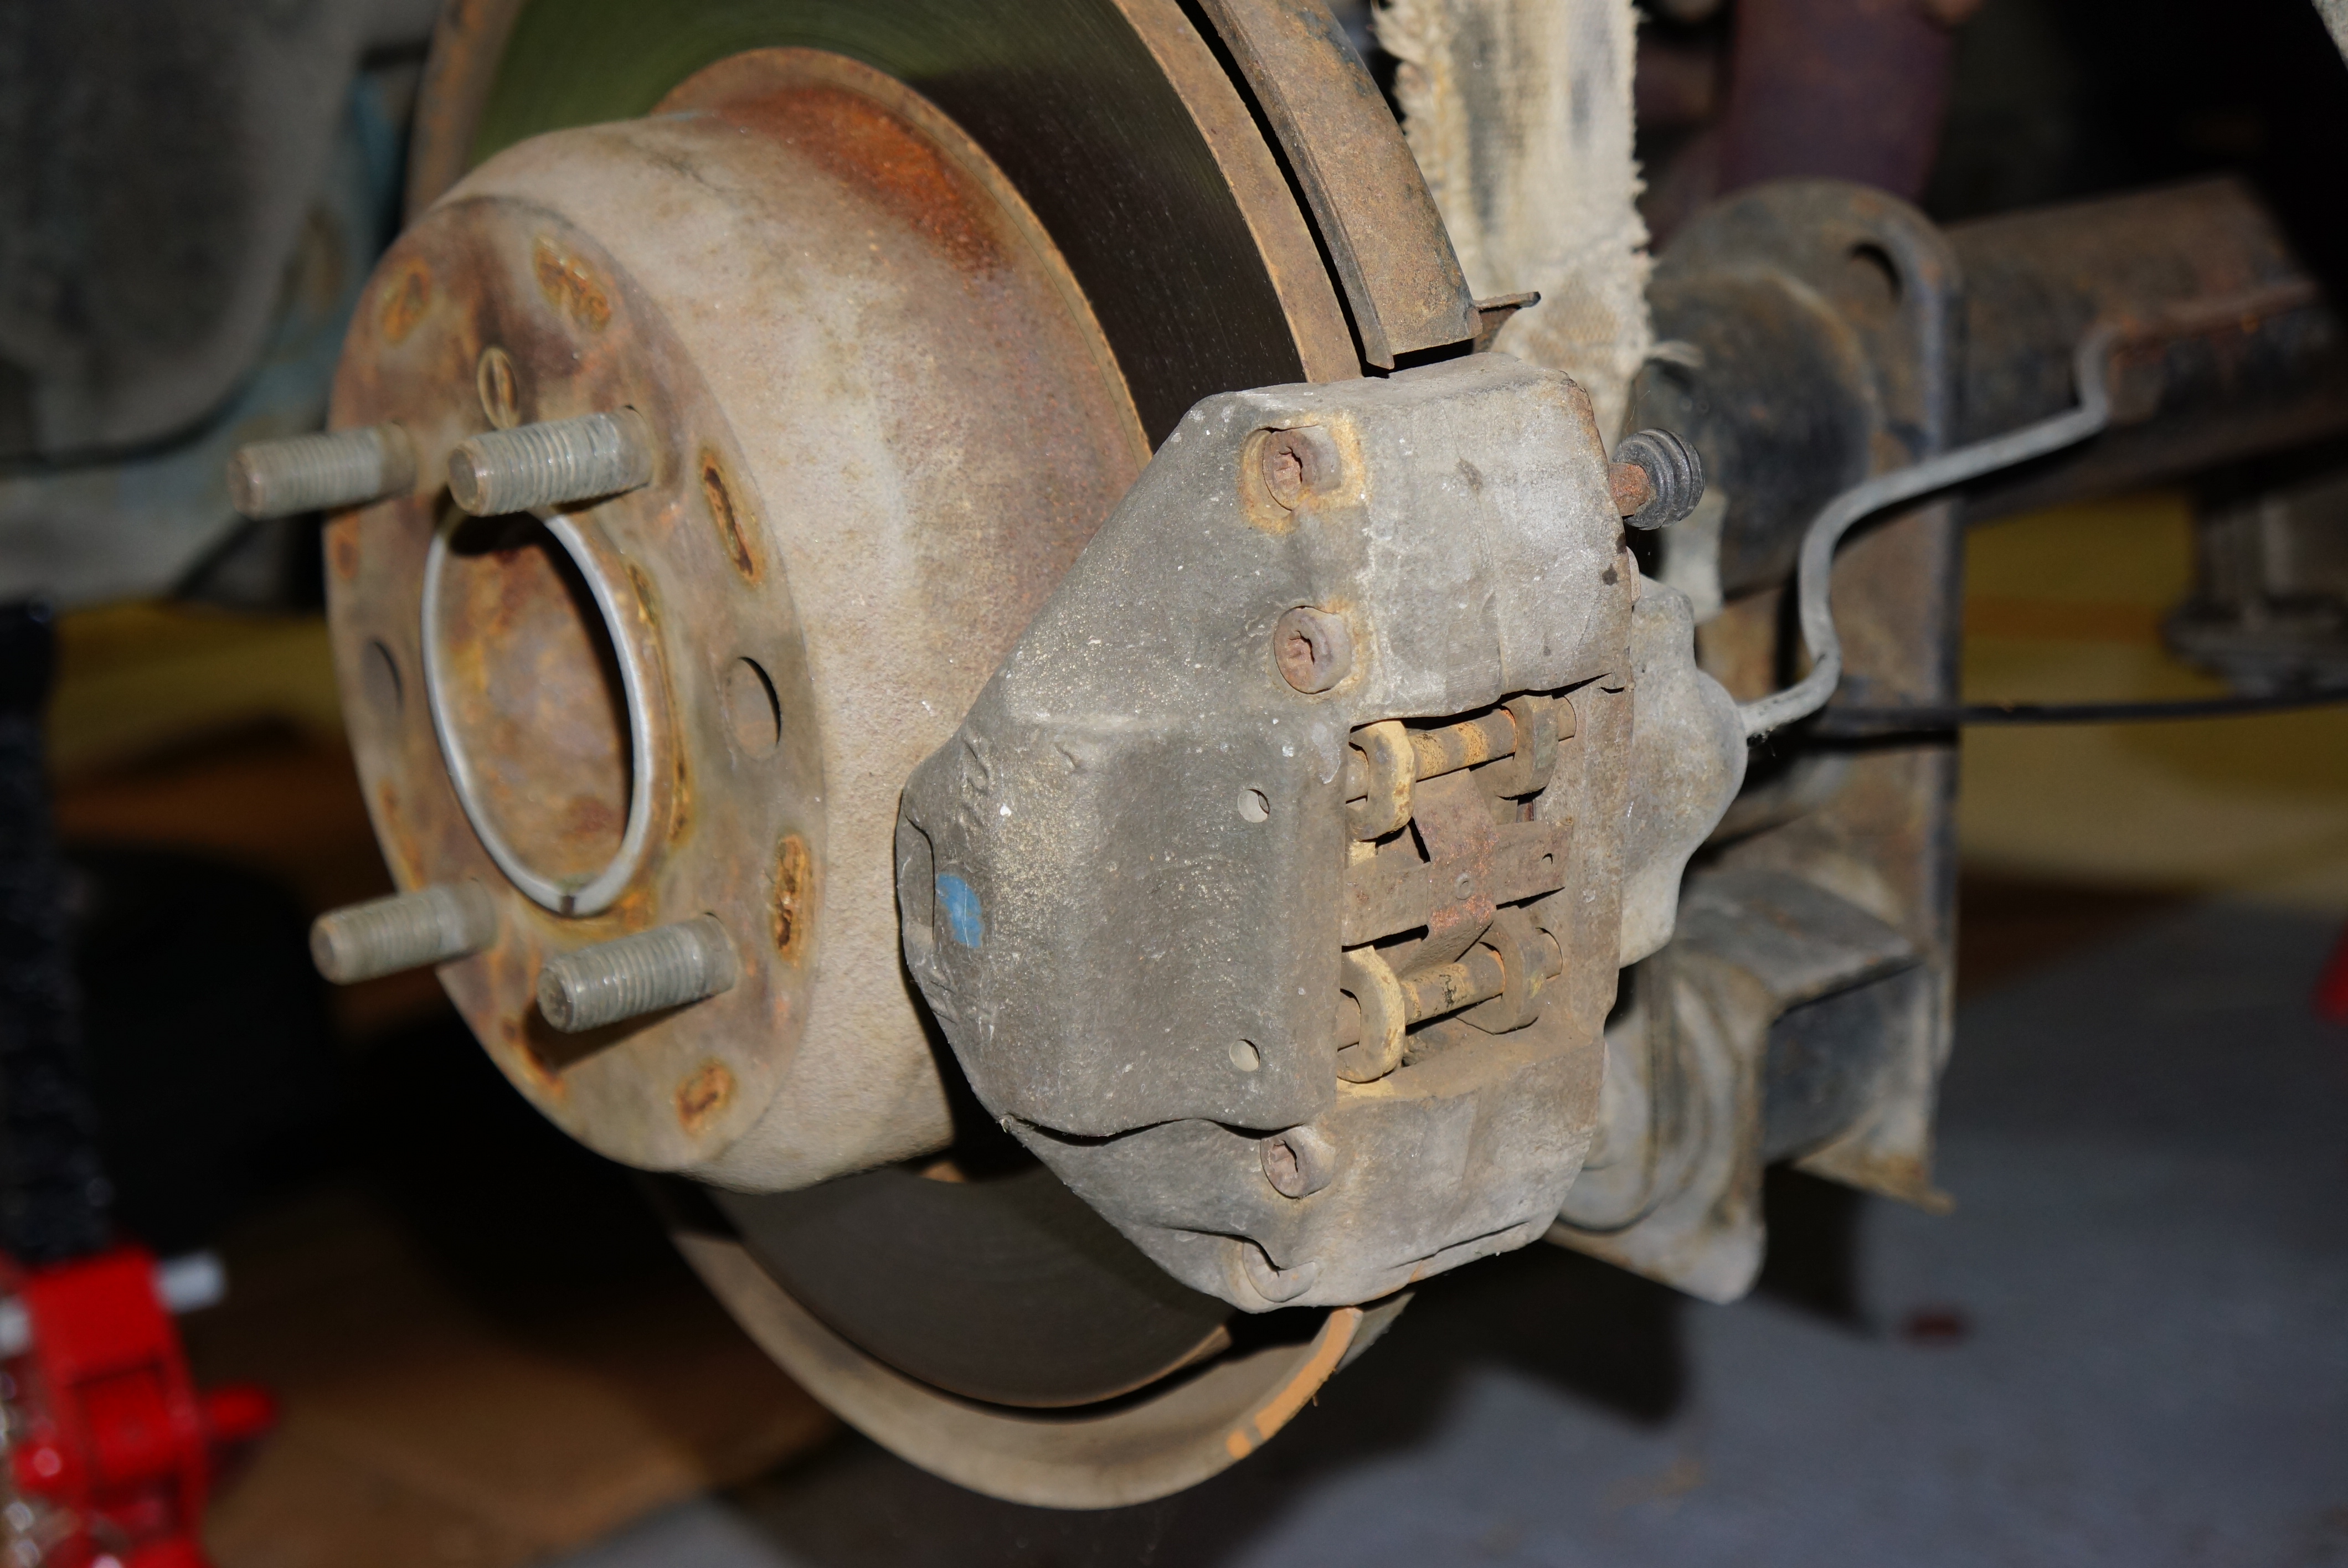
It would not surprise me if I were the first person to expose the parking brake shoes since this car left Italy. Remember that when I bought it, the car has 54,000 original miles. I also have reason to suspect that the rear brake pads were original to the car. There has likely been little need to check or service these components.

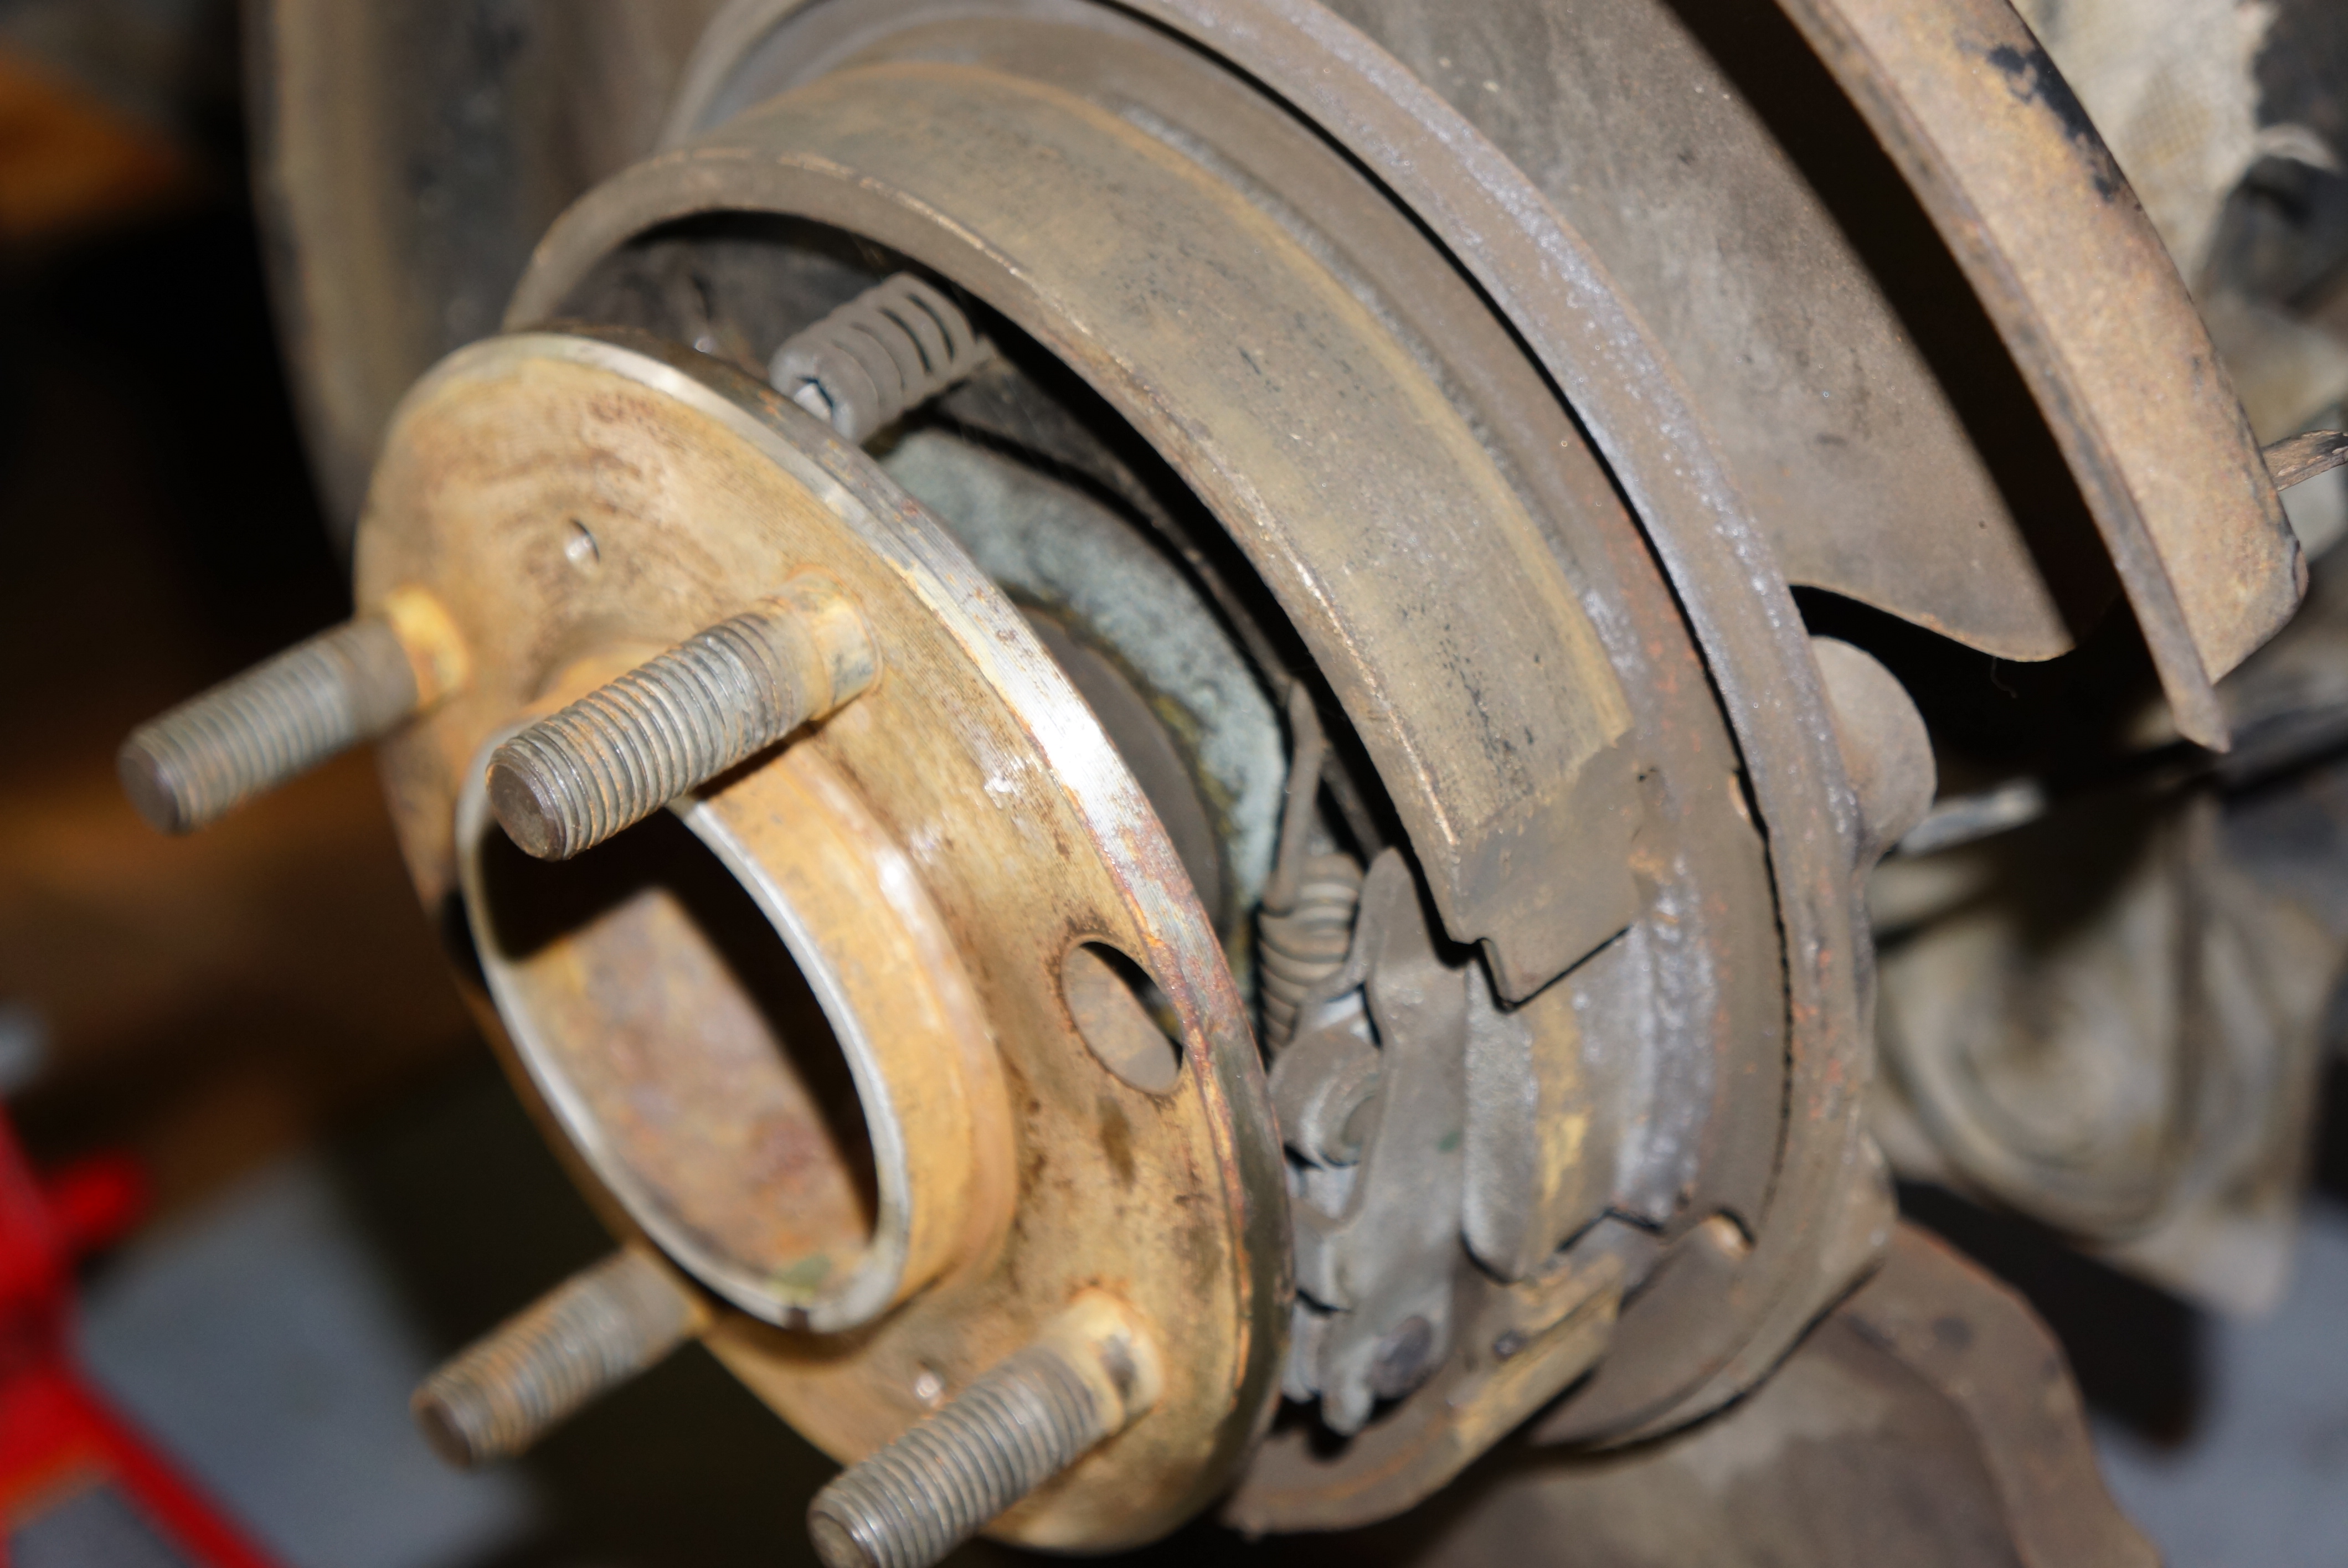
With some effort, I removed the brake shoes on the driver’s side (access is conveniently limited by the hub). The arrangement is typical, with a star wheel for adjustment, and two springs holding the upper and lower shoes. A cable extends from the differential through an access hole in the backing plate, pulling a lever which spreads the shoes. After taking the one side apart, I decided to leave the passenger side intact for reference, and ordered all new parts from Classic Alfa.

Old shoes and springs will be replaced

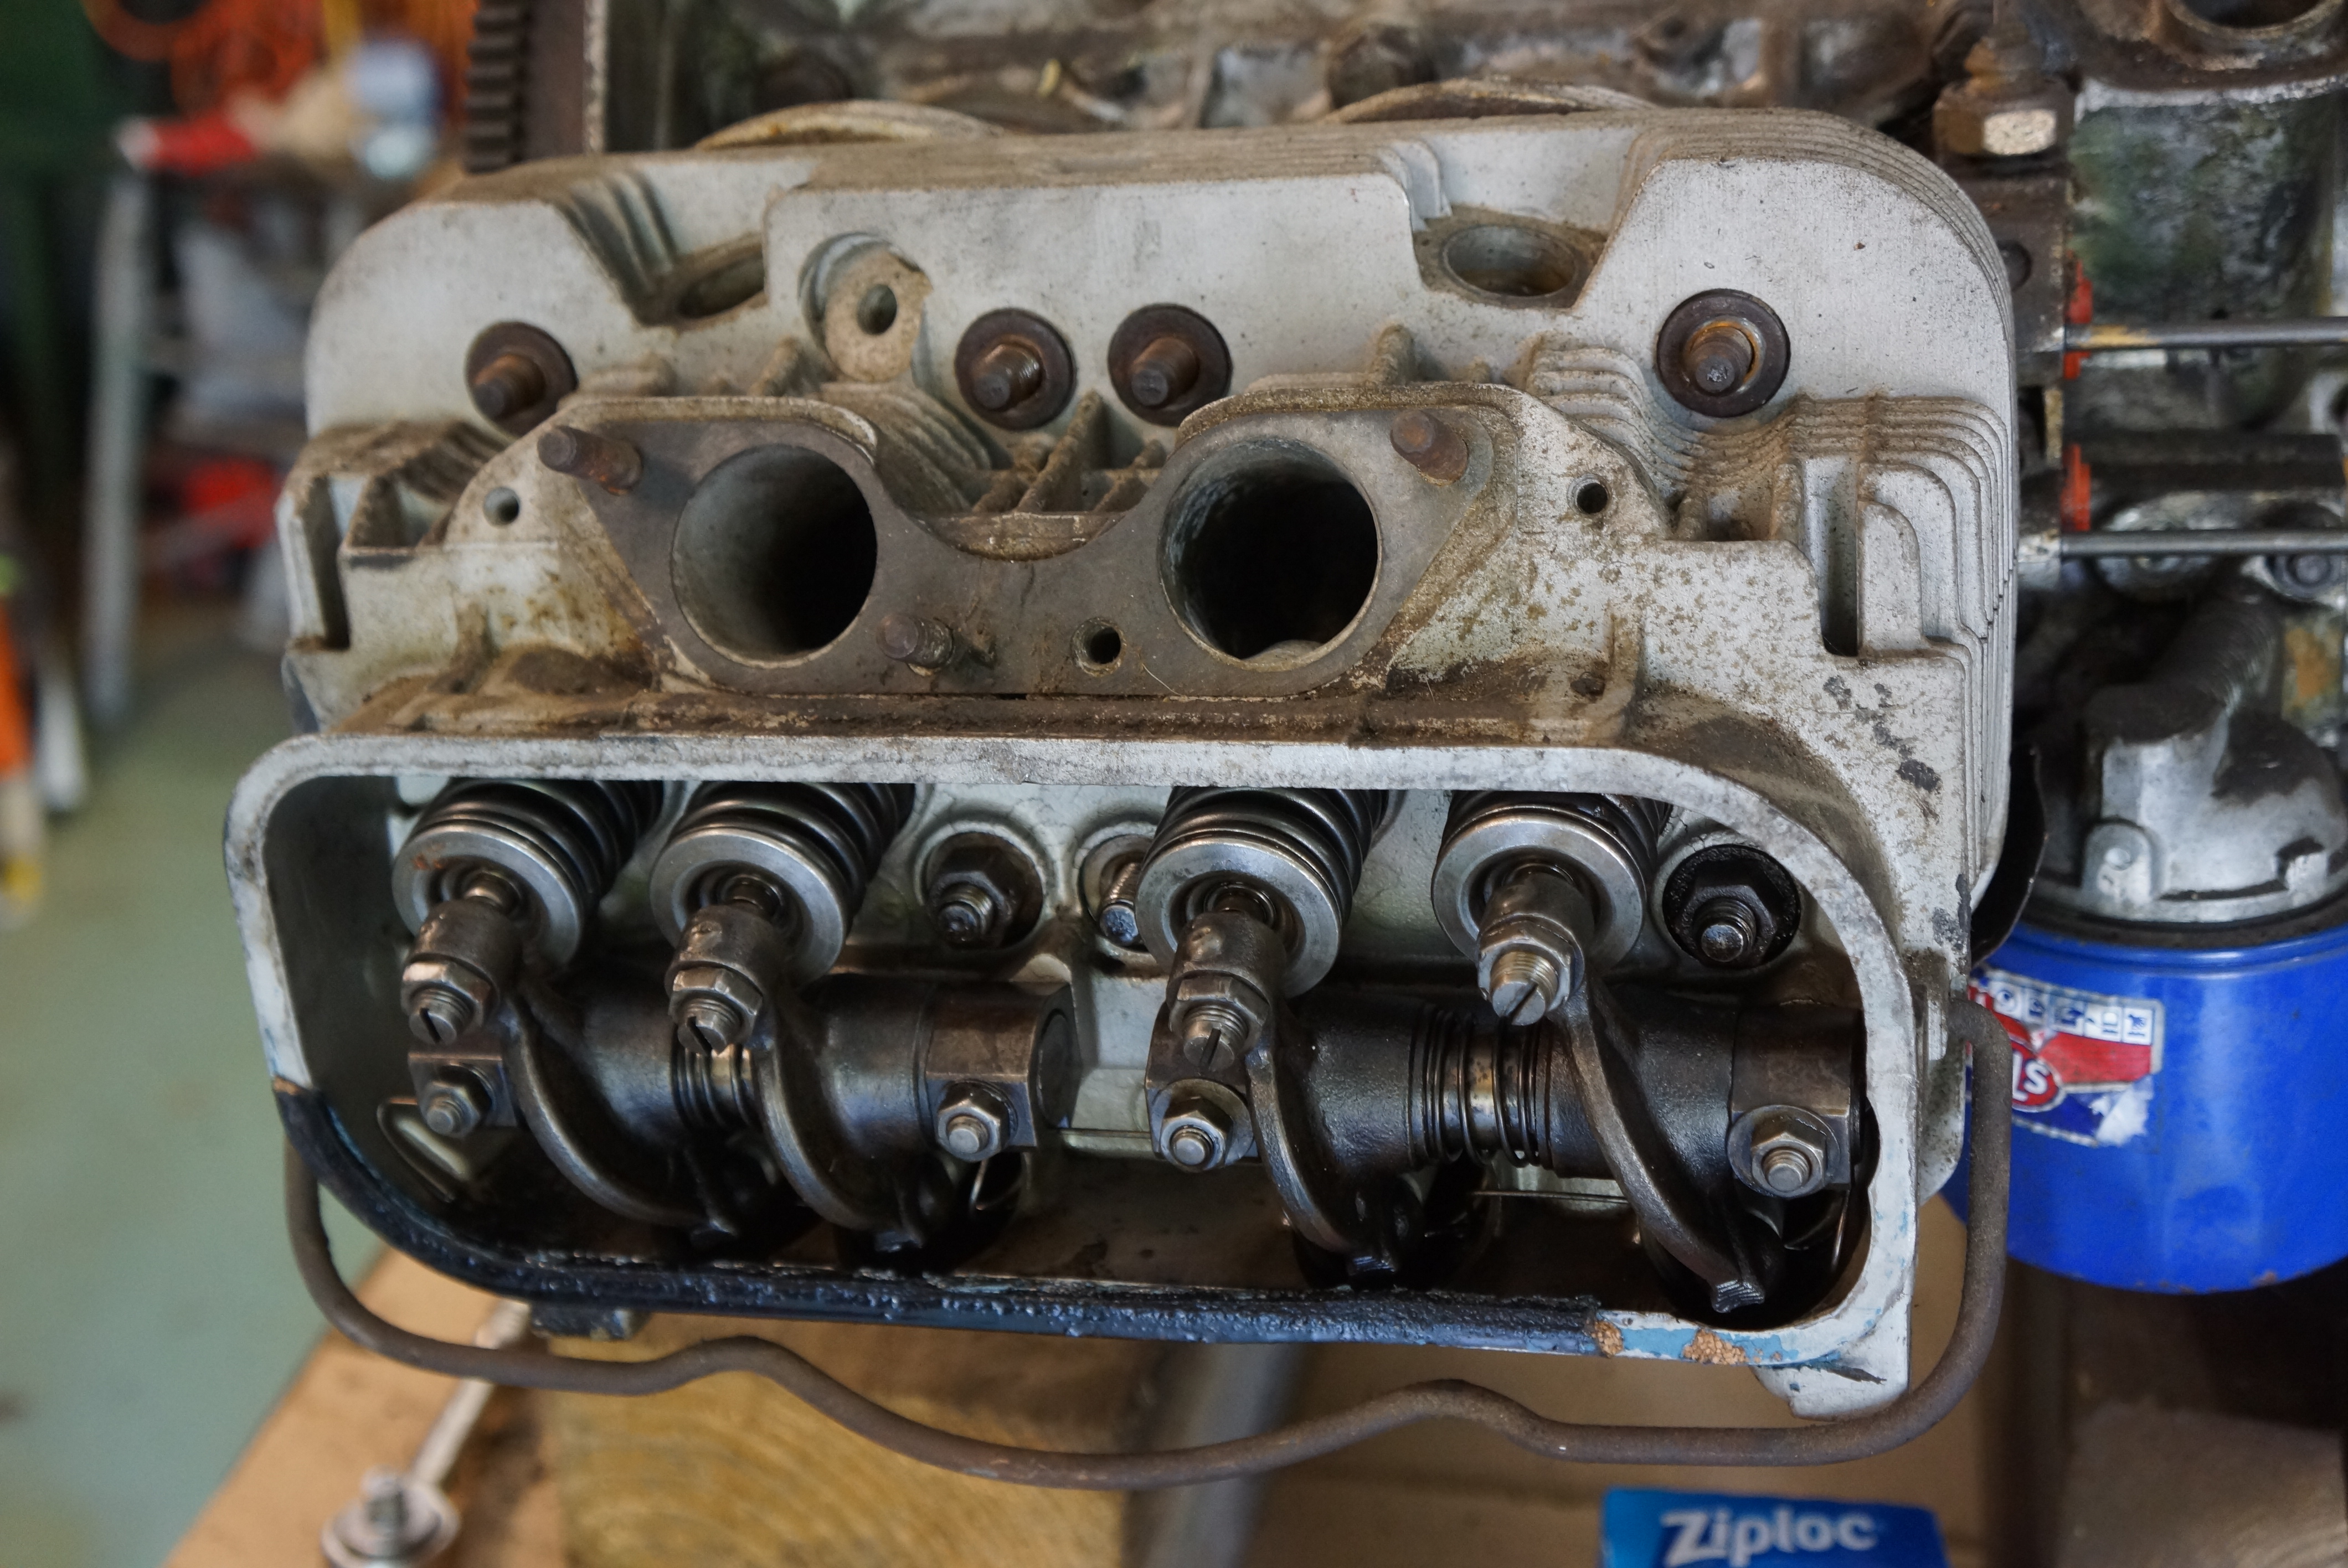
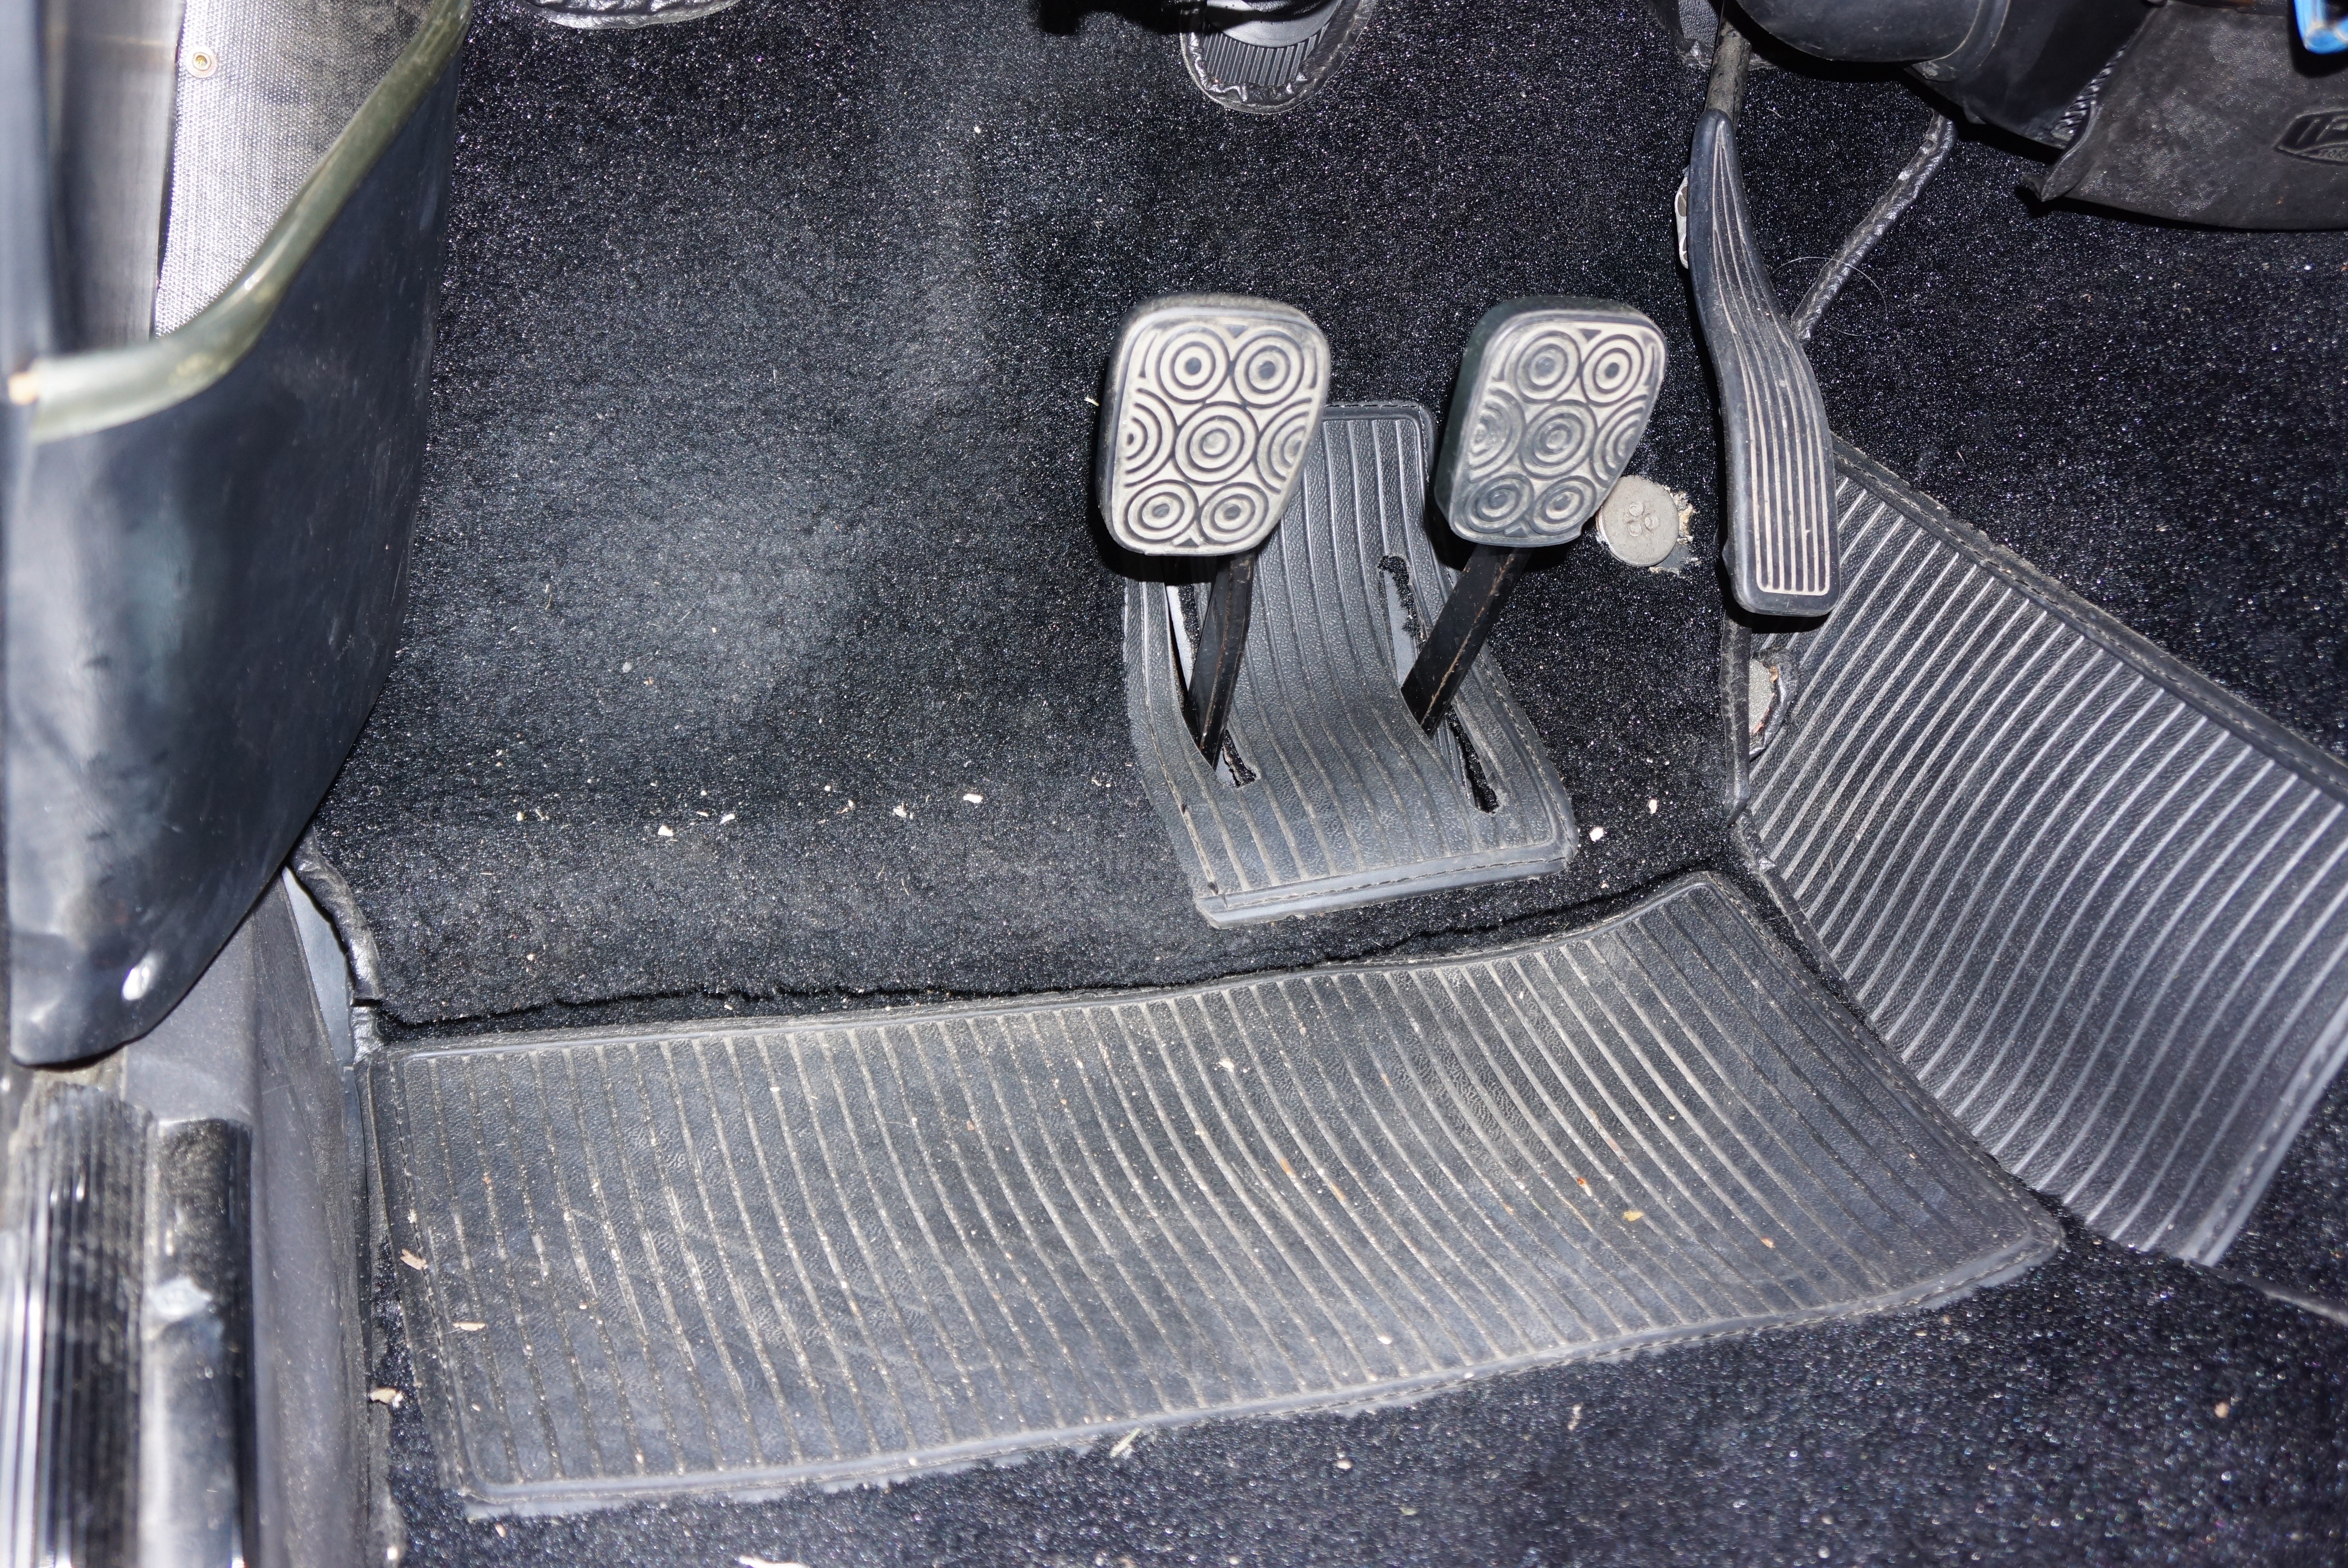
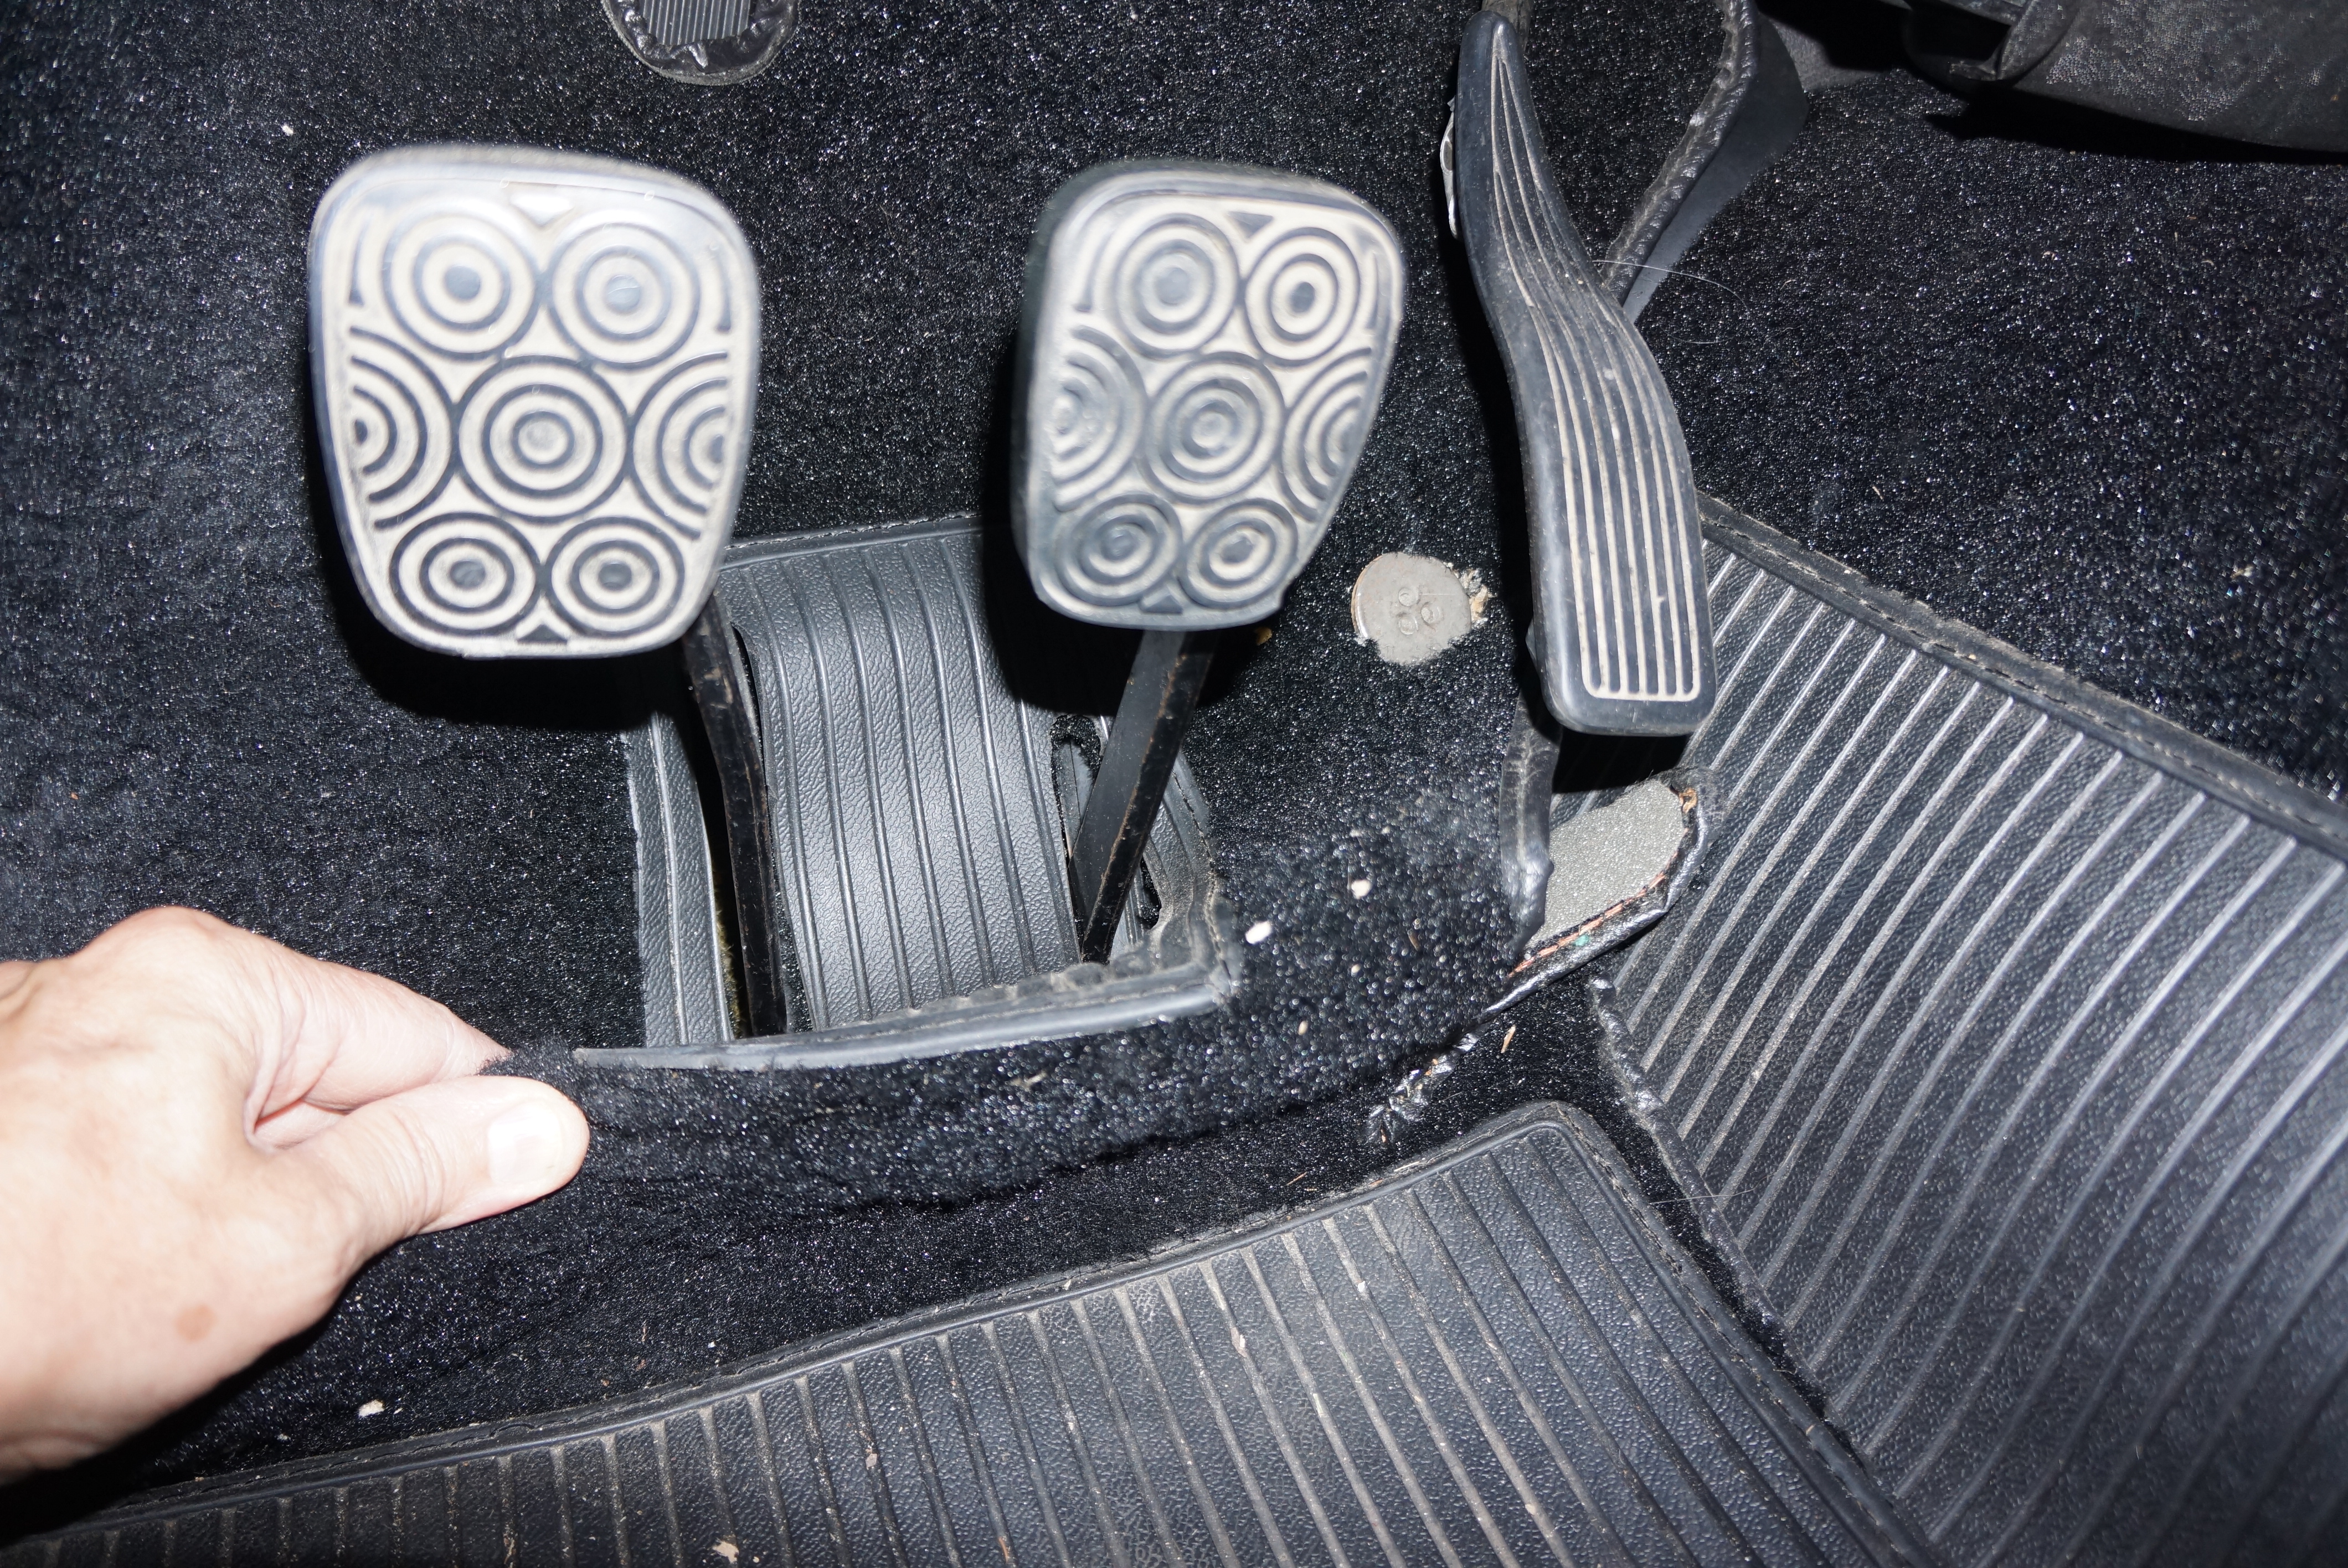
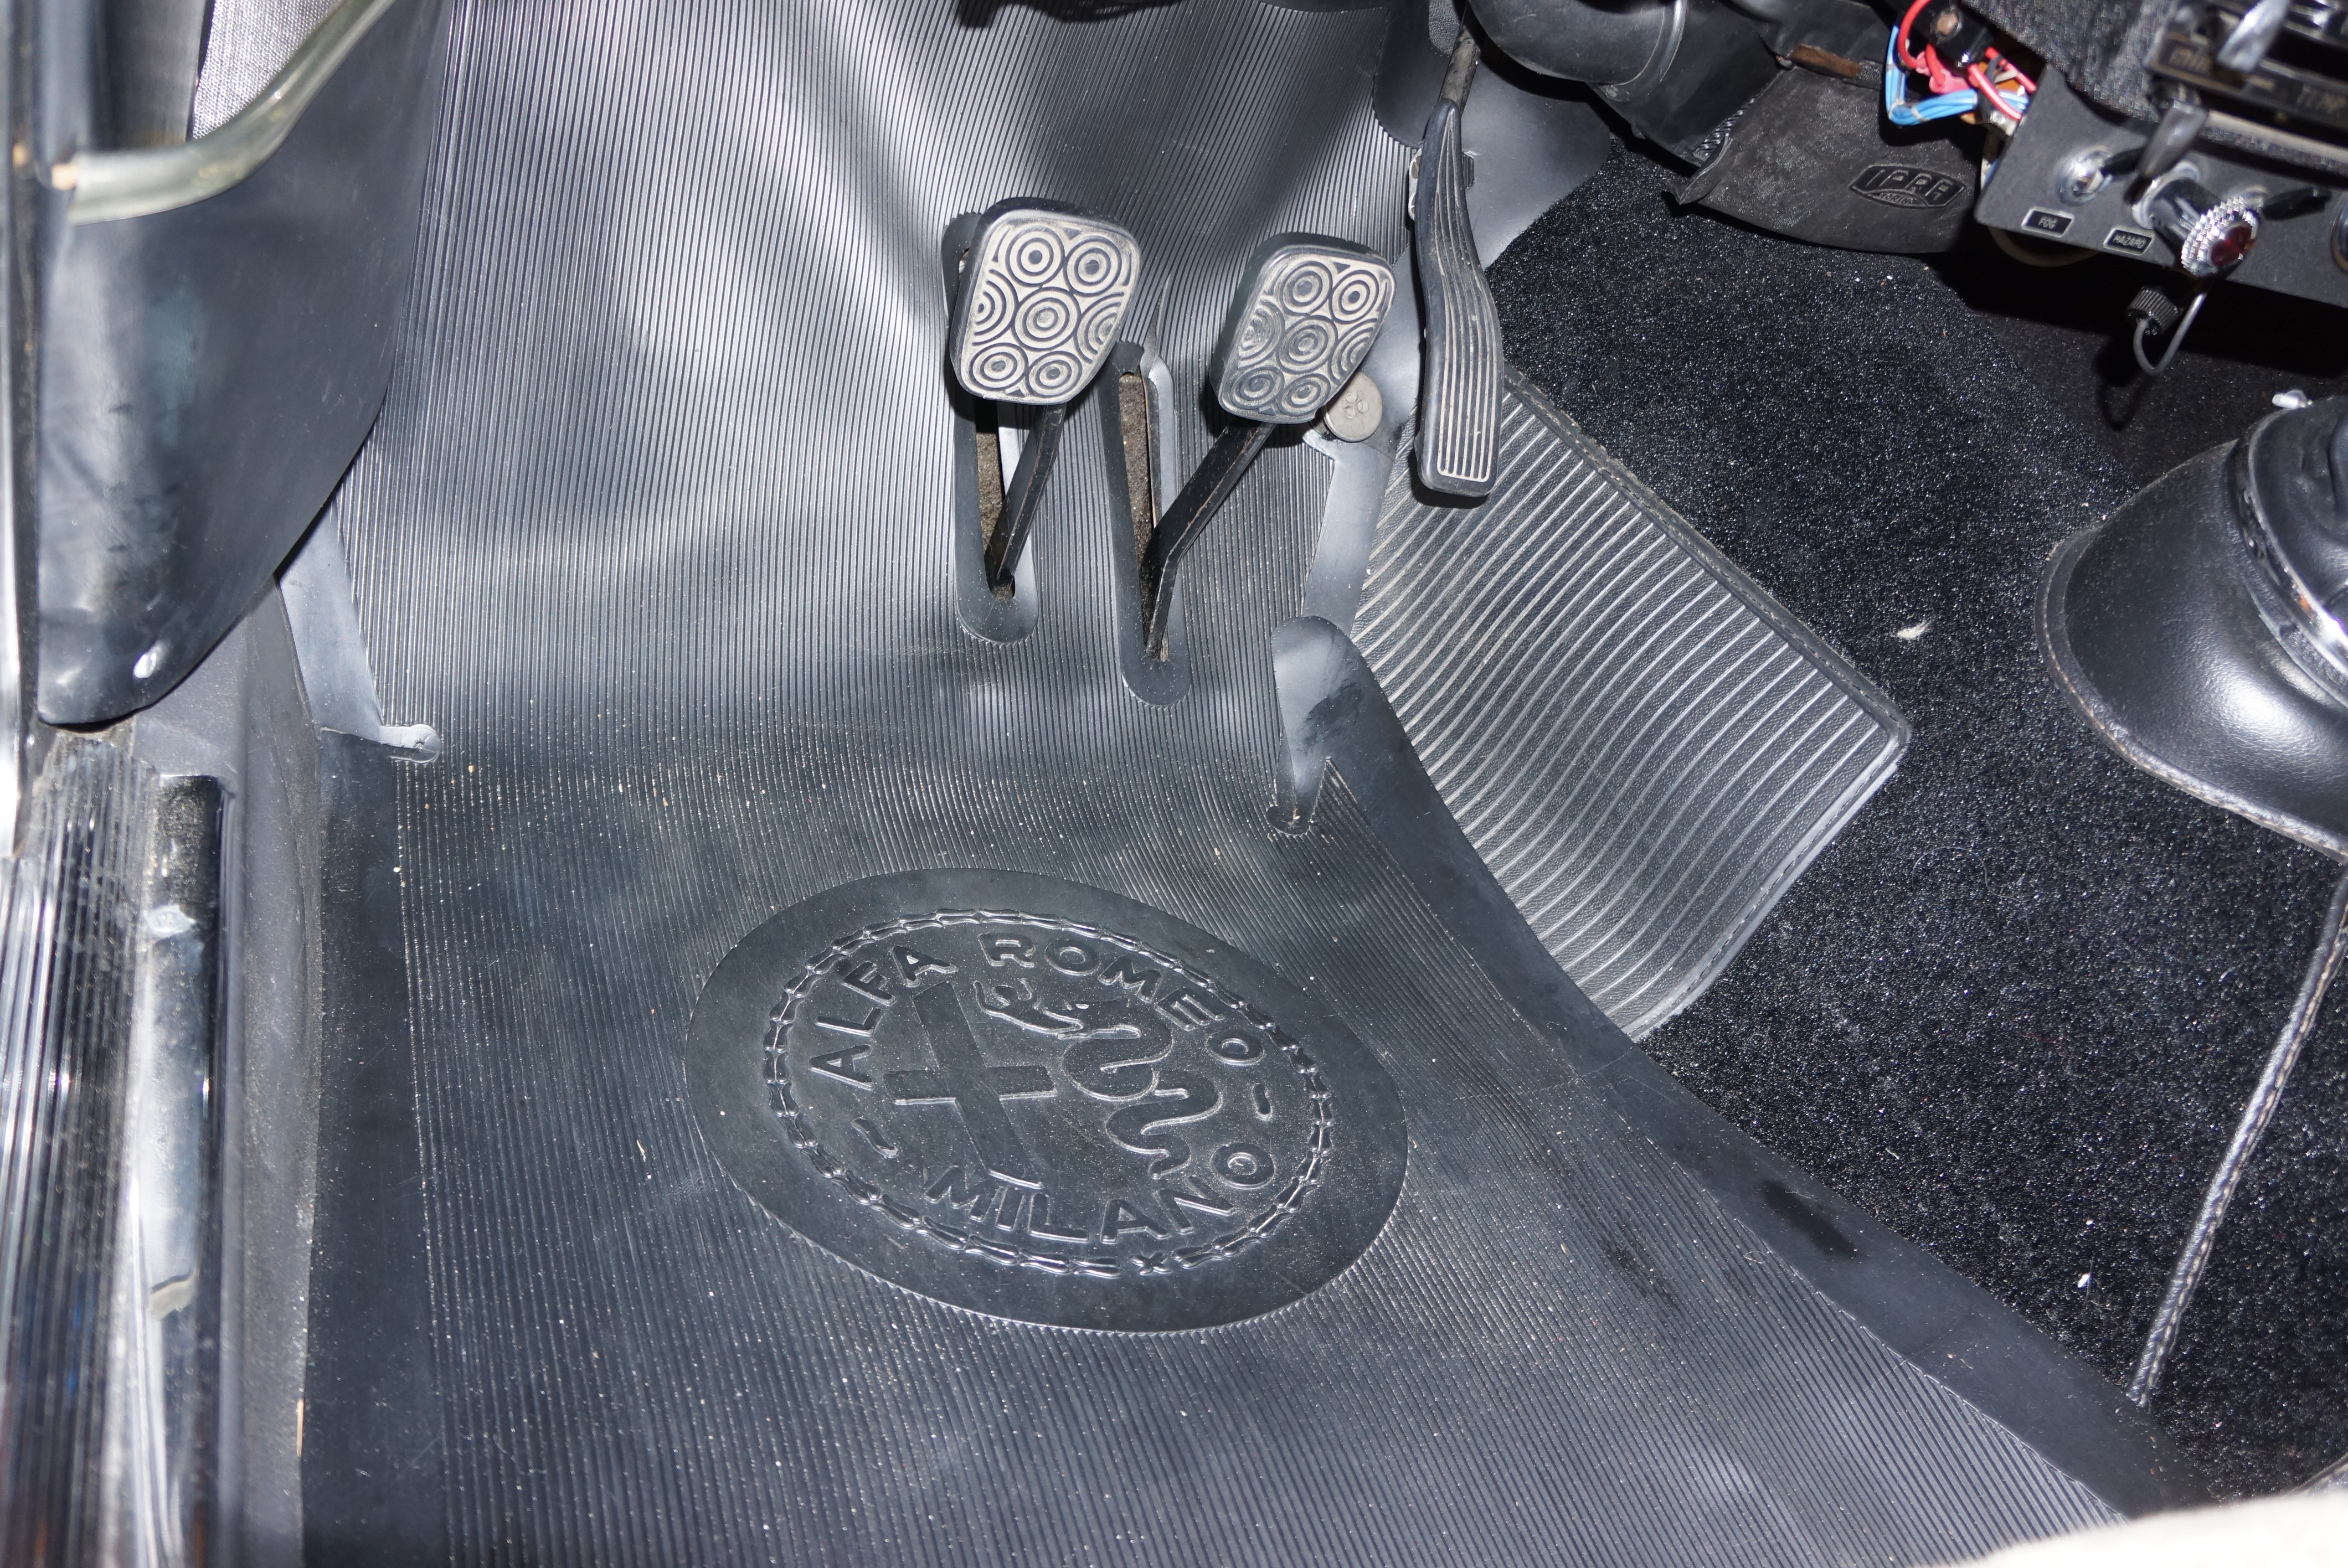
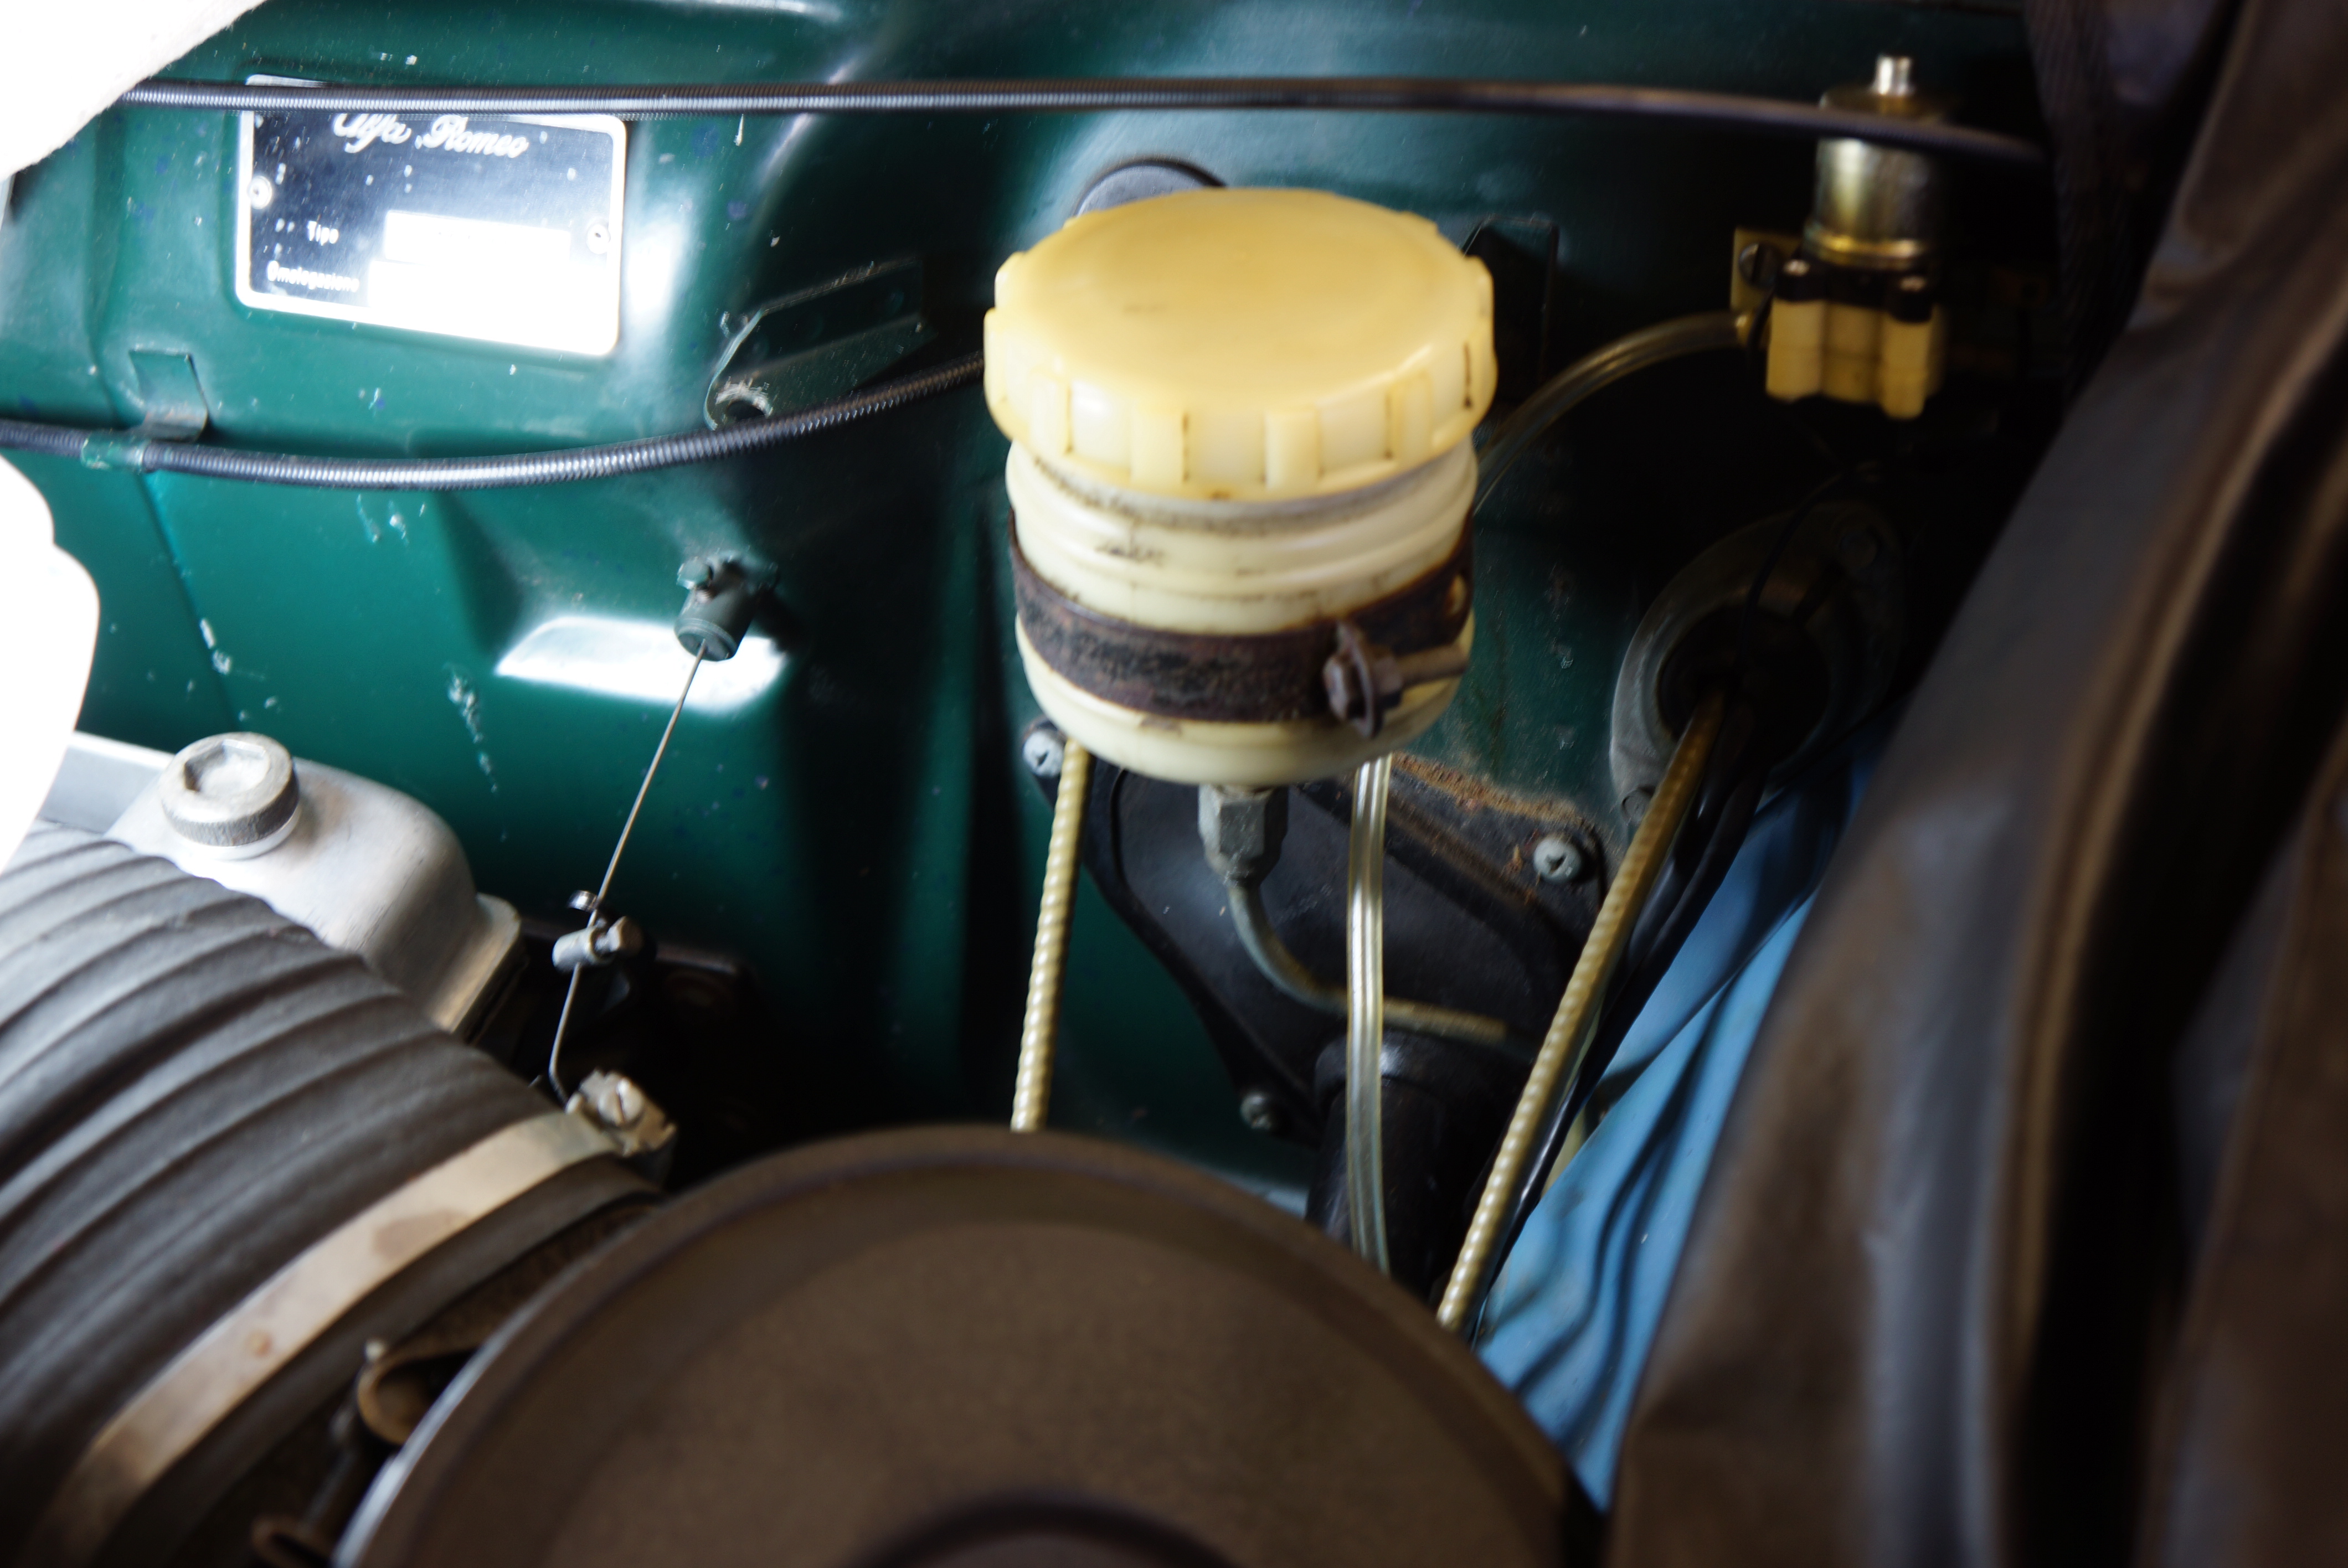
It was also time to remove the master cylinder. With its so-called “standing pedals” hinged through the floor, my ’67 is one of the last Giulia coupes so configured. Within a year or so (varying by model), Alfa would switch to “hanging pedals” and mount the master cylinder in the conventional location on the firewall.

Standing pedals – accel pedal has been removed

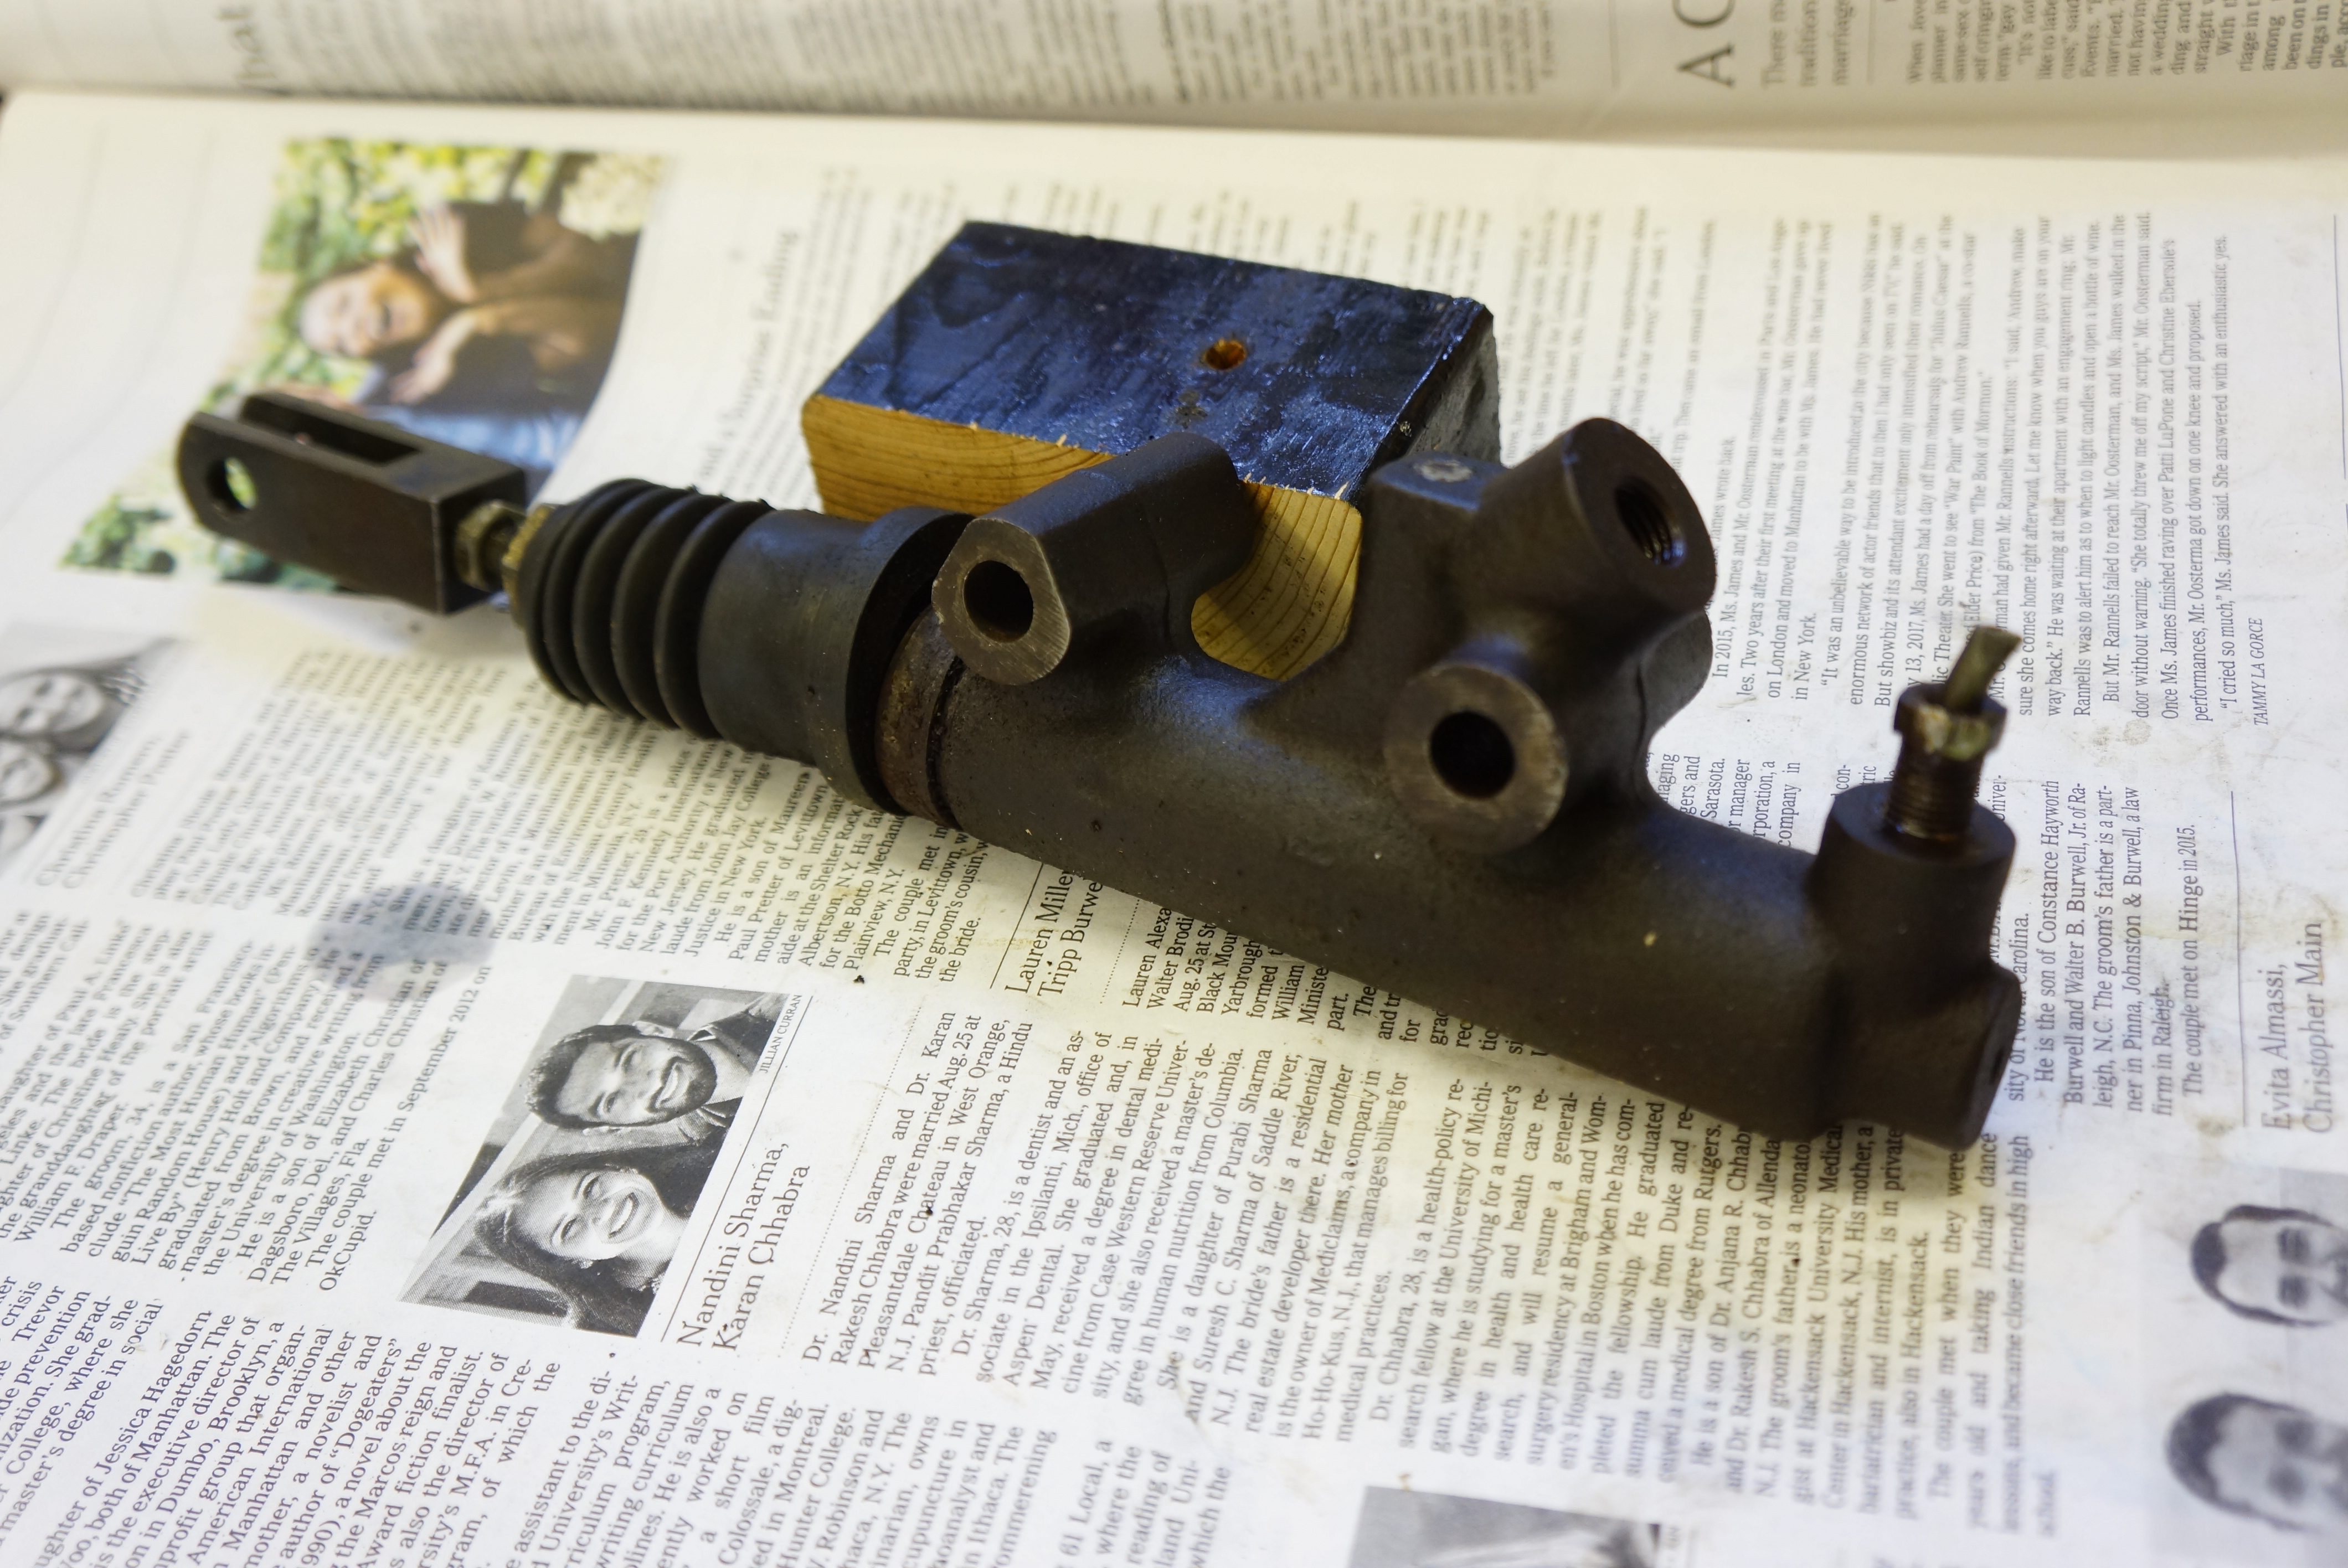
I desperately searched for guidance on the Alfa forums for “master cylinder removal”, but nothing I came across addressed the underfloor location. So I tackled it on my own, and really struggled with it. There are two bolts which pass horizontally through the master cylinder, and these bolts mount into a plate that also holds the clutch linkage. Said plate didn’t look removable to me – that’s from the vantage point of lying on my back, with my nose about 3 inches from the car’s underside. Without removing the plate, there wasn’t enough clearance to remove the bolts. Through sheer luck, I wiggled the cylinder and the bolts and got the master cylinder cleared. But I’ll need to investigate this plate when it comes time for reinstallation.

View of master cylinder while on my back

There was also the matter of the two brake lines, both of which thread into the top of the cylinder. There was little choice but to loosen and drop the cylinder to give me access to the line fittings, but then I lost the leverage one gets from a master cylinder firmly bolted to something.

Brake fluid reservoir on firewall is where you’d expect to find m/c – note hard line which feeds it

Using my flare nut wrenches, the first fitting came out easily. The second one did not. I resorted to using a cheater bar (a length of pipe) on the wrench, and for the first time during this brake overhaul, the wrench slipped on the fitting and rounded it off. The fitting was seized. I cut the line with a pair of diagonal cutters, and the master cylinder was on my workbench. In a bit of good news, the fitting did come loose once I dropped a deep 6-point socket on it.

Master cylinder – note severed line and fitting in right-most hole

There is plenty to do next: finish the rebuilding of the two rear calipers, renew the parking brake parts, and rebuild the master cylinder. Parts were duly ordered and are on their way.

… to be continued ….


All photographs copyright © 2019 Richard A. Reina. Photos may not be copied or reproduced without express written permission.


Sunday Morning Breakfast Drive, Sep 22, 2019

The last official day of summer turned out to be a near-perfect day for a breakfast drive. Pre-dawn, the air remained cool enough for a light jacket; once ol’ Sol broke above the horizon, or in our case, over  the Mahwah Sheraton, the air temp quickly climbed and didn’t stop climbing until reaching the 80s.

(Part of) the morning lineup

Eleven gentlemen in nine different vehicles made the trek on the 22nd. Six of the nine rides wore German badges (I was surprised the group didn’t demand knockwurst and potato pancakes for breakfast). However, it’s a genial bunch, and we heard nary a complaint about our chosen destination, the Hampton Diner in Newton NJ.

On Route 206 in Newton, if you care to visit- book your party here

We set out from the Sheraton at about 8:35am, with Larry leading the way in his Nova. It was a glorious drive through northern Jersey, dipping into then out of New York State. A planned pit stop was undertaken at a BP gas station in Vernon NJ. To everyone’s surprise, Bill’s Porsche did NOT need fuel, but more than a few of us took advantage of the restroom facility. One patch of rough road brought our speed down to below 30mph for a bit, but all the cars escaped unscathed.

Burton demonstrates the ease of dropping the XK-120’s top

We reached the Diner just before 10:30am, were immediately served coffee, and got our breakfast plates not long after. Thanks goes out to our young waiter who seemed to have a pot of hot java available for refills at a moment’s notice.

Bill makes his point


Larry collects the bucks

As is our habit, the conversations continued out into the parking lot, and it was past noon by the time the final vehicles began the return trip home. While tomorrow may be the first day of autumn, that should still give us ample time to fit in one (or two) more breakfast runs this year.

Sal’s E30 BMW


Bill’s black 911


Peter’s red 911


Rich L’s white 911


Jeff’s BMW Z3


Art’s VW GTi


Burton’s Jaguar XK-120


Larry’s Chevy Nova


Your blogger’s Miata


Ours were not the only classics at the diner that morning


All photographs copyright © 2019 Richard A. Reina. Photos may not be copied or reproduced without express written permission.

Alfa Romeo brake system overhaul, Part 2

As you read in Part 1 of the Alfa Romeo brake system overhaul, the new front calipers I had purchased, through no one’s fault, didn’t get the job done. It was just as well; in an attempt to get my car ready to drive to the AROC Convention in Pittsburgh, I was hurrying through the job, which is no way to work on a braking system. If anything, the inability to make the car roadworthy gave me just the excuse I needed to do the right thing.


I had purchased this car in 2013 from my friend Pete. He bought it in 1968, drove it for perhaps five years, mothballed it for over 20 years, then took it out of long-term storage. After refreshing various systems, including the brakes, Pete enjoyed the car for about 10 years before handing over the keys. In my mind, this Alfa had been “recently” refurbished. However, once I added up the years and the miles, I realized my own miscalculation. At best, Pete worked on the brakes around the year 2003, meaning, the brake fluid alone was now 16 years old. Shame on me! Since I loved driving the car, I wanted 100% confidence in its brakes, so The Right Thing meant a complete overhaul: rebuilt calipers, new or rebuilt master cylinder, and new lines and hoses. I got all 4 wheels up off the ground, drained what little fluid remained, and brought both front calipers to the workbench.

Caliper with piston, dust boot and spring in place before removal

First, the dust boots and their retaining springs had to be removed. The springs were so rusty that it was difficult to see them against the boots, but with a little urging from a dental pick, they popped off. The boot for the seized piston looked like it had been on fire (it almost was), and this early discovery reinforced that this overhaul was necessary and overdue.


Dust boot and rusty old spring on their way off


This dust boot is ready for the trash can


I’ve rebuilt calipers before, as a Volvo tech, but it wasn’t a job we did very frequently. All 4 of my car’s calipers are of the two-piston fixed type, and research from my Alfa library led me to conclude that there was no need to split the calipers. The pistons could be removed with compressed air, and the bores cleaned up as necessary.


This 2-piston caliper has 1 piston behind each pad. It is “fixed”: the two halves are bolted together.

Starting with the seized right front unit, my technique was to start by pushing the pistons back into their bores with a piston compression tool. The reasoning is that any movement is good movement. Once they were fully retracted, I hit the fluid passage with compressed air, and both pistons moved outward a few millimeters. The cycle was repeated: retract pistons, apply air; retract pistons, apply air. Finally, one piston popped free.

At the start, piston retraction tool was used to push pistons all the way back


Compressed air is good stuff


But now I had a problem: the compressed air escaped from the now-empty bore, and did nothing to move the piston still in place. I reinstalled the removed piston, but the same thing happened: one piston came out, and one stayed in. I needed a way to block the fluid passages without fully reinstalling the first piston. Stuffing rags into the bore did nothing.

C-clamp is employed to hold 1st piston while compressed air dislodges 2nd one

Here’s how I did that: lubing up the piston with brake fluid, I reinserted it just a few millimeters back into its bore, enough to block air flow, but not so much that I couldn’t pull it out by hand. I held this piston in place with a C-clamp, so the force of the air would blow out the 2nd piston. It worked! The 2nd piston shot out, and once I removed the C-clamp, the 1st piston could be worked out with my fingers. With the pistons out, the inner seals were easily coaxed out with a dental pick.

Removal of the inner seal

A close examination of the pistons revealed that one had a mark along its surface. My local Ace Hardware store had 3M brand emery cloth which I bought in medium, fine, and super fine grit. While I couldn’t completely remove the nick, I smoothed it out so that it couldn’t be felt. The front lips of the pistons showed marks from pliers or Vice-Grips, so someone (not me) got aggressive with a prior piston removal attempt. Thankfully, the marks would not affect the braking performance.

The bores themselves showed some minor corrosion along the outer edges, but the insides (below the inner seals) weren’t bad, and the super-fine emery cloth made them even better. While this was going on, the rear calipers were unbolted and disassembled so that I could measure the piston diameter. According to my supplier, Classic Alfa, this generation Giulia used either 30mm or 36mm rear pistons, and of course, one needed to know before ordering parts. It turned out that my car has 30mm pistons. I placed my order with my favorite Alfa supplier, knowing that I’d have the parts within 48 hours or so.


Pistons before (left) and after (right) emery cloth treatment


Nick in surface could not be removed, but was minimized. Note pliers marks.


Rear caliper piston confirmed as 30mm


… to be continued …


All photographs copyright © 2019 Richard A. Reina. Photos may not be copied or reproduced without express written permission.


Lime Rock Park Historic Festival 37, 2019

Lime Rock Park, an historic race track nestled in a valley within the verdant hills of northwest Connecticut, held its Historic Festival #37 over the 2019 Labor Day weekend. The races run all weekend except Sunday, as that is prohibited by local ordinance. Many moons ago, Festival organizers reasoned that the non-racing day could be put to great use for a car show, and “Sunday in the Park” was born.

For me, the static car show in Lime Rock has been an annual treat going back to the early 1990s. So many factors make this show special, including location, size, quality, and variety. Lime Rock delights in creating its own classes based on decade, country of origin, and vehicle type. It keeps things interesting for the spectators. Added to that is the tremendous support from marque-specific clubs, resulting in hundreds of vehicles lining the perimeter of almost the entire track.

Although the park is a 3-hour one-way trip for me, the long Labor Day weekend means that a one-day round trip on Sunday isn’t so bad, as vacationers squeezing in a last summer getaway won’t be clogging the roads until Monday. Pedestrian traffic at the track wasn’t so dense to prevent unobstructed photos, which are presented below, in semi-organized fashion. Enjoy the automotive eye candy!


ITALIAN
The Italians are coming!


Fiat 500


Lanica B20


A selection of pre-war Alfa race cars


The Al Cosentino Fiat racer


Lancia Scorpion


Alfa spider


Iso Rivolta


Chrome-bumper Fiat 124 spider


GERMAN
VW step-side pickup


1st gen VW Scirocco


Porsche 914


A pair of clown shoes (BMW Z3 coupes)


AMERICAN
Studebaker Hawk


Studebaker Avanti


1940 Ford coupe


Lime Rock enters 21st century; Teslas recharge onsite


2nd gen Chevrolet Corvair


1962 Chevy Bel Air ambulance


BRITISH
MGB-GT


Lotus Elan (for sale: $19k)


Aston Martin


Morgan coupe


Mogies line up


SWEDISH


JAPANESE

Mazda Miata in 4 generations:

1st gen (NA)

2nd gen (NB)

3rd gen (NC)

4th gen (ND)

RETRO DESIGN, AND THE ORIGINAL INSPIRATIONS (or, “Oh my child, how large you’ve grown!)
Fiat 500


P.S.
“patina”


All photographs copyright © 2019 Richard A. Reina. Photos may not be copied or reproduced without express written permission.


Alfa Romeo brake system overhaul, Part 1

Now, the full story as to why I was not able to drive my Alfa to this year’s AROC (Alfa Romeo Owner’s Club) annual convention in Pittsburgh can be told. In my initial post about the convention, I wrote:

Let’s get this bit of disappointing news out of the way: while this Alfista was in attendance, his ’67 Alfa GT Junior was not. Four days before the scheduled departure, the car’s right front brake caliper locked up, and although repair parts were obtained, there wasn’t enough time to effect a safe and sufficient repair. So the green stepnose stayed home.

This is what happened: Four days before we planned to leave for Pittsburgh, I drove the Alfa to my friend George’s house. George (Geo to his really close friends) lives just five miles away, and while he was excited to join in the weekend’s festivities, he had never driven my car before. I thought it only fair that he have a crack at it before we commenced on a 6-hour journey.

As soon as I pulled out of my garage that morning, I sensed that something was amiss. The car seemed a little down on power, and it pulled to the right. Other than that, it drove OK, so I pushed onward. The moment I entered Geo’s driveway and killed the engine, smoke emanated from under the closed hood. I popped the hood but saw nothing obvious. When Geo came out, I explained what had happened, and we both decided to let him drive the car, if only for 2 or 3 miles.

Once Geo got the car back to his place, the smoke returned, only this time, the source was clear: it was pouring off the right front brake. Hindsight made the drifting and low power obvious: this brake caliper was seized. I was lucky we weren’t seeing flames.

We pulled the wheel and there was nothing visibly wrong that we could try to fix on the spot. Putting the wheel back on, I reasoned that I could “carefully” drive the 5 miles back home, and work on it there. As soon as I bade Geo ciao, I started the car, put it in first, and headed down his driveway to the street, where I would need to turn left. Hitting the brake pedal, it sank to the floor. Thankfully, my parking brake (sort of) works, and I used it to stop at the bottom of the driveway. I backed the car up the drive, and started to figure out what Plan B looked like.

Geo couldn’t understand the loss of the pedal. I reasoned that the heat had caused the fluid to boil. Sure enough, 15 minutes later, a firm pedal returned. But I wasn’t driving this car home. There’s a reason I carry an AAA card. I called, they said one hour, and the truck was there in 90 minutes. In seven seasons of ownership, and in over 11,000 miles of driving, this car has never ridden on the back of a flat bed – until this brake failure. But the risk in driving it wasn’t worth it.


There’s a first time for everything

While waiting for the truck, I had time to calculate how I was going to get this repaired by Friday morning, just a few hours shy of four days away. My go-to Alfa parts supplier, Classic Alfa in the UK, was still open, if barely. I had always placed my orders via their website, never by phone, and this seemed like a most valid reason to spend the money for an international call. Given their stellar shipping reputation, I could have the parts by Wednesday, which I reckoned would still allow enough time to make a repair.

I called. ‘Chris’ answered. I explained my dilemma and asked him about my options. He quickly offered the choice of either remanufactured (reman) ATE calipers, or brand new ones. I asked him for the price difference, and he replied about 20 British pounds (approximately $25 thanks to the Brexit-depressed value of the pound). I figured that the small differential between new and reman made the new ones a deal, so I ordered a set. Since a core return wasn’t required, I asked Chris to include a caliper rebuild kit, thinking that I would eventually refurbish the old ones. It was now close to noon on Monday in New Jersey, and Chris said I should see the parts by late Wednesday.

Chris was wrong. The parts were in my hands at 5:30 pm ON TUESDAY. This was a miracle, and I presumed that the boys in the UK pushed the order through, having heard that I was planning on driving this thing to the U.S. Alfa convention in 4 days. So far, so good.

Shiny new caliper, ATE-like

Opening the box, the first disappointment was to discover that while these were certainly new calipers, they were not marked ATE, and I had to conclude that they were ATE copies. I unbolted the offending caliper, and an eyeball comparison proved that the new one was identically shaped. All I had to do was swap over the pads, connect the hard brake line, and bleed the system.

Right front rotor shows slight scoring, looks salvageable

With the existing pads and pad hardware installed, I knelt at the right front knuckle, held the 11 pound caliper in my right hand, and began to thread the brake line fitting into the new caliper with my left hand. The threads would not start. I tried every trick I knew; after perhaps 20 minutes, it felt like the threads had started, but I was unable to turn the fitting by hand more than half a turn. Of course, the dreaded fear is that I might cross-thread it, and ruin the caliper and/or the brake line fitting. After another 20 minutes, with blisters forming on the pads of my fingers, it felt again like it started. I picked up the flare nut wrench, and slowly, carefully, brought the fitting all the way down. It was about 8pm on Tuesday night. I was drenched, from both the 100% humidity and the nervous energy.

Flare-nut wrenches (this fitting is 11mm) indispensable for brake line work

The next evening, I removed the (good) left front caliper, and, convinced that the previous night’s issues were behind me, went through the same routine: swapped the pads, held the caliper up to the knuckle, and began to thread the pipe fitting. SAME PROBLEM. Desperate, I removed the hard line from the car, and brought it and the new caliper to the workbench, where I wouldn’t need to struggle with the caliper’s weight. I never came close to getting the threads to start.

New caliper looks great, too bad it leaks

I rationalized: I have the new caliper on the right front, to replace the known bad caliper. Certainly, I can keep the existing left front caliper in place and drive the car a few hundred miles. The left front caliper was reinstalled. Geo stopped by to assist. We were ready to bleed (the brakes, not us). I filled the master reservoir, asked Geo to climb in, and we began the “pump, hold, release” routine of manual brake bleeding.

There was a drip at the fitting at the right front caliper.

Reluctantly, I put a wrench on it and got another 10-15 degrees in clockwise motion. The bleeding resumed, and so did the dripping. I told Geo that we were done. While I did have the rebuild kit, it was now after dark on Wednesday, and I was out of time, patience, and confidence. Working on a car under such duress only encourages poor decision-making, unnecessary shortcuts, and botched repairs. My only desire was to enjoy the AROC convention, knowing that I would resume this wrenching at an unhurried pace upon my return. The new calipers would go back to Classic Alfa as defective or unusable.

… to be continued …

All photographs copyright © 2019 Richard A. Reina. Photos may not be copied or reproduced without express written permission.

Assisting with a Porsche 914 engine rebuild, Part 2

I’ve some catching-up to do in reporting on progress with Ron’s Porsche 914 engine, as I’ve made two subsequent visits to his place since my initial report.

To briefly recap: Ron bought a derelict 914 many years ago, only to discover that its engine was junk. He purchased a spare motor, and invited me to join in the festivities. We’re on equal ground, because neither of us has ever rebuilt an air-cooled VW or Porsche engine before. To quote Ron: “What could go wrong?”

The good news is, we are still in the disassembly phase, and as anyone who has attempted any kind of project can tell you, taking something apart is easy, compared to putting it all back together (and expecting it to operate).

During my 2nd visit, we were able to remove the rocker arm assemblies, pushrods, cylinder heads, and cylinders (jugs). Ron kept reminding me that he wasn’t too concerned about the condition of all these parts, as he has already purchased new replacements for all of them. However, one issue that is keeping me concerned is that we started with a 1.8L engine (I think), we are now working on a 1.7L engine (I think), yet the new parts are for a 1.8L, as that’s what Ron thought he’d be rebuilding until discovering that it had been stored in a pond. Hey, we’ll figure it out. (If you have any familiarity with the similarities and differences between the 1.7 and 1.8 914 engine, please drop me a line.)


Rocker arm assembly prior to removal


One cylinder head off the crankcase


Condition of valves is unknown but unimportant, as new heads will be used


Pushrod tubes required force to remove, as prior rebuilder glued o-rings (known leak point)


We reasoned that once unbolted, cylinders should slide right off


And they did, exposing pistons and rings

During that same visit, we had intended to remove the flywheel, but we lacked the exact tools we needed (½” drive impact sockets). During my all-too-brief 3rd visit, I brought the required sockets with me, but, even with an air impact gun, the final flywheel bolt would not budge. We worked it so hard that its corners started to round off, so cooler heads prevailed, and we left it alone until a Plan B arises from the pond….

The blue wrench is again utilized in a vain attempt to remove final flywheel bolt

At my urging, Ron did buy a set of snap ring pliers, and they came in handy when removing the snap rings, two per cylinder, one on either side of each piston pin. With those out, the pins were easily knocked free with a drift and hammer, and all the pistons were removed.

With access hindered in places, Ron still managed to reach all 8 snap rings


Ron eyes connecting rod bolts, ponders bearing replacement


I informed Ron that I had a busy August coming up, so in the interim, he had some decisions to make:

  • If the flywheel bolt can’t be removed, what is our next course of action? Just leave it be? He was leaning in that direction.
  • With pistons removed, the con rod bolts are accessible, and Ron was considering replacing the con rod bearings (but not the crank bearings). He was actively mulling that over.
  • While he had previously purchased a complete engine gasket kit, was he certain that it had everything we needed for reassembly? He was going to inventory that kit.

Since that 3rd visit, Ron emailed me with an update: he had purchased a set of bolt extractors, “guaranteed to remove the most stubborn rounded-off bolts”, so he was engaged in that exercise. I hope to get back to wrenching on this engine within the next week or two, but I’ve got the Alfa brakes to tackle, and that’s a project (and a story) that will take me through most of the remaining driving season.


All photographs copyright © 2019 Richard A. Reina. Photos may not be copied or reproduced without express written permission.

Sunday Morning Breakfast Drive, August 4, 2019

It’s been 10 years or more since the Sunday Morning Breakfast Drives started; my partner-in-crime Larry and I have been spearheading the events for at least the last 6 or 7 years; and the format is almost always the same: rendezvous at the Sheraton Hotel in Mahwah NJ; drive a pre-planned route, with all our vehicles following each other; and arrive at a breakfast joint for food and coffee.

However, we’re always looking for ways to mix things up for our little group, so we decided to try something different this time out. We opted for our own “cars & coffee” type of gathering, in lieu of an actual drive along scenic country roads. So while our participants had to drive to get to today’s destination, The Fireplace Restaurant on Route 17 in Paramus NJ, there was no caravan per se. For consistency though, I still used the word “drive” in the subject line.

A dozen or so cars arrived promptly at 8am in The Fireplace’s parking lot, and as is our wont, we chatty men loitered and gabbed for about 20 minutes before Larry yelled “hey, let’s get some breakfast before it gets too crowded in there!” I confess, one aspect of The Fireplace that I enjoy is that it’s each person on his own for ordering and paying. The usual gig at a diner is for the bill to come to me, and after I’ve calculated the tip and grand total, I’m collecting money from 20 heads. The Fireplace affords me the chance to forego that responsibility.

“When I hit 100 I shifted into 3rd, and passed that Vega like it was standing still!”

After a hearty breakfast, we headed outside to admire the hardware. It’s been a hot summer in NJ, and today was not any different. The temperature differential between 8am and 10am was noticeable, but that did not dissuade us from checking out each other’s rides. Several of our regulars arrived in vehicles we’ve not seen before: Julio in his very original Dodge pickup, and Sal in his “I just bought it yesterday” Alfa spider.

We heard no complaints about lack of a tour, and everyone seemed to enjoy the meal, the cars, and the camaraderie. By 11am or so, the group started to break up and head back, which points out another wonderful aspect of our Sunday runs: most of us are home by early afternoon, leaving the rest of the day free for whatever occupies one’s time on a hot sunny August Sunday. Larry and I promised each other that we’ll get another event on the calendar ASAP.

Bob’s Mustang Cobra


Dan’s Porsche 944 cabrio


Larry’s Nova


Richard’s Miata


Bill’s 911


Pete’s 911


Nick’s Mustang


John’s Land Rover Defender


Sal’s Alfa Graduate


Paul’s Camaro


Jeff’s BMW Z3


Julio’s Dodge pickup


See ya! Til next time…


All photographs copyright © 2019 Richard A. Reina. Photos may not be copied or reproduced without express written permission.

AROC Convention/PVGP, Pittsburgh PA, July 2019, Part 2

As mentioned in Part 1 of this topic, the Saturday car show at the Pittsburgh Vintage Grand Prix was truly a multinational affair, with literally thousands of cars scattered within Schenley Park. While many of these vehicles were late model (built within the last 20 years or so), there was enough variety on the ground that anyone with the slightest interest in automobiles would find something to catch their attention – plus there was the racing!

Below are just some of the many photos taken on Saturday of the non-Alfa Romeo vehicles (see Part 1 for exclusively Alfa pictures). I would have literally covered more ground and taken more photos had the intense 100 degree heat not knocked me out by about 2:30pm or so. This blogger hopes that you enjoy the ones below, organized by country, then marque.


ITALIAN
Ferrari


Fiat


GERMAN
BMW

Mercedes-Benz

Porsche

VW


BRITISH
Jaguar


Triumph

SWEDISH
Saab


Volvo

JAPANESE
Acura


Honda


Mazda


The Tre Amici bid you “ciao”

All photographs copyright © 2019 Richard A. Reina. Photos may not be copied or reproduced without express written permission.


AROC Convention/PVGP, Pittsburgh PA, July 2019, Part 1

The Alfa Romeo Owners Club (AROC) held its 2019 Annual Convention in Pittsburgh PA. Entitled “Cortile della Corsa” (The Courtyard of Racing), the Three Rivers Alfa Romeo Club was the local chapter which sponsored the series of events. Interestingly, our July Convention was directly tied in with the week-long Pittsburgh Vintage Grand Prix (PVGP), an annual combo treat of vintage racing and multi-marque vehicle displays.

Let’s get this bit of disappointing news out of the way: while this Alfista was in attendance, his ’67 Alfa GT Junior was not. Four days before the scheduled departure, the car’s right front brake caliper locked up, and although repair parts were obtained, there wasn’t enough time to effect a safe and sufficient repair. So the green stepnose stayed home. Every cloud, though, has its silver lining, and in this case, I drove a modern car with fully functioning climate control in the 99 degree weather. (The brake failure and its ongoing repairs will be the subject of future blog posts.)

I can assure you that the rest of this post will be short on words and long on photos. On Friday evening there was an AROC club dinner at the Pittsburgh Golf Club, with dozens of striking Alfa Romeos looking resplendent on the lawn in the setting sunlight. Saturday was the all-makes show, with literally thousands of domestic, Italian, German, Swedish, and Japanese vehicles on display. Saturday night was the AROC banquet dinner. And on Sunday, club members were treated to a reserved spot along the track to watch some spirited vintage racing. (We also saw race cars driven in anger on Saturday.)

The volume of photos means that I’ve divided this blog post into Parts 1 and 2: Part 1 features photos of Alfas from various vantages during the weekend, plus an assortment of racing car pictures. Part 2 will follow and will include photos of cars other than Alfas.

As always, click on the photos to enjoy full-screen resolutions of them.

ALFAS IN THE HOTEL PARKING LOT

ALFAS AT THE FRIDAY EVE PITTSBURGH GOLF CLUB DISPLAY

Alfa dog

VINTAGE RACERS, ALFAS AND OTHERS


All photographs copyright © 2019 Richard A. Reina. Photos may not be copied or reproduced without express written permission.


Prepping the Alfa for the AROC Convention in Pittsburgh

The Alfa Romeo Owners Club (AROC) is holding its 2019 Annual Convention (“Cortile Della Corsa”) in conjunction with the Pittsburgh Vintage Grand Prix (PVGP). The events actually began this past weekend; however, most of the AROC-specific goings-on will be held from Wednesday July 17th through Sunday the 21st.

For varying reasons, we (the “we” being my buddy George) and I are departing Friday morning.  It’s about a 350-mile one-way trip, and while my 51-year-old Italian car is more than up for it, there’s still all that last-minute stuff to attend to. Since it got a full tune, valve adjustment, and oil change earlier this year, most of what I’ve put effort into these last few weeks has been cosmetic. After all, it will be on a show field with many of its siblings and cousins, and it needs to look it best!

Here are some of those recent efforts:

  1. Floor mats

When I got the car in 2013, there were custom-fitted carpet floor mats in place. Pete, the previous owner, had had them made, and they fit well and looked good. But during my time with the car, the driver’s side mat had started to bunch up near the pedals. Looking at replacement mats online, the biggest challenge was finding a set that could properly deal with the “standing pedals” (hinged through the floor) on my Alfa. The set in the car had a rubber panel, cut to allow the clutch and brake pedals to pass through. I was looking for similar, and was not satisfied with what I was finding.

The good folks at Coco Mats (www.cocomats.com) offered to make a custom set for me, and went so far as to send me a template for a hanging pedal car, which I could customize. But during my email exchanges with them, they seemed reluctant to deal with a mat that would be slotted for the standing pedals. While I liked the idea of coco mats, I continued to search.

My usual UK supplier, Classic Alfa, didn’t carry floor mats at all, but Alfaholics did (www.alfaholics.com). While the mats appeared able to adapt to the pedals, the image on the screen was less assuring. The Alfa logo AND script were rendered in bright red, and took up a large chuck of real estate on the mat; perfect perhaps for a car with some red on the outside or inside, but my GT Junior has neither. I decided to keep looking.

Centerline, based in the states, possibly had a good-looking mat, as the screen shot showed the Alfa logo done up in proper colors. The issue for me was the entire mat wasn’t shown, and I wanted to see how they handled the pedals. So I called and asked if someone could perhaps take a photo or two and send that to me. The nice chap I spoke to said, “well, it’s Friday, but we could do that for you next week”, to which I replied, “great!”. When “next week” came and went, I called again, and got a different, somewhat less-nice chap. His first question was “who did you speak to?” and I replied “I have no idea”. When I again asked for pictures, he said “well, we’re kind of busy filling orders”. Hmm. Guess I’ll just look somewhere else then, shall I? (I never did receive photographs from them.)

Driver’s mats: old mat on left, Mr Fiat mat on right

Out of frustration, I Googled “Alfa Romeo mats made in Italy” (U.S.-made mats were for hanging pedal cars only). This brought me to the website of Mr. Fiat, where I saw good-looking mats for standing pedal cars. The Alfa logo was in all-red, but it was small and subtle. I called. Mrs. Fiat answered the phone, and verified that they had my mats in stock (the company is in Atlanta GA). She transferred me to Mr. Fiat, who took my order over the phone. I had the mats in 3 days.

Juniors left factory with rubber mats, but you got the cross & snake logo!

The look is good; the fit is just so-so, but about what I would expect for aftermarket mats. Their main purpose, after all, is to protect the original rubber mat flooring, so these will get the job done!

Mr Fiat’s Alfa mat installed; not bad


  1. Sheepskin seat covers

Blame Bring A Trailer for this one. Several years ago, a buyer bought an Alfa sedan in Greece, toured Europe with his family in it for several weeks, then had the car shipped back home to the states. He wrote a blog about his journey, and in it, he highly recommended sheepskin seat covers.

I will admit that on 90-degree summer days, the vinyl upholstery in my car becomes a bit unbearable. So the idea of sheepskin covers, with their “cool in the summer, warm in the winter” advantages, appealed. I’m also lucky to work for a company which sells aftermarket car parts and accessories, and I bought my covers, through www.carid.com, from U.S. Sheepskin.

Sheepskin covers are for travel only; big help on hot days

They are universal fit, and while the fit on the seat back is excellent, they are quite big on the seat cushions. The color is complementary at best, but that’s OK, because these are for travel only. Once I get to a show, the covers are coming off to expose the original upholstery. I’ve made some short local trips with the seat covers in place, and so far, pretty comfy.

US Sheepskin doesn’t carry pigskin brown; tan was closest match


  1. Polish and wax

The Alfa has single-stage paint, meaning, no clear coat on top. Not sure that any 1967 cars had two-stage paint, probably not. I’m also guessing that its paint is lacquer, as it has that “soft” feel to it. Whenever I apply any kind of wax, the cloth quickly turns green, so I know I’m removing paint.

Since buying the car in 2013, I’ve put over 10,000 miles on it. When it goes on one of the New England 1000 rallies, it spends a full week outside, and that quickly takes its toll on the paint. In my garage, the car stays covered, but the paint still needs frequent attention.

Meguiars products have been my favorites for over 10 years now, and I’m 99% exclusive with them. For the Alfa, having tried several different combinations of products, I’ve settled on two: Show Car Glaze #7, and Liquid Yellow Wax #26.

#7 and #7 available in the Mirror Glaze Professional line

The Show Car Glaze is a polish, designed to rejuvenate the paint by nourishing it and adding essential oils back into it. It has some compounding effect, but very little. I’ve read articles which refer to Meguiars #7 as “Queen For A Day”, meaning that it may be short-lived, but it will quickly bring back a deep shine.

Yellow Wax #26 is a blend of carnauba and other waxes. It’s easy to apply; there’s no rush to remove it; and it doesn’t dry white, so if you get a little in some nooks and crannies, it’s no big deal. It also seems to sit nicely on top of the #7 Glaze.

Microfiber cloth shows results from polishing entire car

I started with the horizontal surfaces, which had the most hazing on them, and they cleaned up nicely. I was able to go lighter on the sides, and finished up with the front and rear. By the way, the #26 wax works beautifully on my stainless bumpers, frankly, better than the metal polishes I have. We’ll see how well the car does when it’s judged on Saturday!


The Alfa Convention in Montreal in 2017 was my first visit to an AROC event, and I was knocked out. I missed 2018 in Washington state, and am thrilled that the 2019 Convention is so close. Watch this space for updates and a full report!


All photographs copyright © 2019 Richard A. Reina. Photos may not be copied or reproduced without express written permission.