Just shy of 28 years ago, in August of 1996, I was spending a long weekend at the Jersey shore. While driving around the neighborhood, I spotted a used white Miata on a Mazda dealer’s lot. (I’d say that it was a first-generation car, but in 1996, that’s all the factory had produced!) Having never driven one, I stopped in for a test drive. While I didn’t buy that particular car, the brief spin around the block had me hooked. Within days I began to scour the classifieds, and within a few weeks, I bought one: a black and tan 1993 Miata with 34,000 miles on it.
1996: With my 5-year-old nephew Karl Jr. behind the wheel
With plenty of summer weather still ahead of me, I drove my new-to-me Miata as much as I could, putting close to 10,000 miles on it within the first few months. I took it to work on nice days, and had it out almost every single weekend. The car was rust-free when I bought it and I intended to keep it that way, which meant that I’d never drive it in the winter. Since I was employed by Volvo and had a company car, the Miata became a toy car. We took day trips and week-longs trips with it, and it certainly got rained upon. But the exuberant feeling of being behind that wheel never faded.
Time flew by; the mileage continued to pile up; the car was serviced regularly by me; and almost nothing broke. In 2003, I had the top replaced. Sometime after that, the clutch secondary cylinder needed replacement (one of the car’s few known weak points). The power antenna needed repair. One headlight burned out! Oil changes, tires, and brake pads were attended to as needed, but the car was costing me very little to keep on the road.
2018: Hershey!
Time continued to fly by; during the time I owned the Miata, I also cycled through an MGB, a Mustang, and of course, the Isetta. I joined AACA and learned that any car 25 years or older was eligible to be shown at an AACA event. Suddenly it was 2018 and the Miata was 25 years old. I decided to register (what was still in my mind a “newish” used car) for Hershey! The Miata was awarded its HPOF badge, and subsequently shown at AACA Nationals in Parsippany (2019) and Saratoga Springs (2021).
2021: Saratoga Springs
But something else changed. I was not driving the car much, through no fault of the car. I had purchased my Alfa Romeo in 2013 and drove that car a lot, including 4 times in the New England 1000 rallies. The Miata was still great to drive, but my older body was less tolerant of the heat. When I did drive it, the top tended to stay up. The Miata is low, and getting in and out of it wasn’t the easy affair it had been. I considered selling it. A funny thing happened after posting ads and taking prospects on test drives: I would ask myself, “Why am I selling this car? It’s so fun to drive!” In April of last year, I had a buyer all lined up, but at the last minute, the deal fell through, and I decided not to continue the ad.
Earlier this month, I thought I would try again, and for the first time with the Miata, placed an ad on Facebook Marketplace, where I have done very well selling items in the $20-$200 range. I placed the ad on Tuesday morning. A little more than 24 hours later, the car was sold. It has a little over 109,000 miles on the clock, meaning I drove it 75,000 miles in 28 years. The new buyer, a young man, had an NC Automatic which he sold, and seems thrilled to be getting into an NA stick. I have some seller’s remorse, while in reality, I know full well it’s time to let go. Will I replace it? Not right away. I have some shows lined up for the Alfa for the remainder of the summer. I’ll patiently wait to see if anything interesting pops up, but I’m in no rush.
It is somewhat well-known among Miata owners that one of the few mechanical weaknesses of the car is its clutch hydraulic system. Typically, the secondary cylinder1 fails and needs replacement, and indeed, that component was already replaced once on my car, back in 2010. The good news is that the failures tend to happen gradually, and the driver gets significant advance notice as the clutch pedal gradually sinks while gear engagement becomes progressively more difficult.
I hopped into the Miata last week for the first time since winterizing it last autumn and in my case, the pedal was “gone”. Popping the hood, I saw that the clutch hydraulic reservoir was empty, although the dirty fluid left enough of a stain that one could be fooled into thinking there was still some fluid in there. I watched a few YouTube videos, several of which contradicted themselves (more about that coming up) and ordered a new primary cylinder, secondary cylinder, and flexible hose. All are Dorman products; one reason for the choice is that Dorman offers a lifetime warranty on the parts, when most competitors offer one year. The three parts cost me around $65 with shipping.
ABOVE: There are many cars where a single reservoir is shared by the brake and clutch systems, but the Miata is not one of them. The larger reservoir on the left is for the brakes. Note how clean that fluid looks, almost clear in fact. On the right is the clutch primary cylinder, and despite appearances, that reservoir is empty.
All exposed threads got a spray shot of rust-buster the day before, but none of the threads gave me a fight the following day when I put a wrench to them. The primary cylinder came off first: the fluid pipe fitting and two nuts were all easily accessible. Moving downstream, I tackled the clutch hose next. I had never really noticed this part before. In fact, it’s tightly tucked directly between the back of the cylinder head and the firewall. The pipe/hose routing is as follows: a metal pipe is routed from the primary, along the firewall, where it makes a 180-degree turn on the passenger side and connects to the hose. The hose runs back toward the driver’s side, held in place by two firewall-mounted brackets. From there, another metal pipe snakes downward to the secondary cylinder mounted low on the passenger side. (I suspect that much of this back-and-forth routing is due to the JDM (Japanese Domestic Market) Miata being RHD, and this lengthier routing was necessary to adapt to LHD.)
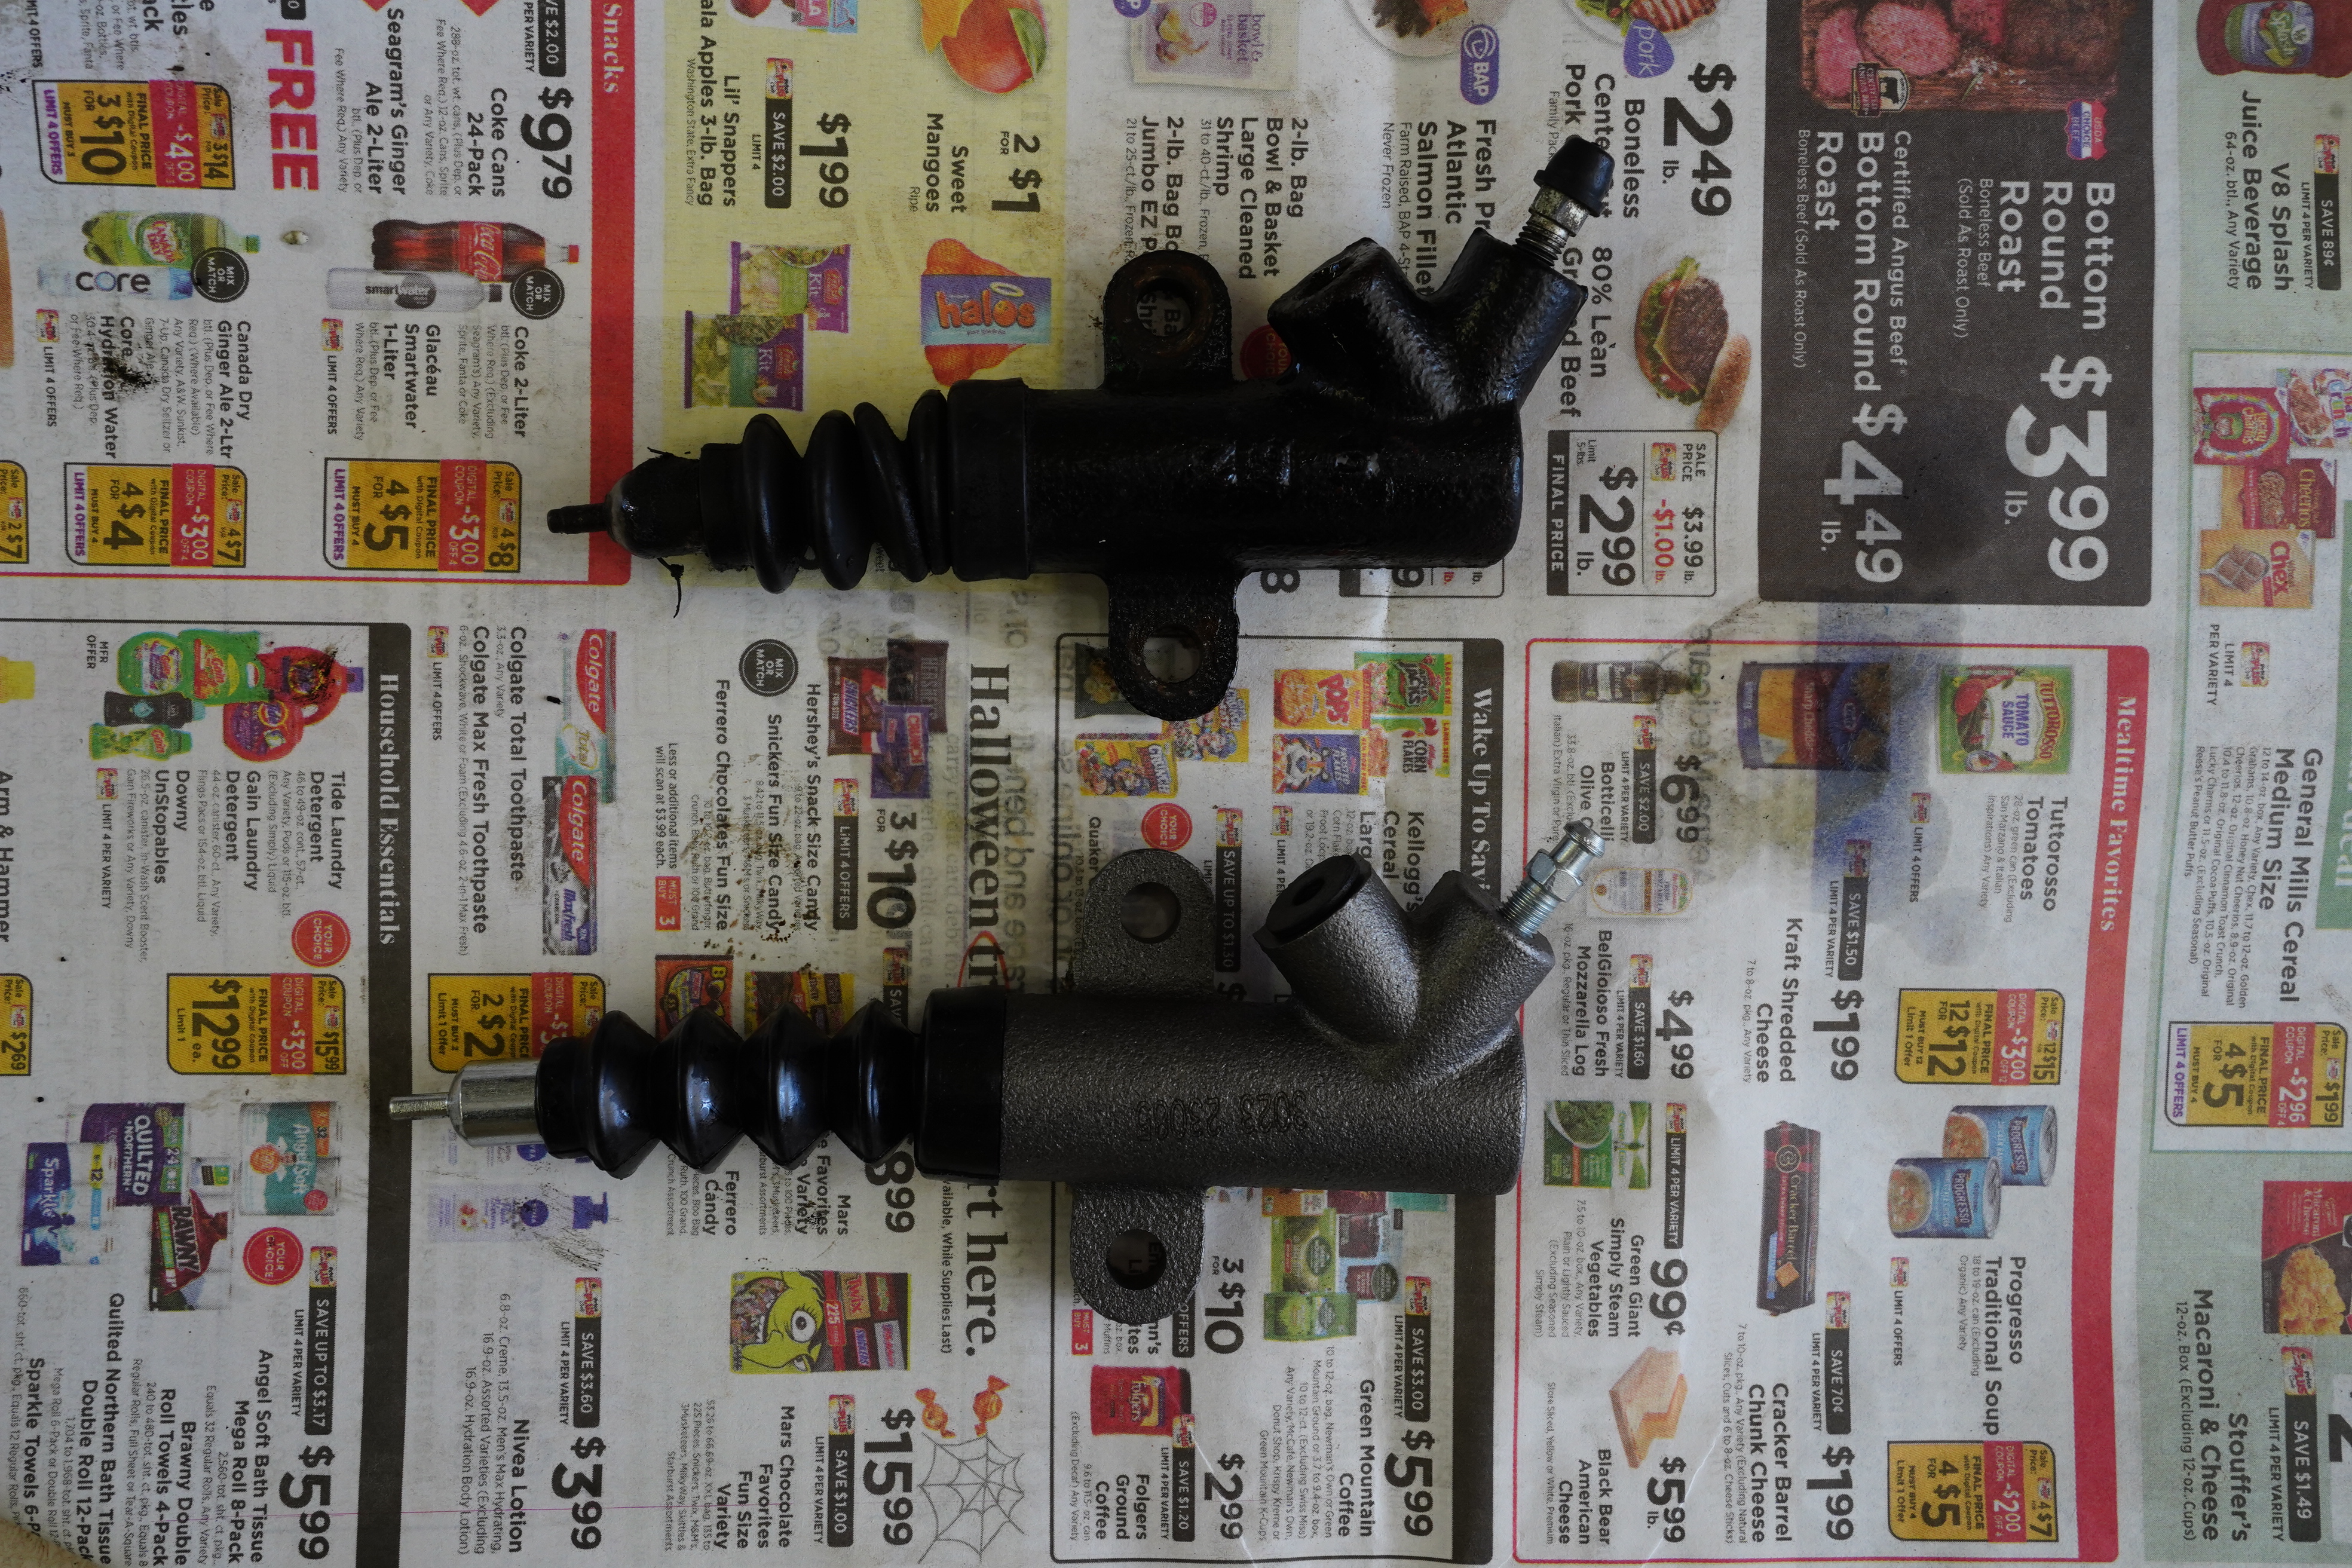
ABOVE: Primary cylinders laying side-by-side, old on left and new on right.
ABOVE: Old secondary cylinder on top, new one on bottom.
Why am I describing all this? Because these hose connections were a B – I – T – C – H to reach, something completely left unsaid in all the videos I watched. The video voiceovers cheerfully exclaimed “And then we replaced the clutch hose before moving to the secondary cylinder” or similar. I ended up disconnecting two wiring harness brackets to provide myself enough room to get a flare nut wrench on the hose ends. Several bloody knuckles later, it was done.
ABOVE: New hose on bottom appeared to be slightly longer, but that did not affect installation.
The secondary cylinder was the third and final piece of the puzzle. Without a lift, access required removing the right front wheel and squeezing my torso into the wheel well to reach the connections. As with the primary, there was only the threaded pipe and two bolts holding the cylinder to the block. After several hours of contorting myself, the R&R portion was done.
ABOVE: This was the easier of the two pipe-to-hose connections to access. Even here, A/C hoses and wiring harness run interference.
Next, it was time to call my able assistant who is well-versed in the “press – hold – release” mantra. My only regret is that I didn’t get a snapshot of Mrs. Reina as she sat in the driver’s seat and multi-tasked: left leg mindlessly going up and down on the pedal while she nursed a hot cup of tea and scrolled through her phone as it sat perched on the center console. And one more comment about the videos: one video insisted that bench-bleeding the primary cylinder was a necessity, while a second video declared it a waste of time. I chose to bypass the bench bleed, but before my wife came out to the car, I filled the reservoir, filled a small jar with brake fluid into which I inserted a hose from the bleeder screw, and left the screw loose. I then pumped the clutch pedal at least 50 times, refilling the reservoir once. This seemed to get a goodly amount of air out and shortened the length of time my wife was on the job. Thank you honey!
I took the car for a short spin and the clutch pedal felt marvelous. Let’s hope the hydraulics last another 10 years.
1Traditional automotive terminology has referred to brake and clutch cylinders as “master” and “slave”, terms which frankly have always caused me to wince. Here, because it’s my blog and I can describe things as I please, I have opted to refer to these parts as “primary cylinder” and “secondary cylinder”. I doubt it will catch on, but I would be eternally pleased if it did.
My 1993 Mazda Miata has been one of the most reliable vehicles I have ever owned. Since purchasing it in 1996 with 34k on the clock, I have put 75,000 miles on it and it has never left me stranded. Aside from maintenance (which to me includes normal wear-and-tear items like brakes, shocks, tires, and batteries), the only “repairs” I’ve made to the car in 27 years have been a clutch secondary cylinder, a heater core, a power antenna, and one headlight bulb. So when I discovered a minor engine oil leak a while back, I ignored it until recently. I finally decided to tackle the leak last week, which involved replacing the rubber o-ring on what Mazda calls the CAS, or Camshaft Angle Sensor.
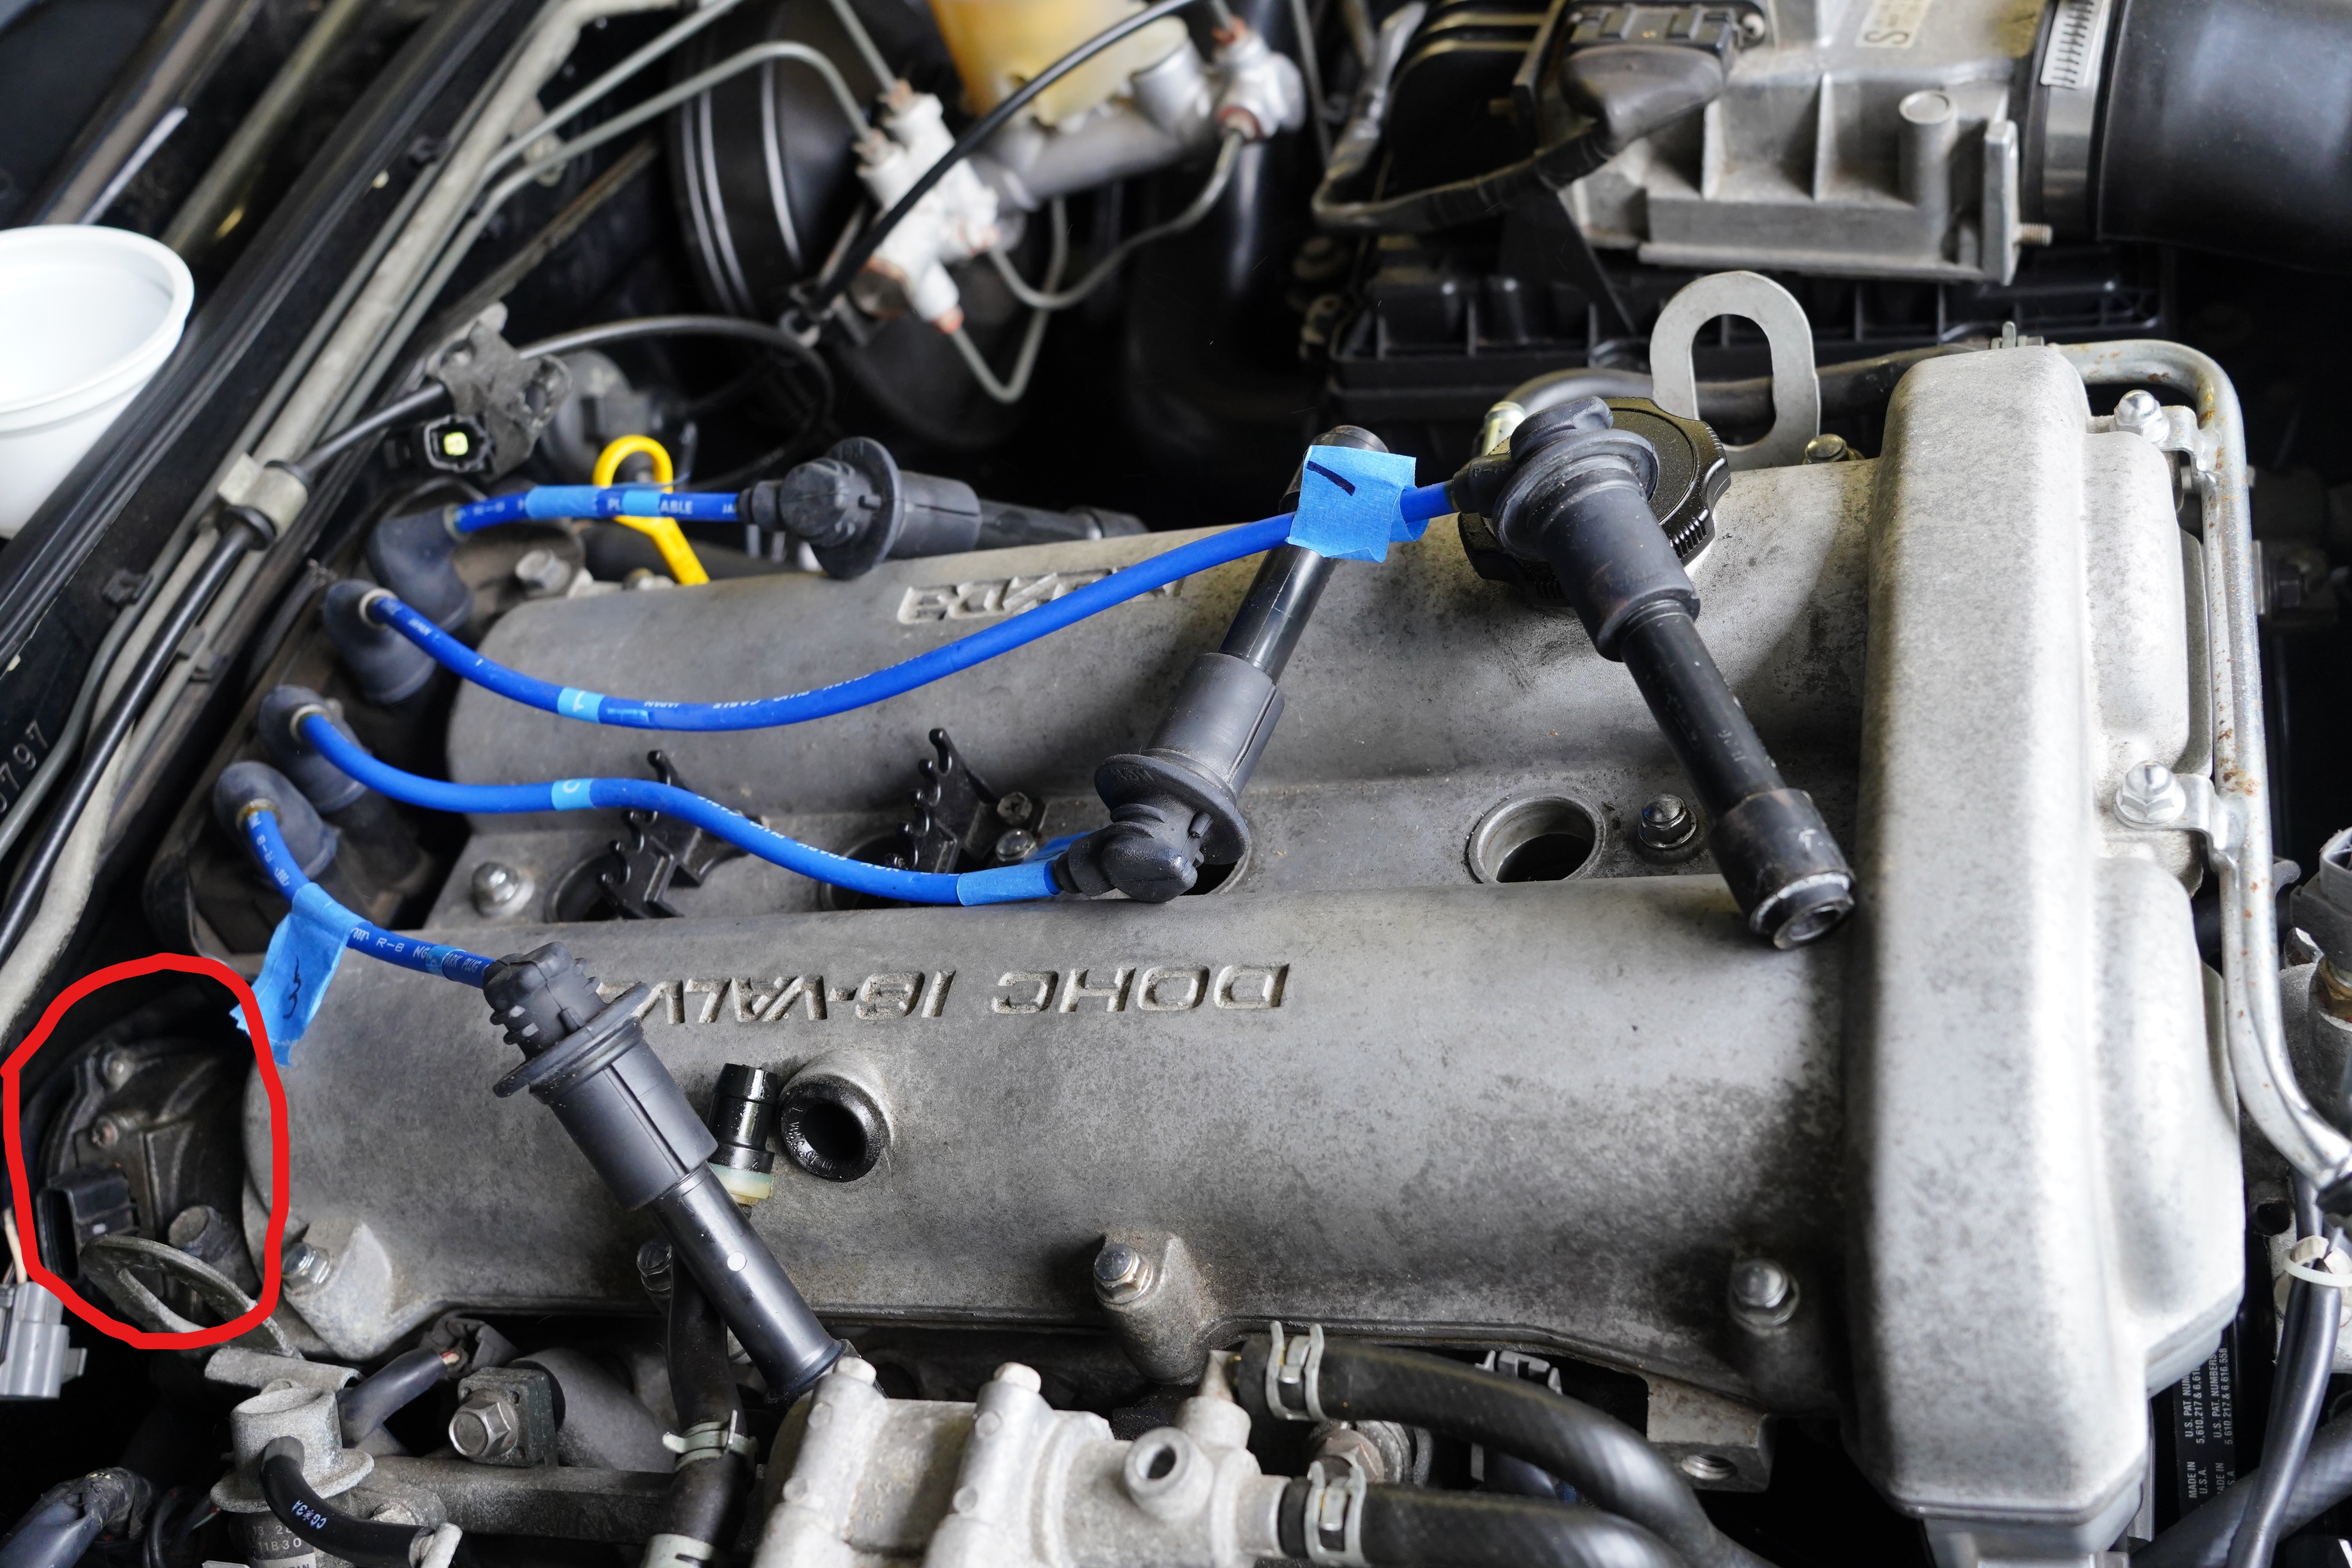
I always take a “before” photo in case I mess up; the circled plug is 1 of 3 to be unplugged.
The CAS sits at the back of the cylinder head, and engages with the intake camshaft. This is how the ignition timing is changed: the CAS is adjustable, and by slightly rotating it in one direction or another, the ignition timing (in relation to the cams) is changed. It’s a DOHC engine, but it is not variable valve timing. Doing some research on the Internet, I found multiple sources identifying the CAS o-ring as the #1 cause of Miata engine oil leaks. The oil drips down the back of the engine onto the transmission, and from below, it can be difficult to pinpoint the cause. A quick check with a flashlight directly under the CAS confirmed this as the leak’s source.
Chat forums and YouTube videos are great places to find repair information, but in this case, there were two distinctly different approaches to the job. On one hand, the “book” method is to remove the valve cover, remove the C-shaped cap over the CAS, and lift it from the car. The alternate, and supposedly less time-consuming approach, is to leave the valve cover in place and only remove the CAS adjustment hold-down bolt. One can then wiggle the CAS out of the engine compartment, with the acknowledgement that re-engaging the “dogs” or teeth which fit into the back of the cam is tricky because it’s a blind operation. At least one commenter admitted that getting the new and unworn o-ring past the CAS hold-down cap can require severe muscular exertion. In either case, viewers were strongly advised to mark the position of the CAS so that re-timing the car would not be necessary. I marked it with a black Sharpie.
Plug wires tagged and about to be removed; CAS is circled in red
After watching 3 or 4 videos and then examining my car, I was not convinced that the savings in time was worth it. Removing the valve cover is not at all difficult, but it takes about 20 minutes. I actually had a more difficult time removing the 3 electrical plugs (which needed unplugging whether I followed method #1 or #2) because these plugs had not been touched in 30 years. But I eventually got them, and followed that by removing the spark plug wire set, the PCV hose, and the 11 bolts holding down the valve cover. I had ordered the CAS o-ring (63 cents) and a new valve cover gasket from Rock Auto; with tax and $9 shipping, I was into the job for twenty bucks in parts.
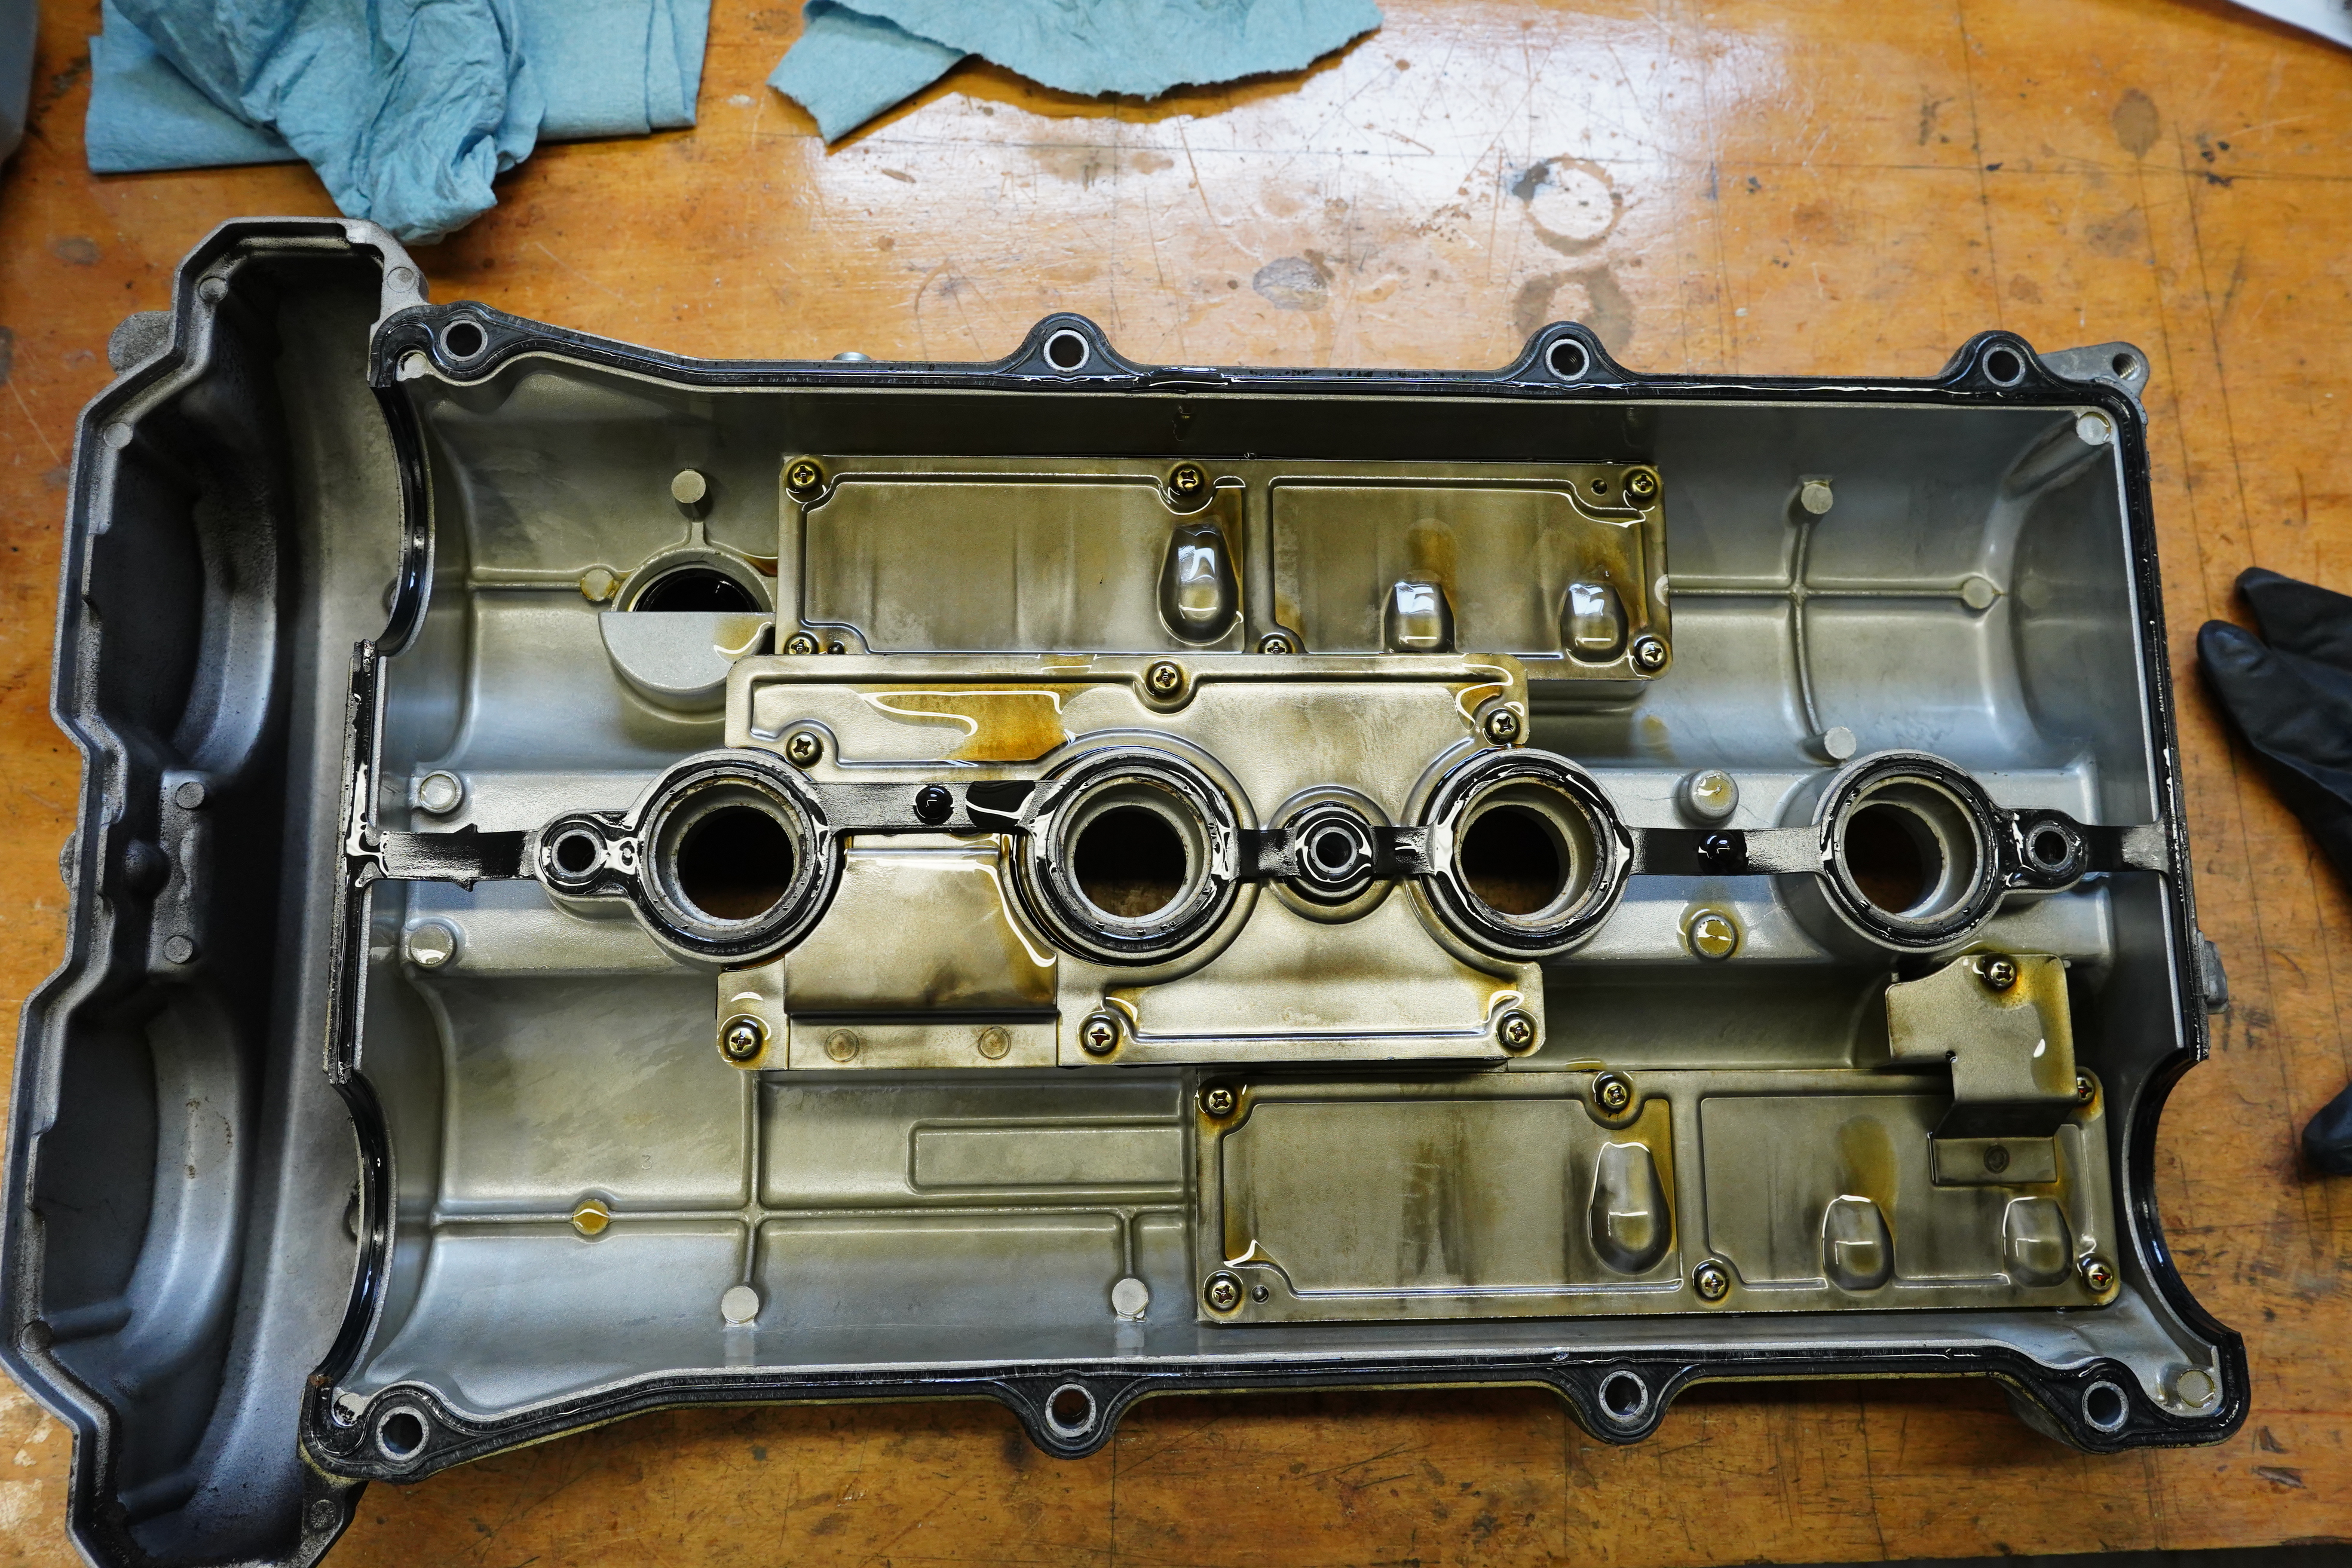
I had an ulterior motive for removing the valve cover: I had never done so, and I wanted to see how clean things were underneath, and they were clean indeed! Frequent oil changes, almost exclusively with Castrol oil, certainly has played a part. Going this route, the CAS was quickly free from the camshaft, but even with the valve cover out of the way, there was precious little clearance between it and the firewall, so I was doubly glad I went for the “longer” method.
Underside of valve cover, old gasket still in place.Miata engine, 30 years old, 109,000 miles, looks clean to me
CAS on my workbench, the old o-ring was so dried out that it snapped like a piece of plastic. The new one slipped on very easily, helped by a little motor oil. Then the job was like it says in the repair manuals: reassembly is the reverse of disassembly.
CAS on my bench, old o-ring still in place
Again, I was glad to have the valve cover out of the way, as engaging the dogs into the cam was a cinch. I rotated the CAS to where I had marked it, locked it down, put the new valve cover gasket in place, and reinstalled everything which had been removed. The car started on first try, and while it was too wet today to go for a test drive, I plan to clean off the underside as best possible, then drive the car to confirm the leak is fixed.
Clear shot of CAS about to reengage with cam
I guess I need to add this repair to my list of “non-maintenance fixes” to my Miata!
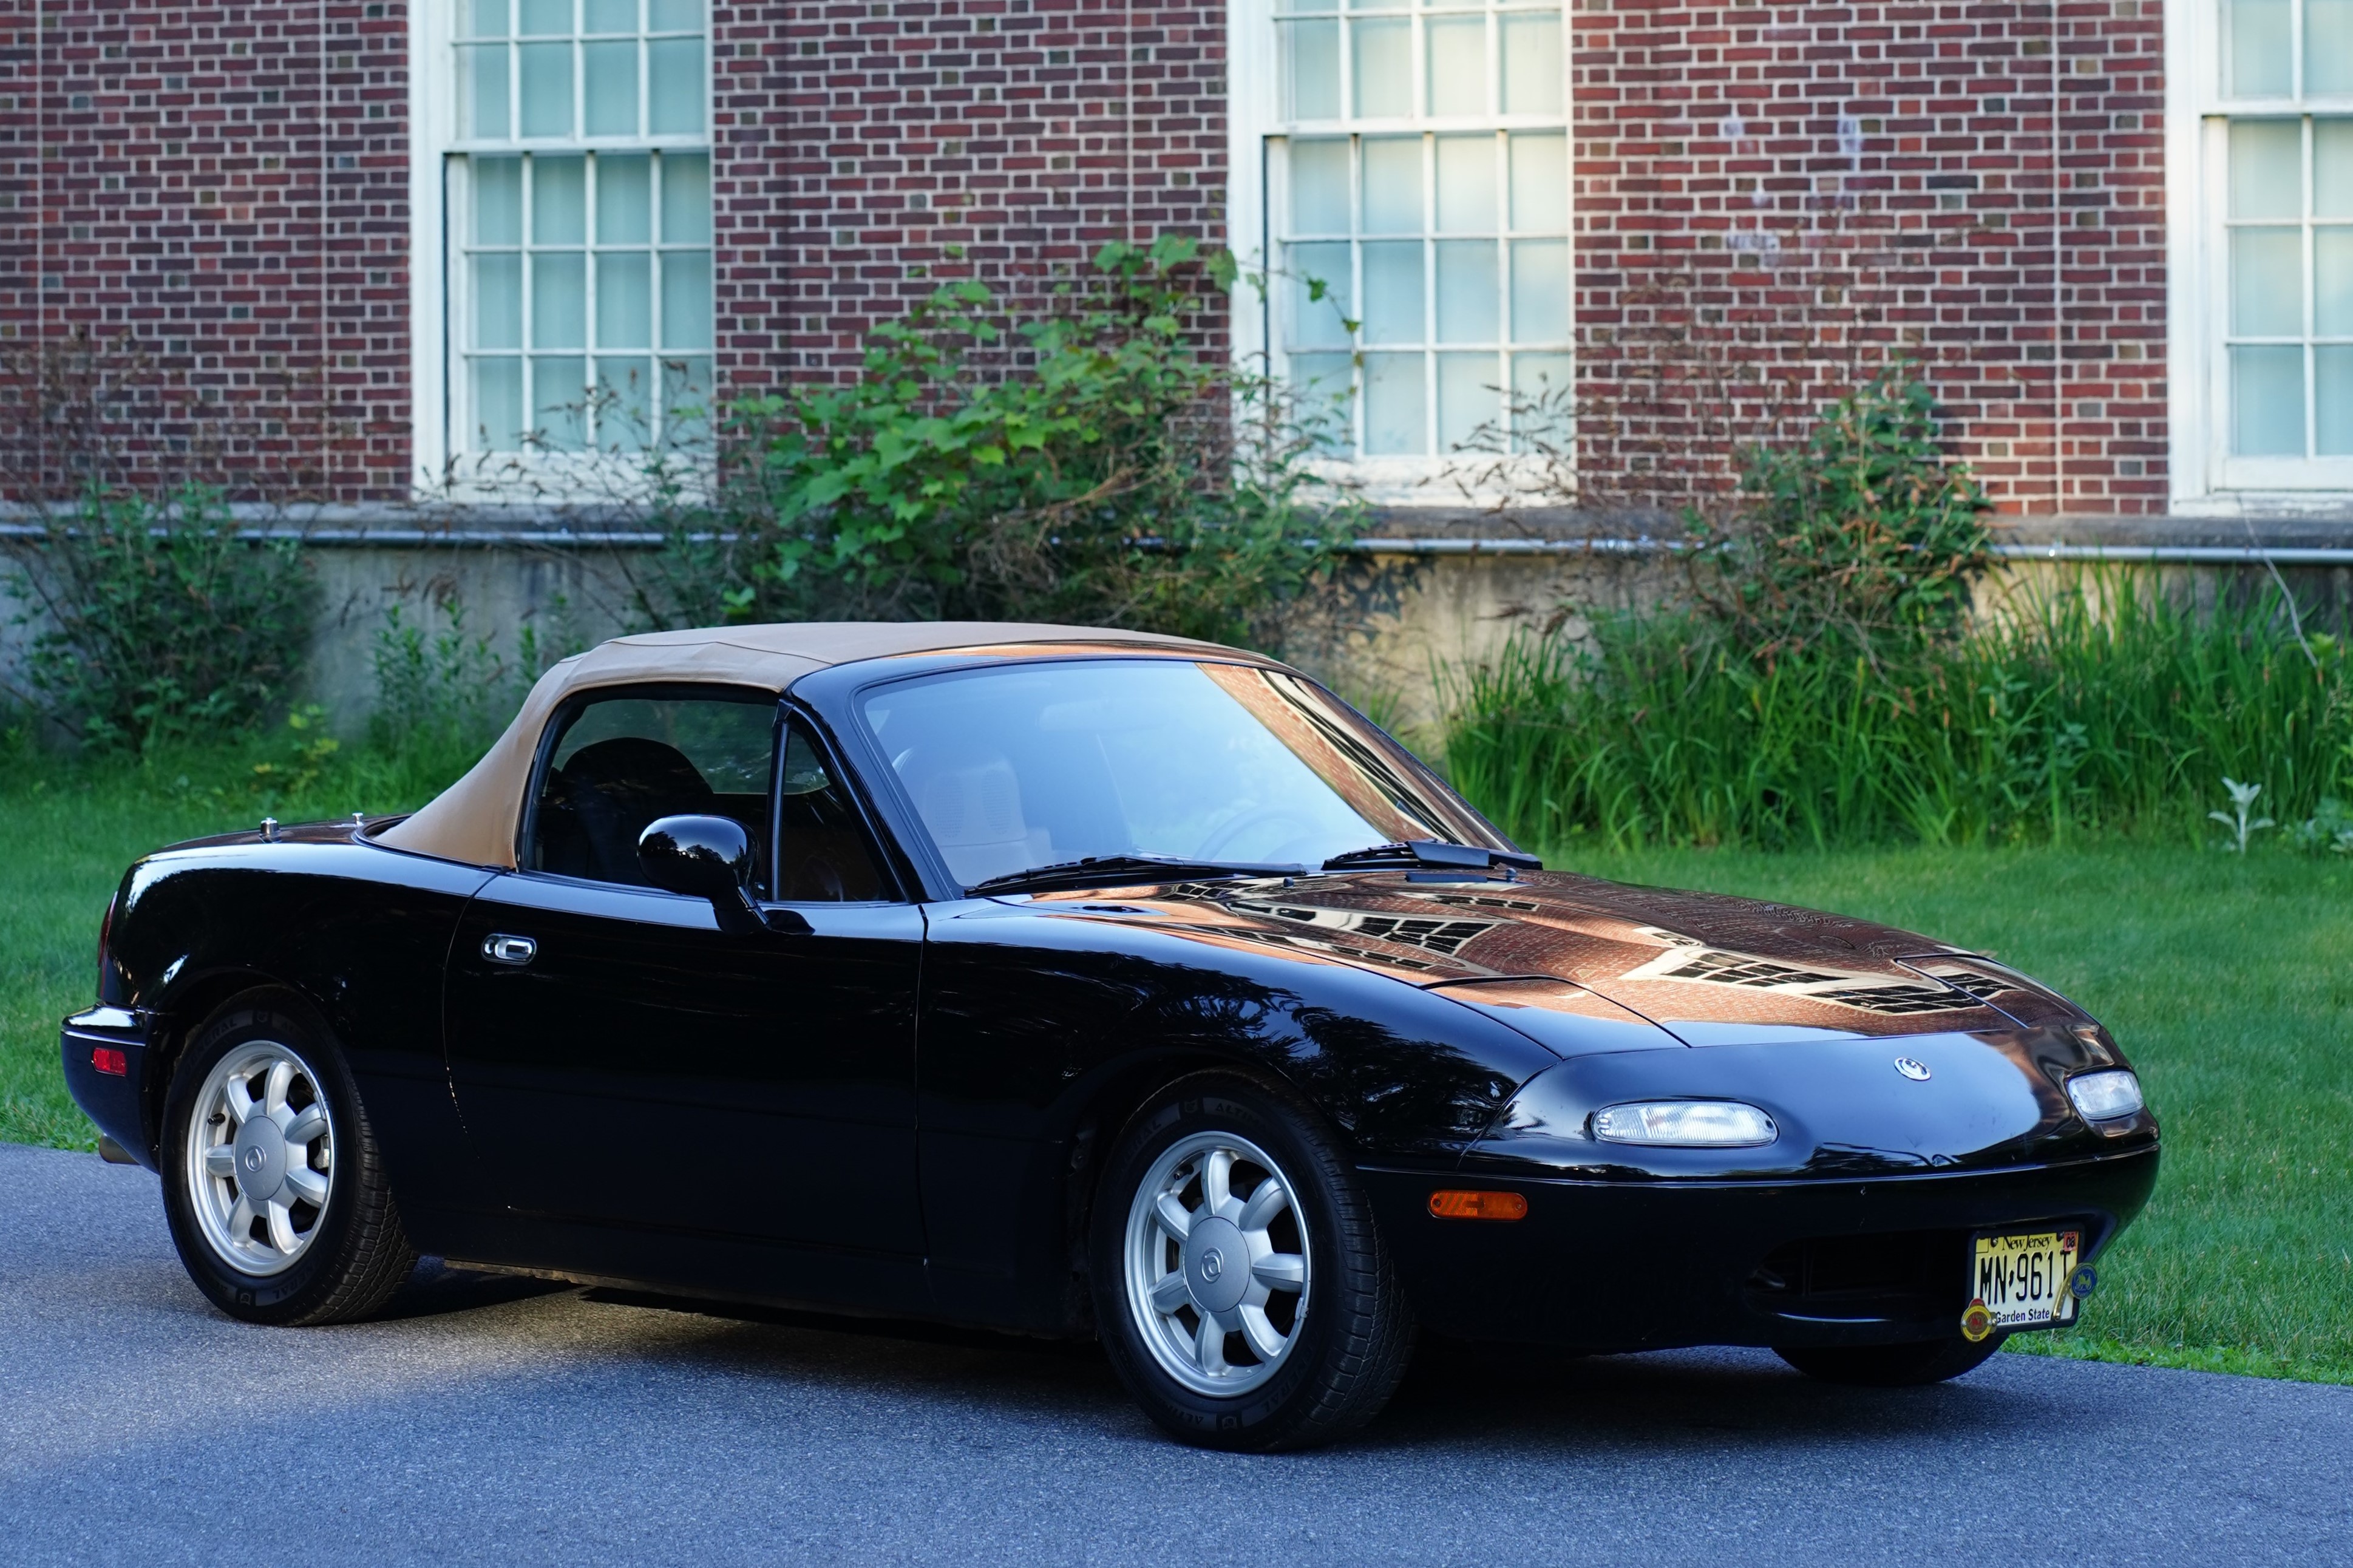
On the show field in Saratoga Springs, 2021. Note that “judging position” means hood and trunk open, convertible top an windows up.
When I showed this car for the first time at a National event, it was Hershey, and I chose to enter it in the HPOF (Historical Preservation of Original Features) class. When I purchased the Miata in August of 1996, it was a gently-used three-year-old car with 34,000 miles on it. I promptly put another 10,000 miles on it before the year was out, but then turned it into a toy for fair weather use. Still, I could not have seen the day when a car which still felt new to me would be eligible for a Hershey event! Thankfully, during those years between 1996 and 2018, I avoided all temptation to modify or ‘improve’ the car, and maintained it to stock specifications.
The view from the owner’s folding chair
I was a proud papa when the car earned its first HPOF badge at that 2018 Hershey showing. The pressure only increased to maintain its originality, and in 2019, when the NJ Region hosted its own National event in Parsippany, I decided to try for the next level, which is “Original HPOF”. (Without going into too much detail, it means that a greater percentage of the vehicle, including paint, upholstery, and mechanicals, are “as built” by the factory). The Miata did win its first Original HPOF in Parsippany, and that was its most recent National event until this year.
Post-judging, hood and trunk are now closed
Of course, 2020 was a washout, but with Covid restrictions easing in 2021, I’m making up for lost time. So it was off to Saratoga Springs with the Miata vying for a Repeat Original HPOF award. I attended the Saturday evening awards banquet, and was humbled and elated to receive my repeat award (actually a chip to be mounted to a wooden display board). The car managed to do this, by the way, with over 107,000 miles showing on the odometer.
A morning-after beauty shot; yes, that is original paint with 107,000 miles on it
What’s next? The remainder of the Nationals for 2021 are too far away, so I will wait and see what the calendar holds for 2022. In the meantime, I’ll continue to enjoy the car, and will do everything I can to maintain its originality. I plan to drive it in the NJ Region’s Summer Tour coming up at the end of this month, which will take us as far north as Rochester NY. The miles will pile on, but the car is up to it!
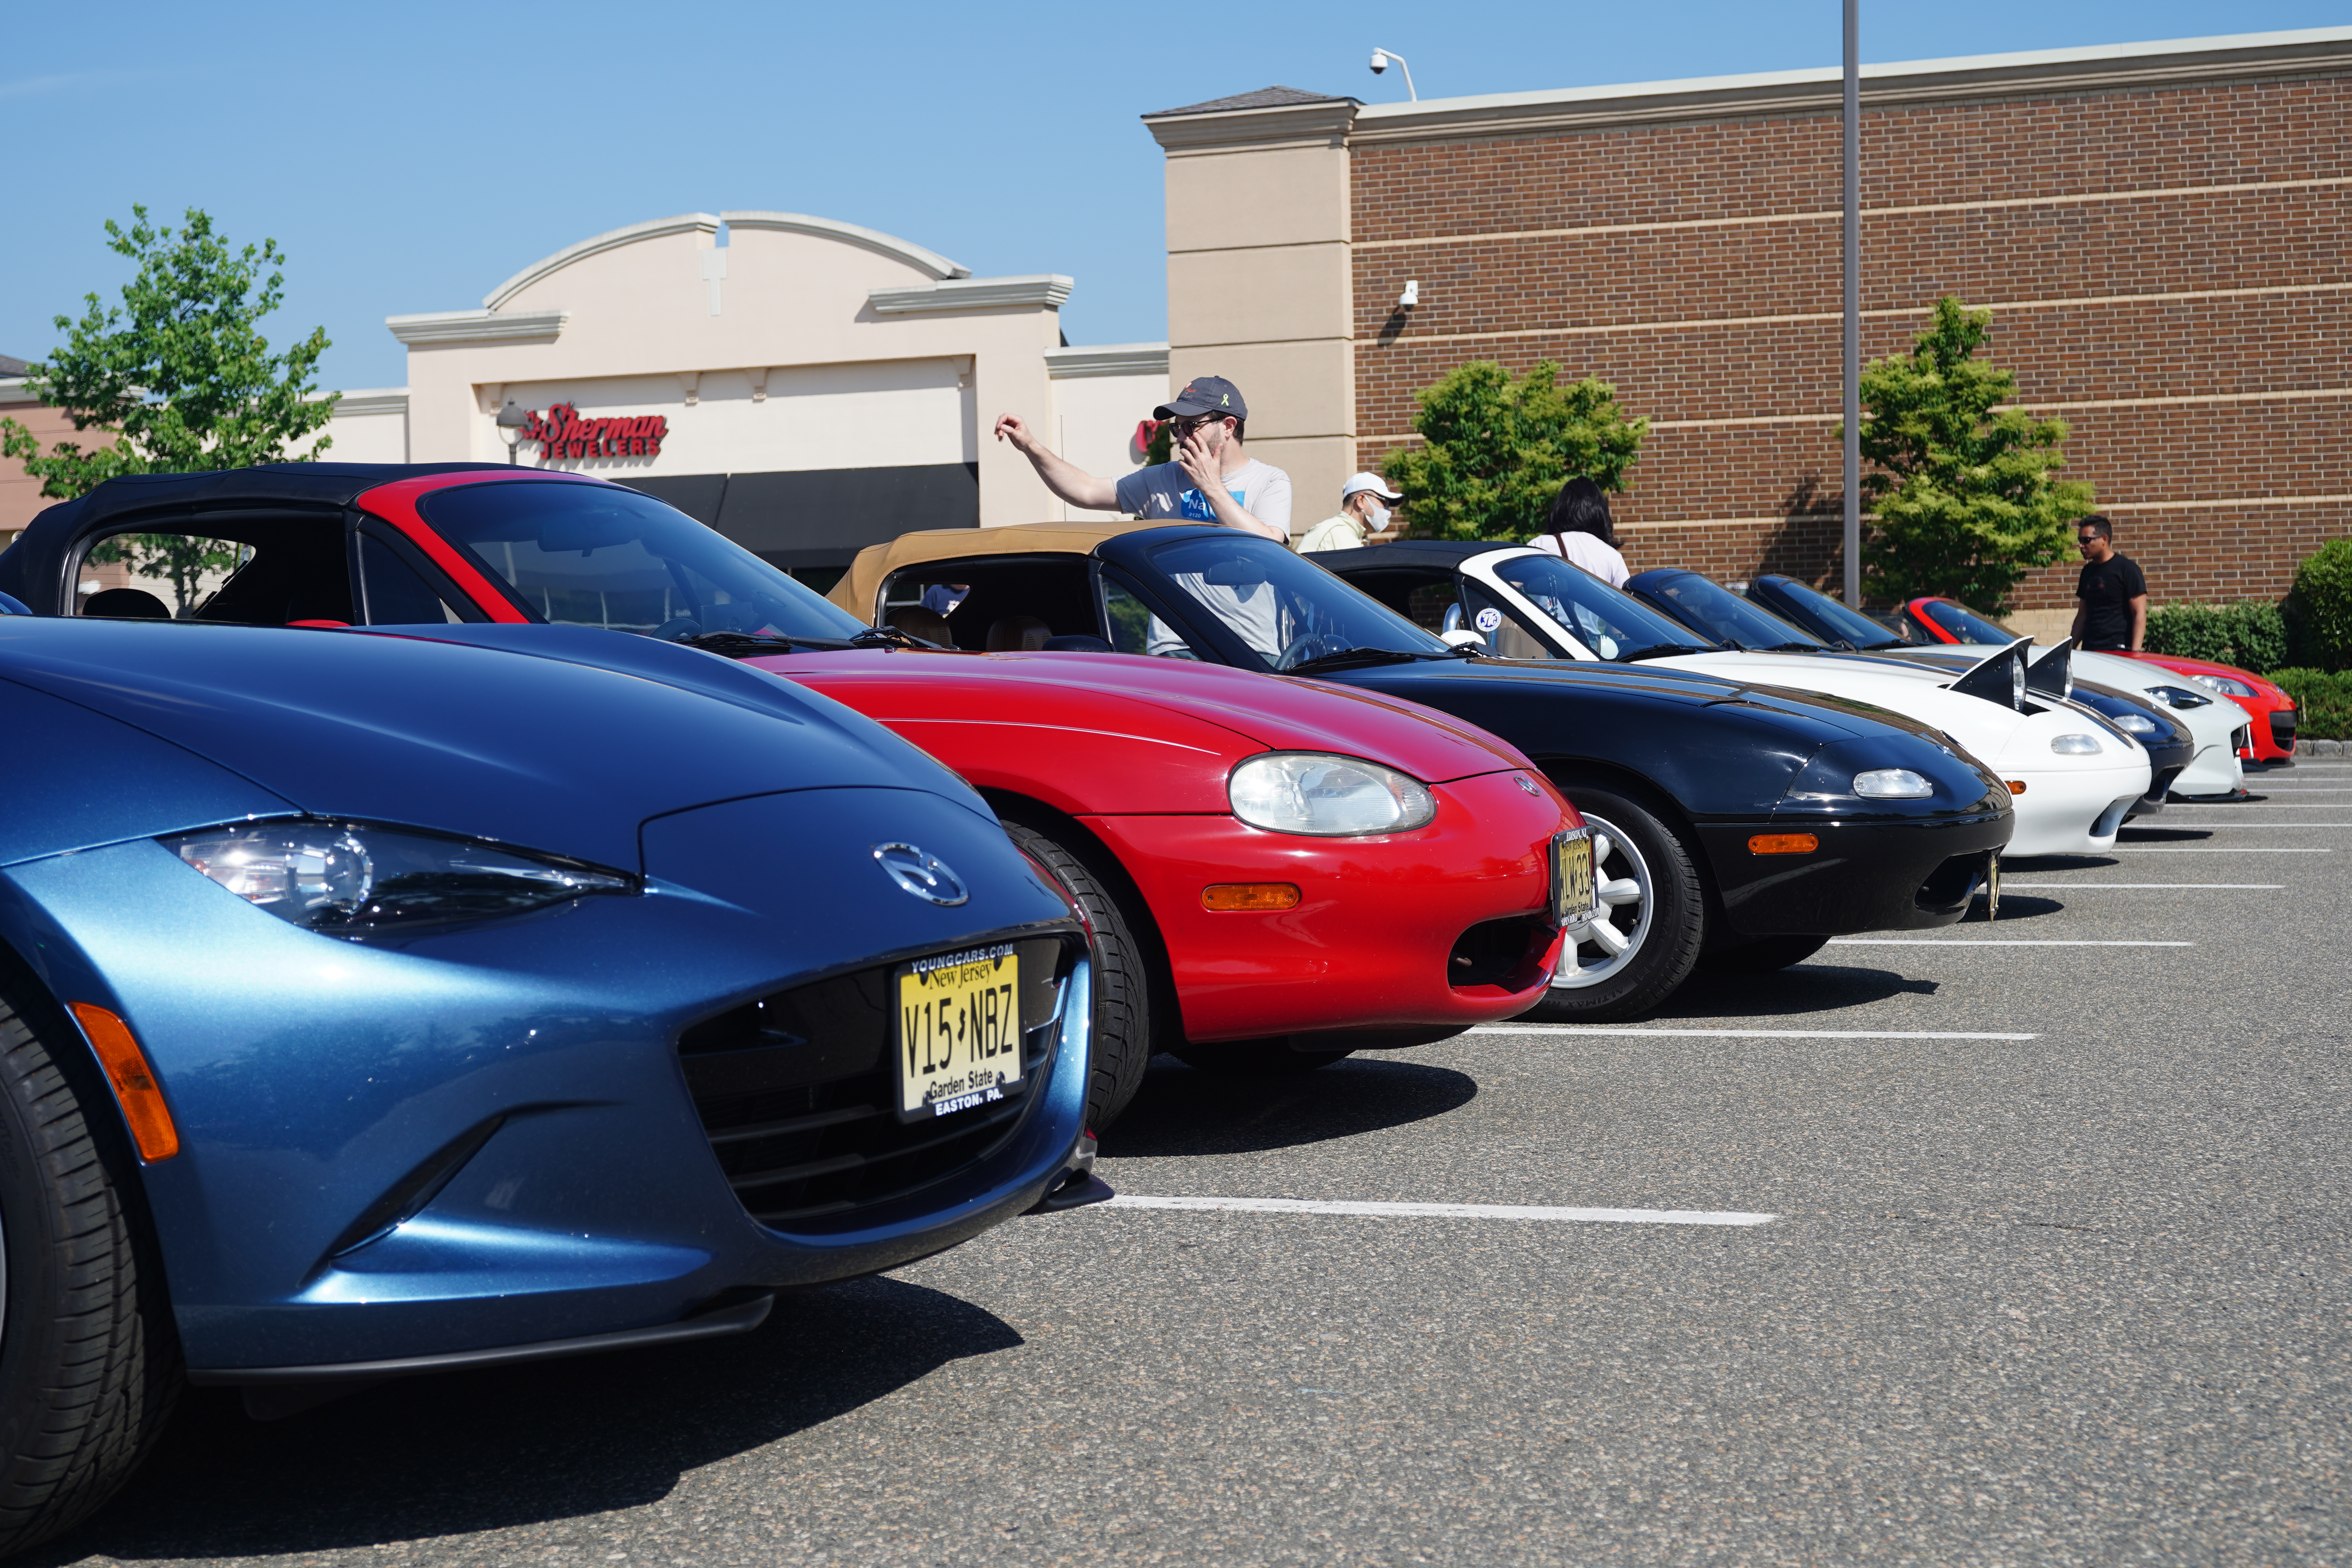
Just before the pandemic shutdown hit in 2020, I joined the Delaware Valley Miata Club, hoping to connect to an organization that would provide me with an excuse to drive my Mazda Miata a bit more frequently. (Since 2013, when I purchased my 1967 Alfa Romeo, I have put about the same total mileage on the two cars.) The DelVal Miata Club is very active and organizes frequent drives, about two to four a month during our three-season driving year.
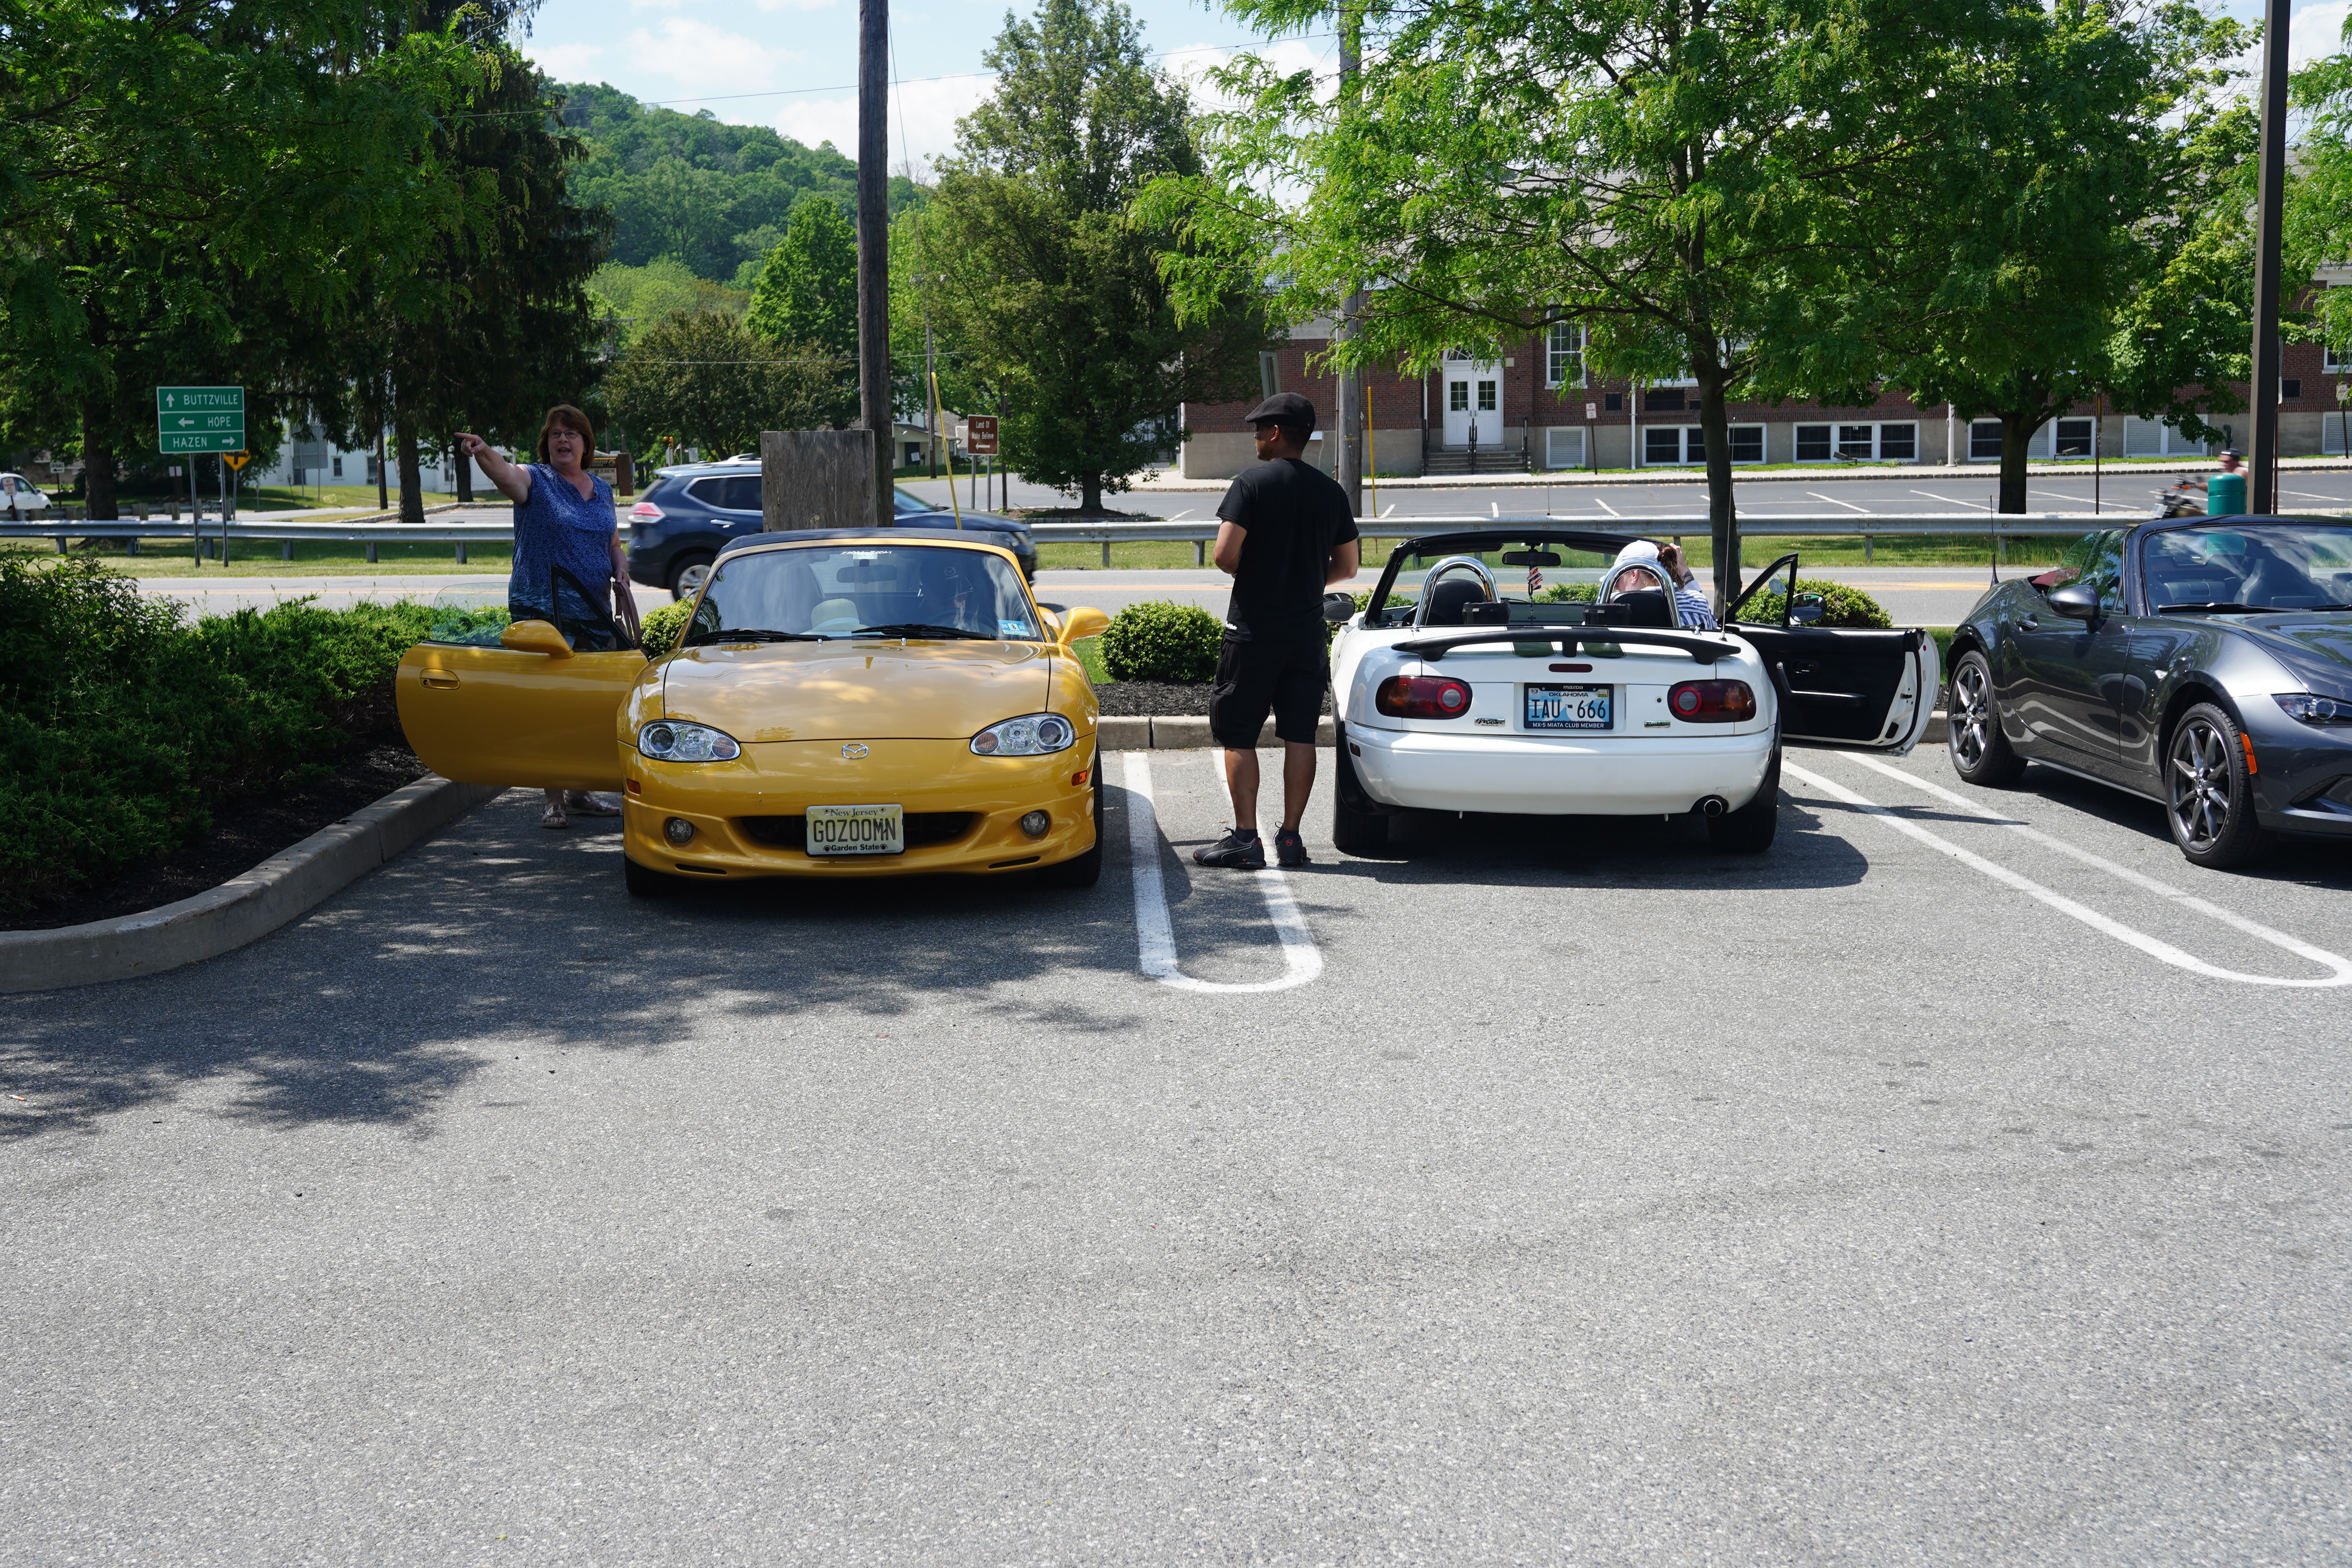
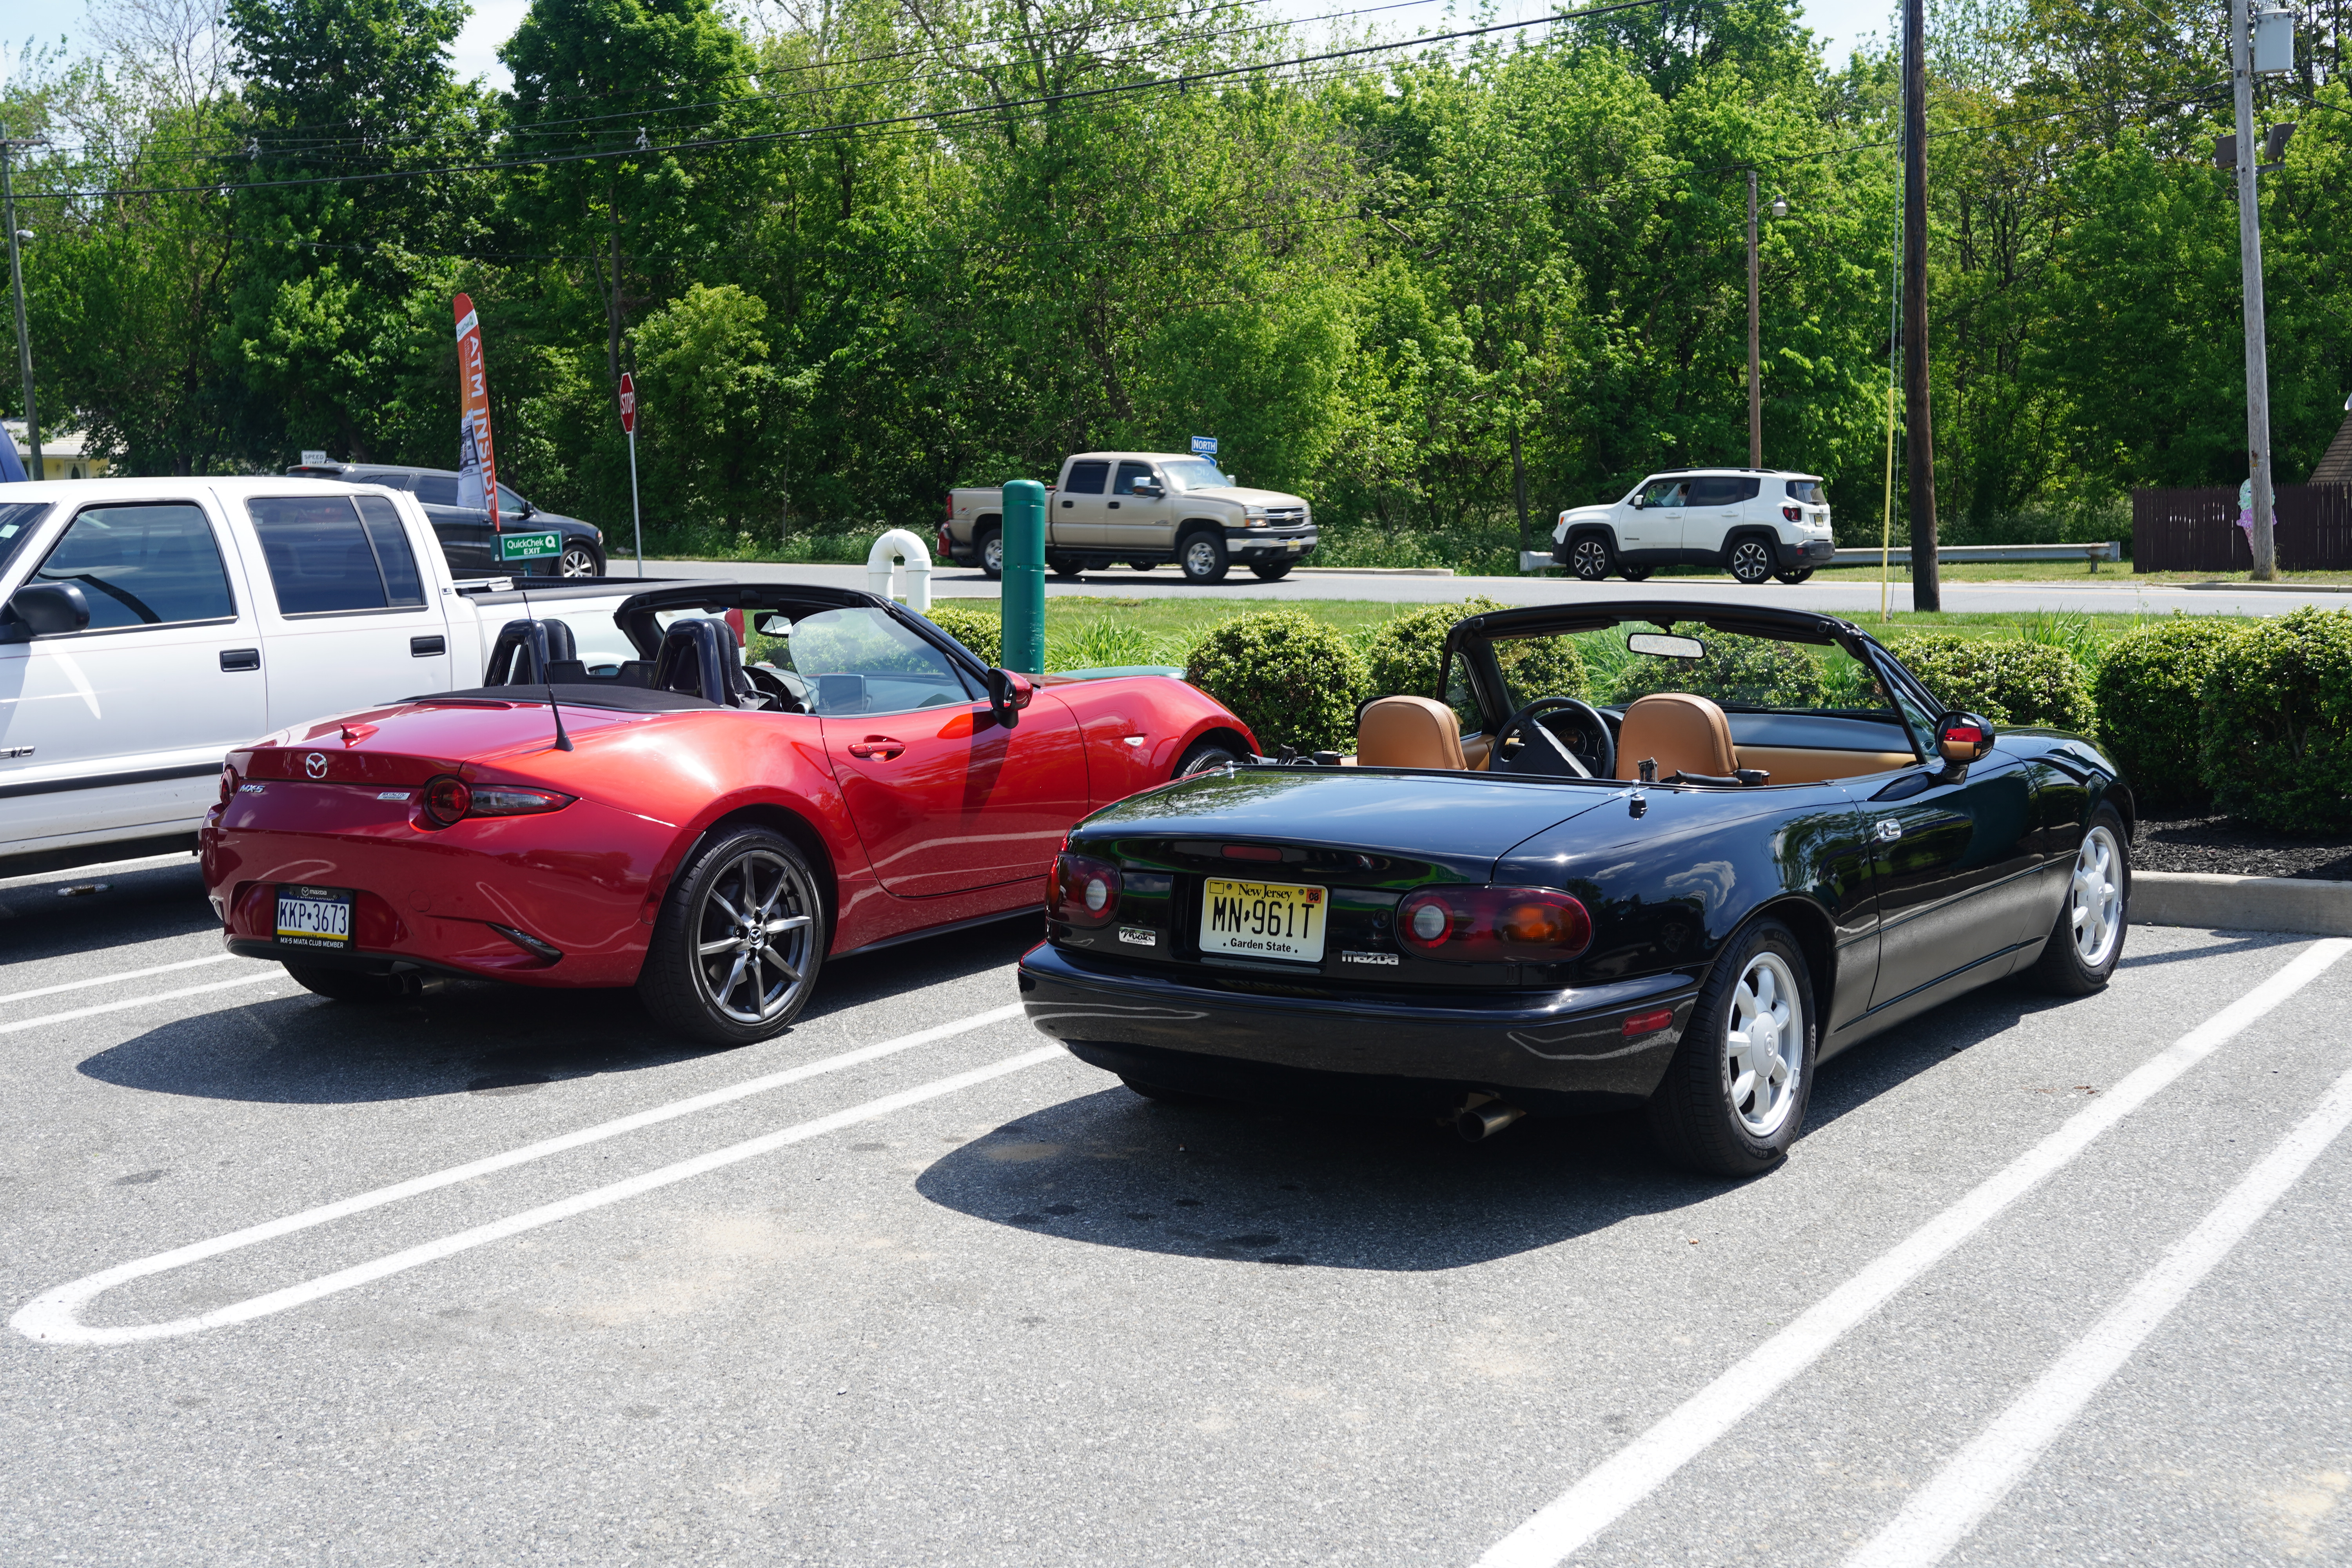
Above: L to R are a blue ND, a red NB, and my black NA
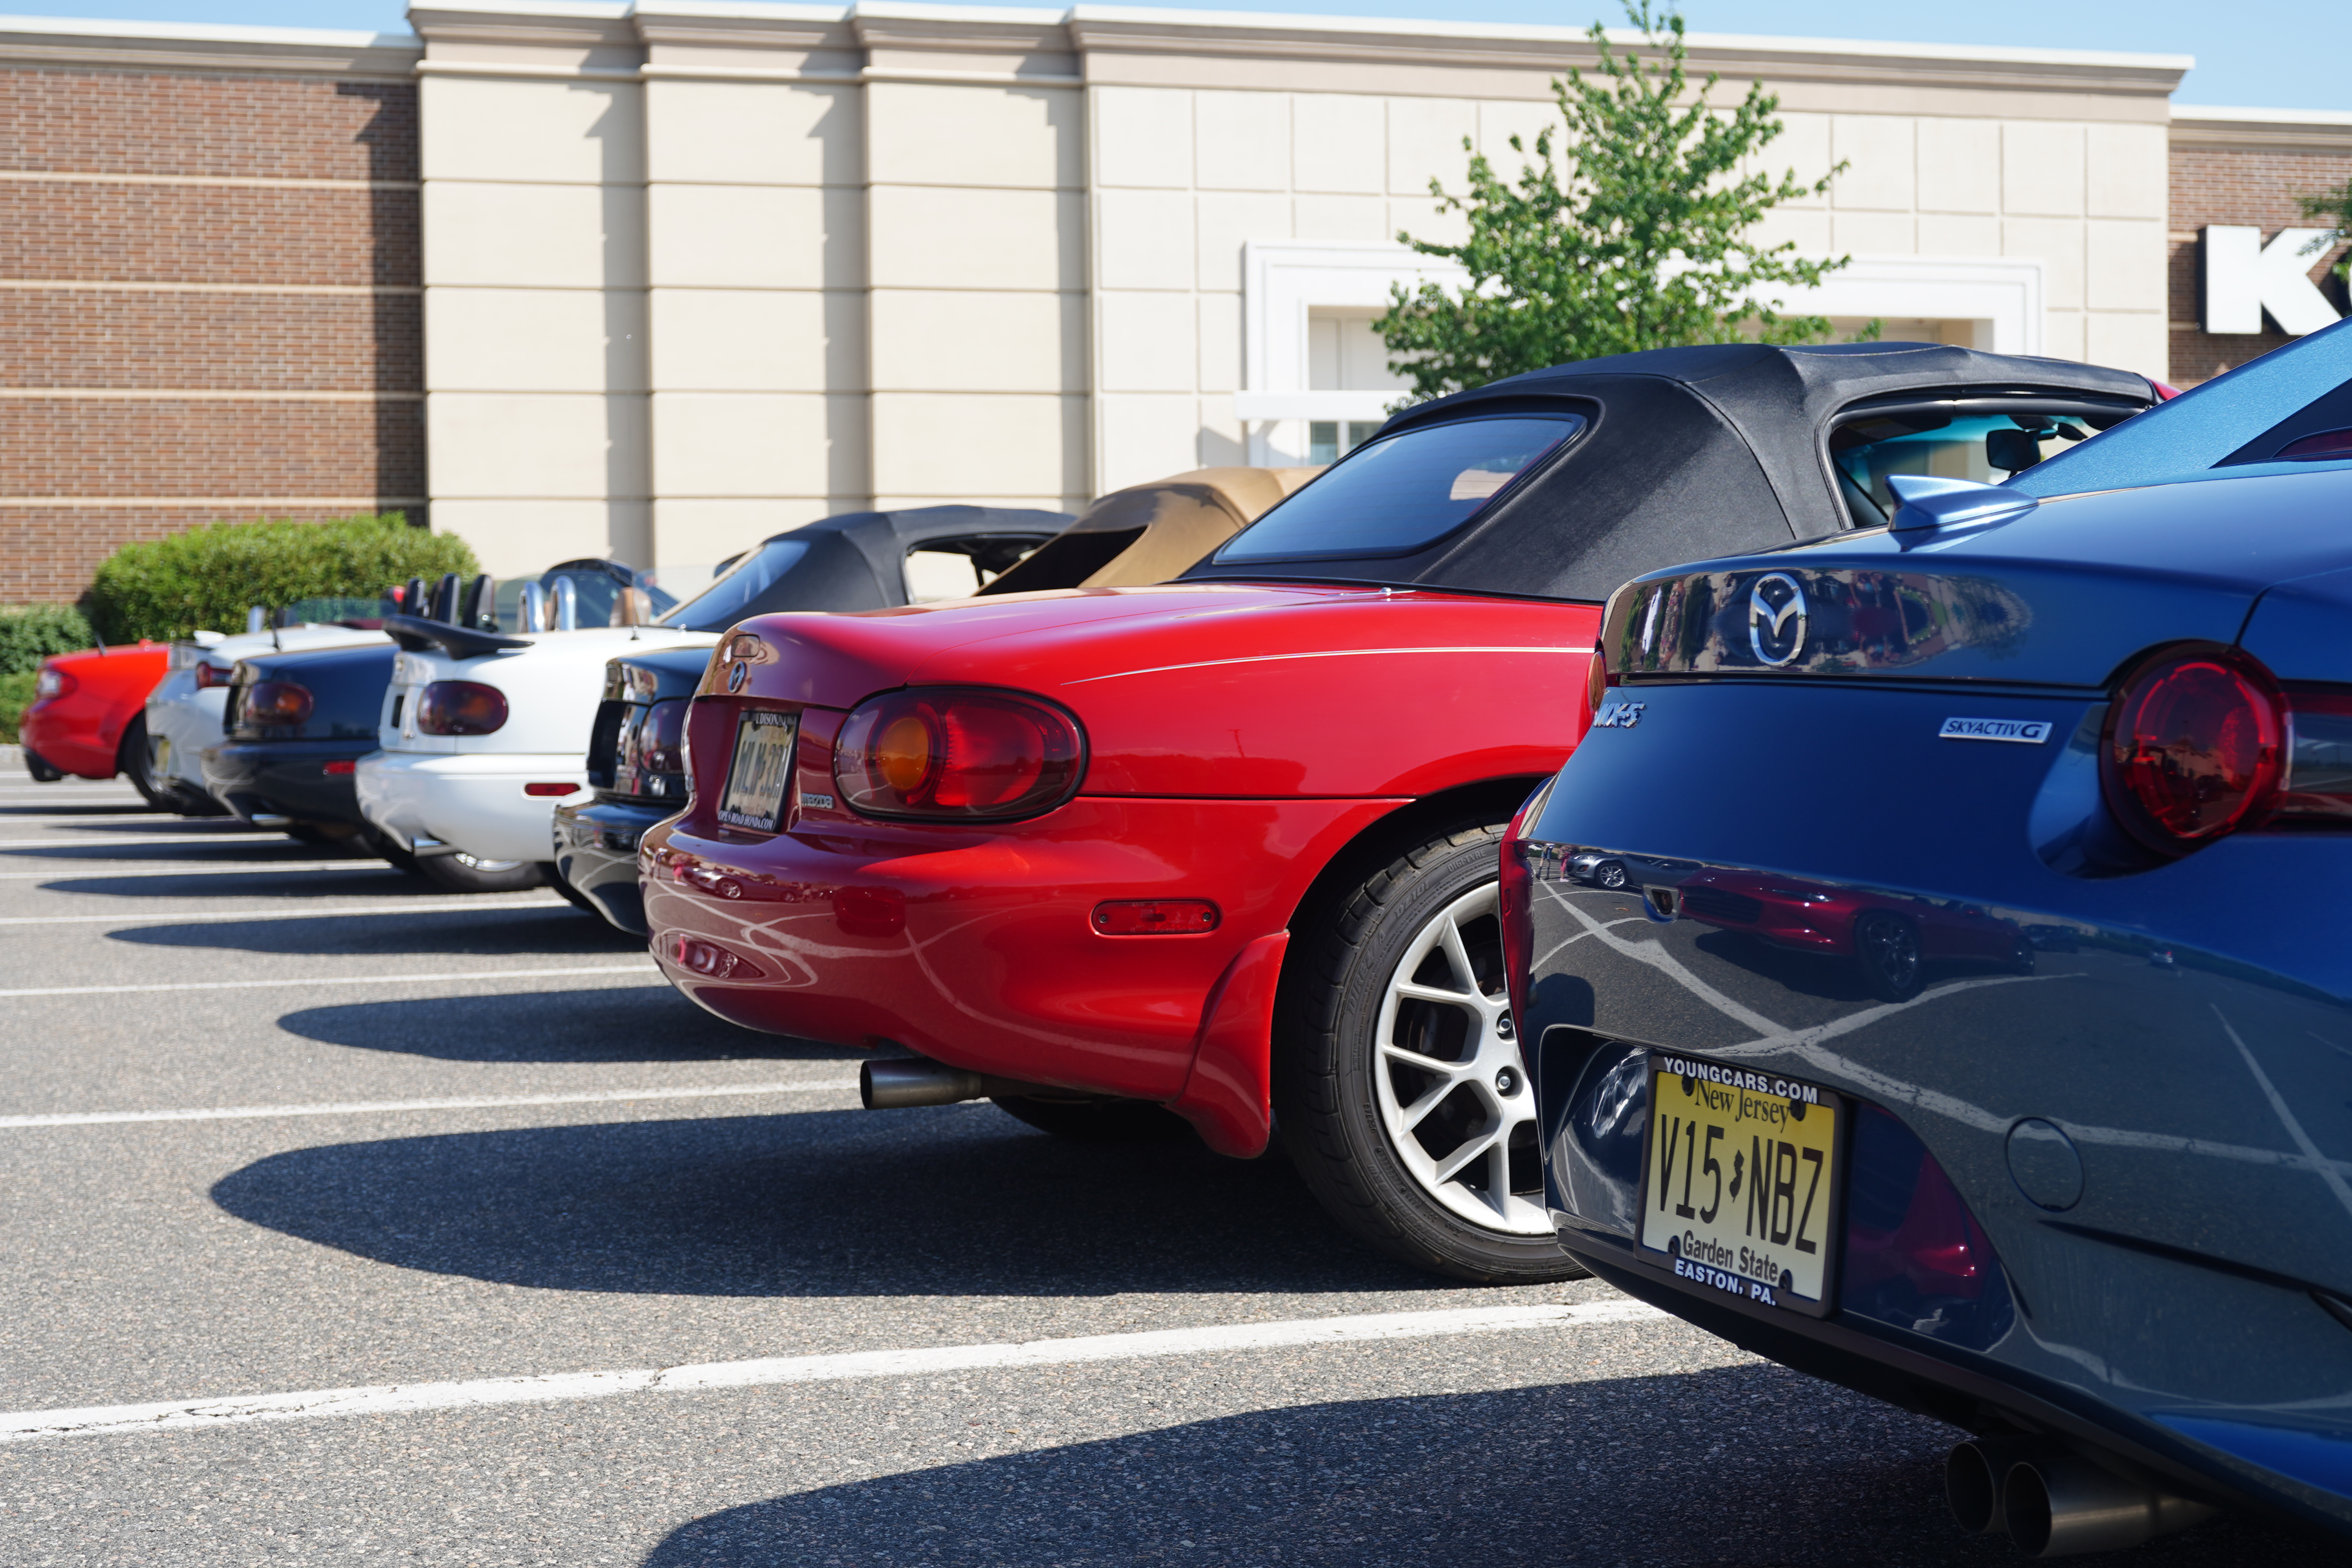
Above: the red NB and blue ND compare back ends
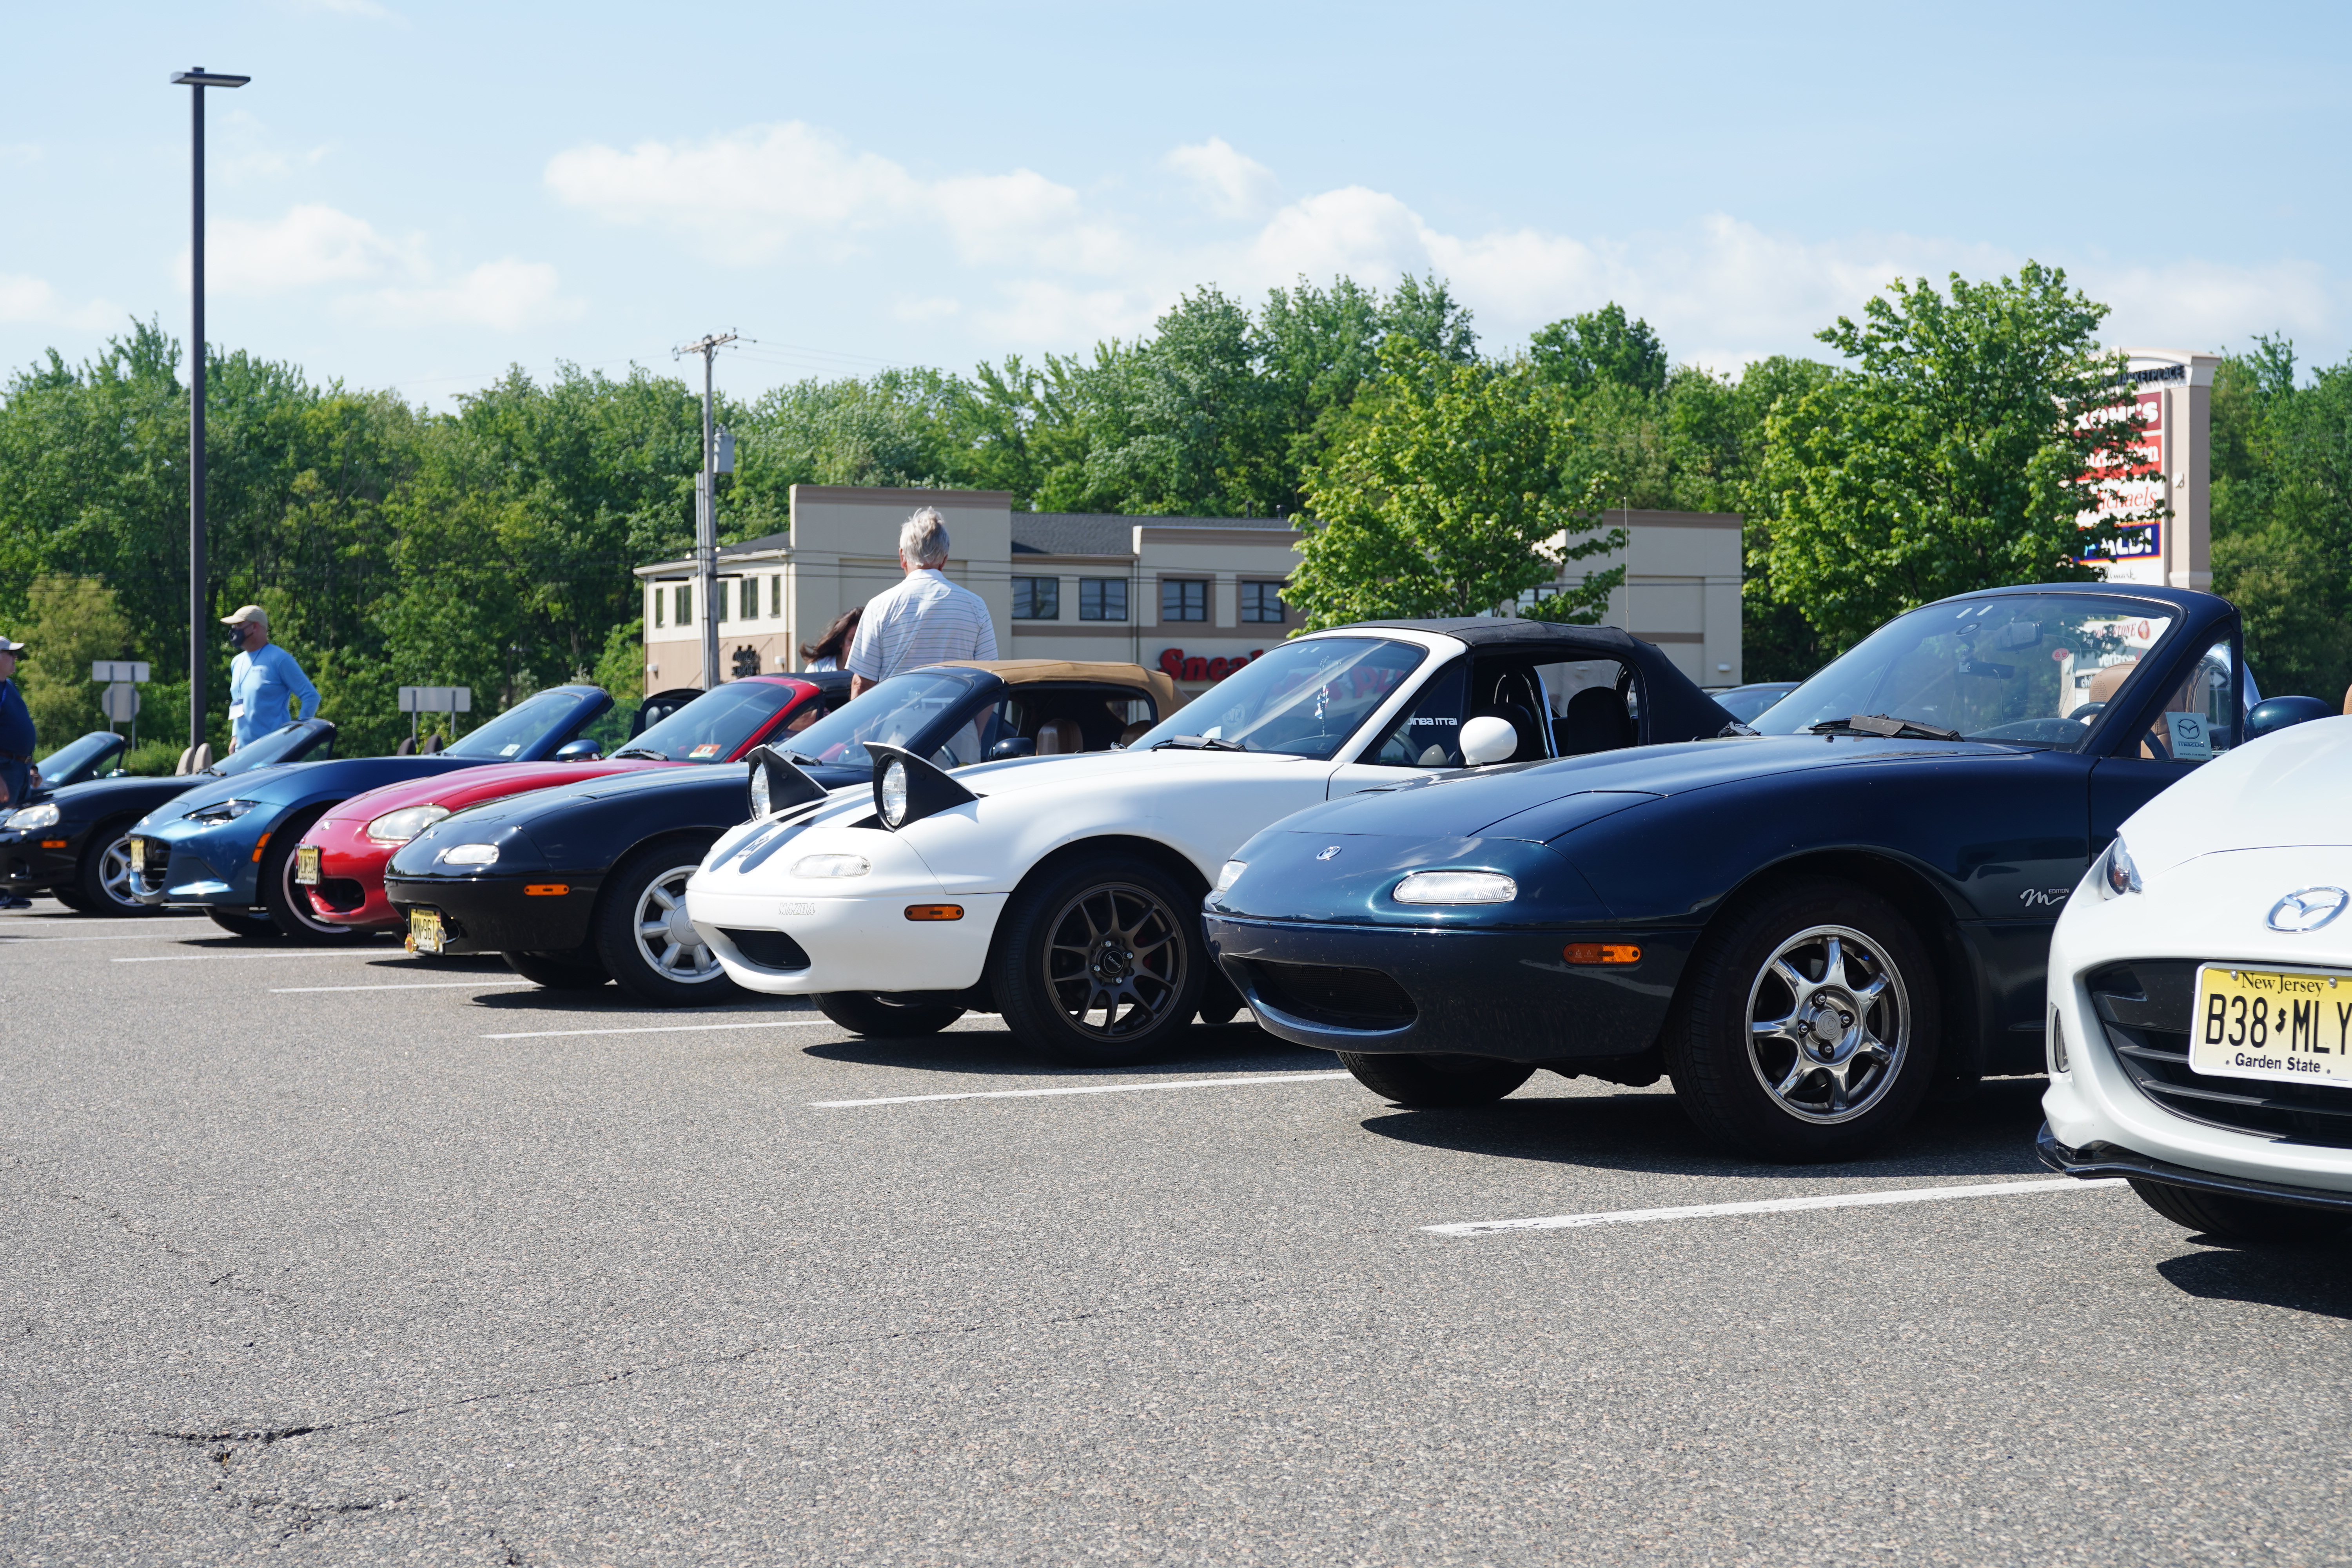
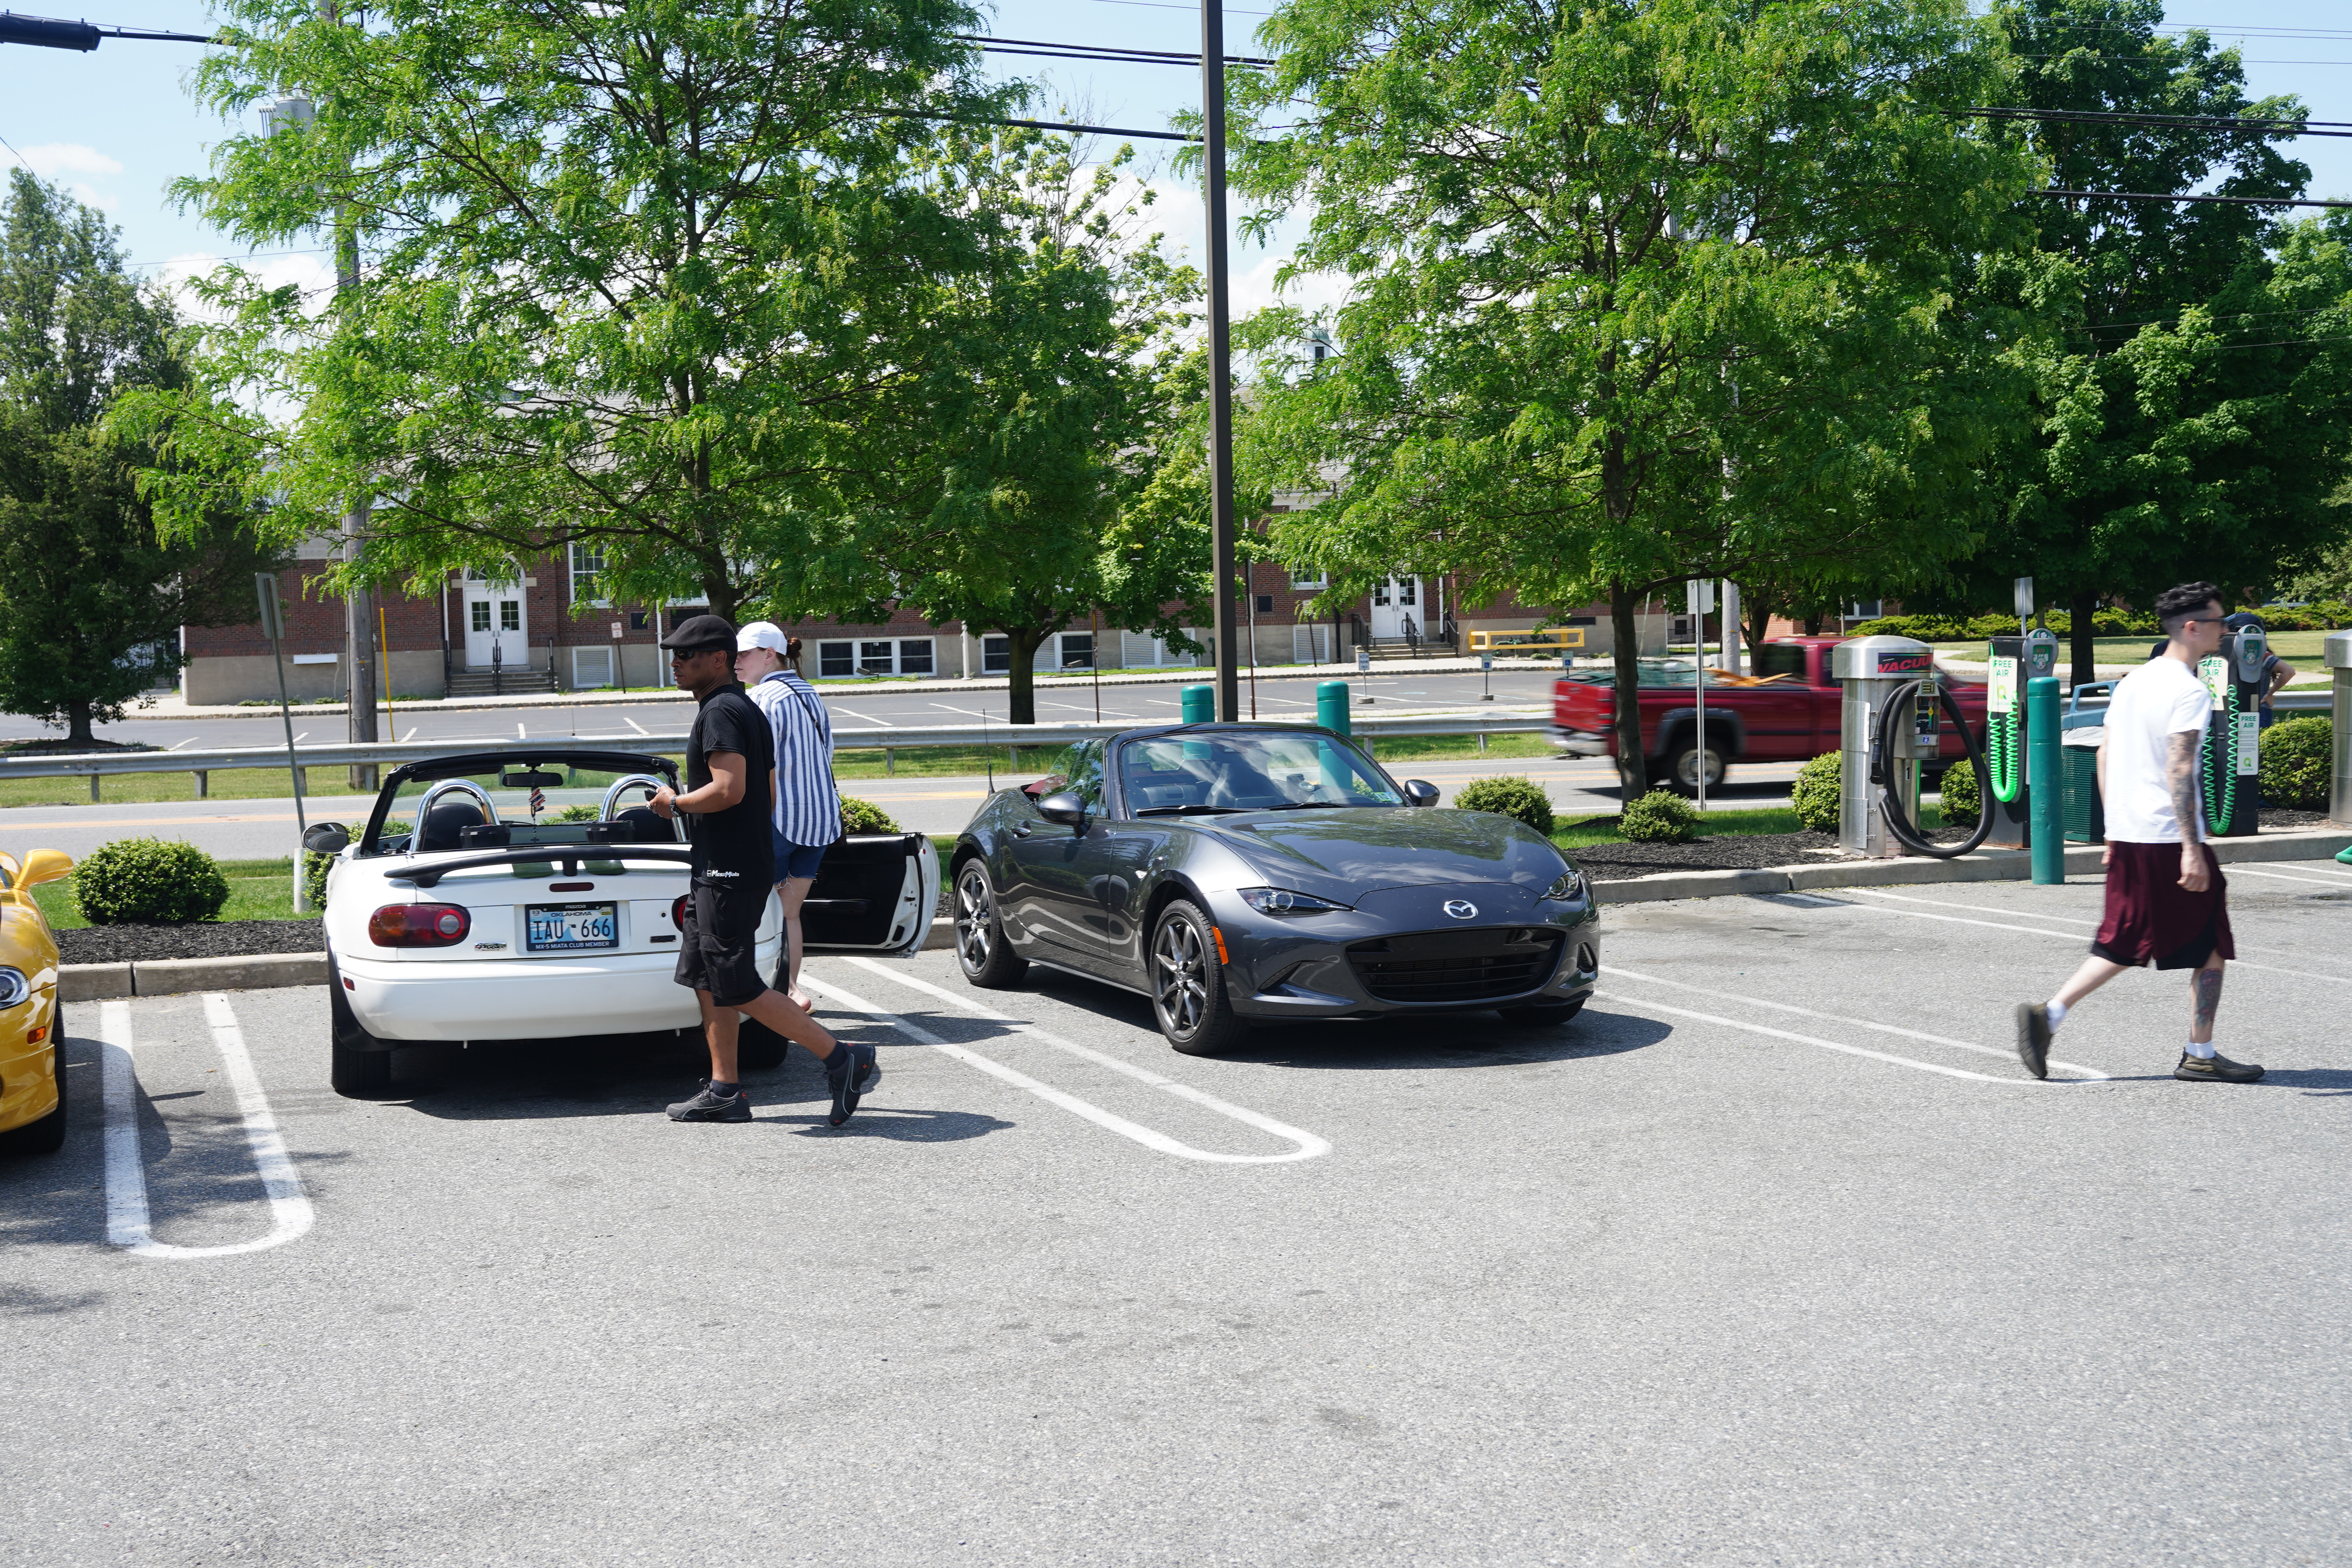
Above: the white NA rides with headlights UP
Alas, this was not to be for me in 2020. Looking at my mileage log, I put 178 miles on the convertible in 2020, an all-time low, and the lowest since I did 762 miles in it in 2012. I vowed to myself that 2021 would be different, and it’s gotten off to a good start. I already have used it in several events, and on Sunday May 23, I participated in my first DelVal Miata Club drive.
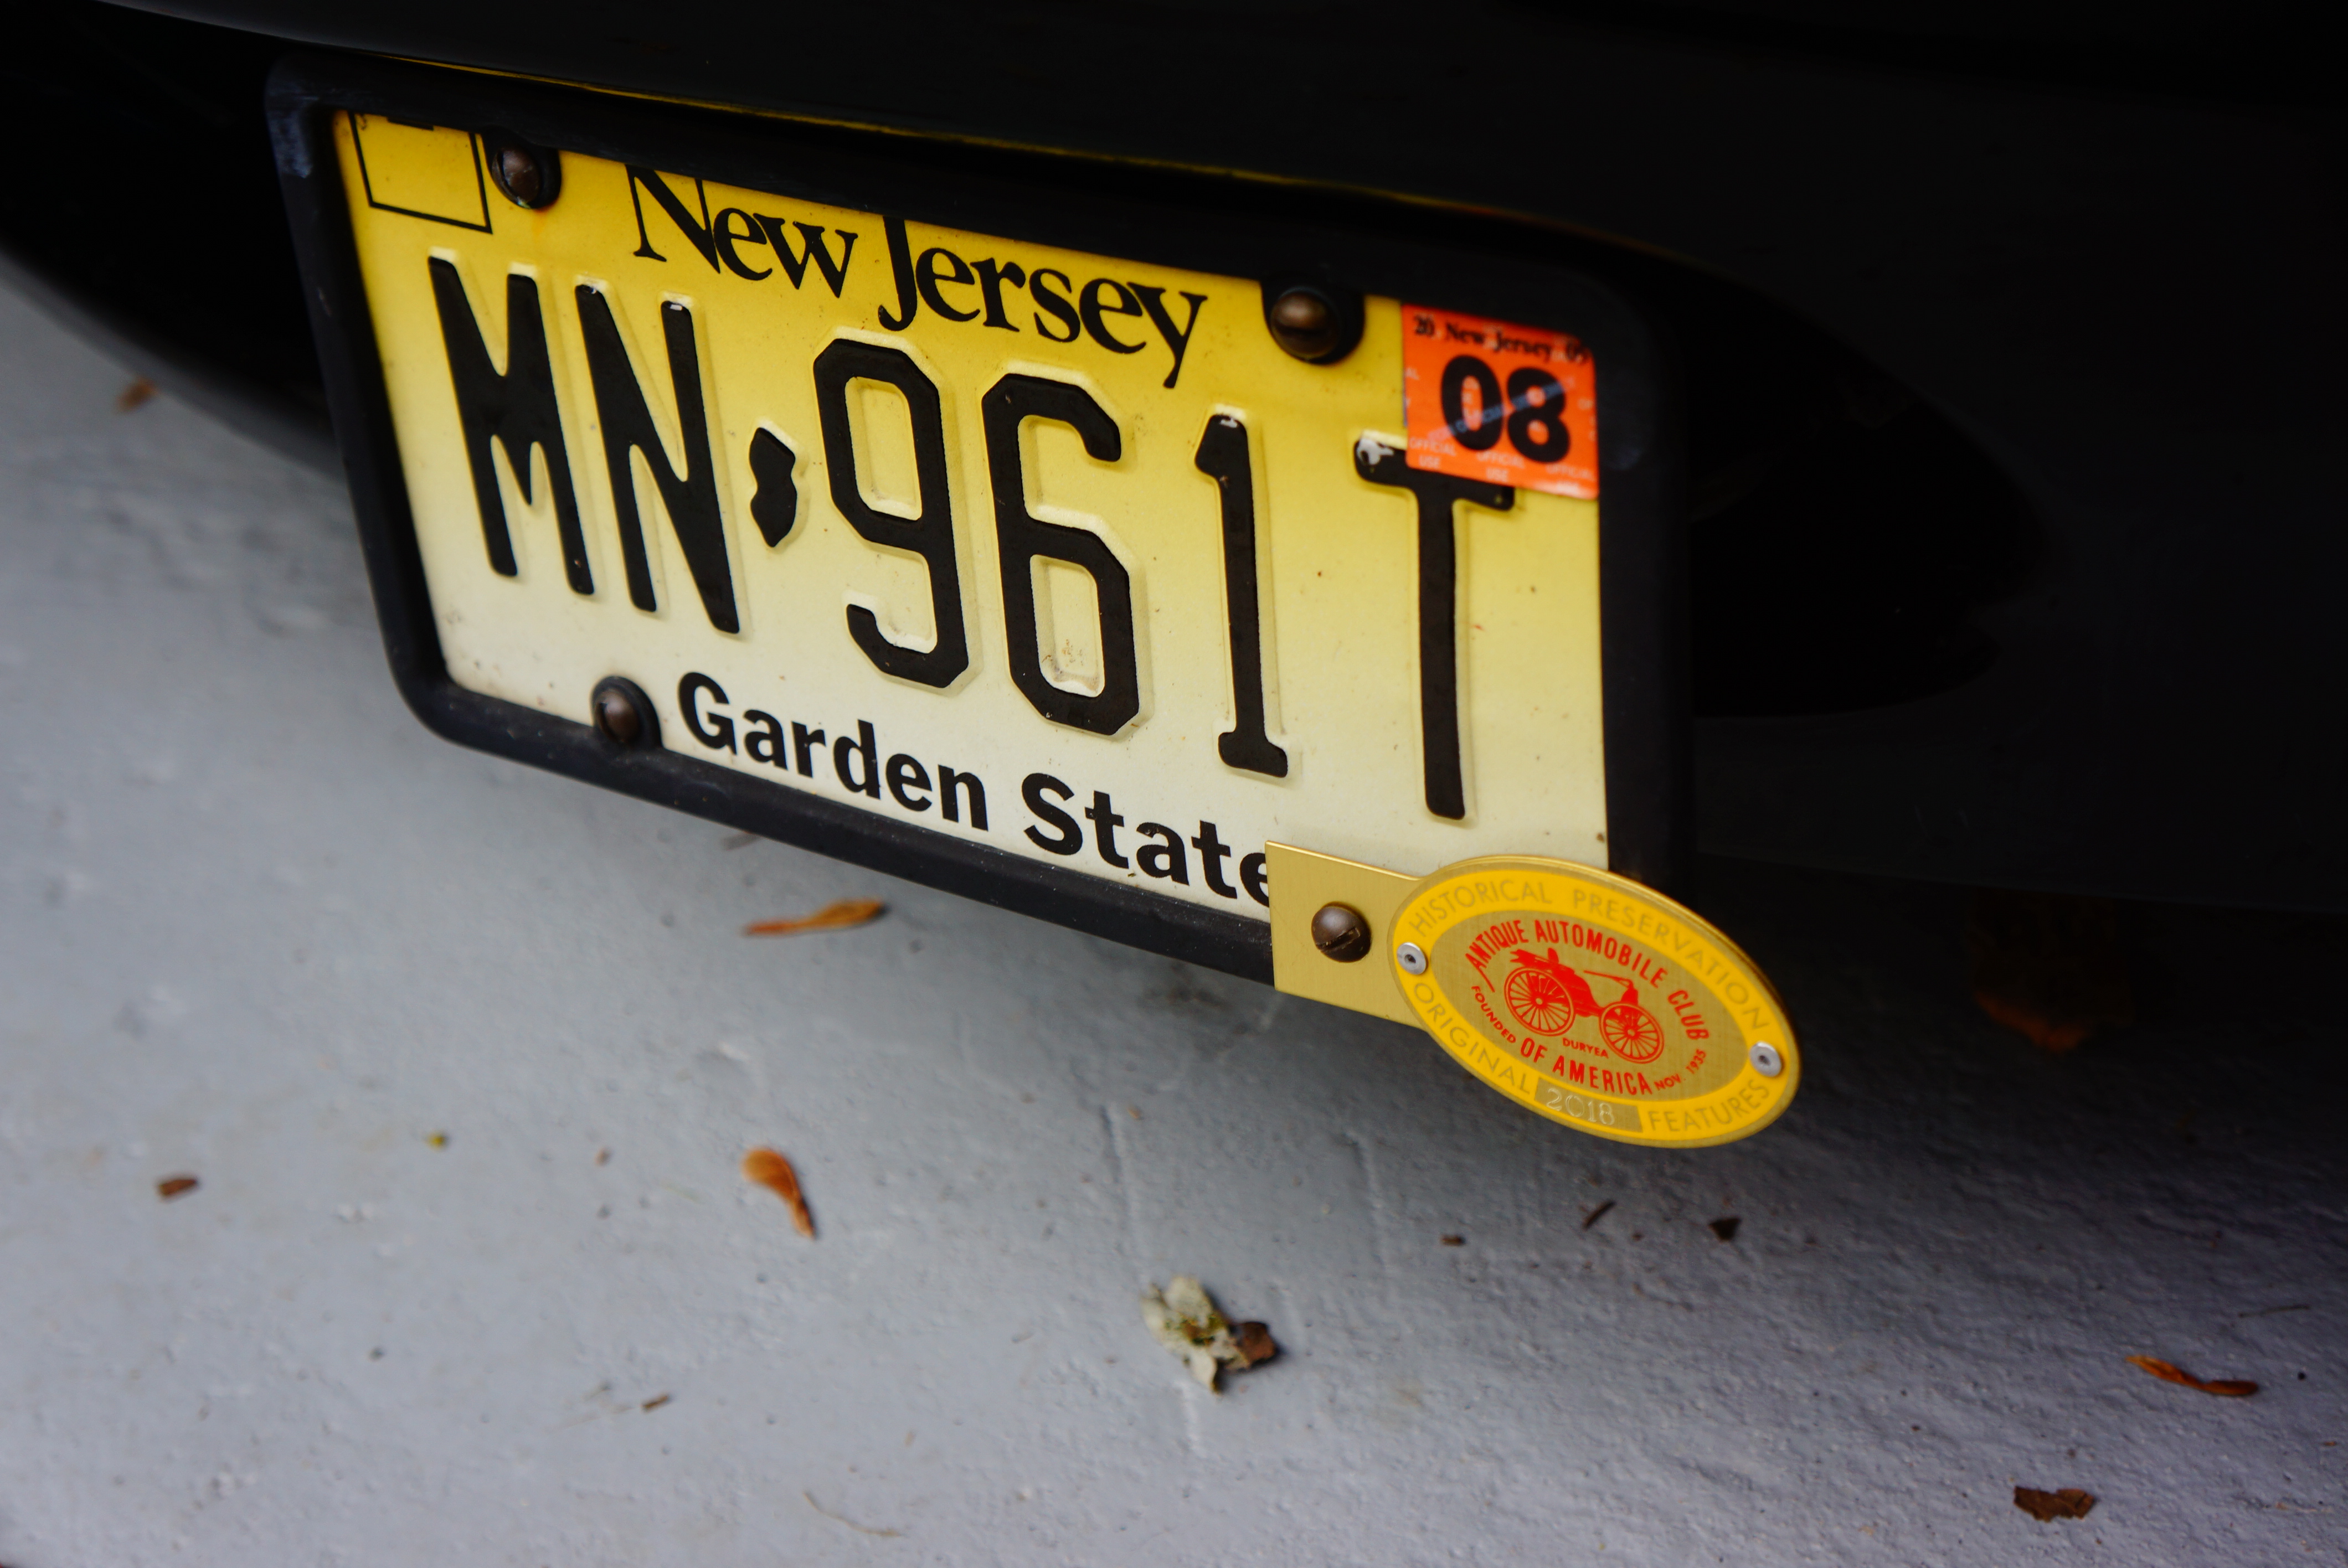
Above: my black ’93, with frontal jewelry, showing its face at a Miata club event for the first time
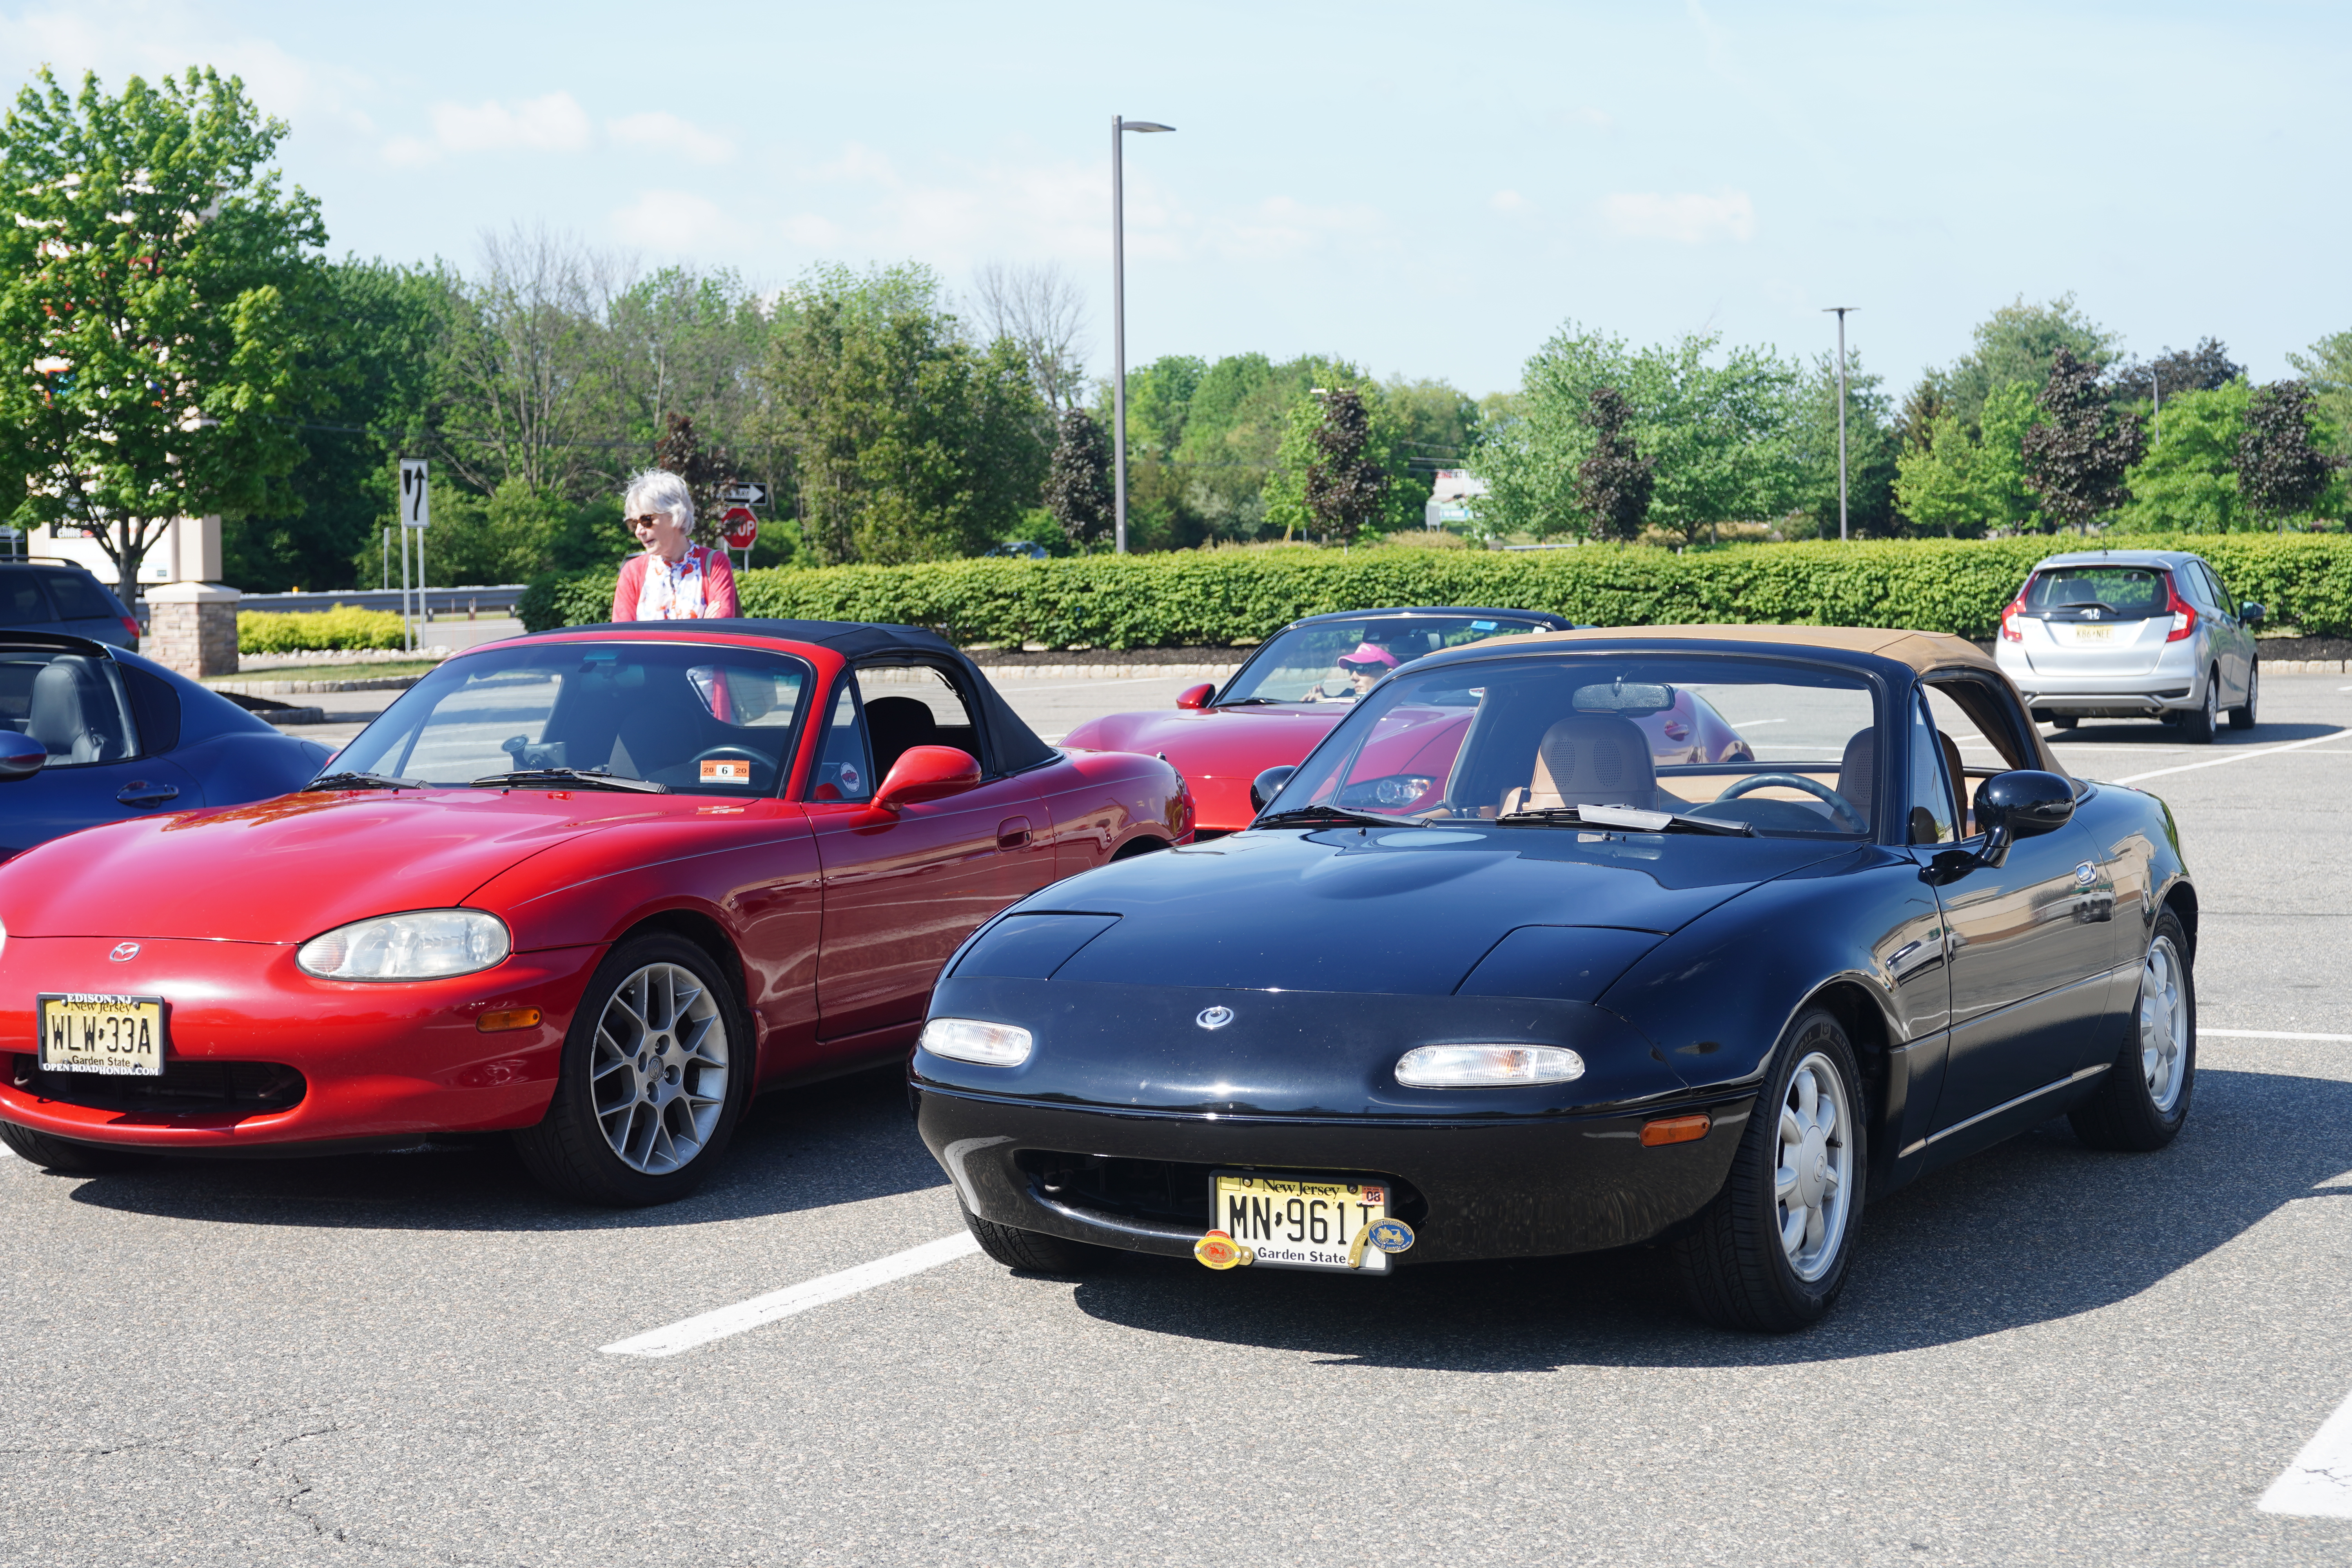
The start point was the parking lot of a strip mall in Flemington, all of 6 miles from me, so that was part of the impetus for me to participate. The planned route was to follow NJ Route 519 north, which we would pick up just a few miles west of Flemington, and drive all the way to Route 206 in Newton, about 75 miles away. There were about 25 Miatas of all generations in the lot when I showed up, and many people seemed to know each other, which was no surprise. I made some idle chat with a few folks, and then the driver’s meeting was held. There was little to discuss other than the revelation that the group was so large, we would split in half, with the second wave departing about 15 minutes after the initial bunch pushed off. I was in the first group, and got myself situated somewhere in the middle.
Above: Driver’s meeting in progress
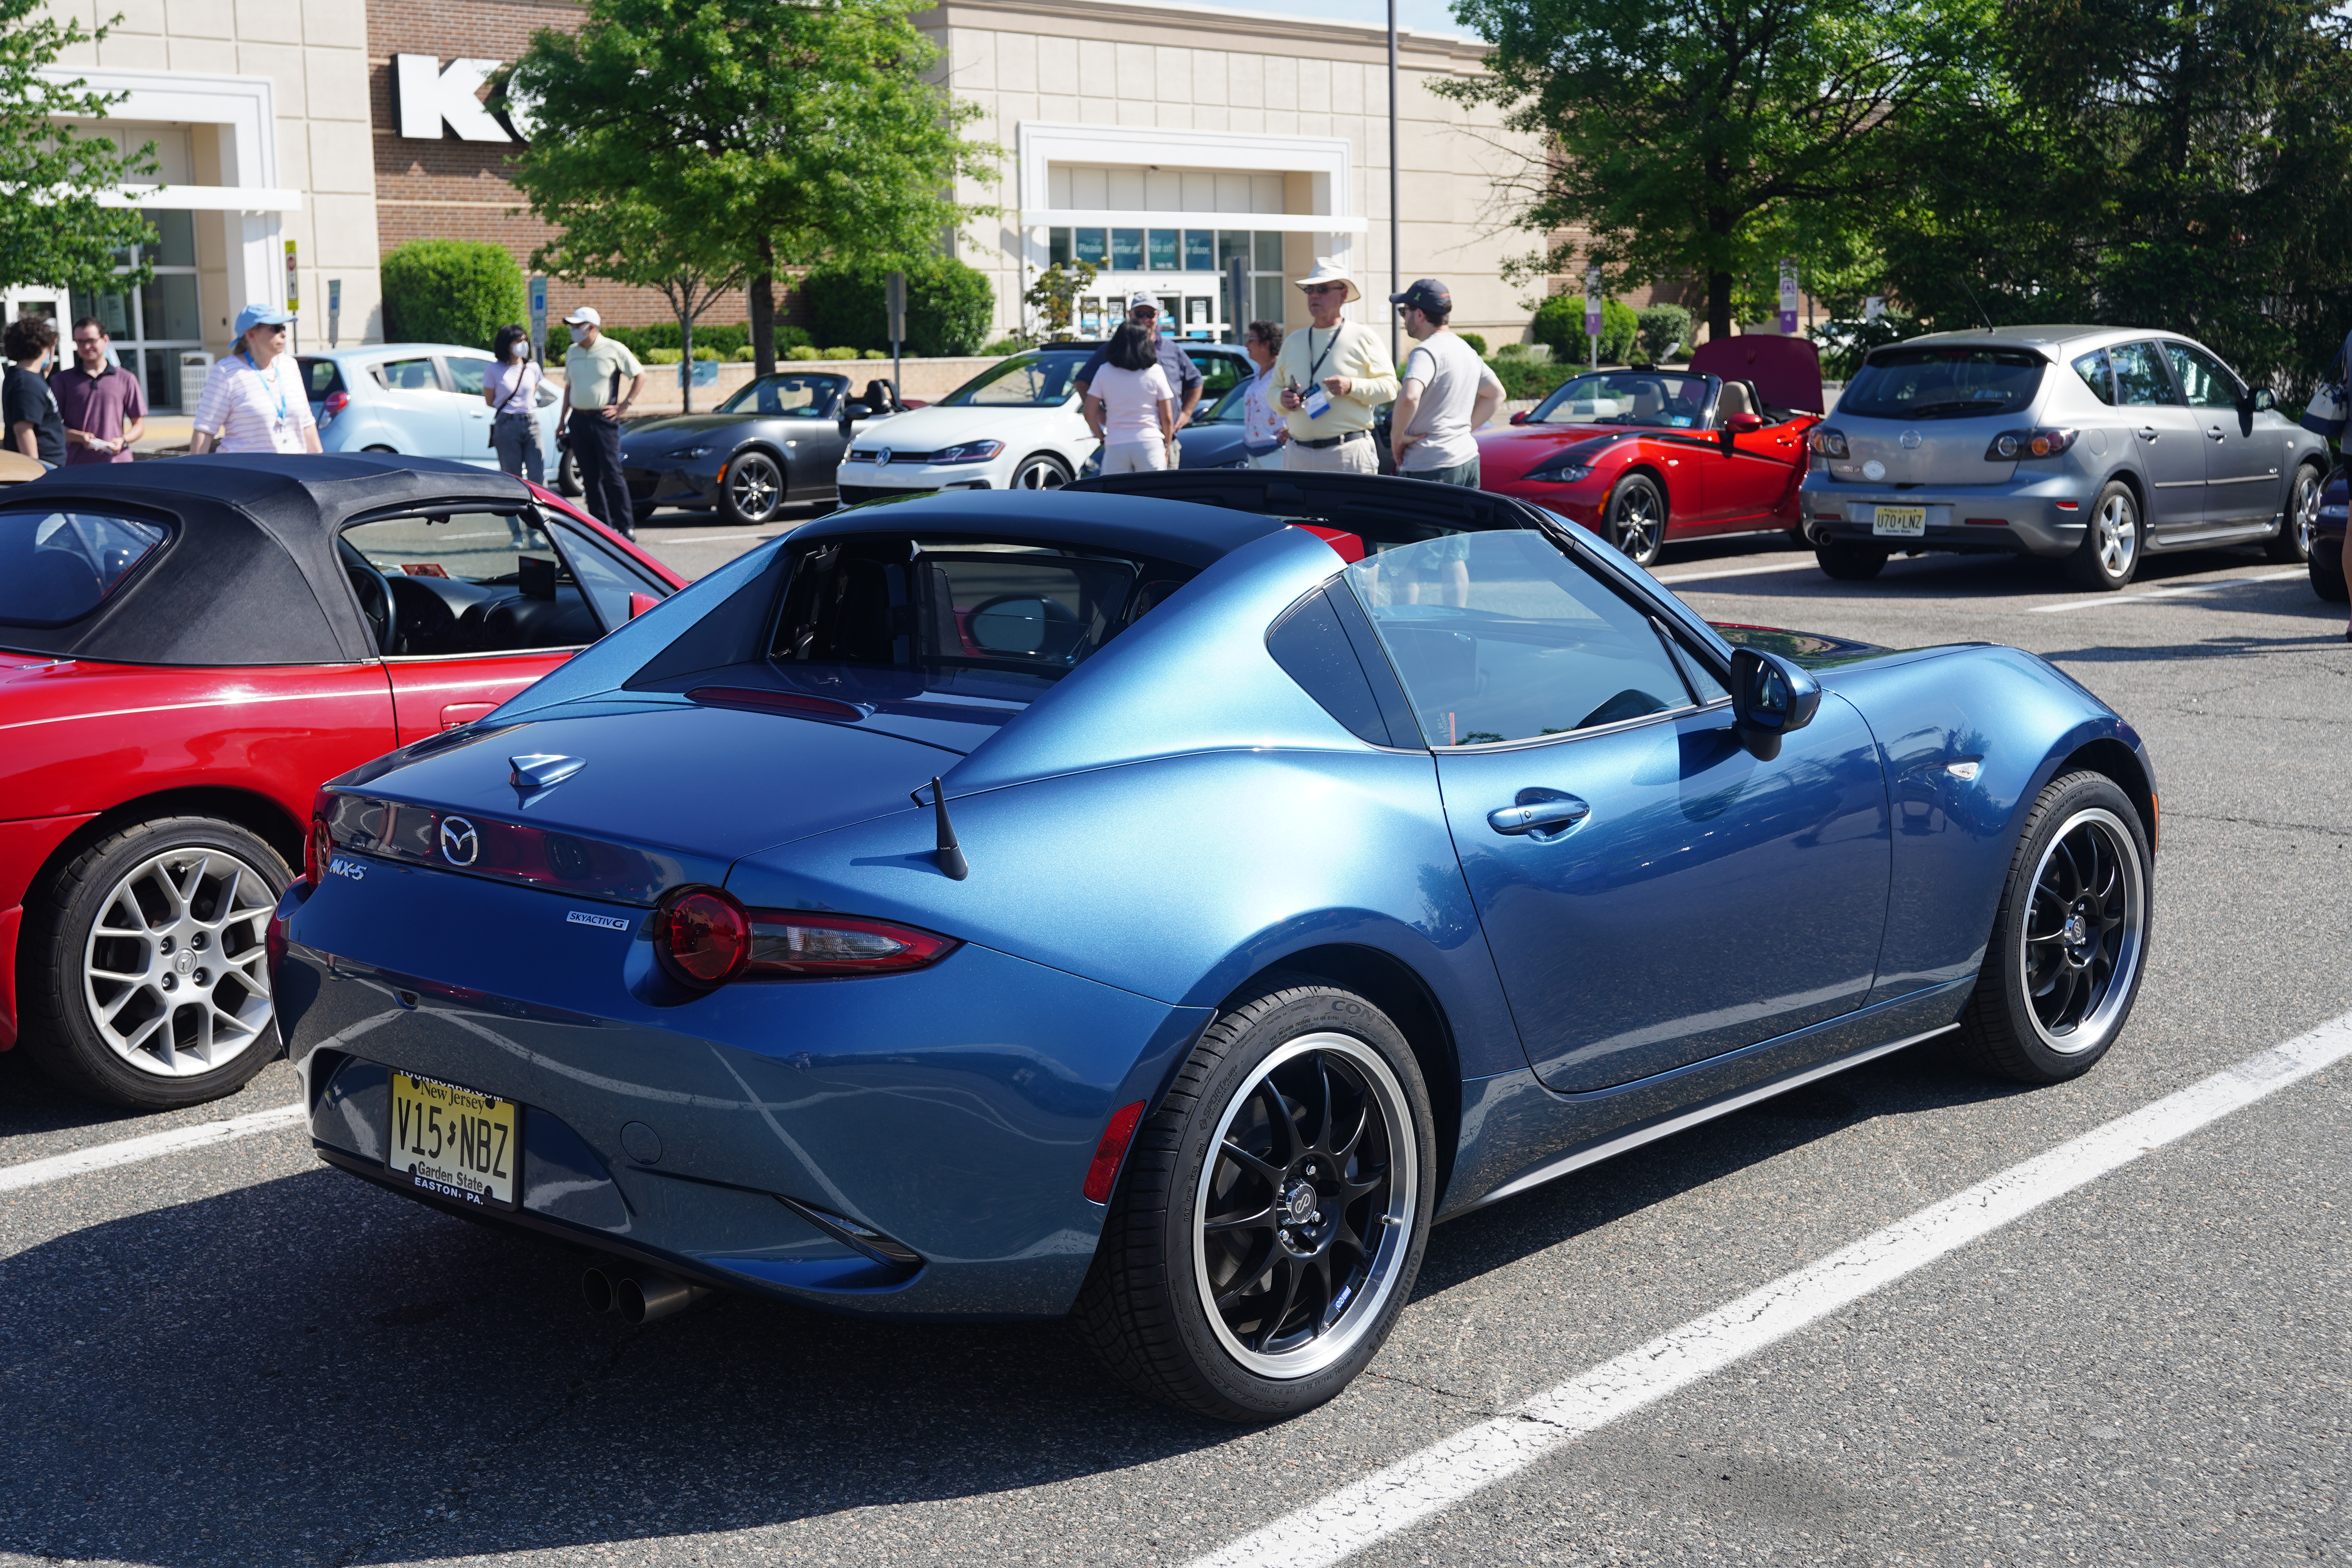
It was great fun to have a string of Miatas as far as I could see in front of me, and almost as many to my rear. I mentioned earlier that there were cars of all generations. I’ll briefly explain that Mazda has so far built four generations, what insiders refer to as NA, NB, NC, and ND (this based on VIN code). My car, an NA, is of the generation built from model year 1990 to 1997. The NB cars look almost identical to the NA ones; the big giveaway are the exposed headlights on the NB (only the NA had retractable headlights). The NC cars have pronounced fender flares, and sit a bit higher compared to previous cars. There was a retractable hardtop option on the NC. The ND styling is probably the biggest departure of the four generations, but it also brought the car back very close in size and weight to the 1990 version. The ND is also available as an RF (Retractable Fastback) which opens the top but leaves the structure around the rear window in place.
Above: this blue RF ( retractable fastback) was striking looking; note the custom wheels
Above: the view from the driver’s seat
Back to our drive – we were motoring along at a good clip, a bit above the posted limit, but not too aggressively so, when we came to our scheduled pit stop, a Quick Check, which gave us a chance to fuel up, use the facilities, and grab a cold drink. Then it was back to the cars and back on the road, continuing north on 519, easy to say but less easy to do when foliage sometimes blocks the road signs. It took us a bit over two hours to reach Route 206, where we turned right, and following the cars immediately in front of me, entered a diner parking lot a short distance ahead. This is where I discovered that everyone was on their own for lunch, as most of the remaining Miatas motored past us, on their way to some other eatery.
Above: Quick Check rest stop in progress
About 14 or 15 of us entered the diner and sat. I got to chat up a bit more with some folks I had not seen earlier, and somehow it came out that I also have an Alfa Romeo at home. “That’s YOUR problem!” one woman good-naturedly teased me. I guess they think that their Japanese sports cars are somehow more reliable than my Italian sports car…. We all ate, we all chatted a bit more, then we all left for home, heading in all different directions. Perhaps it’s because the group is new to me, but this was a bit different compared to my own breakfast driving club or the Alfa club. The primary focus of this Miata club is to drive, and there’s nothing wrong with that. I would have preferred if everyone ate together, but that was not up to me, and logistically that may have not been possible, at least not this time. I’ll certainly join this group on future drives, and I’ll try to befriend some more club members.
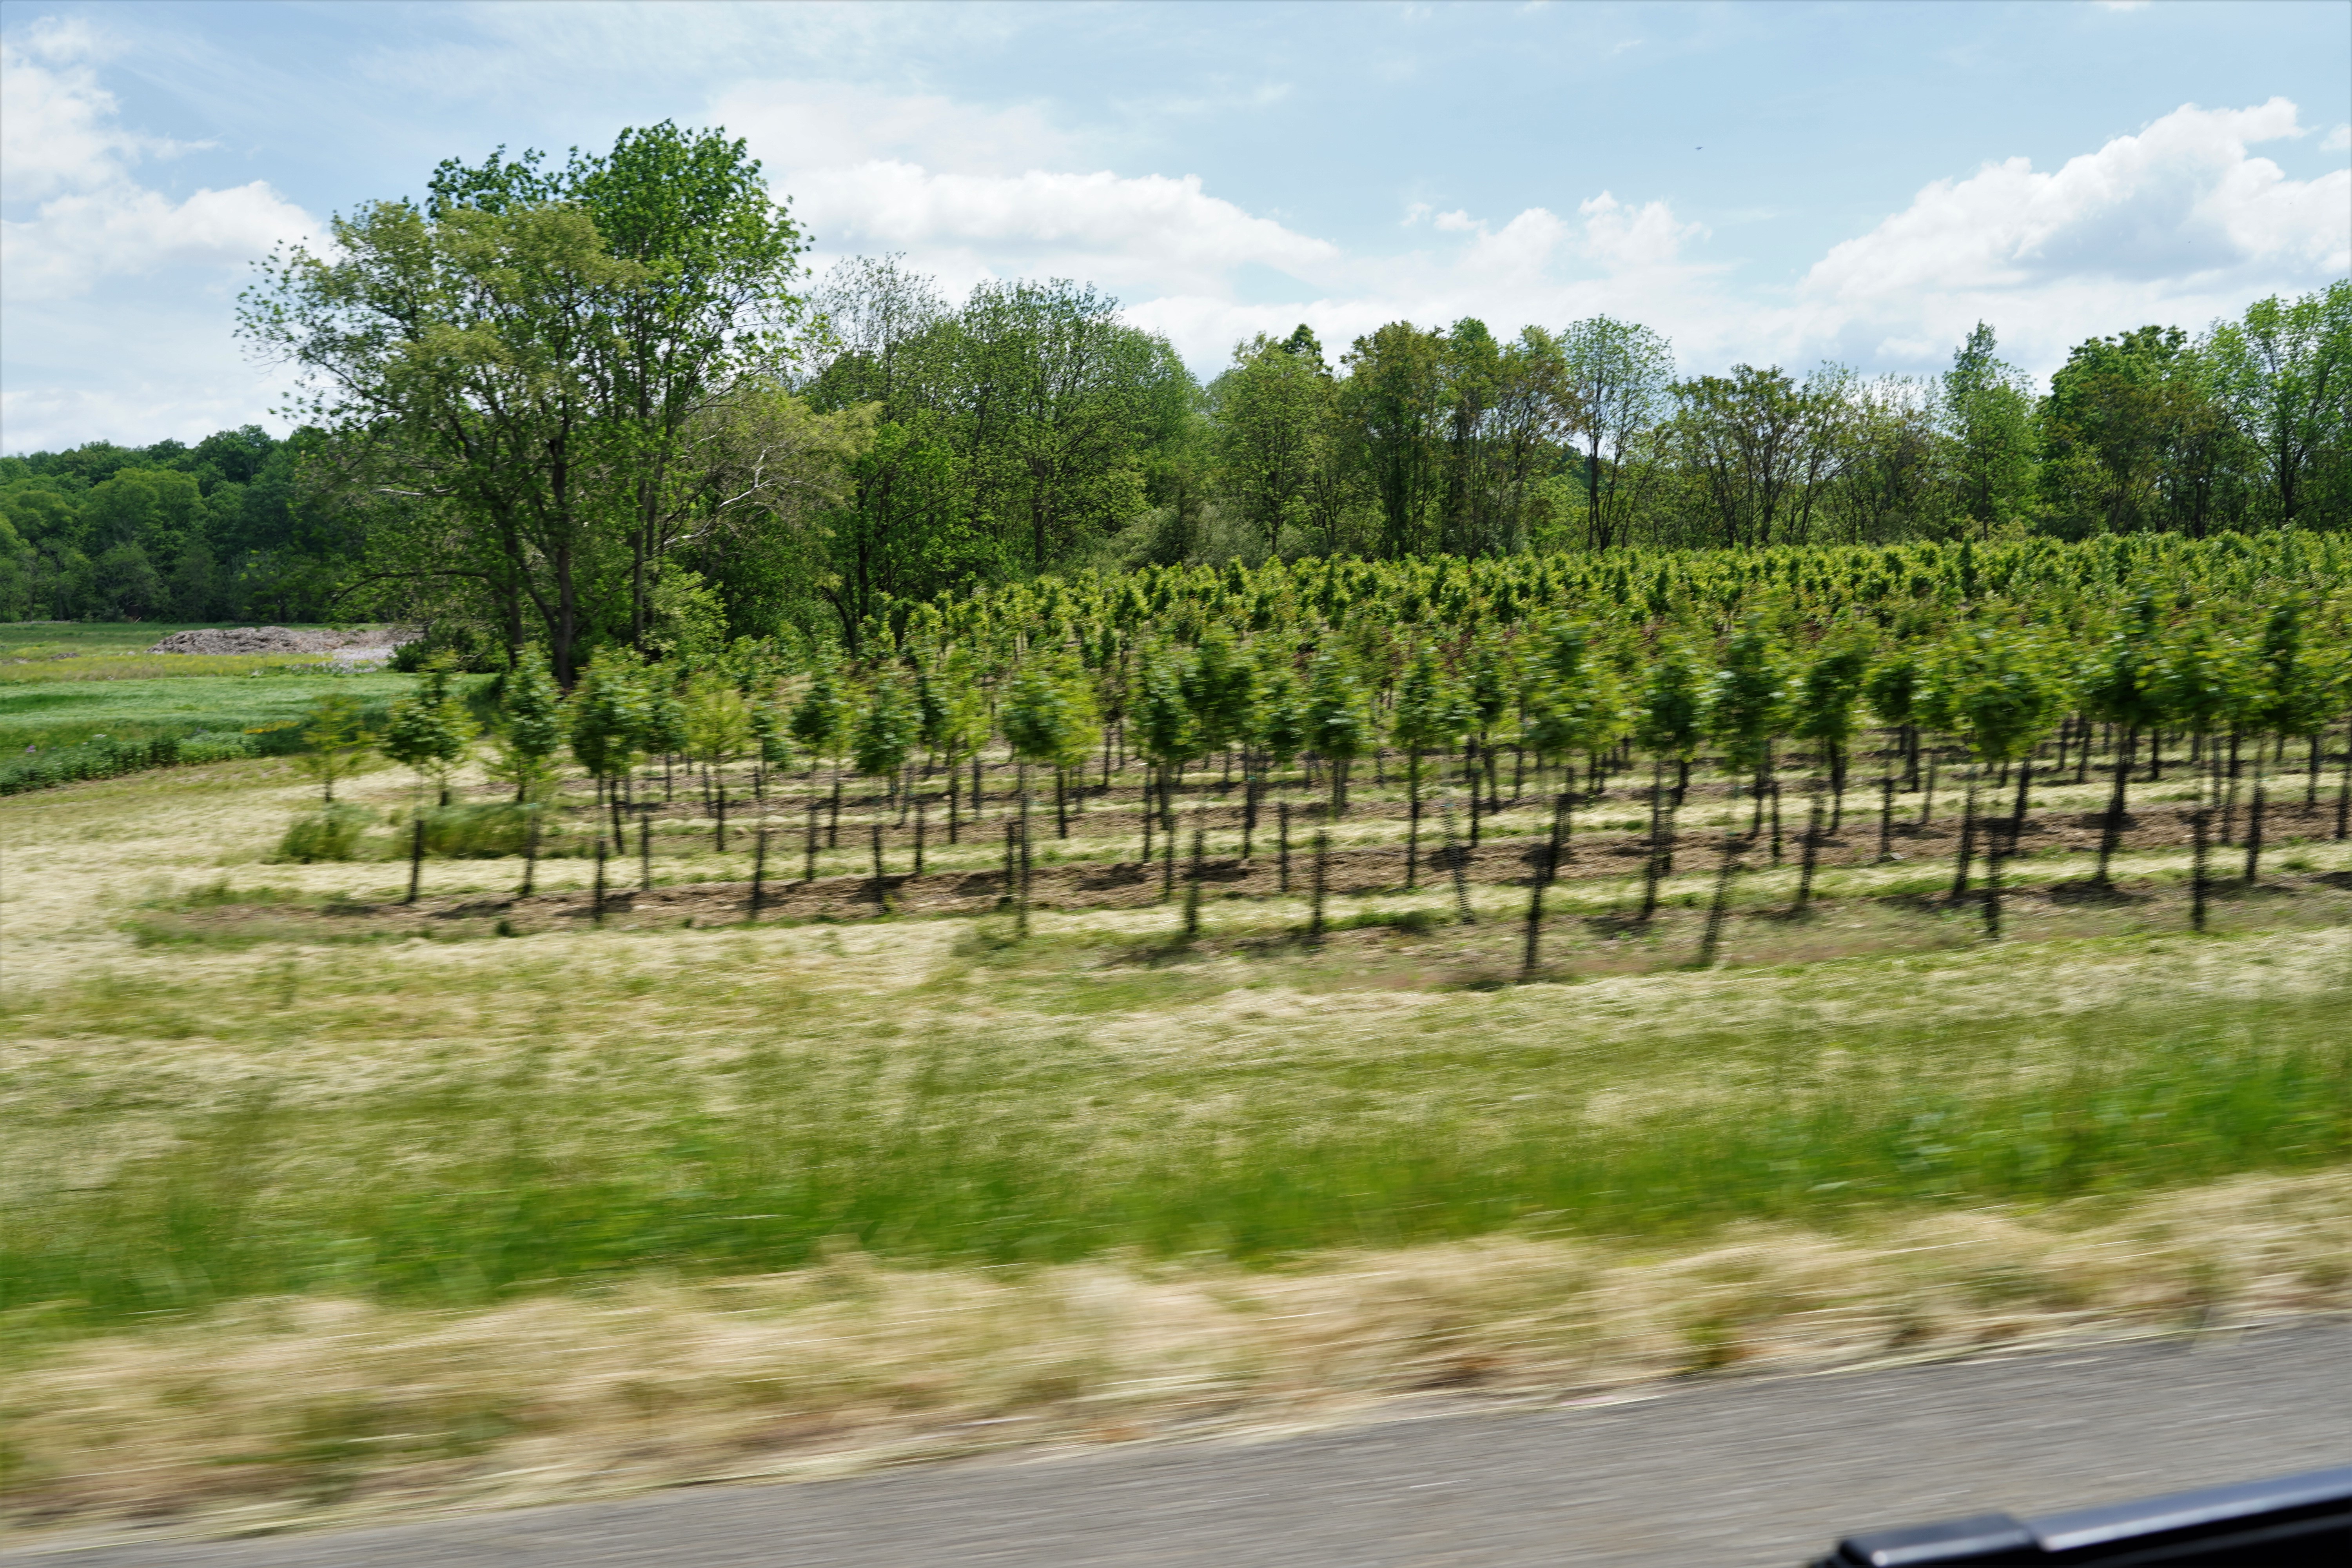
Above: there is some beautiful scenery in western Jersey
Above: the Miatas managed to stay together on this lightly-traveled road
A frequent question I get is “what makes a car a classic?” There is no one right answer. The definition of such a car can be up to you! If you think your vehicle is “interesting” on some level, and the car is used more for special occasions (anything from Sunday drives to cruise nights) than as a daily driver, then it fits the bill. Who am I to say that a 3-year-old Camaro which is only driven in dry weather to GM-themed events isn’t a collector car?
Attending various shows around the Northeast bears this out. The variety and quality of vehicles at a Boonton NJ cruise night is certainly different than what’s seen at The Greenwich Concours. Driving events run the gamut from our own Sunday breakfast cruises (featuring a “run what you brung” mentality) to the million-dollar cars in the New England 1000 rally. Sometimes there are no rules, and other times the rule book is voluminous.
Attendees at Antique Automobile Club of America (AACA) shows typically see cars which have been restored to the highest professional standards. A true “#1 condition” car is rare, but you’ll find them in the AACA. These cars are almost never driven on the road; the engines are run long enough to move them into and out of an enclosed trailer to preserve their perfected state, and that’s it for the driving.
My first AACA experience was Hershey in the early 1980s. As a young man not yet 30, the rows of perfect Mustangs and T-Birds depressed me into concluding that I’d never have a vehicle which could qualify there. These owners’ cars were judged by arbiters who would dole out trophies and bragging rights, so there was no such thing as “too nice”.
Except, there was. The Overseers at AACA began to realize they had a problem: strictly speaking, their own rule book said that cars should be restored to be as close as possible to “factory new” condition, when in practice many of these cars were better than new. Trim which the factory buffed was now chromed; single-stage paint now wore a clear coat; and unpainted surfaces were now sealed. It’s a condition called “over-restoration”. Some owners complained that their ultra-low mileage never-restored cars were losing out to restorers with deep pockets and questionable taste.
To its credit, AACA created a new judging class: the Historical Preservation of Original Features, or HPOF. The concept was simple: reward vehicle owners whose steeds still were screwed together as the factory did it. Dull paint and worn upholstery didn’t matter, but original equipment and fittings did. The goal was to encourage the preservation of cars in their original state for future generations to observe, study, and learn from them. HPOF has become a very popular category for owners and spectators alike.
As a separate class, there would be no clash in trying to judge an HPOF car against a fully-restored one. An obvious example from the HPOF rule book is paint: a car must wear all or almost all of its original paint to be eligible in this class. In fact, a car which wins an HPOF award and is subsequently repainted will lose its HPOF accreditation.
Aug. 1996: me with my newly-acquired Miata (no SUVs on the streets yet!)
When I purchased my 1993 Mazda Miata in 1996, it was a gently-used 3-year-old car with barely 30,000 miles on it. The first-generation “NA” models were still in Mazda showrooms. The Miata got driven a lot, but never in the winter. I kept up with all maintenance on the car, and I can count the total number of repairs on one hand: a clutch slave cylinder, a power antenna, a heater core, and one headlight bulb. (Service items such as hoses, belts, fluids, brakes and tires are all part of routine maintenance.)
Oct. 2018: the same car on the Hershey show field
Perhaps the most difficult part of owning this car for 22 years (it now has 104,000 miles) has been avoiding the temptation to modify it. The aftermarket business for the Miata has always been strong and keeps getting stronger. I’ve been tempted to add a turbo; replace the stereo; reupholster the seats; install bigger brakes, wheels, and tires; and add interior wood trim. While a few small changes have occurred (I upgraded the floor mats and replaced some lighting with LED bulbs), the car appears the same as it did when I got it in ’96.
Wearing its new badge
This year, the car turned 25 and became eligible for AACA events. I was excited to enter it into the Hershey show in the HPOF category, and last week, the package arrived informing me that indeed, my 1993 Mazda Miata had earned its HPOF badge. I’m a proud papa, and plan to continue to enter this car in HPOF, notably, in the June 2019 National meet which the NJ Region is hosting in Parsippany NJ. There will be plenty to talk about between now and then.
The PLAN was to spend free time during this past winter working on the Miata. What happened? Where did the winter go? Of course, I ask that based on the CALENDAR, not on the actual WEATHER. (As I sit here composing this missive at 7:24 p.m. EDT on April 15, it is 38 degrees F outside, and the rain and wind make it feel like 31F. Clearly, it does NOT feel like spring!)
The to-do list for the ’93 Miata, drawn up last November, included: rear brake service, transmission service, new lights, new tires, and an engine compartment detail. I haven’t gotten very far. The first item to be tackled, the brakes, wasn’t started until March, and still needs bleeding and parking brake adjustment before it’s crossed off the list.
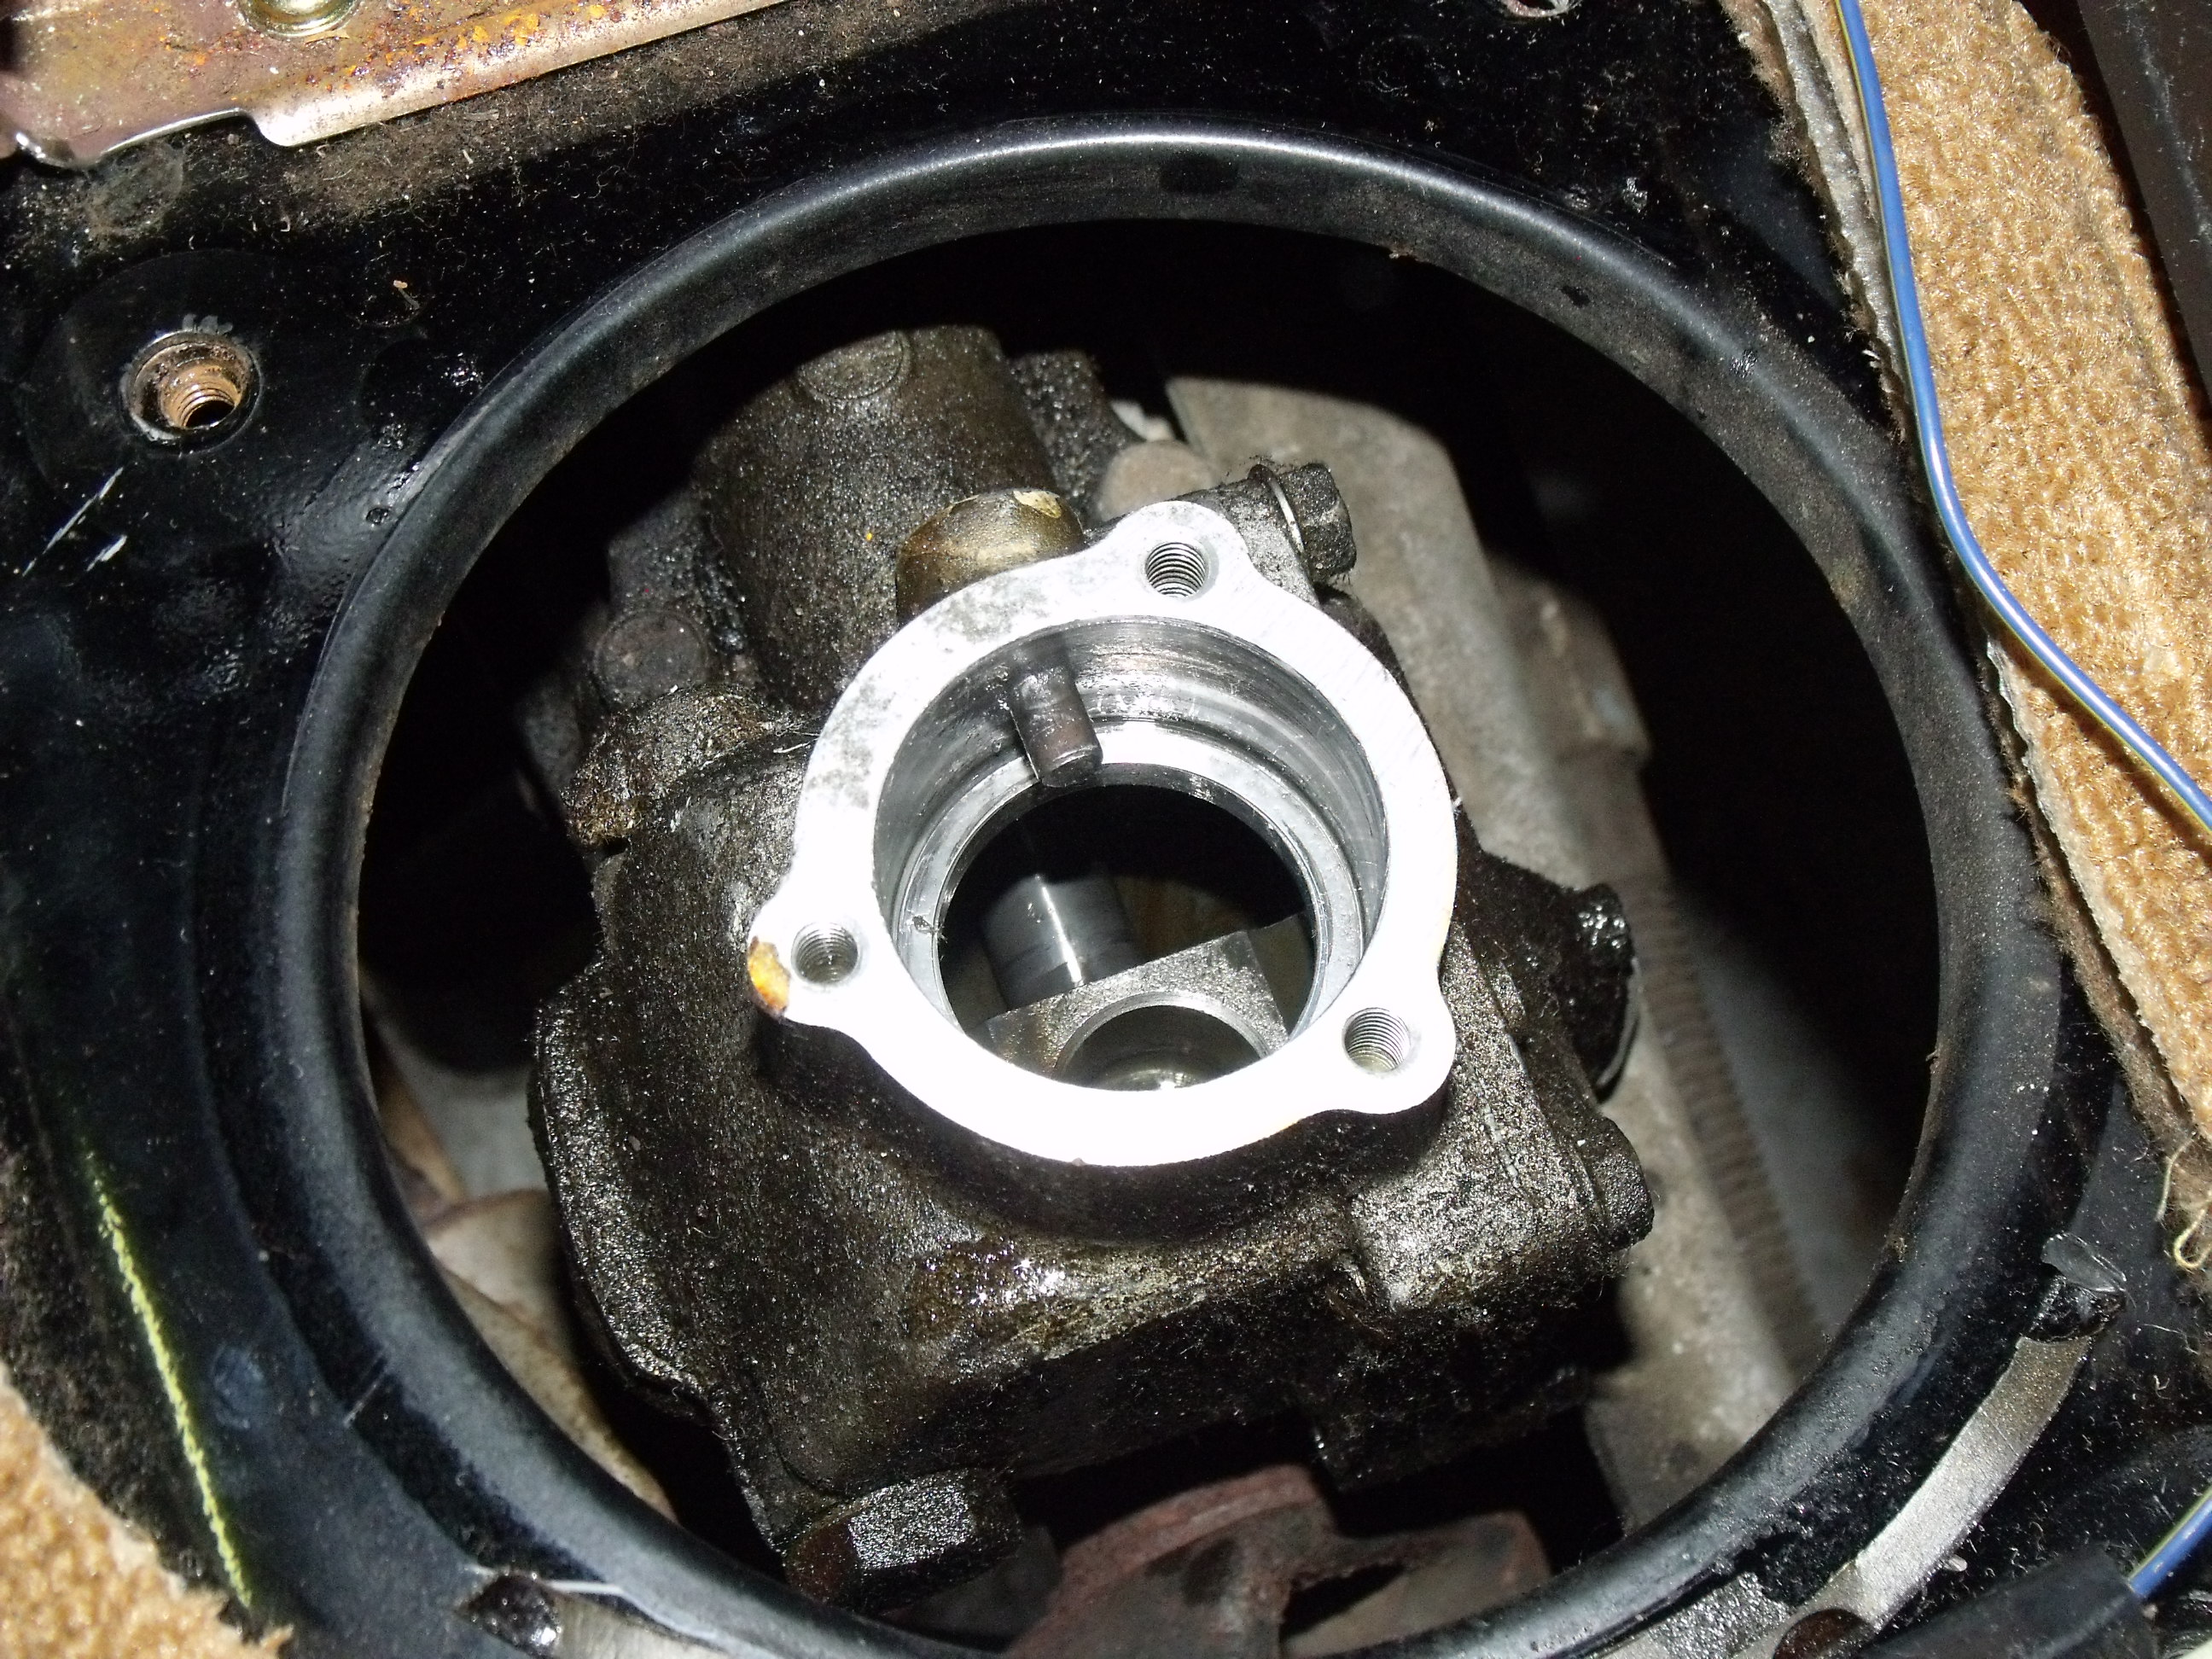
Since e-brake adjustment requires removal of the center console, I combined that with servicing the shifter. Here was a case where online forums provided information not to be found in a service manual.
My Miata service book, published not by Mazda itself but by an independent publisher, is quite good. However, it says nothing of servicing the shifter “turret”. The turret is an oil-filled box at the rear of the transmission, in which the shift rod connects to the external shift linkage. It does not share its oil with the rest of the gearbox.
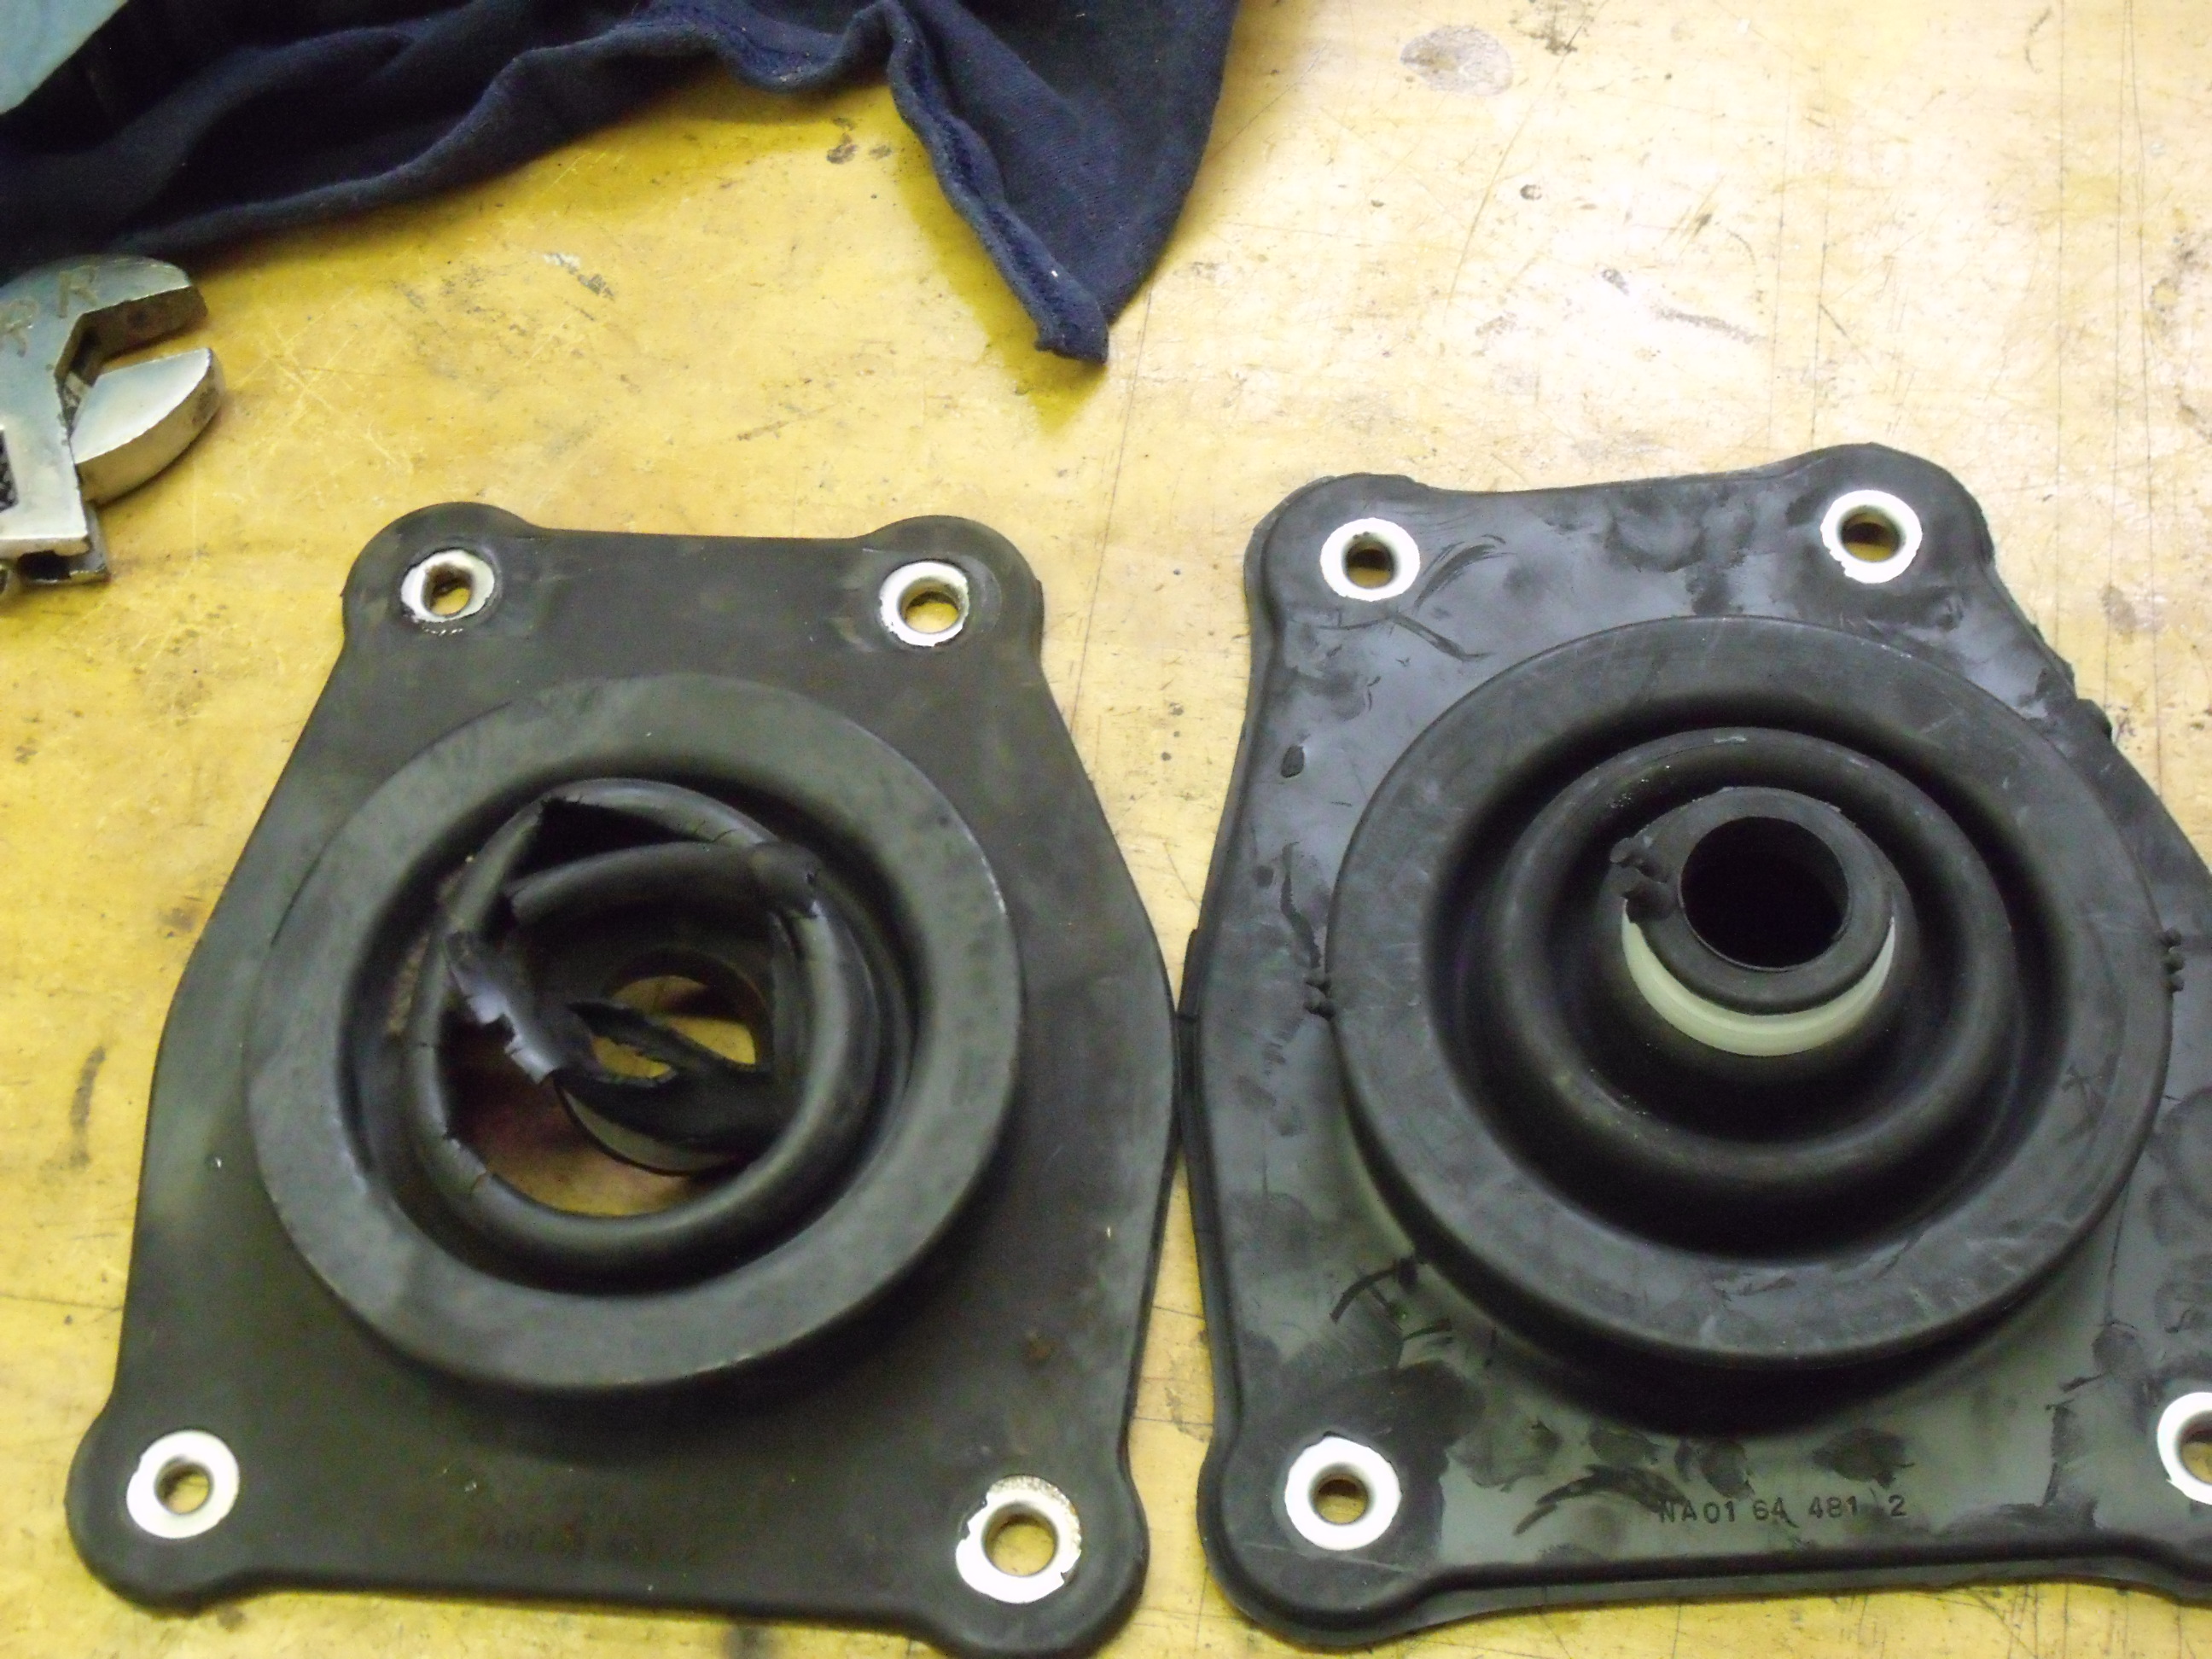
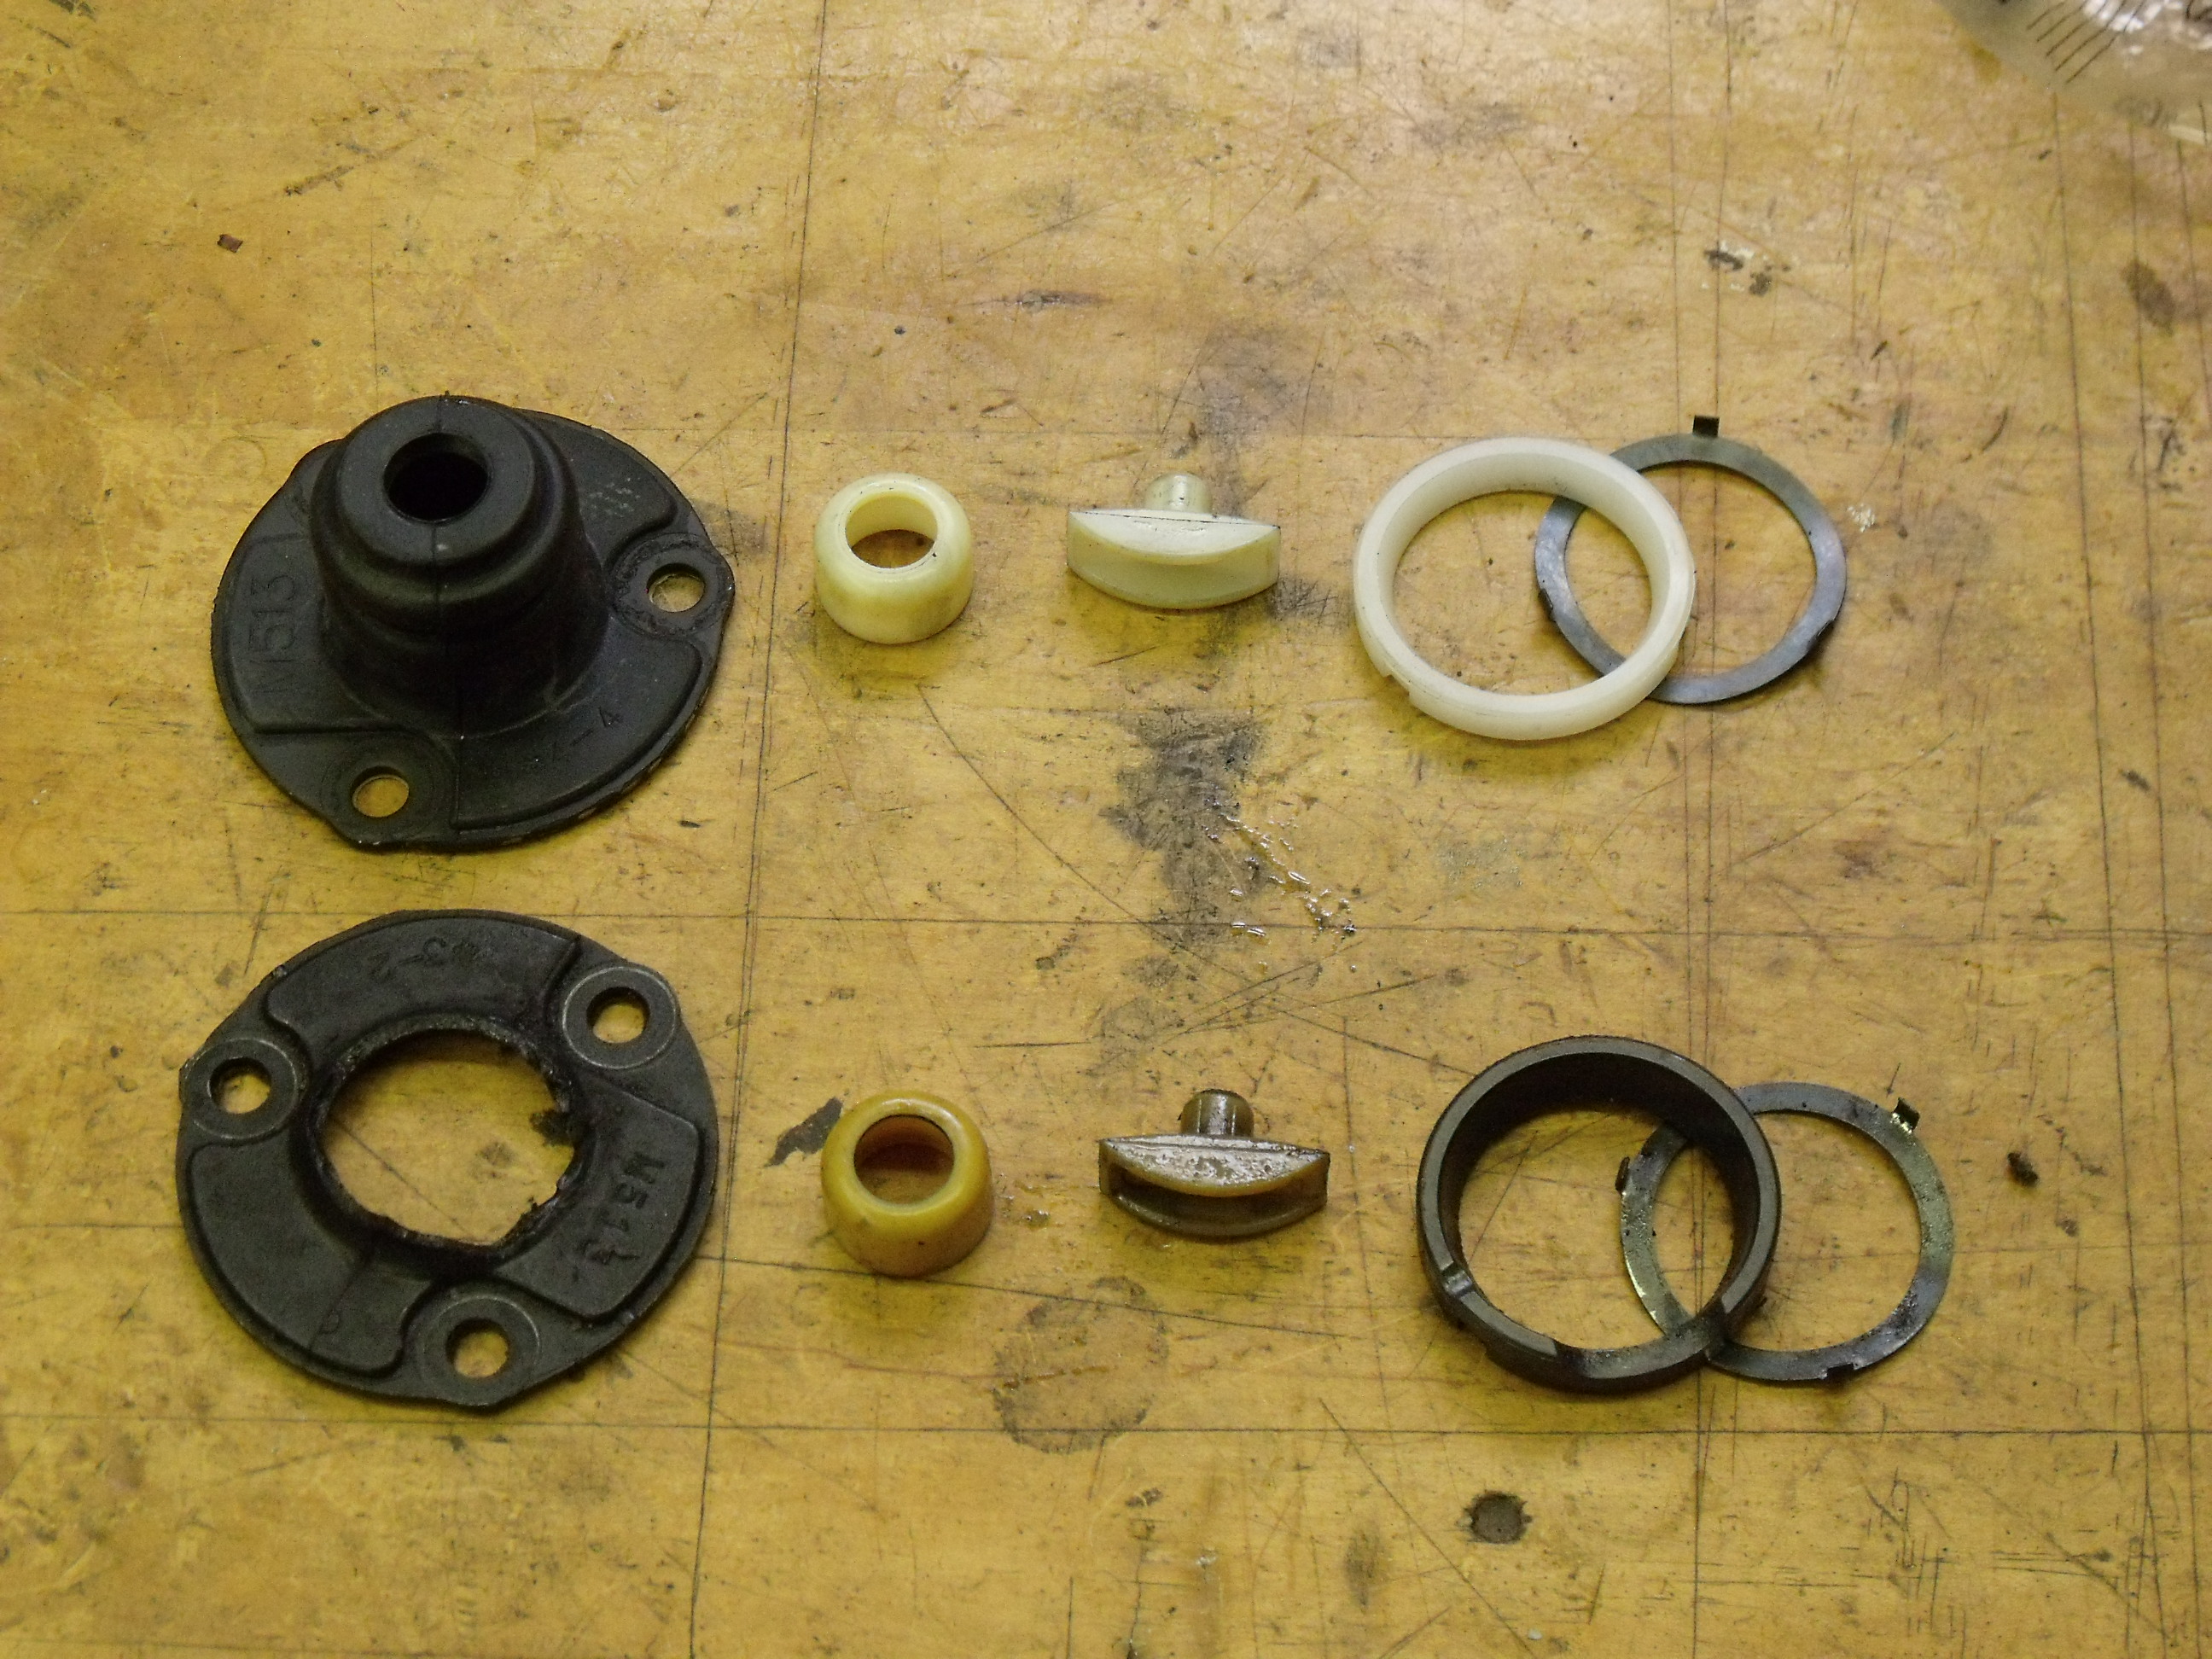
Under the leather faux boot is the real rubber shift boot. Old (L) and new (R) side-by-side.
Once the shift knob was unscrewed and the center console lifted out of the way (the leather boot attached to the console is but a decorative item), it was obvious that repair work was overdue. (This is what happens when you drive the same car for 21 years, and the small deteriorations are not noticed.) The large rubber shift boot was shredded, and the flexible rubber cap, bonded to a metal plate which forms the top of the turret, was equally damaged. Removal of the cap allowed the shift rod itself to be extricated. The plastic bushings at the bottom of the rod were worn but not broken. Most of the turret’s gear oil was gone.
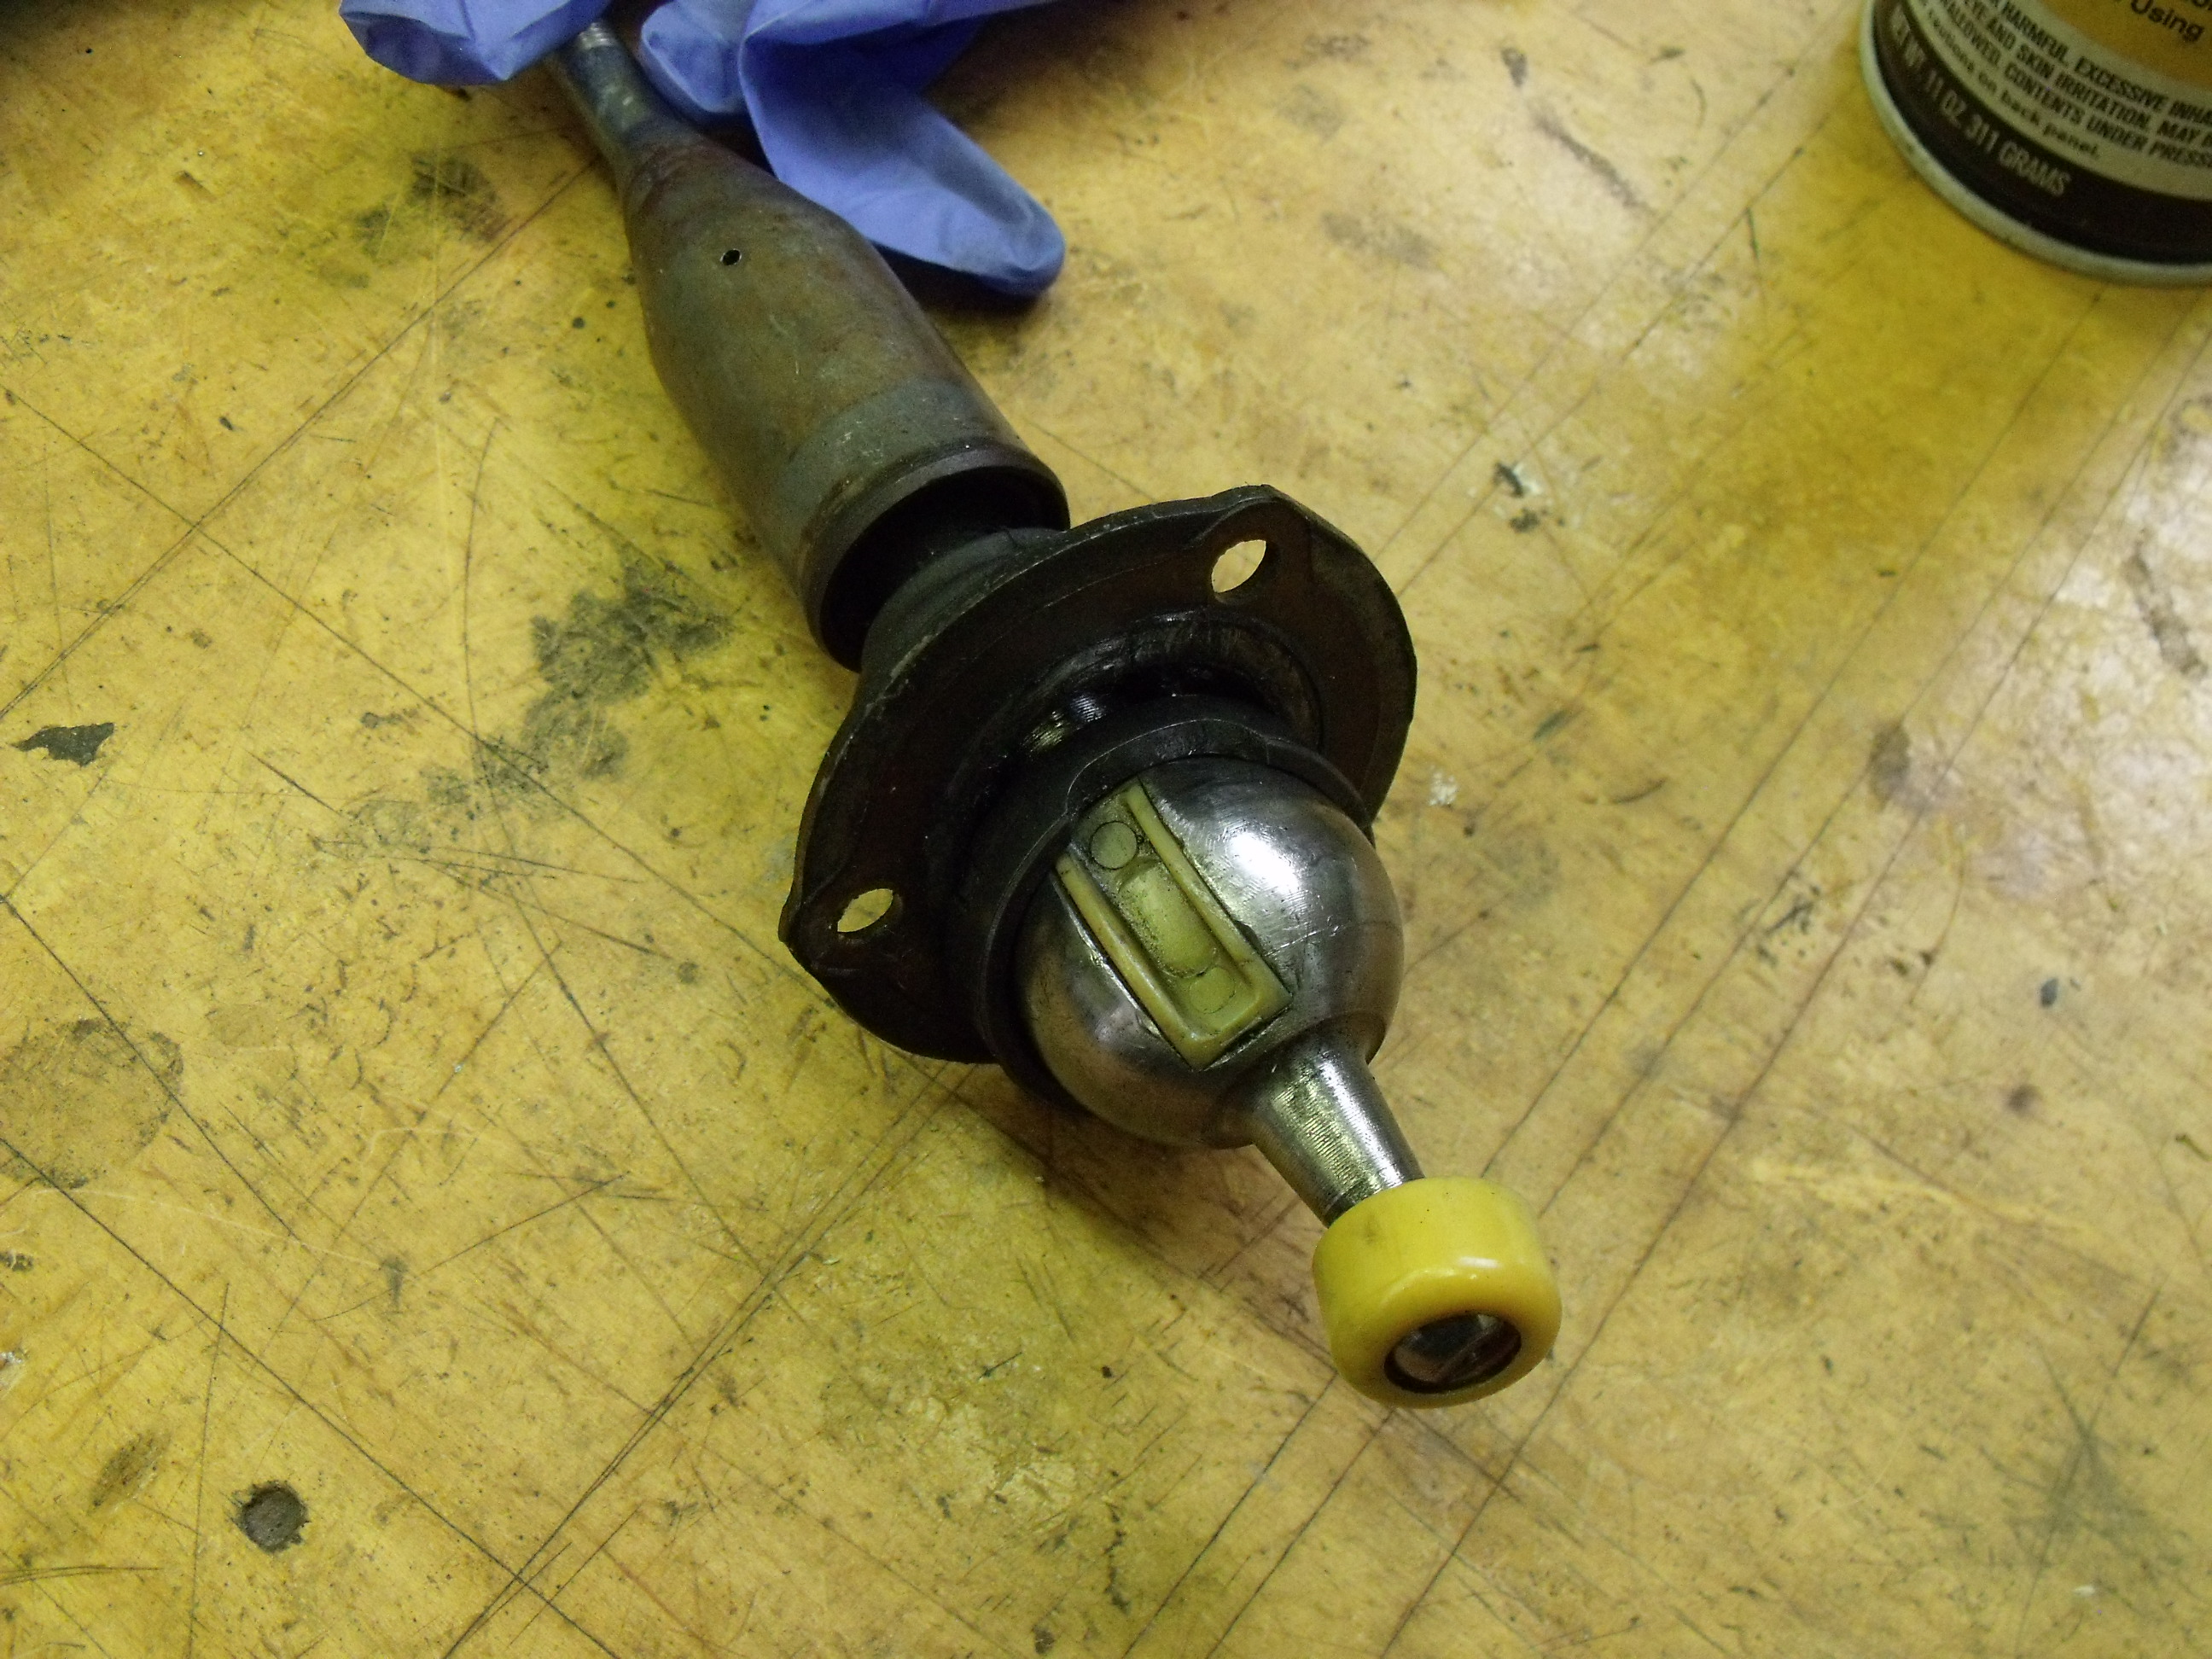
Bottom of shift rod, with old plastic bushings still attached
One of the major forum findings was just that: “You’ll find the turret to be empty or almost empty. Service it by refilling it with oil”. The mystery remains: where did the oil GO? Using a turkey baster which has been appropriated to the garage, the scant remaining oil was sucked out, and fresh 75W-90 gear oil was added until it almost reached the top of the turret.
Peering into the now-empty turret
It was time to rebuild the shift knob. The aftermarket replicates all the needed plastic and rubber parts; however, scanning the various online listings convinced me that spending a bit more and getting OEM components was the wiser move. A Mazda dealer in Vienna VA, Priority Mazda, runs an eBay store and had the best combination of price/availability/shipping cost/delivery time. I placed the order and had all my parts, in Mazda bags, at my house in 3 days.
Old (bottom) and new (top) service parts lined up
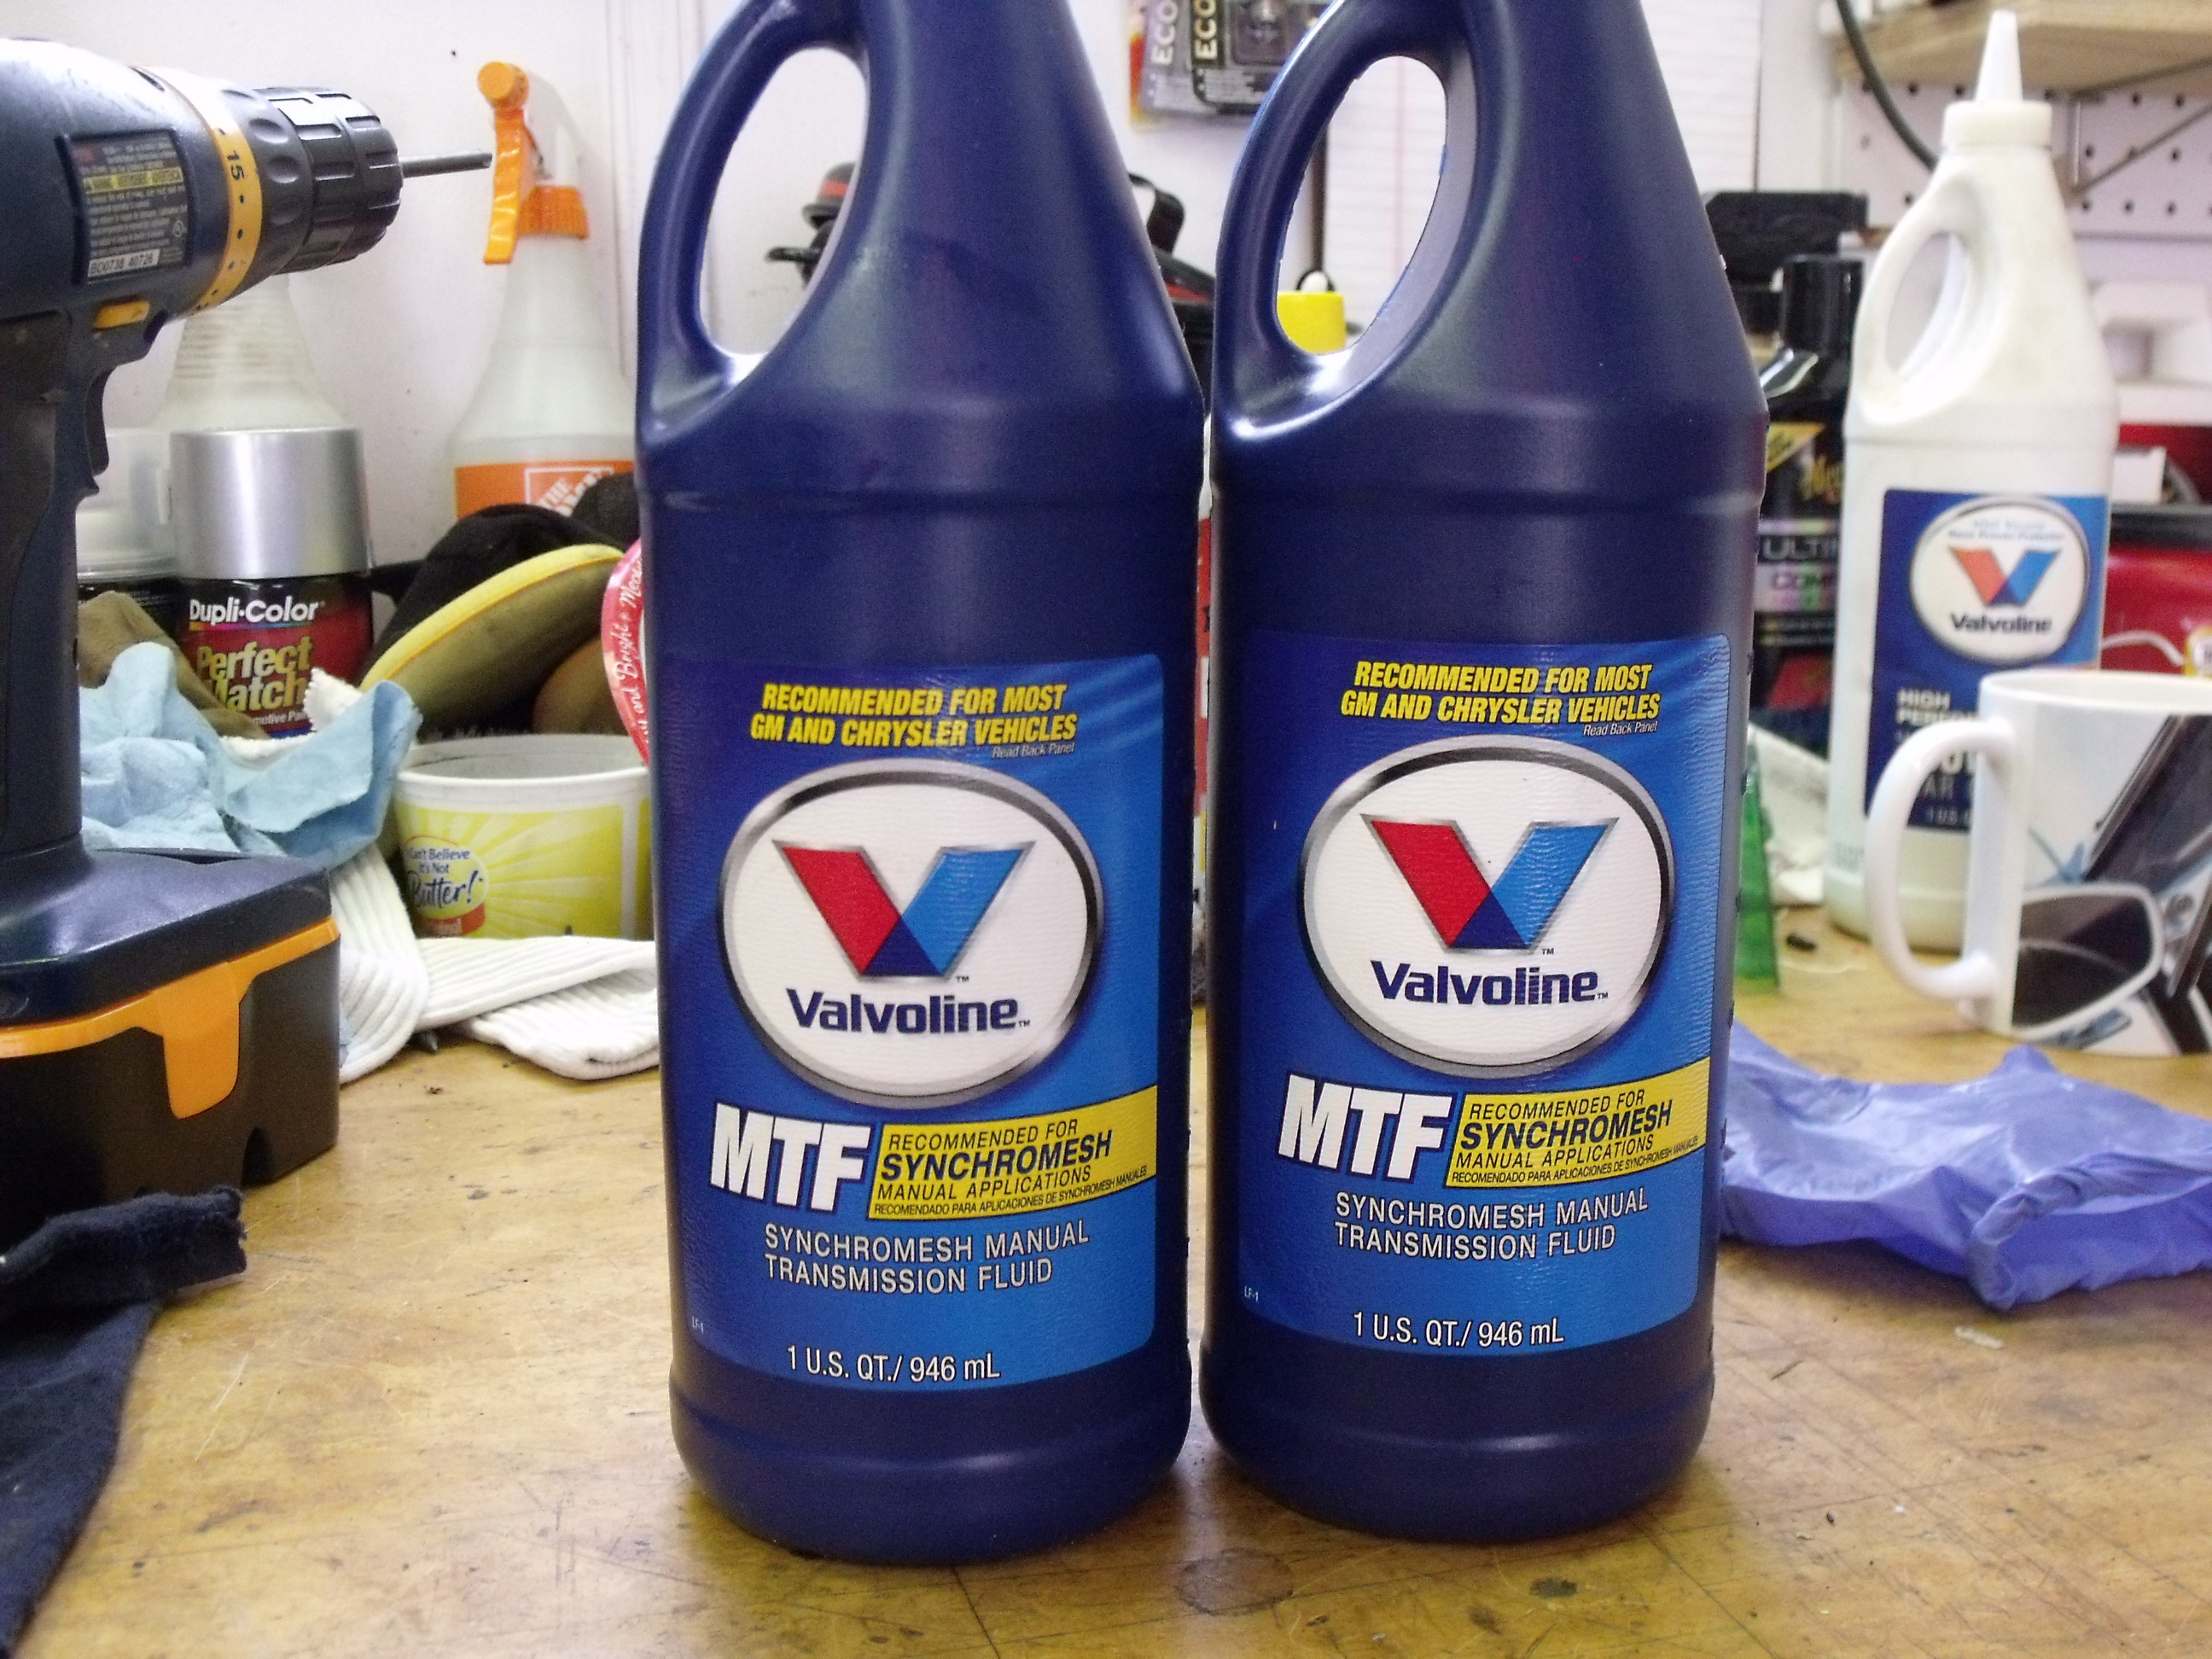
The new pieces went together quite easily. With the turret full, everything at the center console was reinstalled. While I was there, I drained the gearbox oil, and again using a recommendation from the forum, refilled it with Valvoline “Manual Transmission Fluid”, GL4, NOT GL5. After visiting 3 auto parts stores looking for this stuff, I had to order the Valvoline online also. What did we do before the World Wide Web?
Valvoline MTF, hard to find in stores
The trick to getting 75W-90 gear oil to flow in 50 degree weather
Rebuilt shift rod reattached to now-filled turret
The Miata is still up on 4 jackstands; just as well, because it ain’t goin’ out in this weather just yet. Once it warms up, I’m excited to take that first test drive and try out the shift action. With fresh tranny oil, refilled turret, and new rubber booties, I have great expectations. But I better put a hustle in my bustle. The NJ Region AACA annual car show is Sunday May 6, EXACTLY 3 weeks from today, and my now-25-year-old Miata will be making its AACA debut there. It’s at the Mennen Arena in Morristown. If you’re in the area, I expect you’ll come by.
The Isetta Saga has many more chapters to go before reaching its inevitable conclusion. With the help of some colleagues, I’m working on a big surprise, and hope to have it available for your viewing pleasure soon.
FUN FACT:
Road & Track magazine, in its July 1989 edition, ran its first full road test of the new 1990 Mazda Miata. A sidebar article crowned it one of the “World’s Best Cars”. Here’s what they said about its manual transmission:
“…. performance is further enhanced by a close-ratio 5-speed that rates nothing less than a 10 for its smooth, positive operation. With the feel of a Formula car, this tranny is fun just to run through the gears.”
If your memory is good, you may recall that way back in December of 2017, I filed a blog post entitled “Winter Storage, and the Start of the Miata’s Next To-Do List”. Somewhere in there, I wrote words to the effect that “should we have a mild winter, I’ll be attending to some maintenance, repair, and detail items for the Miata”.
Maybe I jinxed things.
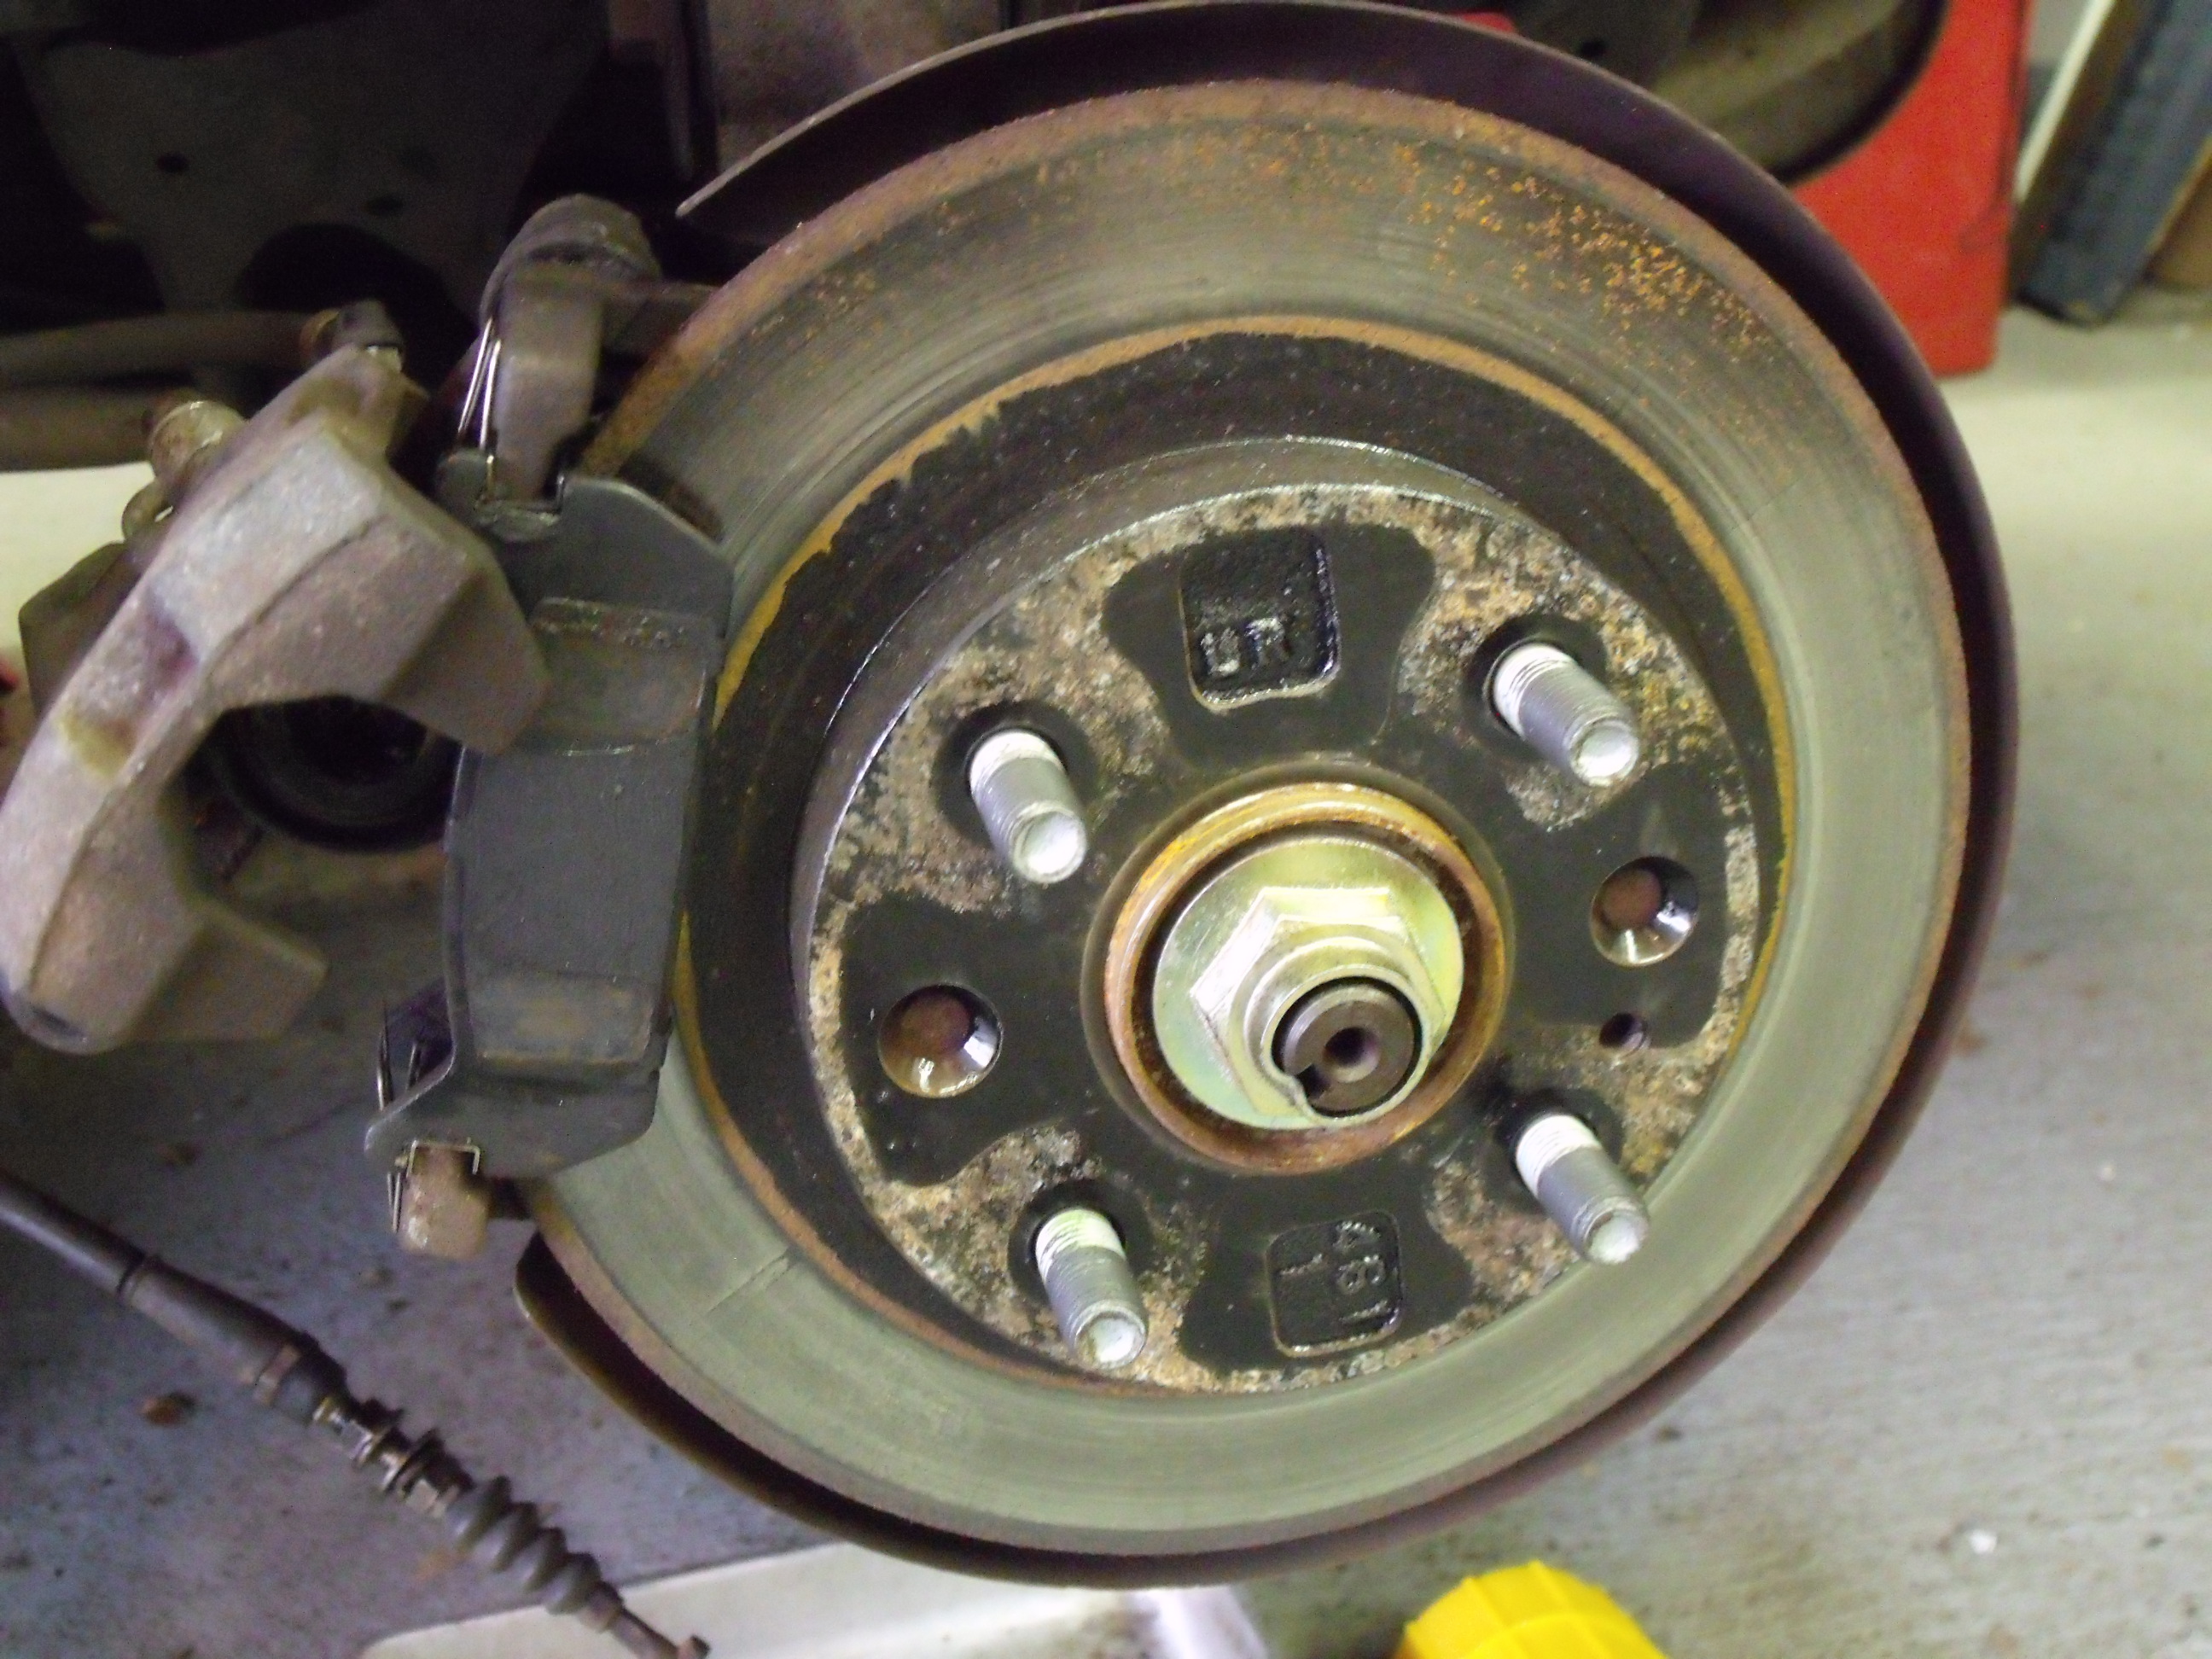
While certainly not a terrible winter, it was plenty cold; too cold to spend much time in the unheated garage. But the calendar claims that spring is around the corner, even if the thermometer has yet to catch up. A few weeks ago, cold or not, I decided to forge ahead with the car’s #1 priority: the replacement of the rear brakes, including pads, rotors, and calipers.
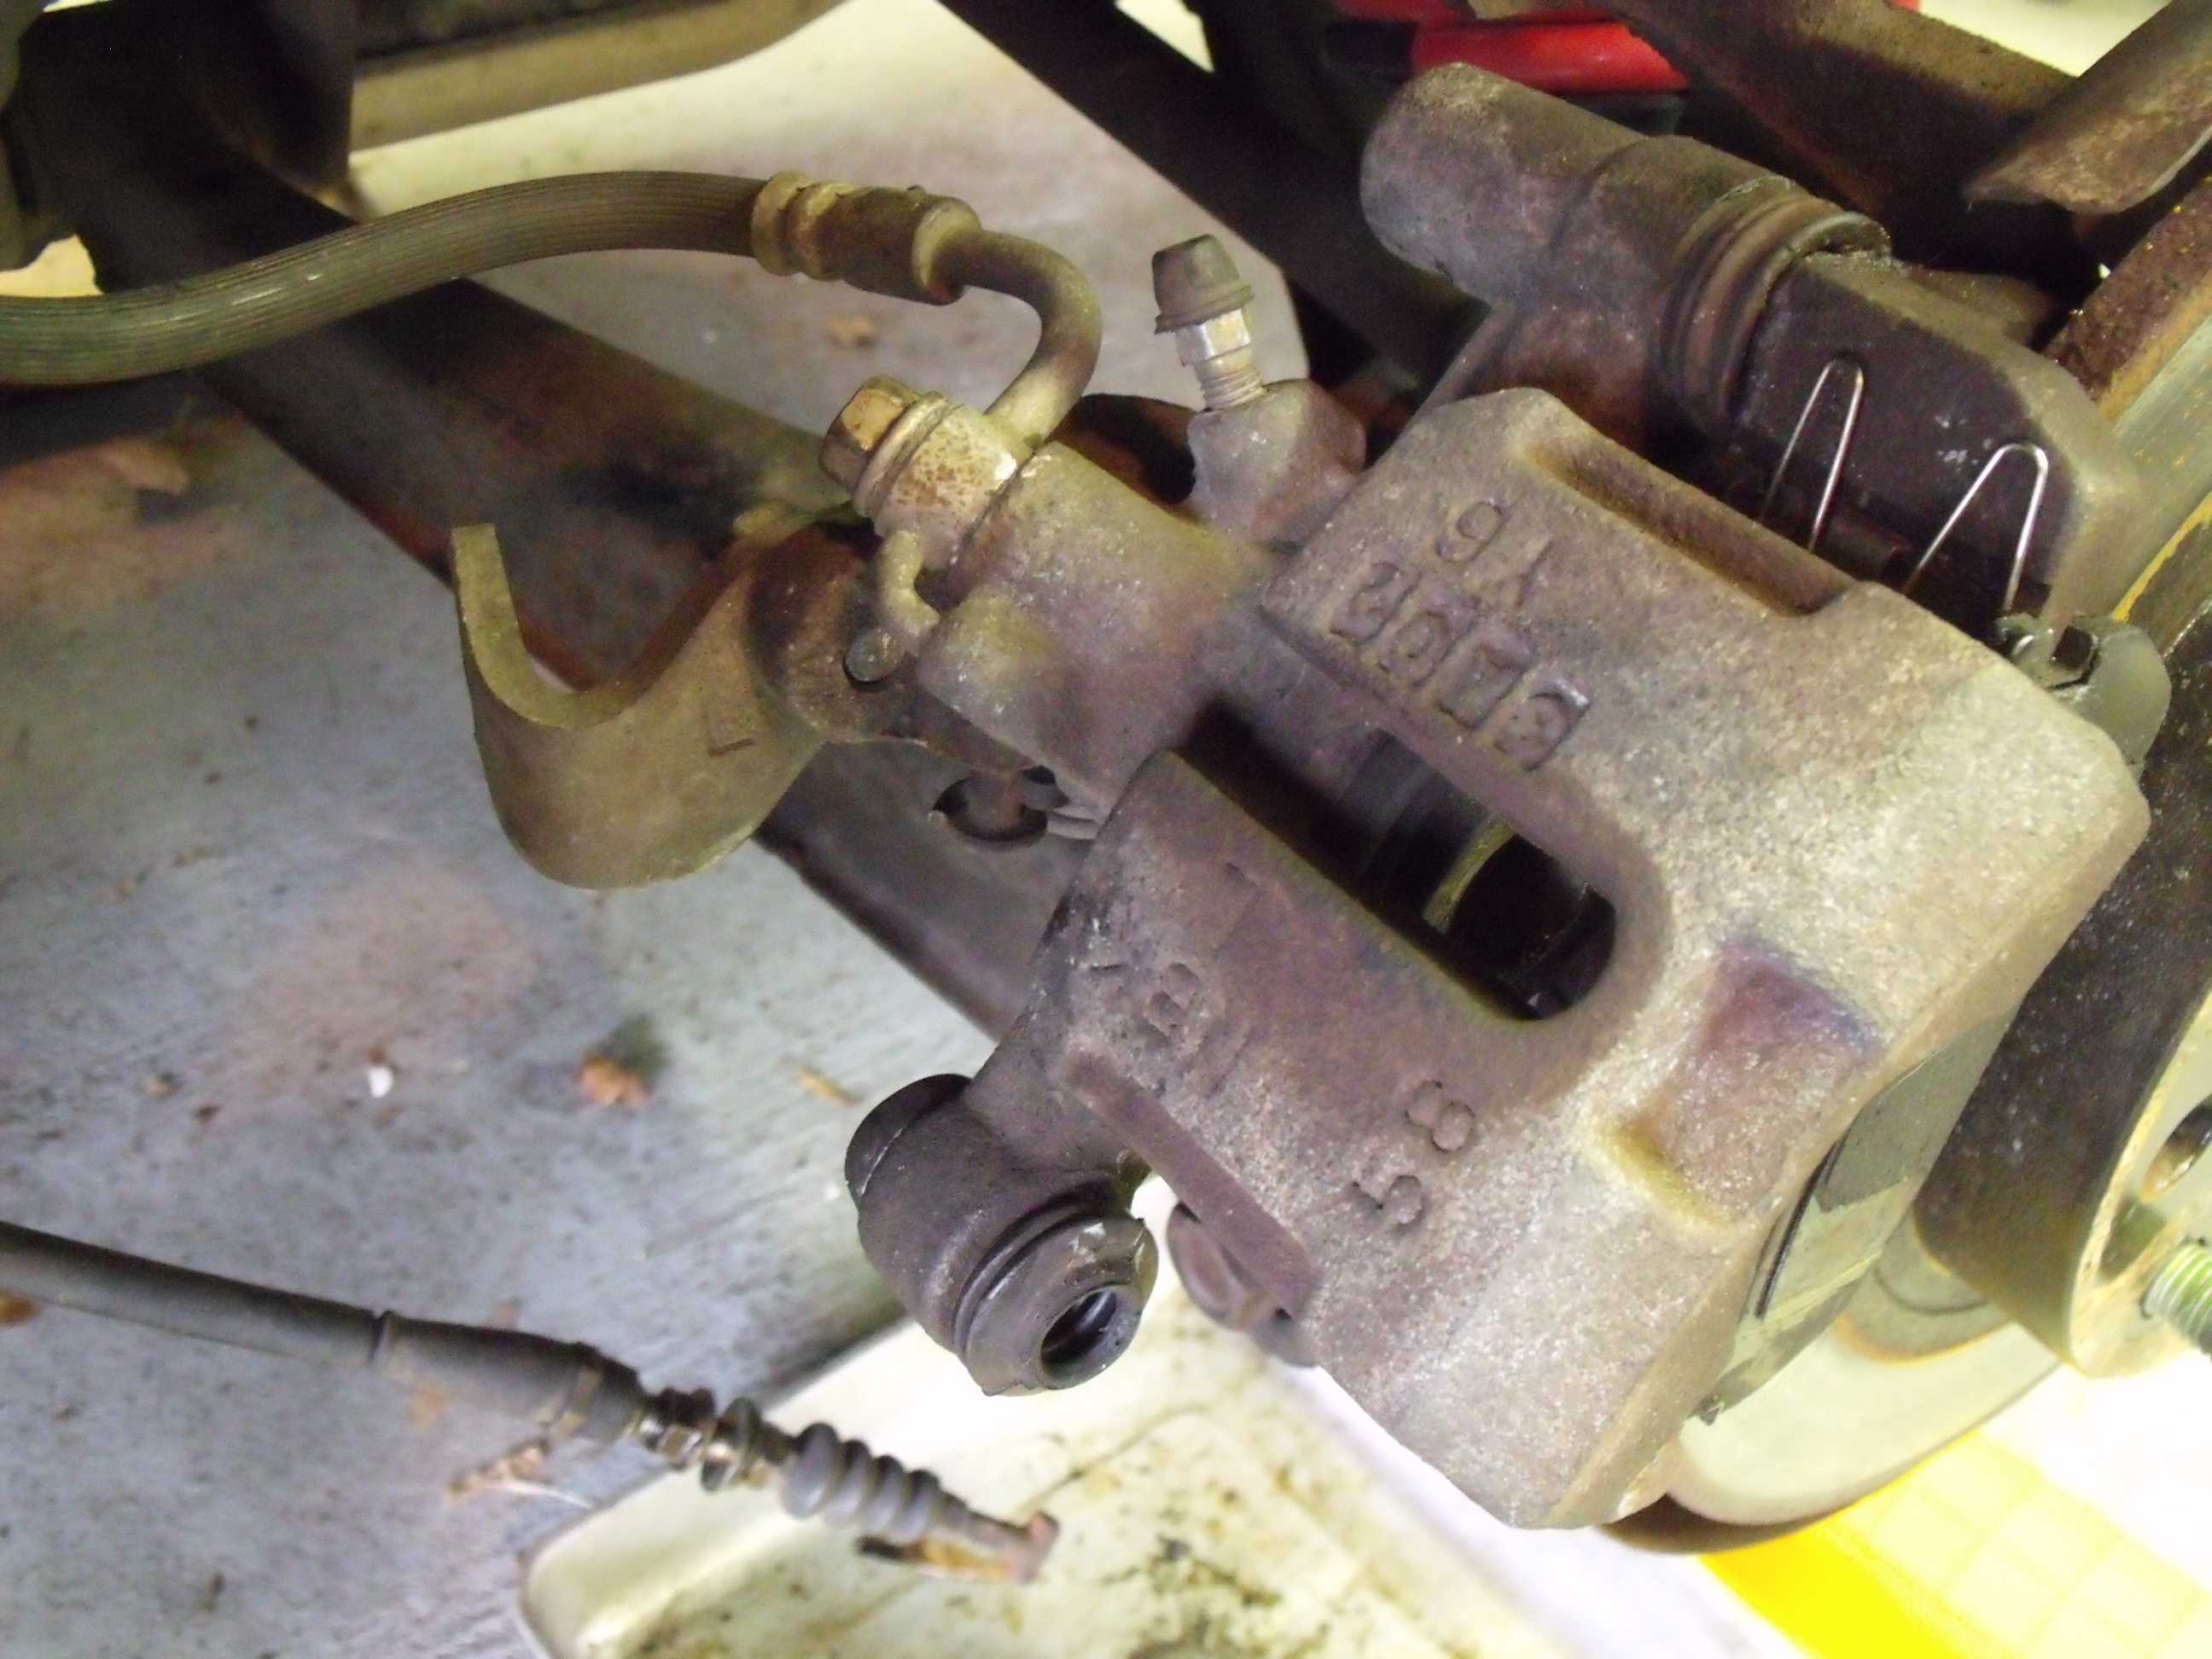
Old caliper looks crusty; can’t see it, but piston is stuck
The Mazda’s parking brake has been loose for a while, requiring a long pull of the handle before it would engage. Attempts to adjust it were for naught. It turned out that the piston in one of the rear calipers couldn’t be adjusted in either direction. Unlike the European cars I’m accustomed to, this Mazda’s e-brake operates directly via cables on the brake calipers, moving the pistons inward to contact the pads and apply the hand brake. Each rear caliper piston should be able to be rotated inward or outward as an adjustment.
Rear rotors are original; while not shot, they’re worth replacing while new calipers are going on
All my Volvos used a set of parking brake shoes inside the ‘hat’ of the rear rotor, in essence giving you a drum brake within the disc brake. While it has its advantages, I’ve seen cases where the e-brake shoes rust and seize inside the rotors. When that happens, your first tool of choice is a large hammer, and the repair procedure reverts to incessantly beating on the rotor to free it from the shoes.
Parking brake cable was easily removed once adjustment nut was loosened
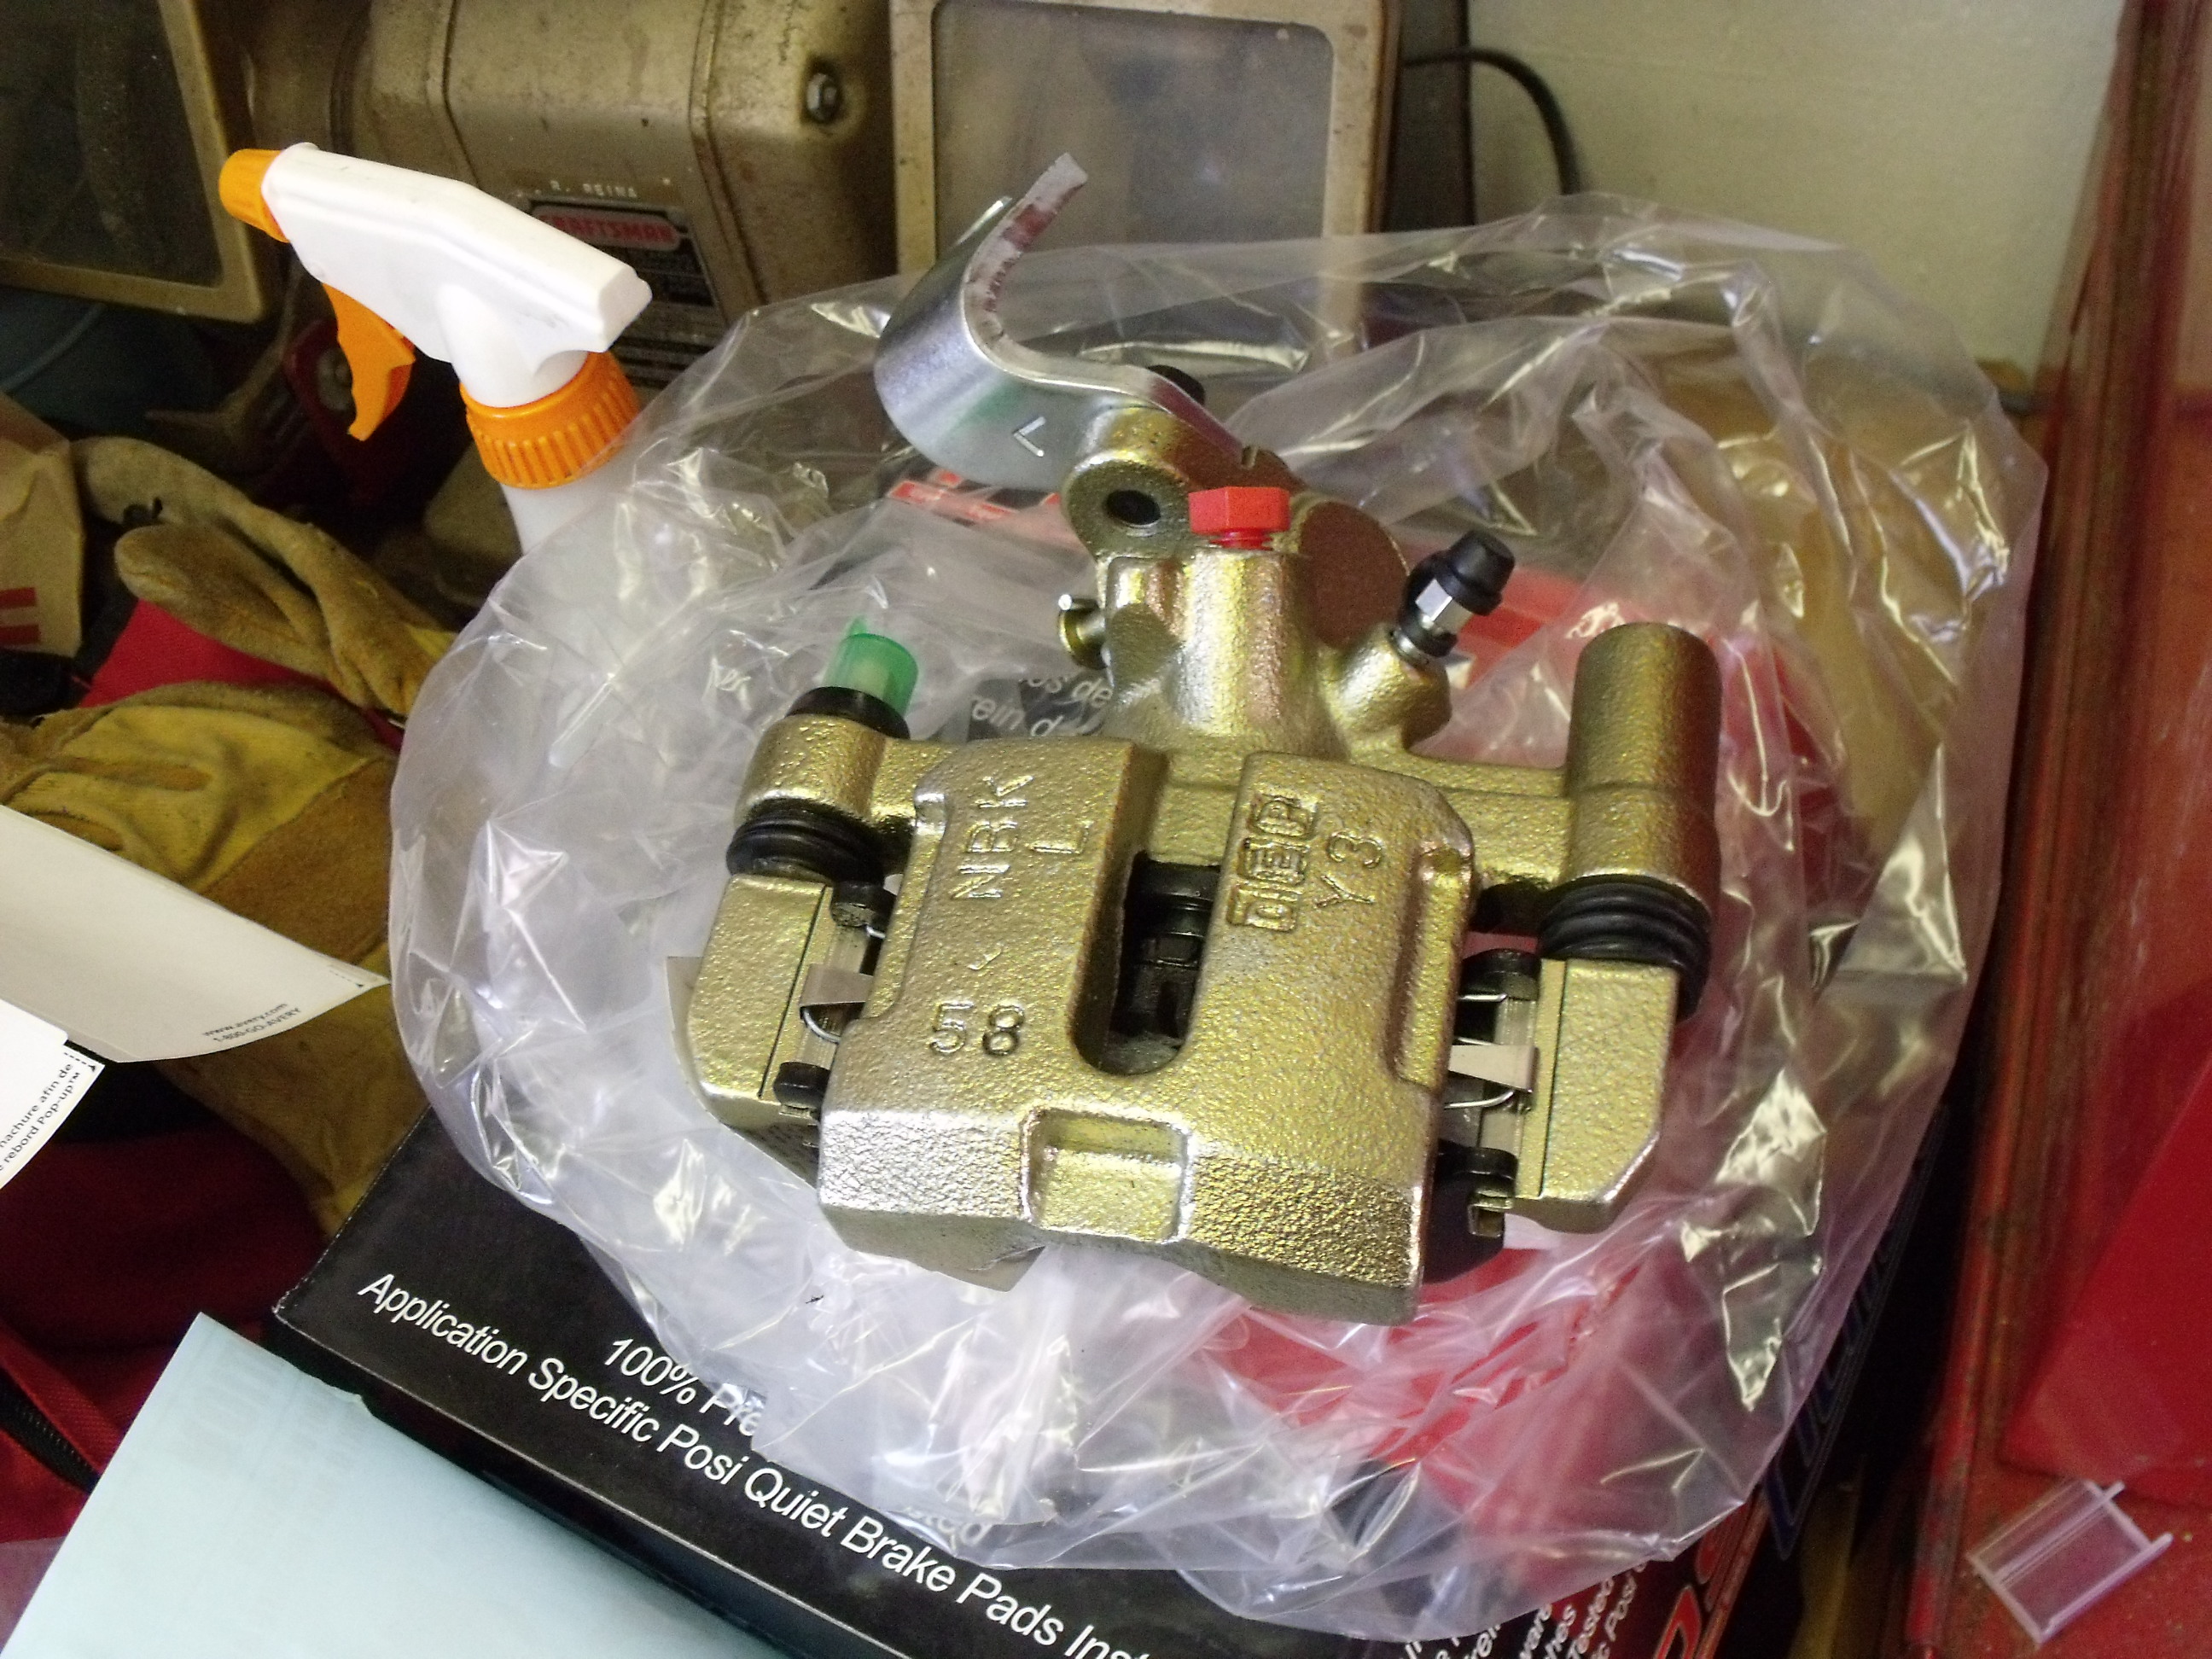
But back to the Miata. I ordered parts through my place of business from Centric. I had my choice from a number of reputable brake parts suppliers, and I chose Centric after learning some detailed information from one of their reps. He informed me that if one orders the LOADED calipers (with pads installed), the calipers receive an anodized finish, compared to the SEMI-LOADED (hardware but no pads) ones, which are cleaned, but are left with a bare metal finish. All the calipers are remanufactured (‘reman’) units, and carry a core charge, refunded once the old parts are returned.
New (actually, remanufactured) caliper is a thing of beauty
I also stepped up for higher-quality rotors which have a black e-coating on the non-contact surfaces, to prevent rust. All the parts arrived last week, and initial inspection showed that everything looked copasetic. In order to get my core charge refunded ASAP, I used this most recent weekend to install the calipers.
Picture show black rust-preventative coating on rotor non-contact surfaces
Once the order was placed, but before the parts arrived, I removed the parking brake cables, and loosened all the caliper bolts, including the hydraulic lines, to ensure that I’d have no surprises during installation. Centric makes a big deal about reinforcing the message to the customer that the core return must include the caliper and parking brake brackets. I’d presume that would be obvious as they are included on the reman caliper, but perhaps not.
The job could not have been more straightforward. Centric even provides new banjo bolts and copper o-rings for the hydraulic fittings. Starting with the left side, I bolted everything up, but had a slight drip from the brake line. It turned out that one of the old o-rings was stuck to the line, and I hadn’t seen it. Once I removed it, everything snugged up and stayed dry.
Newly installed caliper and rotor on left rear
Then I had the exact same problem on the right side, only there was no double o-ring in the way. To stop the drip, I had to resort to reusing the old o-rings. For some reason, the new o-rings are ever-so-slightly larger than the old ones. While it’s good for now, I will get to the store and buy new copper o-rings to make sure that I’ve got fresh ones installed. I’m still not sure why it’s leaking with the new o-rings, but I can get back to that later. Both old calipers, with the necessary brackets, are off the car, and are boxed up and ready to be shipped back to Centric, which I’ll attend to this week.
In the meantime, I placed an order for Valvoline “synchromesh manual transmission fluid”, which comes highly recommended for my five-speed by the guys and gals on the miata.net forum. Weather permitting, I’ll tackle that next weekend.
Looking for the next installment of the Isetta Saga? So am I. Once I find it, which should be during the upcoming week, I’ll spiff it up and get it online for your reading enjoyment by next weekend.
The first-generation Miata, known as the “NA” version, was launched in 1989 and sold through 1997. Mazda sold over 400,000 units, a runaway success by anyone’s definition.
As happens every winter, the collector cars (loosely defined as the cars that don’t get driven in snow) are put away for the winter. The ritual is one that has evolved over the years and is now consistent: fill the tanks with fresh fuel, add Sta-Bil, pump up the tires at least 10 p.s.i. over normal to avoid flat-spotting, put a trickle charger on the batteries, and cover the cars with a dedicated car cover. It’s easy, takes little time, and doesn’t cost very much.
Before going further, let’s take a moment to say a few words about the brands I use, and have continued to use. (I’m a firm believer in finding good products and sticking with them, even if they cost a trifle more. As the cliché goes, ‘you get what you pay for’.)
The Sta-Bil brand of fuel stabilizer, made by Gold Eagle, has been in use in my garage since I’ve owned powered lawn and garden equipment. Many moons ago, I heard stories about lawn mowers and snow throwers, two examples of gas-engine devices which see seasonal use, failing to run because the old gummed-up gas gummed up the works. As soon as I got my first lawn mower, Sta-Bil went into its tank. The gumming has never happened to me, and I’ve stuck with the brand ever since.
Sta-Bil STORAGE is your basic fuel additive if fuel is going to sit
Yes, I had my doubts about their ethanol treatment after it seemingly made the Alfa run worse (a conclusion which I now doubt since discovering my carbs are running rich and fouling the plugs a bit), but your basic ‘storage’ version of Sta-Bil is the way to go for any fuel tank in which fuel may sit more than 6 weeks or so.
It’s a similar story with battery chargers. I still have my dad’s Sears charger, which looks like it was made in the 1960s. It works great to jump-start a dead battery, but it ain’t no trickle charger. Long-term battery storage requires both a slow charge (the “trickle”) and a volt-sensing cut-out that won’t overcharge the thing and boil it to death.
You know it’s an old charger when there’s a switch for “6V” and “12V”
The Deltran Battery Tender brand came onto the market several decades ago, and they found their niche for the car collectors whose vehicles are stored in the off-season. While many competing brands have since been introduced, I’ve stayed with what I know works. I think I’m up to 3 of these Battery Tenders in the garage.
Green is good! Battery Tender keeps battery charged without overcharging
Car covers are a relatively new accessory to my winter arsenal. Up until a few years ago, frankly, I didn’t believe in them. It was a combination of fear of paint damage from moisture trapped beneath the cover, and frustration with my inability to find a custom-fit cover for the BMW Isetta (my expectations were a bit high with that one).
Since working at CARiD, I’ve learned a lot about the usefulness of good quality car covers, and one thing I learned is that the Covercraft brand is my favorite. The fit is perfect, and the variety of material choices will satisfy any indoor or outdoor cover needs at any price point.
The indoor-rated Dustop from Covercraft fits the Alfa perfectly
The Alfa has a Covercraft Block-It Dustop (yes, they had the ’67 Alfa pattern in stock), and the Miata wears the Covercraft Evolution indoor-outdoor cover. In the garage, both covers do more than keep dust off the paint; they also protect the interiors from sunlight, and provide some protection from wayward nuts and bolts spinning out of control off my workbench. I would never again think of storing a car without a cover. Even in the nice weather, if it’s going to be more than a week or two before one of the cars gets driven again, the cover goes on.
The Covercraft Evolution cover on the Miata is rated for indoor and outdoor use
All this is a prelude to an announcement about my Mazda Miata: after giving some thought to selling it, I’ve now decided to keep the car. What’s more, next year, in 2018, this 1993 automobile will be 25 years old, making it eligible for AACA events. So I’m going to turn it into a show car.
The plan is to spend the winter tending to some mechanical maintenance, but also attending to some detail work in order to display the car at shows next year as a 25-year-old original unrestored car.
The mechanical list includes new rear brake calipers (one of the parking brake adjusters is stuck), new tires (tread is good, but they’re 10 years old), and a continuation of the LED bulb upgrade. The detail work involves a new convertible top (worn and dirty), an engine compartment detail, Paintless Dent Removal work on some small dings, and a complete polish and wax.
Here’s hoping for a mild winter, which will encourage me to get out to the garage! As long as the temperature is above freezing, I can spend a few hours out there. Watch this blog for updates on my progress with the Miata.
In the 21 years since I purchased my 1993 Mazda Miata, and during the 70,000 miles of driving enjoyment I’ve had behind the wheel, there is one peculiarity that has come to my attention.
The car has shrunk.
Not really. However, the automotive landscape has gone through tremendous upheavals since 1996. When I bought the Miata, from a young woman in her 30s who had purchased it new, I asked her “what will you be replacing it with?” She replied “a Chevy Blazer”. At that point in time, the concept of voluntarily moving from a two-seat sports car to a Sport Utility Vehicle was a foreign one. But no longer. In 2017, the majority of daily-driven vehicles are classified as “light trucks”: minivans, SUVs, and pickup trucks.
The Miata is small even next to the Alfa
It is in that sense that my Miata has gotten smaller, as without exaggeration, every four-wheel contraption sharing pavement with me towers over my windshield. Pulling up next to a late-model Accord or Camry at a stop light is a lesson in relativity, as I observe that those mid-sized sedans’ beltlines are higher than my roof.
As the title of this blog post is “Installing LED lights in my Miata”, you may wonder what the foregoing has to do with LEDs. Plenty, in fact, and it’s summed up in the word conspicuity.
There are two aspects to vehicular lighting, as I was taught in Automotive Safety 101: being able to see, and being seen. Other than headlights, and perhaps reversing lights, a vehicle’s exterior illumination is designed to help other drivers see you. A few weeks ago, it occurred to me that there was a super simple way for me to make the Miata more conspicuous to other drivers, and that would be by installing some LED lights.
To the automotive purists, aftermarket LED lighting may have a bad rap. Your first thought may be of glare-producing headlights (more likely caused by HID lighting). Perhaps you’ve seen some tricked-out show cars with blue/green/violet LED lighting in front and rear lamp assemblies, even under the car, pulsing along with a 120-decibel sound system.
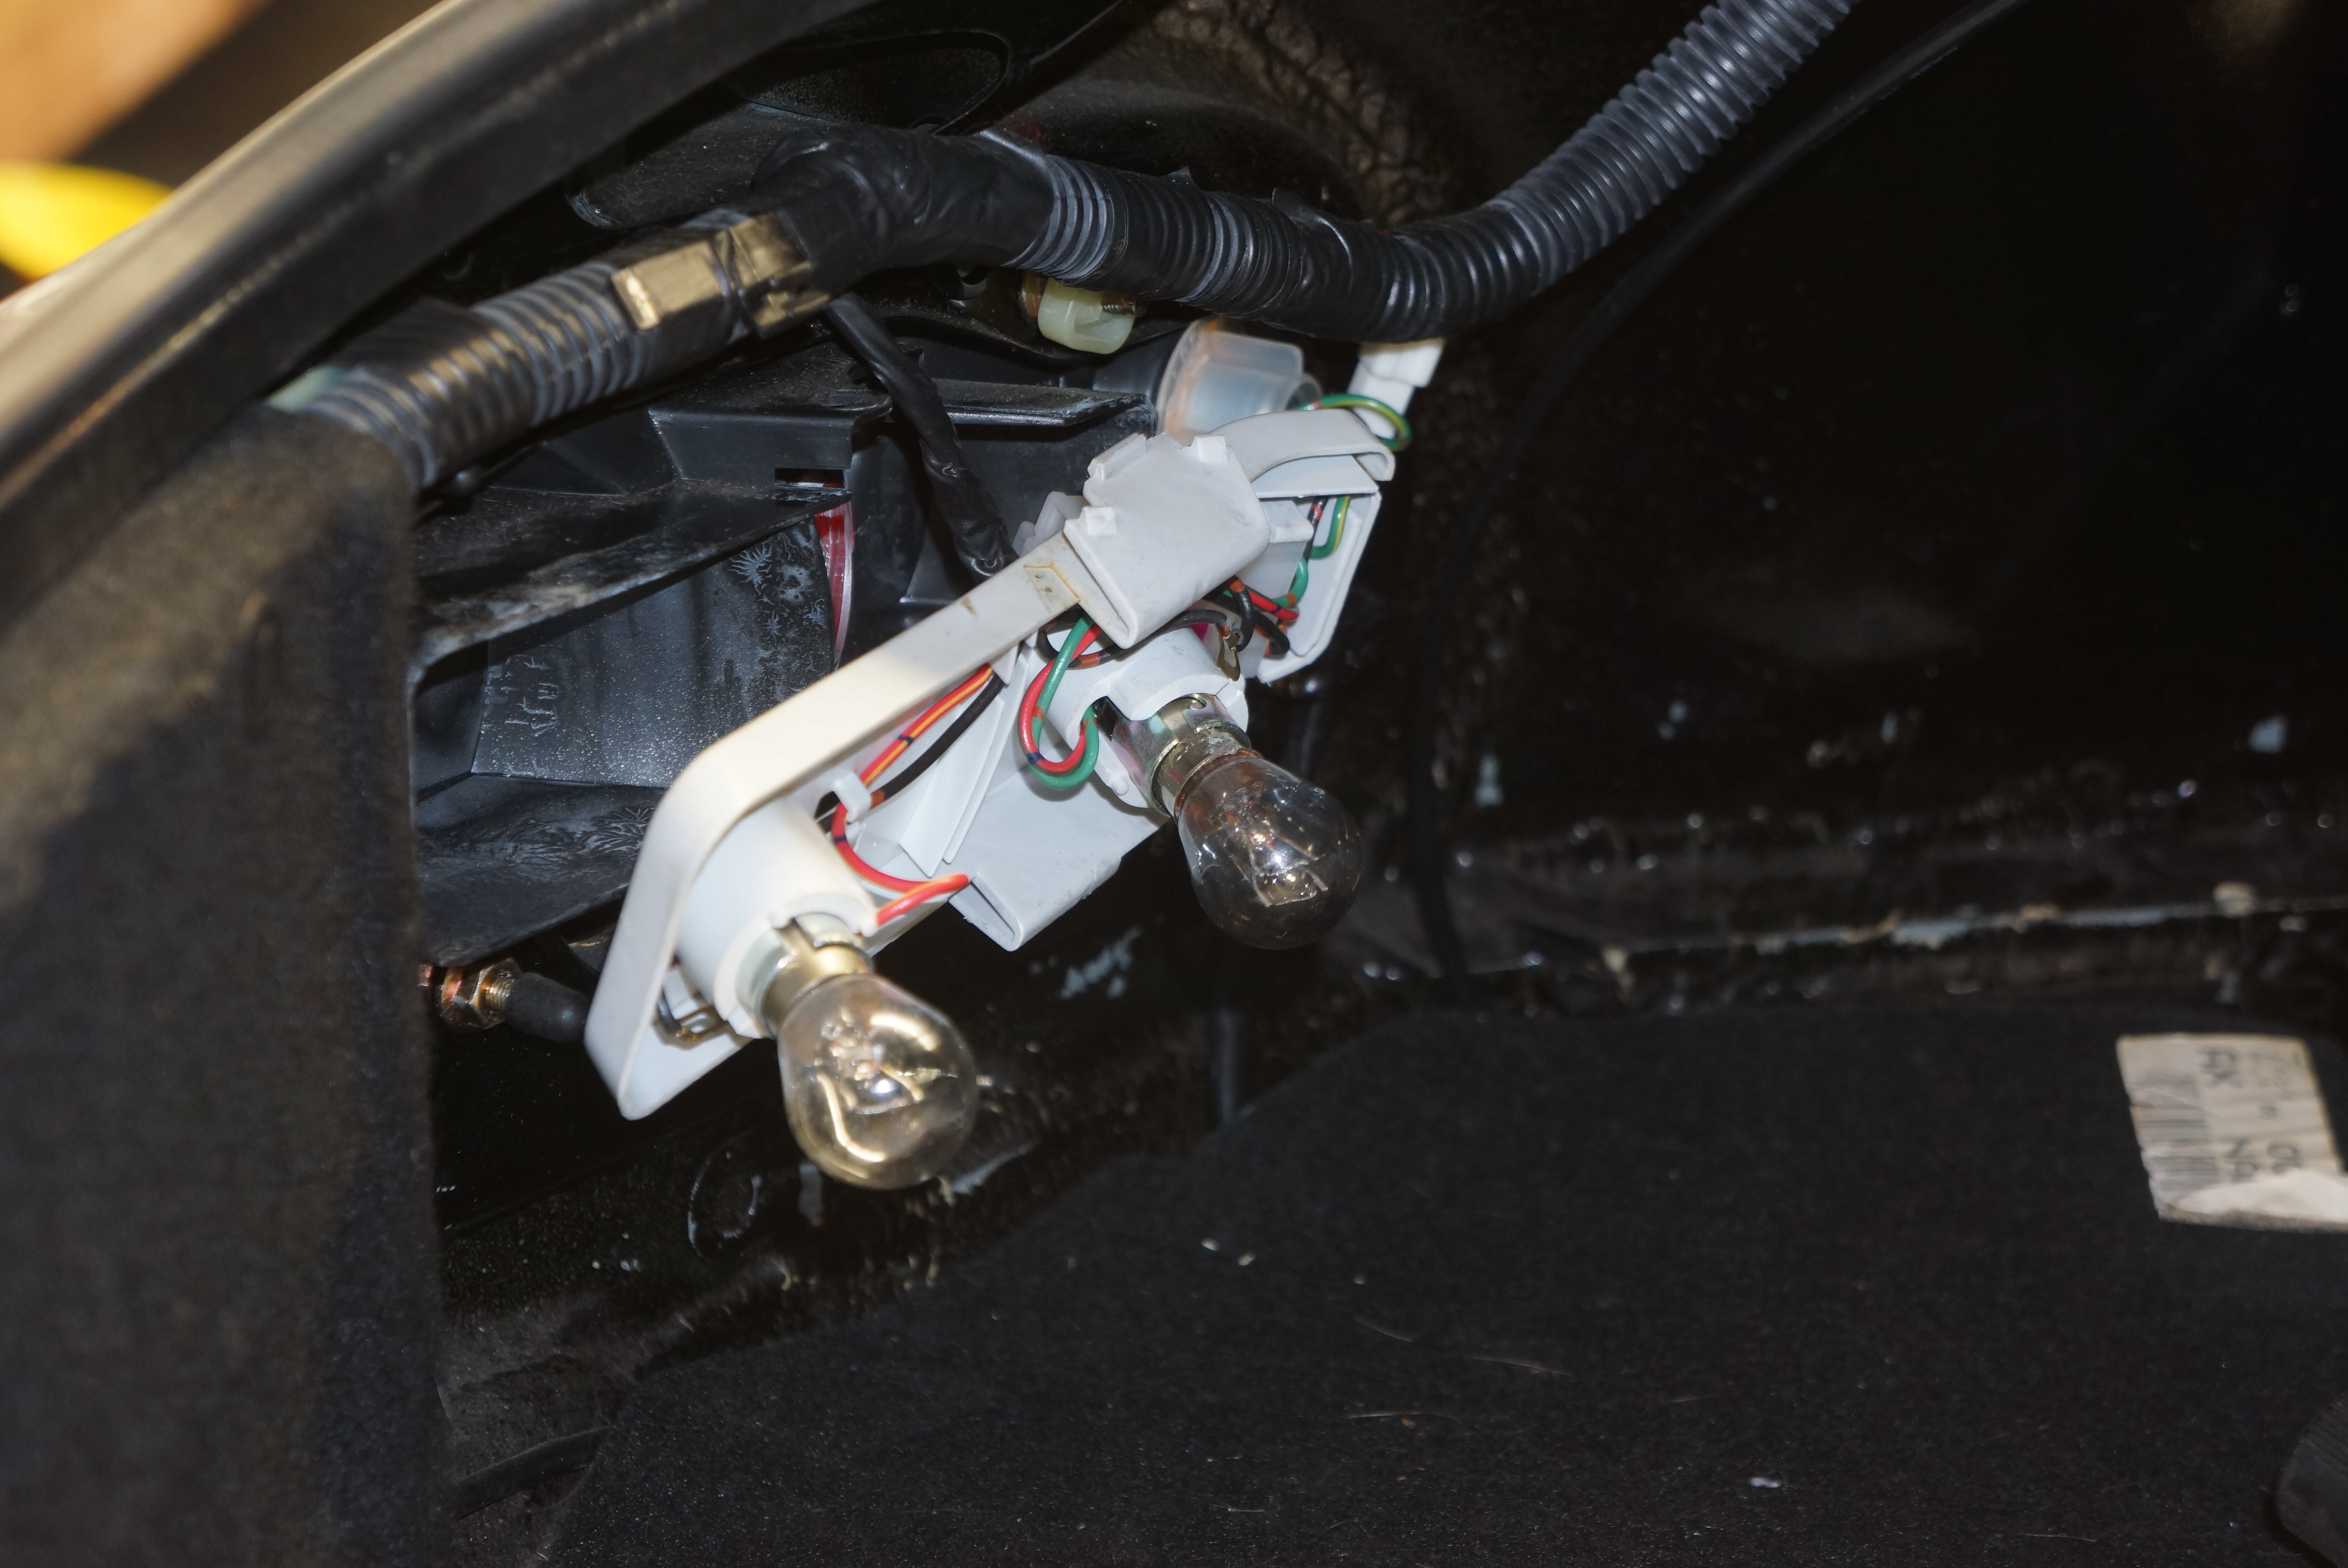
The upgrade I pursued is much more straightforward than that. The aftermarket has made LED light bulbs available, in standard sizes, as “plug-and-play” direct replacements for incandescent bulbs. With the Miata, I wanted to start small, and at the rear, by replacing the combo tail/brake light bulbs (#1157) and reverse bulbs (#1156).
I obtained several sets of bulbs from CARiD.com (and in full disclosure, this is the company where I’m employed). The LED bulbs are available in different colors. I got the 1157 bulbs in both white and red, and the 1156 bulbs in white.
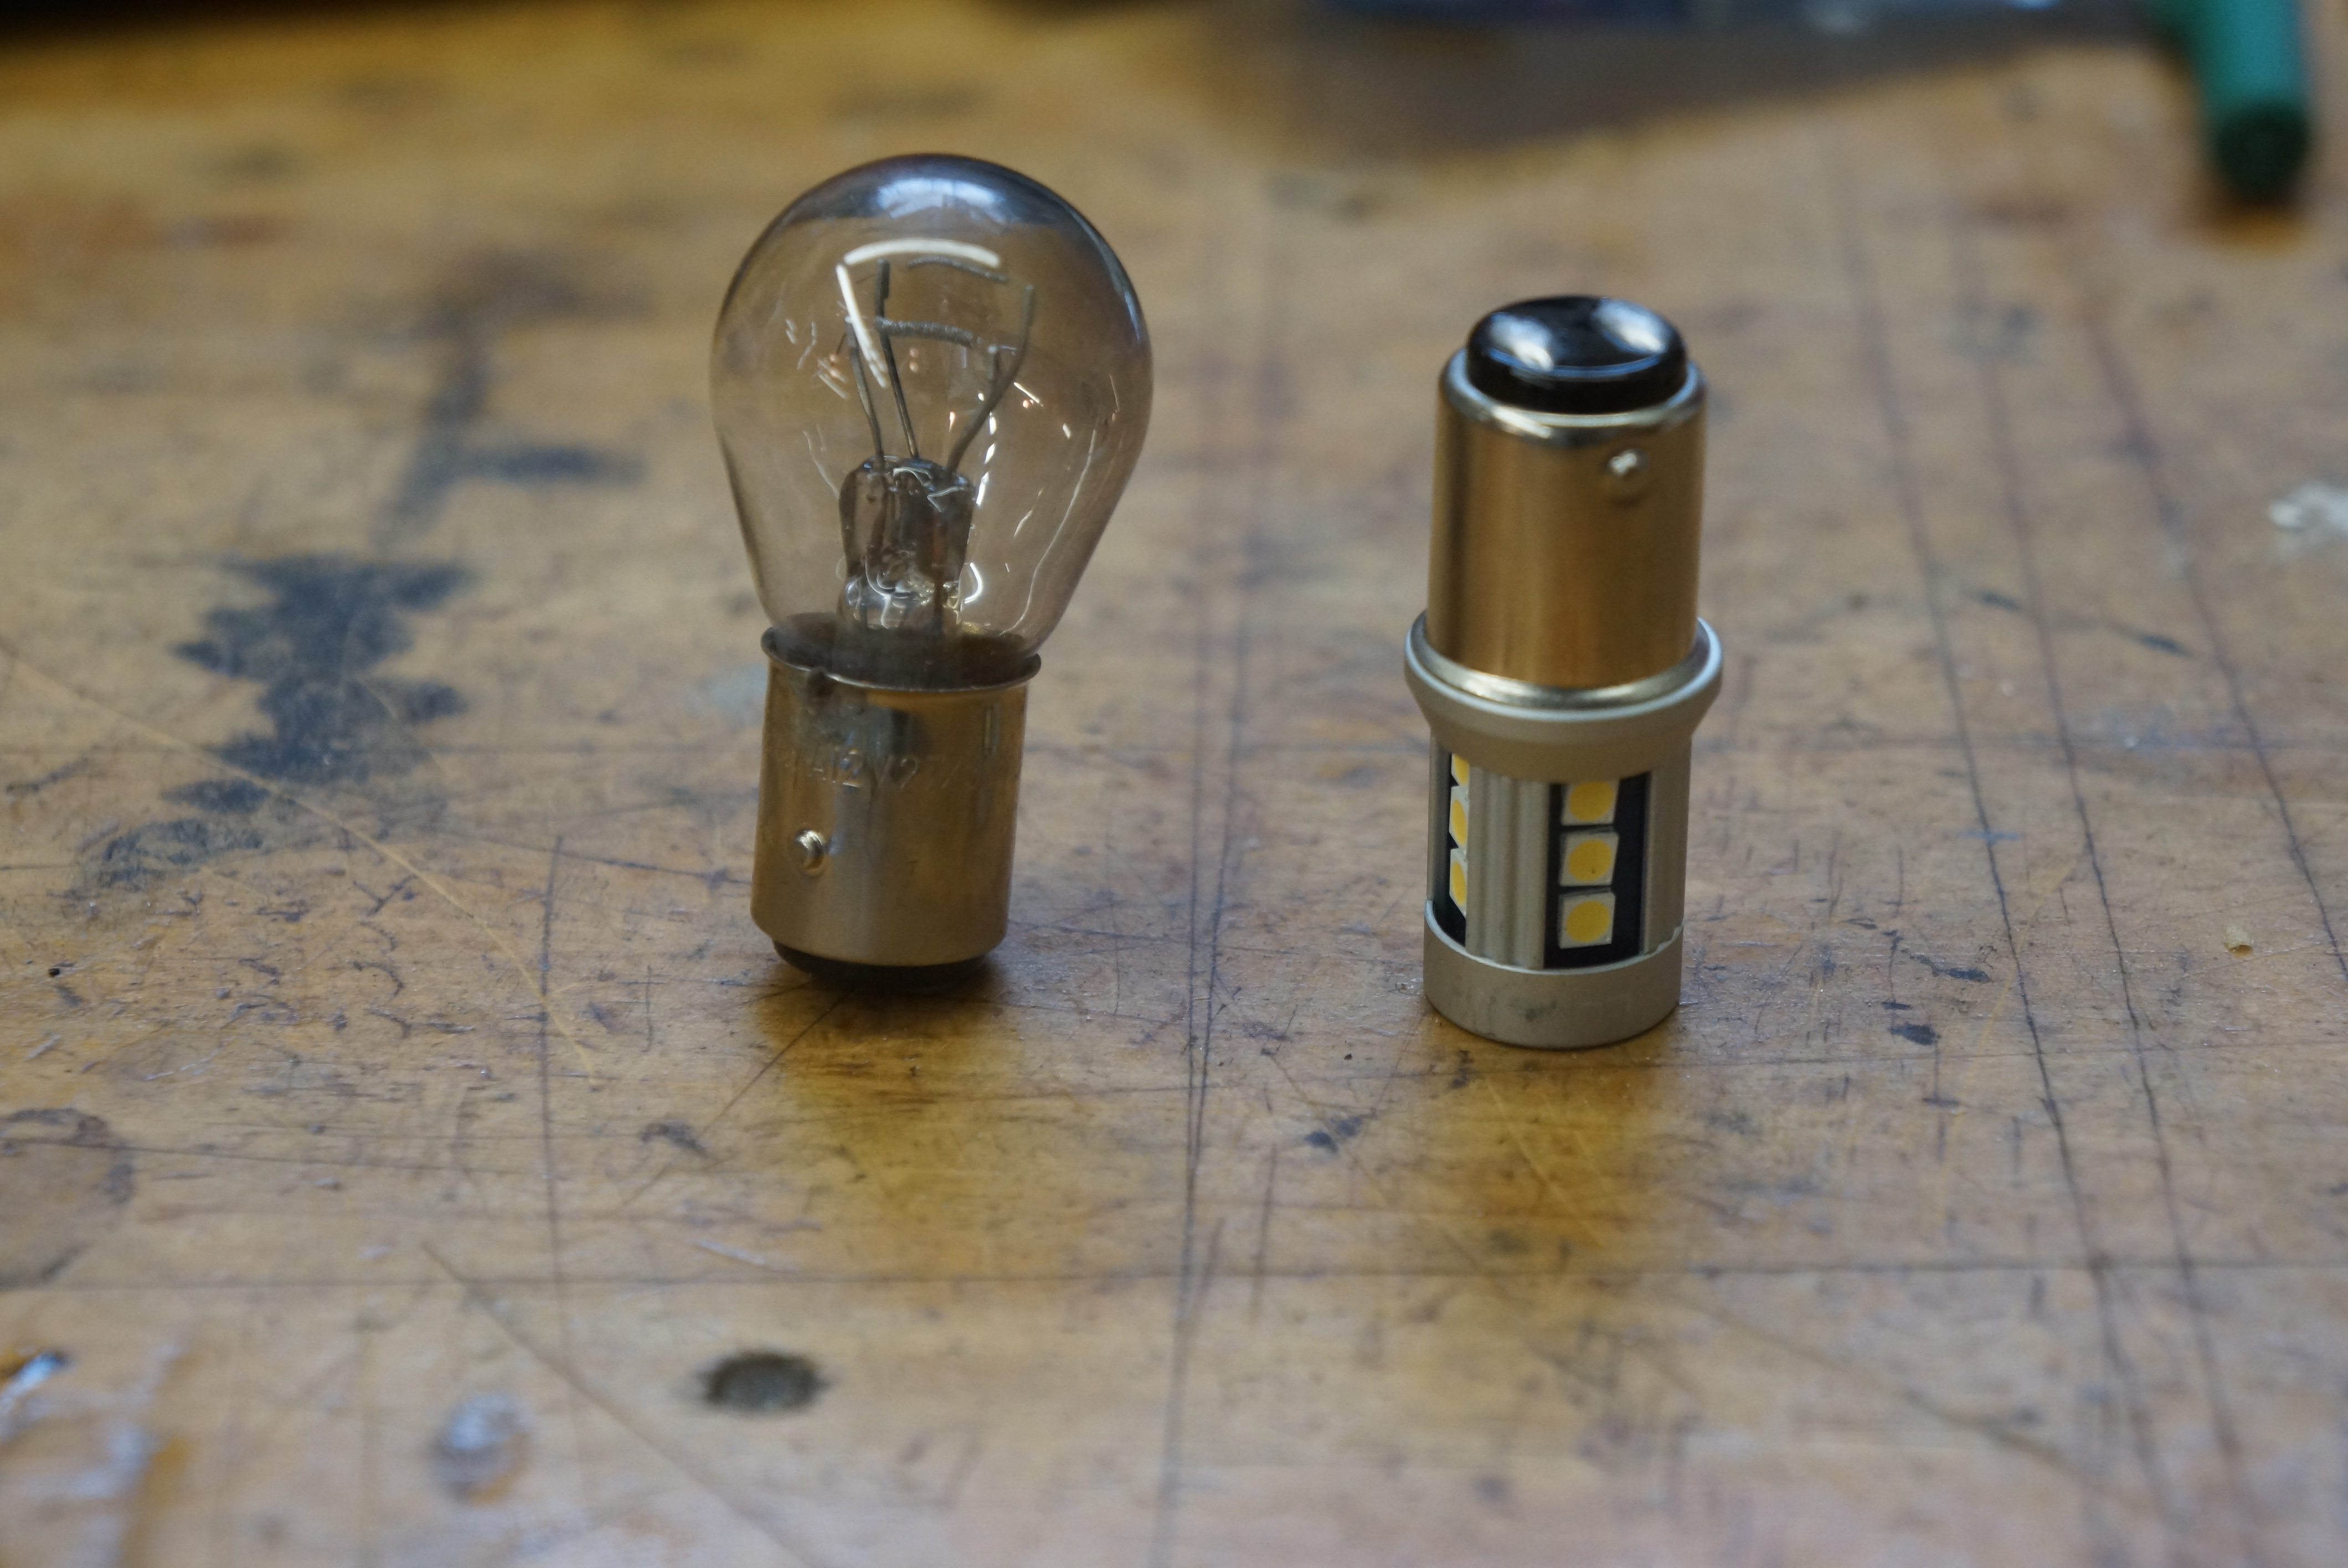
When replacing incandescents with LEDs, it is extremely important that the LED bulb is the same length, or shorter than, the bulb it is replacing. LEDs are available from different companies, and most companies offer them in different lengths. An LED bulb which is too long may not fit at all, or may press against the plastic lens, causing that lens to melt, or worse.
New Lumen LED bulb (right) is slightly shorter than incandescent (left) it’s replacing
My bulbs are the Lumen brand, available in 3 different lengths. Generally speaking, the larger the bulb, the more light it emits. It therefore becomes tempting to decide on the largest bulb; again, make sure that it’s going to fit inside the assembly!
Today’s LEDs are direct replacements, emit lots more light and less heat
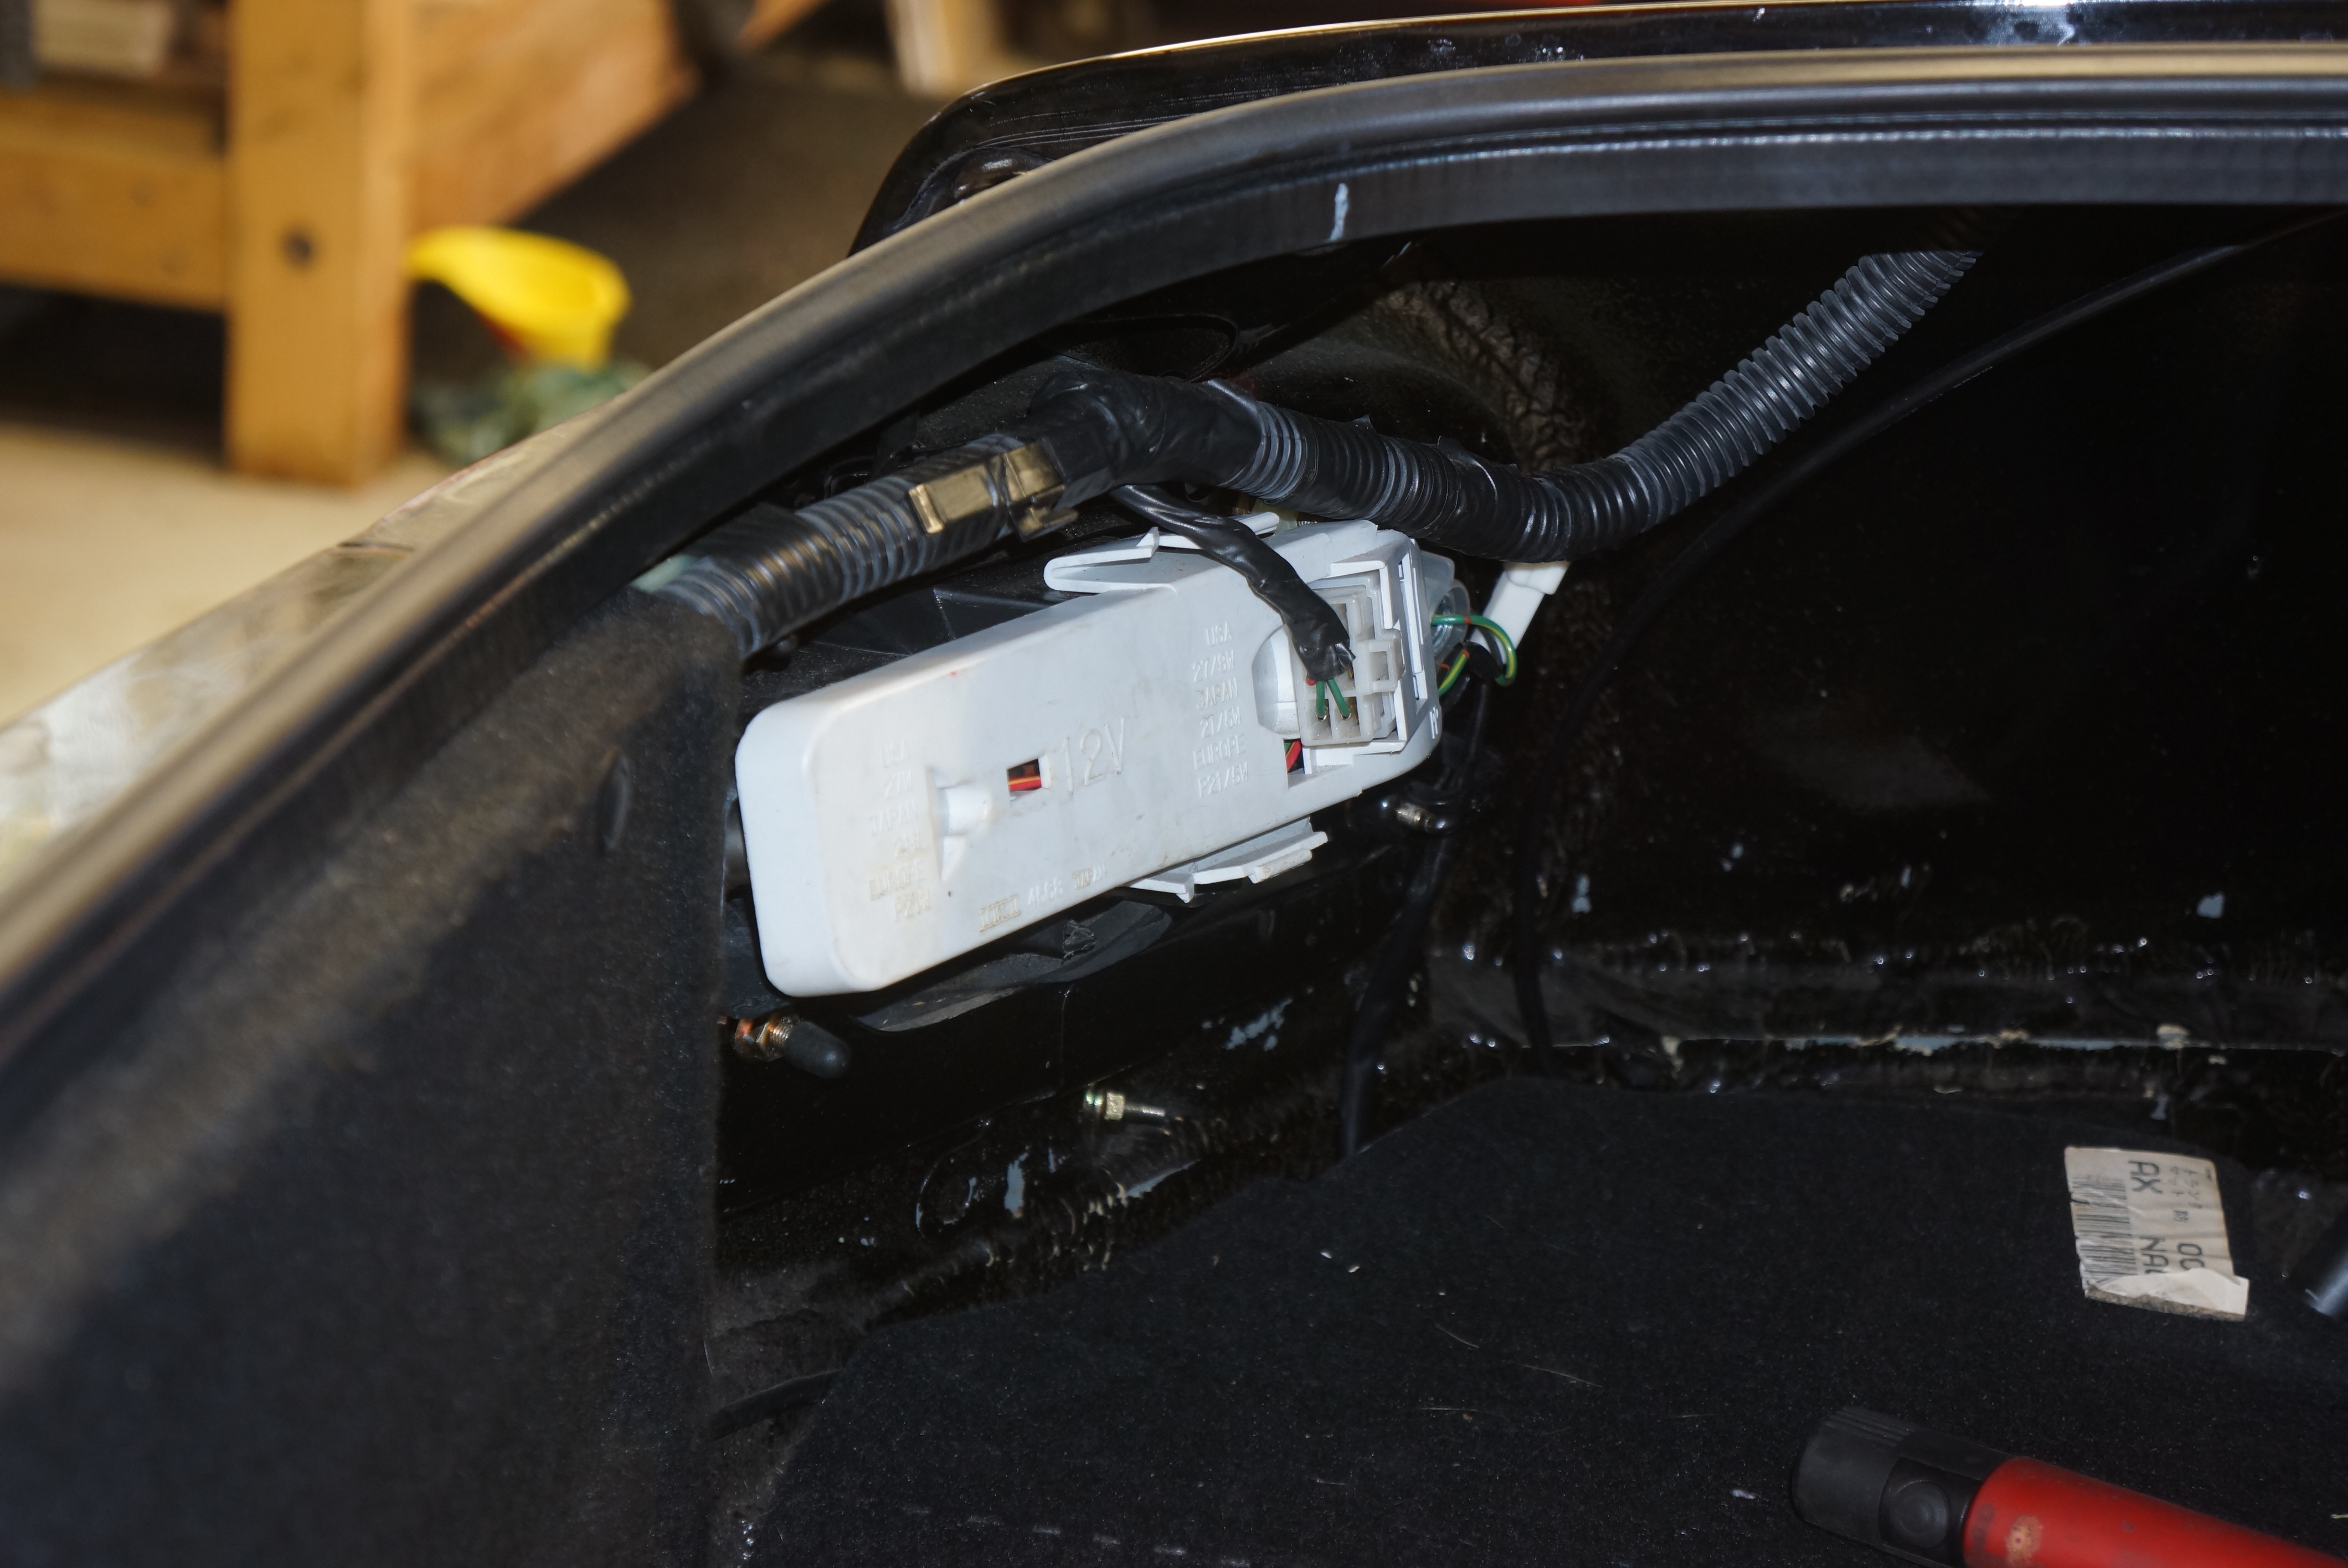
In my case, to be on the safe side, I selected the shortest bulbs. With pieces in hand, I opened the Miata’s trunk and was pleasantly surprised to see the covers behind the tail lamp assemblies were easily accessed.
(Sidenote: in 21 years of ownership, I have never removed one of these covers before this LED bulb swap. The ONLY exterior bulb I’ve replaced on this car since 1996 is one sealed-beam headlight bulb. Darn those Japanese, not giving the bulb makers a chance to sell their wares!)
Tail lamp assembly cover easily accessed from trunk
Push in two clips, and flip cover (no tools needed)
Once the cover was removed (no need to disconnect the harness plugs), I flipped it over, and both bulbs were right there. I did note that the tail/brake light glass (“envelope” in bulb-speak) was darkened, probably dimming its output; however, the bulbs still worked. Wanting to make changes one step at a time, I swapped out the 1157s first, using the Lumen white LED bulb (the tail lamp housing has a red lens).
To document the changes, I took photos, figuring that the camera doesn’t lie (but it might try to make the car look thinner). I put my Sony digital camera on a tripod, and set the controls to full manual. In this way, the camera’s light sensor would not automatically adjust the exposure, which could artificially make the light look either brighter or darker.
With new tail light bulbs in place, I subjectively thought that the light output was brighter. The big improvement, however, was in the amount of illumination: now, the entire lens assembly was lit, compared to prior, when the upper corners remained dark. So far, so good.
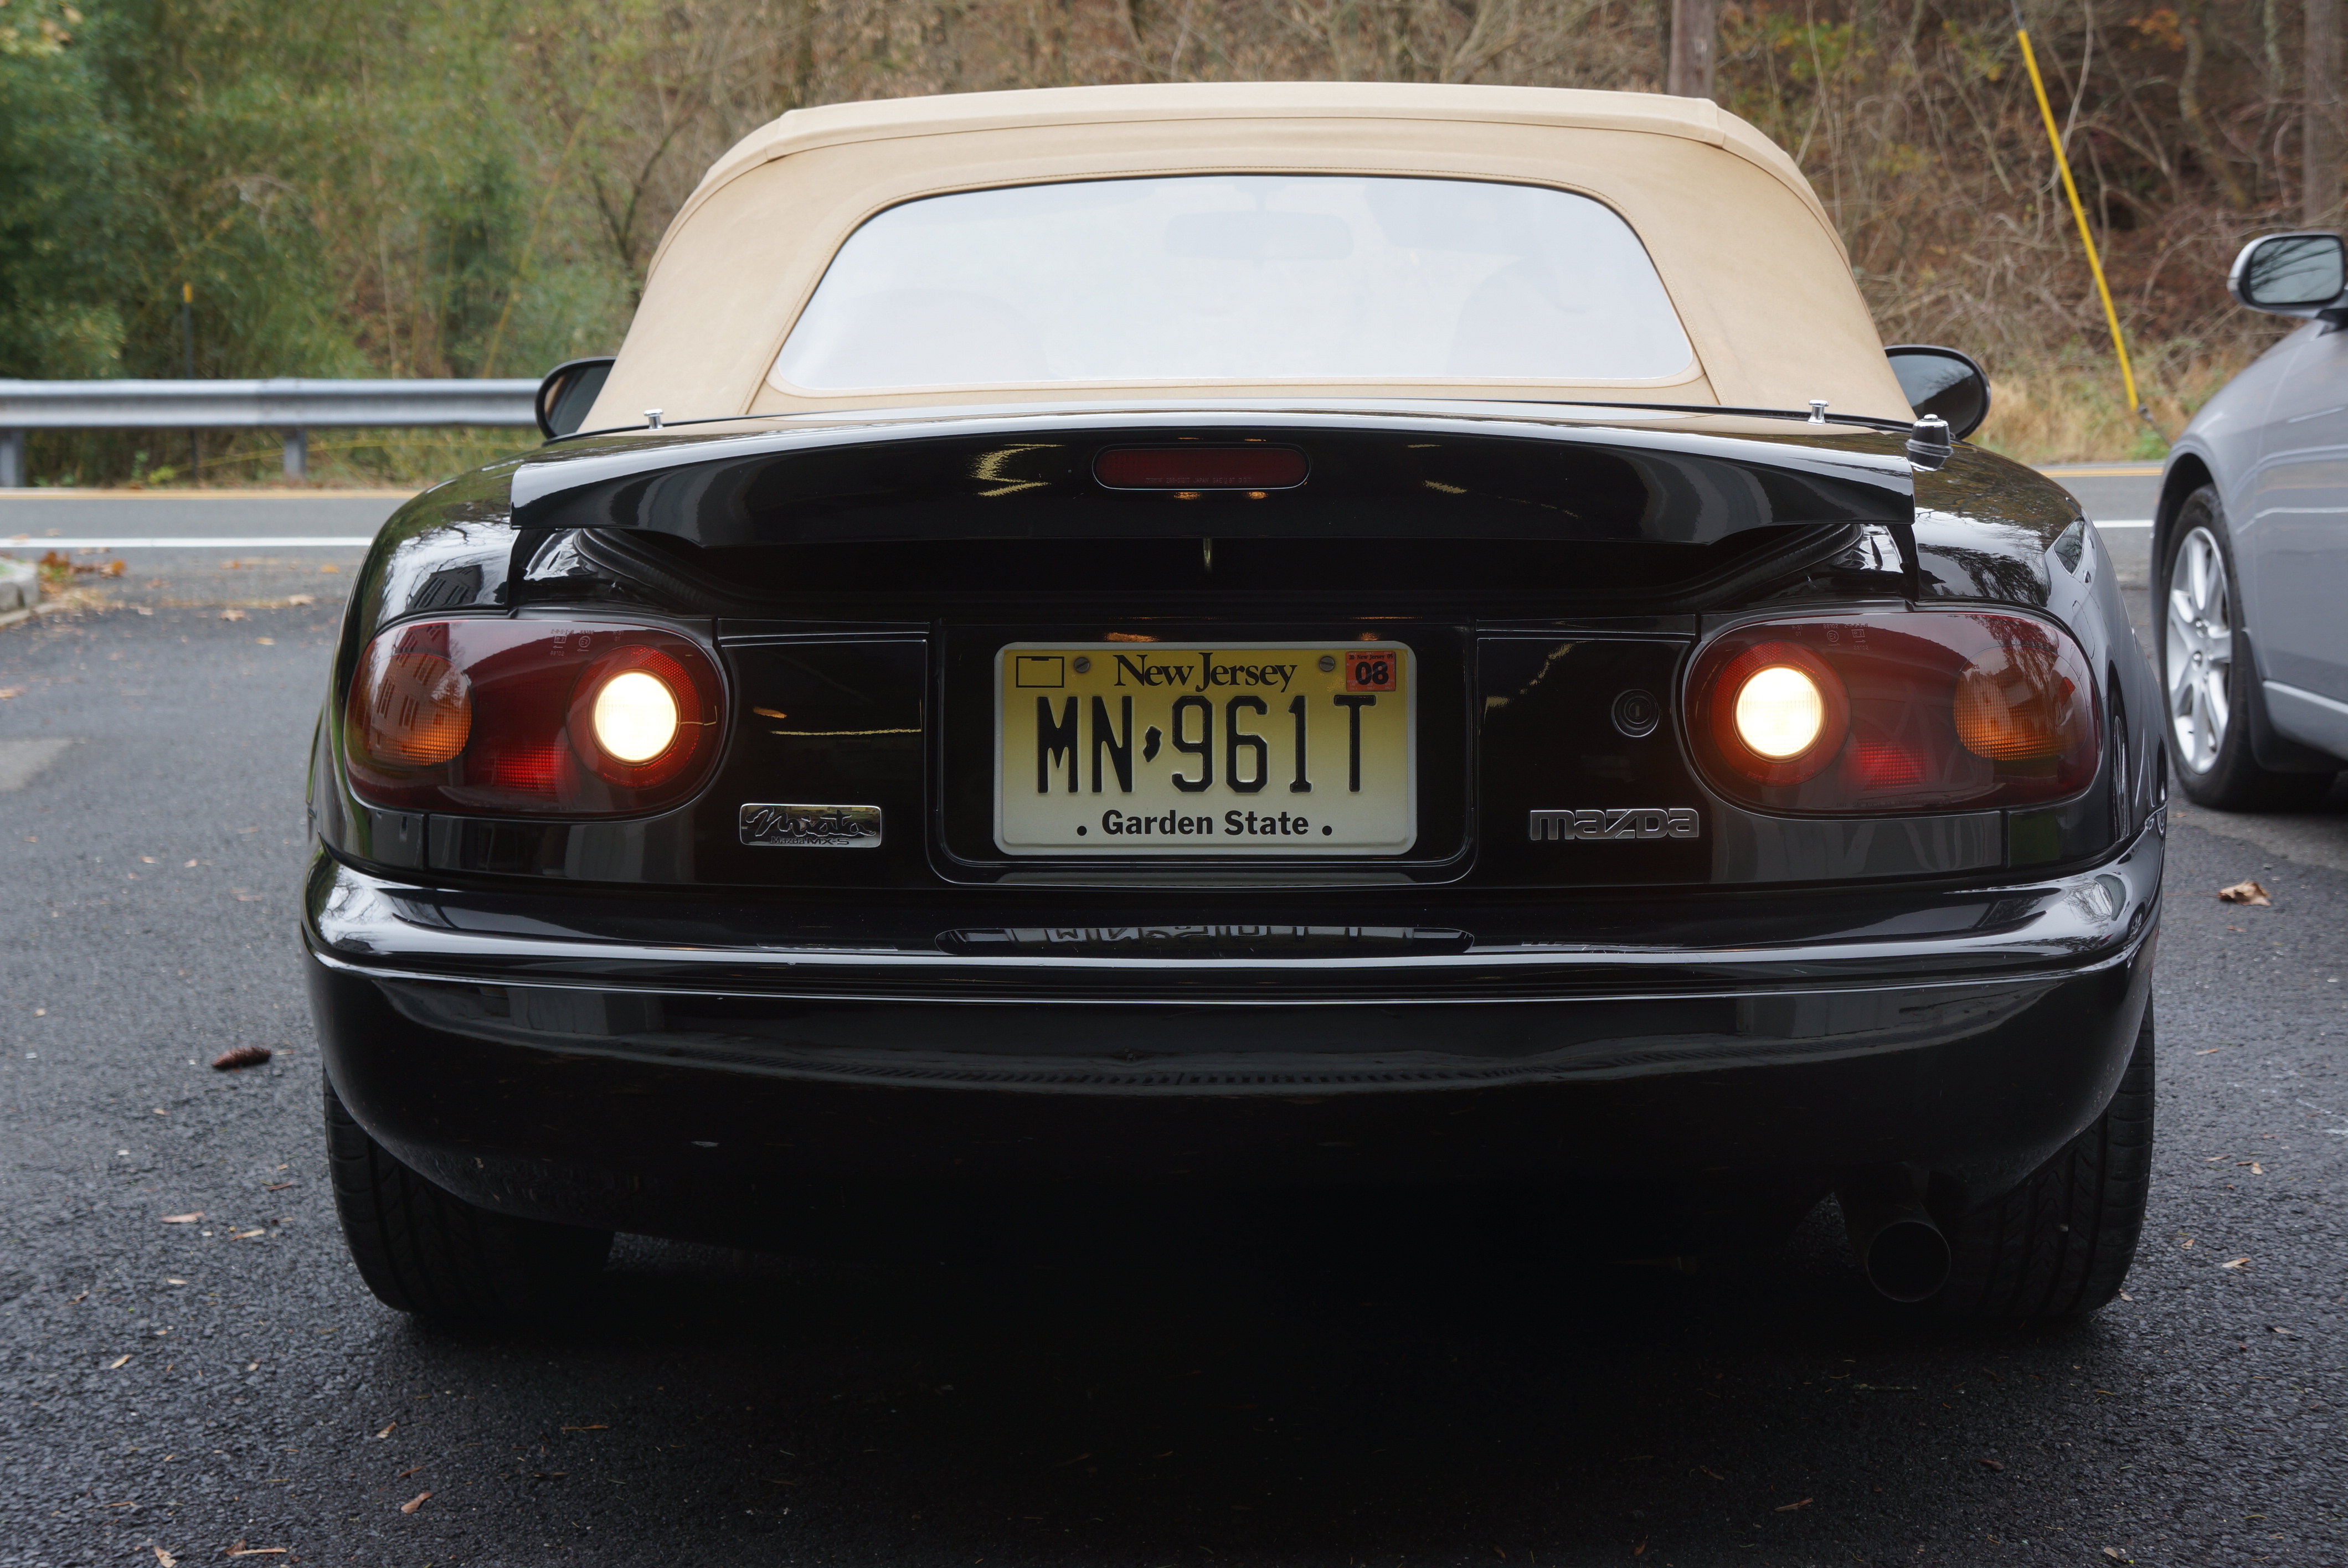
Tail lamps: incandescent
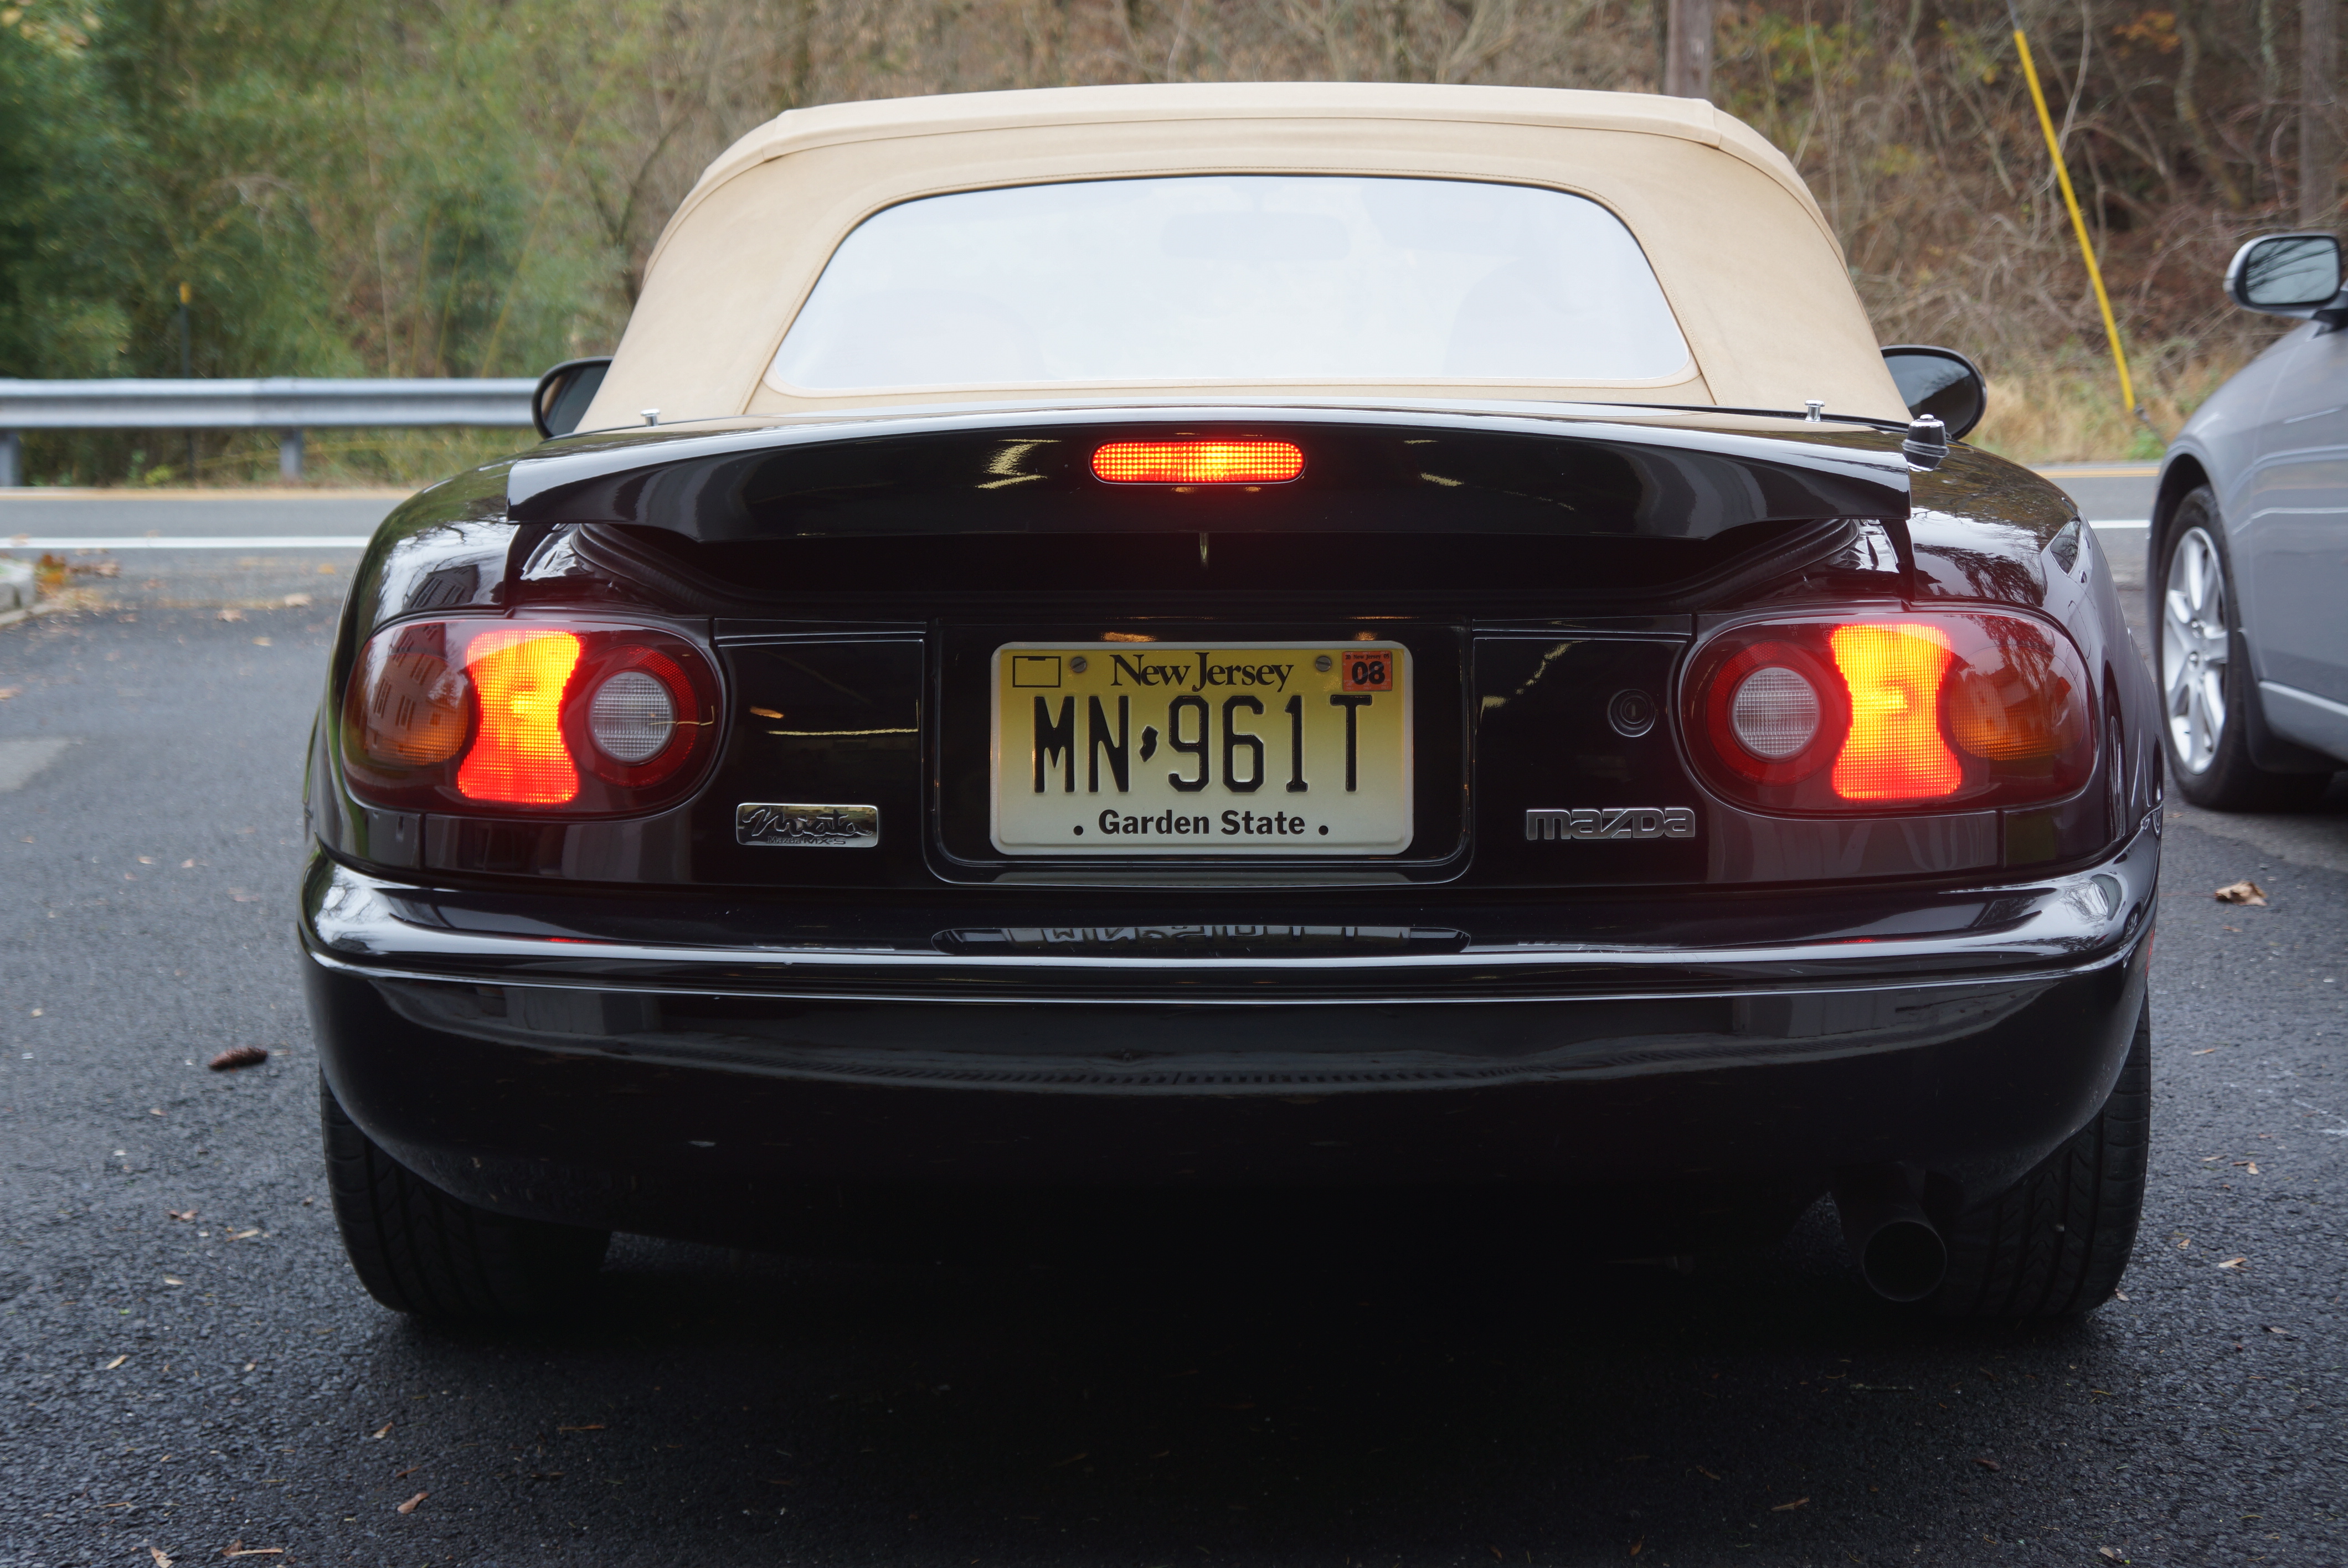
Tail lamps: white LED
Next to be installed were the reverse lights. This was a great improvement, as the light is not only markedly brighter, the color is a pure white, compared to the hazy yellow of the incandescents.
Reverse lights: incandescent
Reverse lights: LED
Lastly, I went back and replaced the 1157 LED white bulbs with the same size in red. My expectations were low, as I had run this same experiment at work several years ago with an older Honda Civic, and the red tail lamp bulbs behind a red lens were not as bright as white bulbs.
The Miata yielded a much better result: the light was slightly brighter, and it was redder too. If conspicuity was my goal, the red 1157s and white 1156s allowed me to achieve it.
Tail lamps: white LED
Tail lamps: red LED
(For those who want to make the same upgrades, I would suggest trying both red AND white LED bulbs in the tail lamp assembly – provided that the tail lamp lens is red. Vehicles with WHITE lenses for tail/brake lamps MUST use a red bulb.)
Tail AND brakes lamps both on
What’s next for the Miata’s lighting? I had considered upgrading the front and rear turn signals, but LED bulbs introduce a small hiccup: their low resistance causes the flasher relay in many cars to “hyperflash”, or, flash too rapidly. There is a fix in the way of a resistor, but that costs extra, and must be permanently mounted to the car, a modification that I’m not willing to make.
The front and rear side marker lights would be a likely next step for LEDs. On the interior, the footwell courtesy lighting could really stand to get LEDs (the poor passenger compartment illumination is partly caused by lack of any overhead lights).
Was I surprised by the improvement in the Miata’s rear lighting? Not at all. The biggest surprise may only be that I waited this long to make the upgrades. Oh, and the Alfa will definitely be getting similar LED bulbs. Just don’t tell the AACA judges.
“Reverse” lights, also known as “back-up” lamps, are wired to illuminate whenever (and only when) the vehicle’s transmission is in reverse. They are designed to both help light the way for the driver, AND, serve as a signal to others of the driver’s intention to move in that direction.
In the U.S., reverse lights became required by law with the passage of the initial Federal Motor Vehicle Safety Standards (FMVSS) in 1968. Before that, back-up lamps were optional equipment for many vehicles, if they were even available. As a boy, I can recall seeing lower-line American cars with steel “blanking plates” in place of reverse lights.