This past weekend I had the opportunity to spend a day with my good friend “Pete”, the fellow who sold me my Alfa Romeo after his 45-year stint with it. Pete has always had an eclectic collection of older and newer special-interest cars, and one of the oldest in his ever-changing fleet is his 1936 Oldsmobile L-36 convertible, with an inline eight-cylinder engine. During this most recent visit, I finally got the chance to drive it.
First, a history lesson: in the 1930s, General Motors’ car marques consisted of more than just the five that may come to mind. Besides Chevrolet, Pontiac, Oldsmobile, Buick, and Cadillac, there were Marquette, Oakland, and LaSalle. Marquette, Buick’s junior division, was dead and gone after 1930, and Oakland survived only one year longer than that. LaSalle, Cadillac’s sister division, produced its last car in 1940. Even in the 1930s, GM priced its cars in a very careful step-by-step fashion.
Omitting the low and high outliers Chevrolet and Cadillac, if you were shopping for a mid-priced GM convertible in 1936, you had no fewer than these 8 different models from which to choose:
YEAR
MAKE
MODEL
WHEELBASE
ENGINE
PRICE
1936
Pontiac
Master Silver Streak cabriolet
112″
inline-6, 80 hp
$760
1936
Oldsmobile
F-36 convertible
115″
inline-6, 90 hp
$805
1936
Pontiac
DeLuxe Silver Streak cabriolet
112″
inline-6, 80 hp
$810
1936
Pontiac
DeLuxe 8 Silver Streak cabriolet
116″
inline-8, 87 hp
$855
1936
Buick
Series 40 Special convertible
118″
inline-8, 93 hp
$905
1936
Oldsmobile
L-36 convertible
121″
inline-8, 100 hp
$935
1936
Buick
Series 60 Century convertible
122″
inline-8, 120 hp
$1,135
1936
LaSalle
Series 50 convertible
120″
inline-8, 105 hp
$1,255
The chart is arranged in price order, low to high. First note, not surprisingly, that the six-cylinder models all fall to the bottom of the range. The least-expensive 8-cylinder is the most expensive of the three Pontiacs. Don’t downplay the inclusion of “wheelbase” in this data: a vehicle’s wheelbase, and hence overall length, contributed mightily to its visual statement as a luxury item. The 4 straight-eight GM convertibles pricier than the Pontiac 8 have wheelbases 2-to-6 inches longer than Pontiac’s 116”, and engine output figures which are 5-to-33 horsepower above Pontiac’s meager 87.
The savvy buyer who might have compared the two Buicks, the Olds, and the LaSalle eights may have realized that for just $30 more than the “junior Buick”, s/he could get an Olds with a 3-inch longer wheelbase, and 7 more ponies to pull that extra length. The next choice in this price hierarchy, the “senior” Buick (admittedly with a big power jump) cost over 20% more. In this light, the Olds L-36 appears to be a smart choice.
Actual sales figures bear this out. According to my copy of the “Encyclopedia of American Cars”, Buick sold only 766 Series 60 Century convertibles, while Oldsmobile sold 931 L-36 convertibles. What does this prove? Only that the original purchaser of Pete’s ’36 did their homework, and would likely be shocked to know that the car was still around 83 years later.
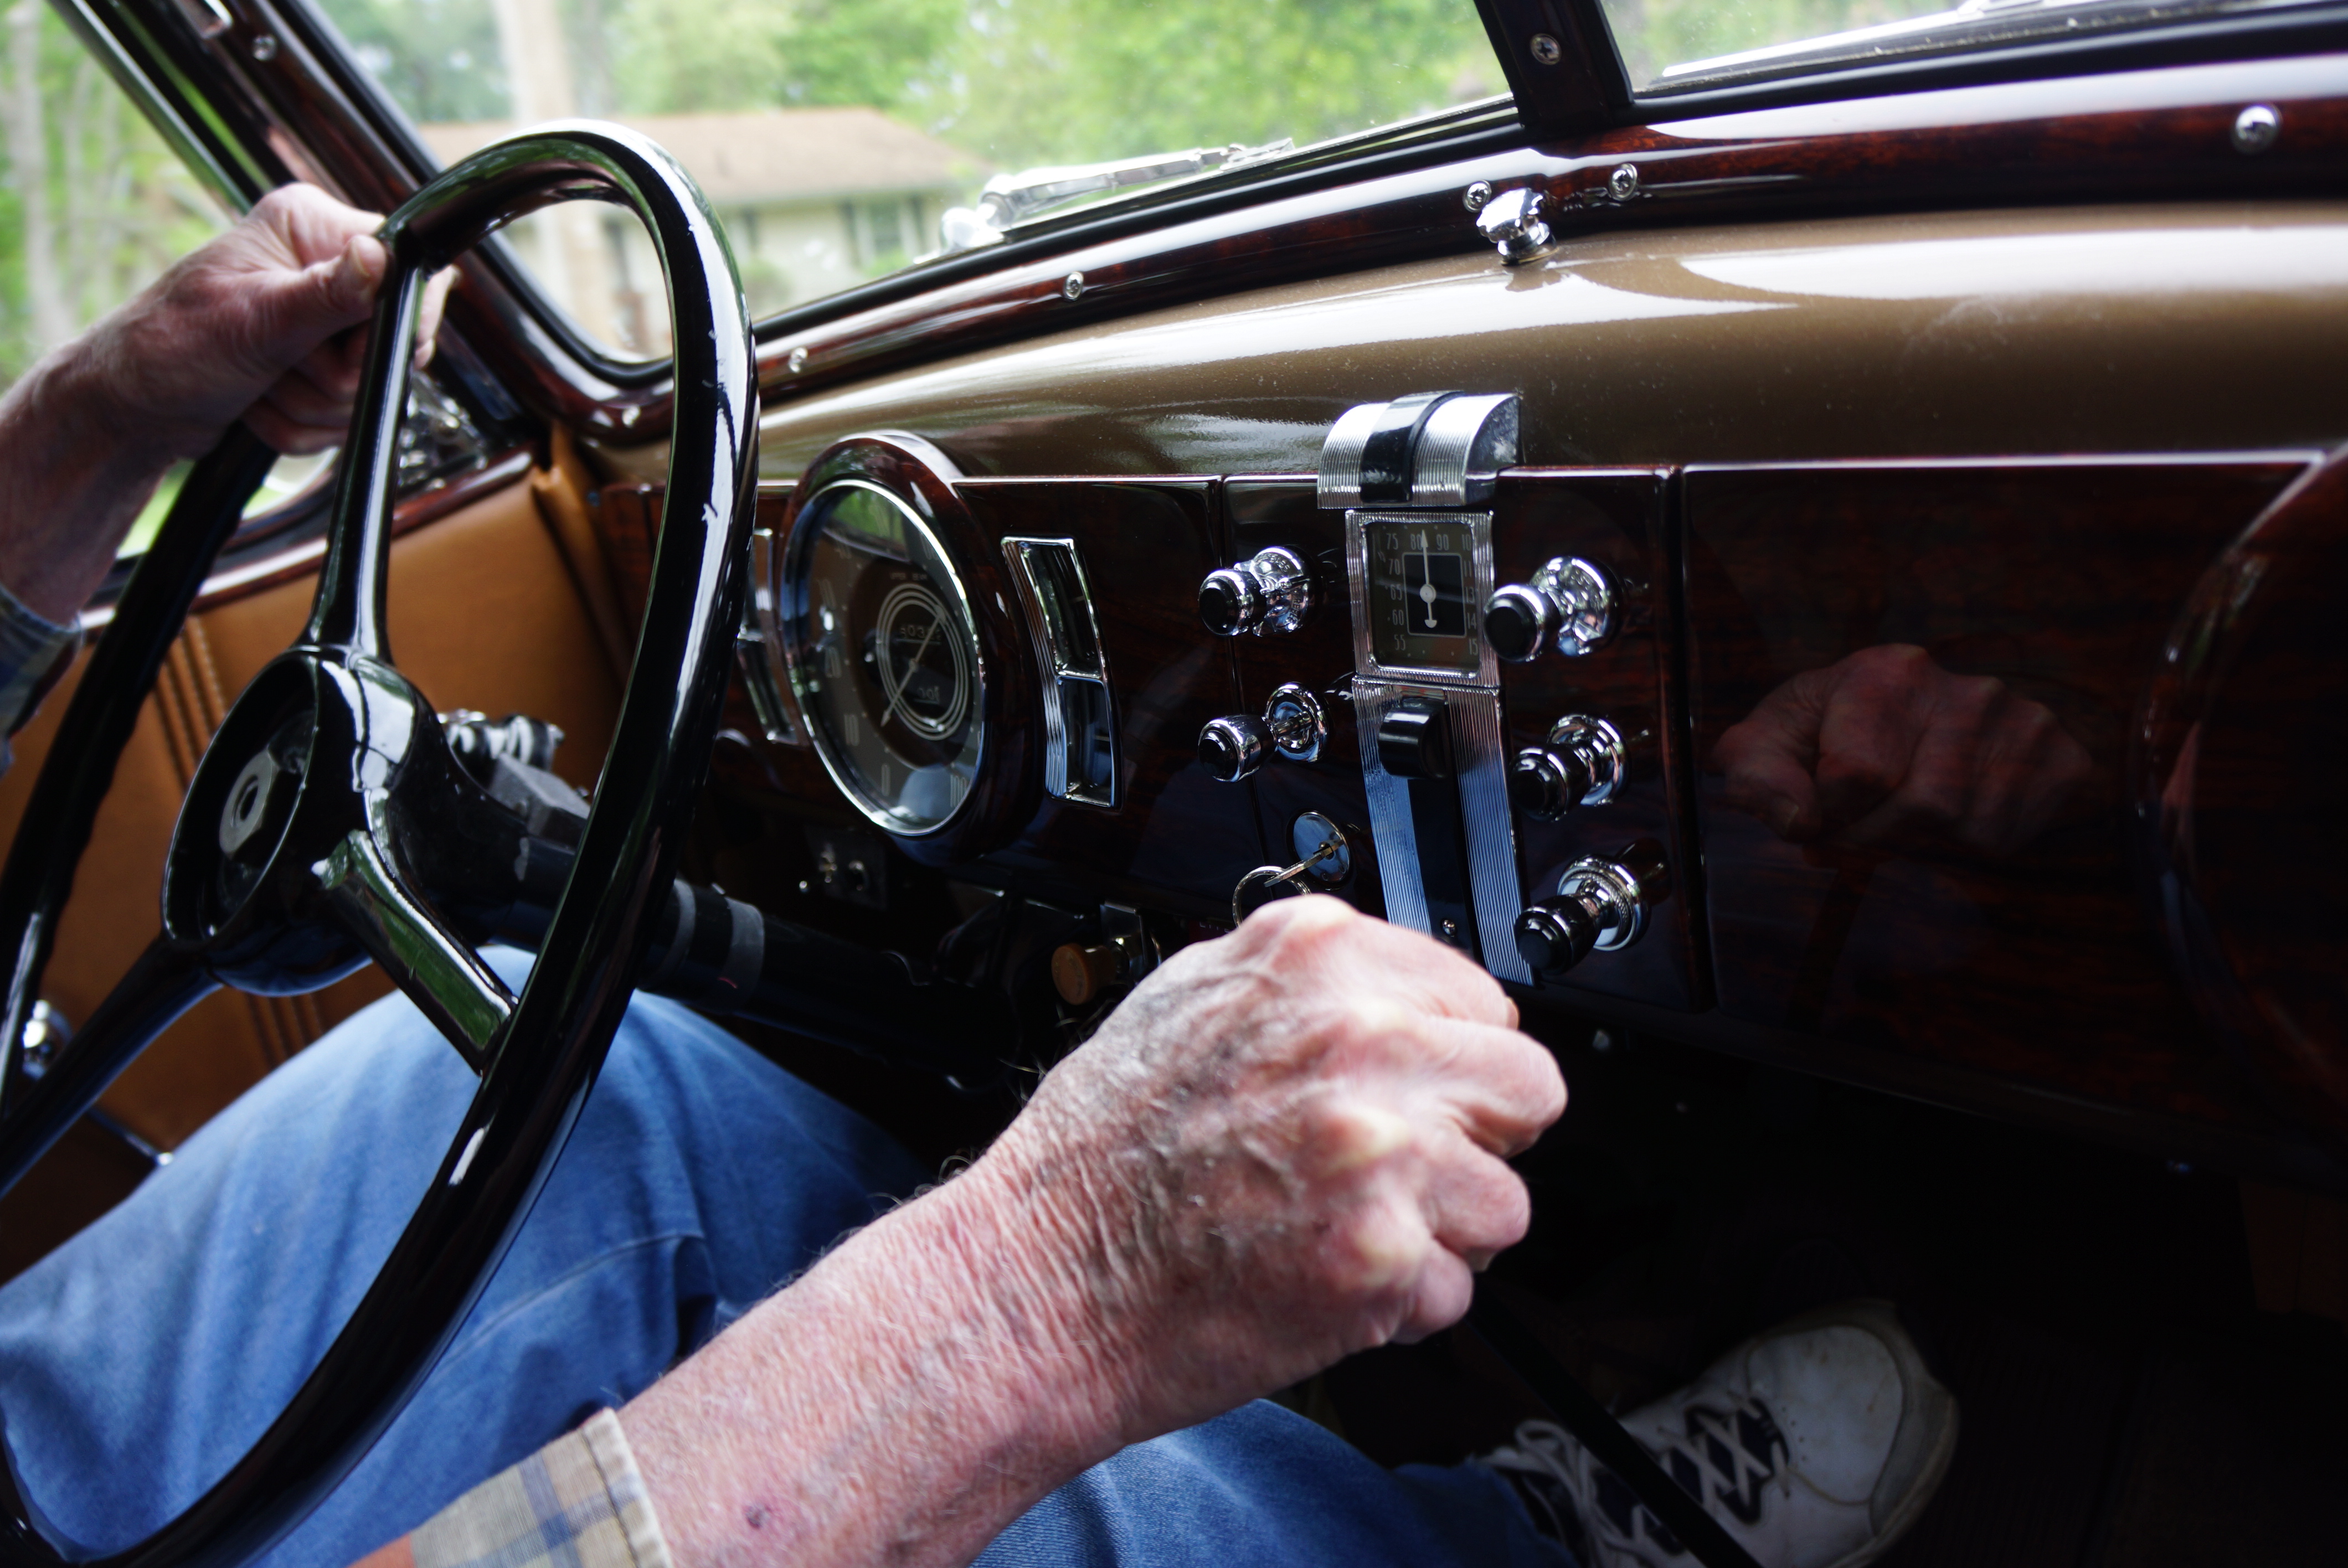
The owner takes the wheel first during our drive
Regarding my time behind the wheel, the driving experience was sublime. That straight-8 has torque to spare, so shifting the 3-speed gearbox (with lever on the floor) could be conducted at a leisurely pace. First gear is almost a granny gear. At one stop sign, facing downhill, I started in 2nd, with no complaints from engine or clutch. I found that I could comfortably put it into top gear by the time I reached 20 mph, and acceleration was always smooth and velvety, if a bit unhurried compared to modern metal.
Typical ’30s dash with painted woodgrain effect
But when you’re cruising in a ’36 Olds convertible, what’s the rush? The heavy steering requires that you take your time in turns anyway. Actually, after a few lefts and rights, I got the hang of it. Just think about the turn 100 feet or so before reaching it, begin to dial in some lock, and point that long nose in the general direction you’d like to head. It’s easy, really.
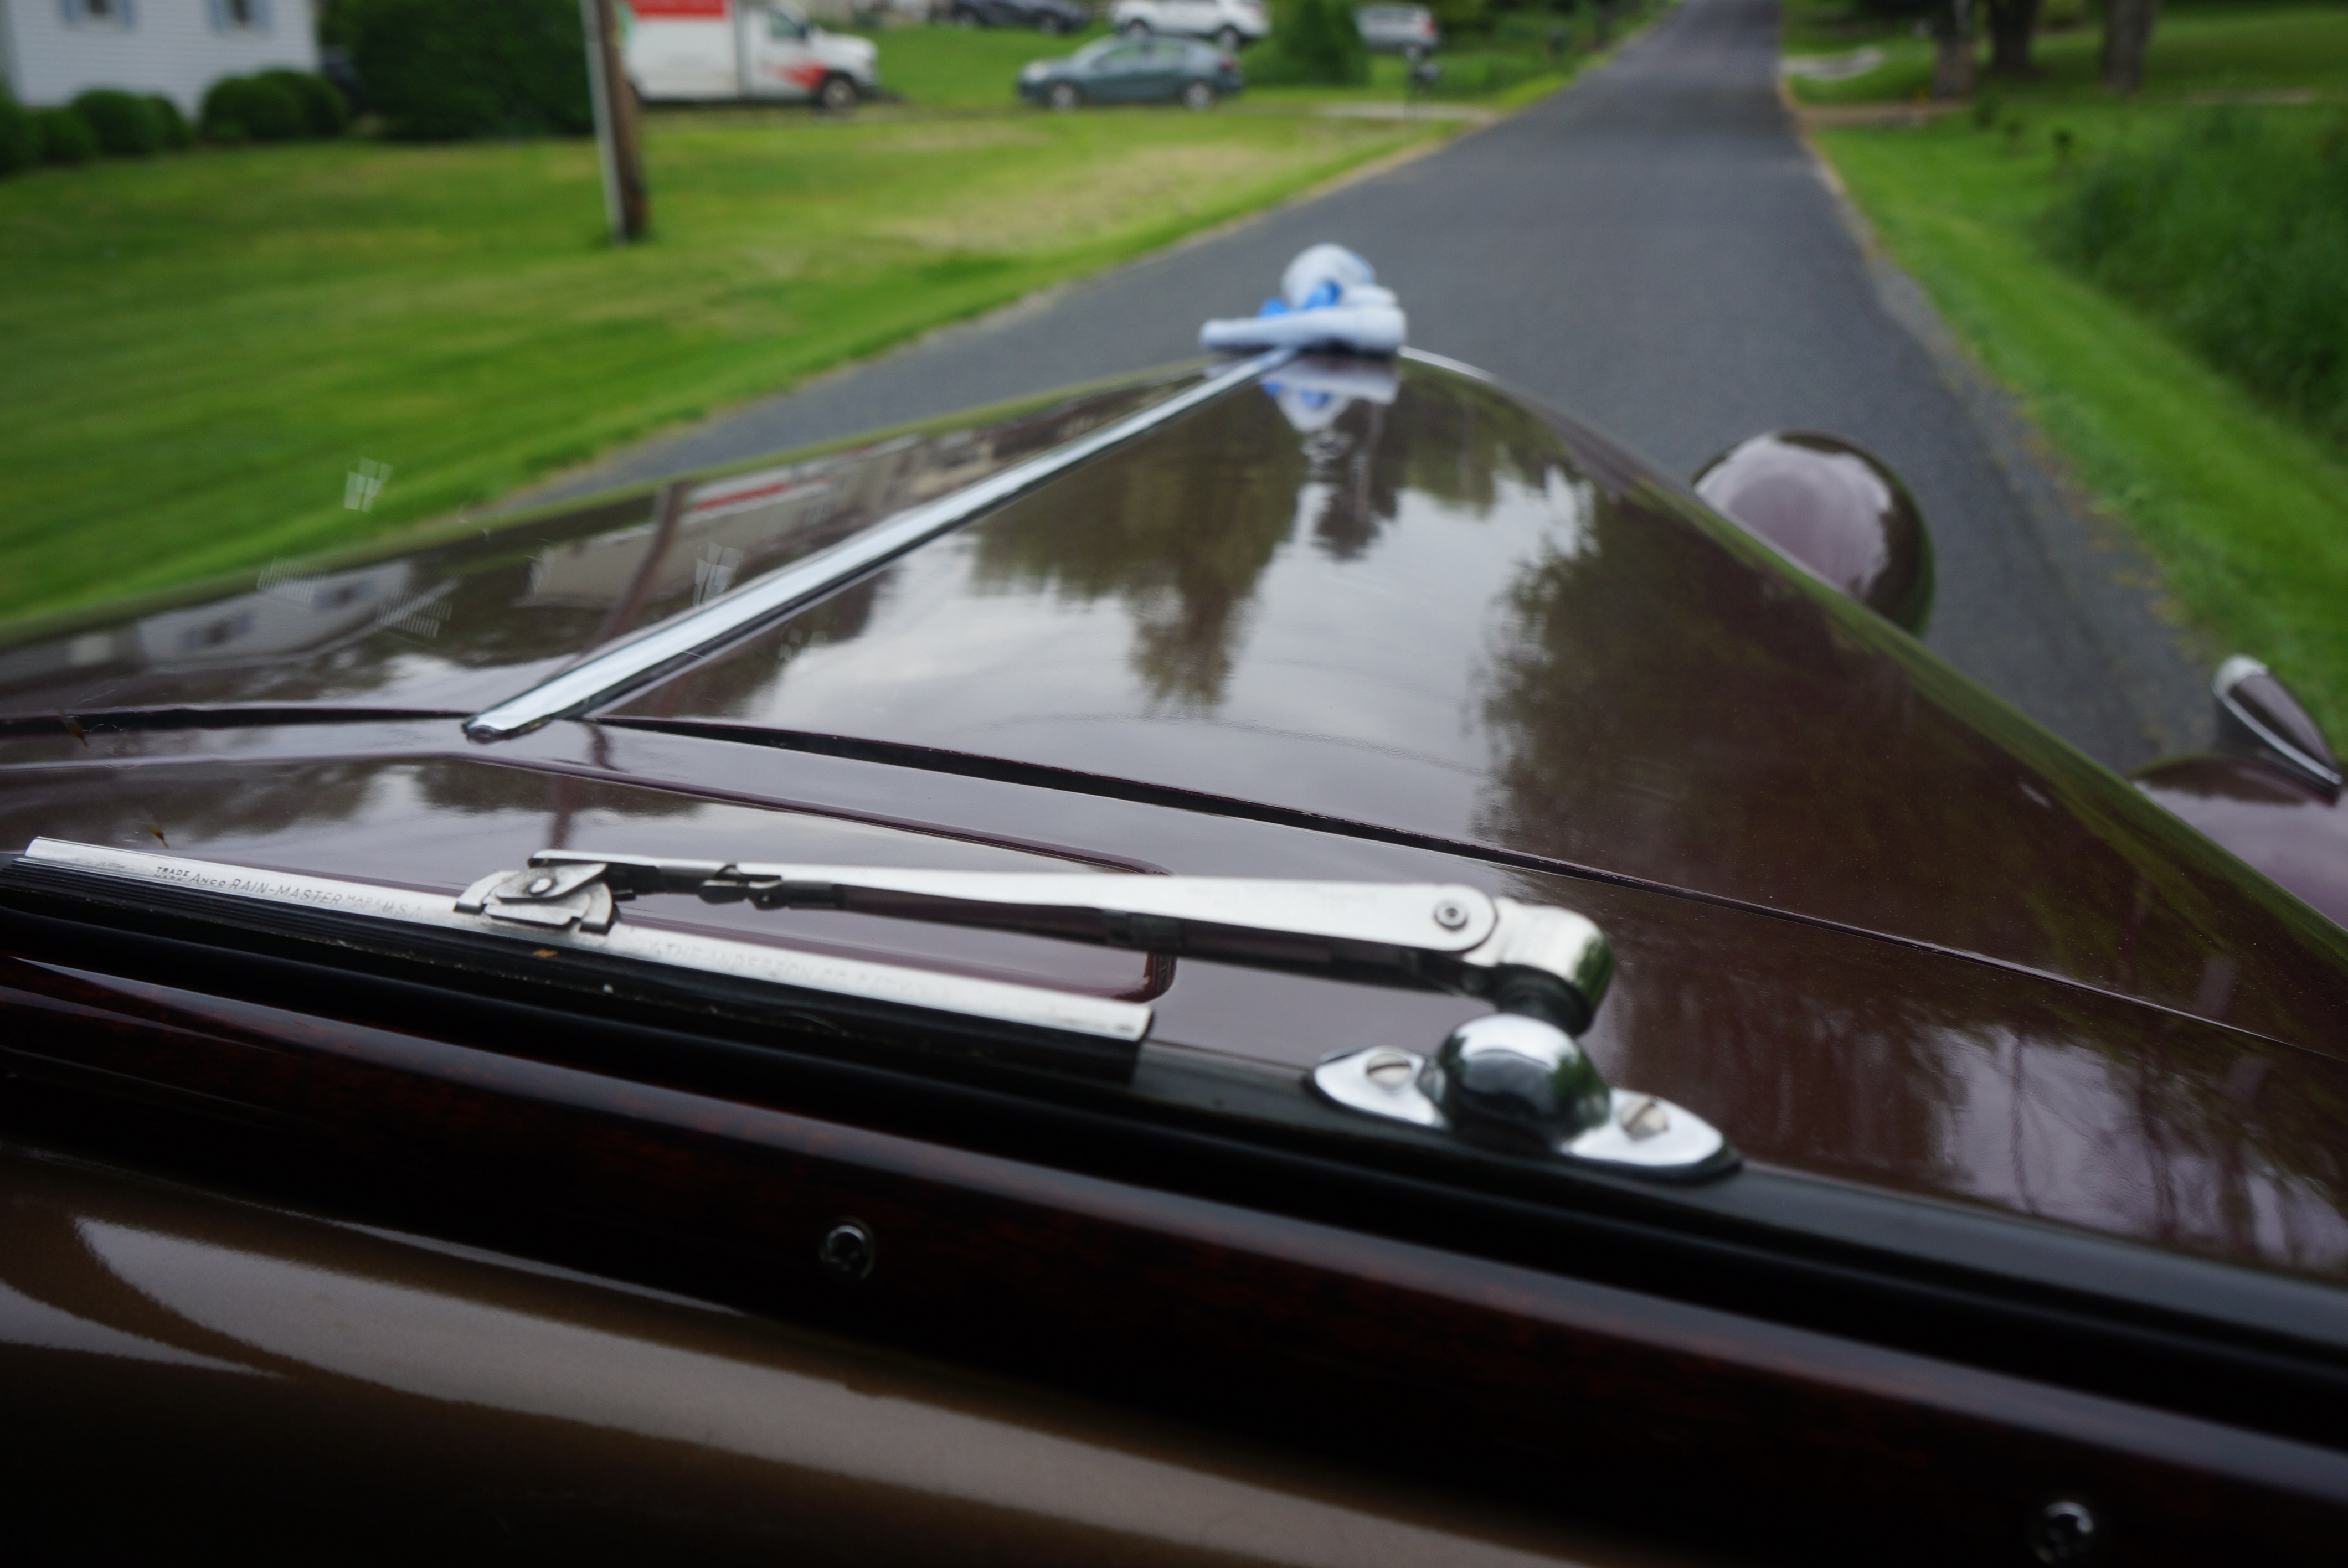
The view down the LONG hood
All the pedals, extending through the floor just like the Alfa, had good feel. The brakes brought the car to stop without drama, at least from 30 mph (my max speed for the day). The clutch exhibited no signs of chatter or slipping, and shifting was smooth on the all-synchromesh box. (Pete caught me double-clutching my first shift and said “you don’t need to do that!”) Visibility out the front was very good, but out the rear was inhibited by the small opera window in the erect cloth top.
The odometer on this car reads 60,000 miles, which is nothing for a car this age, but perhaps a significant number for a car of this configuration. And back to that production total of 931: how many have survived? First, these are convertibles, which reduces their lifespan (theft, water damage, rust). Second, by the time this car was 20 years old, the modern V-8 engined car, with its attendant power steering, brakes, windows, etc., would have made this ’36 look like the dinosaur it was. And last, as sad as it is to acknowledge this, those in the collector car hobby have been eyeing Fords, Chevrolets, and “true luxury” nameplates like Packard and Auburn. Oldsmobiles were not on most hobbyists’ radar. Taken together, all of these factors make this one rare bird. I’d guesstimate that there might be a few dozen 1936 L-36 convertibles out there, and many fewer that look and drive as good as this one.
This particular jewel of the motor car deserves to be kept in the loving condition it’s in, with occasional maintenance use to keep it fresh. I’ve already volunteered to be available for future test drives in order to accomplish just that.
The ’03 T-Bird and ’79 Volvo 265 peek out above the Olds’ top
POSTSCRIPT:
This particular vehicle is for sale by its owner. Please contact me directly if you are interested, or might know of someone who is.
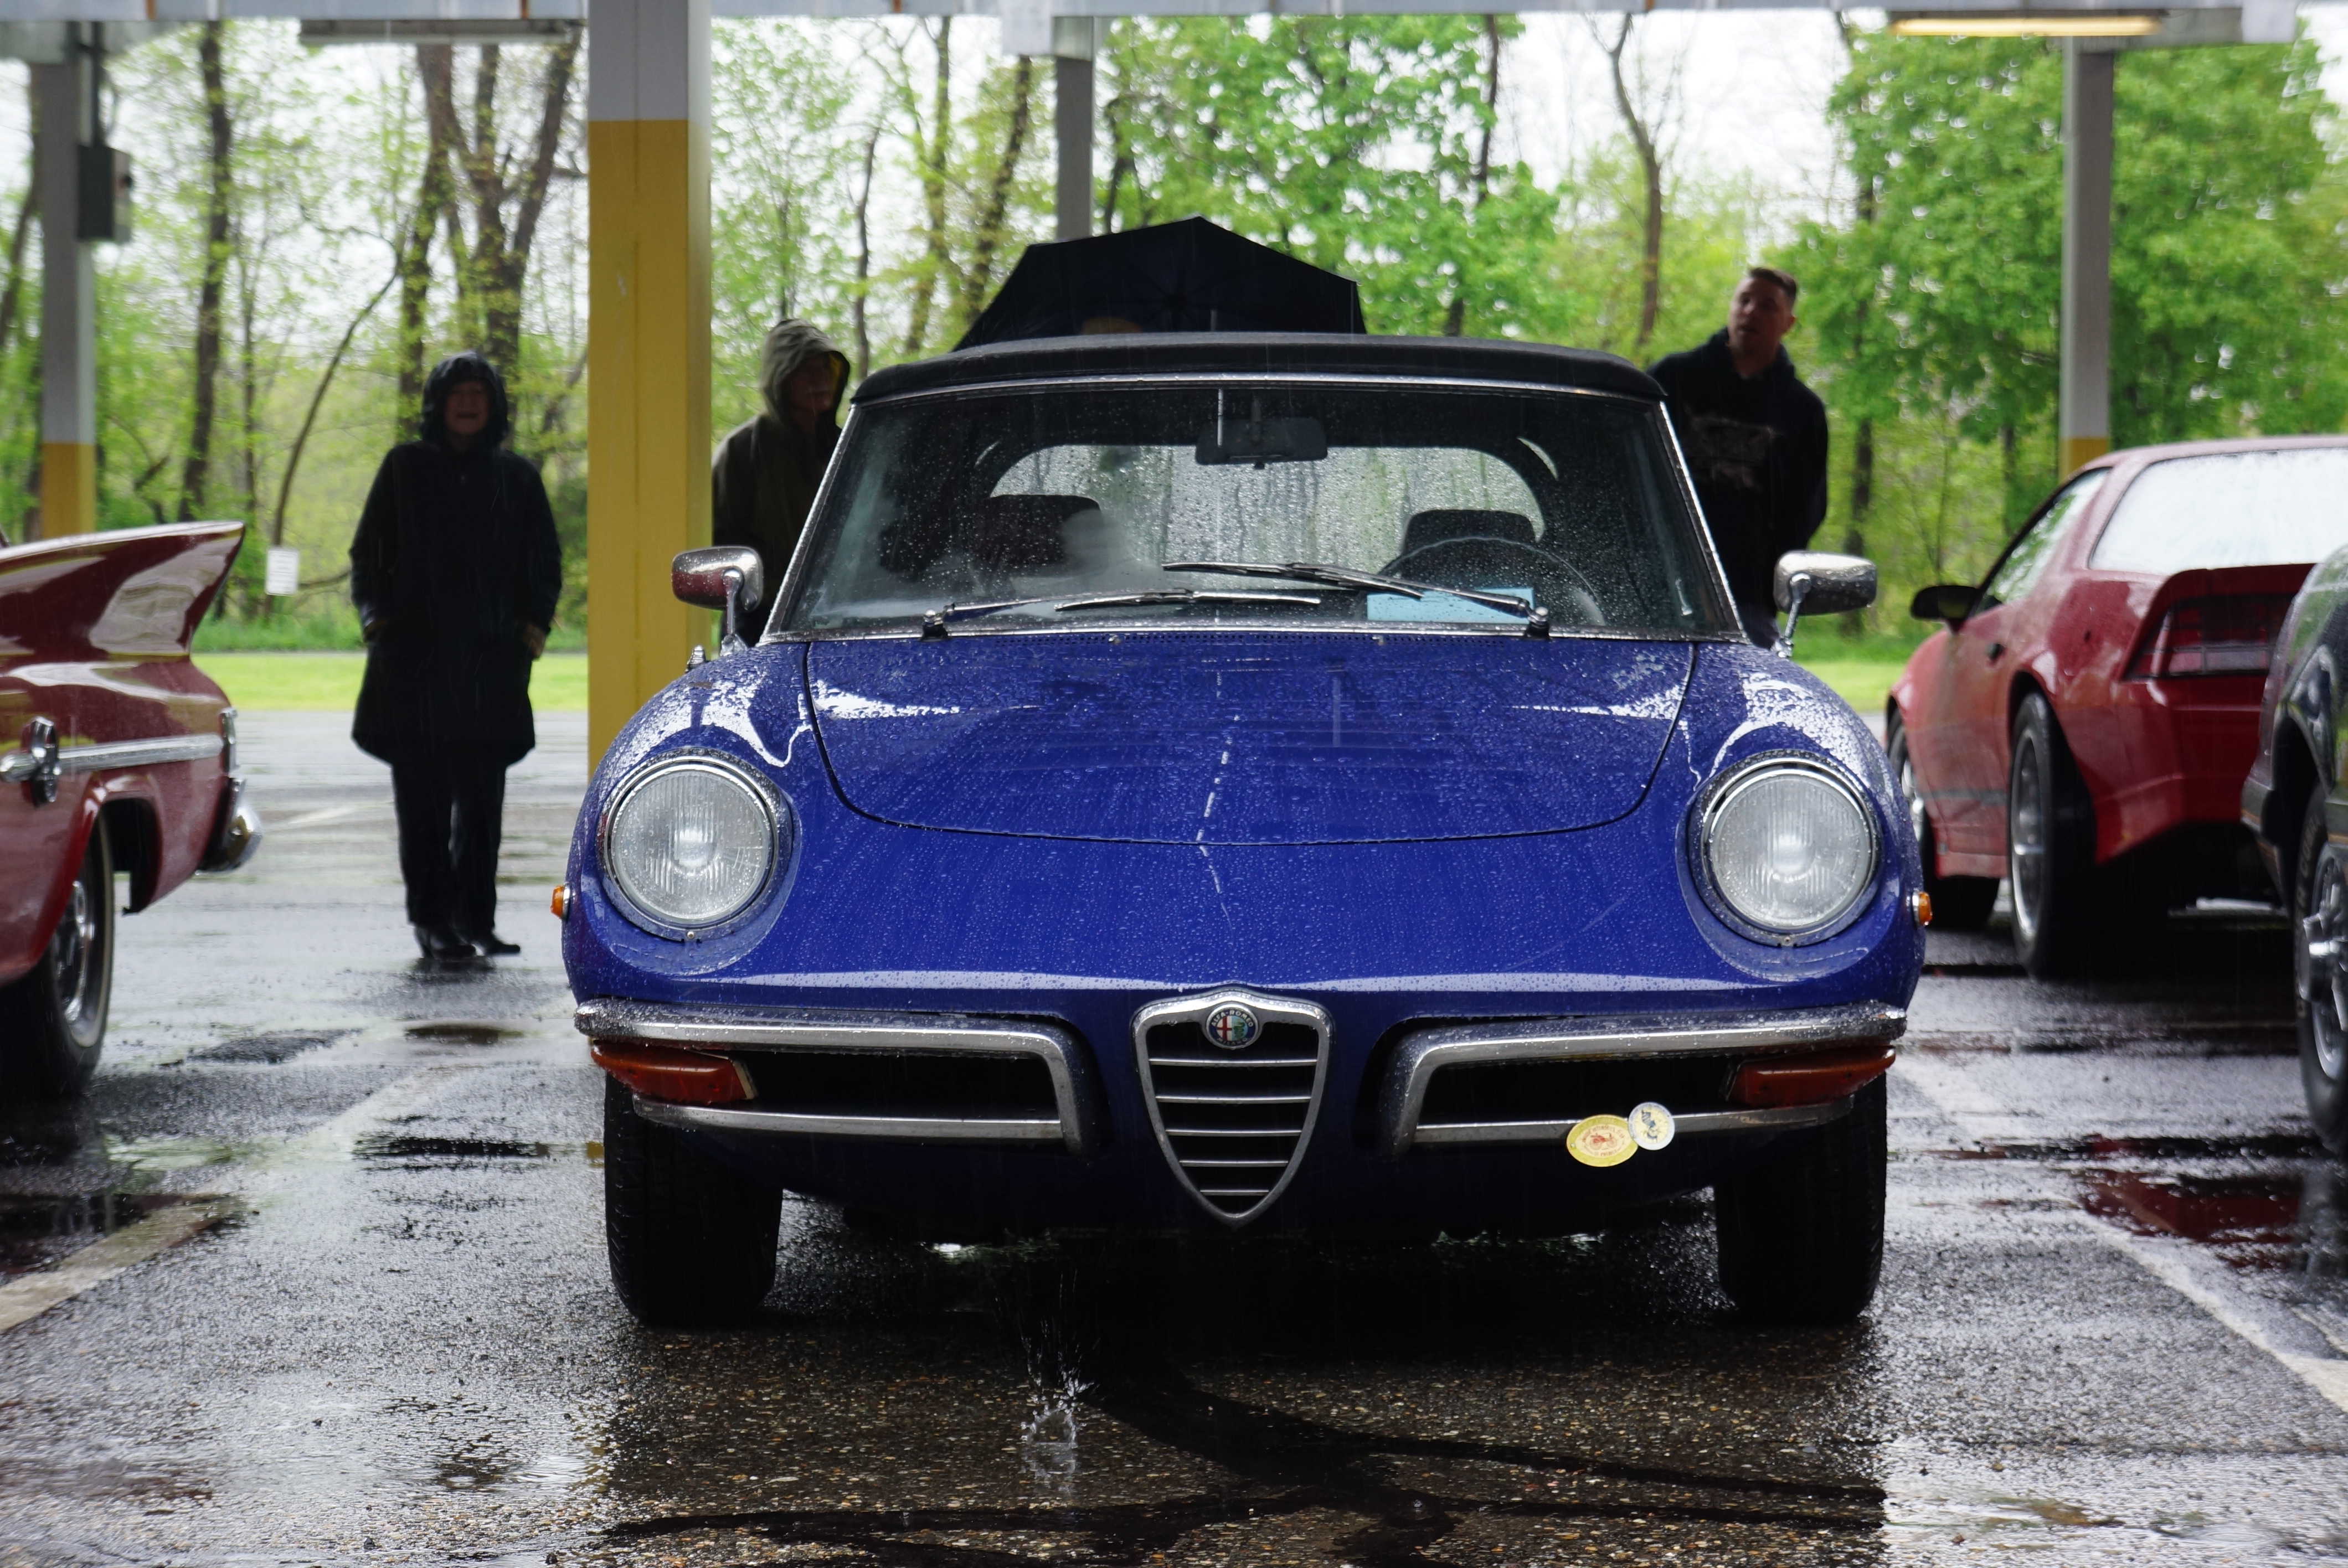
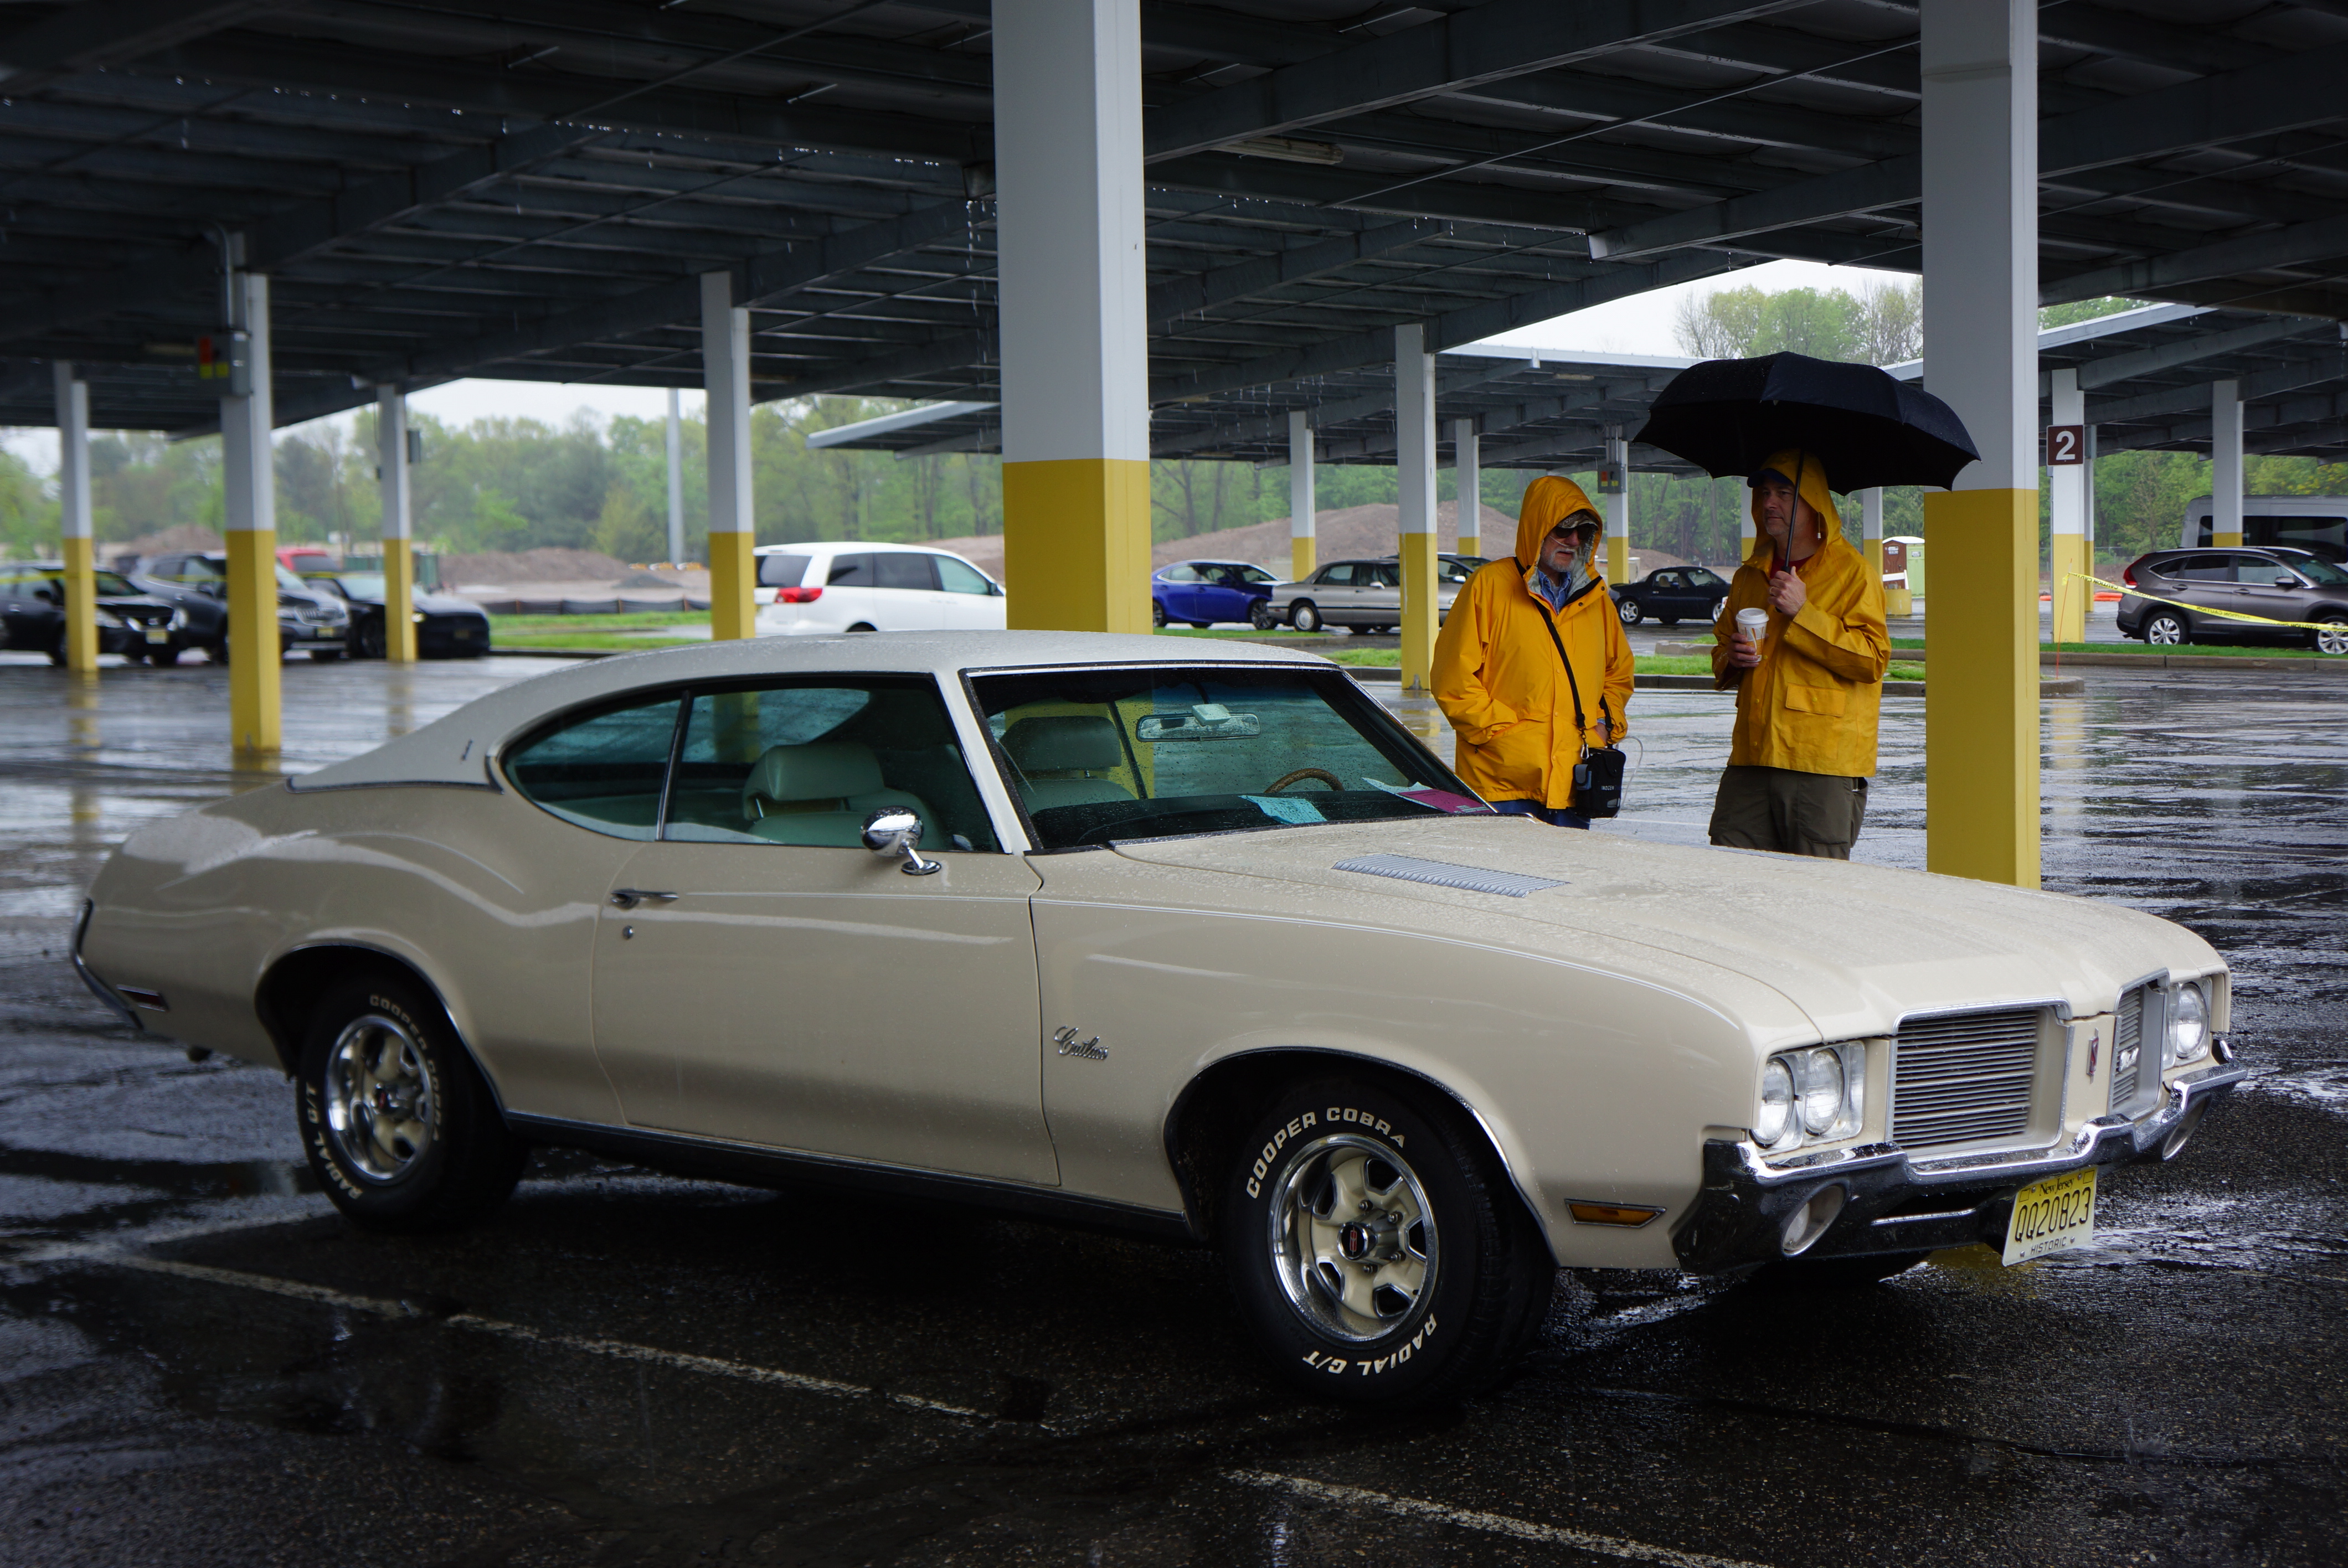
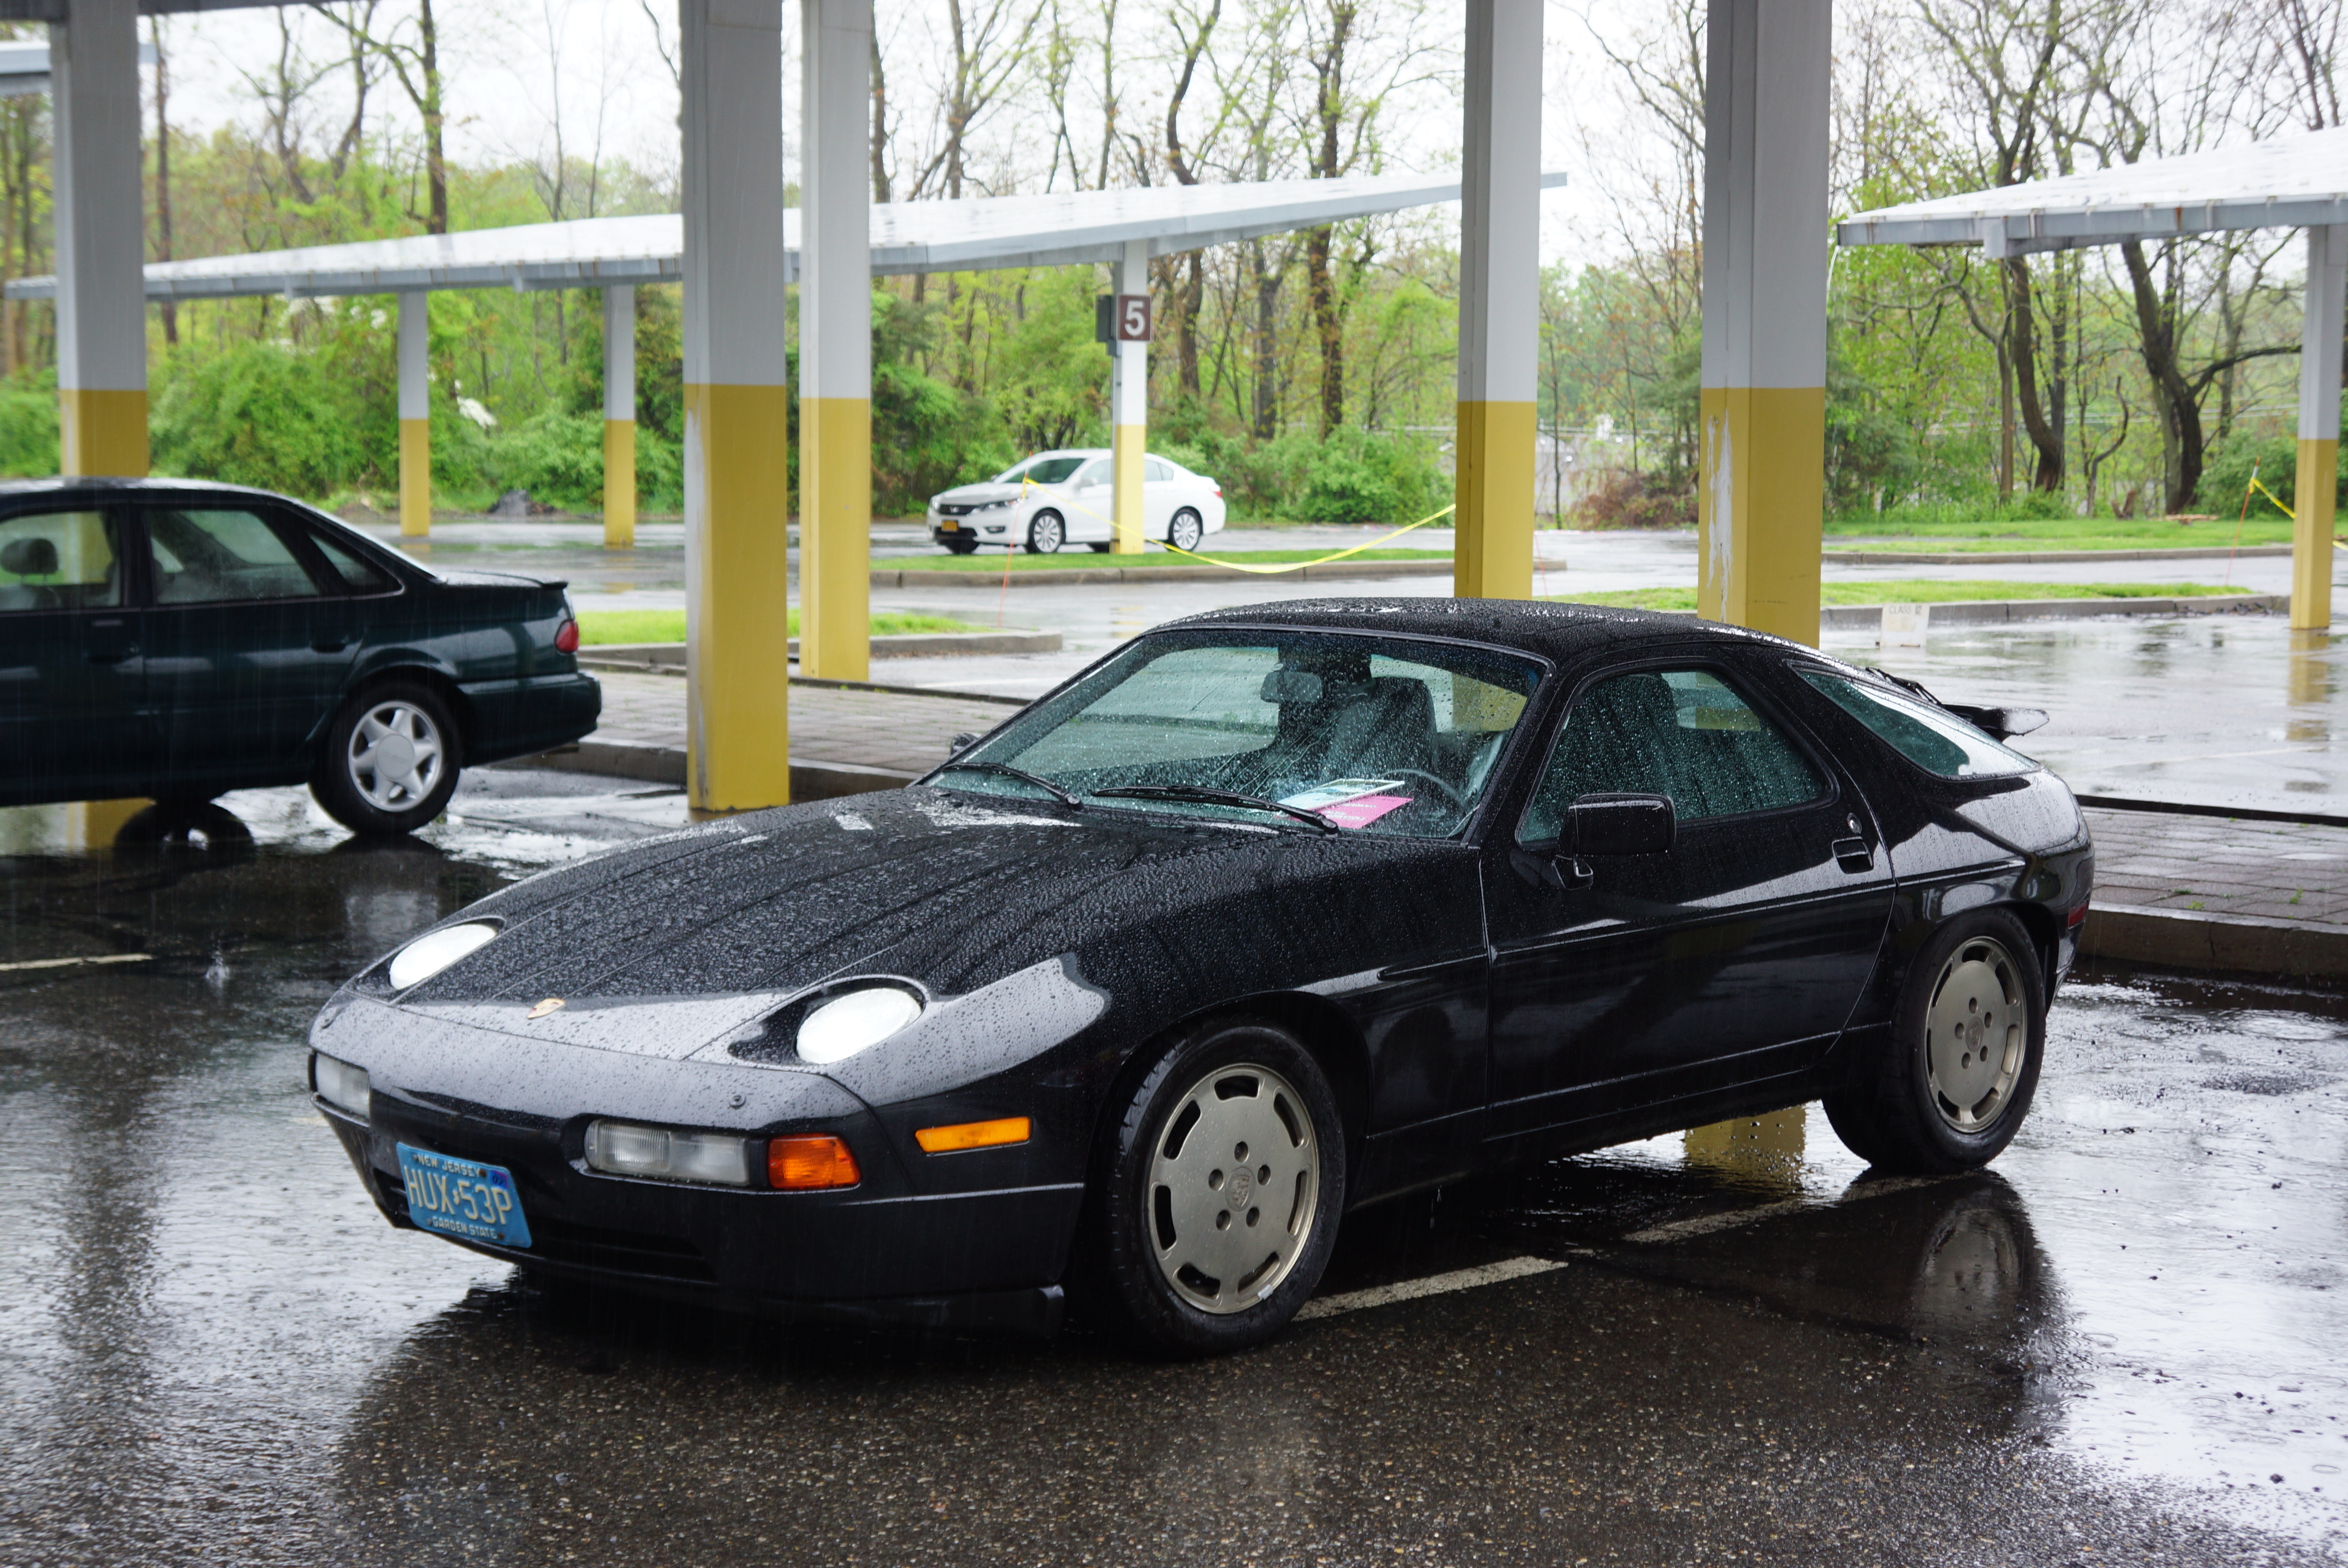
The New Jersey Region of the AACA (Antique Automobile Club of America) held its annual car show on Sunday, May 5, 2019. It has long been the Region’s tradition to hold the meet on the first Sunday in May, and it’s also policy that the show is a rain or shine event.
This was the 4th consecutive year that it rained on show day. In the recent past, the rain reduced but did not completely suppress the turnout. This year was different, as fewer than 20 brave souls brought their cars (your reporter was not one of them). At its peak, this show has been known to garner upwards of 250 classic and antique automobiles, so to state that the car count was off its highs is an understatement.
Even with such a diminished number, the quality of the machinery remained as stellar as always. Below are photos featuring most of the vehicles in attendance. As always, members of the NJ Region had boots on the ground, as registration, parking, judging, and awarding of trophies still went on.
Richard’s Car Blog continues to provide the only online auction reports with:
Multiple pictures of each car;
Results in sale price order; and
Timely posts within days of auction end.
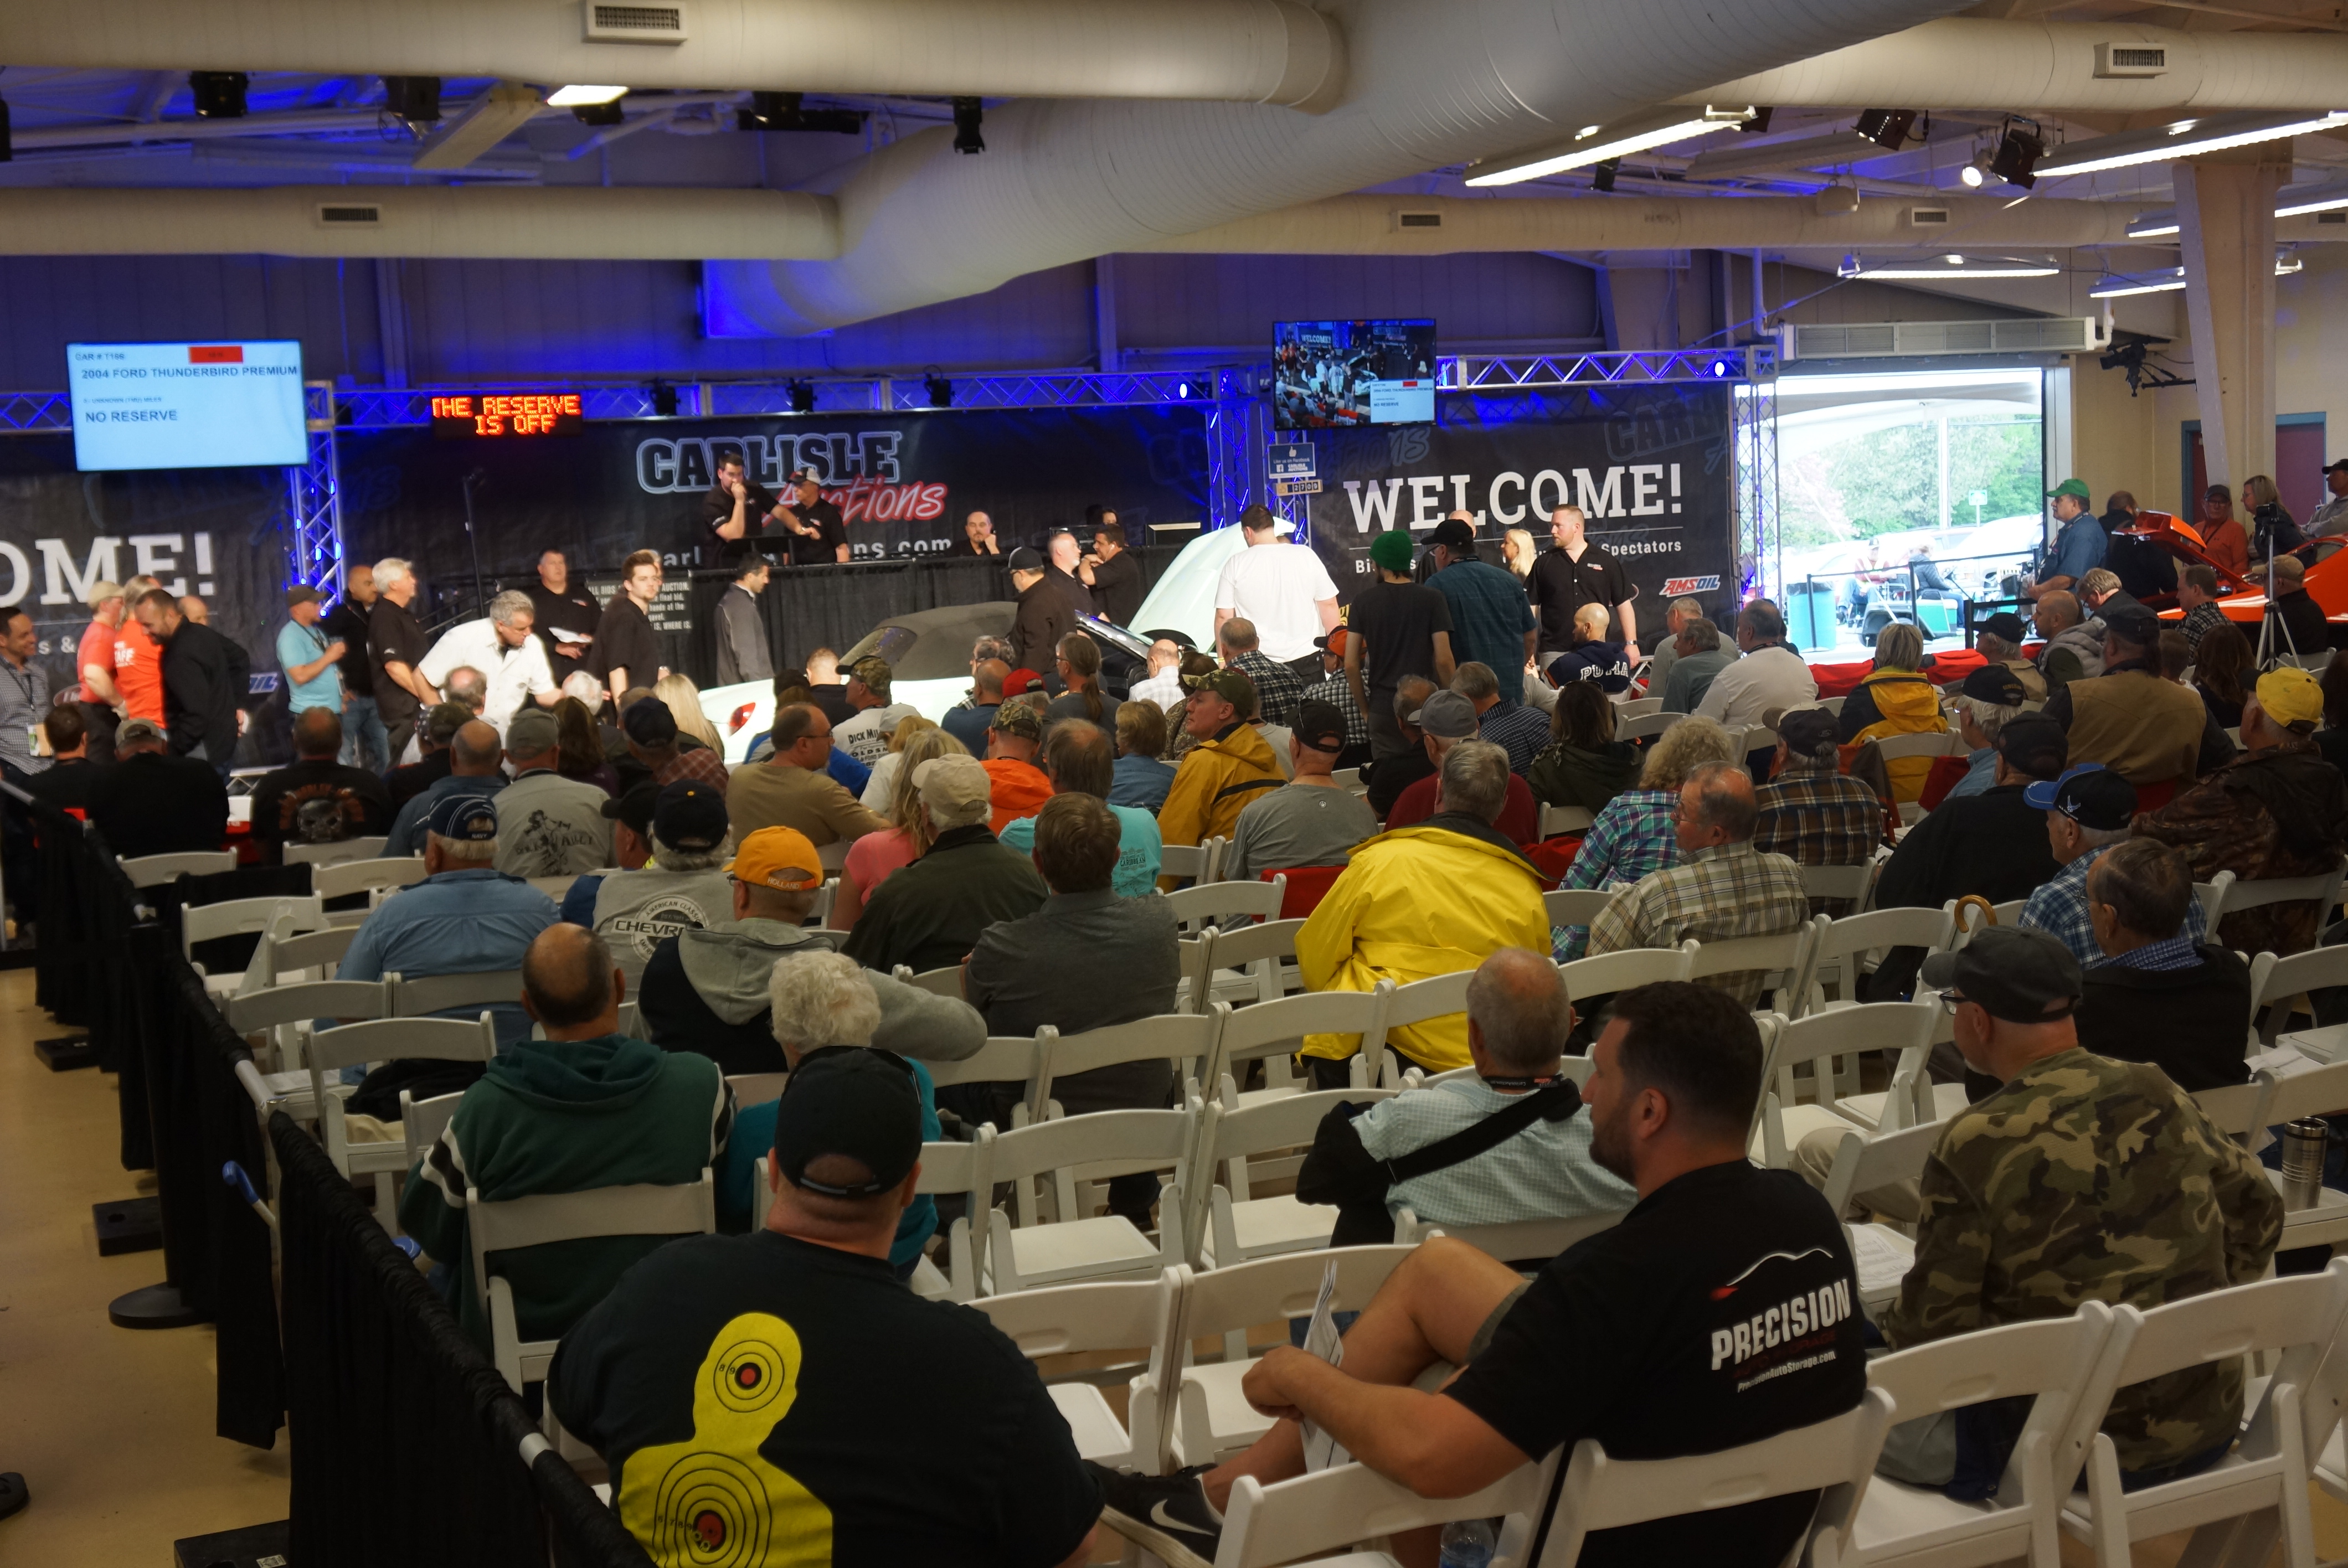
Carlisle Auctions held its spring 2019 event on Thursday and Friday, April 25 and 26, 2019. As a sign of its increasing success, auction start times were moved up to 12 noon on both days, compared to 2pm in previous years.
Each day’s run sheets had about 225 vehicles on them, and the necessity of staging 450 cars and trucks had the Carlisle staff again extend their parking arrangement into the Tree of Life church lot across the street. The weather held up, with only intermittent sprinkles and the briefest of downpours, and the crowds were of decent size both days.
On both Thursday and Friday, I observed the first 40 or so cars to cross the block, and things started slowly, as the sell-through rate was a none-too-impressive 46% (17 out of 37 on Thursday, and 19 out of 41 on Friday). Things picked up later, helped in part by “no reserve hour” on Thursday, which guaranteed a 100% sell-through. Like any auction, some reserves were unreasonable, some cars sold for fair money, and there were some deals to be had.
Some cars need a pull across the block
Interestingly, on Friday before the auction start, Bill Miller (who founded Carlisle Events) announced that they had “done about $2 million yesterday, and we’re hoping for 3.5 [million] today”. Around $5.5 million dollars in sales doesn’t sound too shabby for this independent auction house that has grown larger and more organized year after year (check out my 2015 and 2016 auction reports to see how far they’ve come).
A footrest for tired toes
Twenty-seven cars which struck my fancy are featured below, arranged in sold price from $2,000 to $24,000. For those who continue to insist that “the hobby is too expensive, and I can’t afford to get into it anymore”, note that I’ve included FIVE running vehicles which hammered below five thousand dollars.
UNDER $5,000 (5 CARS)
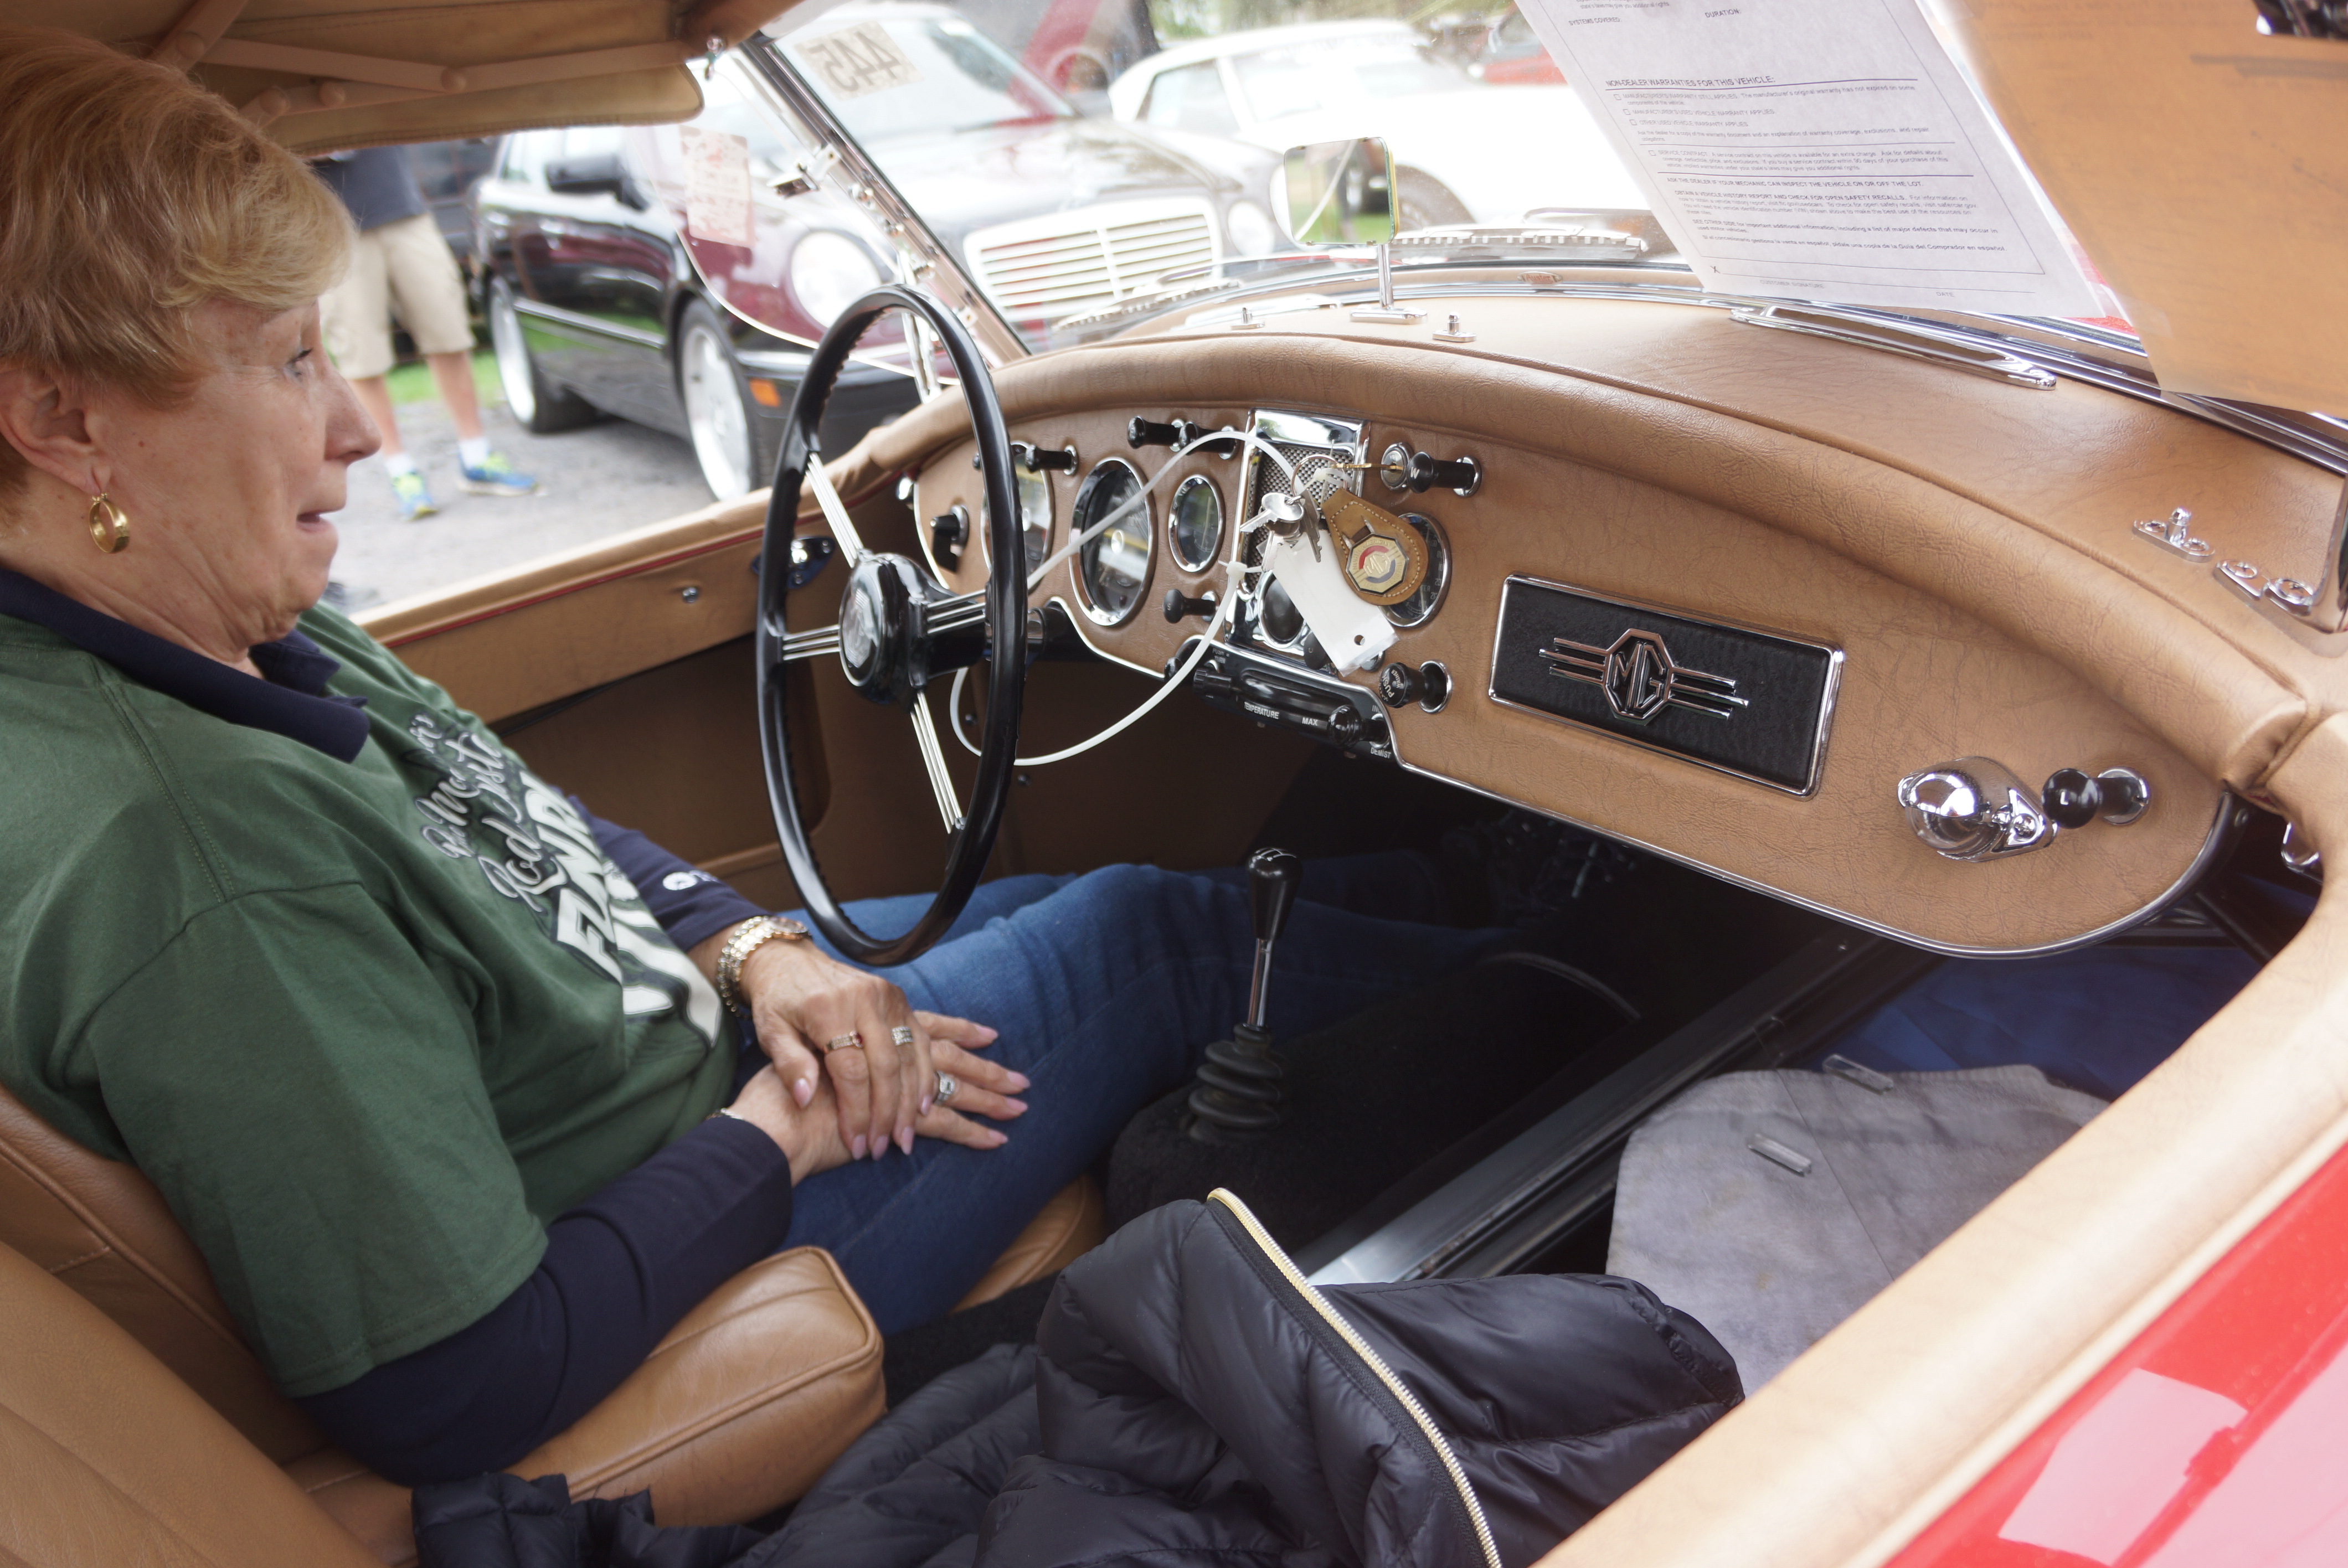
T161 NO RESERVE 1990 Mazda MX-5 Miata, blue, black convertible top, black leather aftermarket kit looks good enough to be mistaken for factory upholstery. 158,000 miles on odometer. Paint looks very good for age and mileage. Entire car let down by gaudy chrome wheels which are about 6” larger than factory. Underhood looks decent, shocked to see that brake fluid appears to have been recently serviced. Ugly wheels are an easy fix.
SOLD FOR $2,000– Based on my observations of the first-gen (NA) used Miata market (I own a ’93), one could do a lot worse than spend 2 grand on this car. The mileage didn’t scare me as the car looked maintained. The lack of typical rust was a major positive. Spend $500 on OE wheels and enjoy it.
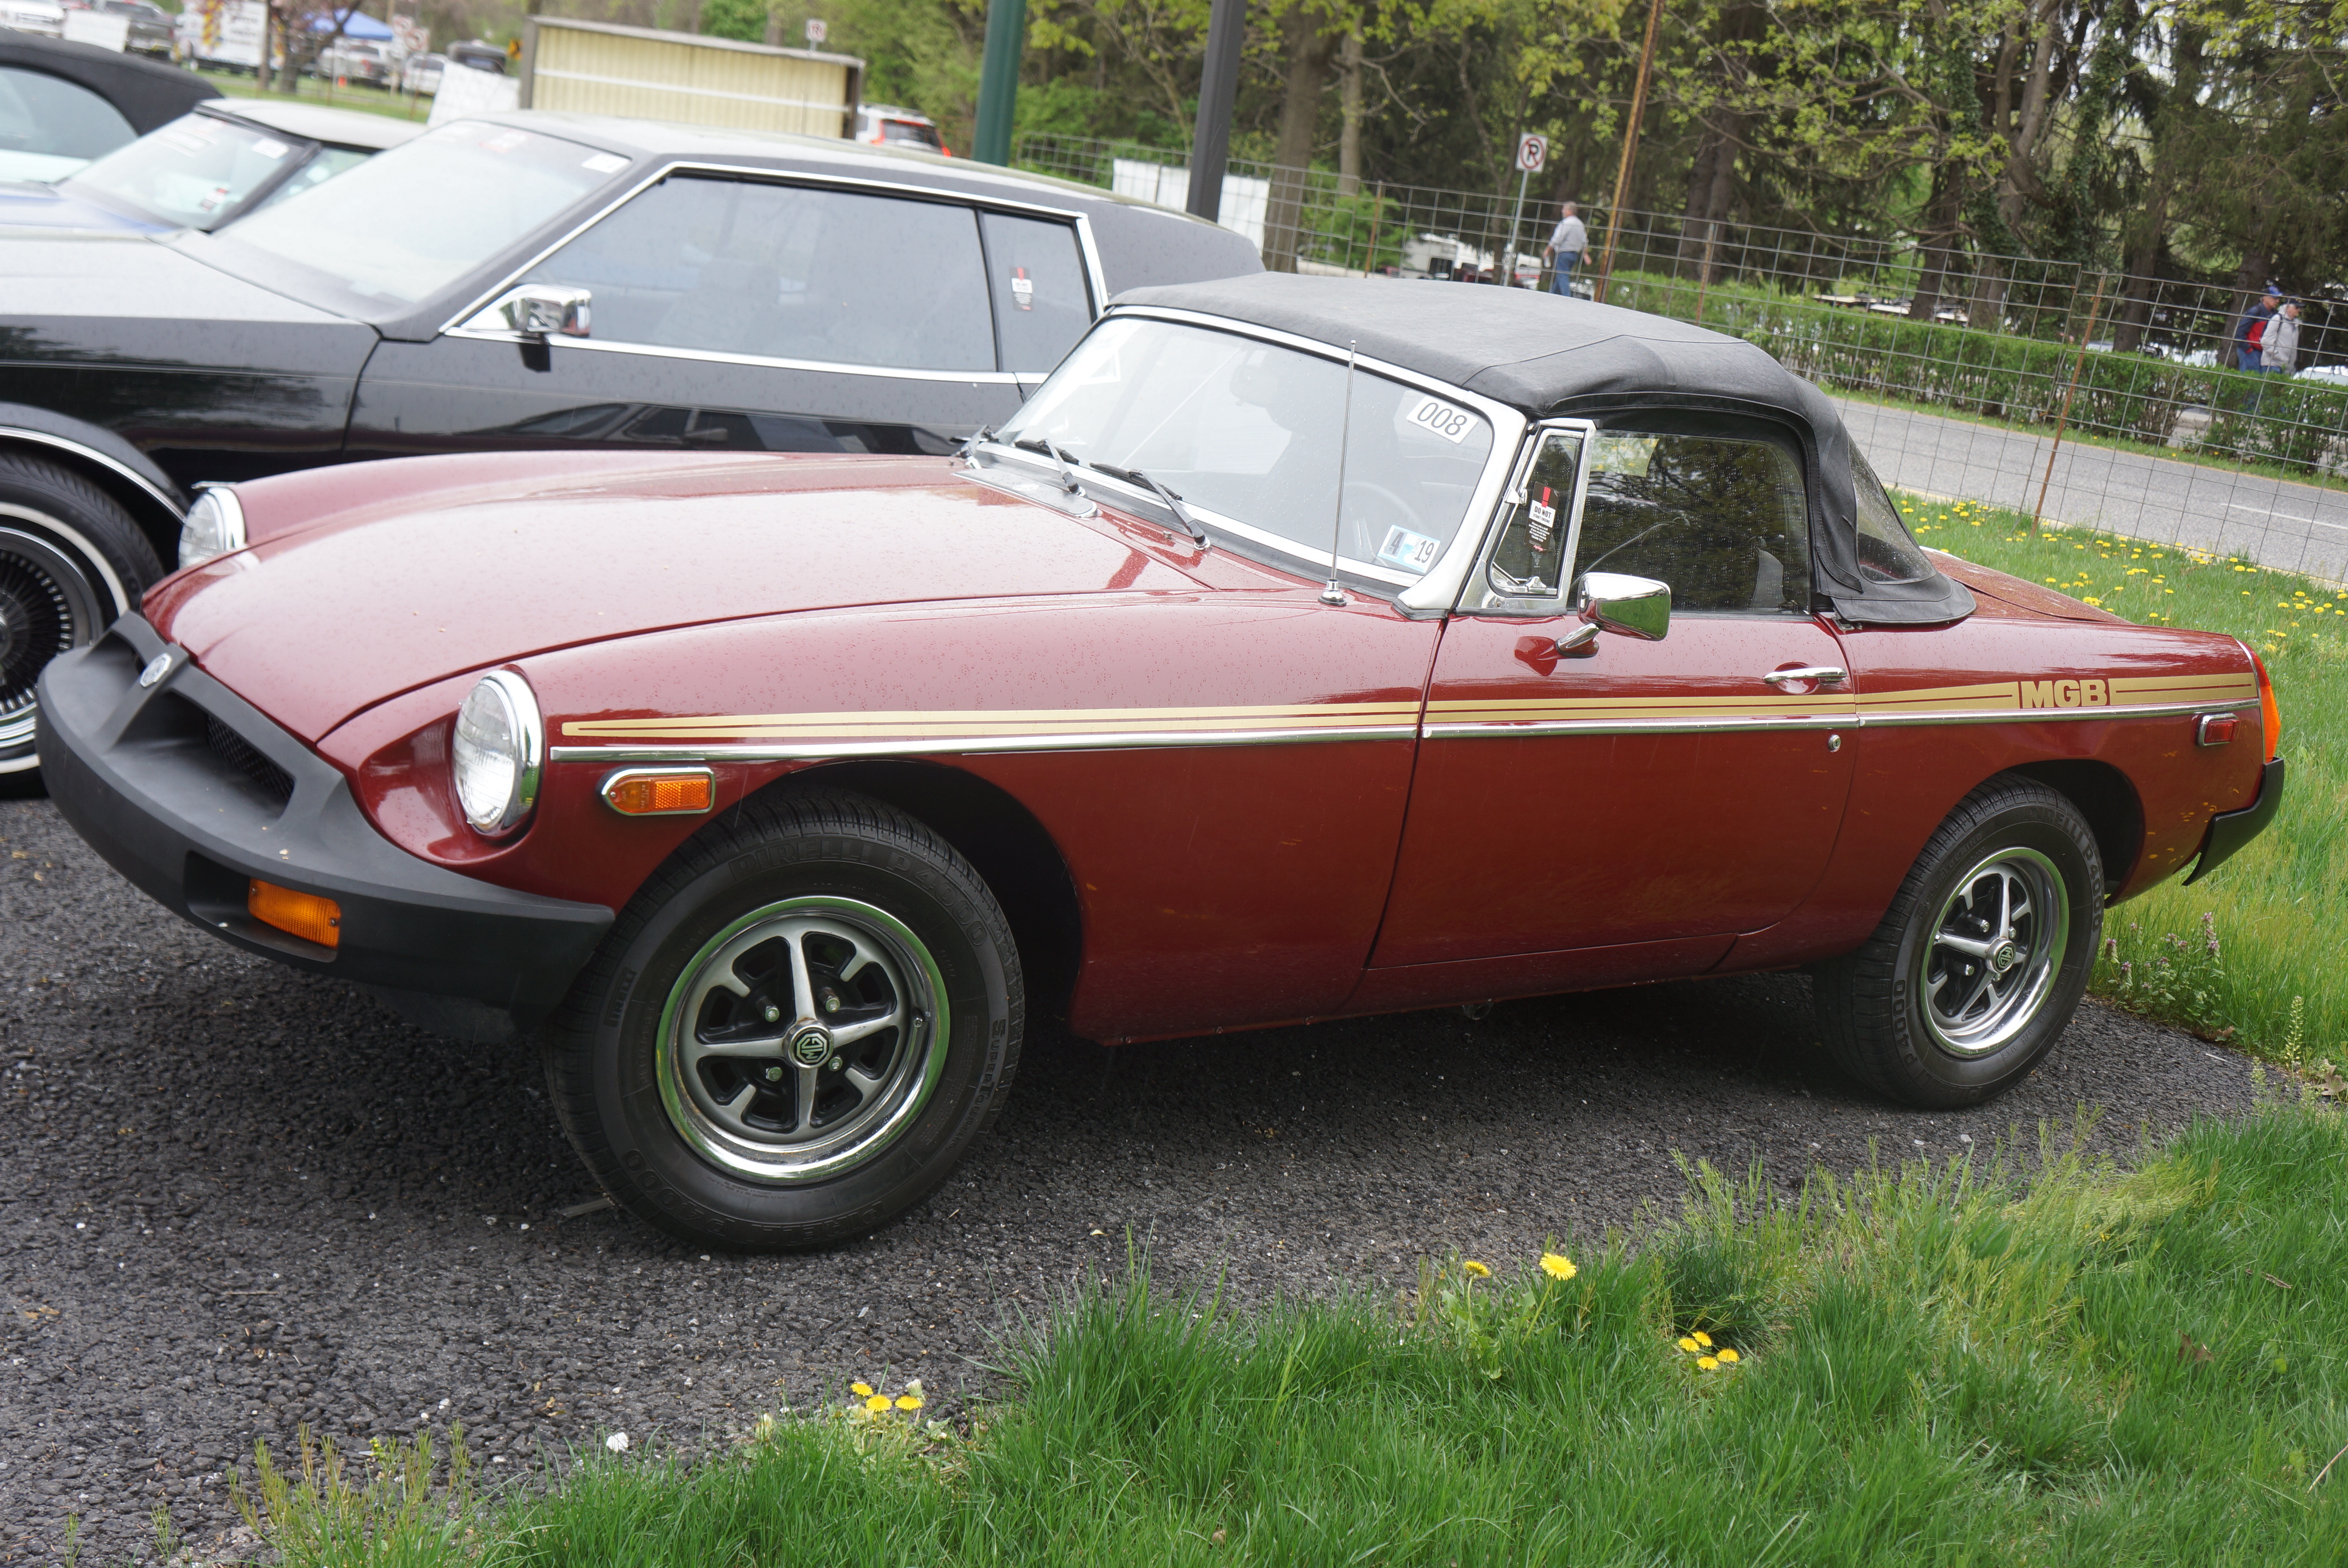
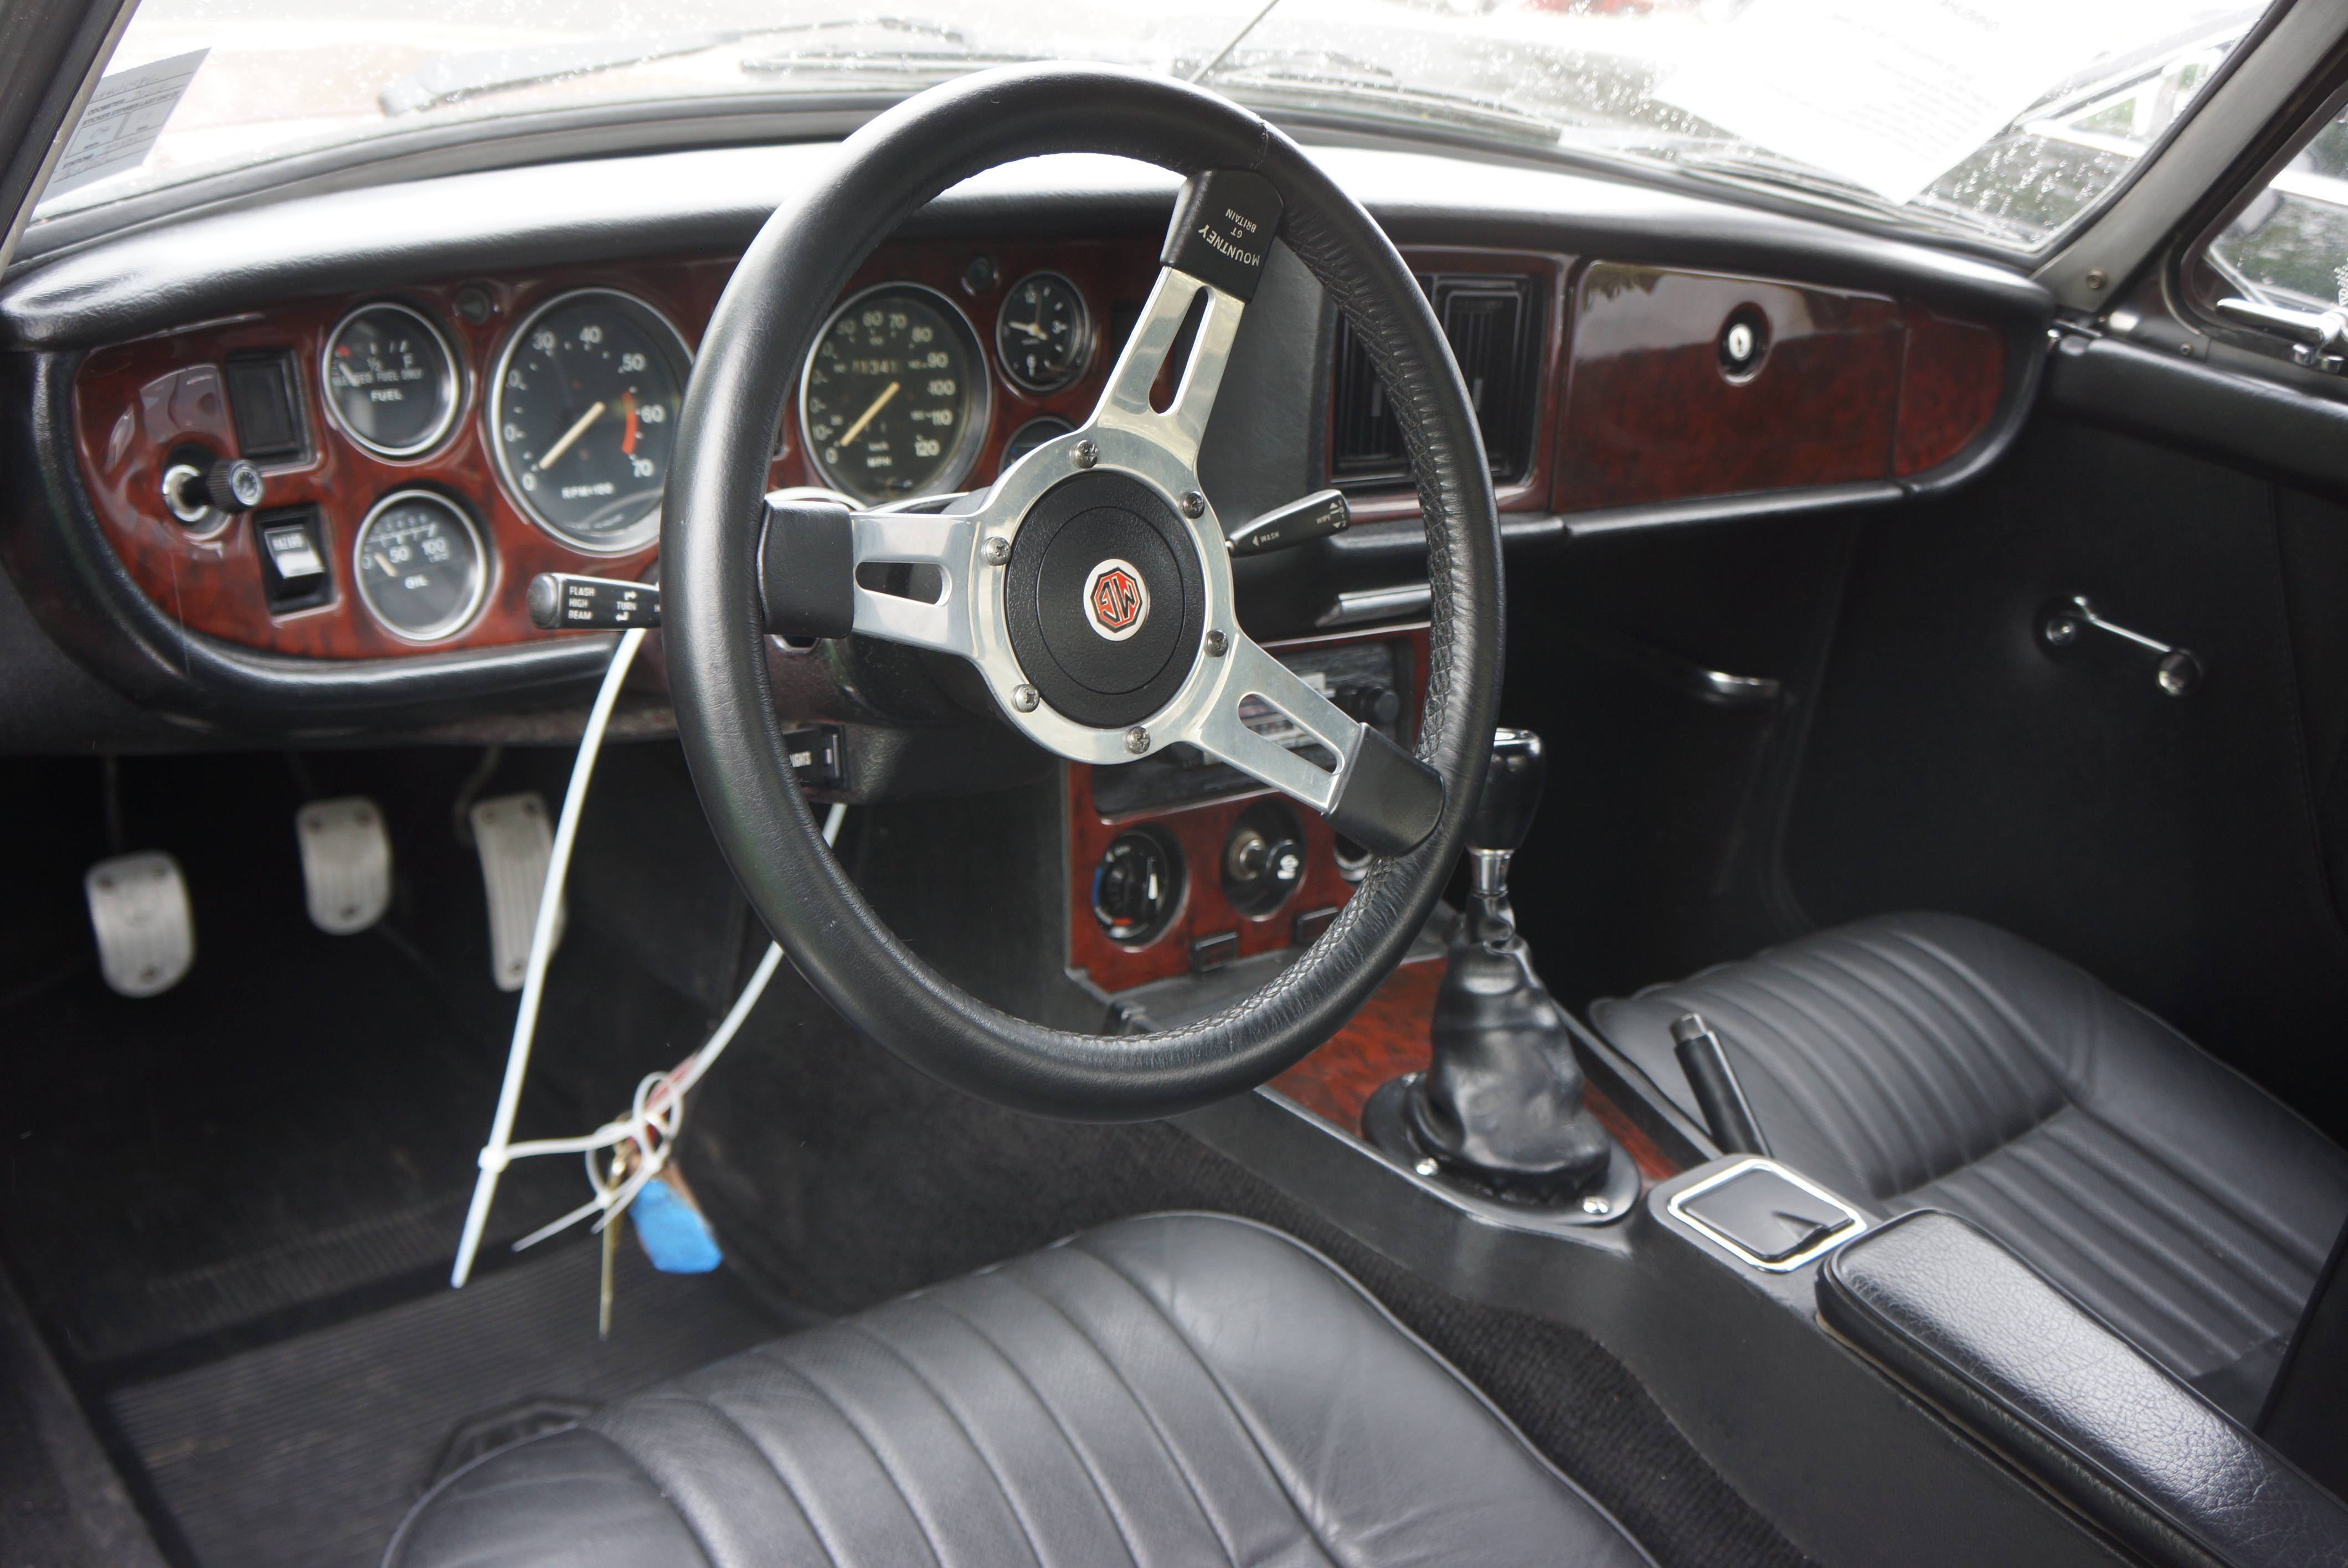
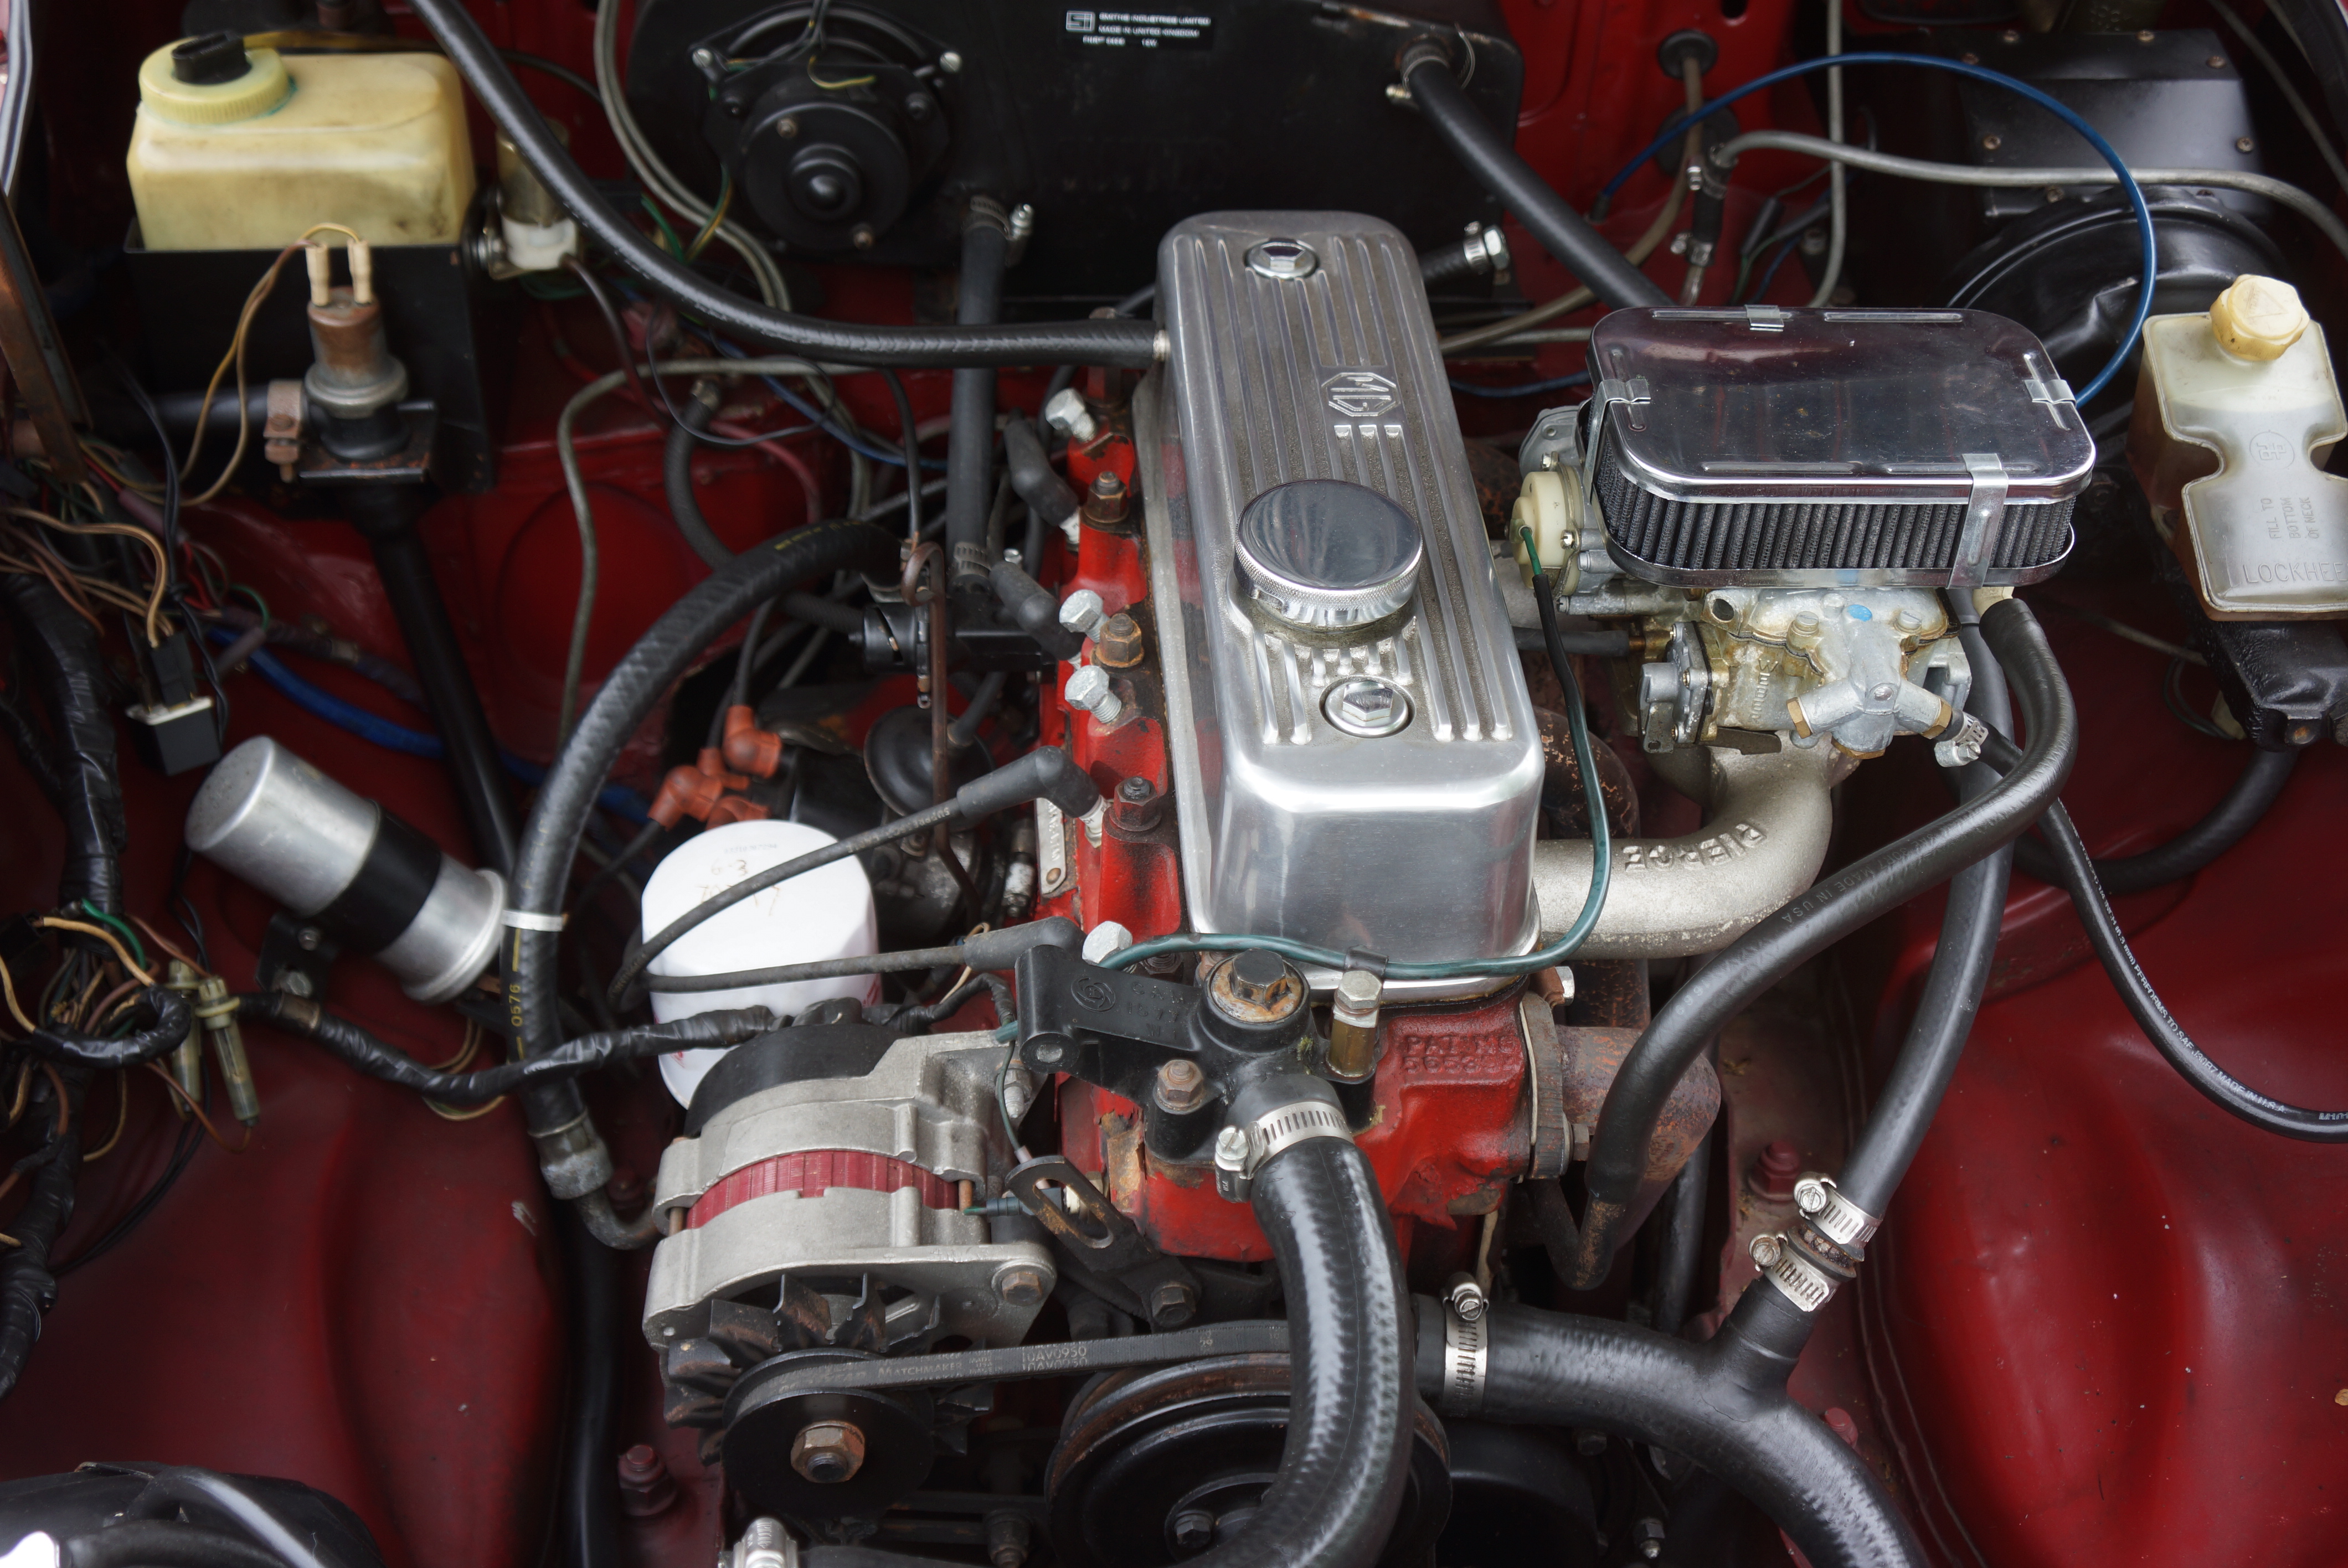
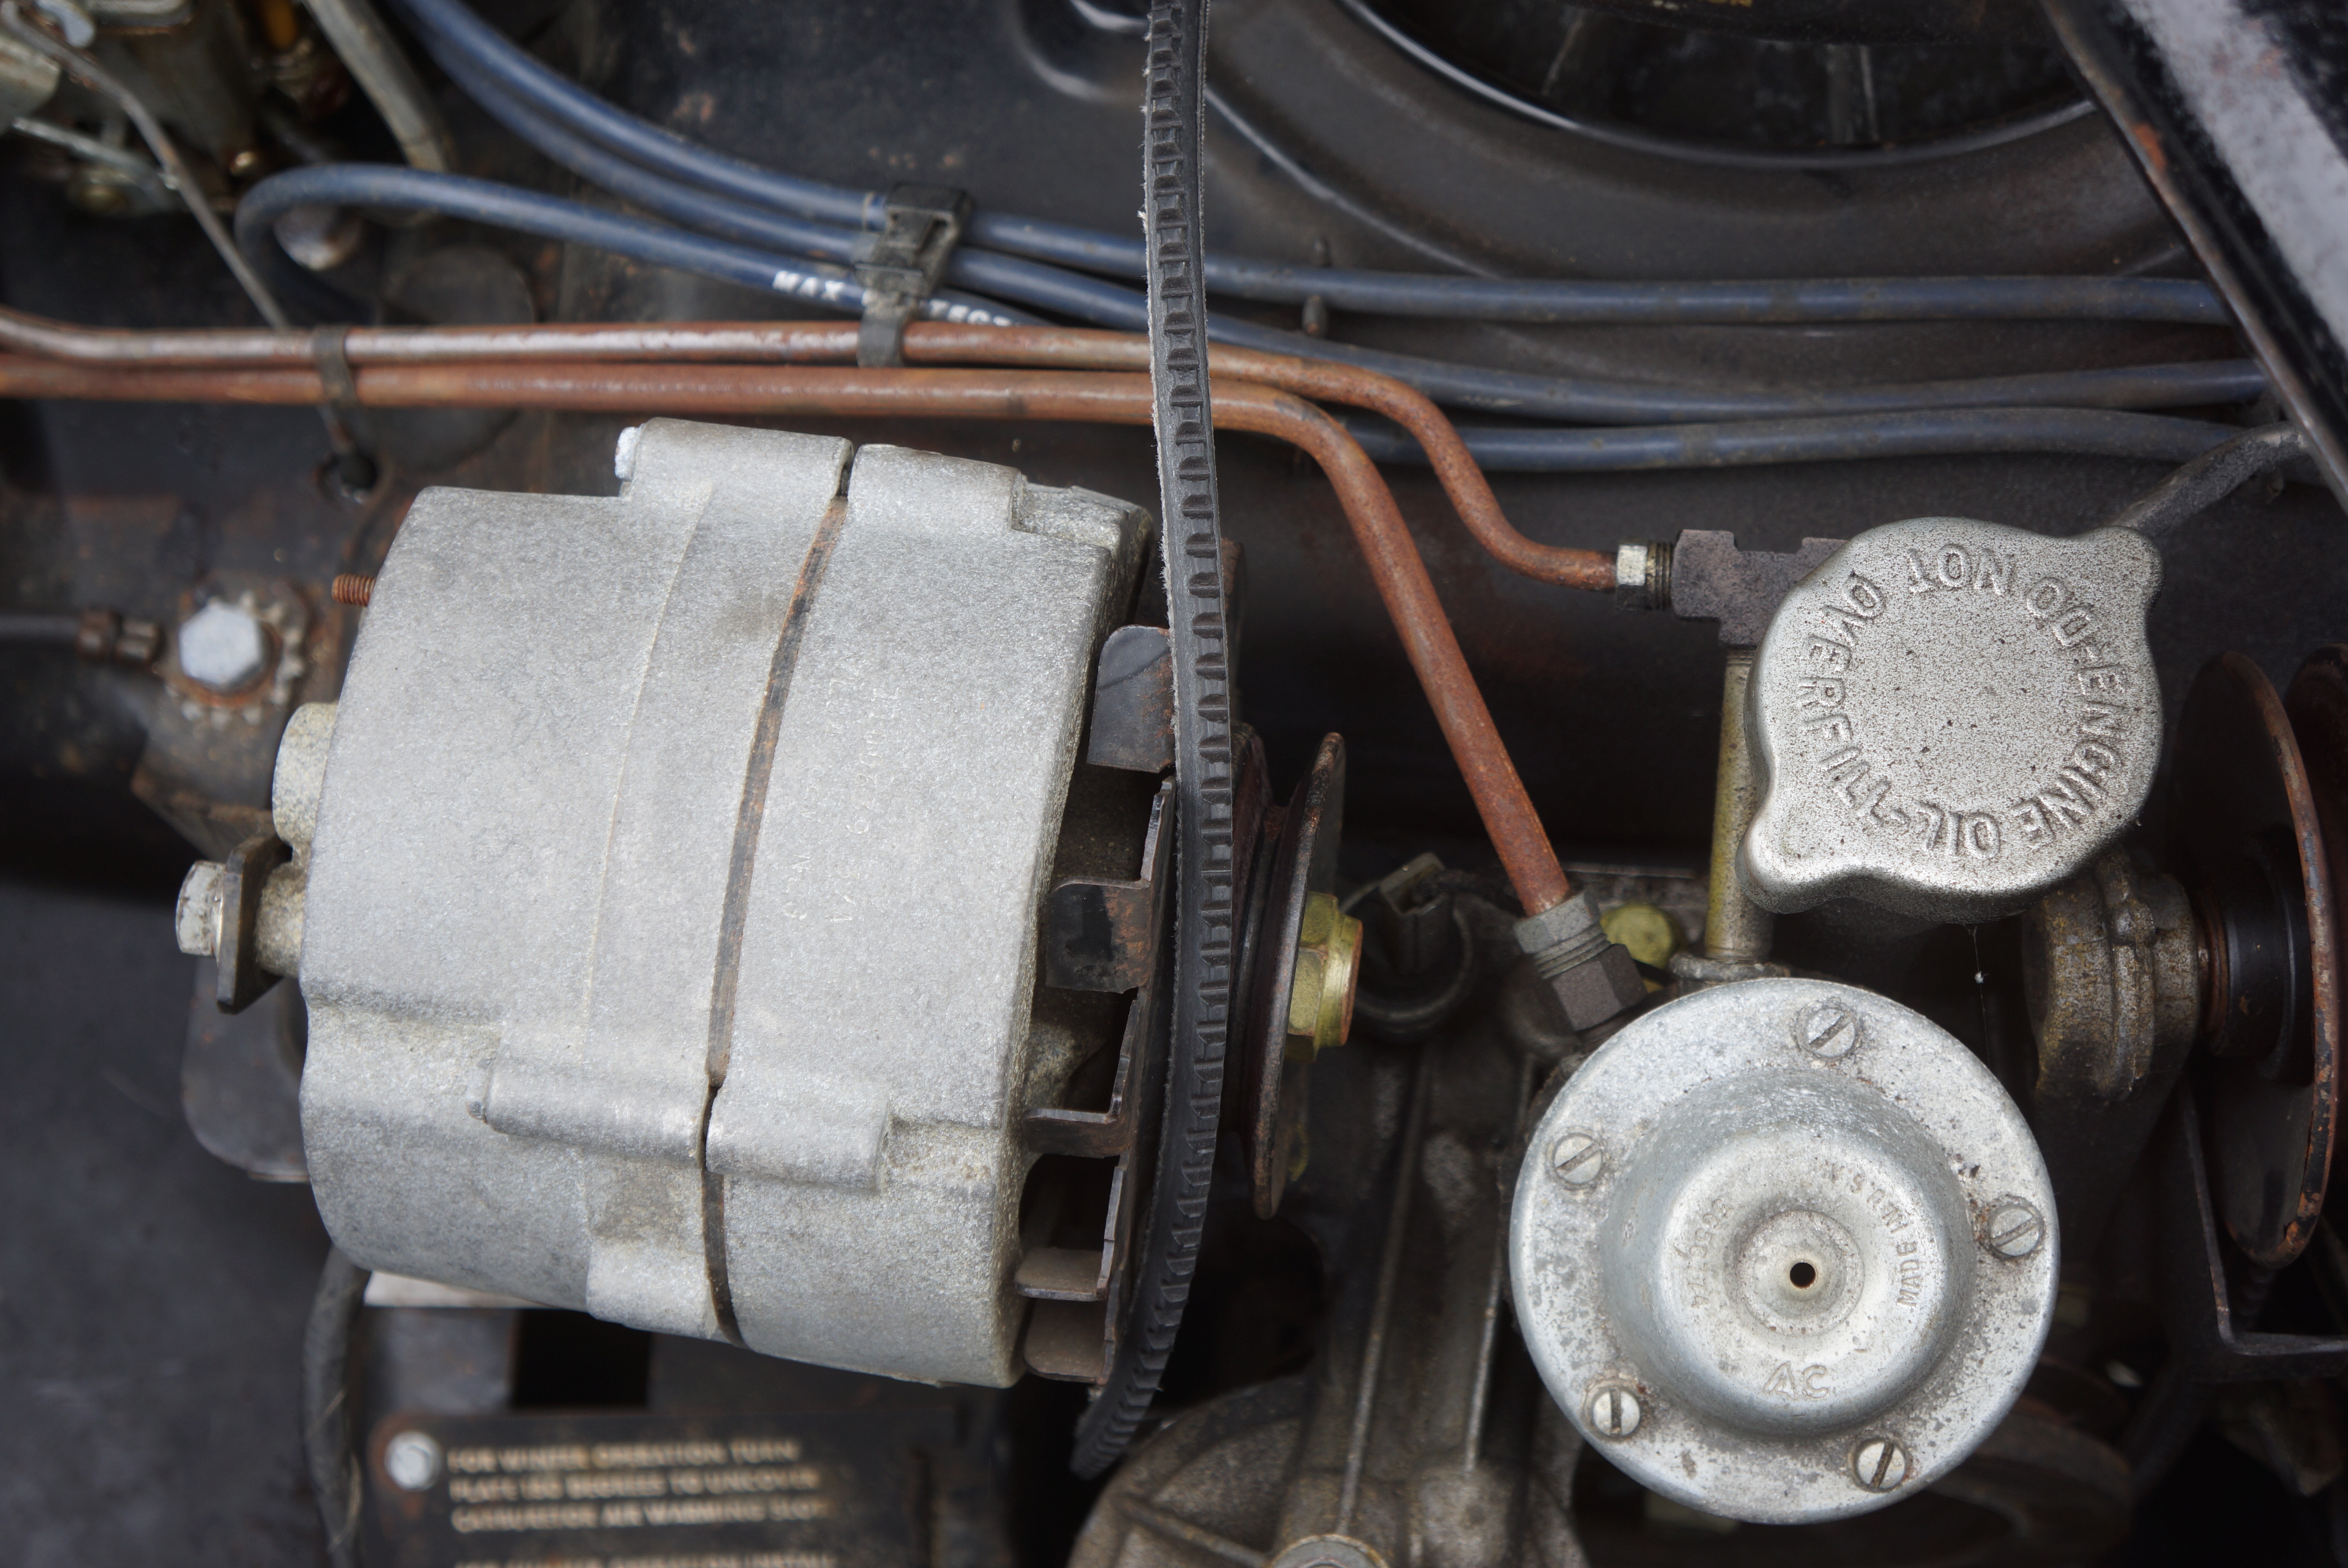
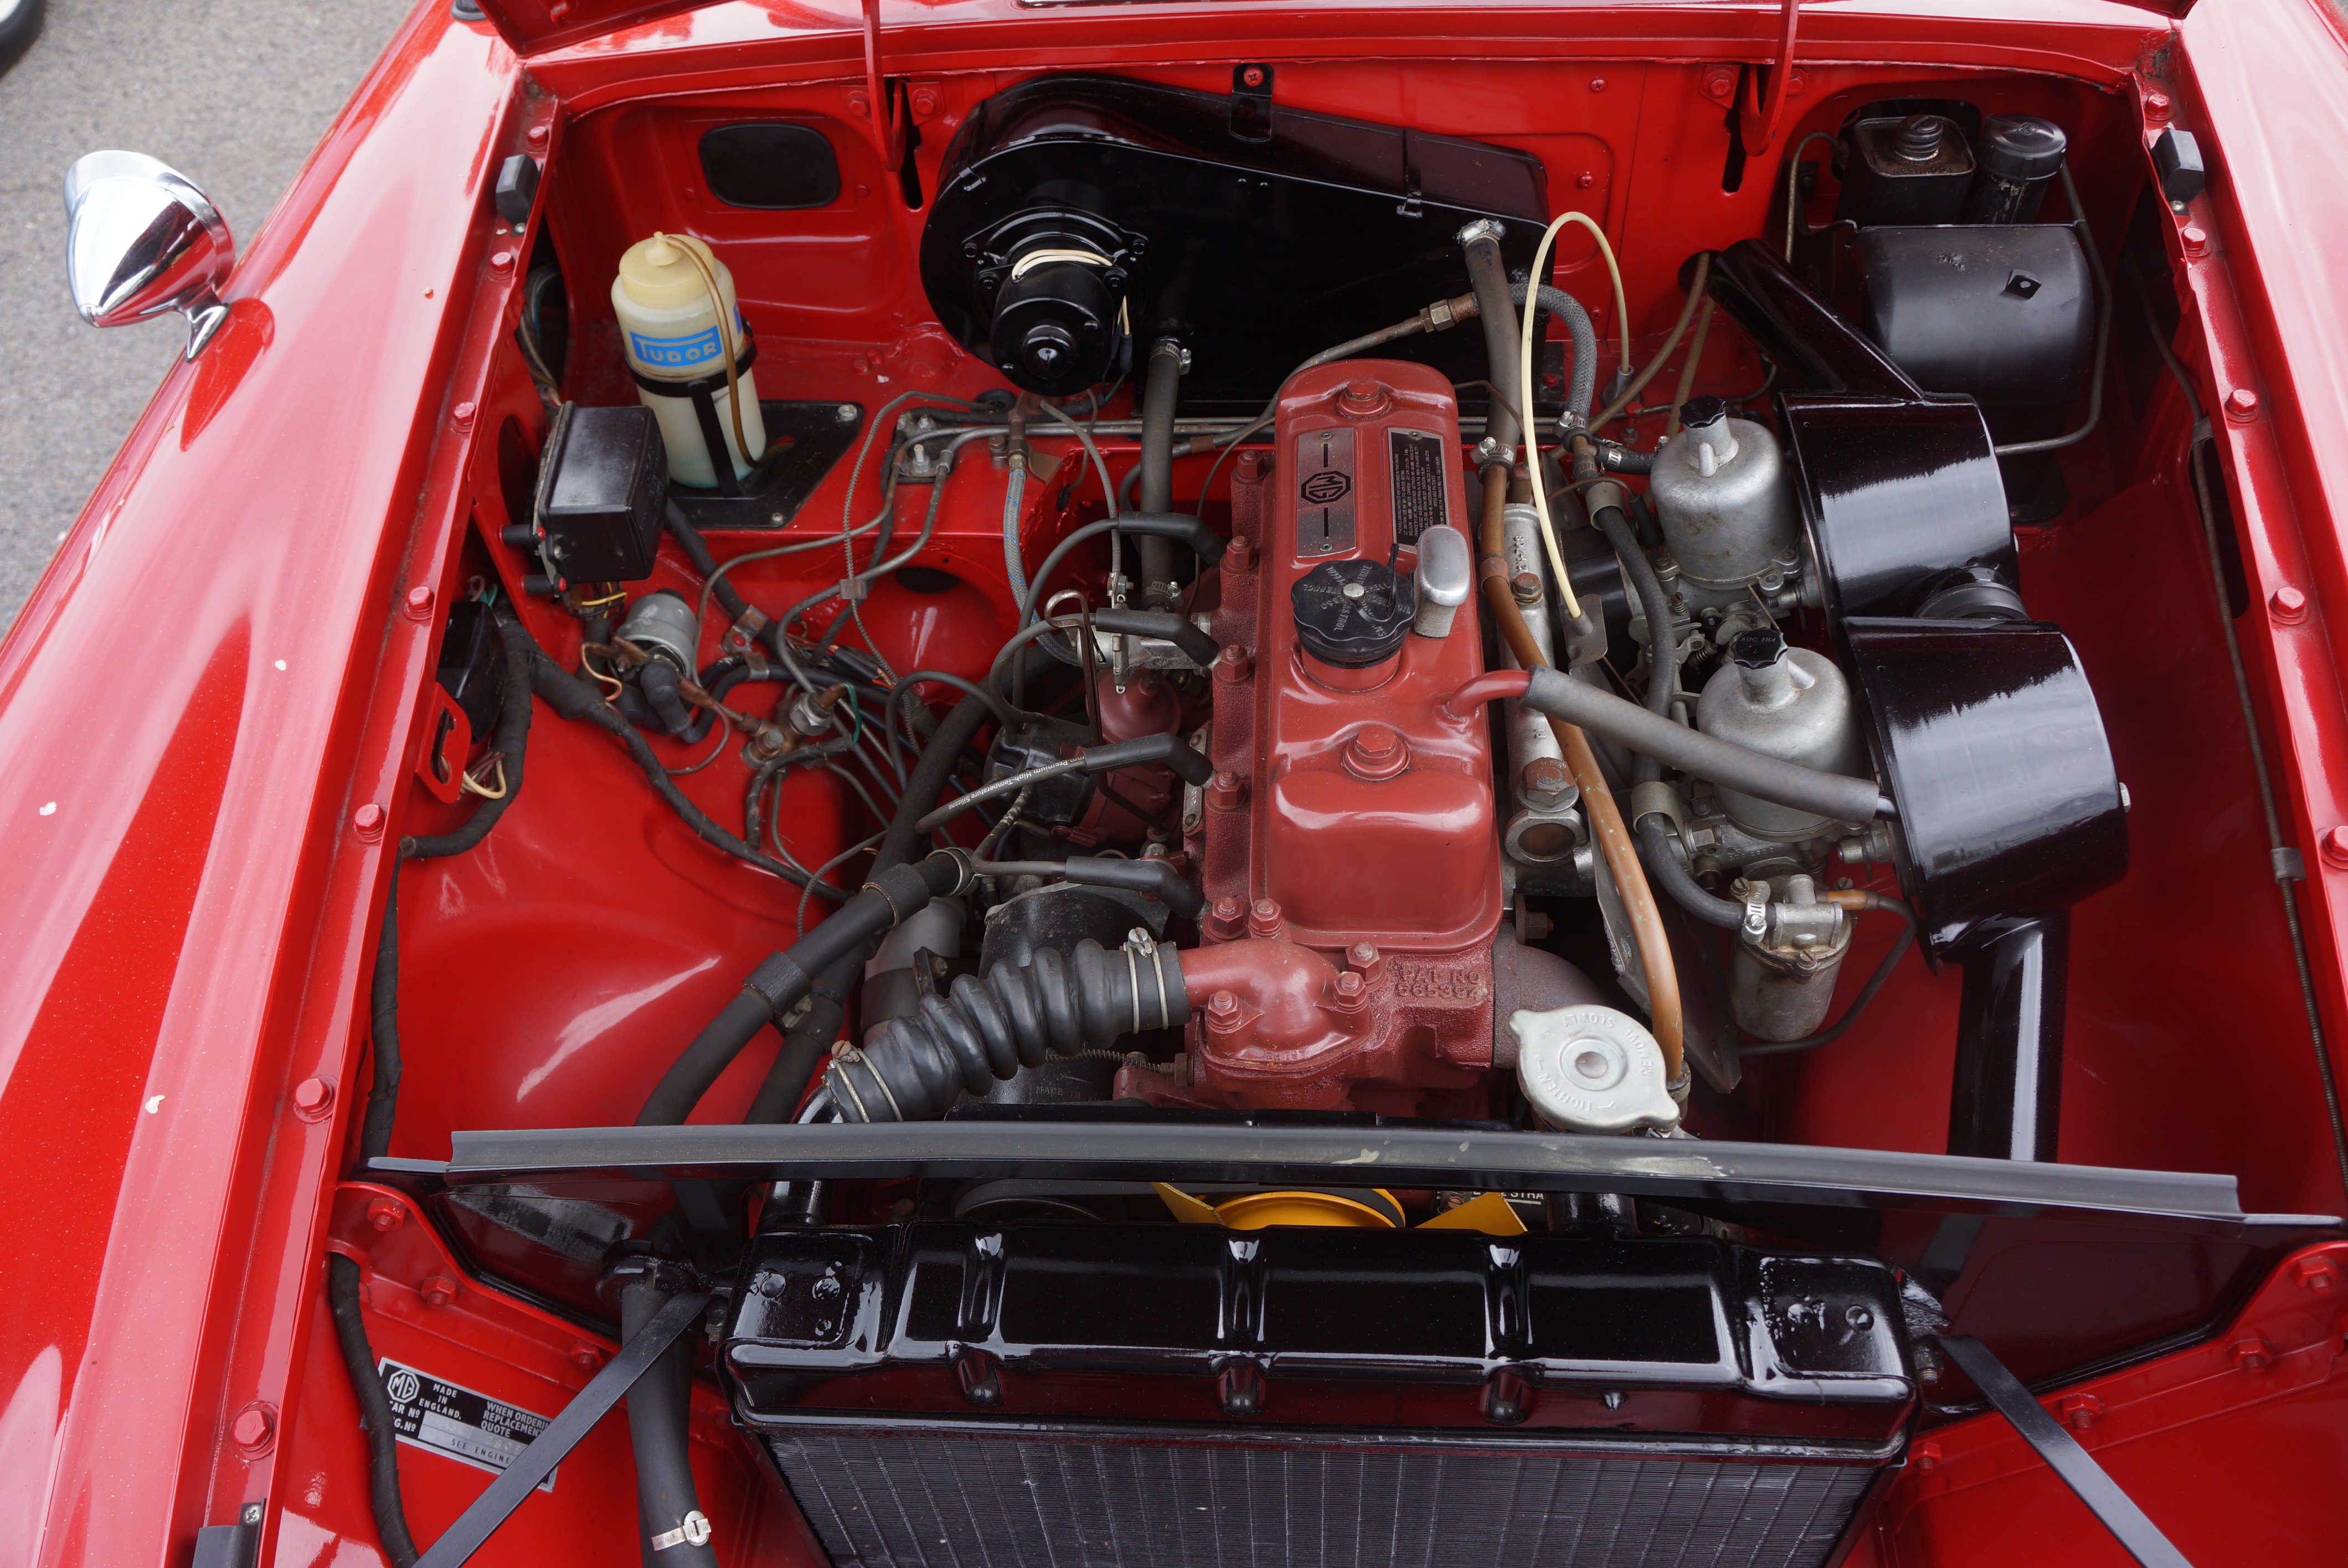
T163 NO RESERVE 1977 MGB roadster, burgundy, black convertible top, black leather interior, new battery, wood steering wheel is nice touch. MG alloy wheels with black wall tires. 71,341 miles on odometer is believable, no obvious rust. Engine compartment shows some tasteful mods: finned valve cover, Weber carb, header, Ansa exhaust. Fun starter car, as the rubber bumper cars gather interest with the chrome bumper cars moving up in price.
SOLD FOR $3,000- I looked at this car before it crossed the block, and knew it would sell cheaply, but this price floored me. Carlisle is not the place to sell imports. Someone got a fun British roadster at half off.
T115 1965 Chevy Corvair 4-door hardtop, gold and gold, 110 hp, Powerglide, mileage is 51,554, sign on car alleges original mileage. Fake wire wheels, ugly black rub strip down sides, rear luggage rack can double as pizza warmer. Bucket seats. Alternator drive belt off its pulleys (a common Corvair conundrum). Car shows no signs of maintenance or care. Entire car is dirty, rust in rear quarter panels.
SOLD FOR $3,200- The 2nd gen Corvairs (1965-1969) are beautiful, and have collector interest, but primarily the 2-door coupes and convertibles. Even at this price, I see no upside here.
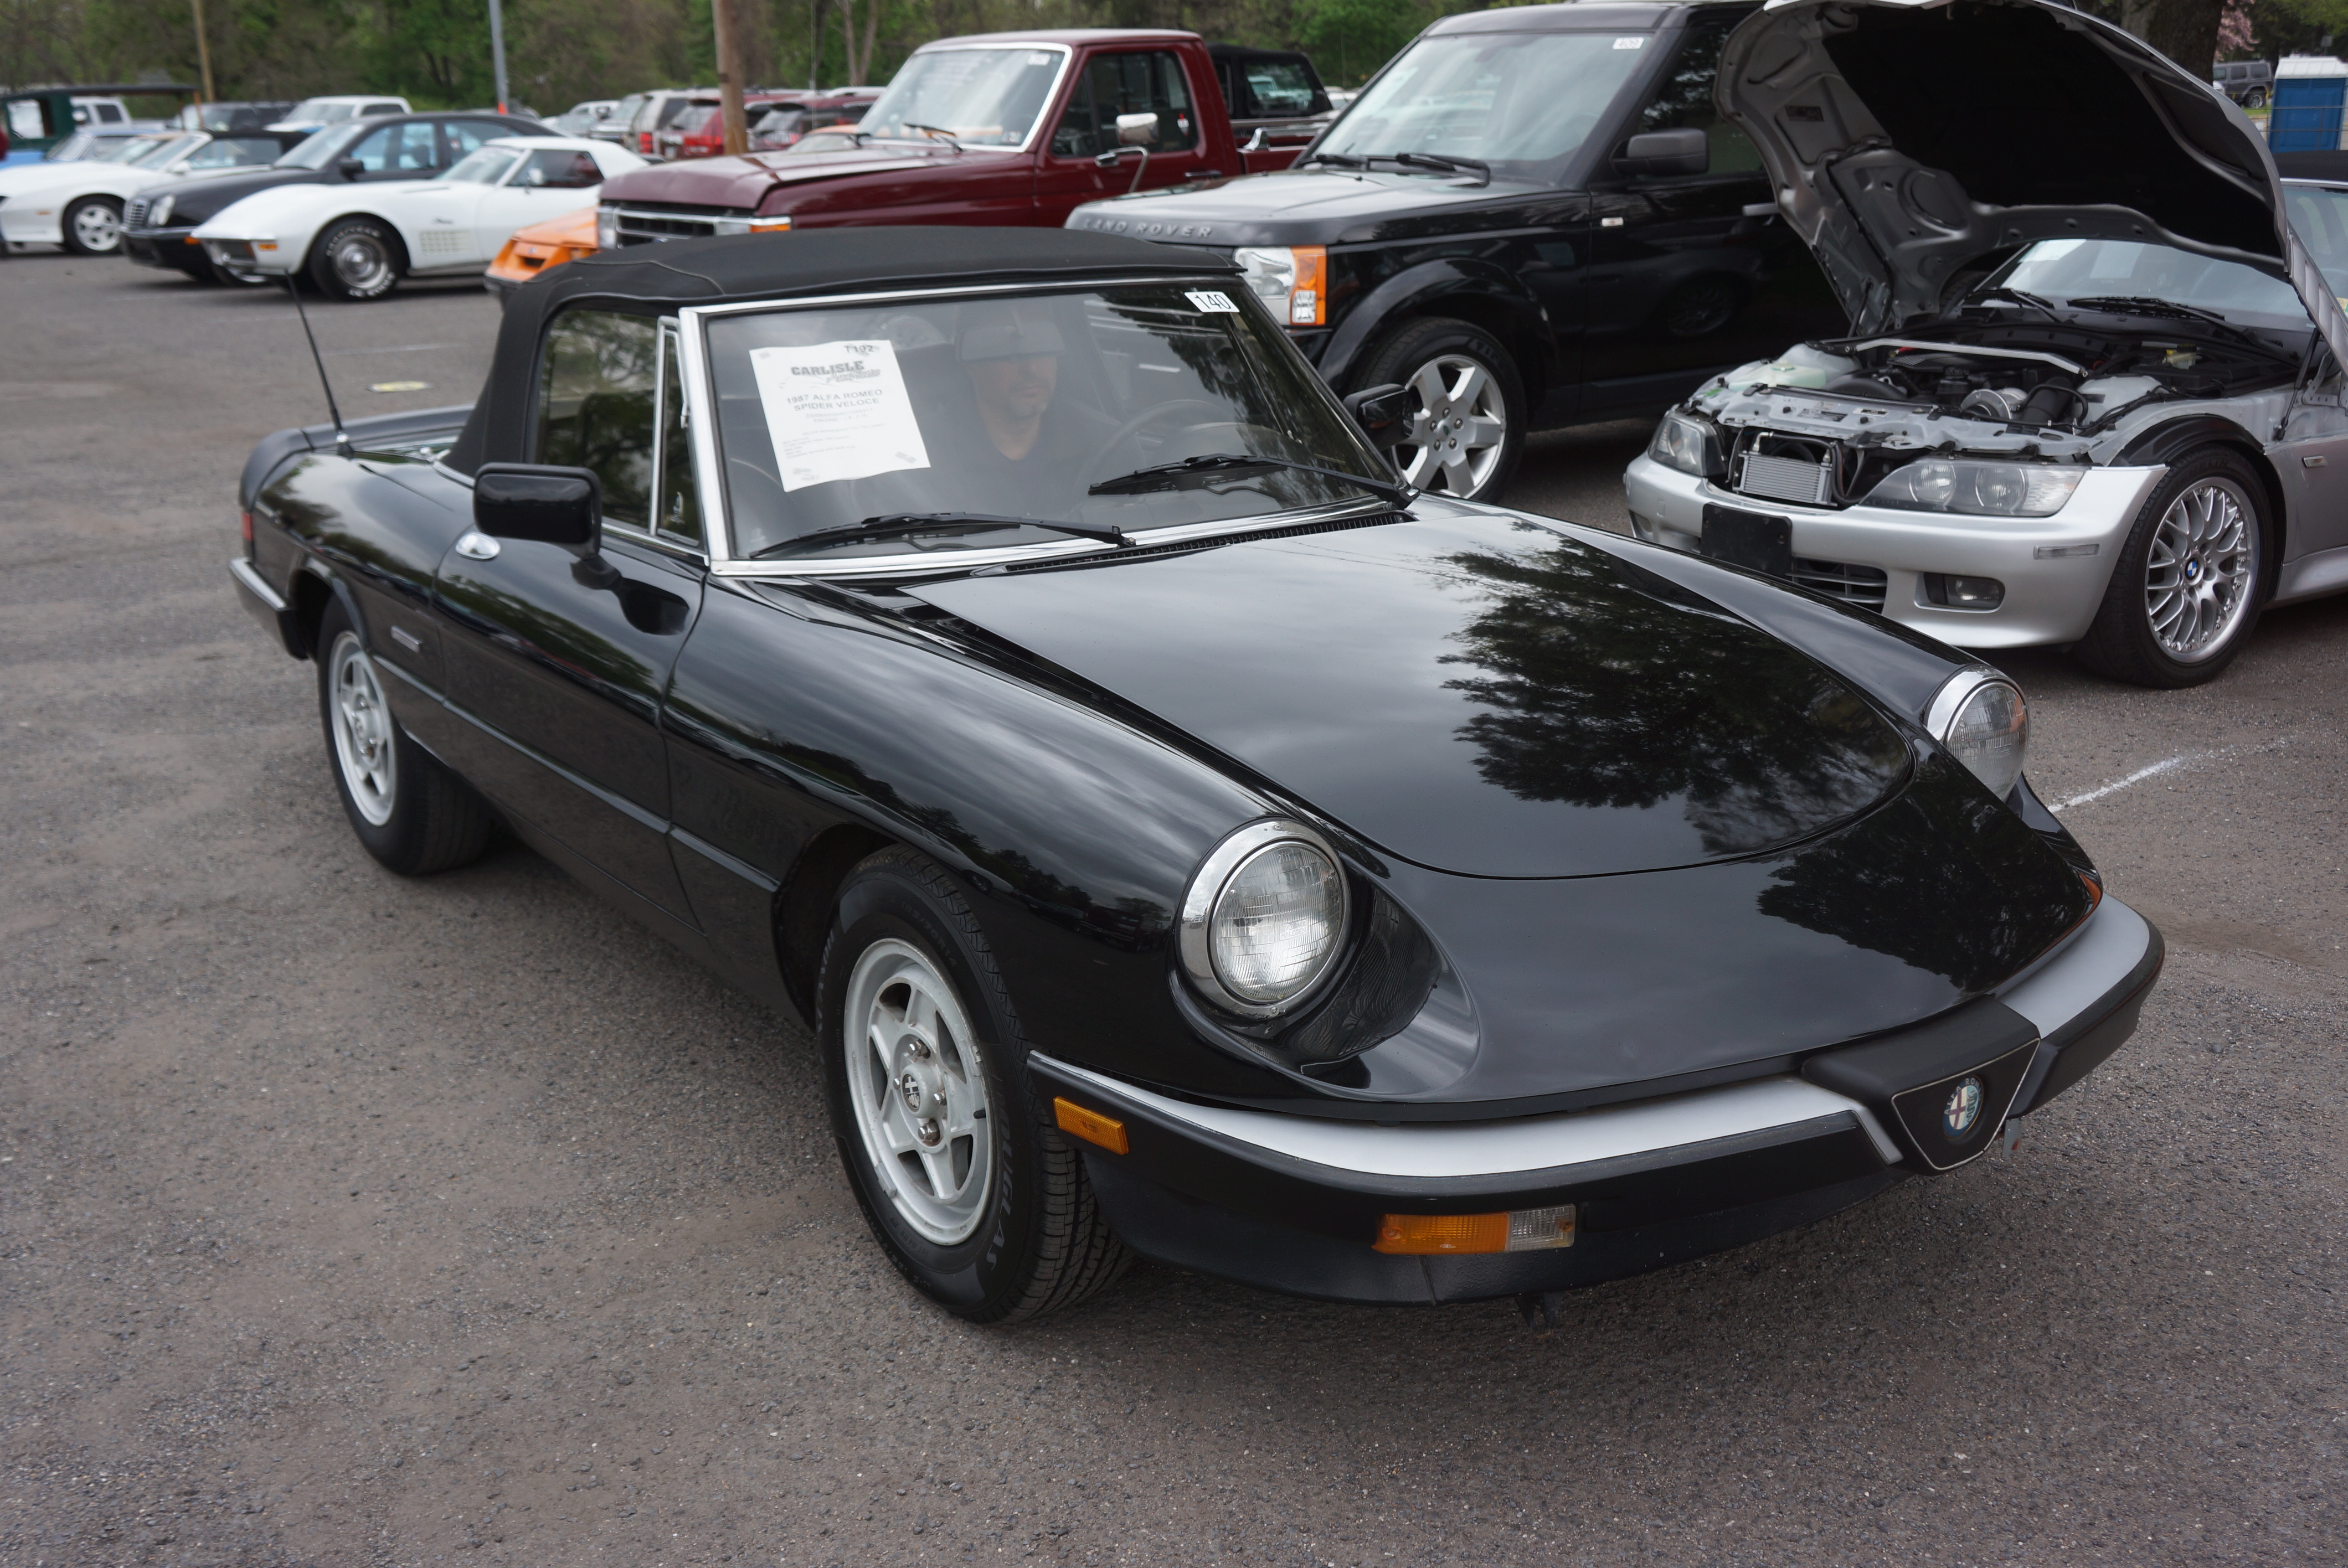
T192 1987 Alfa Romeo Spider Veloce, triple black, Alfa Romeo alloys, blackwall tires. Odometer is 77,000. Paint shows well, rear rubber duck tail blends well with paint. Some spotting in paint near fuel filler. Underhood could use a detailing, but no obvious defects.
SOLD FOR $4,000- Like Lot T163, the MGB, this result is a shock. While these Alfas are known to rust, this one looked clean and straight (full disclosure: I did not get on my knees and peek under it). The deal-breaker for me was the black paint/black top/black interior (WHO orders a convertible like that??) Even so, this was a dirt-cheap entry fee into the Alfa club.
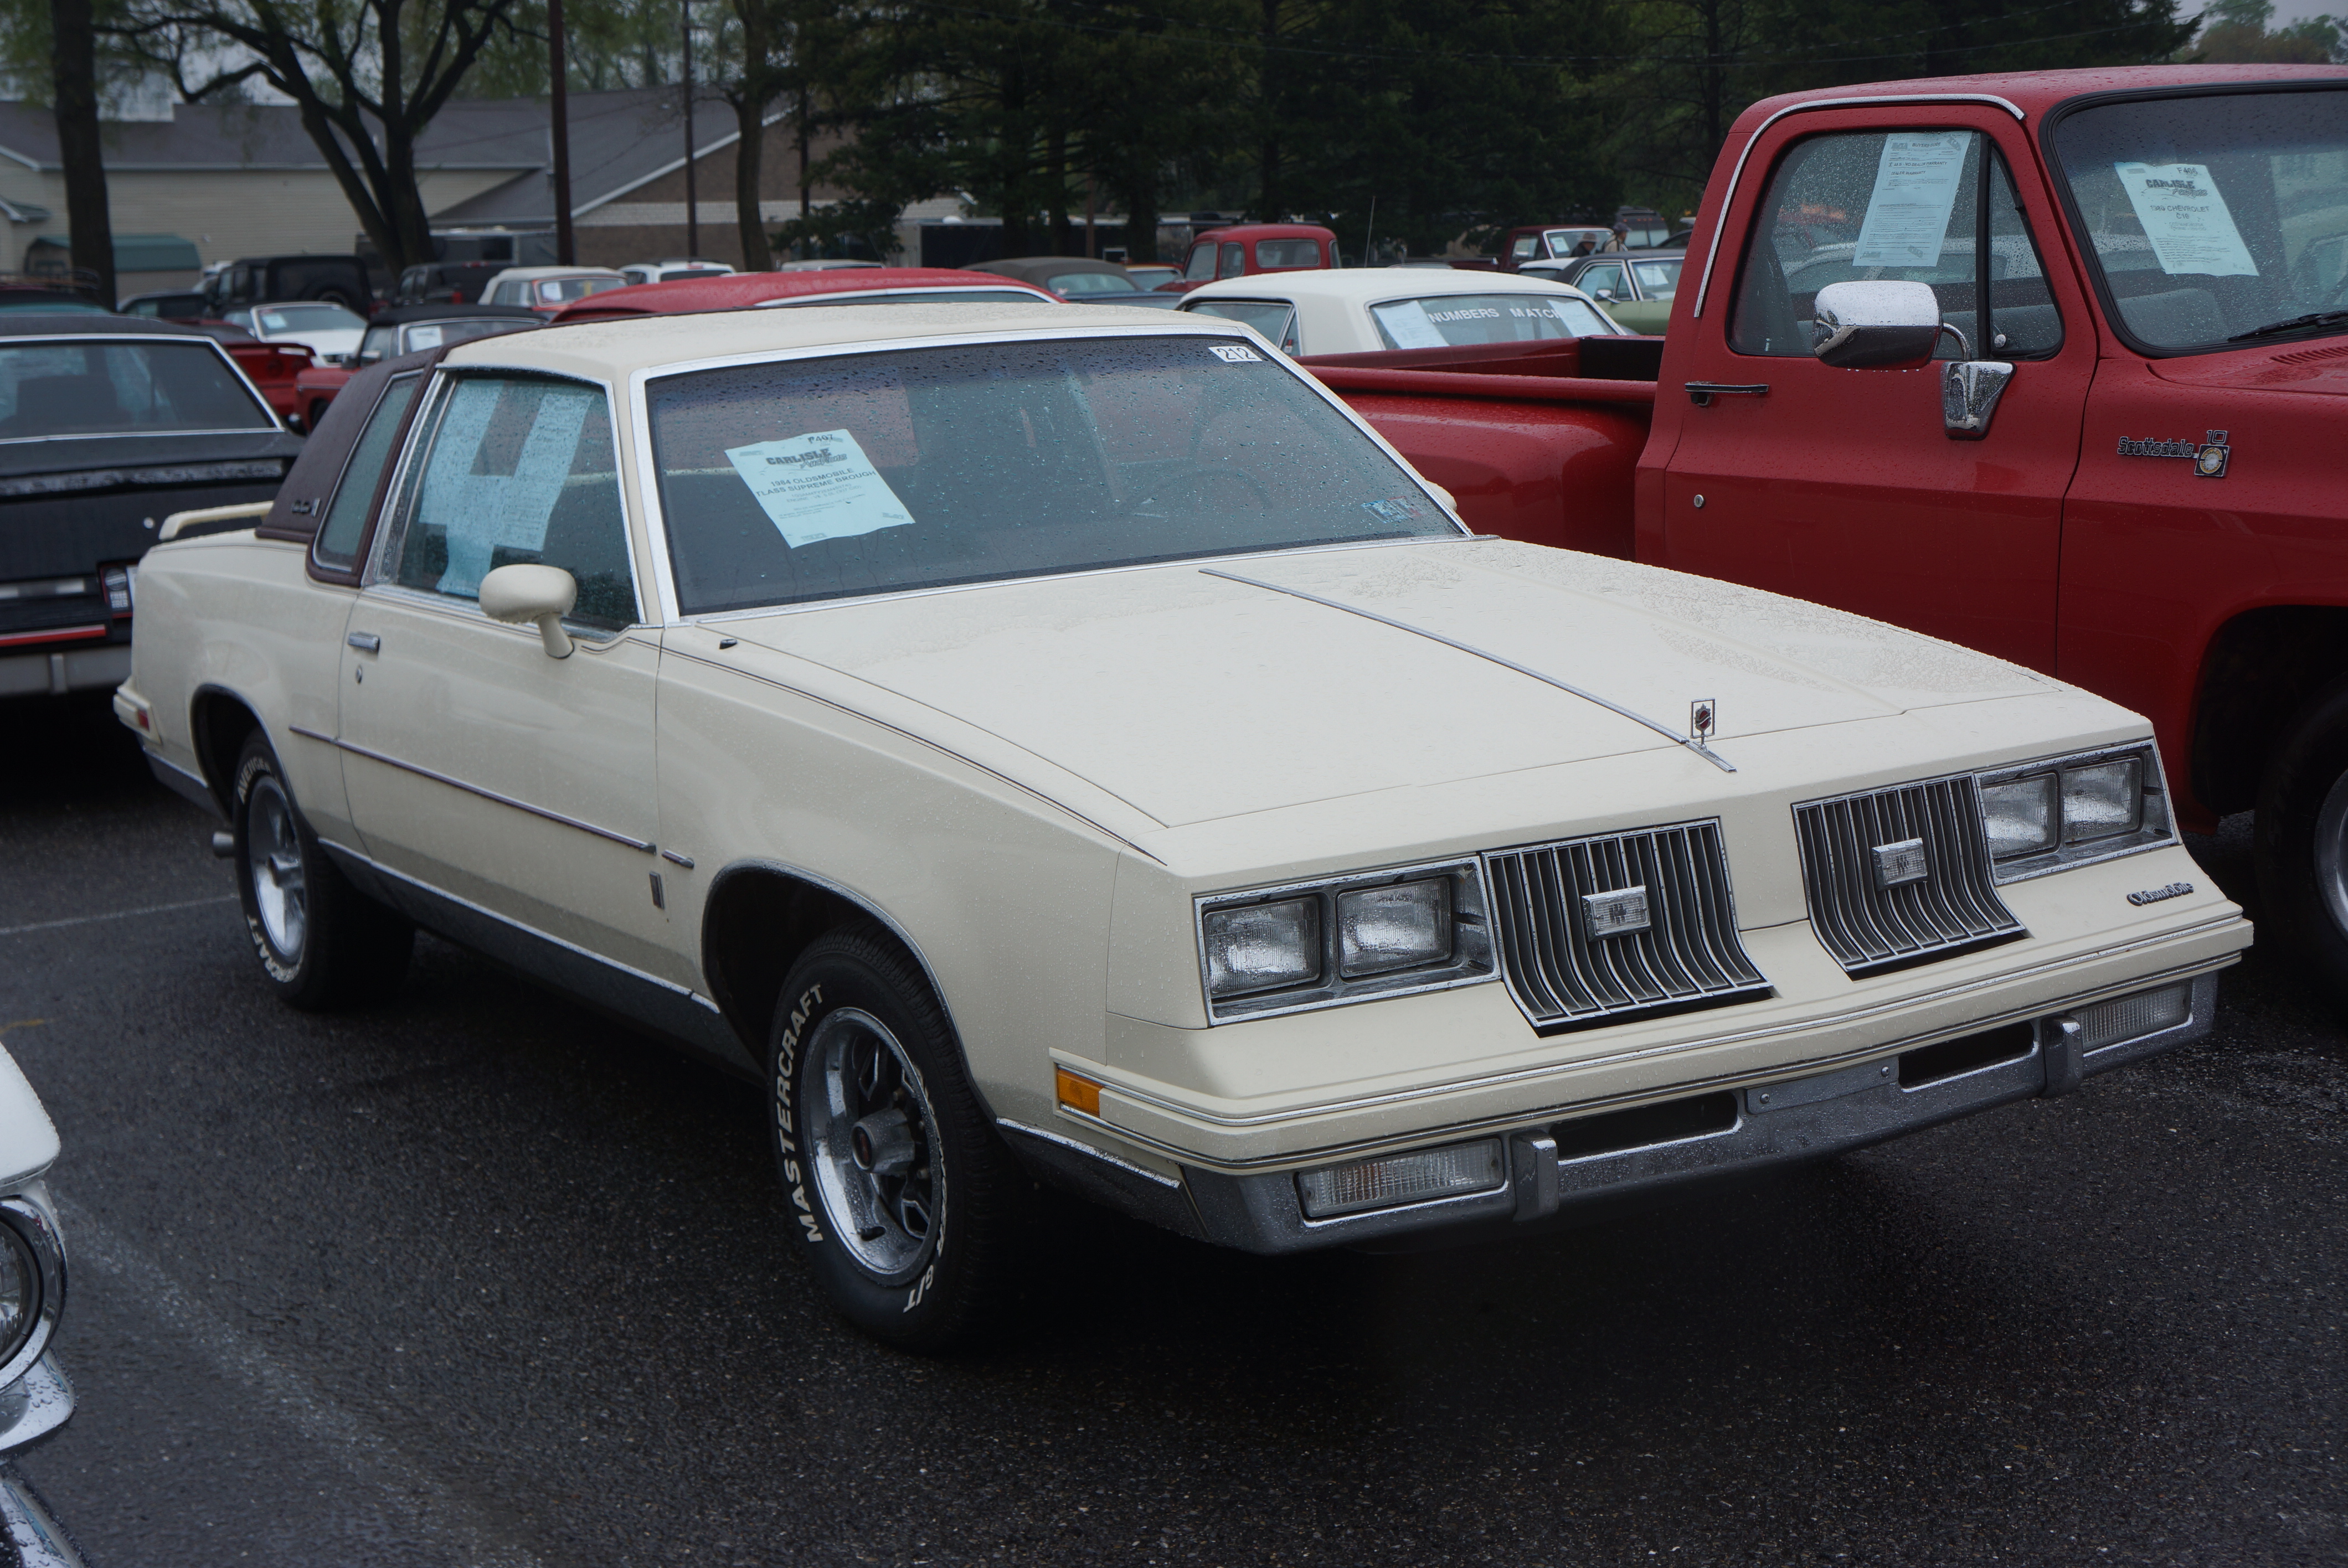
F407 1984 Old Cutlass Supreme Brougham 2-door formal coupe. Light cream paint, dark red half-vinyl roof, red velour “loose pillow” interior. V8, automatic. Olds alloy wheels and trim rings, Mastercraft tires. One of the last RWD Cutlasses. Funny lights added to grille; rear spoiler detracts from formal look. Odometer reads 55,892 which looks accurate. Outside is OK, no obvious defects. Olds Club of America decal! A little dirty inside. Both doors along bottom inside edges show filler and paint as if to head off some early rust, not showing through outside. Yet.
NO SALE AT HGH BID OF $3,700- auctioneer announced that reserve is $5,000. Website says car sold for $4,000.Seller obviously came to his senses and sold the car $1,000 below his reserve. Even with the door rust, which might lie dormant, buyer got a reliable, good-looking and good-sized American car that has another 100,000+ miles remaining in it before any serious work is needed.
$5,000 TO $9,000 (8 CARS)
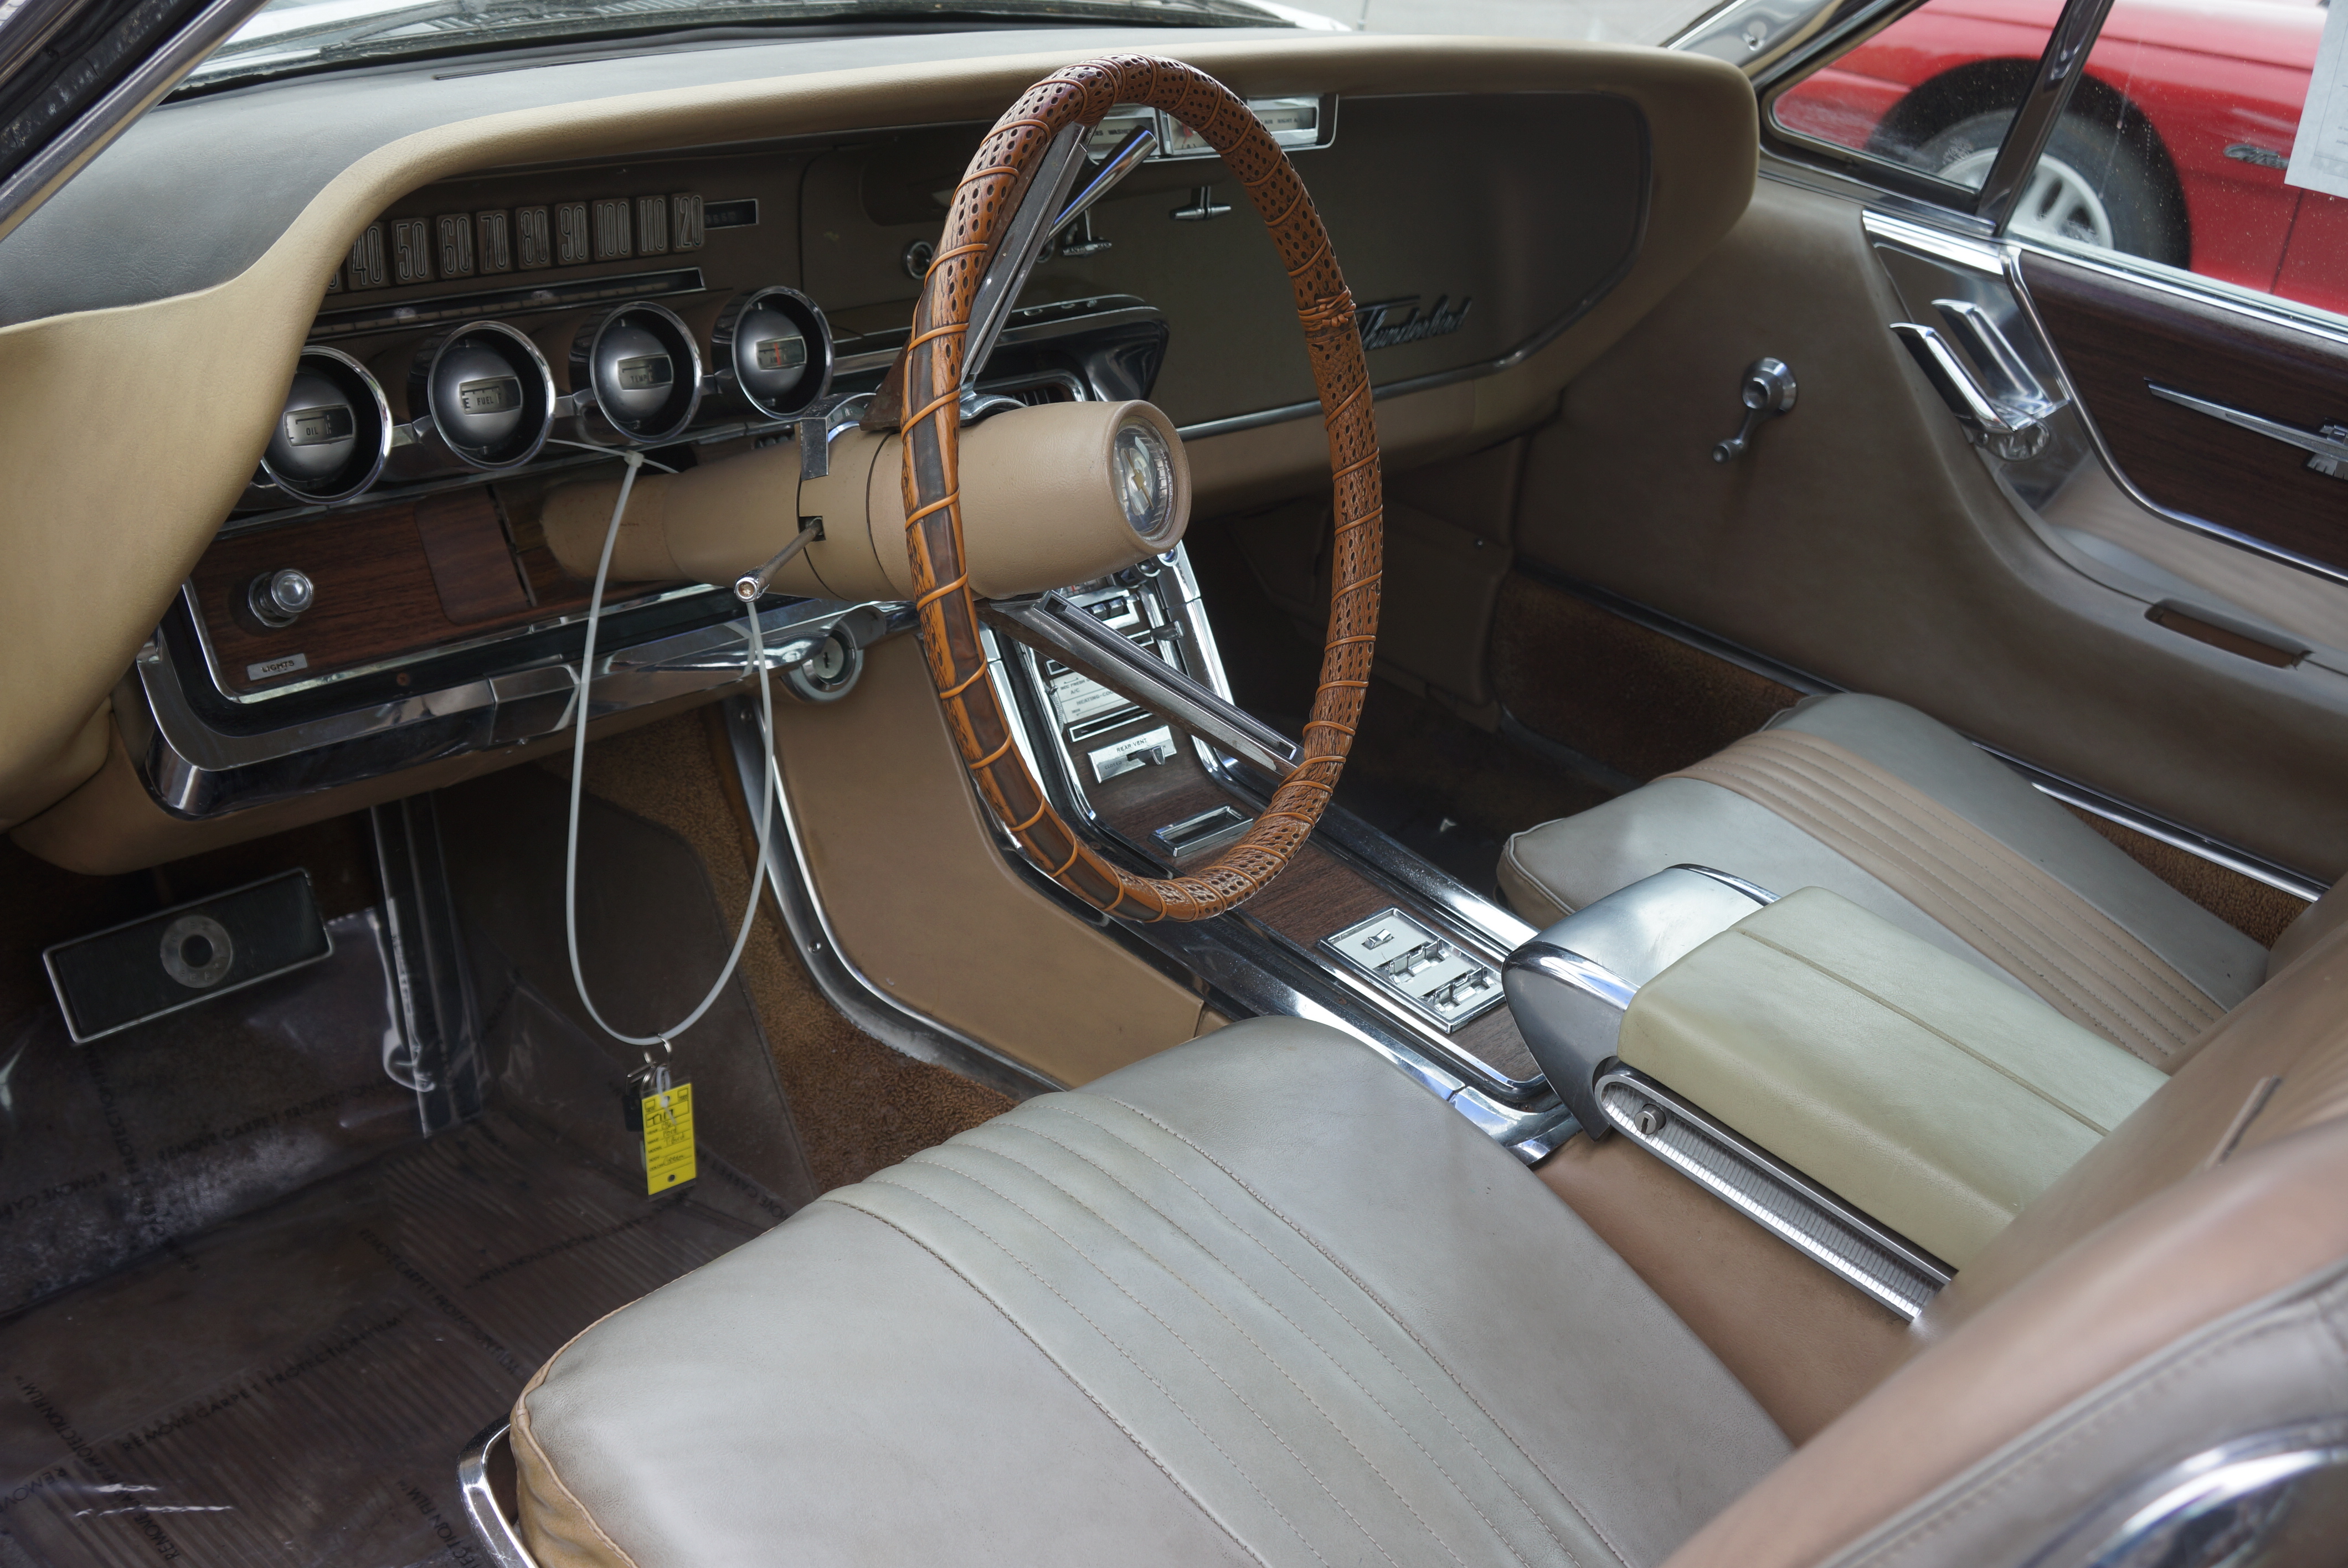
T117 1965 Ford T-Bird 2-door hardtop, dark green, black vinyl roof, landau bars, full wheel covers, whitewall tires. Mileage is 21,966, best guess is to add a “1” to the front of that. Car is dirty on outside, hard to determine paint condition. Underhood is a complete disaster. Interior is light gold or green, hard to tell as interior has faded to various autumnal shades. Factory A/C, driver’s door panel torn and taped, carpet worn, chrome pitted, entire interior needs a deep cleaning. There may be a decent car hiding under the mess.
SOLD FOR $5,700- I shouldn’t be shocked, but I am, at the overall condition of many of these auction cars. This T-Bird in particular rates a condition ‘4’ on the traditional 1-to-5 scale. But a weekend spent cleaning and detailing it could have brought it up to a solid #3 or even a 2-, which would have brought another $2,000-3,000 on the block. If a flipper bought it, that is exactly what he is going to do.
F532 1999 Jaguar XK8, silver, black convertible top, black leather interior. Jag alloy wheels, blackwall tires. Top looks spotless. 45,208 original miles. Some signs of wiring repairs underhood. Interior shows more wear than expected for mileage, especially driver’s seat bottom. Bland color combo, looks like nothing more than another used car.
SOLD FOR $5,900- These first generation XK8 convertibles are an auction mainstay. Most of the ones I’ve seen have higher mileage, and have been bringing around $7,000-9,000. This one had lower miles and brought less money, which is great news for the buyer and not-great news for the seller.
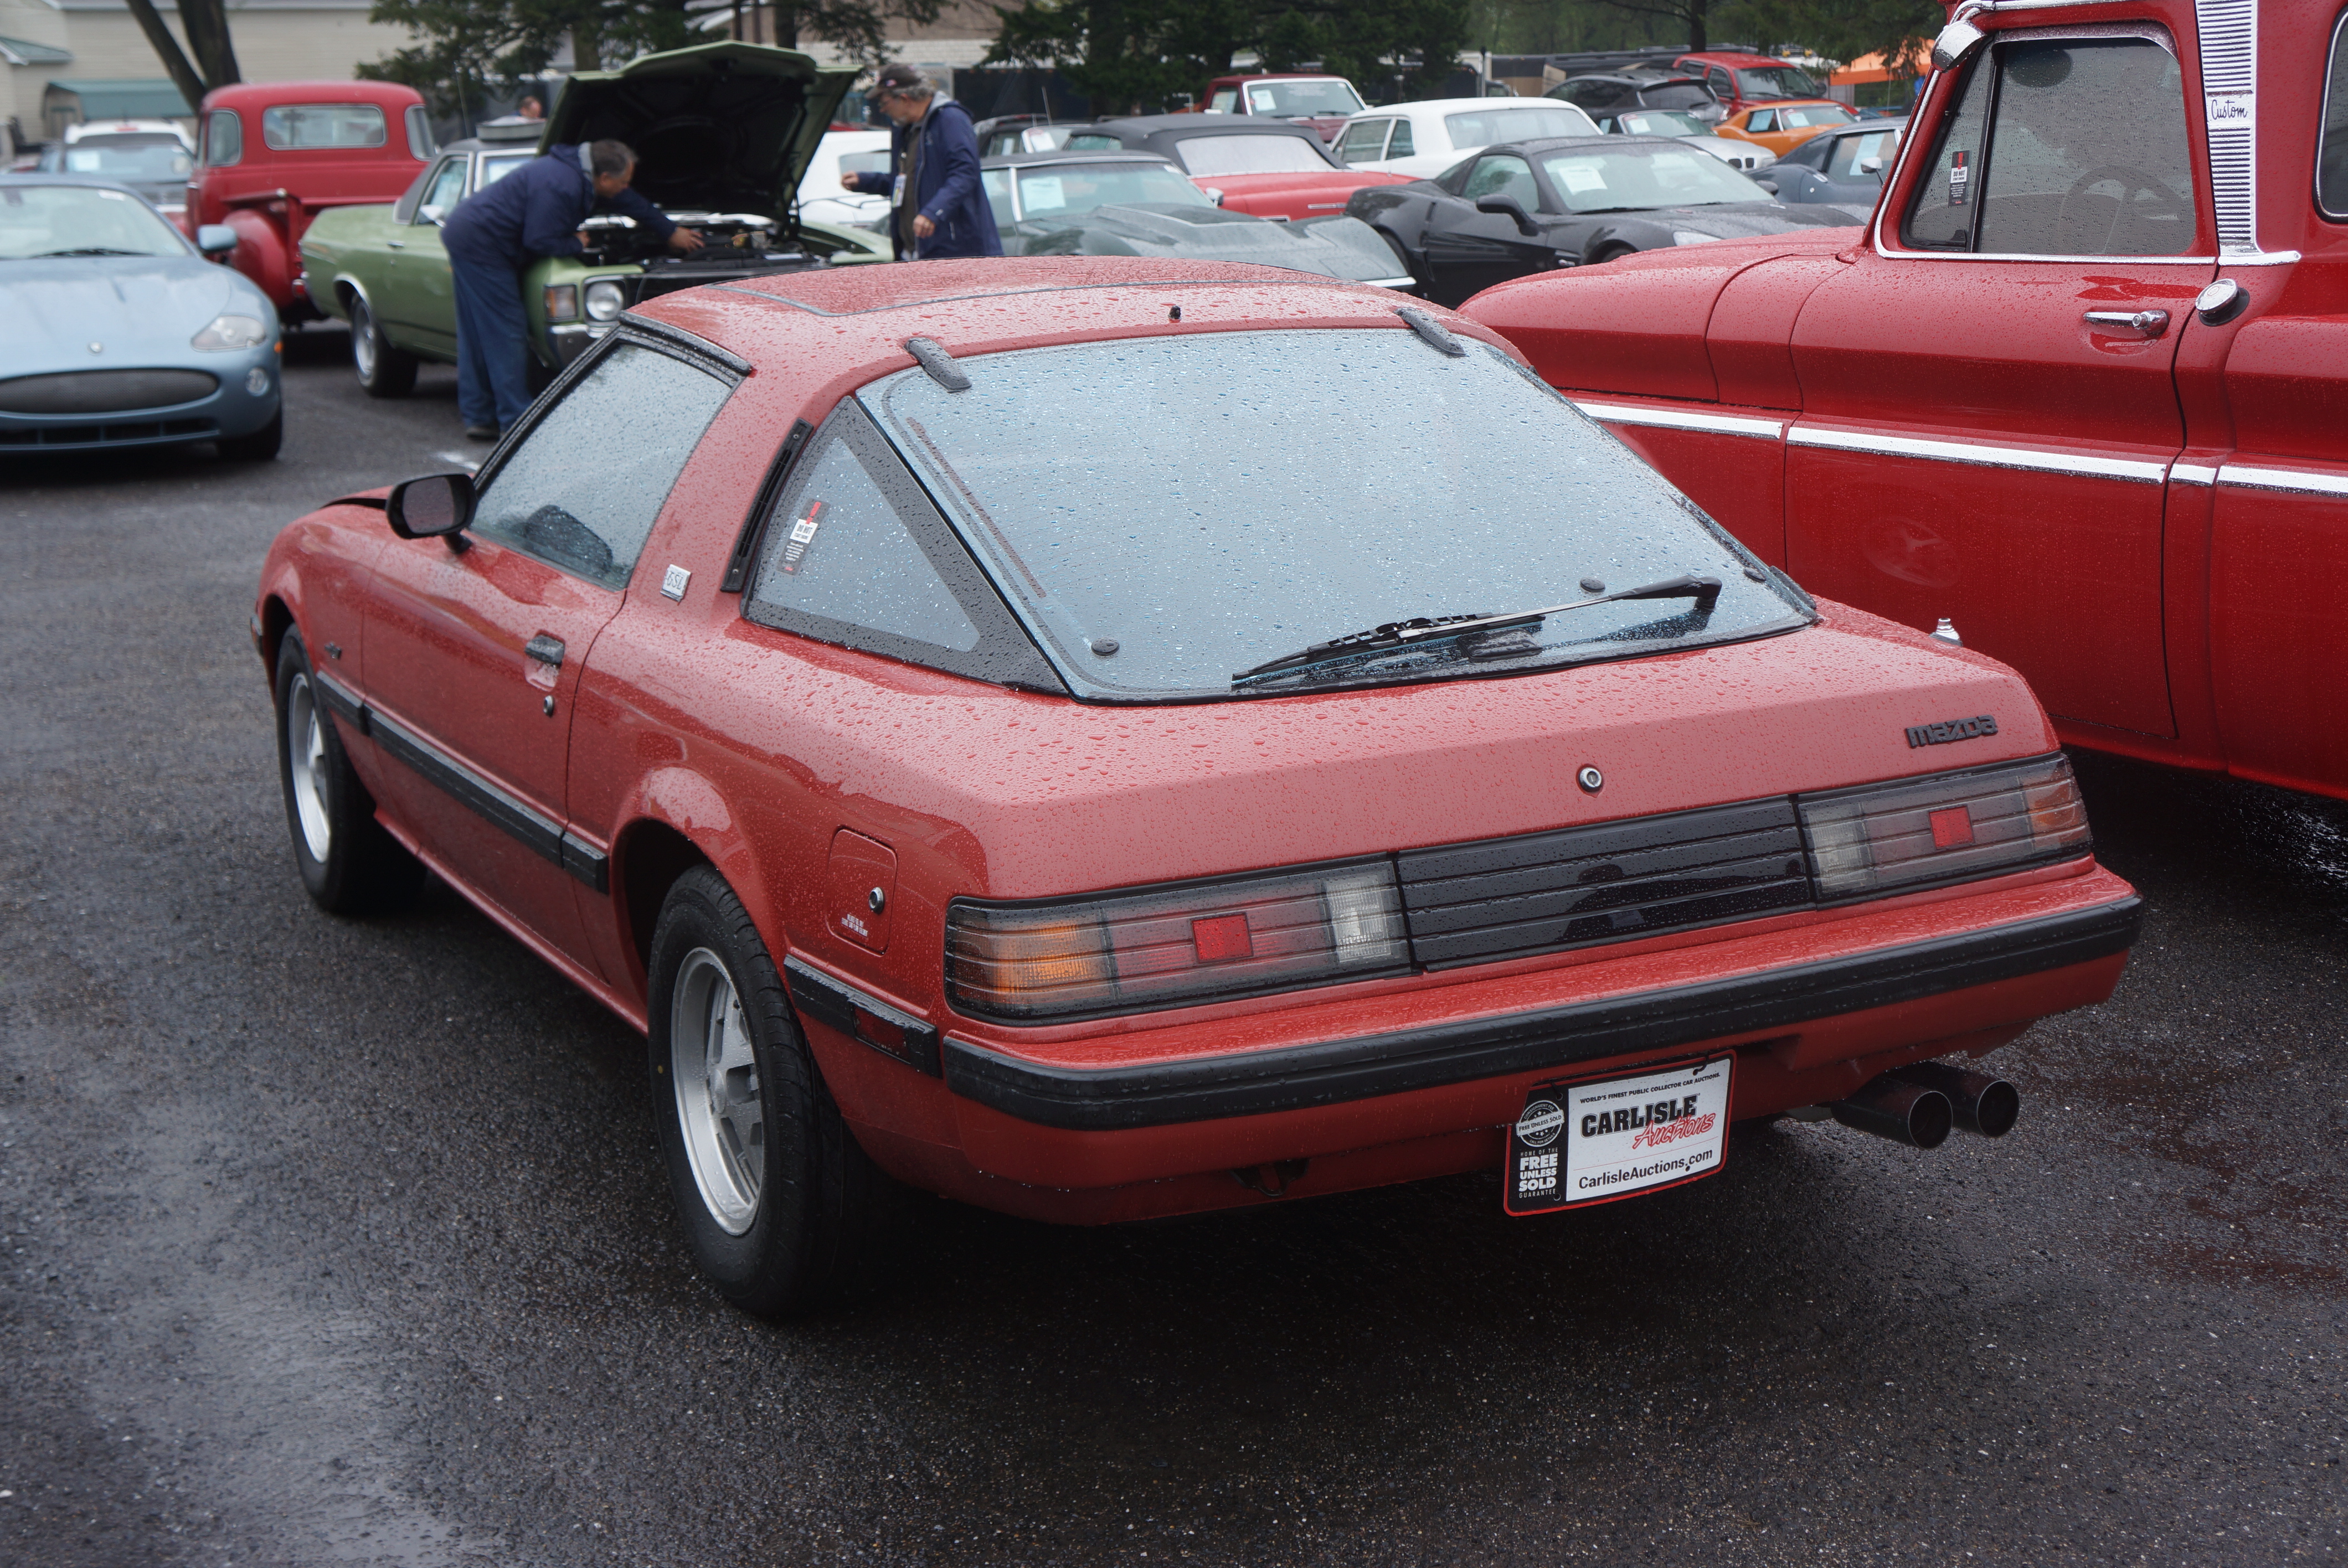
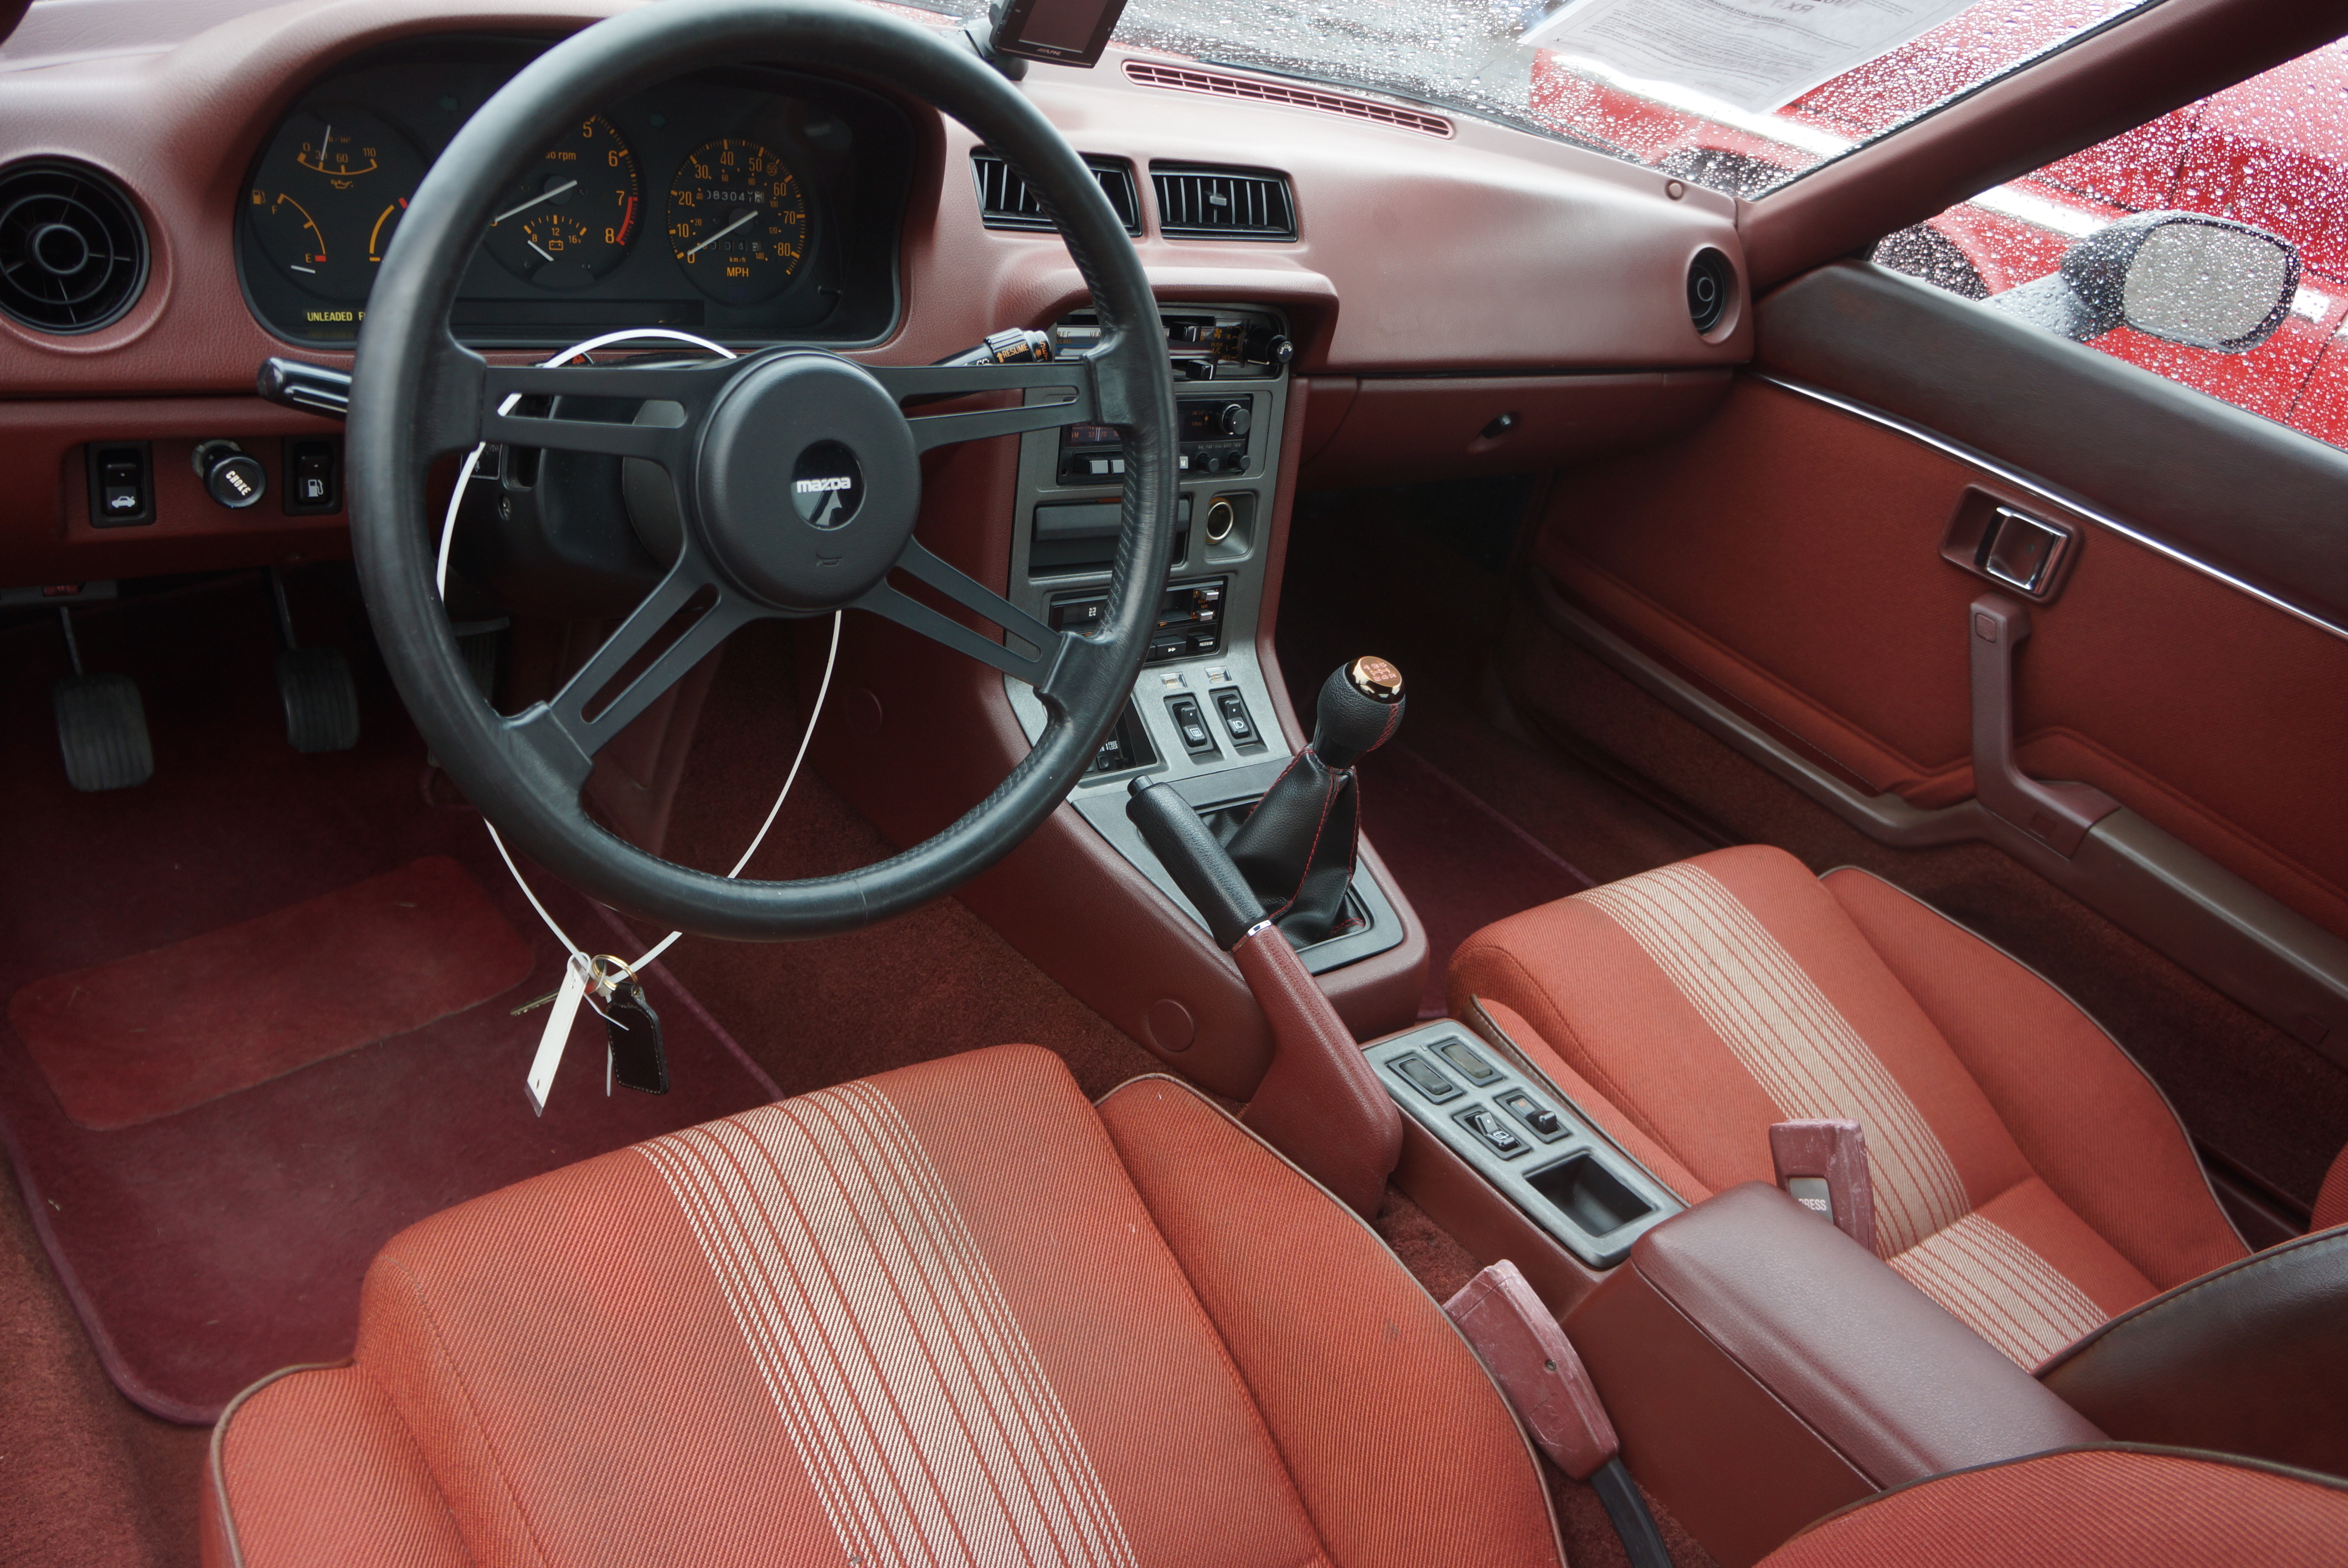
F421 1982 Mazda RX-7 GSL, 82040 miles, factory alloy wheels, sunroof. Metallic red, red cloth interior. Rotary engine, 5-speed transmission. Paint OK, but black on exterior glass trim has worn away in spots. Both underhood and interior are dirty. Floor mats worn out, driver’s seat bolster worn.
SOLD FOR $6,200- First-gen RX-7s have a cult following, but they have yet to bring the bucks. This one, like so many other cars here, was dirty and looked unloved. The good news is that it had not been messed with, as it retained all its factory equipment. Sale price was fair to both buyer and seller.
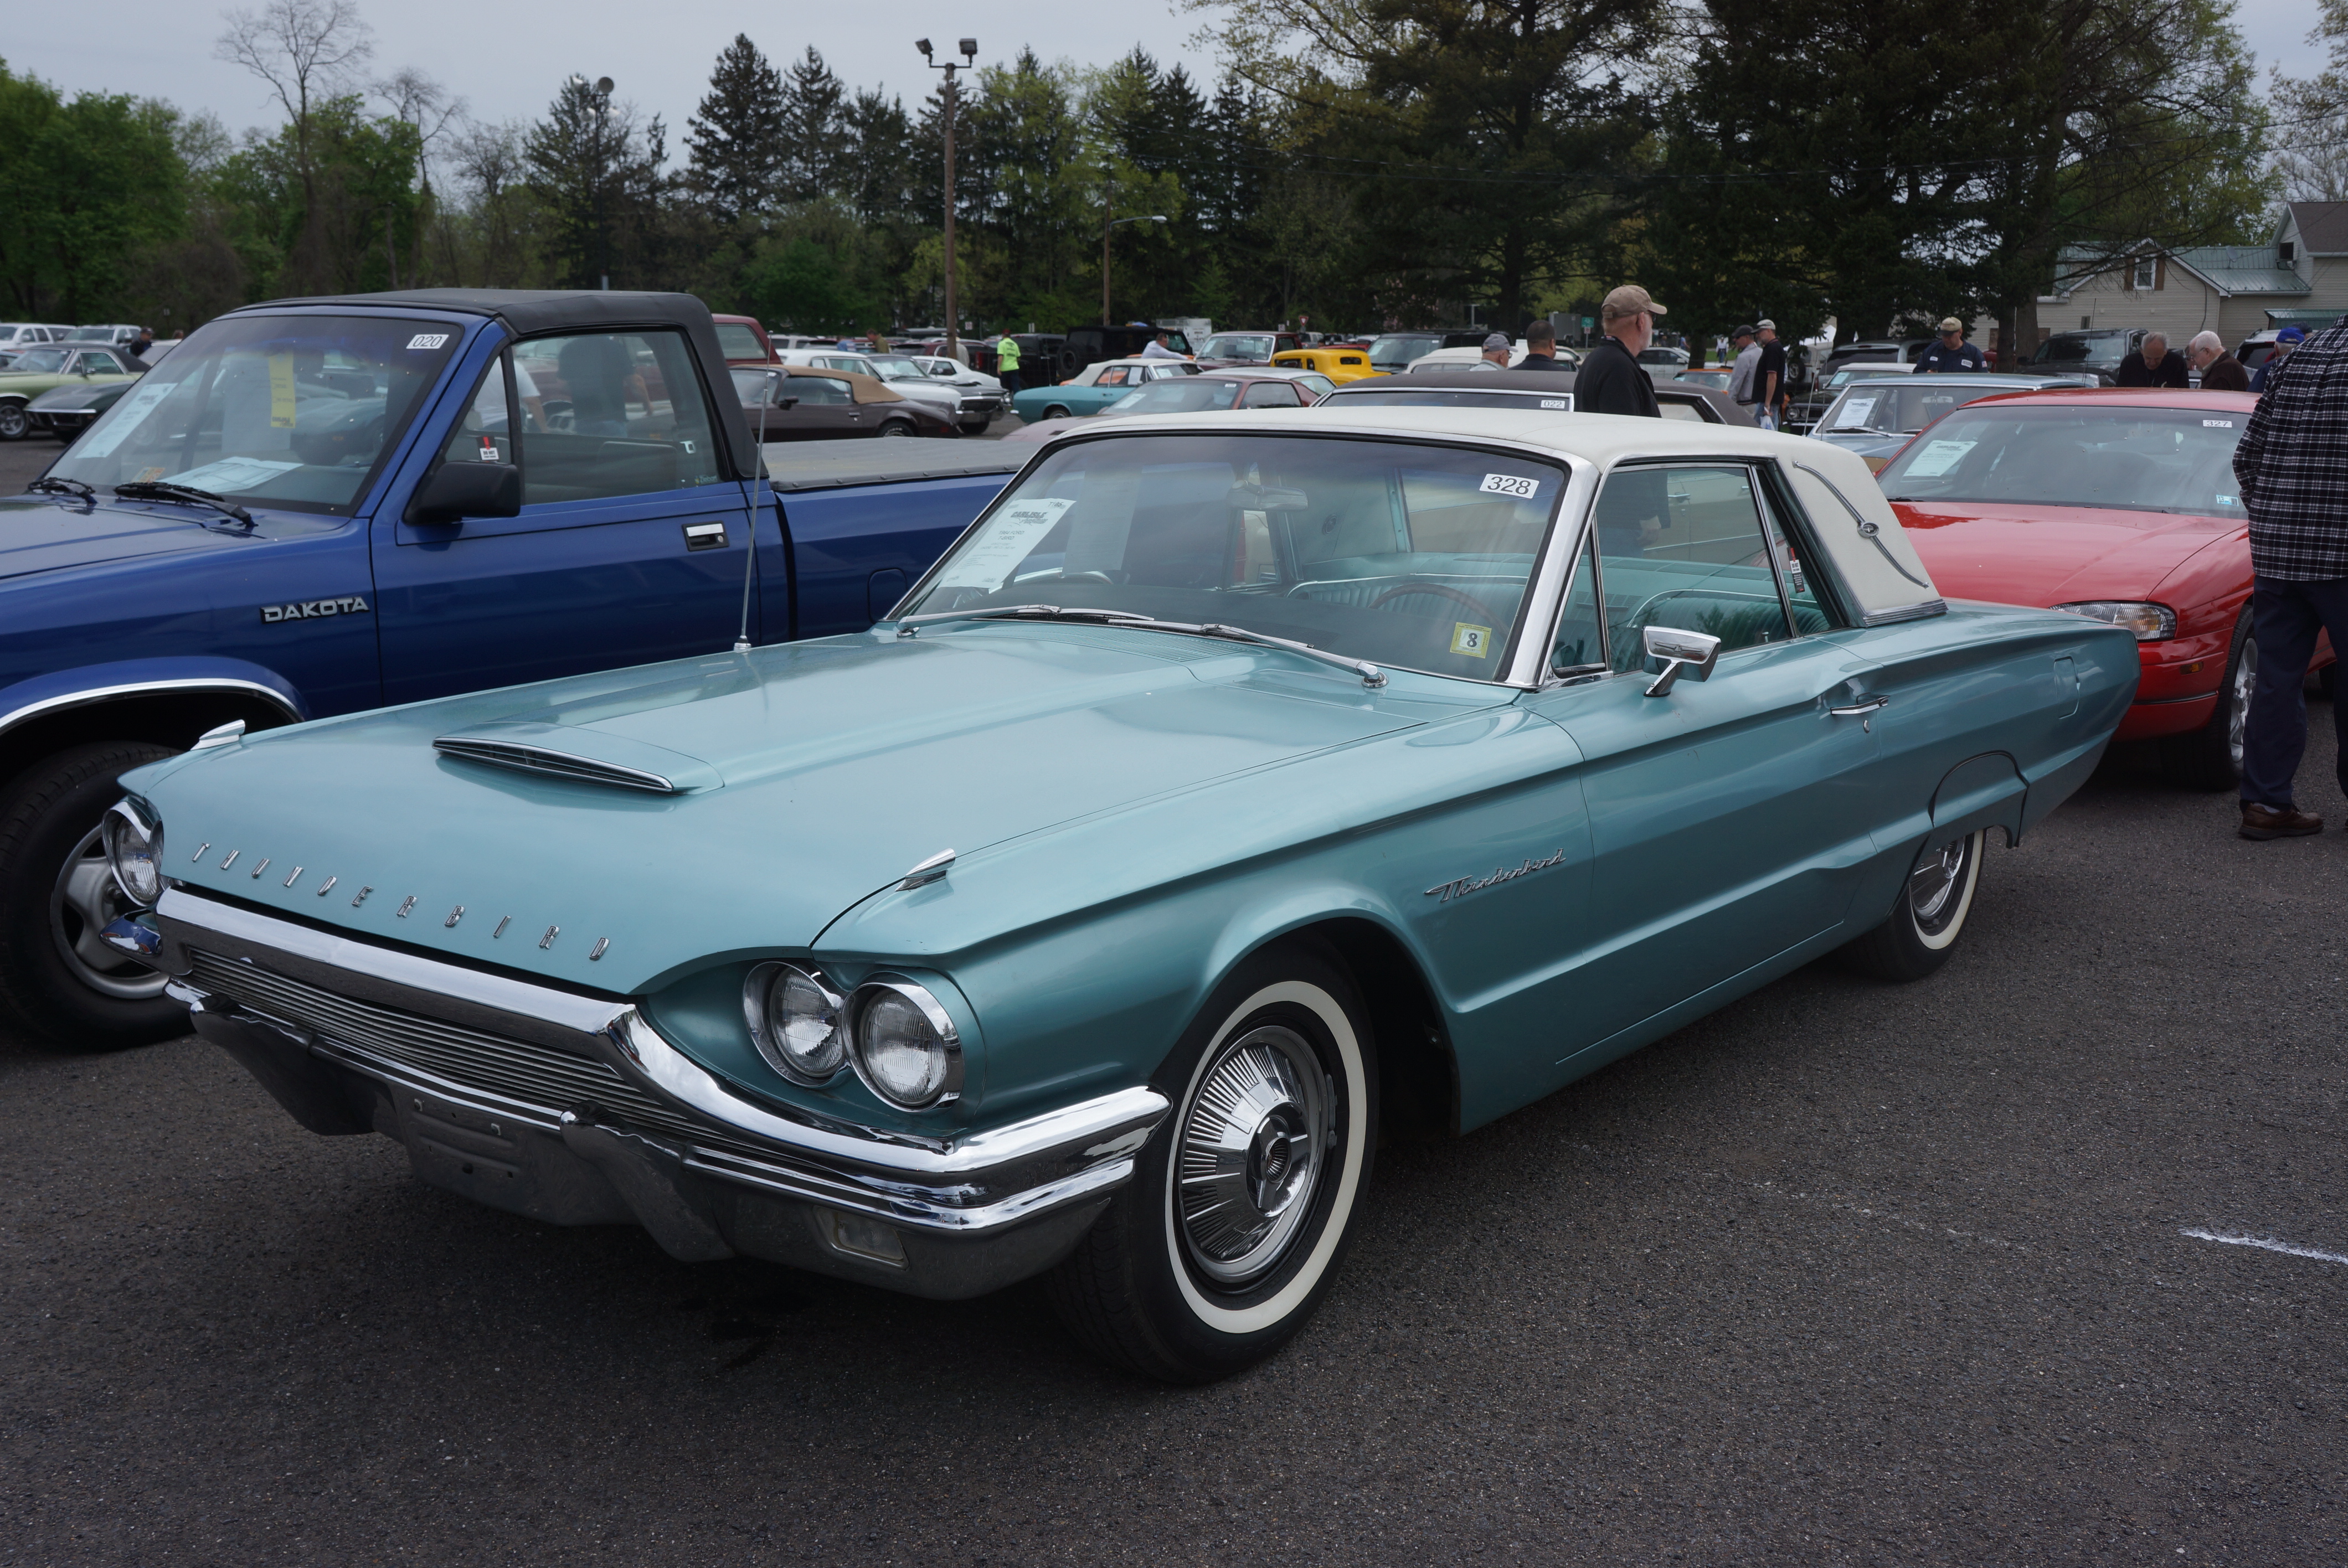
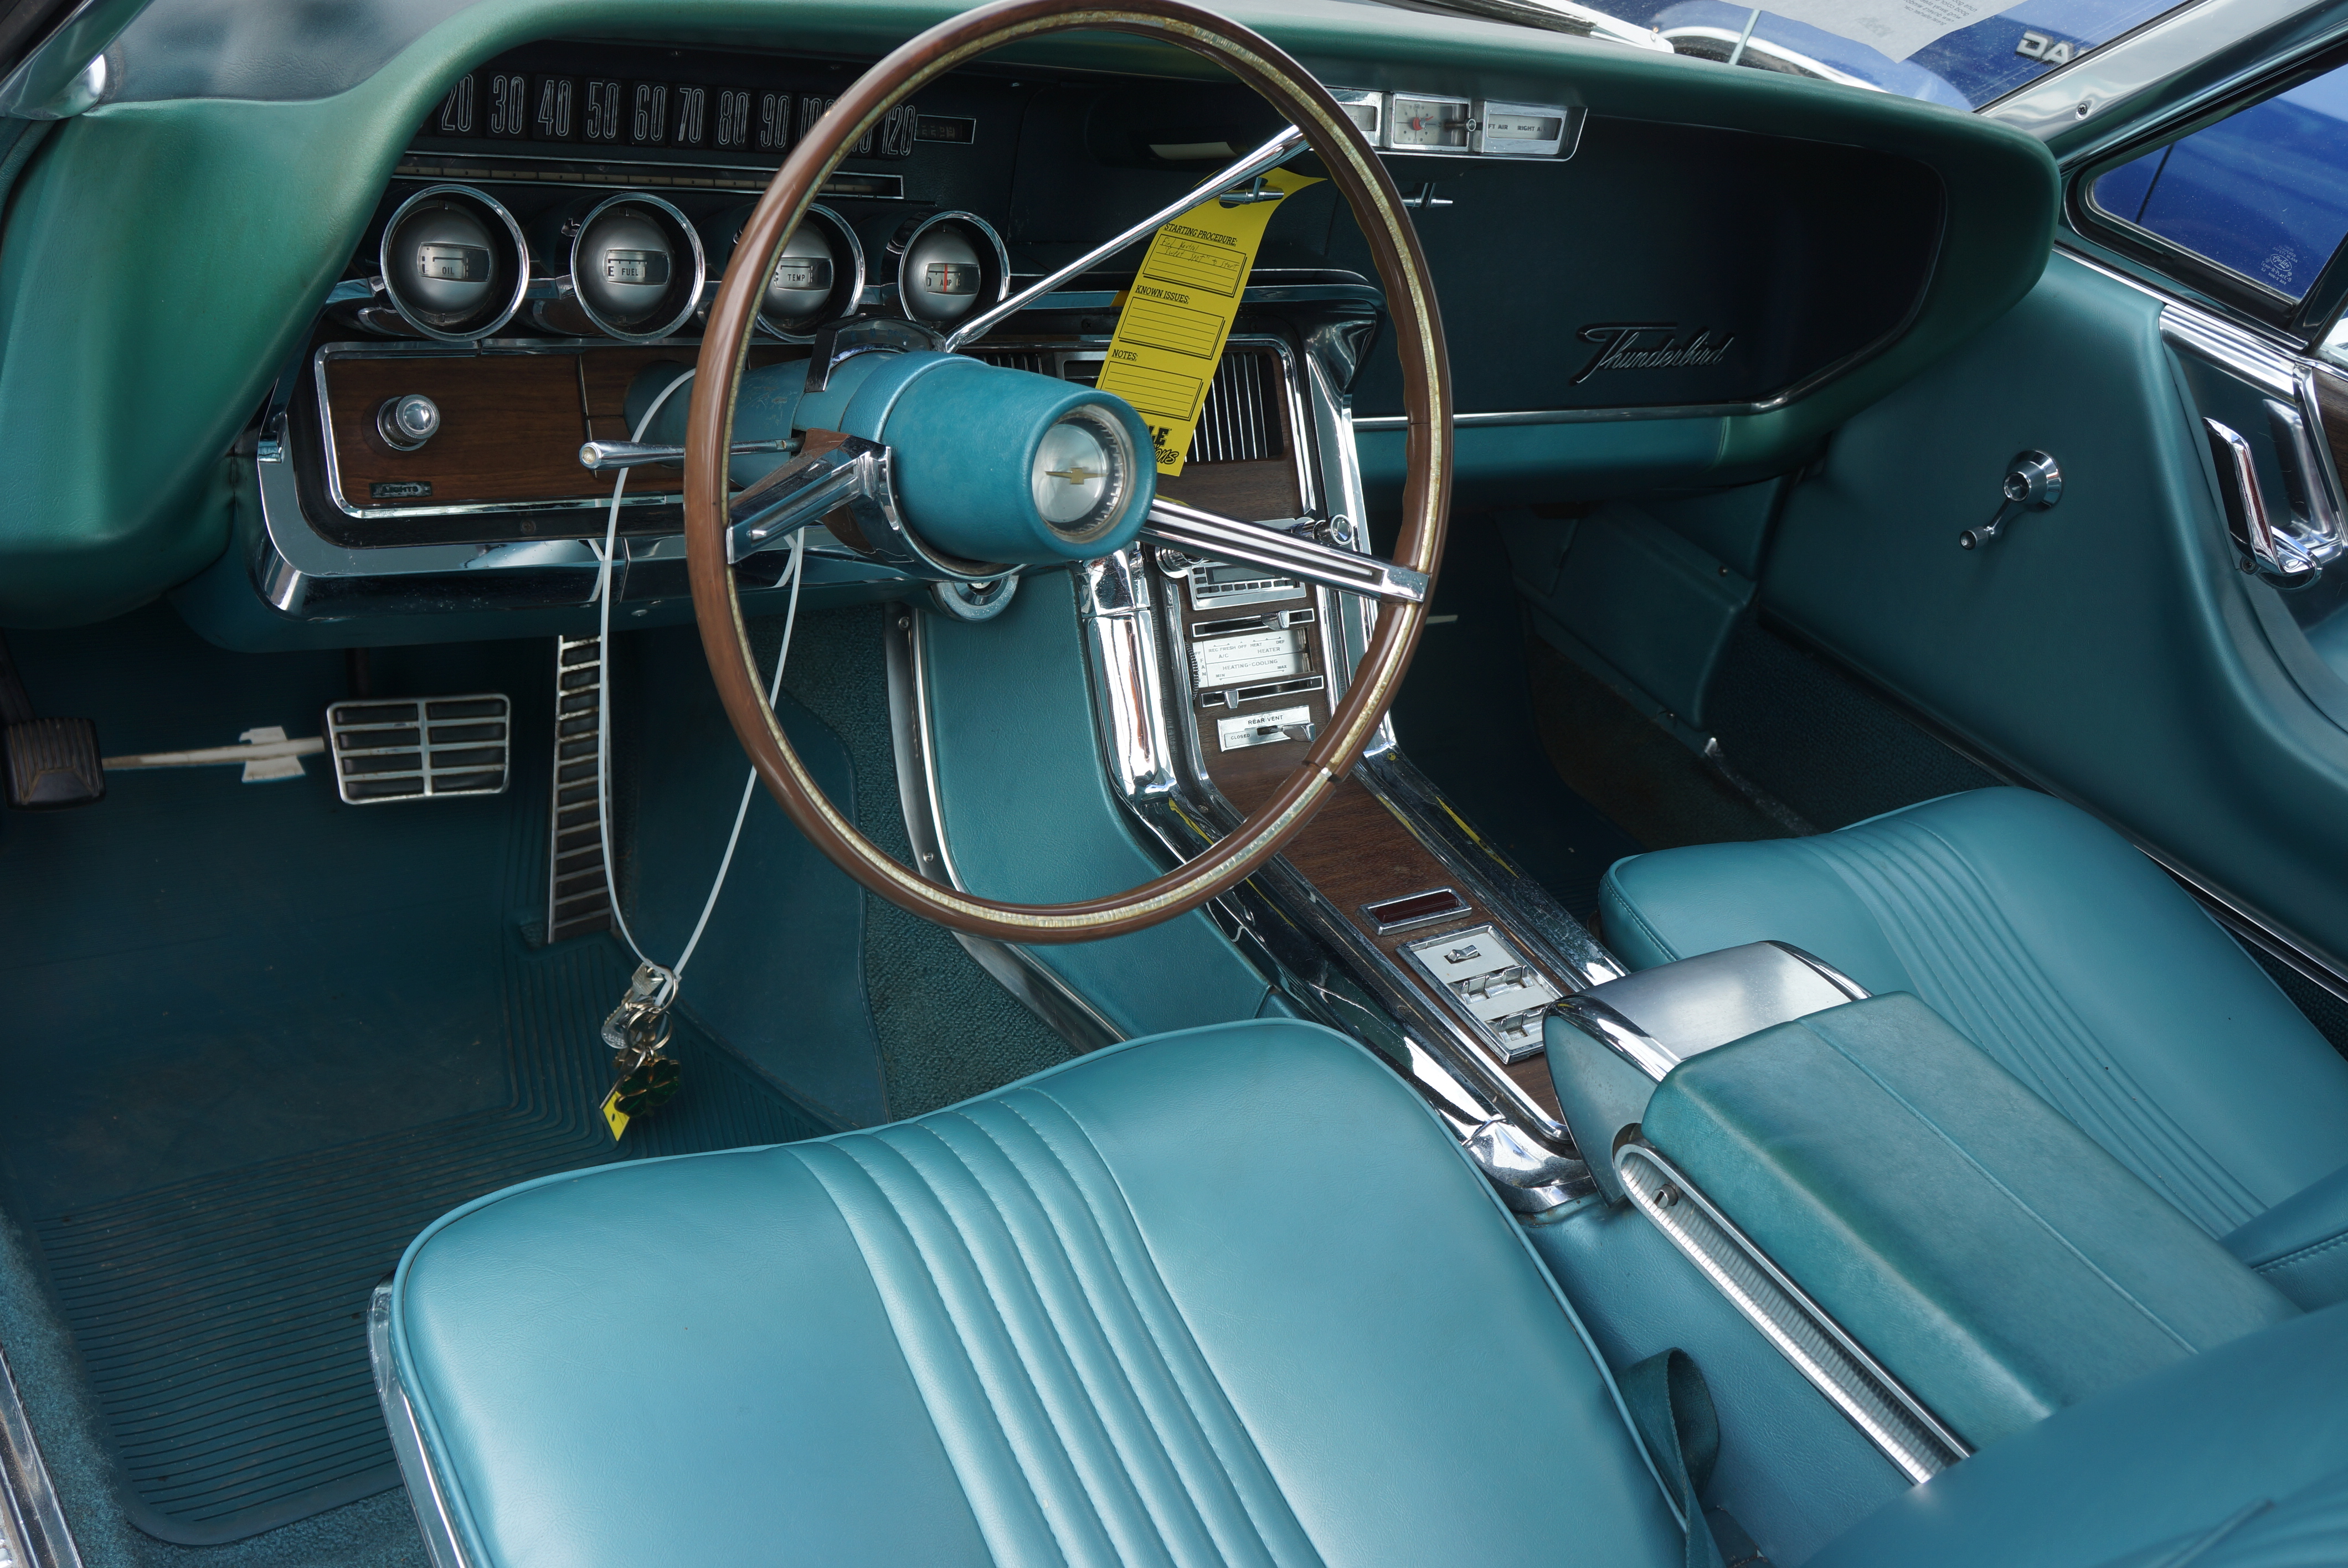
T105 1964 Ford T-Bird hardtop, 390/automatic, aqua, white vinyl top with landau bars, aqua interior. Odometer reads 99,556. Paint looks old, and is faded and blotchy all over. By contrast, interior is very clean except for cracks in steering wheel. Upholstery is so nice it’s likely been redone. Underhood surprisingly clean. A car to drive, or paint it to bring it up a notch.
SOLD FOR $6,300- The ’61-’66 T-Birds are favorites of mine. I prefer the ’61-63 Bullet Birds, but I wouldn’t turn down a ’64 like this one. These are large cars which float down the road. There’s nothing sporty about the driving experience, but it is luxurious. This was a fair price for a car in a nice color combo that needs paint.
T260 1954 Packard Patrician, 4-door sedan, straight 8, automatic. Green inside and out. Might be factory paint, with some blended-in repainted areas which don’t match. Full factory wheel covers, white wall tires look like bias-ply. Mileage is 45,000, sign claims that is original. Sign also claims long-term one-family ownership. Interior completely original and looks well cared for, if a bit worn and faded in places. Painted metal dash in great shape. Rear seat footrests still in place. Car oozes charm and patina. A true survivor which will be held back by its sedan body style.
SOLD FOR $7,500- I spent about 20 minutes checking out this car, and sat in both front and rear seats. While the $3,000 MGB or the $4,000 Alfa Spider are more to my taste, I’ve been smitten lately with Packards. As one friend joked, at this price, this is about a dollar a pound (a slight exaggeration). I hope this car is not restored, but is preserved. It’s a piece of rolling history.
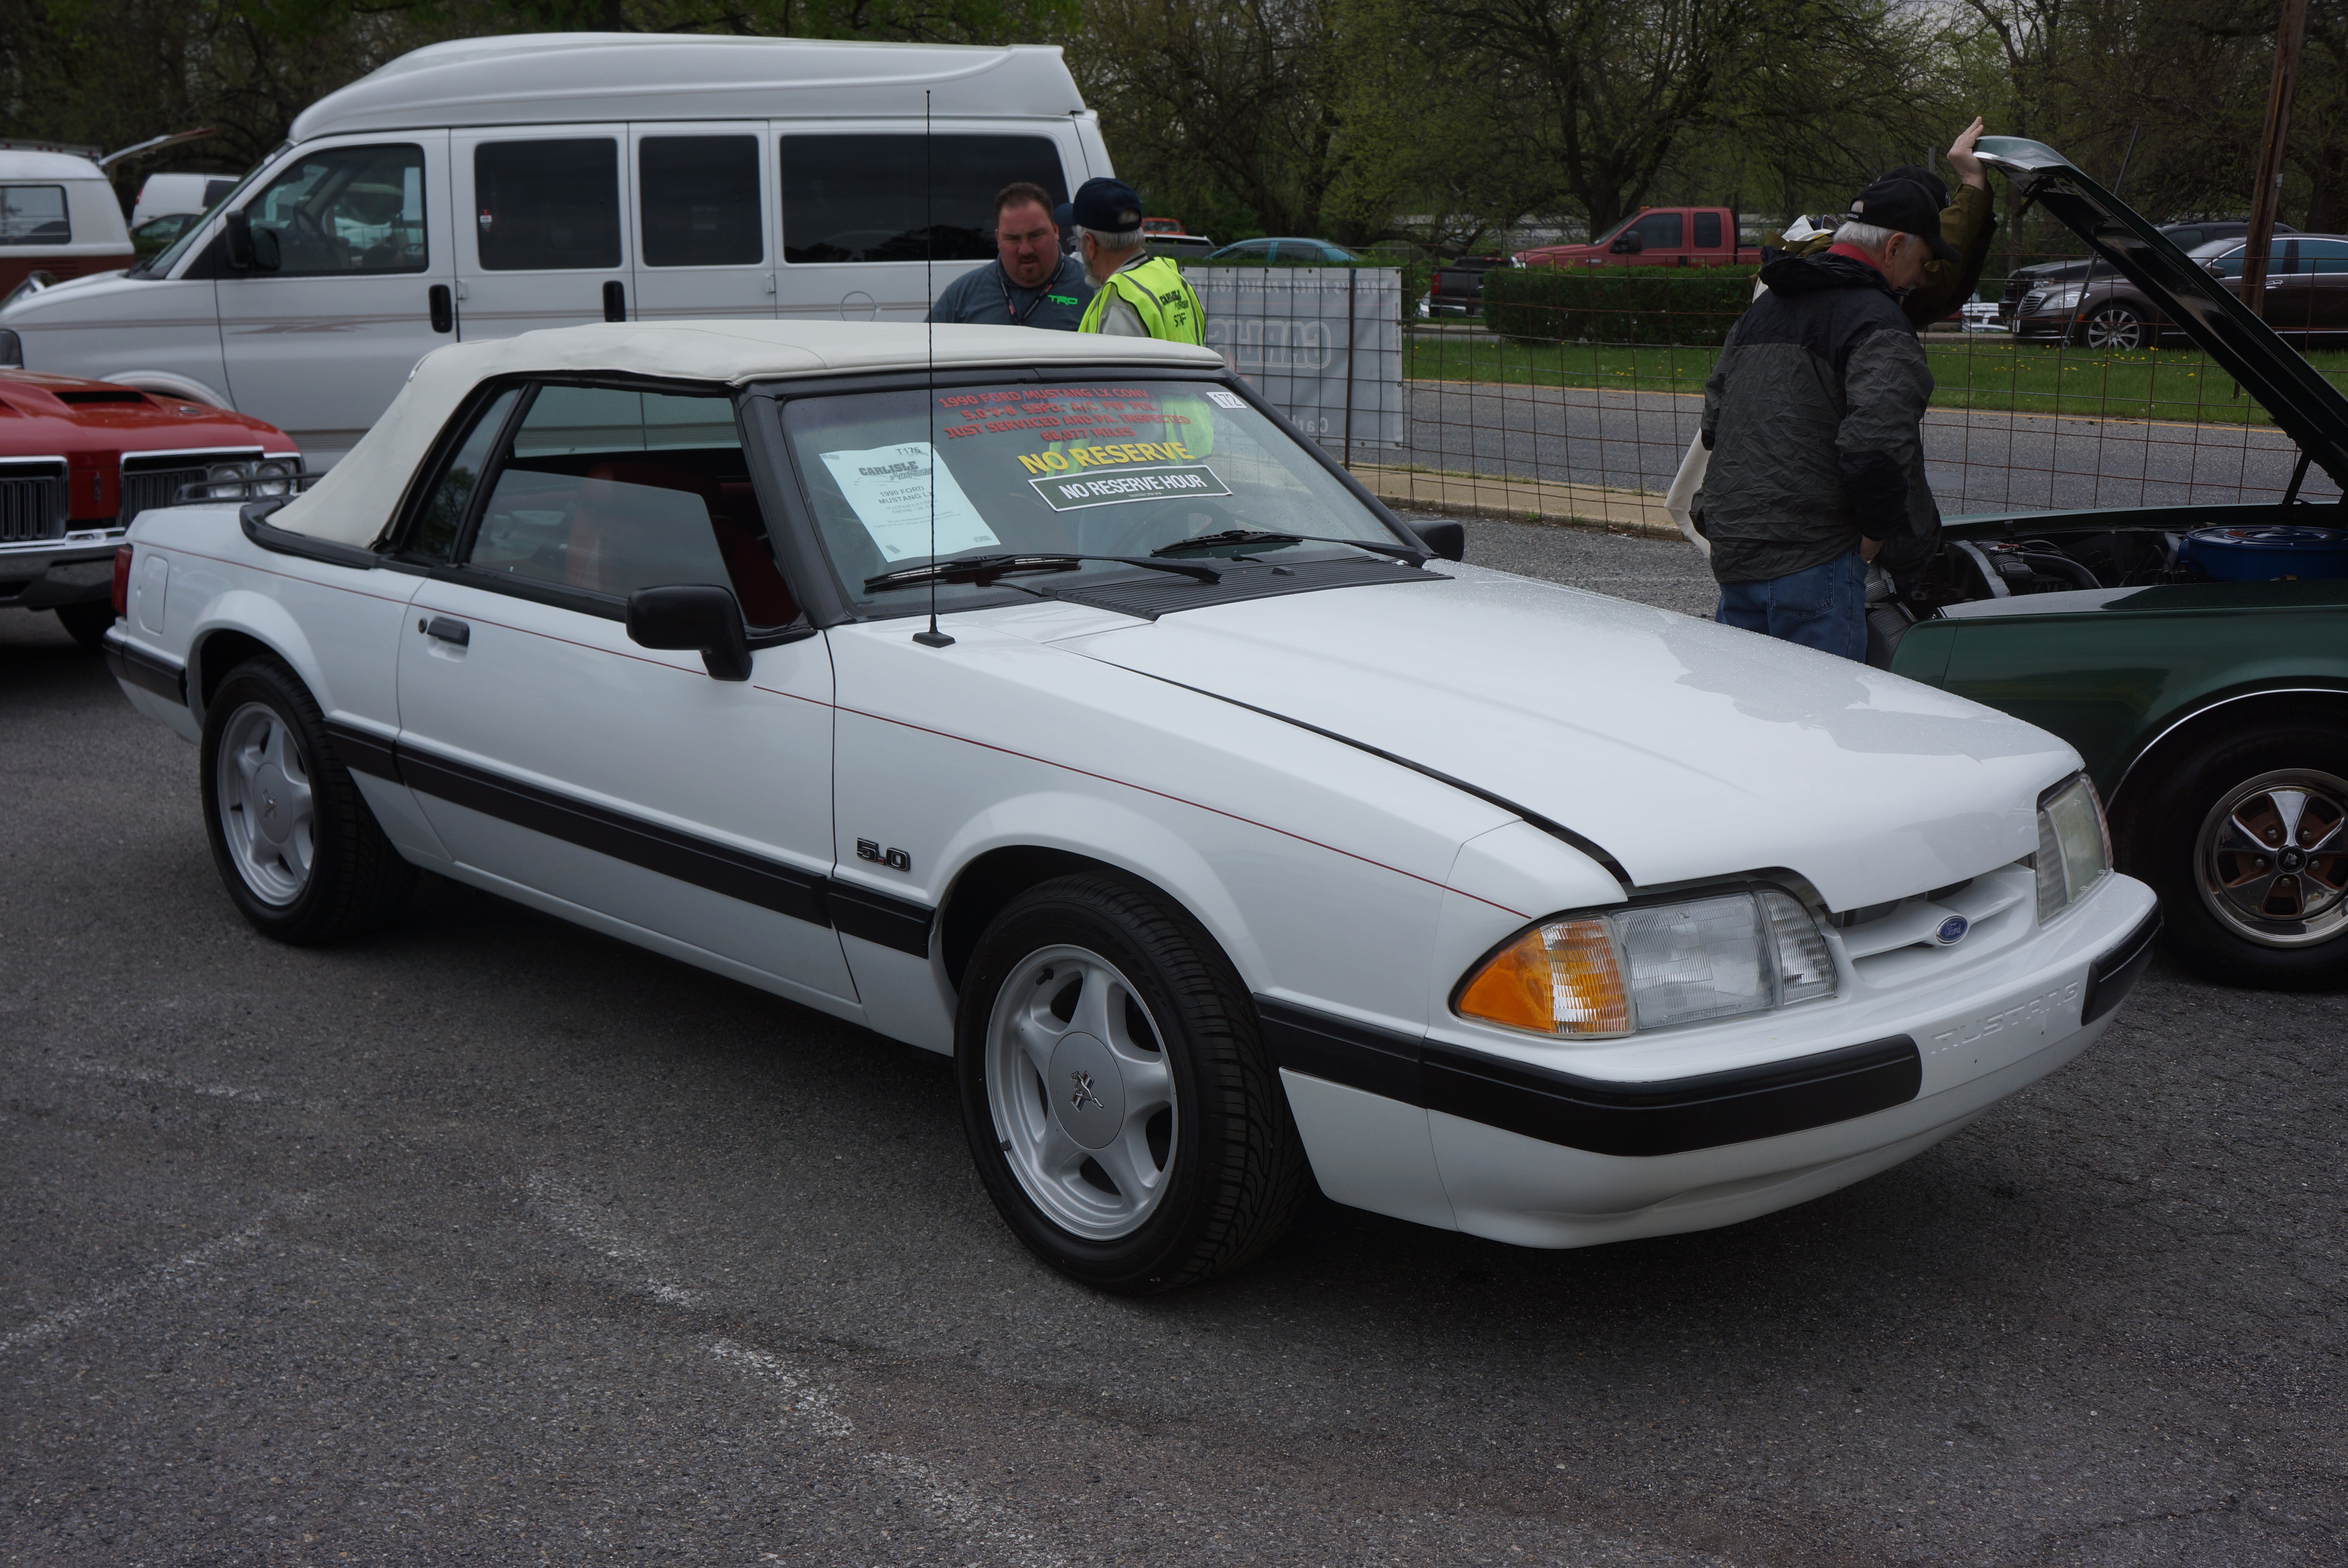
T176 NO RESERVE 1994 Ford Mustang LX convertible, 68,077 miles. 5.0 V8, 5-speed manual, white, white top, red cloth interior, blac wall tires, luggage rack on deck. Paint could be original. Factory alloy wheels, no curb rash. One headlight is opaque. A 25-year-old survivor.
SOLD FOR $8,500- Lots of fun in a Fox-body V8 drop-top. A fair price in a quick and reliable car, AND it’s now AACA-eligible!
F471 1974 MGB-GT, 1.8L 4 cylinder, 4-speed manual. Odometer reads 46,143. Citron Green paint, black interior, seats have seat covers on them. Painted wire wheels, black wall tires. Rubber bumper car. Clean underhood. Outside relatively unmarked. Both door panels are wrinkled as if they had gotten wet. Car not modified, looks like it’s all there. Drilled holes and plugs in jambs from rustproofing treatment, “Rusty Jones” sticker verifies it.
SOLD FOR $8,500- Unusual color not to everyone’s taste, but a GT can swallow a weekend’s worth of luggage if you’re willing to give up top-down motoring. Some (including me) even prefer the looks of this over the roadster. This was no bargain, but the buyer didn’t overpay either. He got a good car that you can’t lose in a parking lot.
T116 1965 Chevy Corvair convertible, aqua, white top, black vinyl interior, odometer reads 55,260, sign on car claims that is original mileage. Fake wire wheel covers, whitewall tires. Driver’s door sagging and hitting jamb. Buckets, 4-speed manual, 110-hp engine. Fan belt sits correctly on this one.
SOLD FOR $9,000- Hopefully the door fit issue is an adjustment and not the beginning of a sagging body. Folding top and 4-speed make up for low output motor in a nice looking Corvair.
$10,500 TO $11,500 (6 CARS)
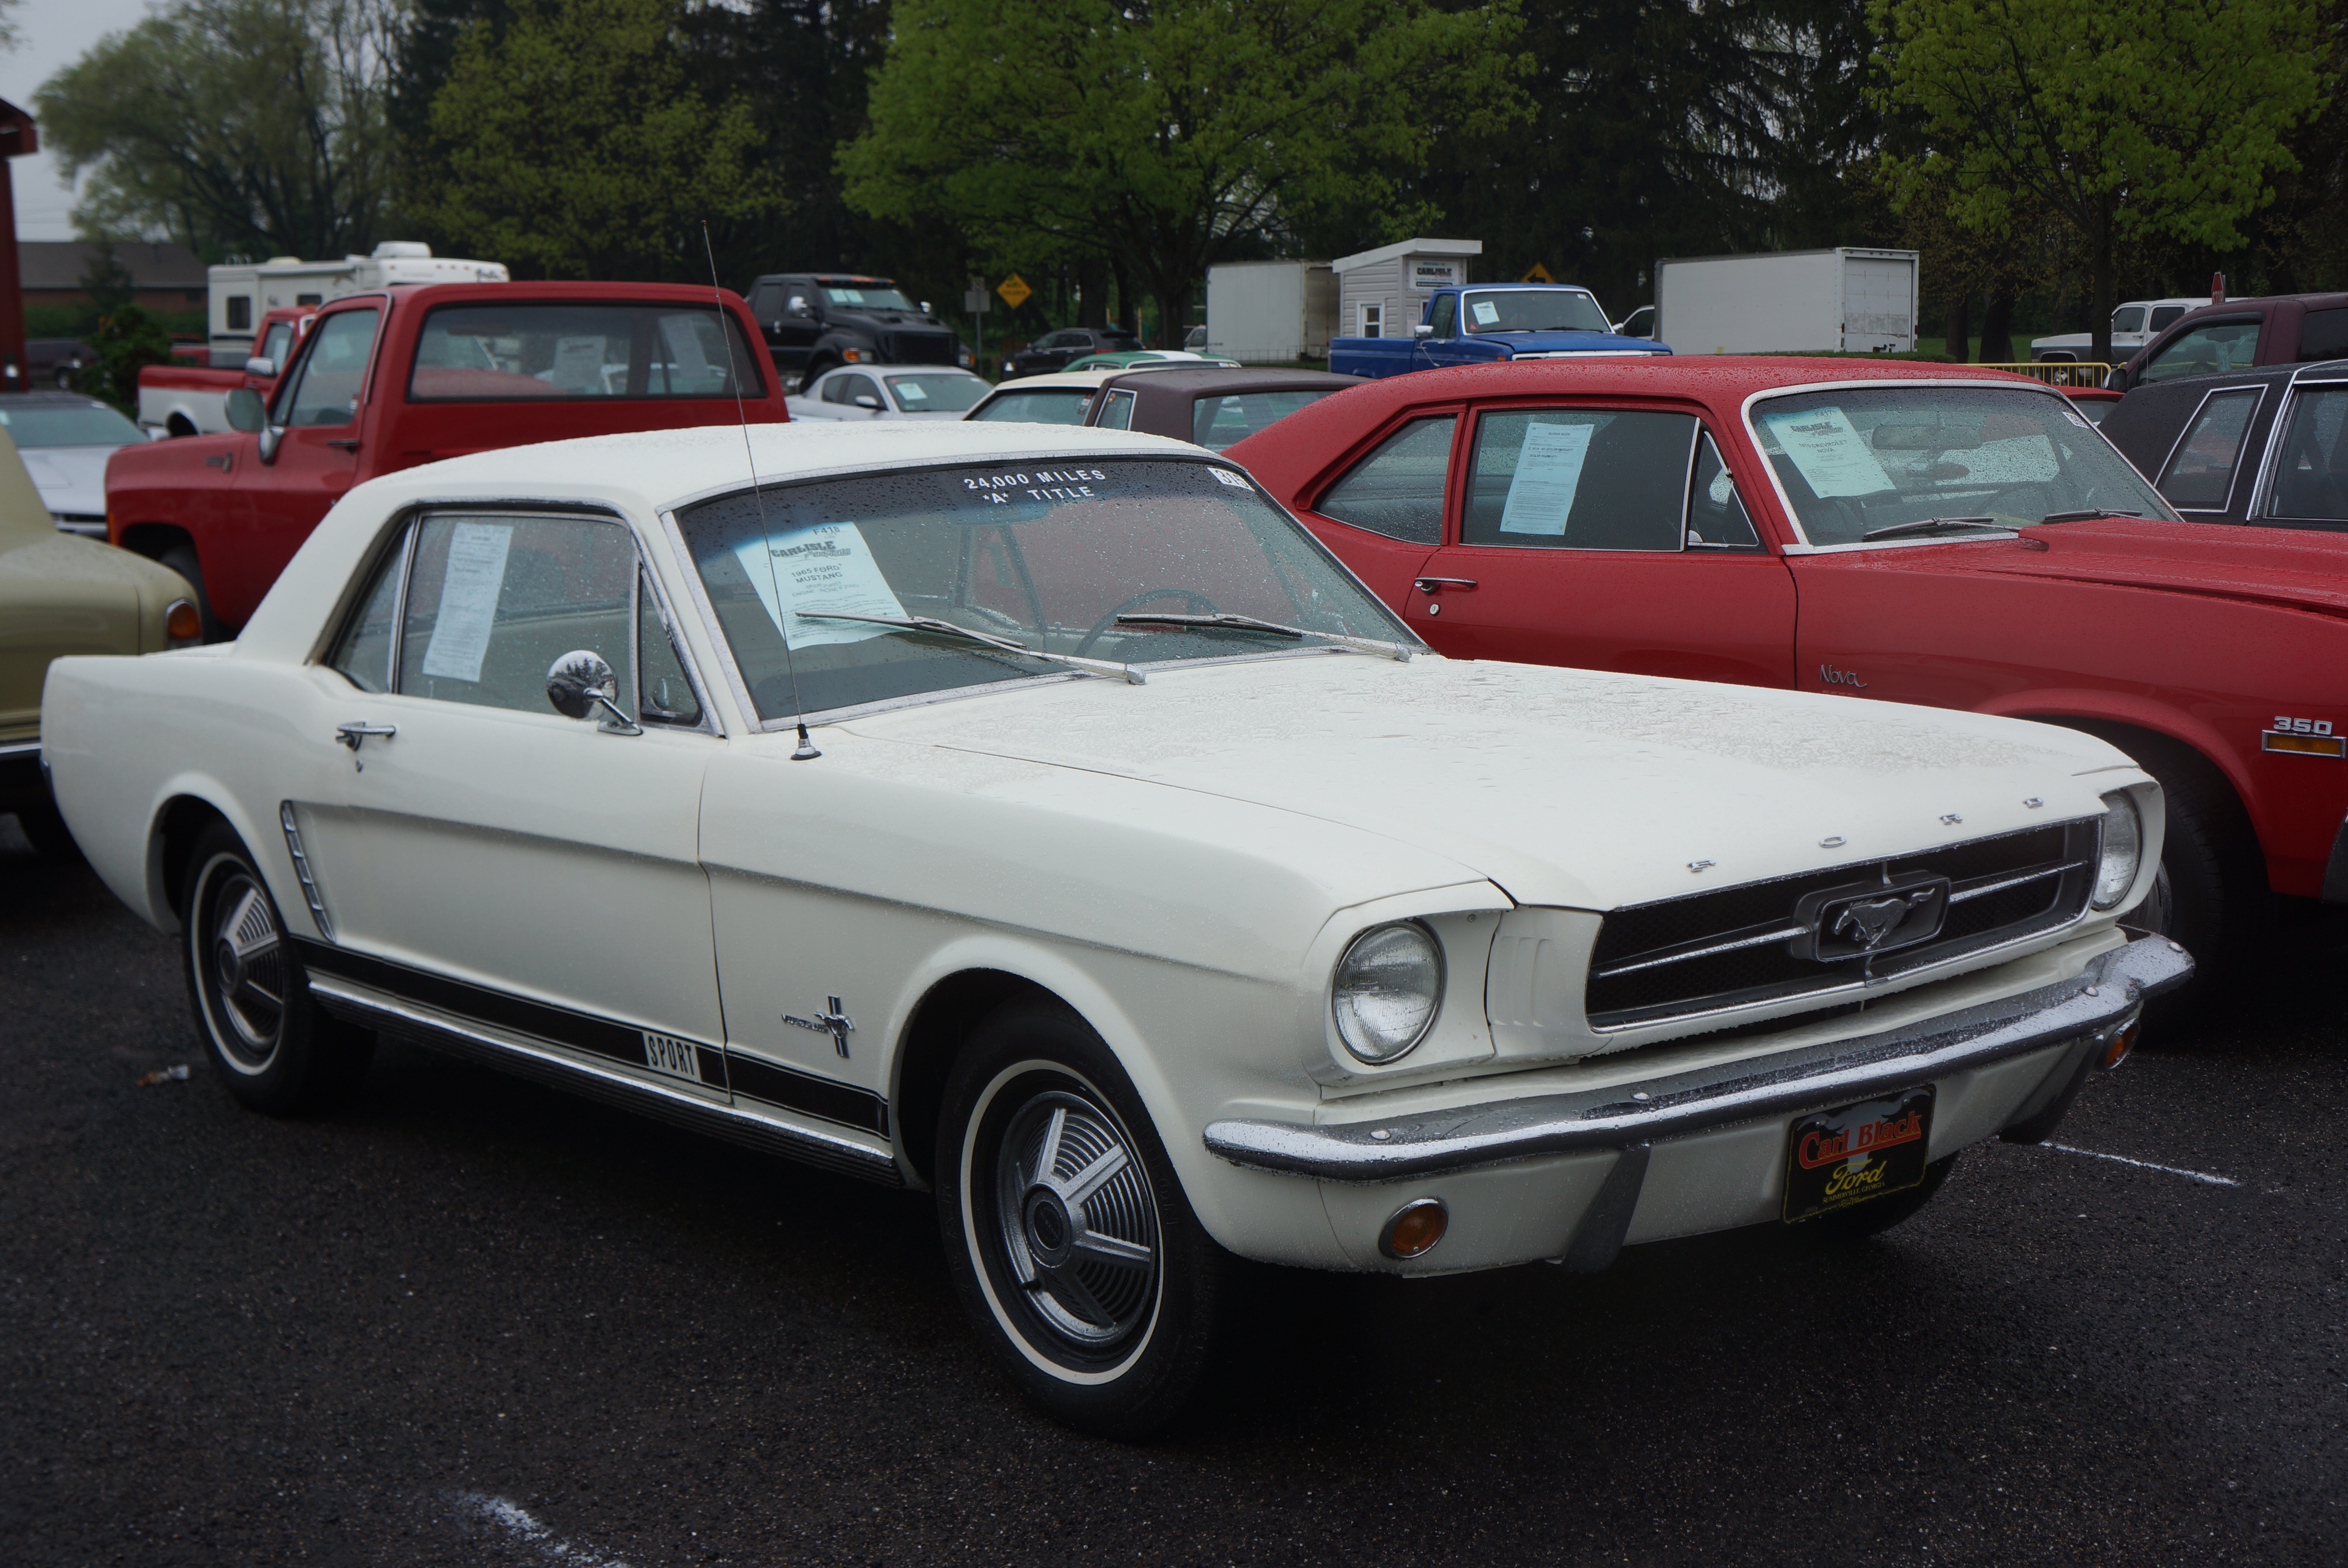
F418 1965 Ford Mustang, 2 door hardtop, white with white interior. Odo reads 03088, but windshield decal claims 24k original miles. 200 c.i. 6, 3-speed on floor, center console. Black rocker stripe not factory. Mediocre repaint, poor sealant job along windshield. White-on-white looks unusual. Driver’s seat worn, interior dirty, can of starting fluid on front floor not reassuring. Sign claims history as Southwest car, but other signs point to need to inspect undercarriage carefully.
SOLD FOR $10,500- While on the block, the auctioneer repeatedly referred to this as an “original 24,000 mile car”, yet I saw the odometer with my own eyes. I am beyond being able to rationalize the discrepancy. This actually happened once before at a Carlisle auction, when the screen’s mileage and the car’s mileage were wildly divergent. The auctioneer stopped the auction, wound it back to the top, and restarted. I hope whoever paid $10,500 for this car has a better understanding of the mileage situation than I do. NOTE: I now observe that this car is NOT on the results page of Carlisle Auction’s website. Was the deal voided?
T185 1994 Jaguar XJ-S convertible, 4.0L inline 6, automatic transmission. Dark red paint, tan top, tan leather interior, alloys, blackwall tires. Odometer is 35,000, sign claims original miles. Interior is so worn that it makes mileage claim hard to believe. Driver’s seat and door panel very worn. Another convertible parked with the top always down?
SOLD FOR $10,500- The restyled XJ-S cars like this one are an improvement over the originals, with their smoothed rear quarters and more legible instrument clusters. Like the later XK8s, these have been auction regulars too. The 6-cylinder engine has its fans among those who are put off by the complexities of 12 cylinders. The interior on this car was bothersome, but I guess it didn’t bother someone willing to spend $10,500 plus commission. I’ve seen nicer ones sell for less, but that was a few years ago.
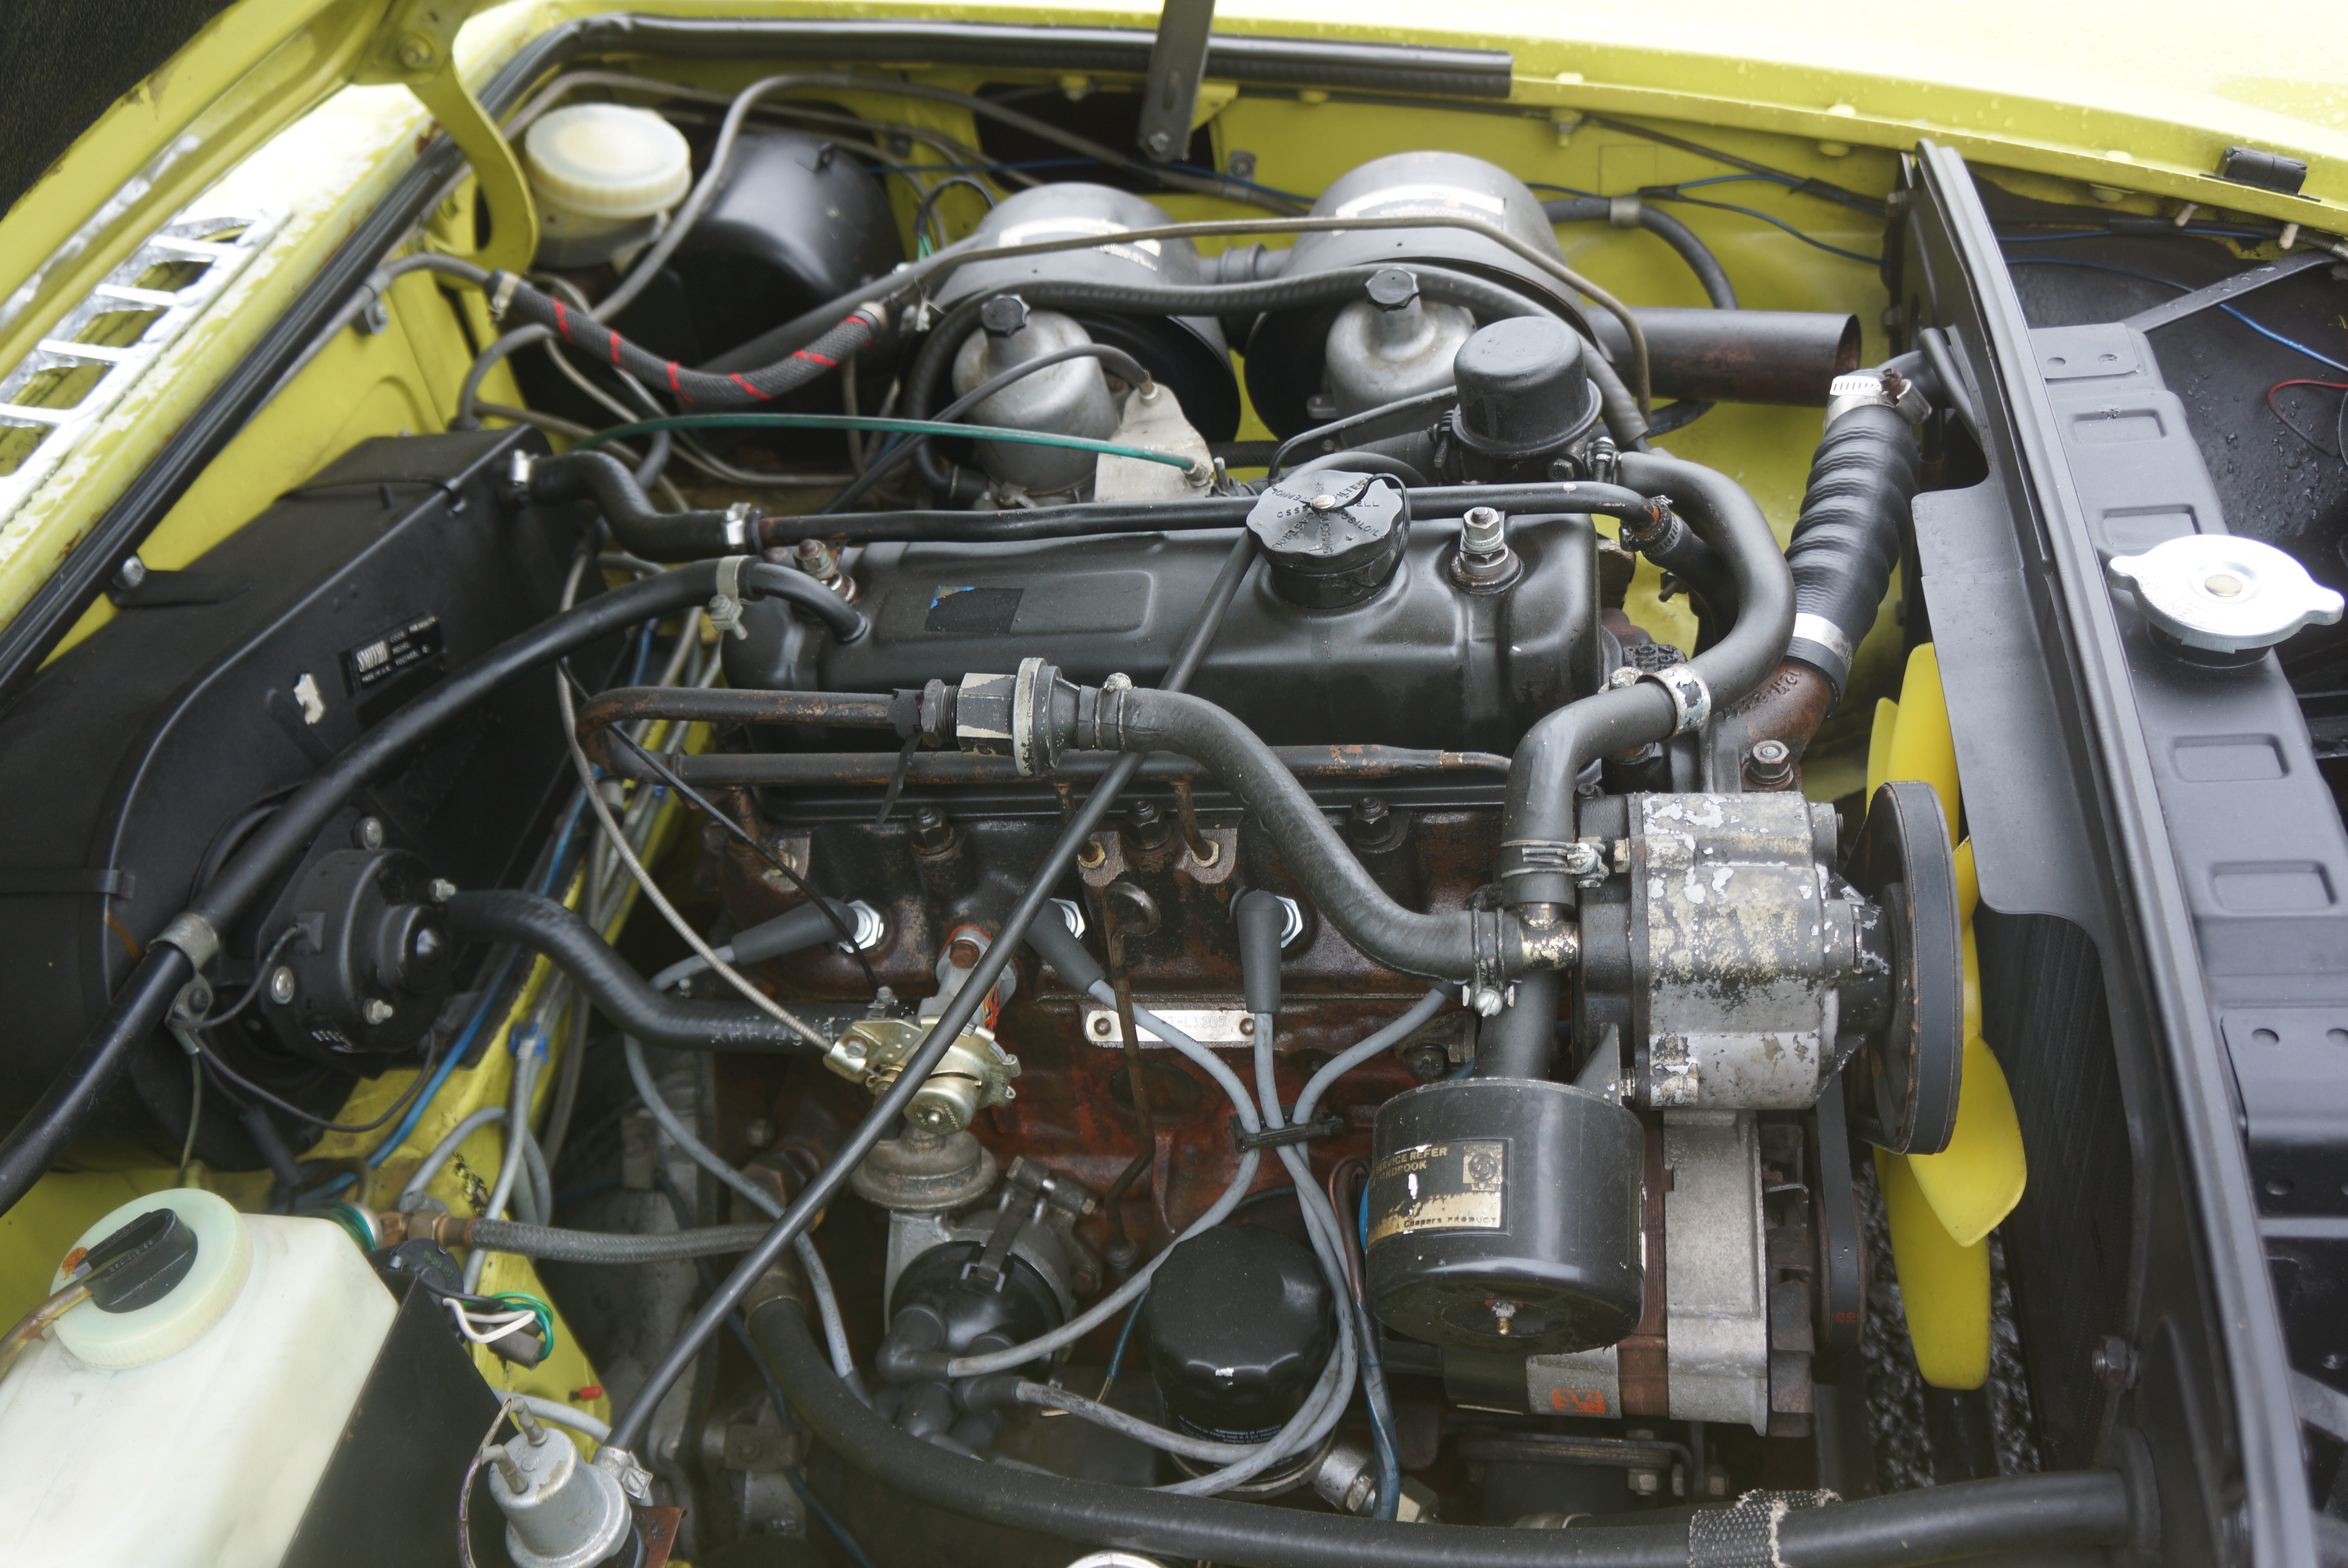
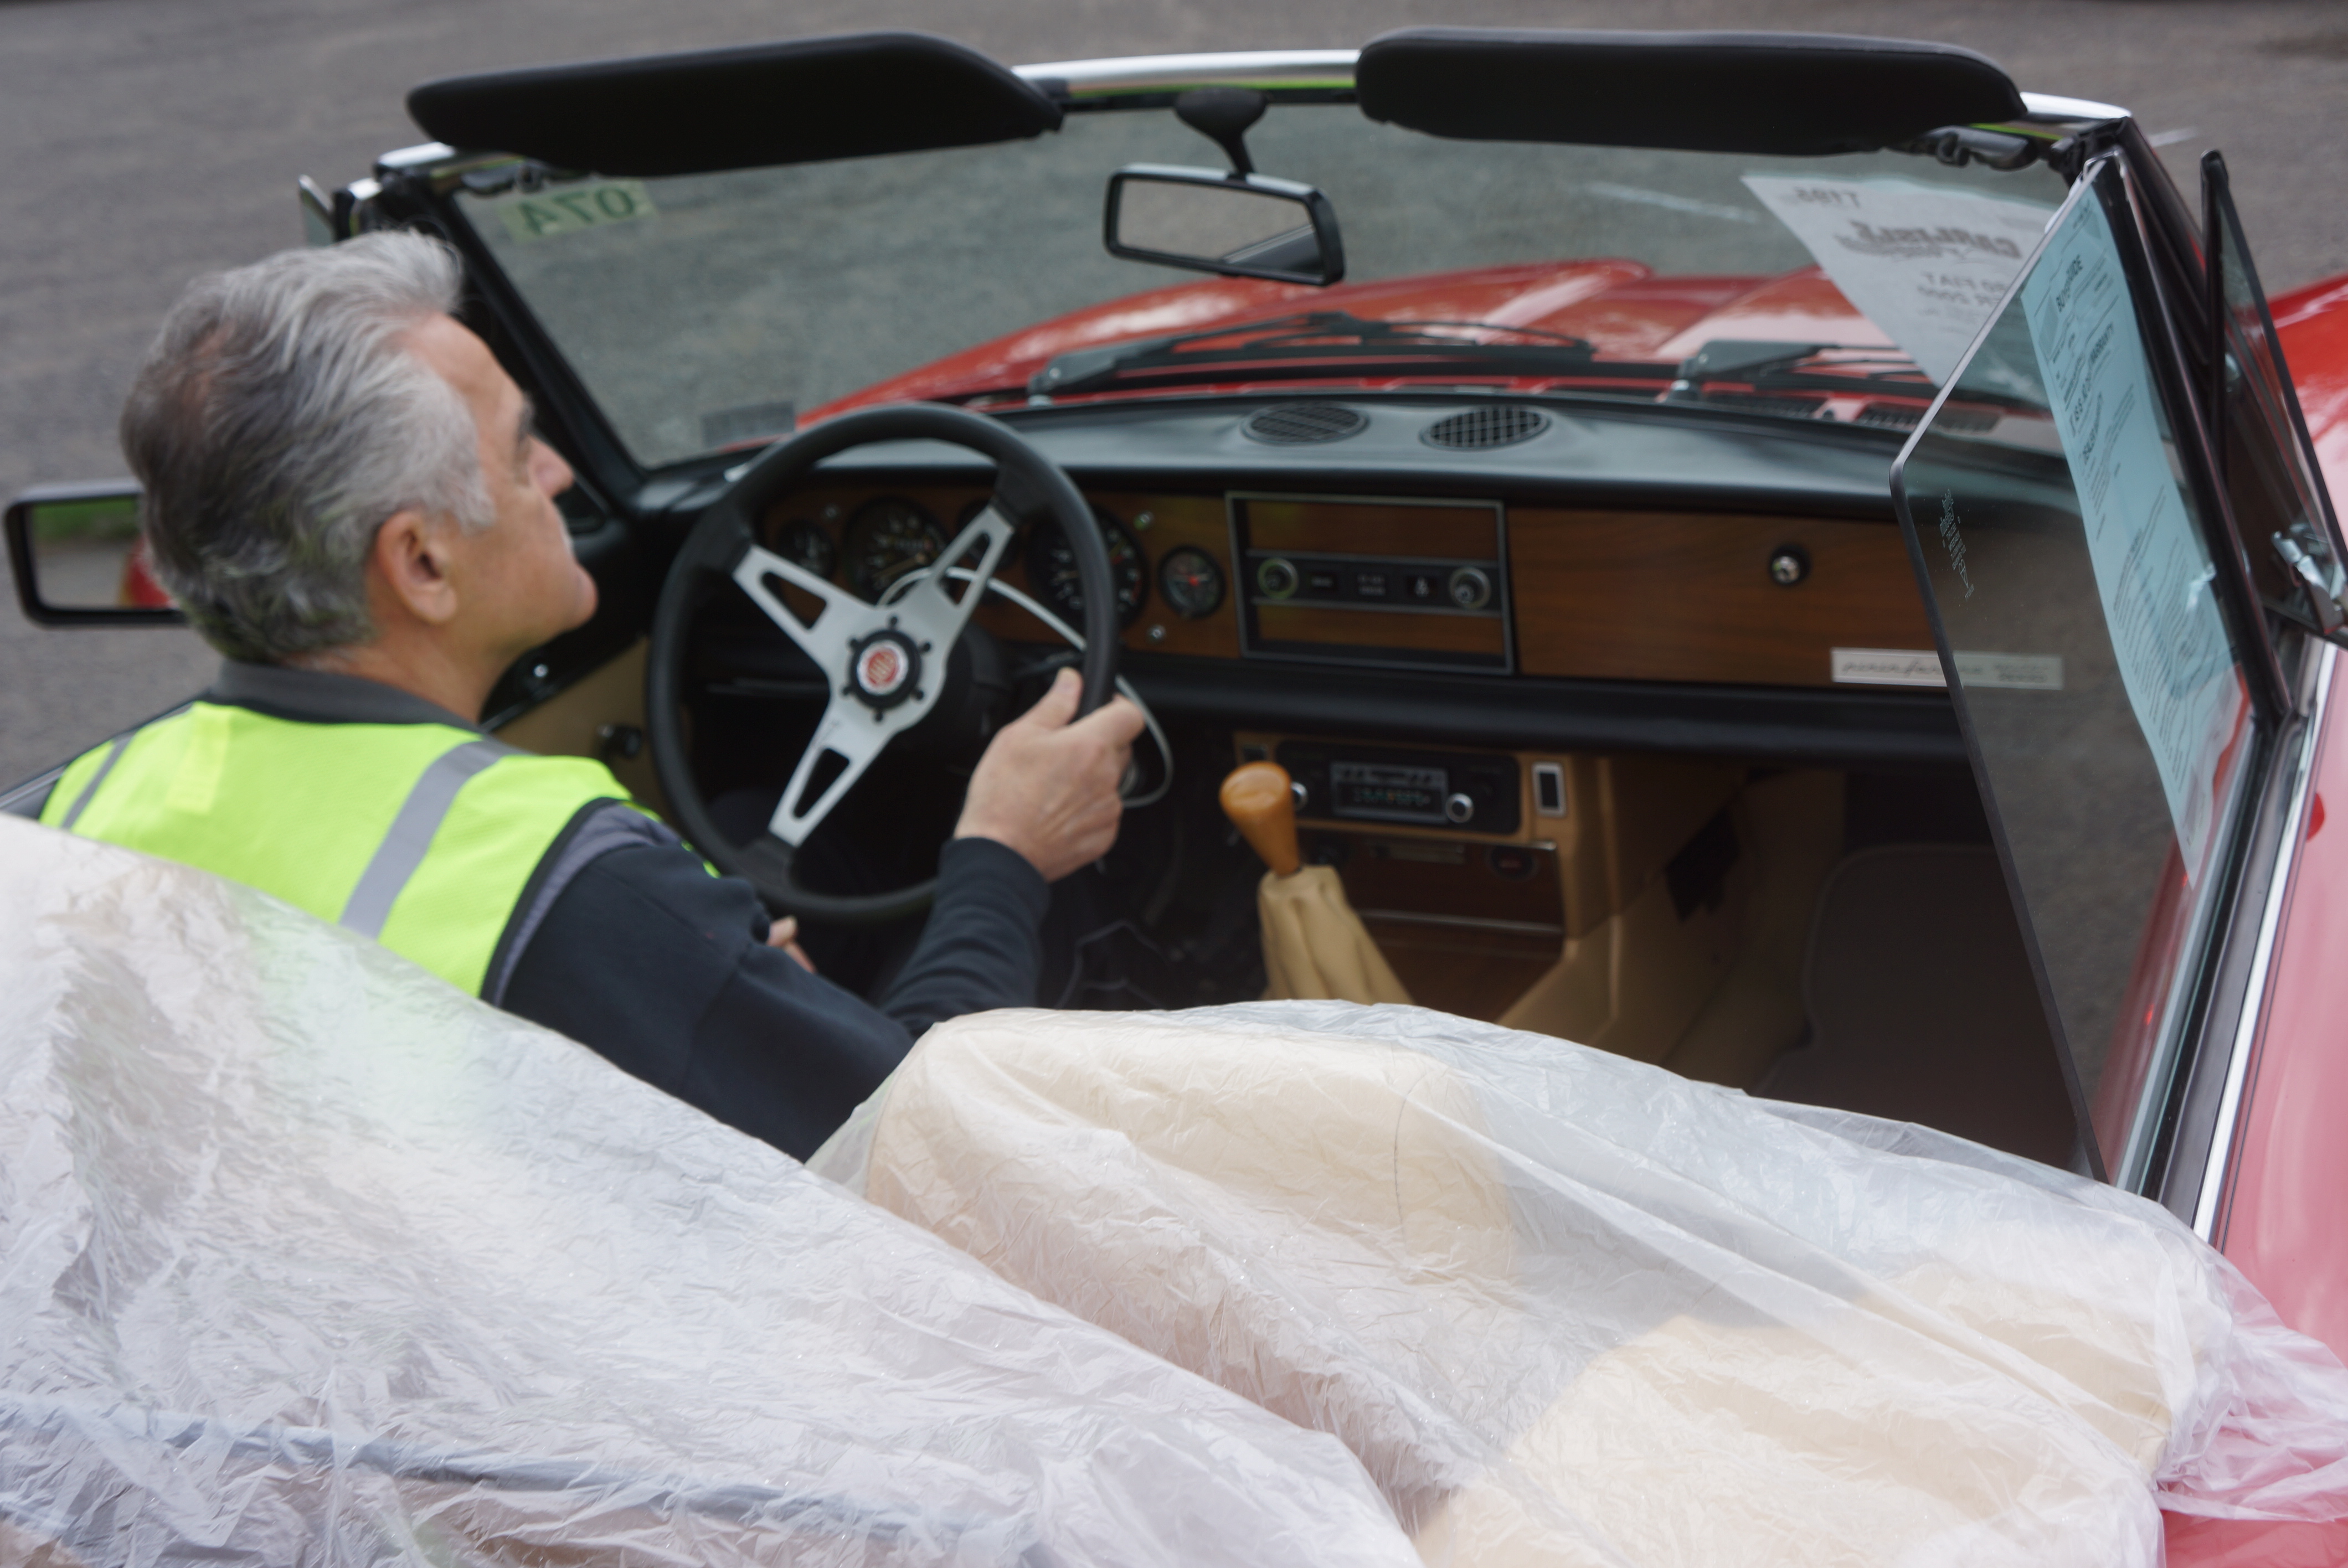
T195 1980 Fiat Spider 2000. 2.0L inline 4, fuel injected, 5-speed manual. Red, tan top, tan vinyl interior (sign incorrectly claims it’s leather). I spoke with the seller, who recently bought the car from its original owner. Car has 20,000 original miles, and looks like a 3-year-old used car. Some swirl marks in the horizontal paint surfaces. Trunk lid got minor dent when it was shut onto something oversize. Overall, car is immaculate for a 1980 anything, much less a Fiat.
SOLD FOR $10,700- The seller, a flipper, must have stolen this from the original owner. Fiat Spiders aren’t overly valuable, but prices have crept up ever so slightly in recent years. I (wrongly) guessed there would be a reserve of around $12,000. Someone got a clean and desirable spider at a 20% discount.
T168 NO RESERVE 1972 Porsche 914, white, black targa top, black interior, repaint shows overspray in various spots. Interior is straight but spartan as all 914 interiors are. Engine is 1.7L as per online listing.
SOLD FOR $10,800- All Porsches are collectible; some are just more collectible than others. With 911s selling for $100,000+, and 356s (the more covered in dirt the better ) selling for $250,000+, what’s a poor person to do? Buy a 914, that’s what. Personally they’re nothing to look at (and white over black is as bland as it gets), but I’m told it’s like driving a go-kart on the street. Let’s hope this one gets driven.
T219 1973 Pontiac Firebird Formula 350, automatic. Odometer reads 78,614. Dark silver metallic, black interior. Outside is OK. Underhood is unkempt. Heater hoses look so old they may have been transplanted from a 1953 Star Chief. Buckets, aftermarket gauges. CB radio in center console has been there almost as long as the heater hoses.
SOLD FOR $11,250- I looked at this car because a) it wasn’t a Camaro, and b) it’s the last year of the original nose introduced in 1970, and I like that look. Most of these cars have not survived. The car had a nasty rumble to it while underway, which had me suspect undisclosed engine or exhaust mods. A similar Camaro might have sold for twice this, so the buyer did well.
T223 1986 Pontiac Fiero GT, V6, automatic, red, grey velour interior, sunroof. 10,000 original miles, and it basically looks it. Factory alloys, Goodyear blackwall tires. Some driver’s seat wear. Car’s main claim to fame is low mileage.
SOLD FOR $11,500- Fieros are starting to gain some collector interest, but even with the ultra-low miles, this result surprised me for a car with an automatic. I had it pinned to sell for half this (shows you what I know).
$13,500 TO $15,500 (4 CARS)
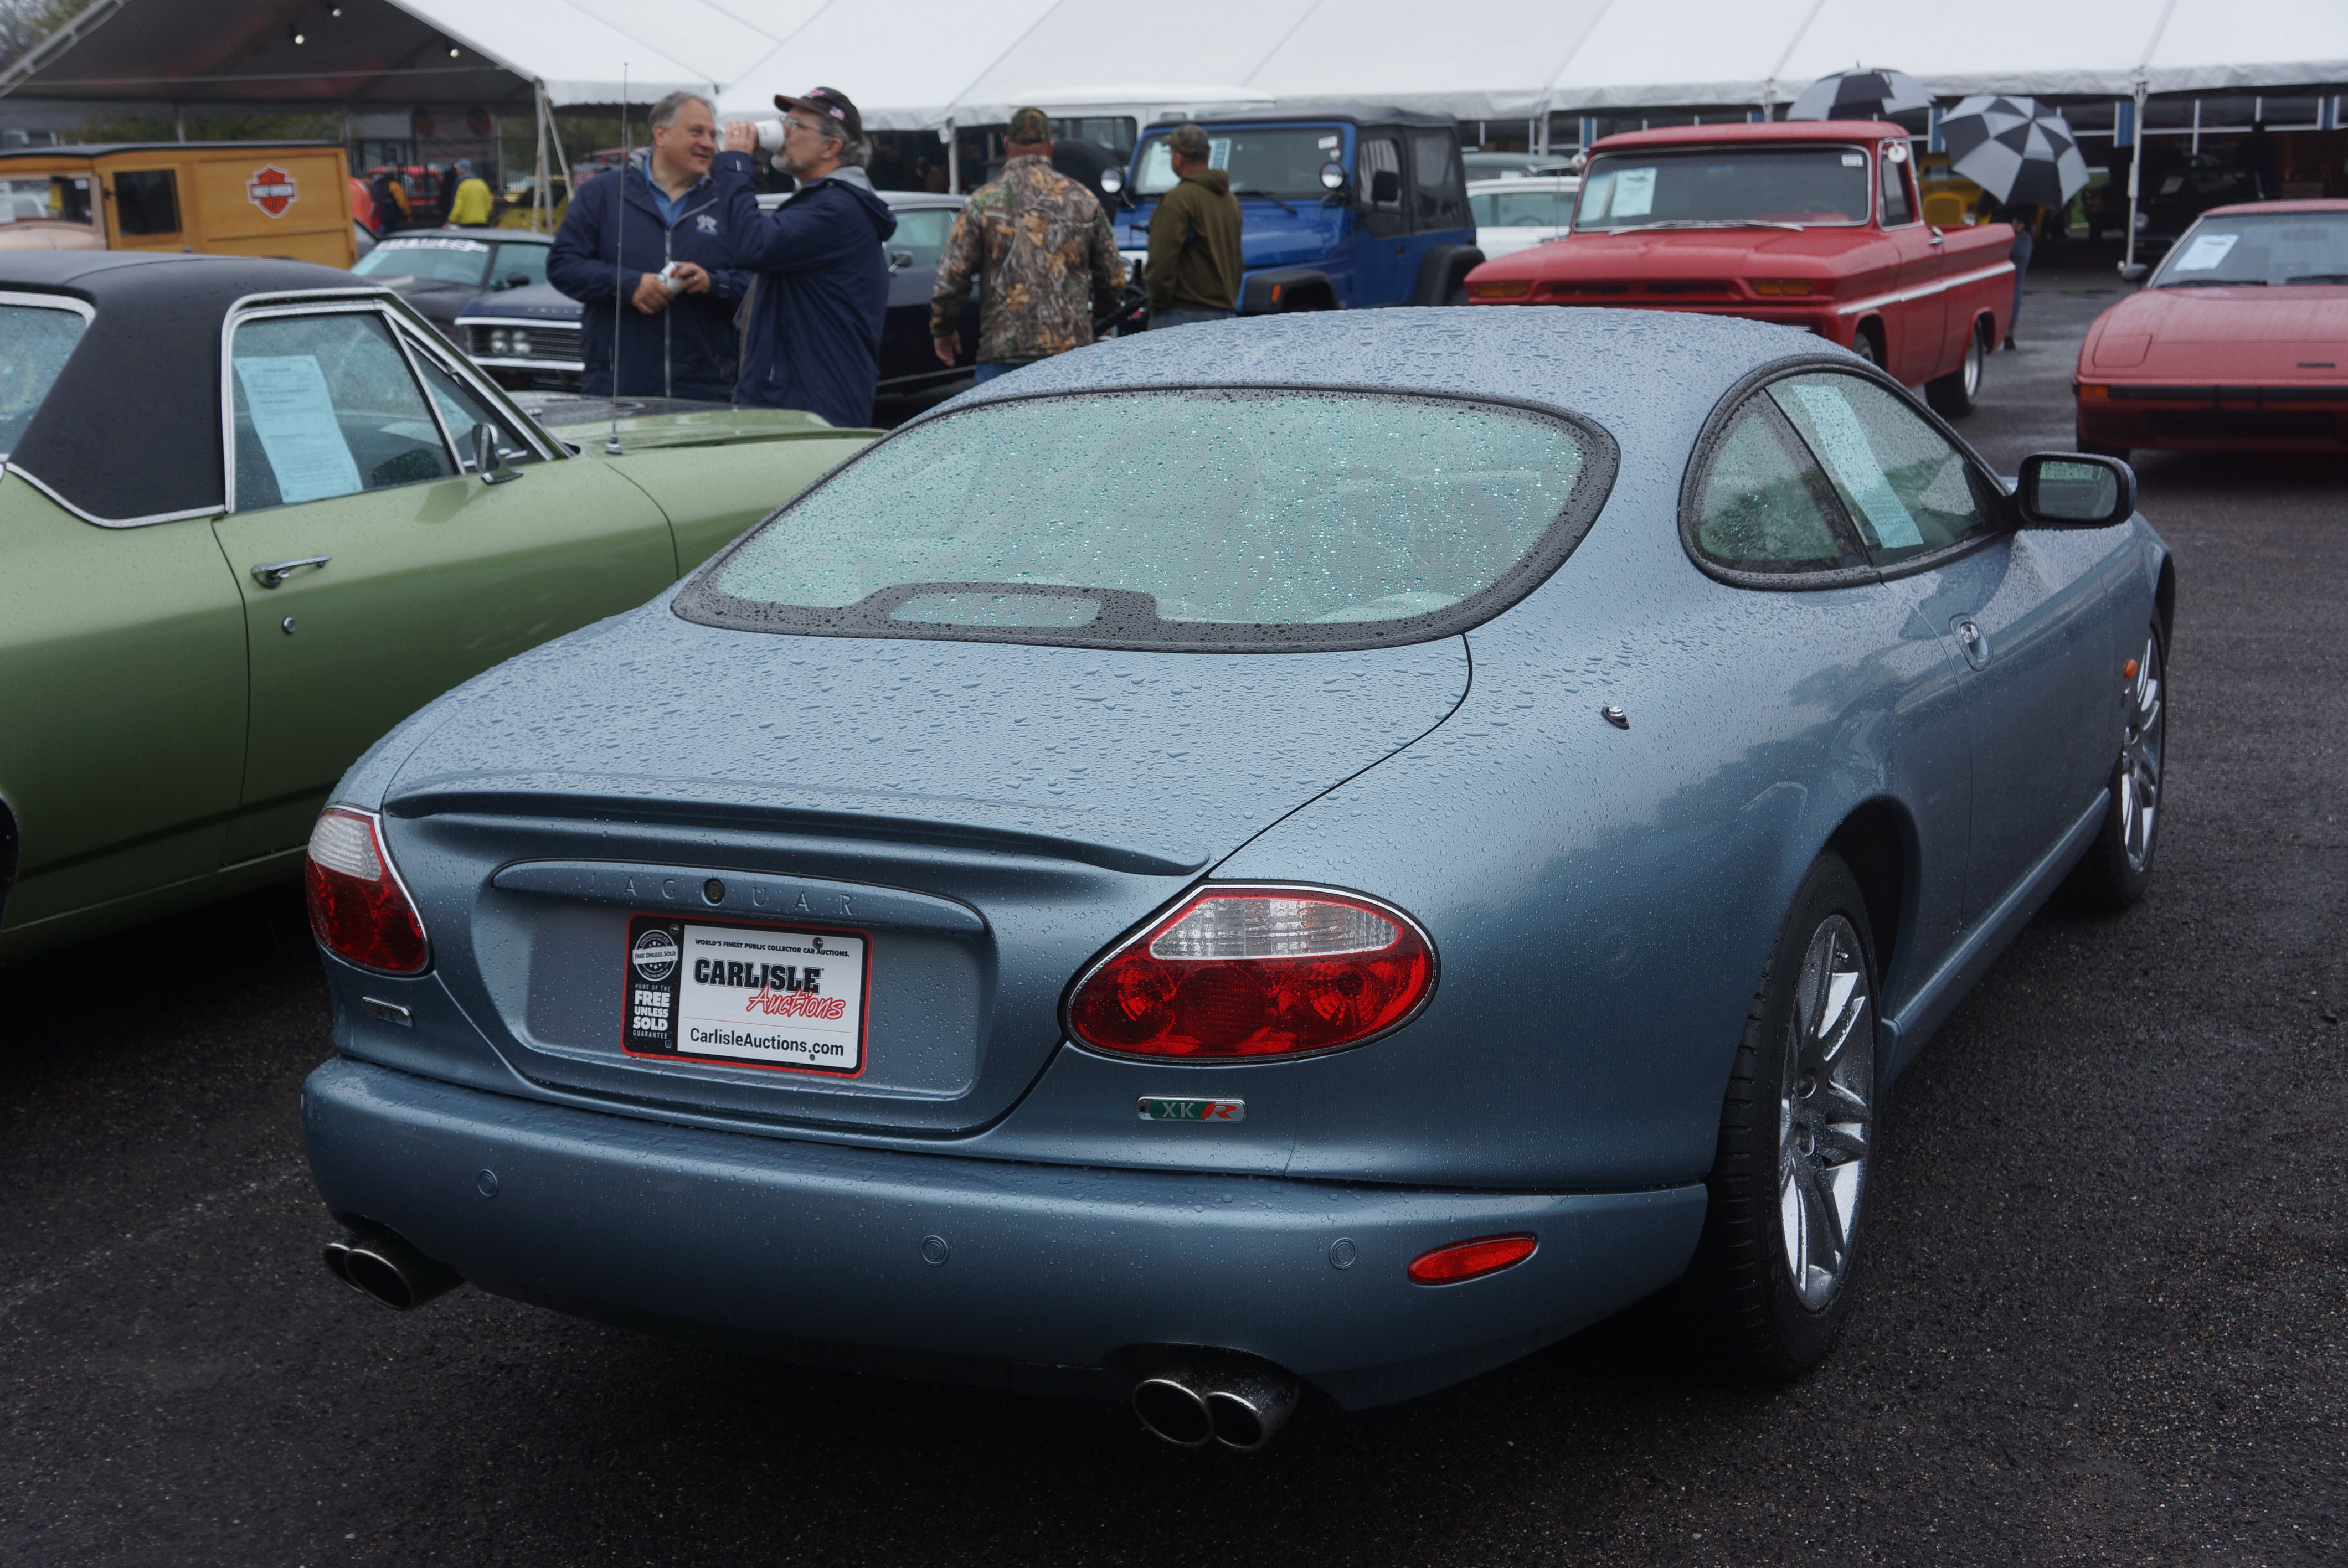
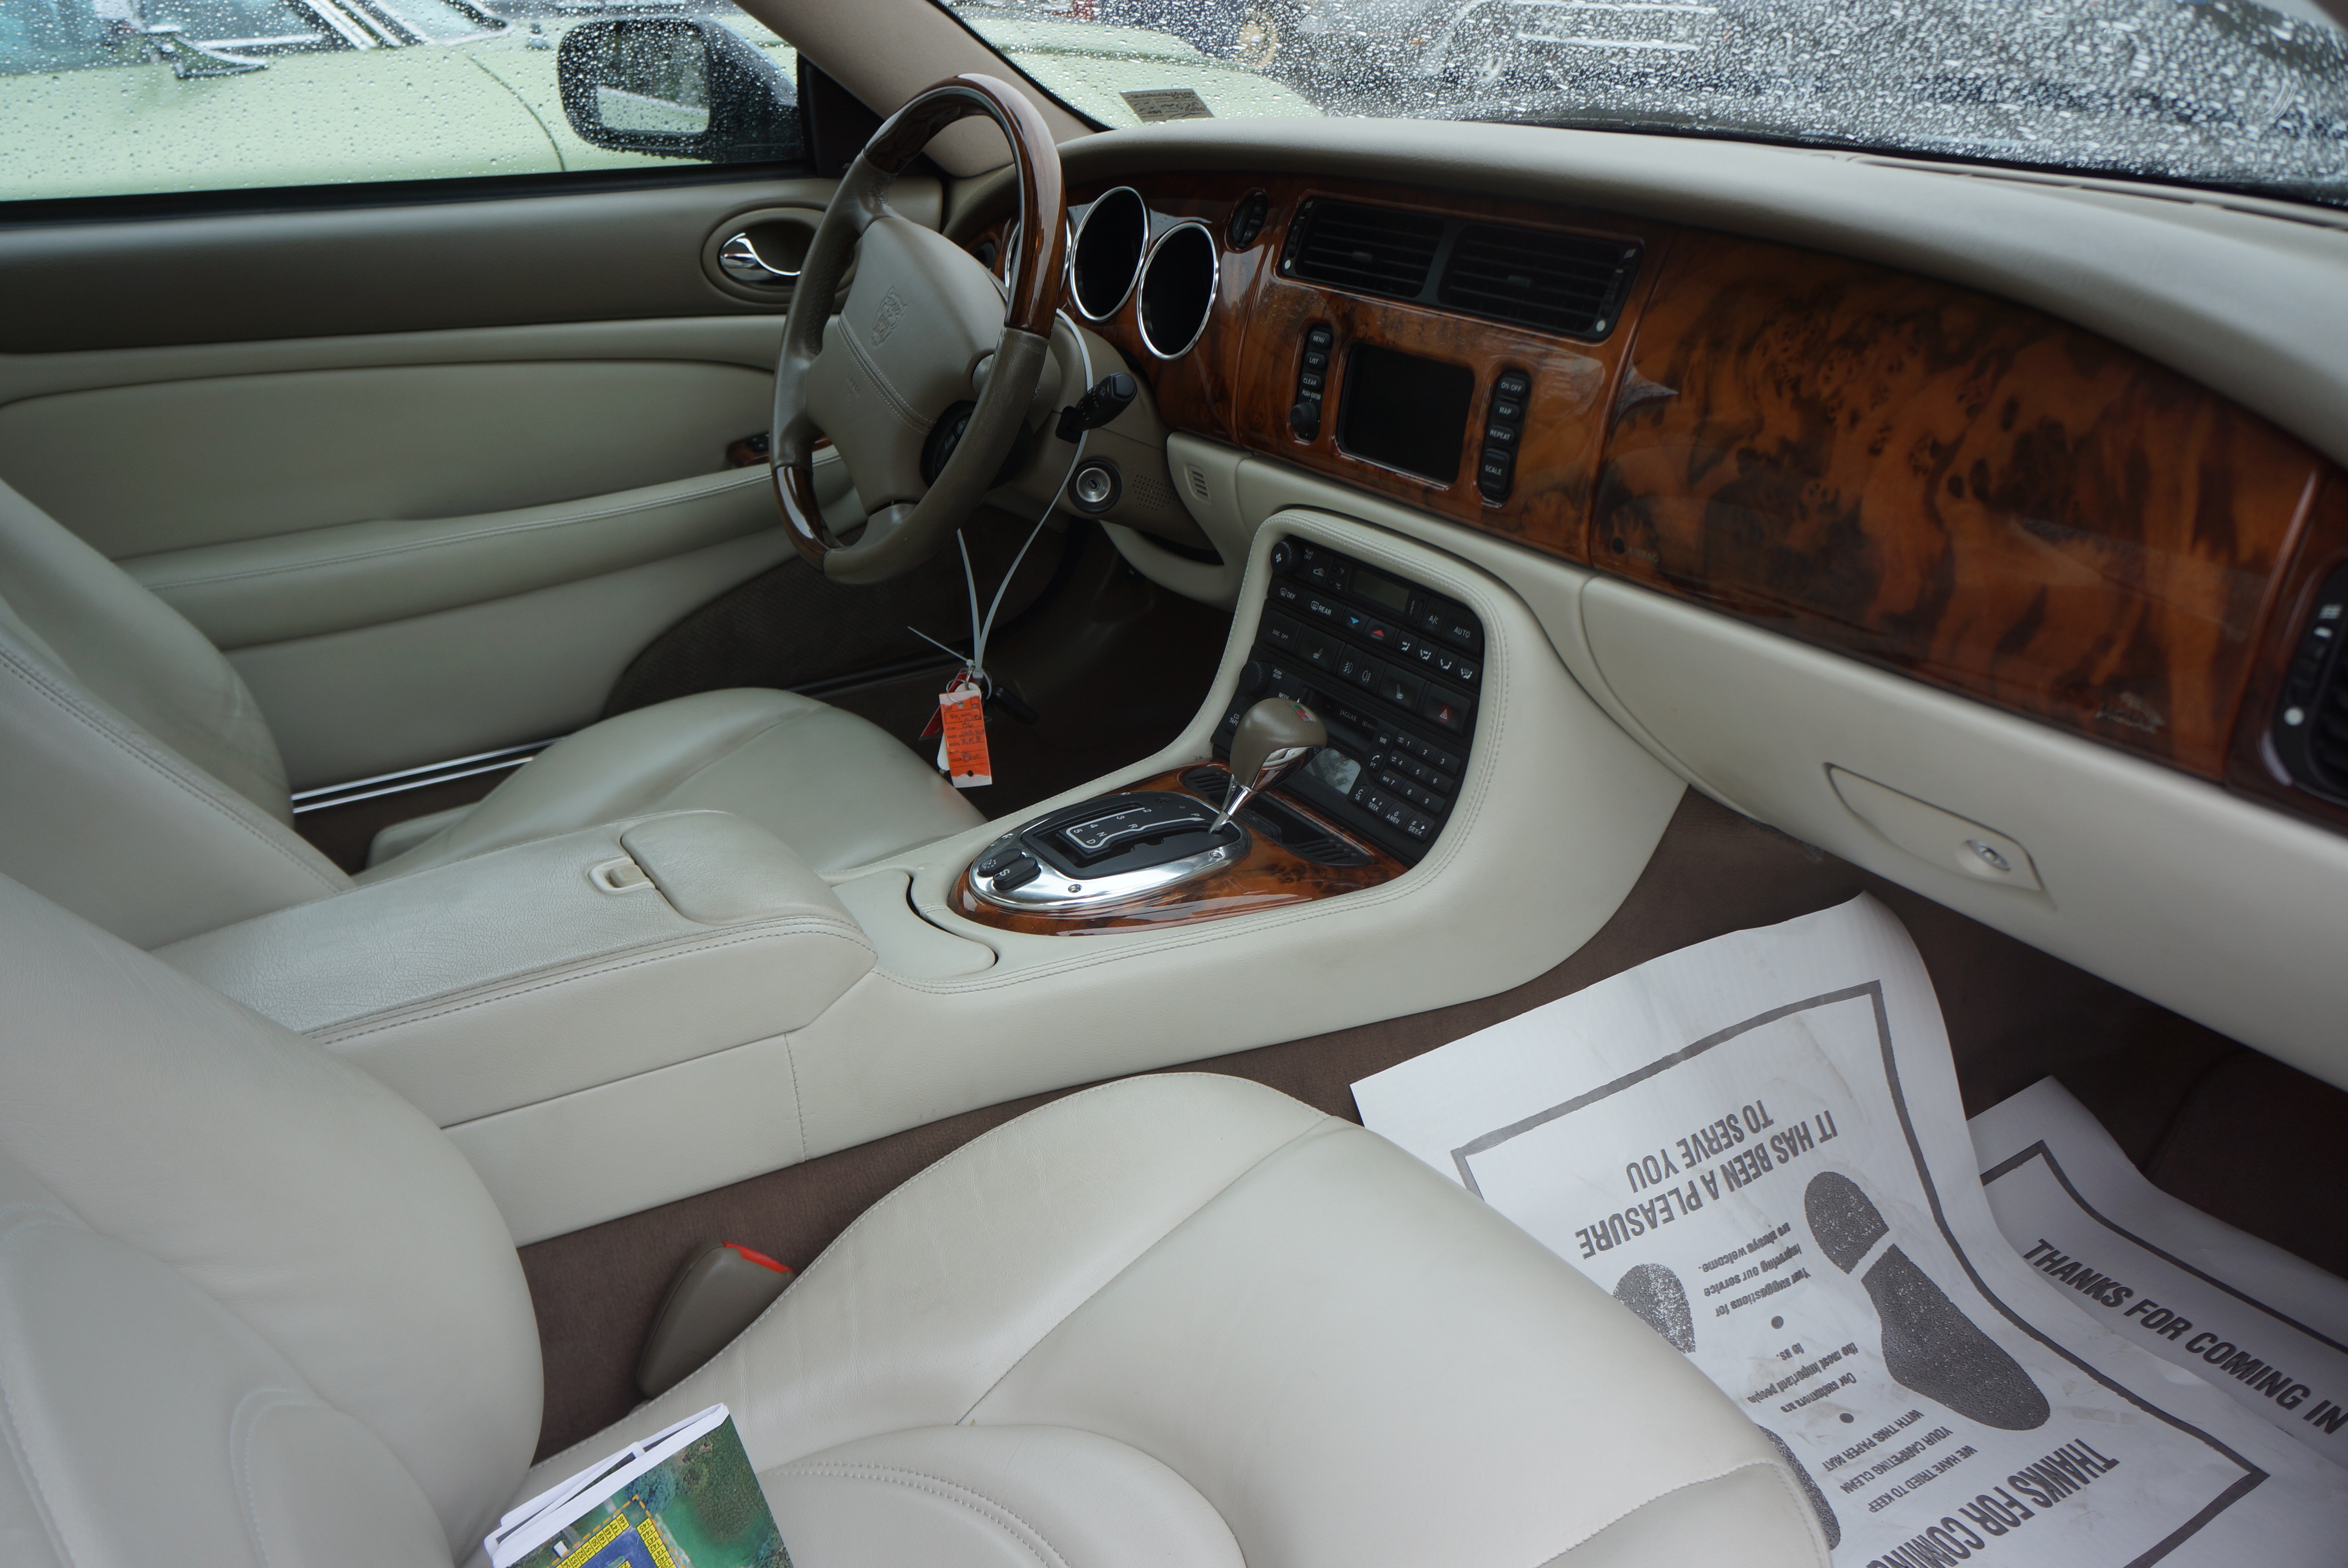
F438 2006 Jaguar XKR supercharged coupe. V8, automatic. Light blue metallic, light cream interior. Jaguar alloy wheels, blackwall tires. Odometer reads 35k and the car looks it. Overall clean and straight. Headliner is not falling down, a known issue on these coupes. Cassette player in dash – who besides me still has cassettes?
SOLD FOR $13,500- The XK8 convertible-to-coupe sales ratio was about 10-to-1, so it’s rare to see any coupe, much less a supercharged one. I’m not a fan of this shade of blue, but the immaculate state of the interior absolved any other sins. This was a great price on a car that can serve as an alternative to domestic air travel. I can loan you the cassettes.
T171 2002 NO RESERVE Porsche Boxster, grey, black convertible top, black leather interior. Porsche alloys, blackwall tires. H6, five speed manual. First gen Boxster with “broken egg” headlights. Sign claims 33,000 original miles. Clean inside and out.
SOLD FOR $13,500- Sold during “No Reserve” hour, this price was slightly higher than I’ve seen other Boxsters sell for recently. In its favor, it was spotless and the mileage was unusually low. But was the IMS bearing done? 😉
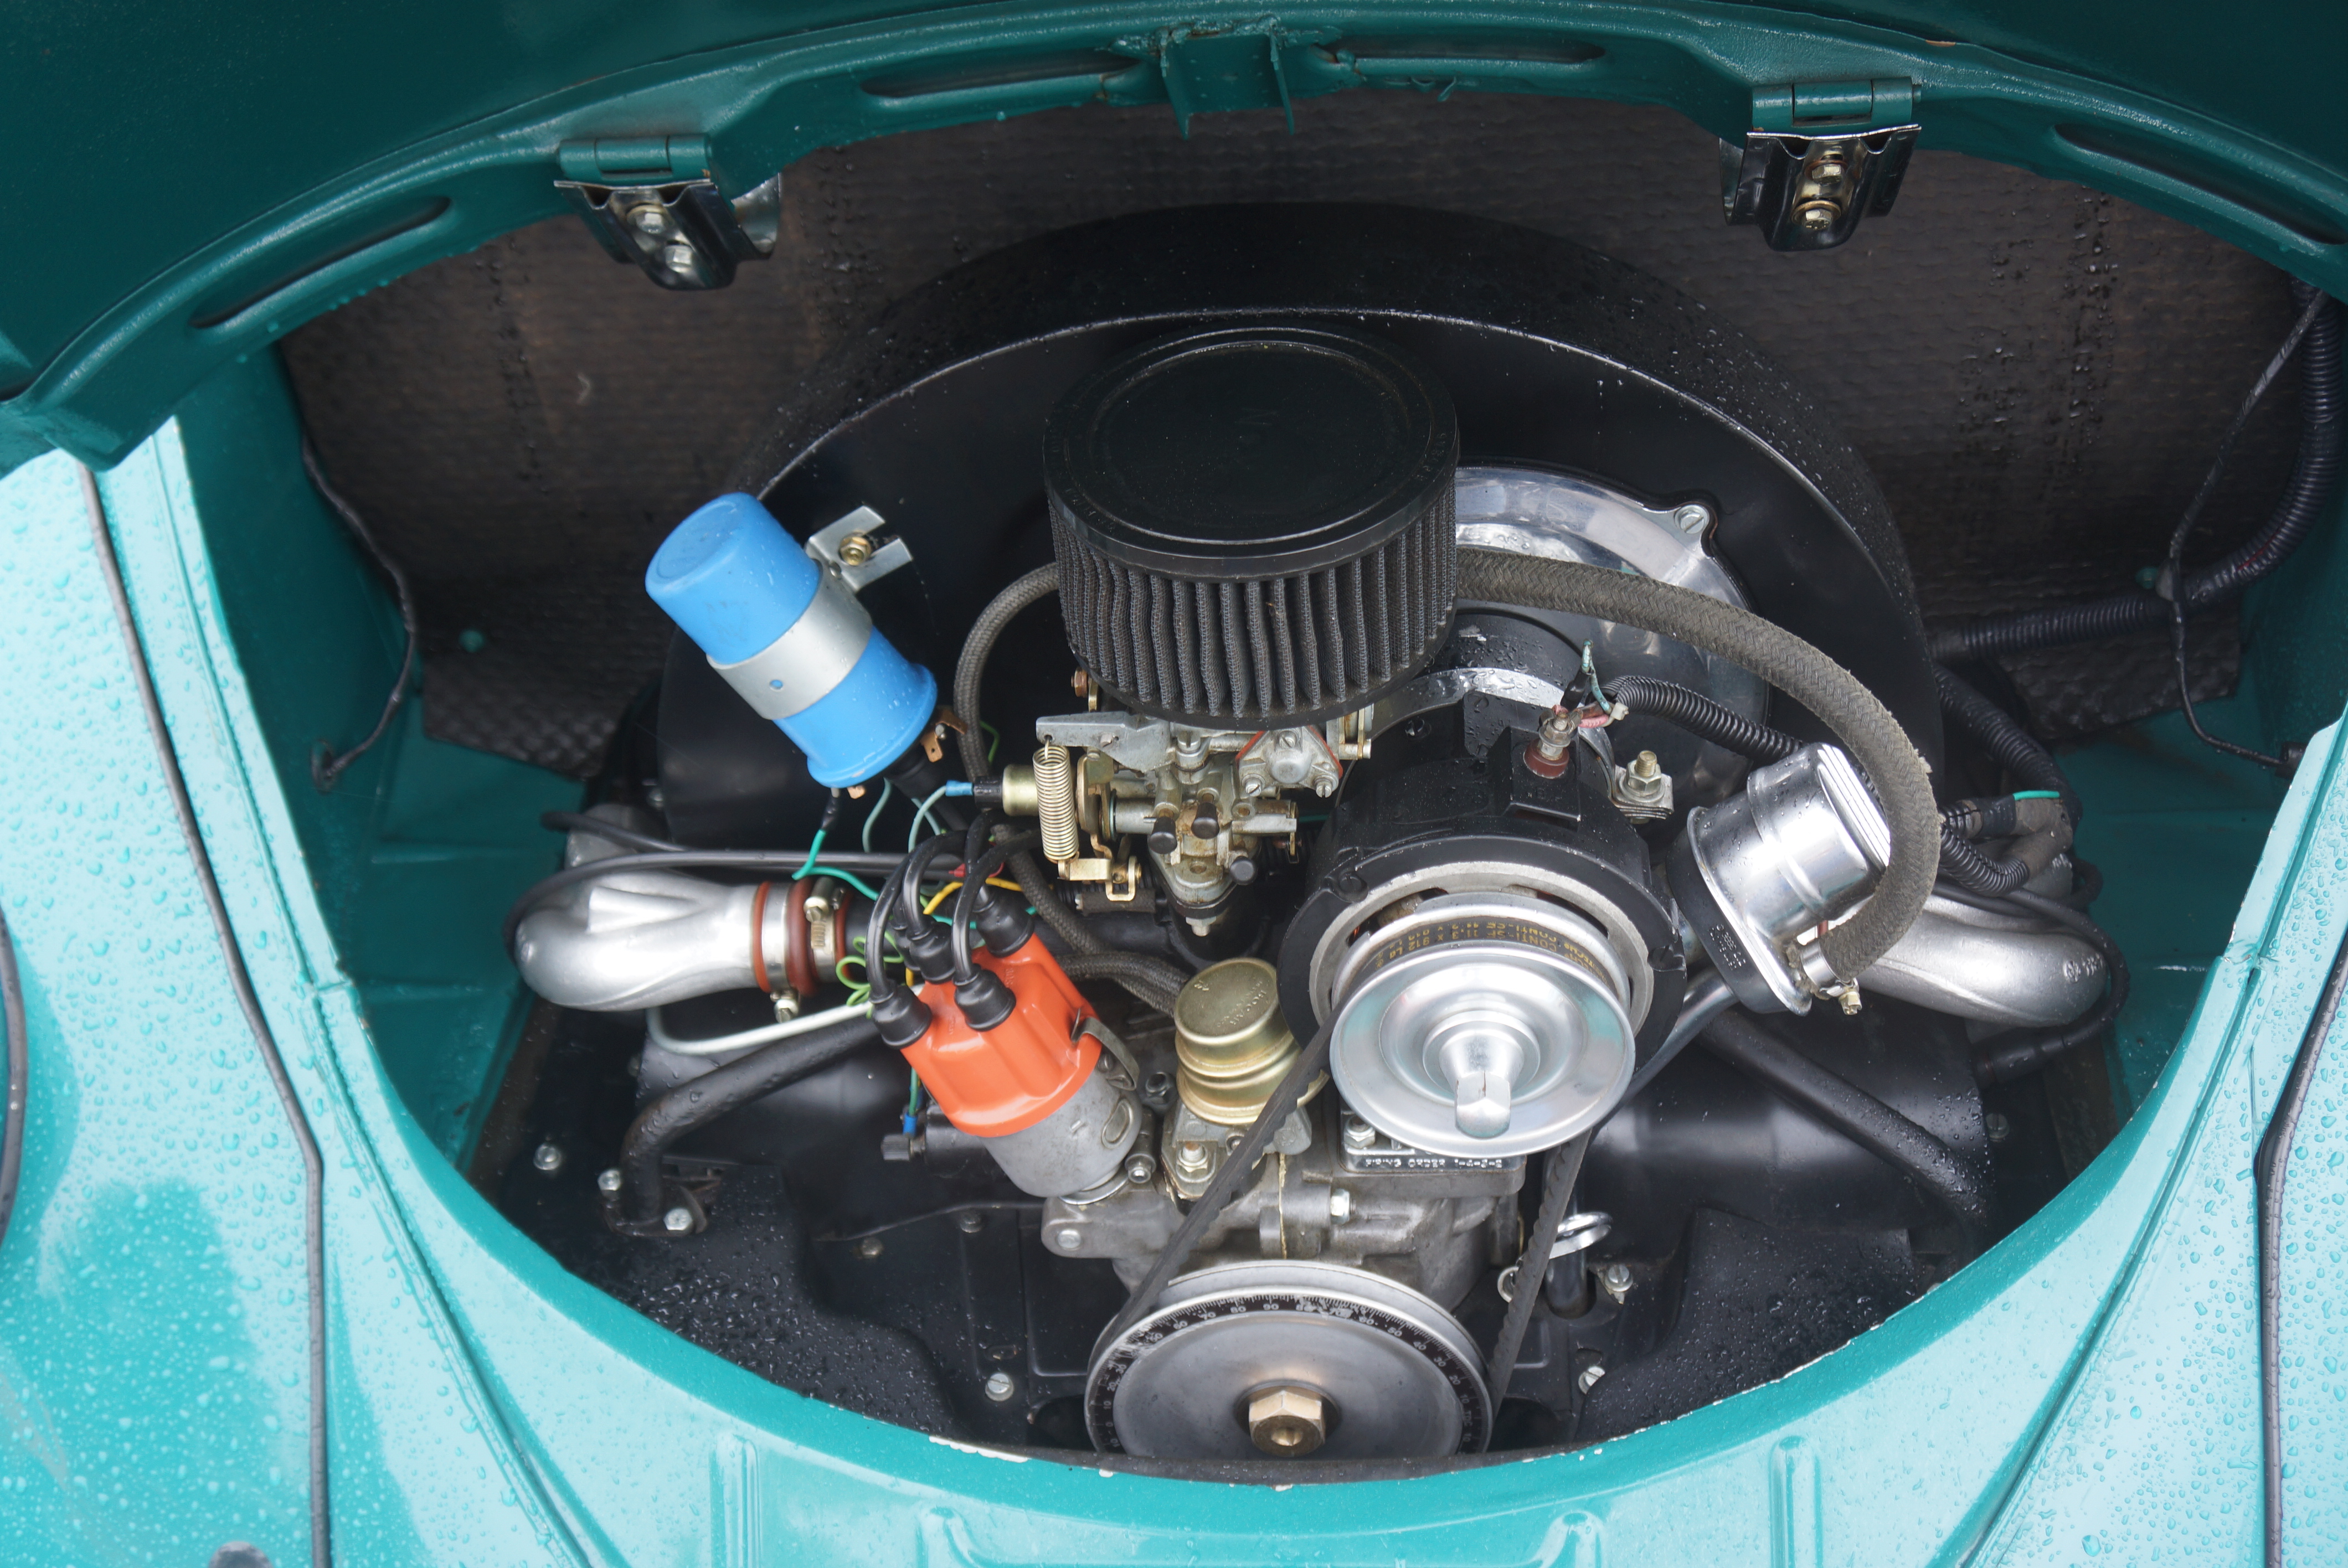
F442 NO RESERVE 1956 VW Beetle, green, black interior. Odometer reads 72,452. 4-cyl, 4-speed. Mix of original and custom. Black fabric sunroof, roof-mounted luggage rack looks aftermarket but period-correct. Cheap looking alloys, blackwall tires. Oval rear window and small taillights which Beetle collectors love. Front and rear bumpers without traditional over-riders. Dashboard is non-original, with additional gauges on left and “1956 Oval” sign in center. Upholstery is decent.
SOLD FOR $14,500- Did they devalue the car with customized touches? It’s hard to say, as I’m not sure of the oval window market. On one hand, this seems like a lot of money for a Beetle, but on the other hand, the car was in great shape overall, and the worst of the custom touches (wheels, luggage rack) are easily reversed. Sold at no reserve, so the market decided.
T109 1963 MGB roadster, red, red convertible top, black upholstery with red piping. Painted wire wheels, knockoffs, blackwall tires. Chrome bumpers. Underhood is clean as is interior. “Bent” shifter as early MGB’s have. Sign claims original top- were they red in ’63?
SOLD FOR $15,500- This is an early “B” (first model year was 1962) and few have survived. Car was a very nice example overall, but I question the claim that the red top is original. I can’t recall ever seeing a factory red top on any B, and besides, it looked too good to be 56 years old. Despite the top controversy, this was a fair price for a well-preserved early B.
$20,000 TO $24,000 (4 CARS)
F503 1964 Chevy Corvair Monza Spider convertible, red, tan convertible top, tan interior. Turbocharged, 150 hp. 4-speed manual, power top, bucket seats, color coordinated interior. Whitewall tires, full wheel covers. Paint looks decent, obviously repainted. AM radio plus tissue dispenser. Odometer reads 04,339, so car has over 100k. Turbo proudly sits on top of H6.
SOLD FOR $20,500- While I much prefer the 2nd gen Corvair styling, this was a very attractive car. The red against the tan really popped. I can’t recall ever seeing a tan dash in this generation Corvair, but I’ll take the owner’s word for it that it’s factory. Let the haters hate, but I’ll state that you could spend $100,000 on “that” brand’s H6 turbo, or, get this H6 turbo for 1/5 the price. I know which I’d choose.
T202 1962 MGA roadster, red, tan top, tan interior, painted wire wheels. Odometer is 02,662, so presumption is that car has over 100,000 miles. Mark II model with revised tail light location. Sign states last year of MGA. Overall, a presentable and attractive car, albeit in an older restoration.
SOLD FOR $22,500- Perhaps MGA prices are down a bit, as I thought this car would bring closer to high 20’s or even $30k. A bit of a steal. Or this audience doesn’t care about MGs.
F544 1962 Ford T-Bird, convertible, red, black top, black vinyl interior. Wire wheels, whitewall tires, “roadster” tonneau cover. Chrome around side windows pitted. 390/auto. Odo reads 59,969 miles. Interior slightly tarnished and worn, but front seats look nicer than rest of interior, possible they were reupholstered. Aftermarket speakers added. Underhood is decent; silver painted valve covers.
SOLD FOR $23,250- It’s well-known among collectors that many of these T-Bird roadsters are fakes, which is to say, the car didn’t leave the factory with the tonneau cover. Real deals command a price premium of close to double the price of an ordinary T-Bird convertible. This car was nice, but was not a factory roadster. It sold for close to average retail for the model. A “real’ roadster might have brought $50,000.
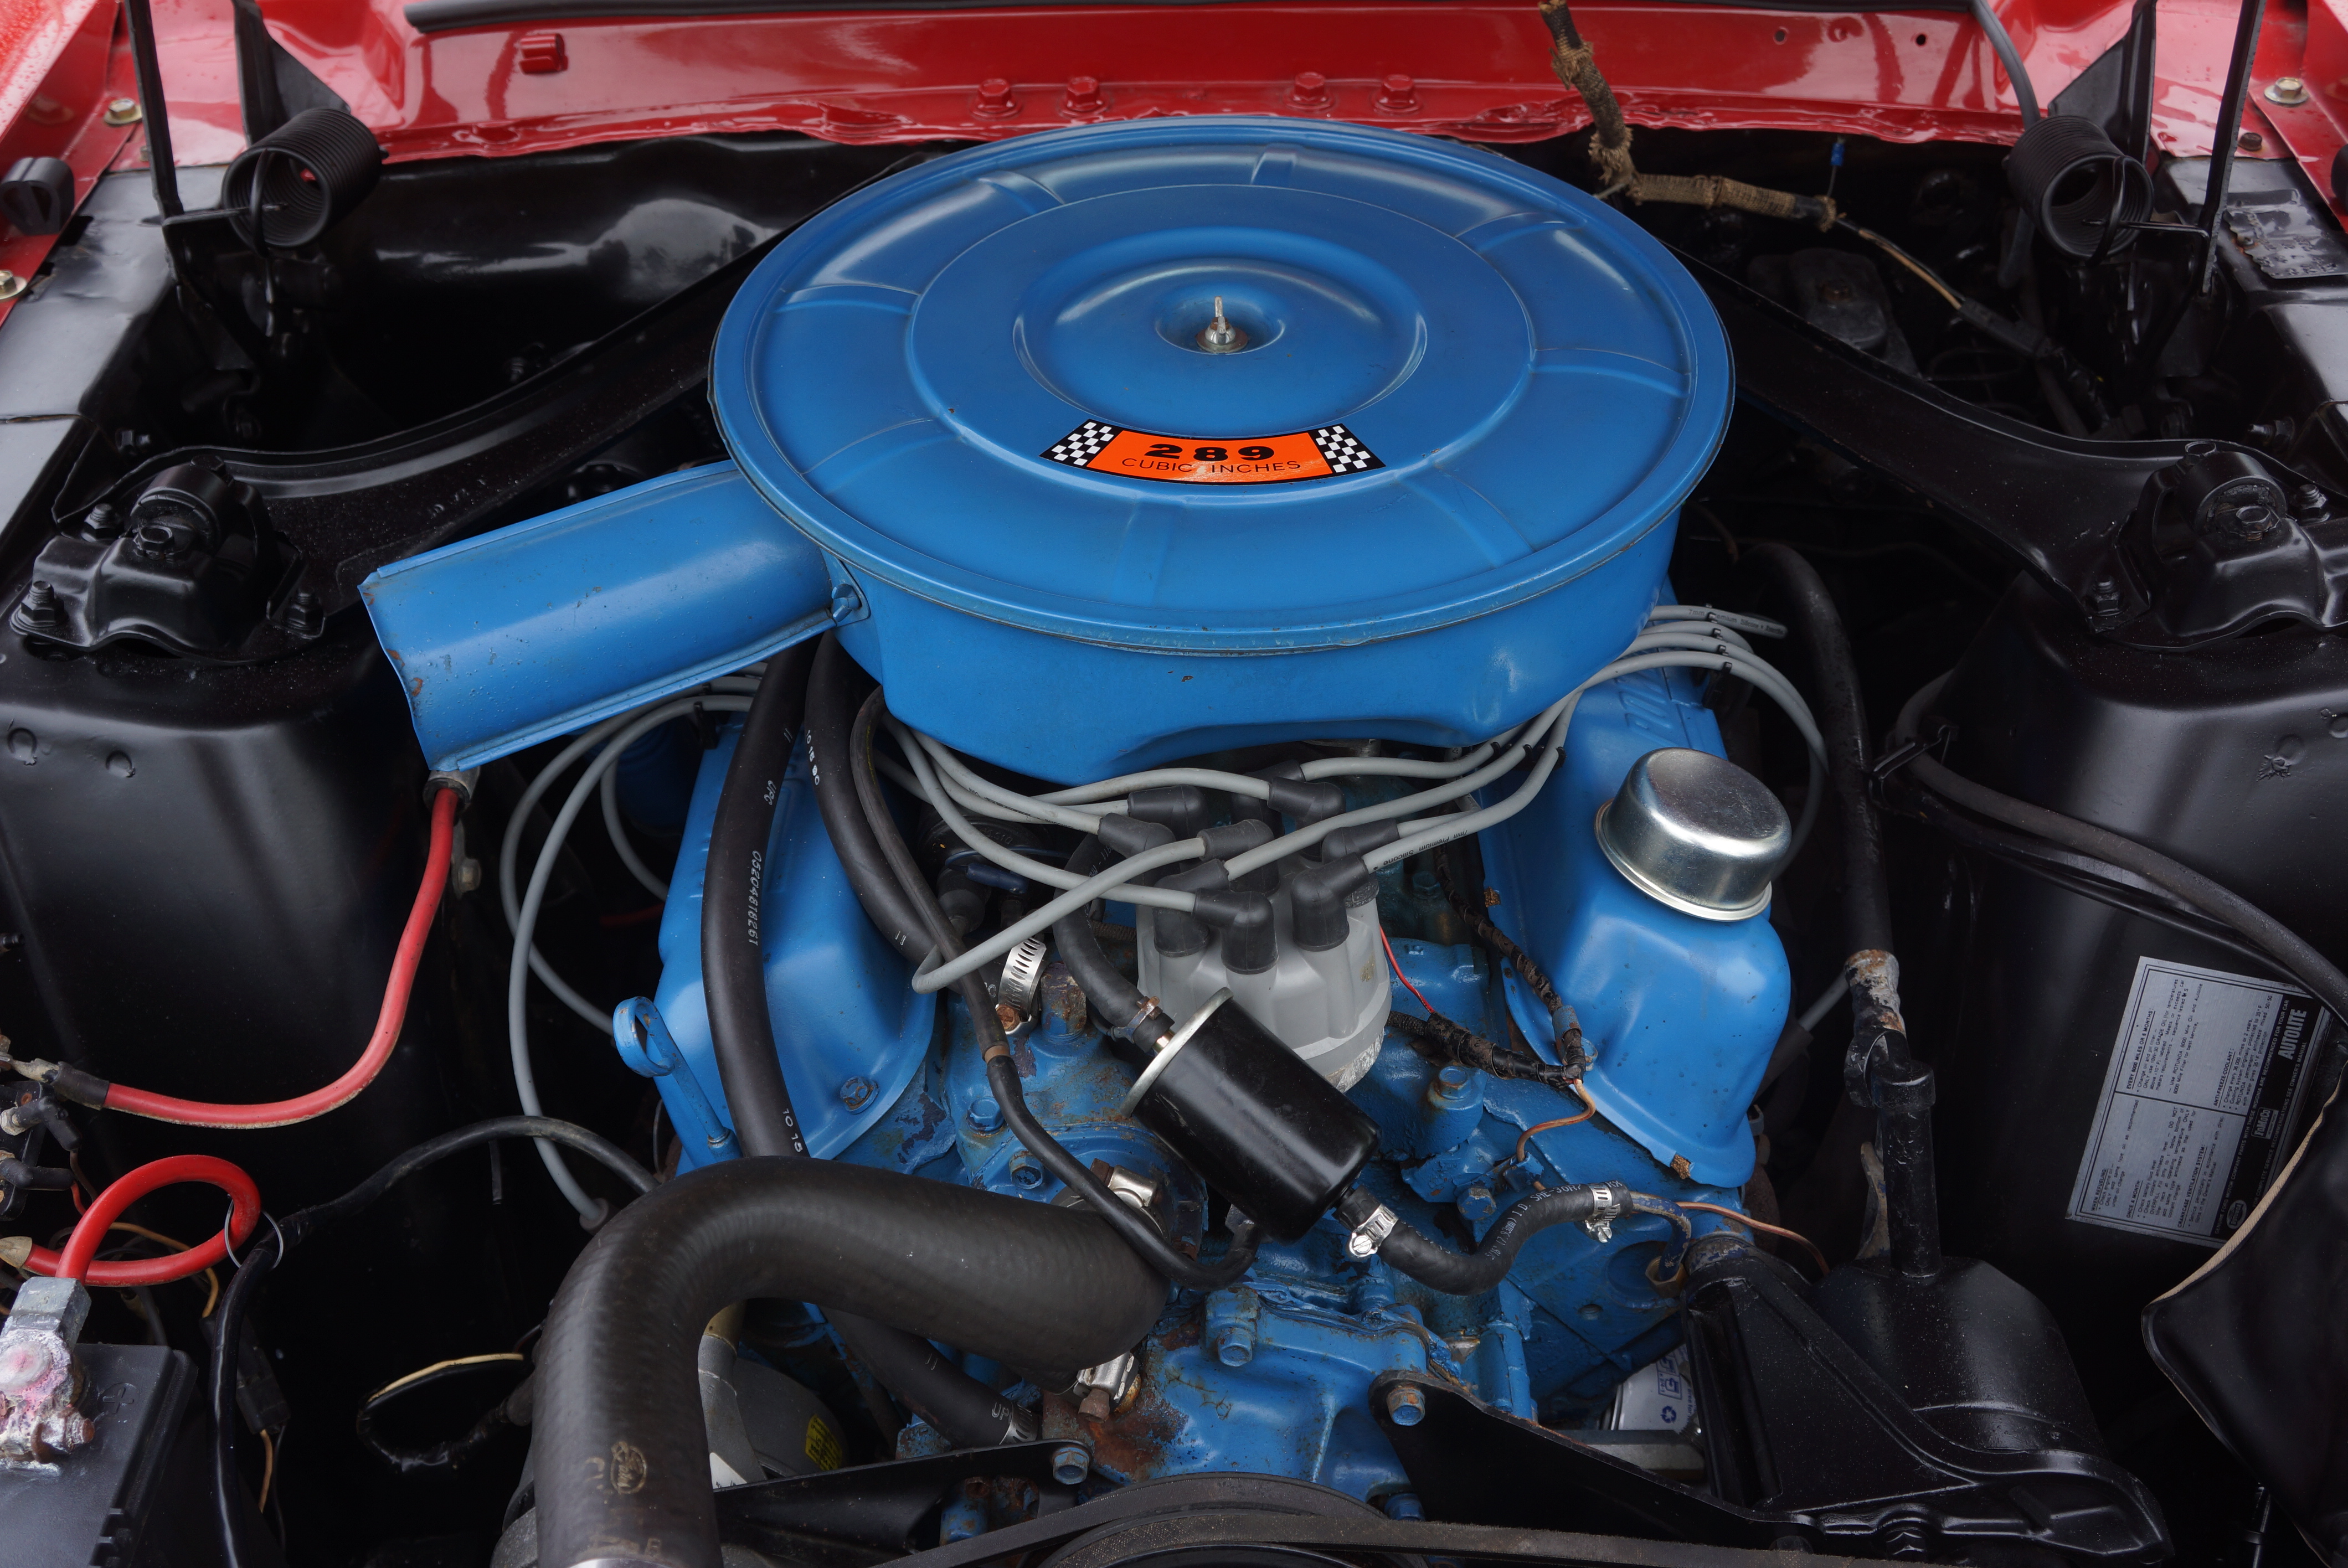
T208 1967 Ford Mustang convertible, red, white top, black interior. 289 V8, C4 automatic. Wire wheel covers with white wall tires. Wheels painted red, which is odd touch. Restored to a visibly high standard. Not a deluxe Mustang interior, but what is there is clean and straight. Gauge cluster looks especially good. 91,342 miles on odometer.
SOLD FOR $24,000- Charming color combo, on what appears to be a recent restoration. 1967 is my favorite Mustang year, and I especially like the interiors. This one didn’t have the deluxe interior stuff (center console, fancy door panels, chrome-trimmed seats) but was clean and presented well. The price was not unexpected for such a nice car.
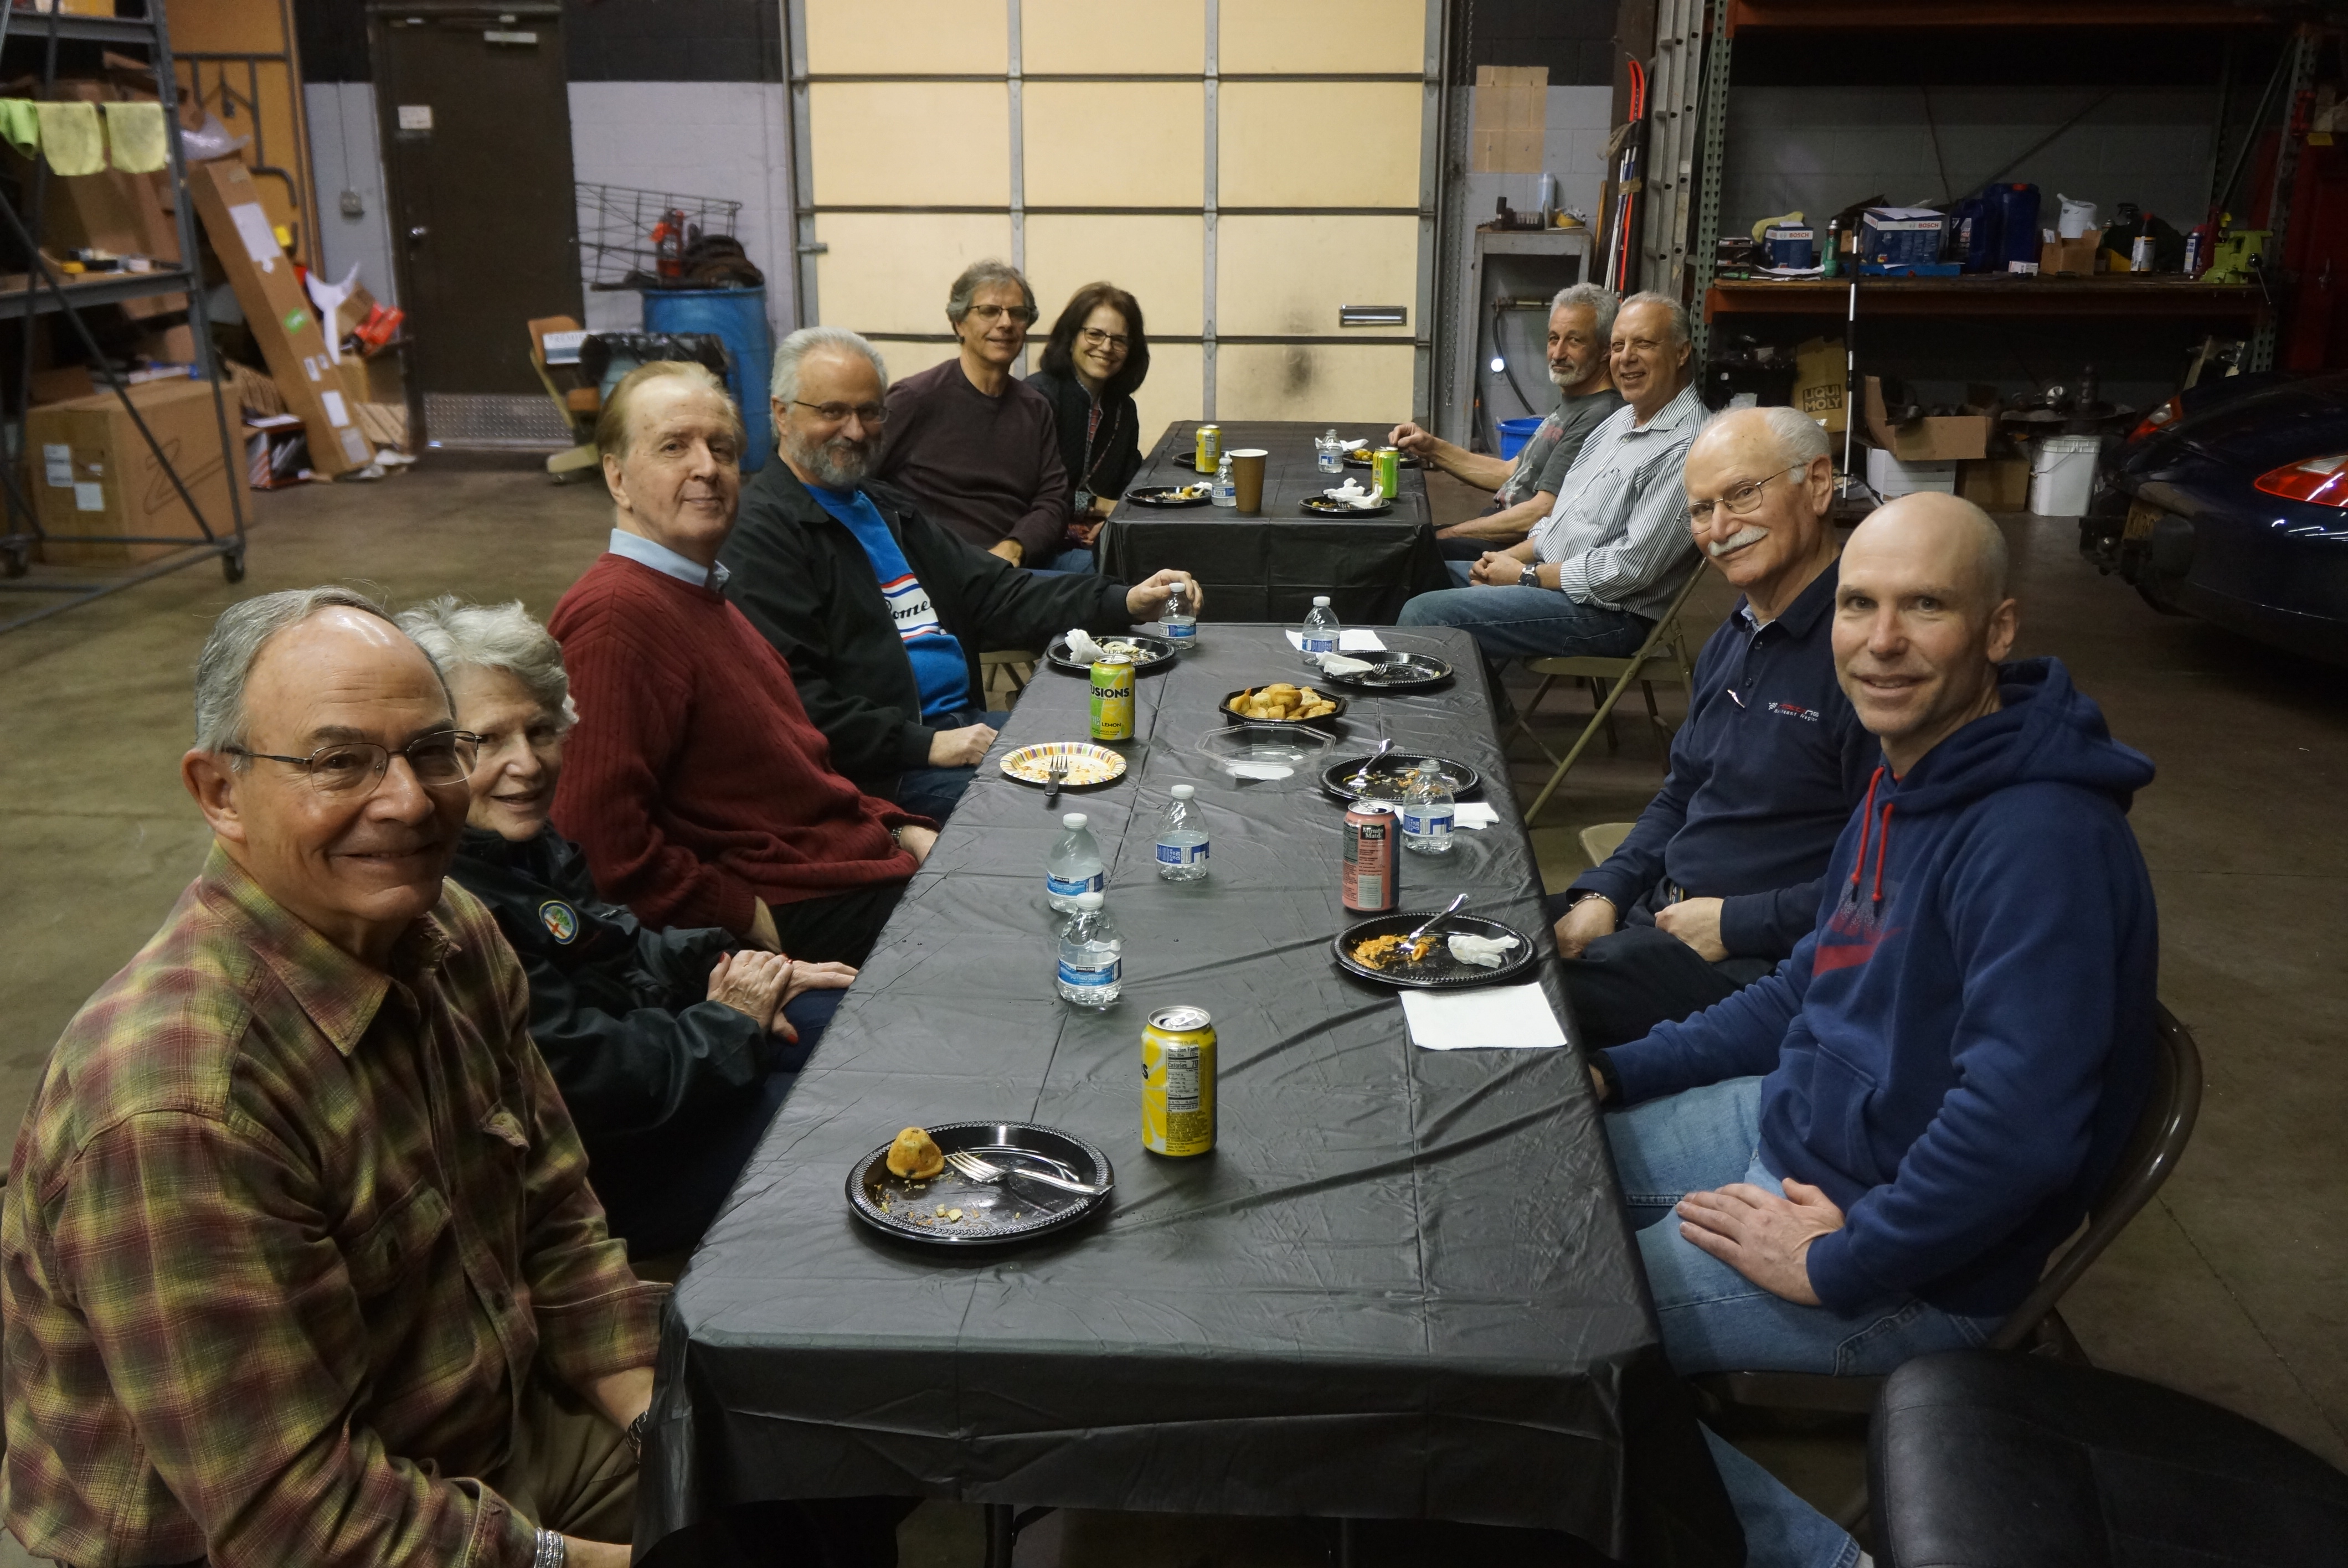
The New Jersey Chapter of the Alfa Romeo Owners Club (AROC), under the able leadership of Chapter President Enrico Ciabattoni, held its first event of 2019 by organizing a luncheon on Saturday April 13. Our hosts were the fine folks at Driving Impressions, a Dover N.J.-based business which sells racing accessories in the front, and has ample garage space out back.
Nice SWAG in Driving Impressions’ retail store
We had a small but enthusiastic turnout of about a dozen, consisting of a mix of AROC-NJ members with some local friends. The lunch (Italian food, whaddya expect?) was grand, but we were really there to get together to talk about our #1 passion, cars. There was lots to talk about, starting with the cars on either side of the lunch table. The service bays were occupied by Italian cars OTHER than Alfas, and there were interesting non-Italian toys too.
Love Italian food? Check. Love Italian CARS? Two checks.
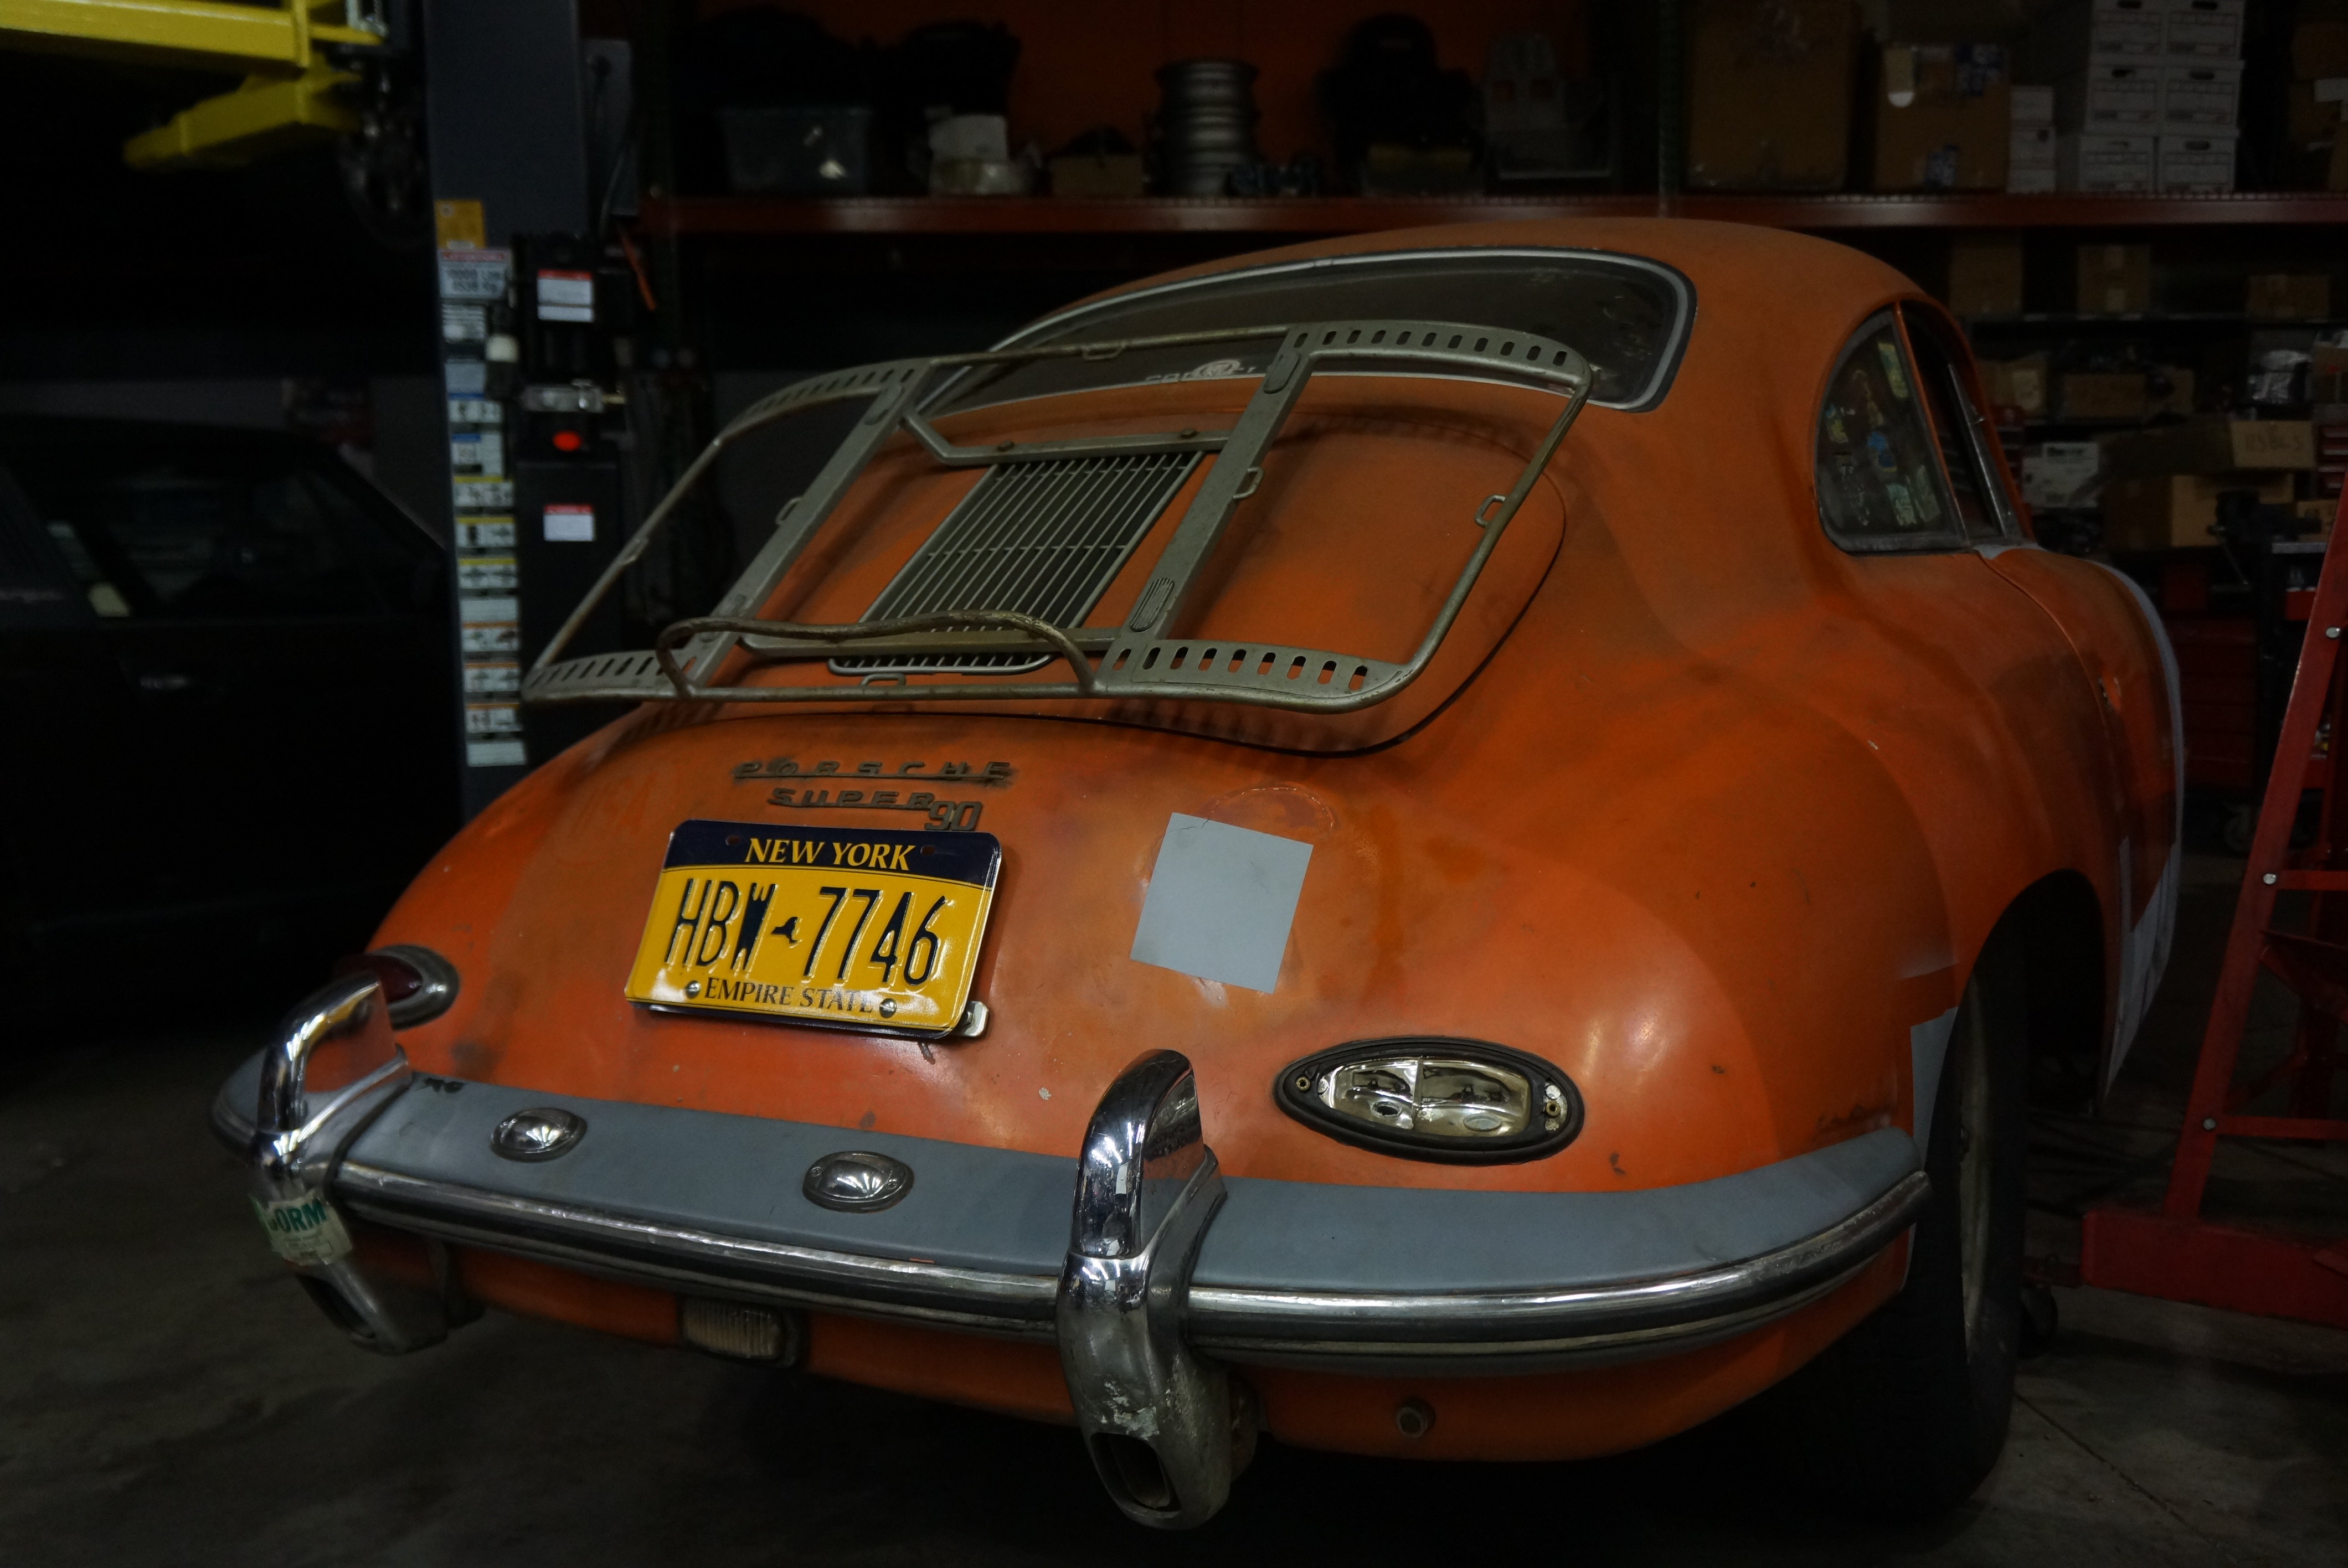
One corner of the garage is rented to a tech who specializes in Porsches. A 928 with its drivetrain removed was high up in the air, and next to it, on the ground, was a 356 coupe which appeared to be in original condition. It actually gave off the vibe of one of those barn-find 356s I’ve seen at auctions that hammer for 300 large.
A 928 in for service. Not for the faint of heart or the light of wallet.
This Porsche 356 coupe appeared to have never been restored
Interior of the 356
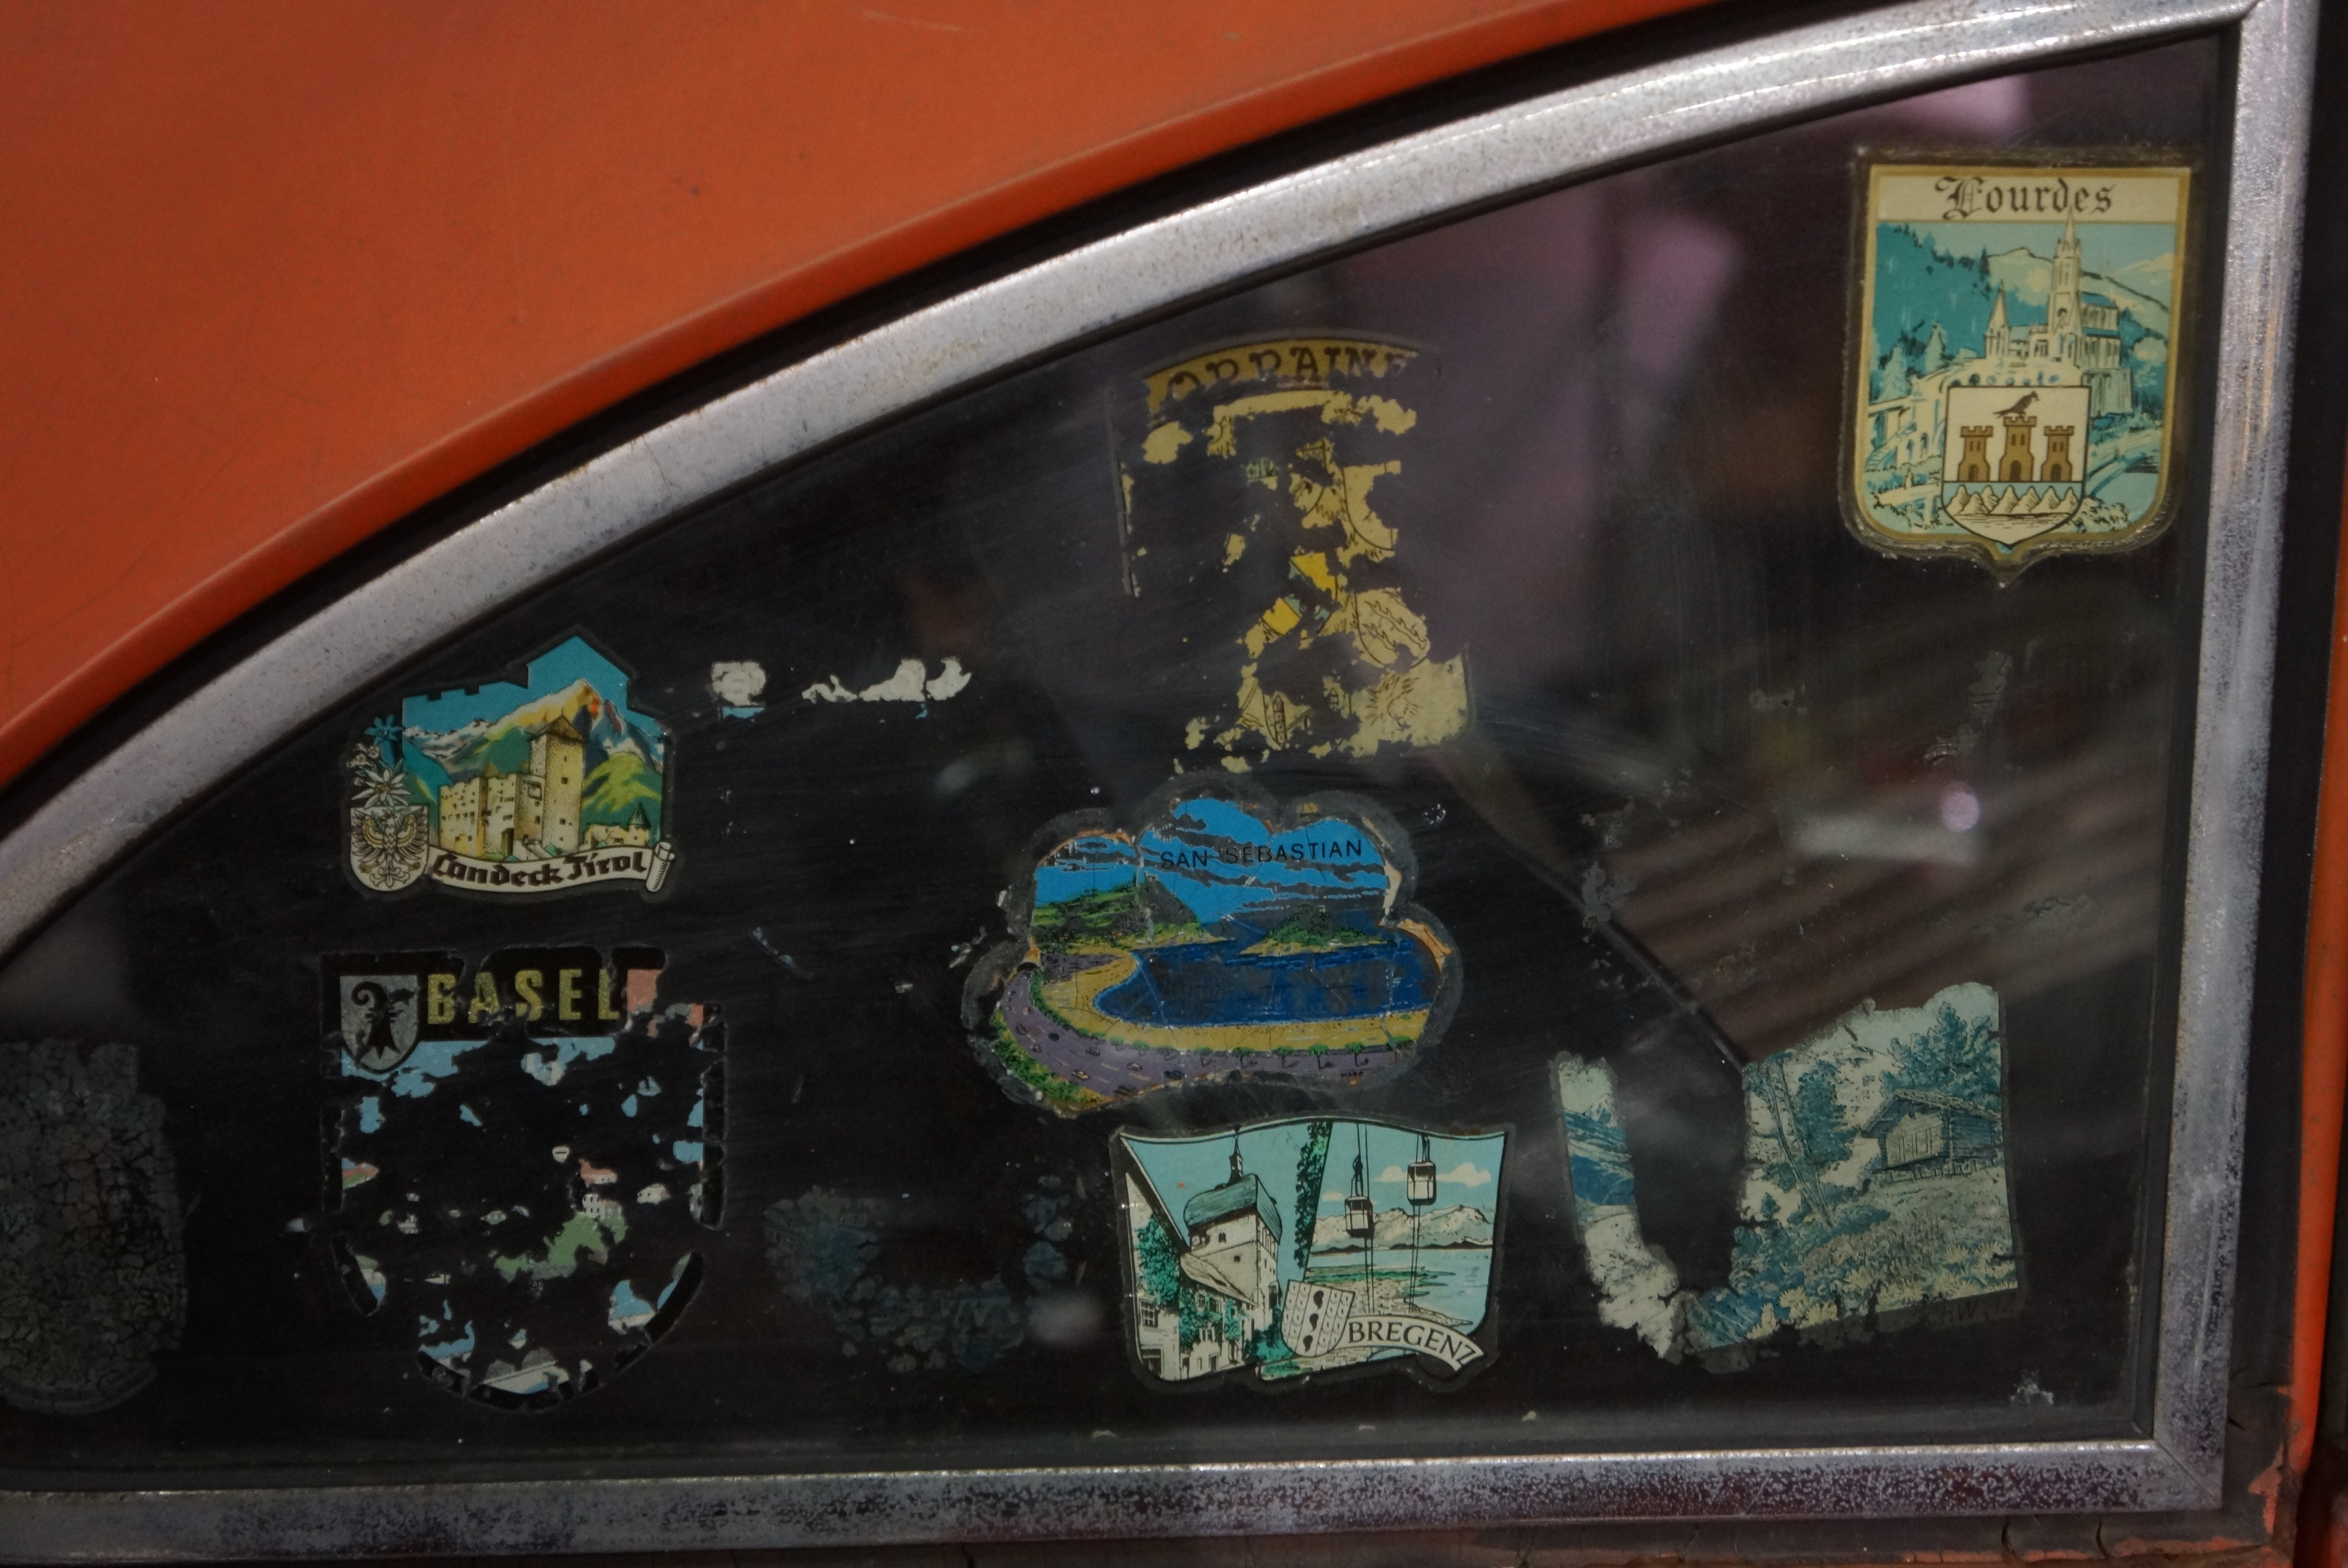
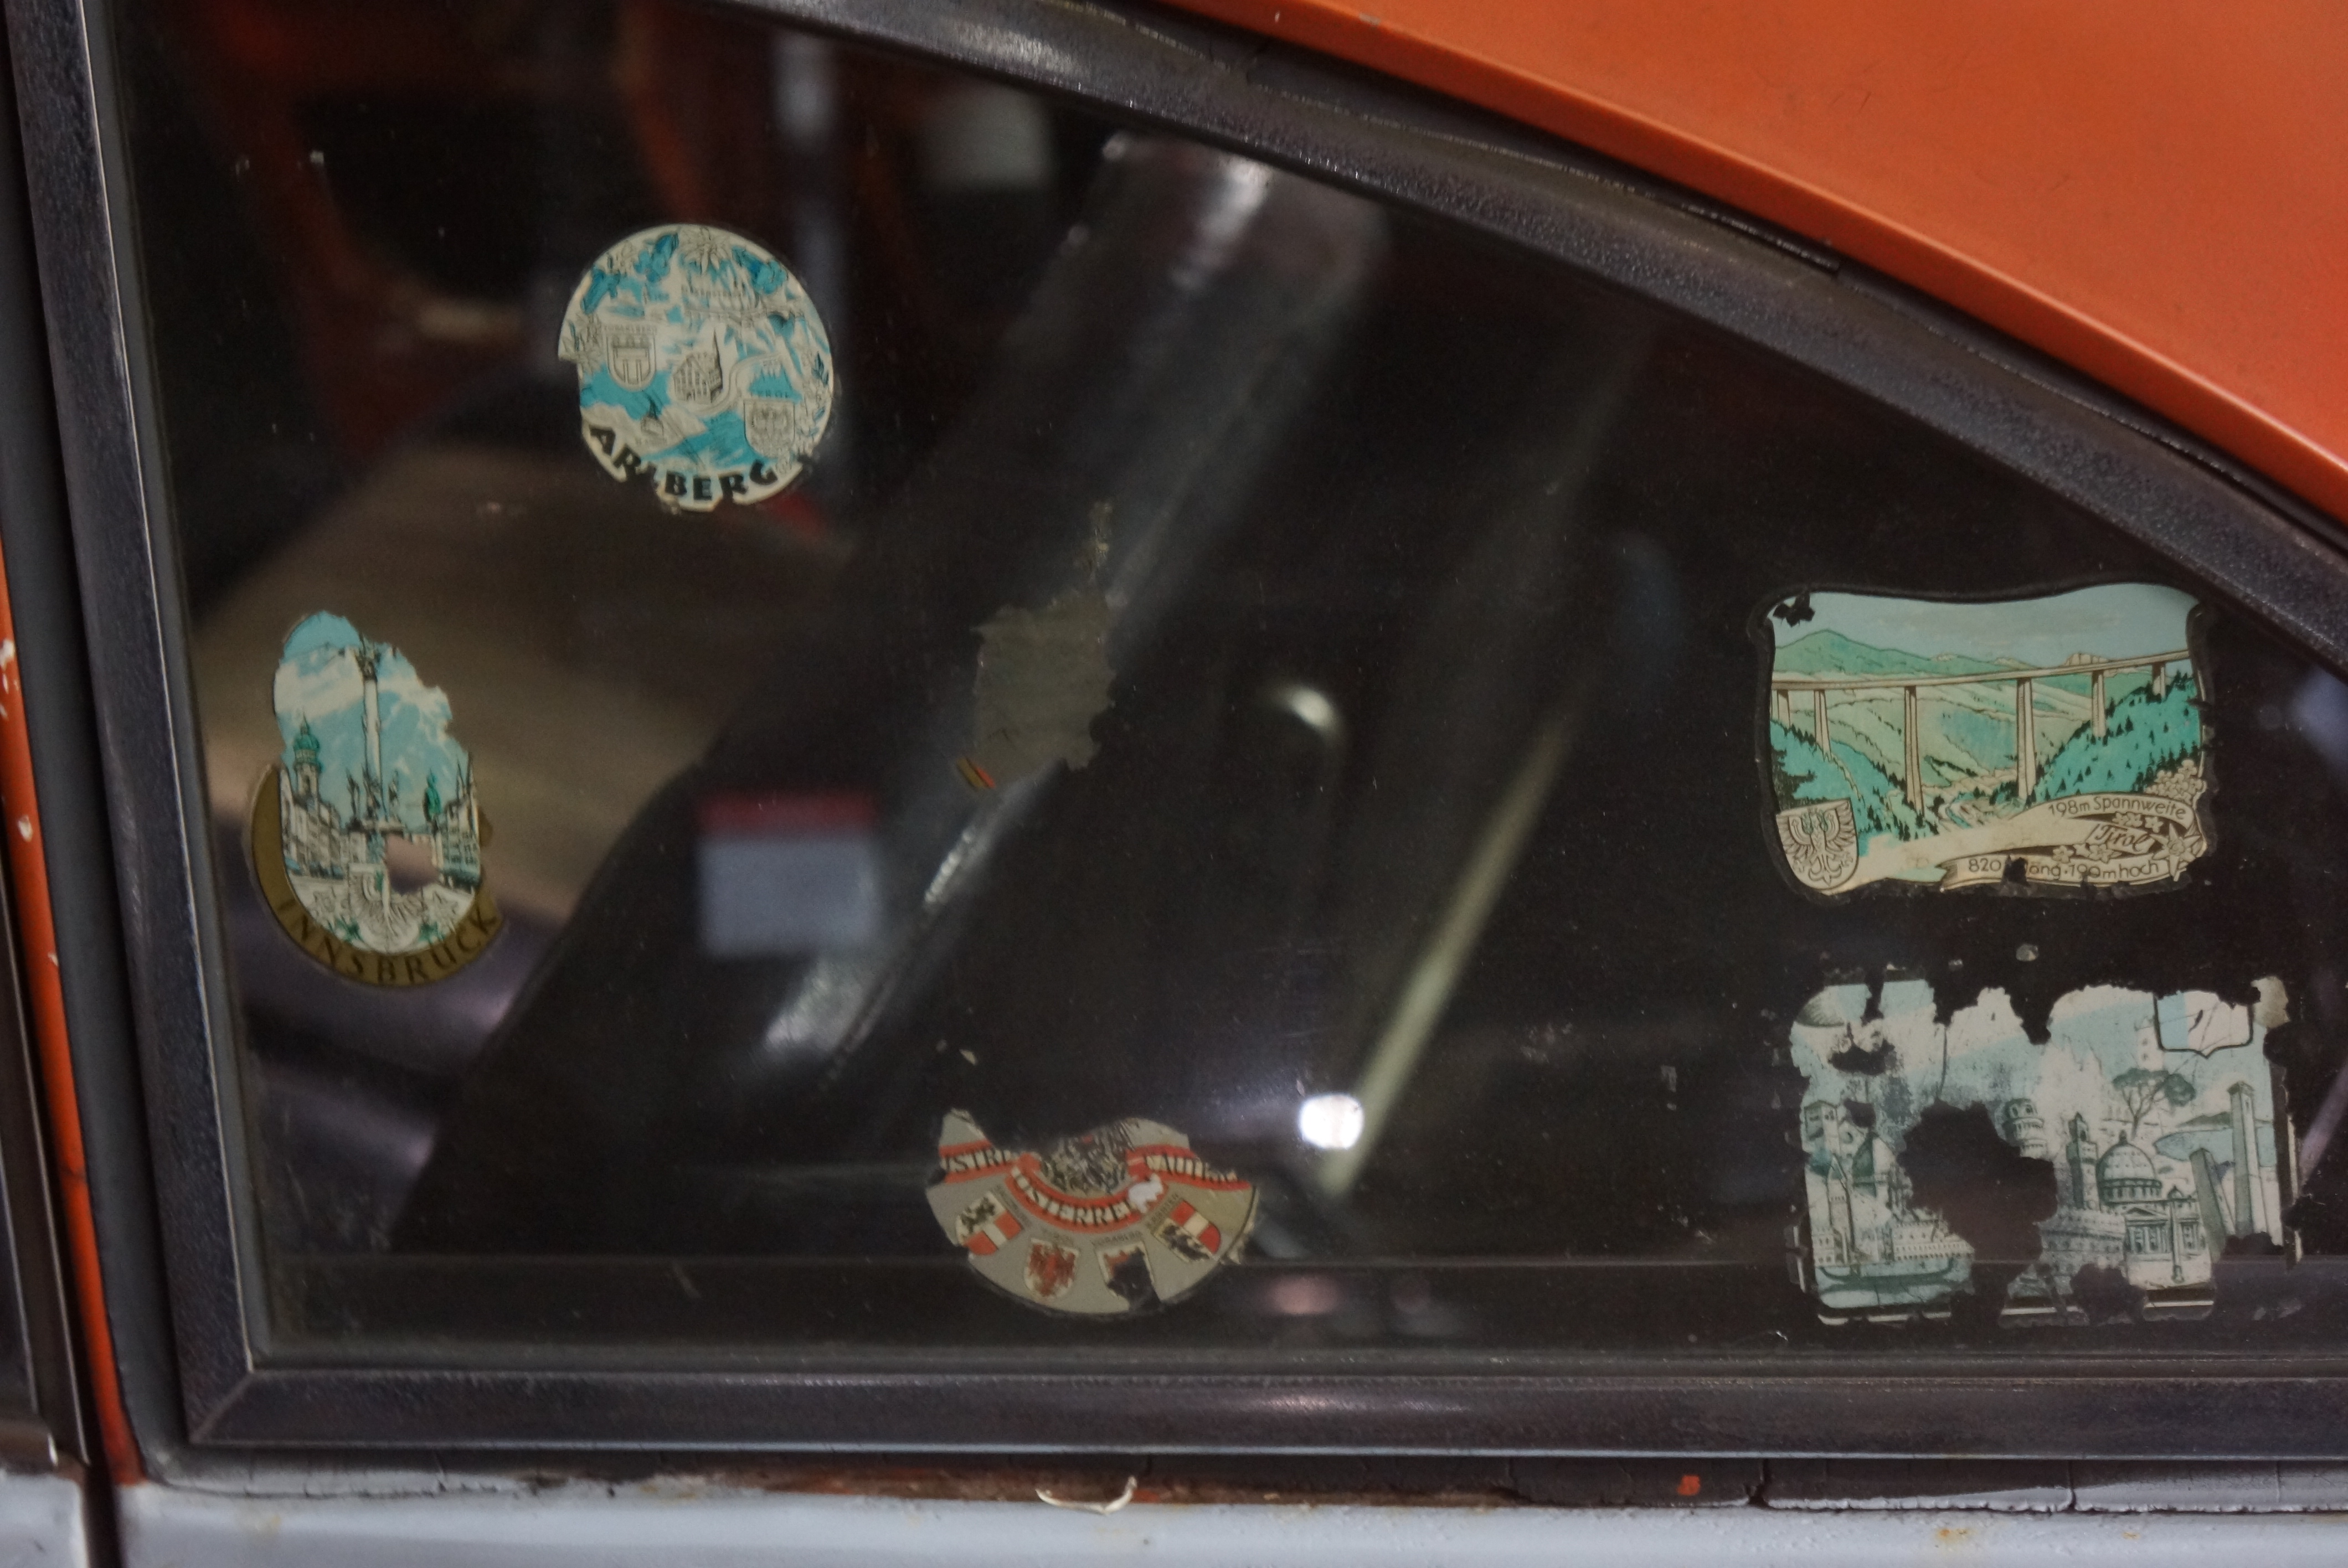
Quarter window decals
show a well-traveled car
Three Italian cars competed for my attention: a current-generation Fiat 500, with turbo and other goodies under the hood, claimed to be the fastest 500 on earth (based on a magazine article I was shown, so it must be true); a Fiat 600, with its cheeky water-cooled four-banger out back, appeared to be in the throes of major reconstruction; and a Lancia Delta Integrale, all ‘80s squared-off inside and out, lounged in the corner, looking like it was daring the turbo 500 to a duel.
Fiat 500 racecar
A Fiat 600 in for a refresh
Lancia Delta Integrale
Lancia engine
Lancia interior
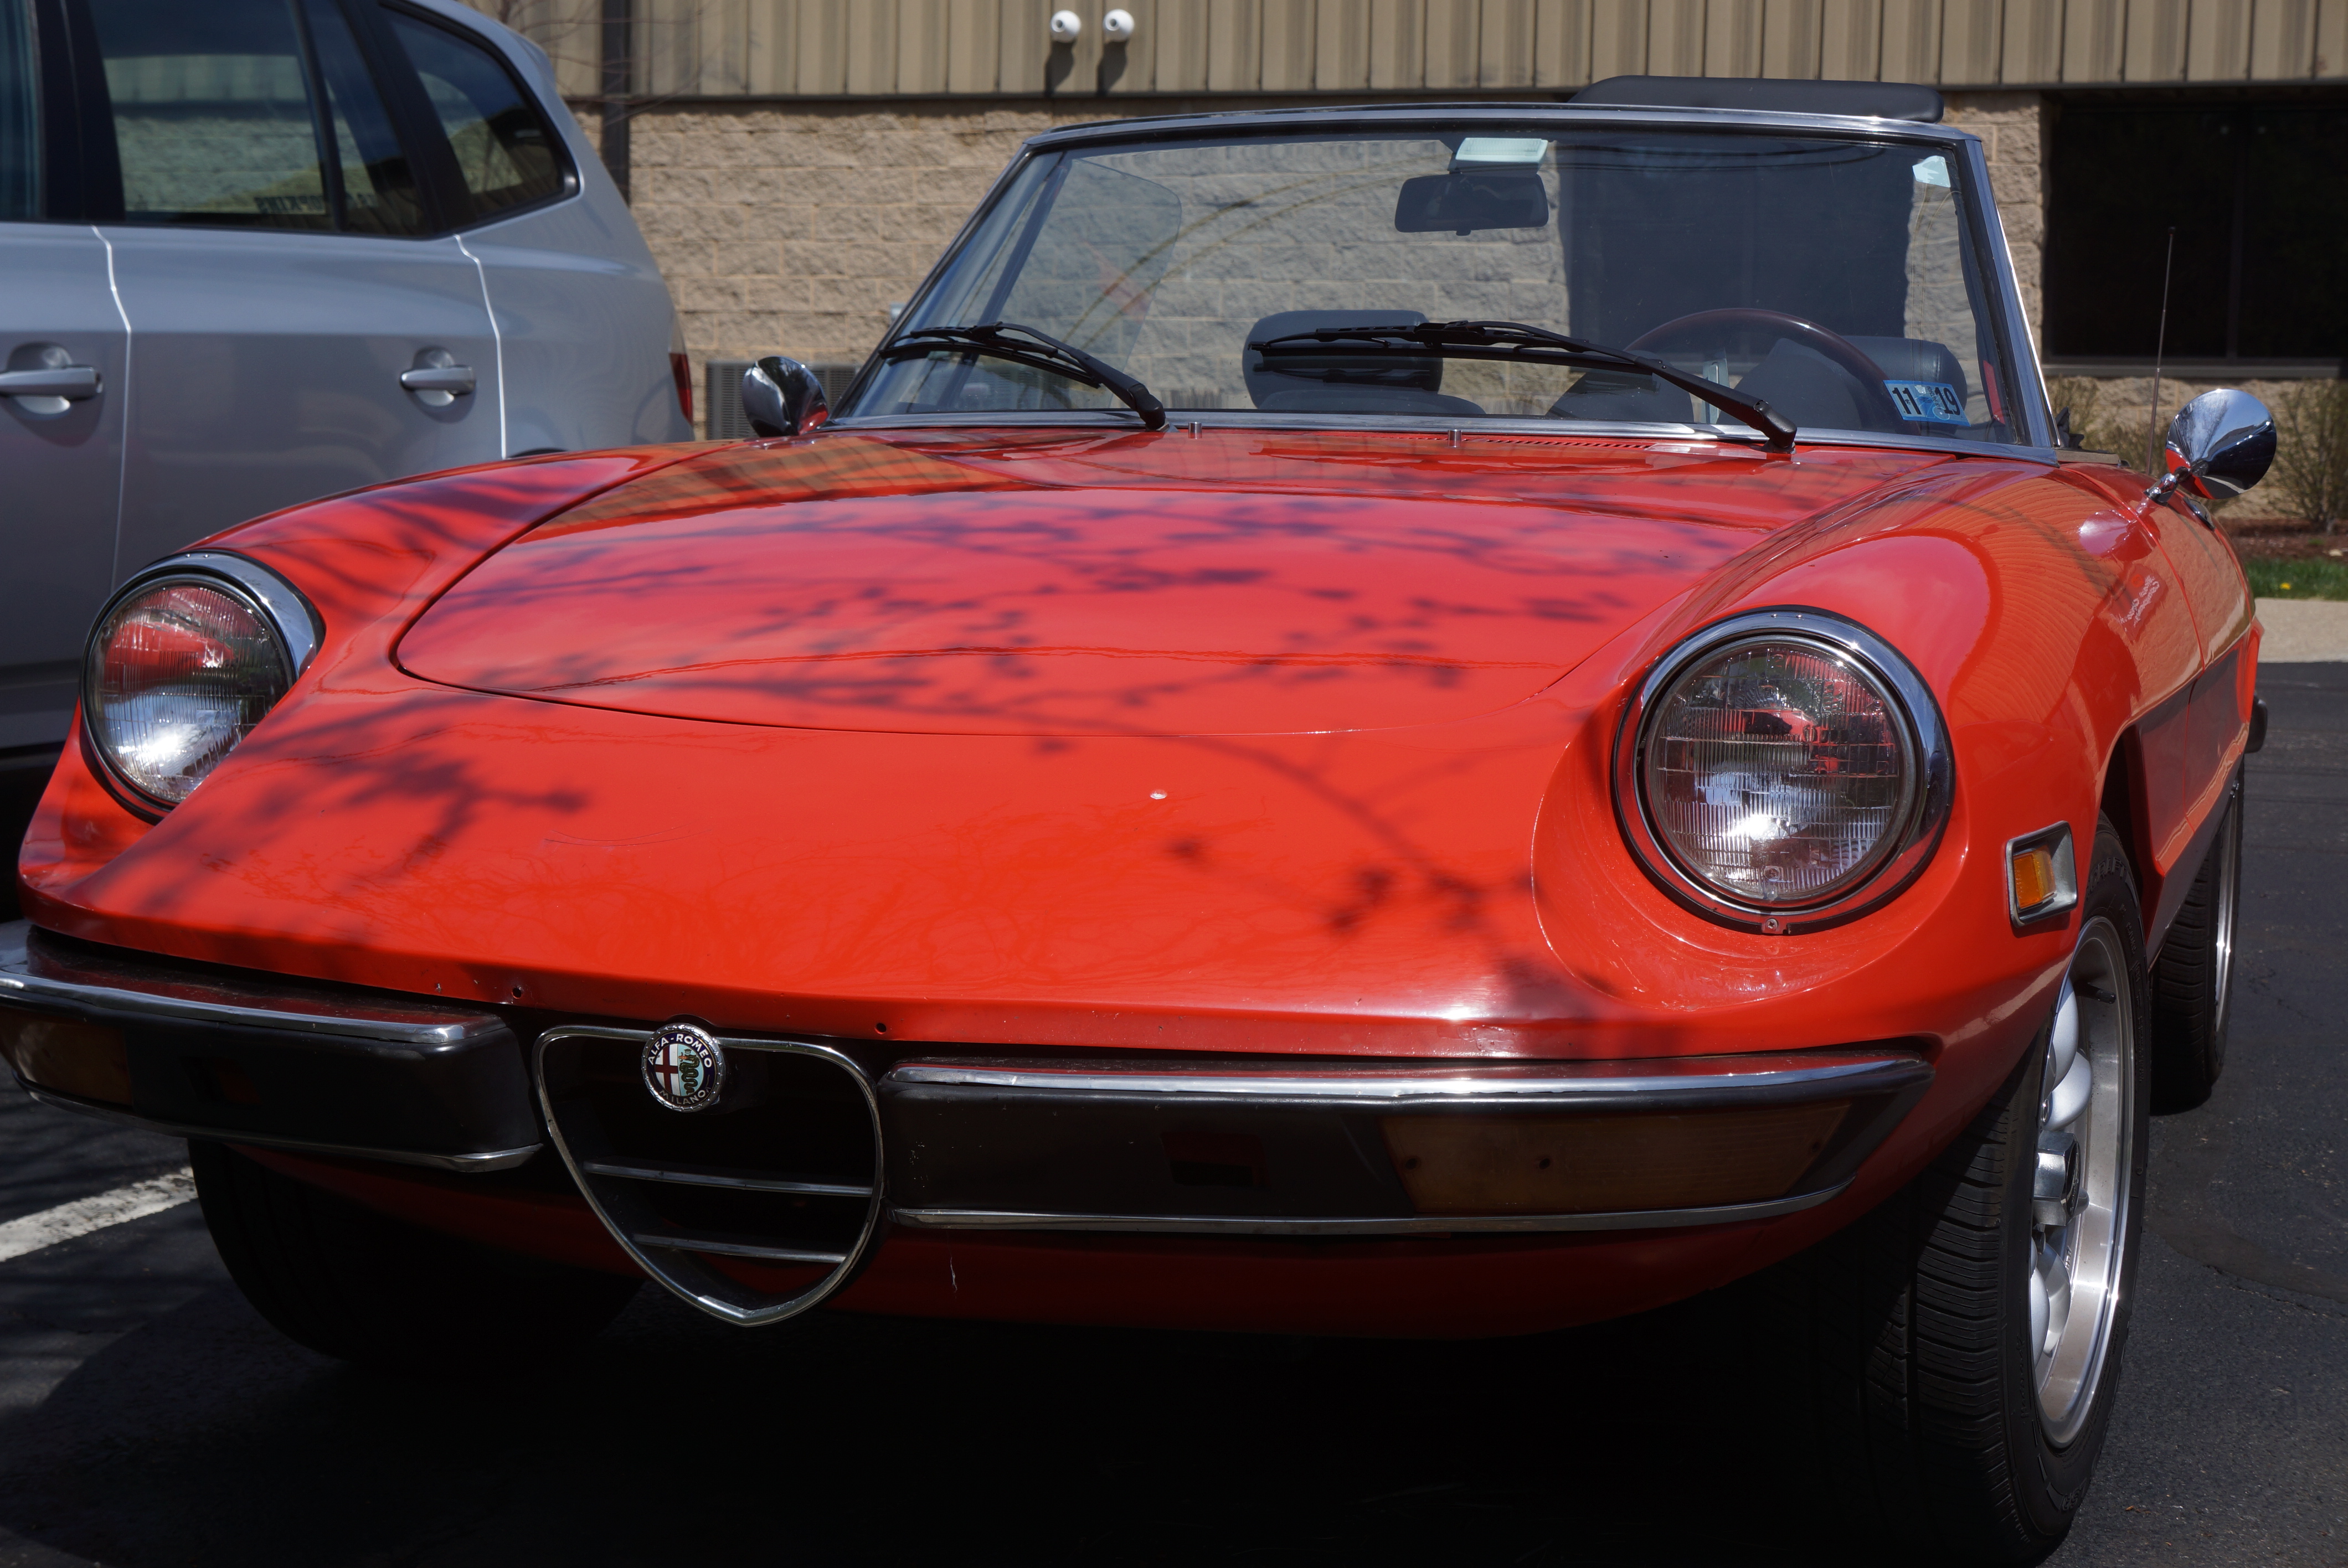
A quick peek outside revealed the 3 classic Alfas which dared make today’s drive. It stayed warm and dry, so it was an ideal day to cruise in our classics. Alas, no modern Giulias or Stelvios made the trip.
Alfa Romeo Spider
Alfa Romeo Nuova Super 1600
Alfa Romeo GT 1300 Jr
With the AROC National in Pittsburgh fast approaching in July, there was some discussion among the Alfisti about who was attending, who was driving there, and who might want to caravan. Your author has volunteered to lead the caravan; now I just need someone to agree to join it.
The first breakfast drive of 2019 was held on Sunday April 14, 2019, and while the weatherman and weatherwomen of the greater NY Metro area may have earlier tried to dissuade us, their forecast eventually pushed the predicted rain back into the latter part of the day. We made the go/no go decision on Friday, and the Sunday skies were bluer and air temperature warmer than expected.
The sunny Sunday lineup
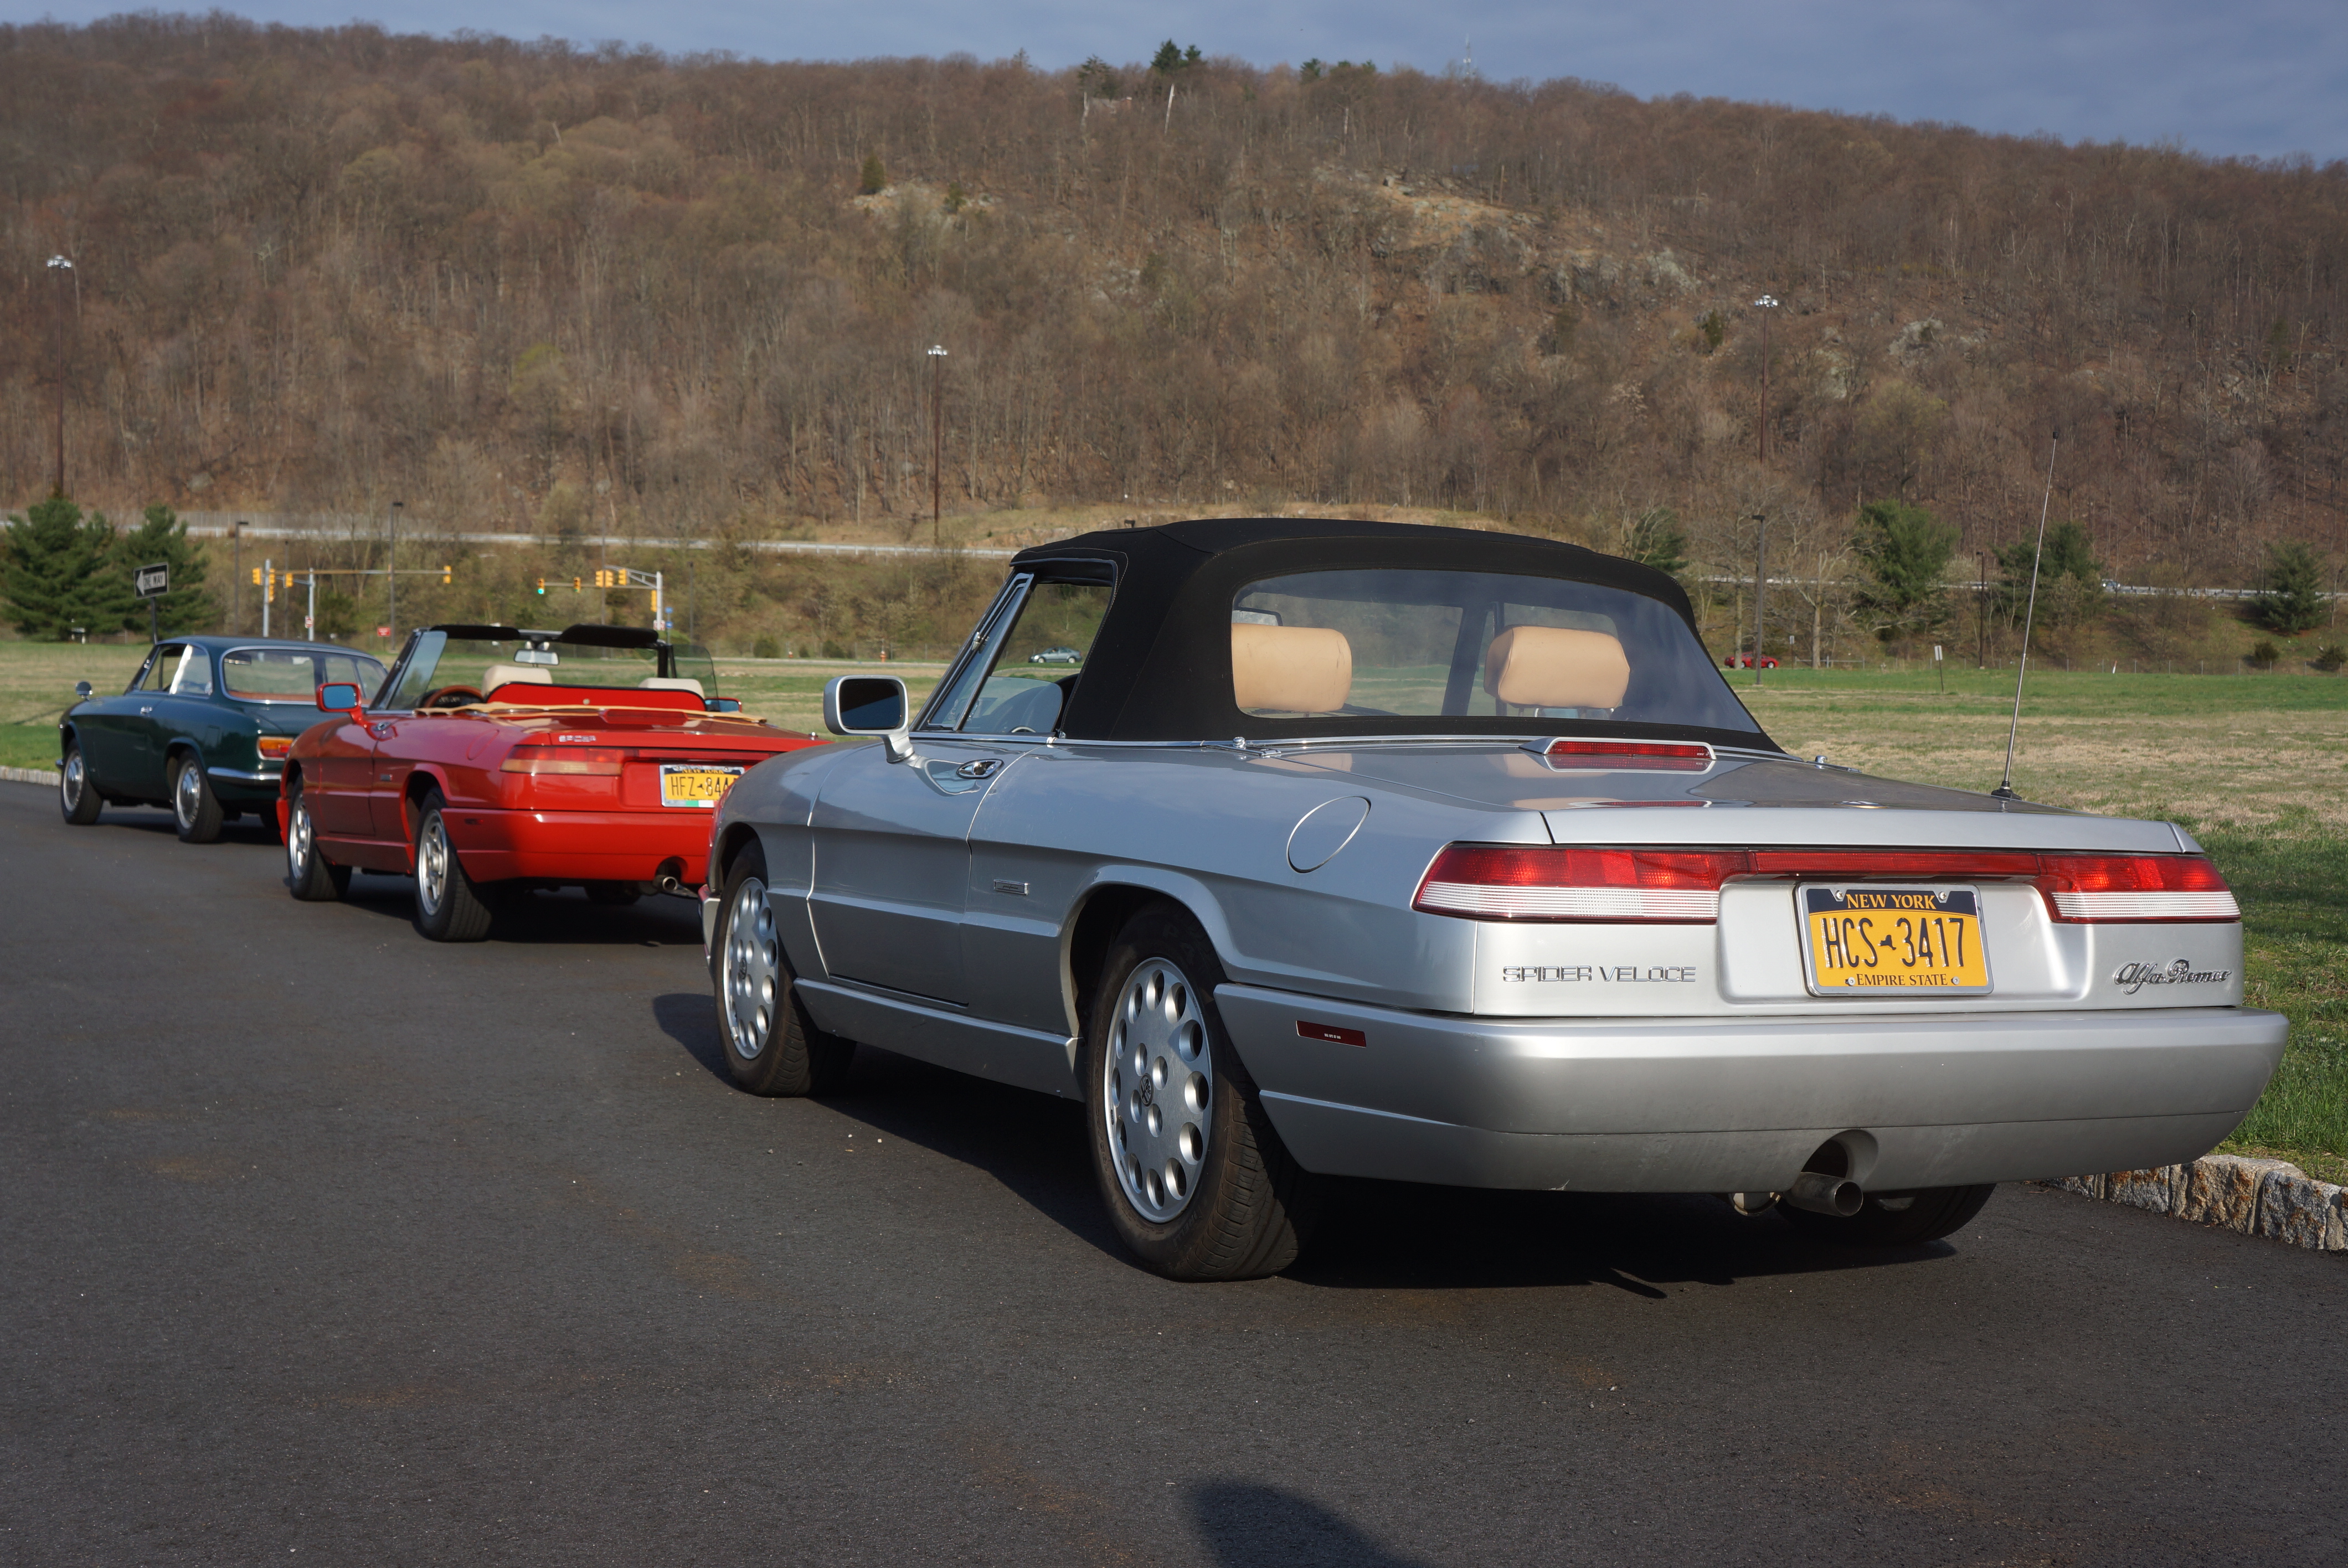
We Alfisti almost got away with turning this into an Italian breakfast run, as the first 3 cars to show were all from the fabled Milanese marque. But diversity ruled the day, with one Japanese car (Miata), one domestic vehicle (Nova), and 6 German machines (3 Porsches, 2 BMWs, and a VW GTi) in attendance.
Green, red, and silver: nice Alfas come in many colors
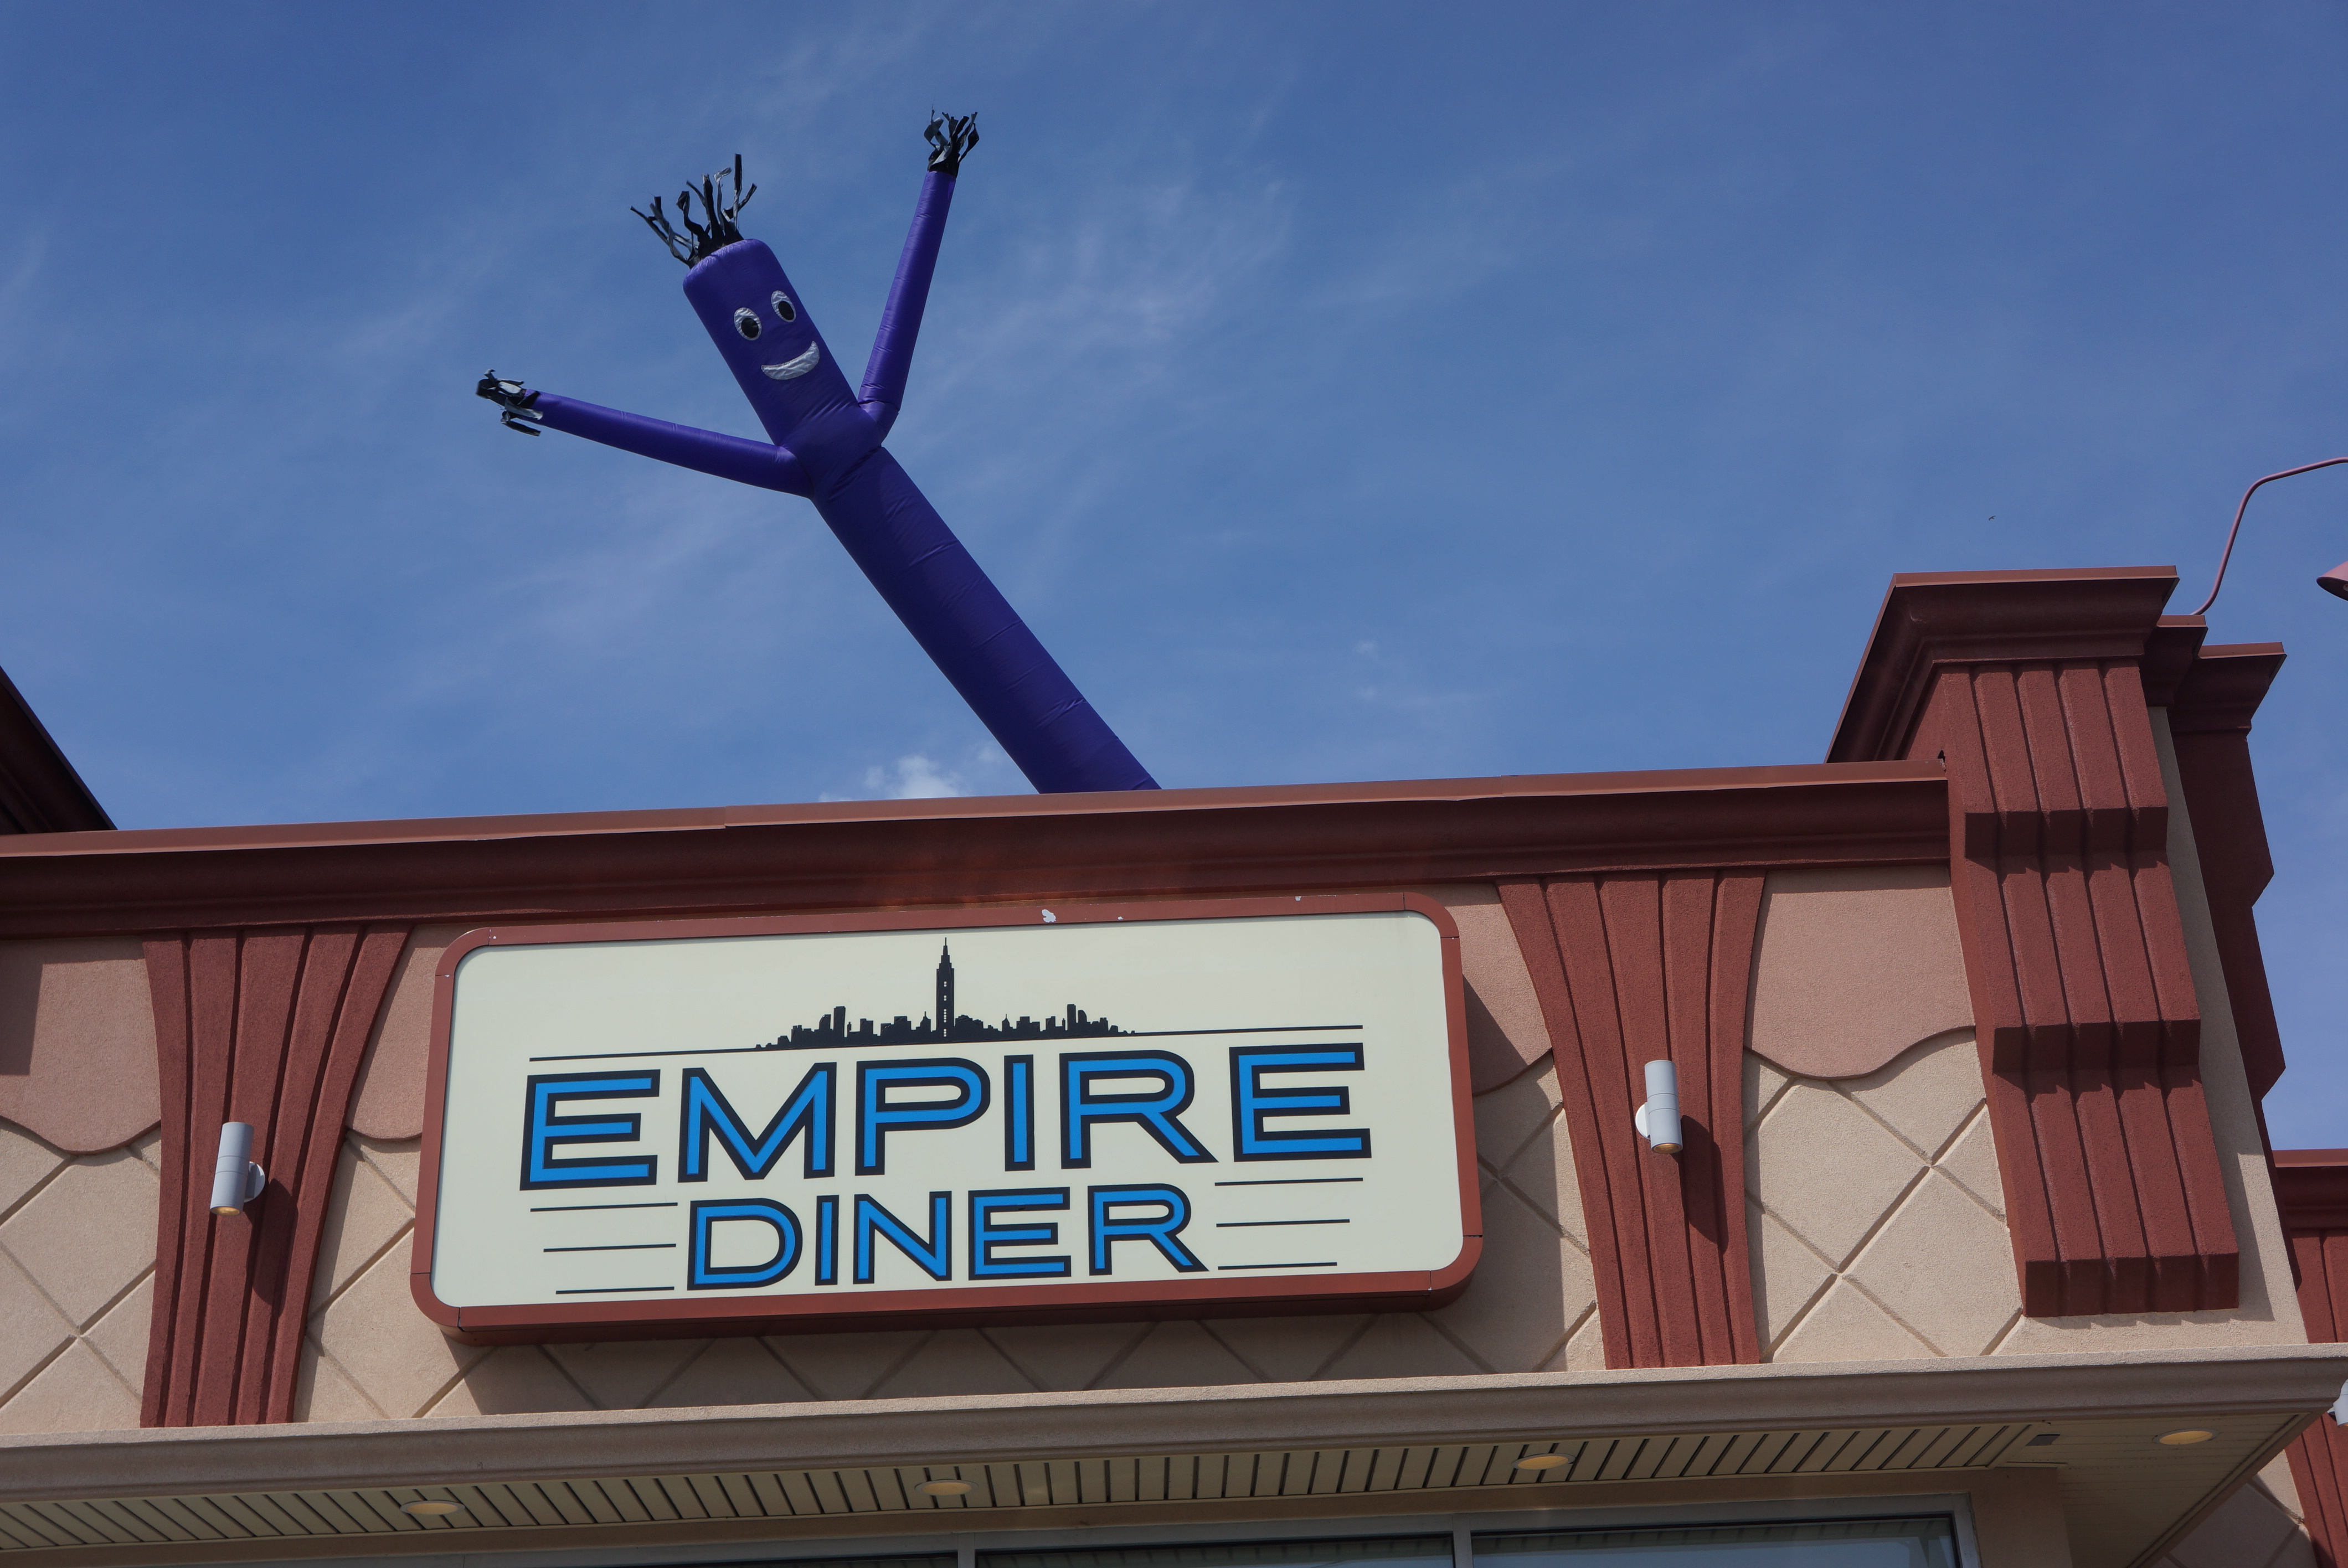
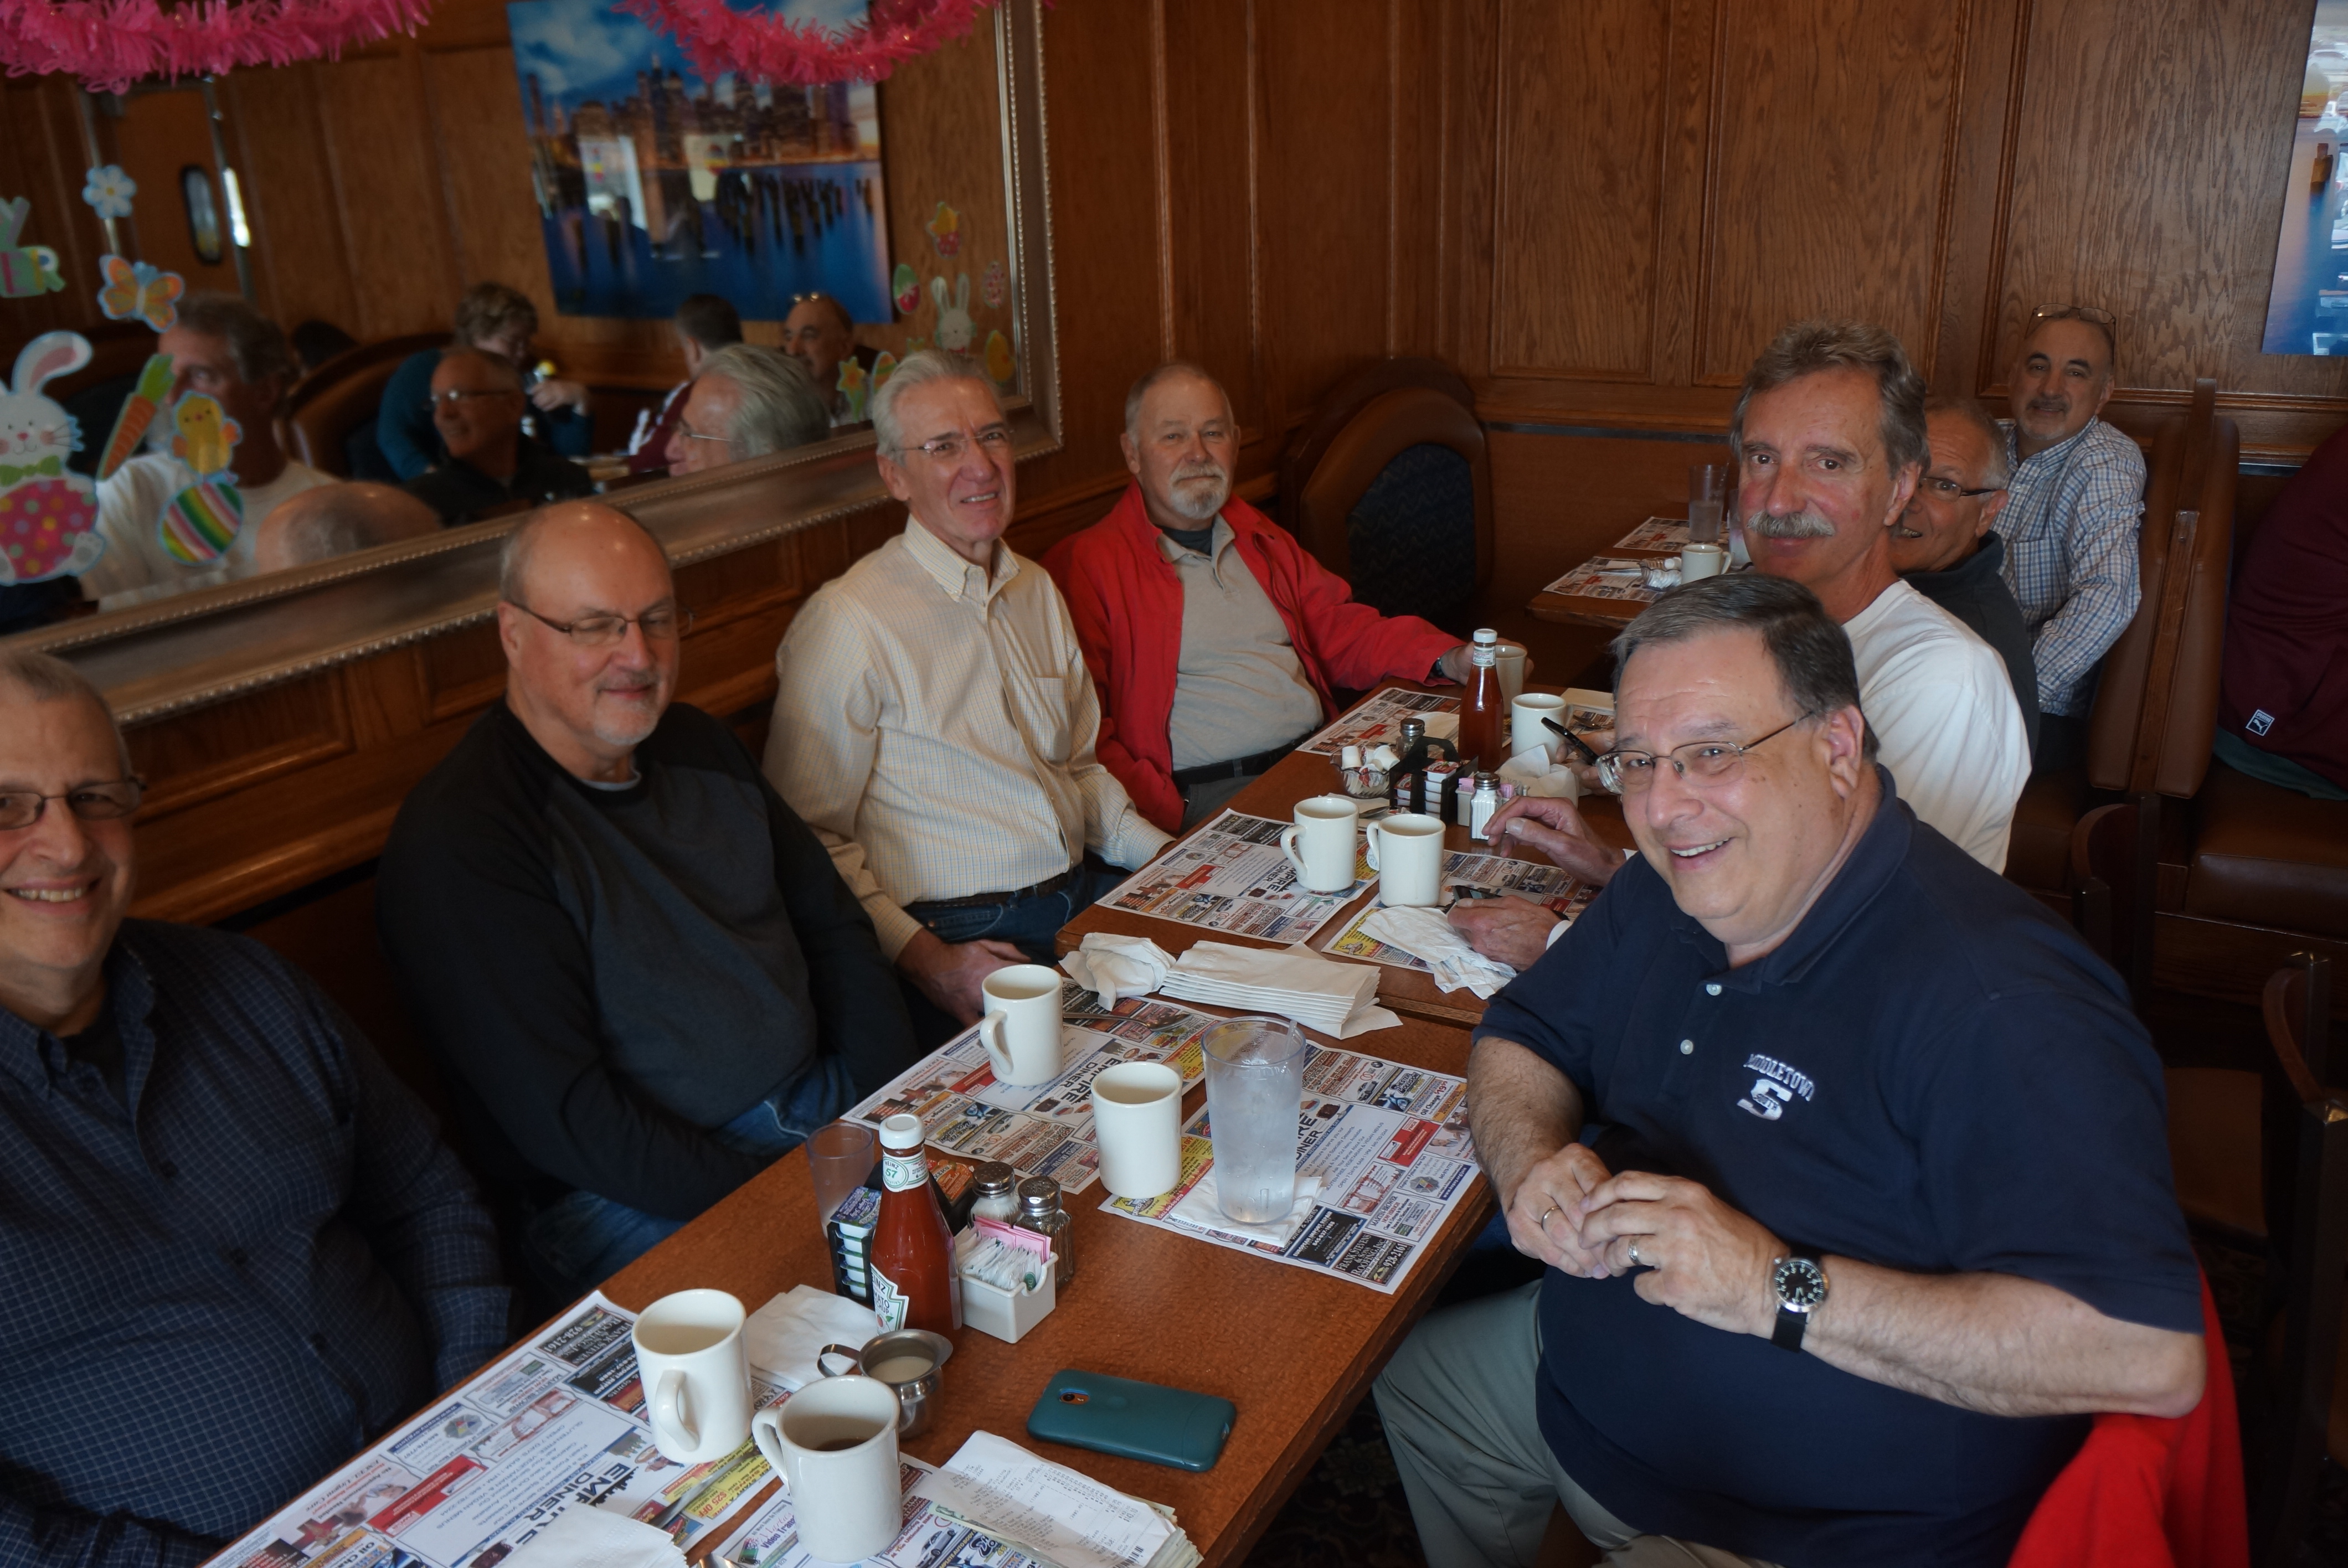
After a long winter’s hibernation, it was great to see so many familiar and friendly faces. We pushed off from the Sheraton Crossroads parking lot at 8:30am sharp. Eleven cars, 15 hungry car-centric folk, and a scenic one-hour drive along Greenwood Lake had us at the Empire Diner in Monroe NY by 9:30 am.
The view from the sweep car
The friendly staff at the Empire had tables ready for us, and we were ably attended to by two of the diner’s finest waitresses. As usual, we lingered long after plates were cleared and 6th refills of coffee were served. Car guys never seem to run out of things to talk about. We found our way back to the parking lot, said our goodbyes one last time, and as always, promised each other to do this again as soon as practical.
Mr. Empire himself waves from the diner rooftop
Our Sunday morning breakfast runs have taken on a life of their own. As your humble scribe glanced around the breakfast table, he saw former colleagues he has known for 30 years, and also saw fellow diners who have just recently become “regulars” because they were recommended to us. The group makeup is certainly not limited to “old friends”. We had cars from the ‘60s, ‘80s, ‘90s, and the 21st century in the lot. It’s not about whose car is the fastest, or shiniest, or priciest. We’re all passionate about our four-wheeled modes of transportation. It’s not about anything but a chance to spend an all-too-brief few hours with each other, driving together and dining together, doing what friends do, which is sharing our lives with each other.
1991 Alfa Romeo spider
1991 Alfa Romeo spider
1967 Alfa Romeo GT 1300 Jr.
Porsche 911 Targa
Porsche 911
BMW 325 iS
BMW M3 sedan
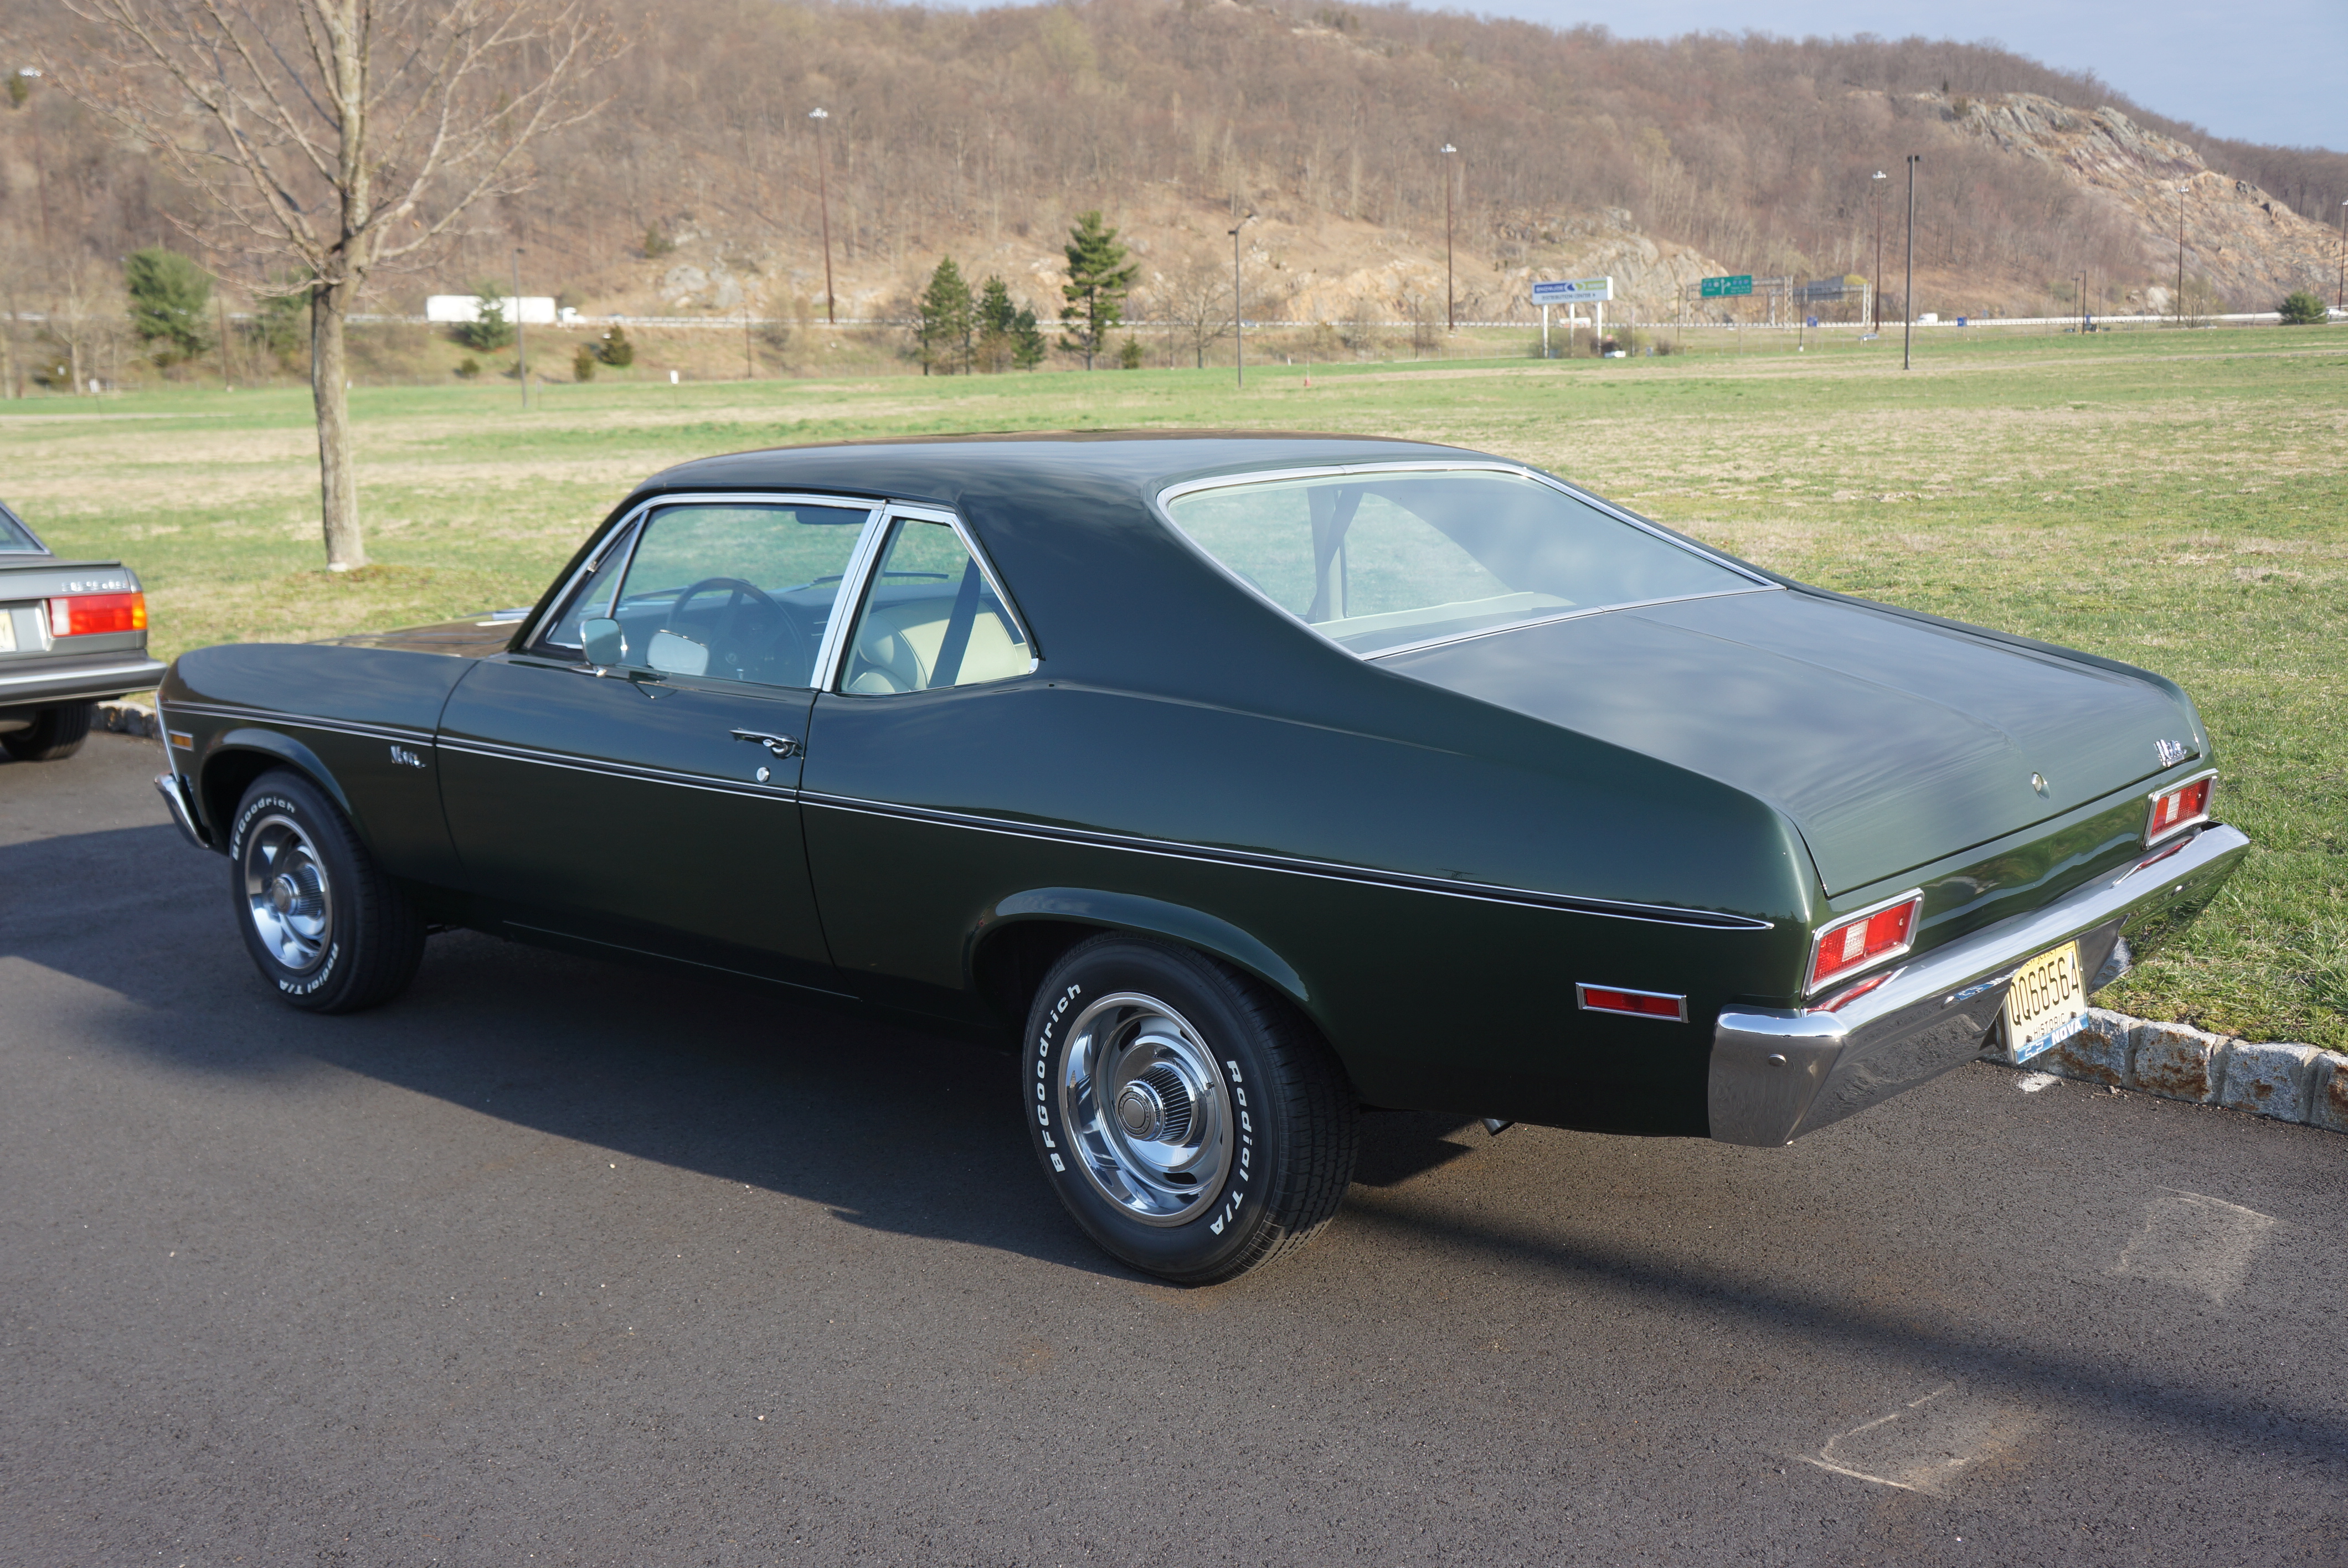
1972 Chevrolet Nova
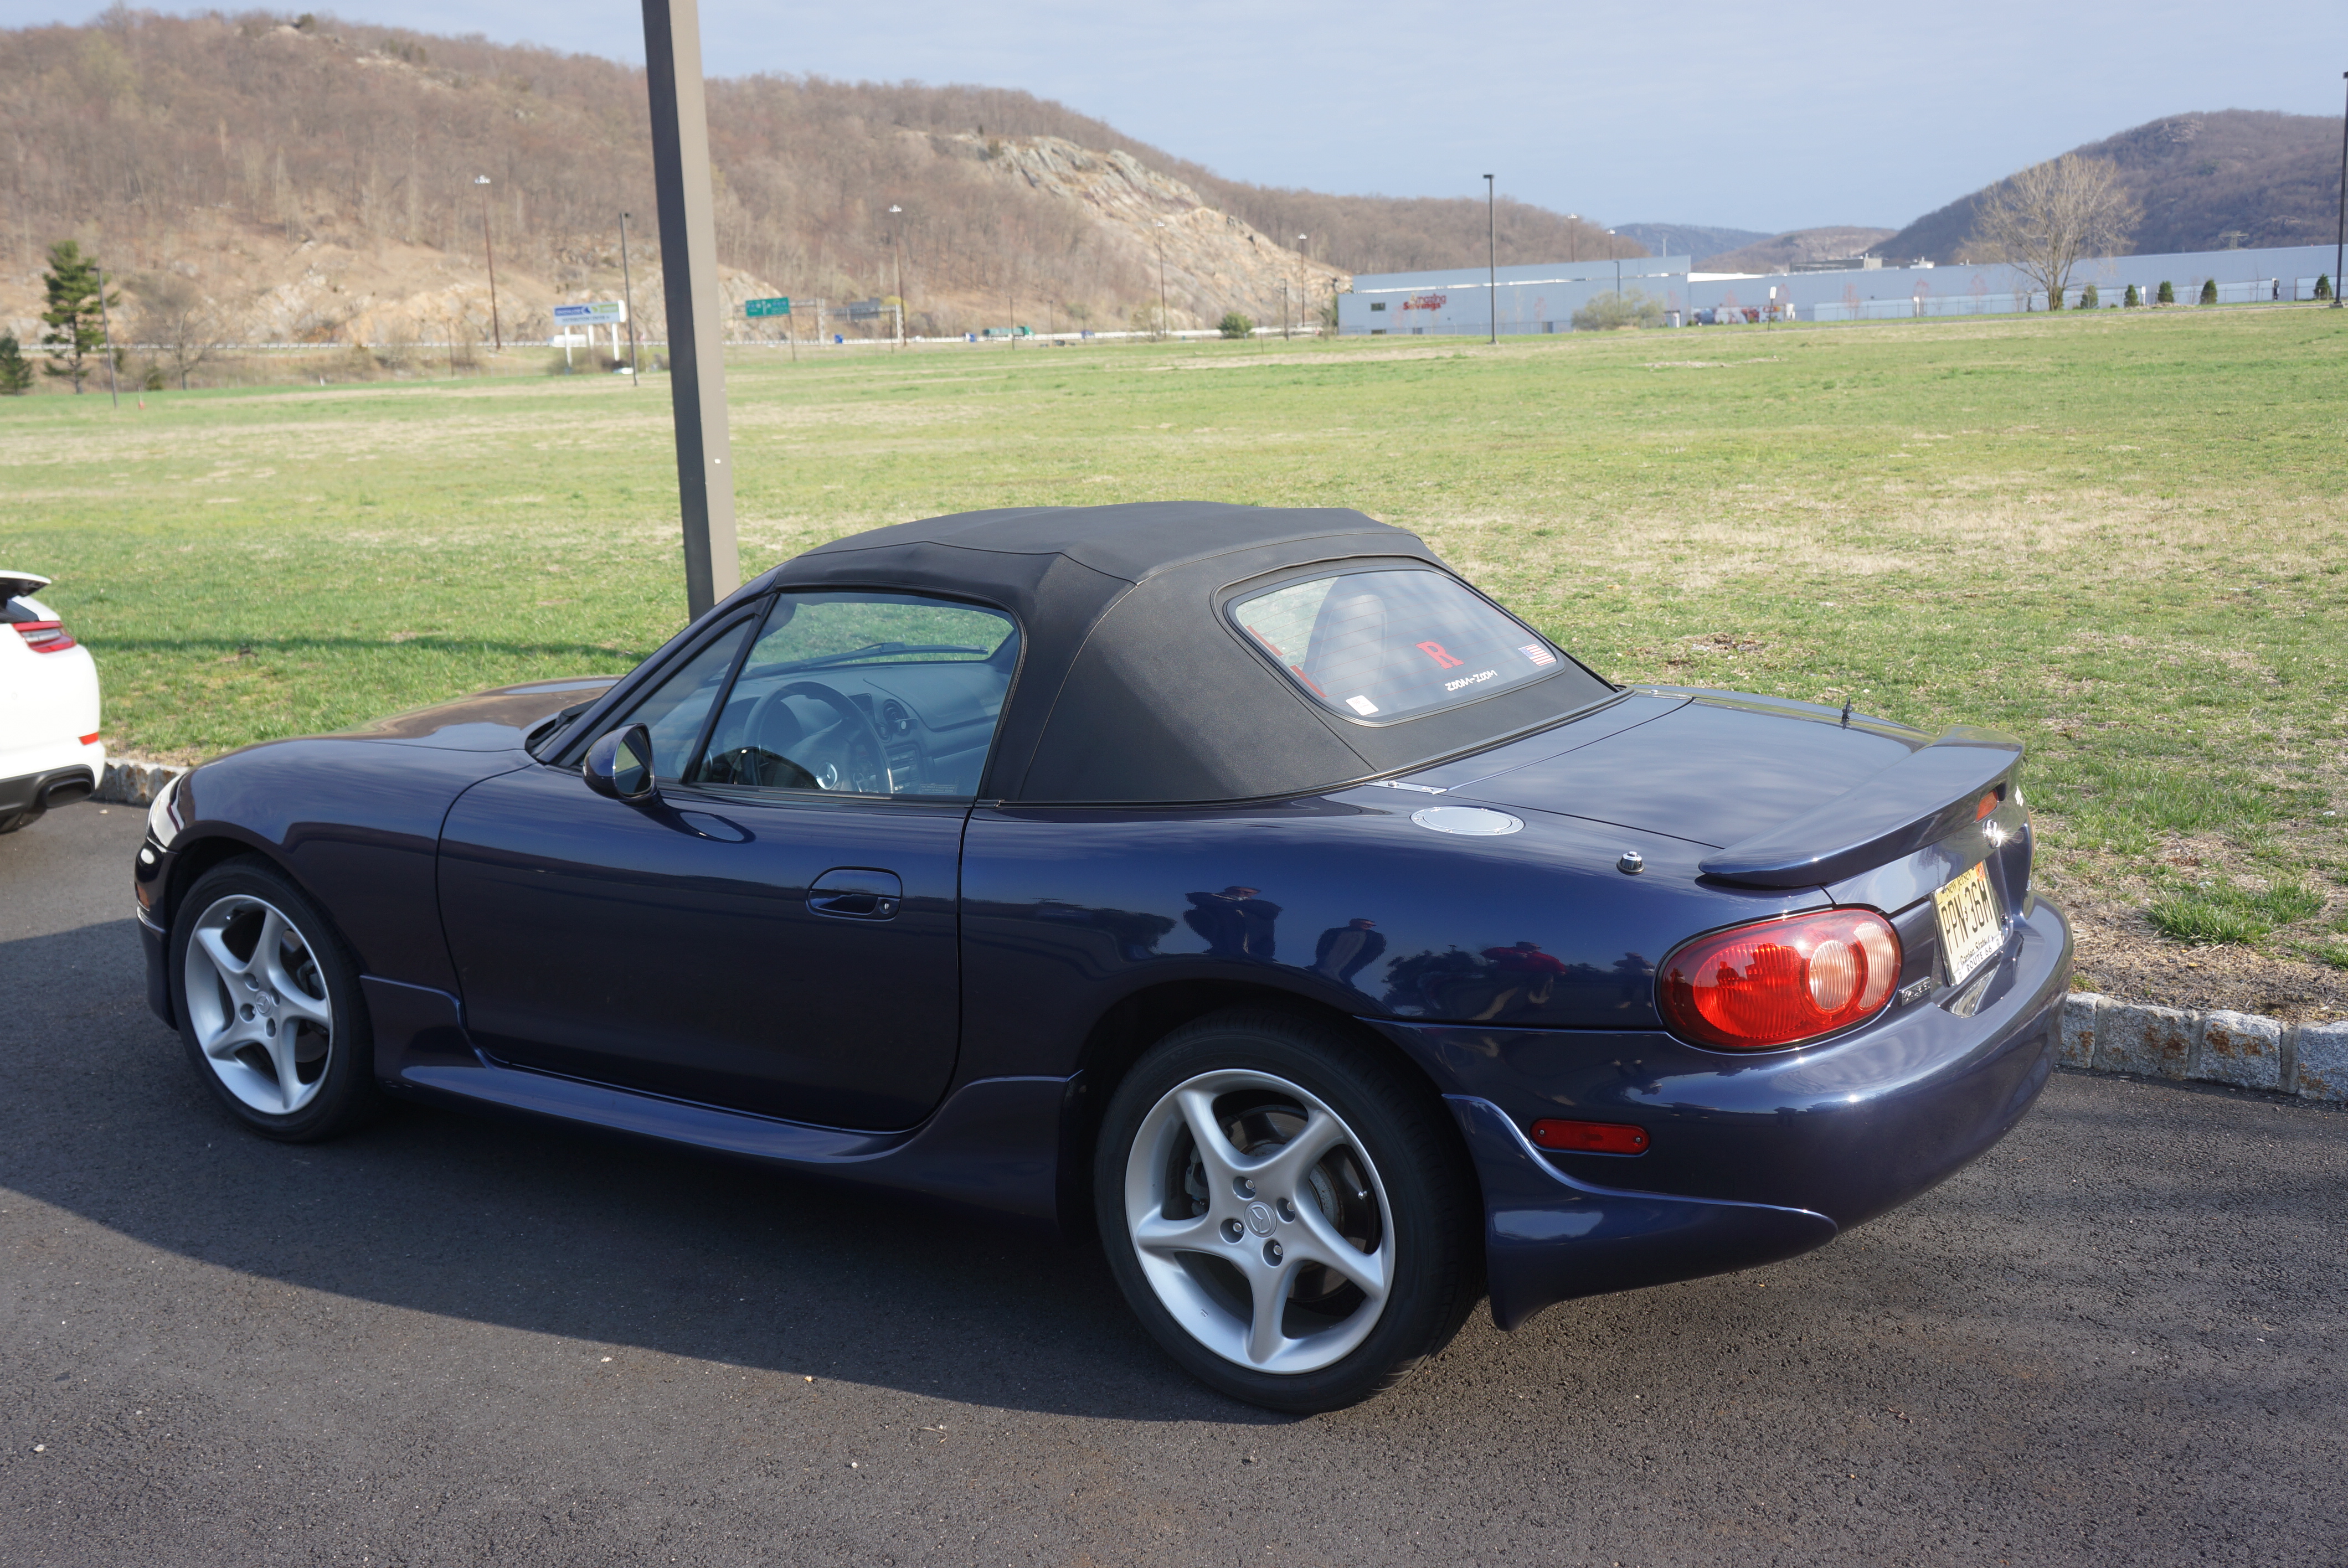
Mazda Miata 2nd gen (NB)
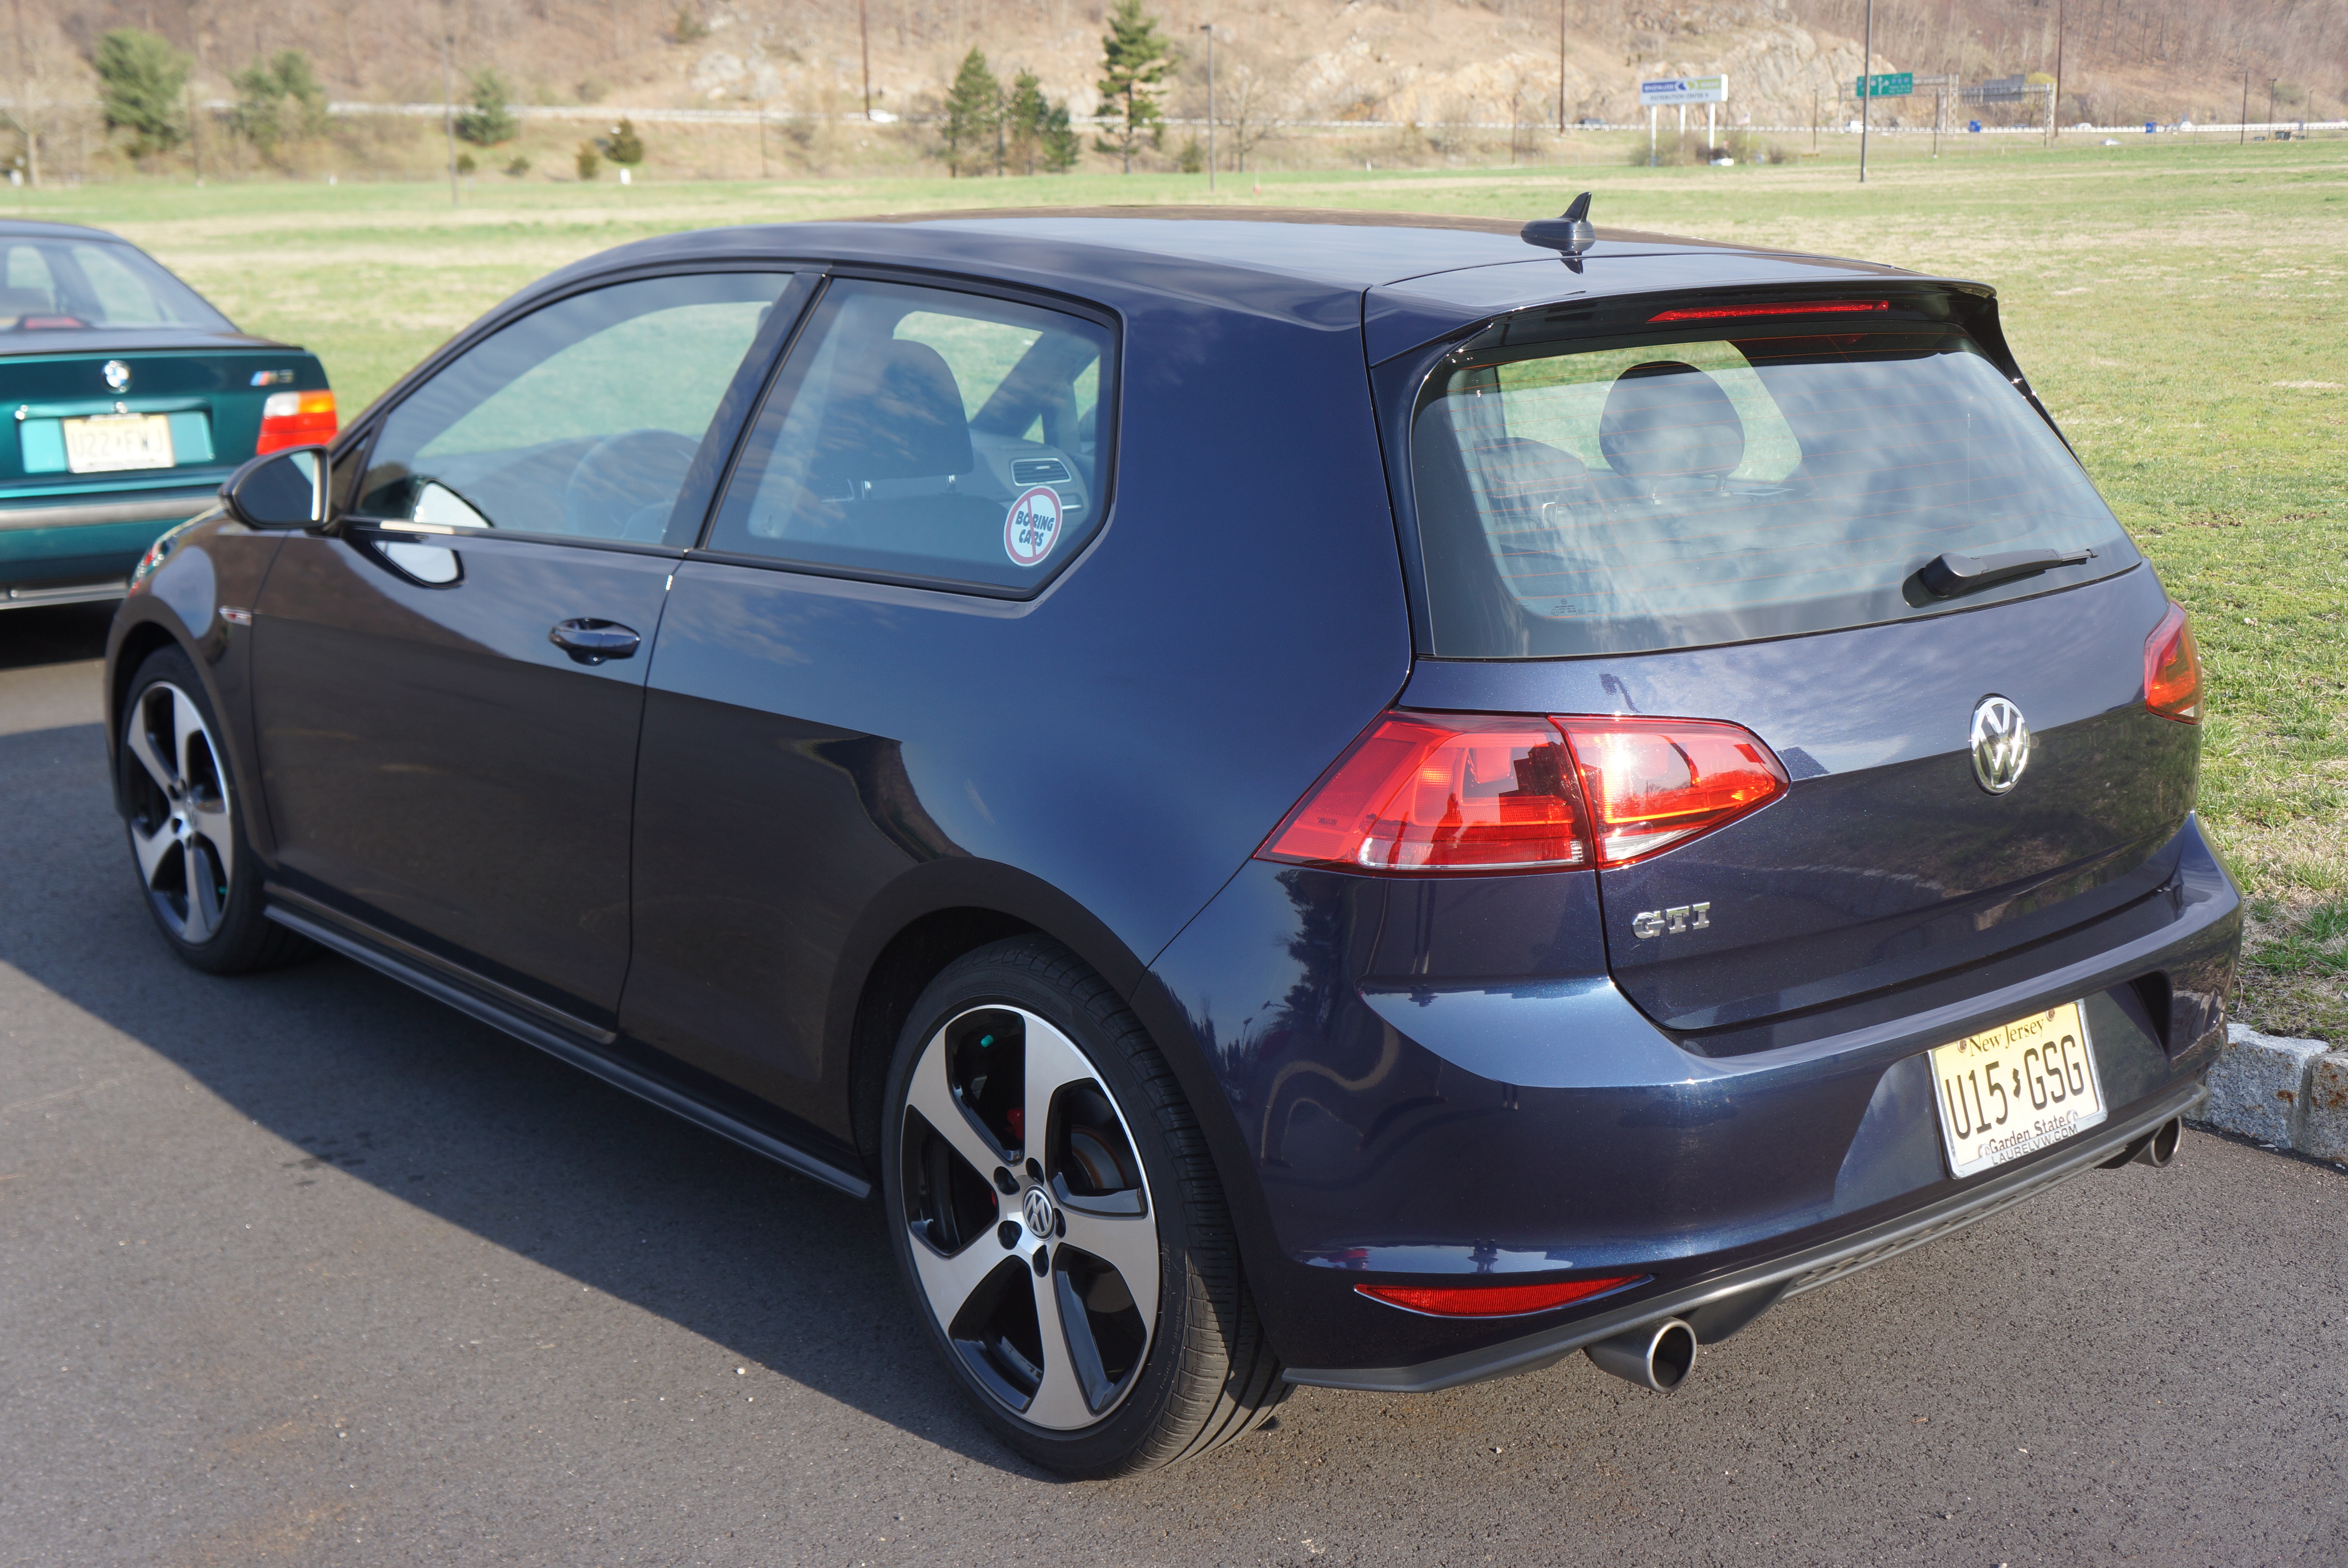
VW GTi
Porsche 911 cabrio
The (mostly) Italian table
The rest of the crew
A Honda Accord coupe is smallish; a Ford Fusion is smallish; they make the Alfa look toyish
When I bought my Alfa Romeo GT 1300 Junior in March of 2013, it was for the express purpose of using it to participate in automotive events. There’s no denying that I have piled on the miles. The four New England 1000 rallies of 2013, 2014, 2015, and 2018, the Alfa National (International) excursion to Montreal in 2017, and two trips to the Greenwich CT Concours have accounted for the bulk of the mileage. Add to that the innumerable local breakfast drives and car shows, and you can understand how in 6 years of ownership I’ve managed to spend 11,000 miles behind the wheel of this fine Italian automobile.
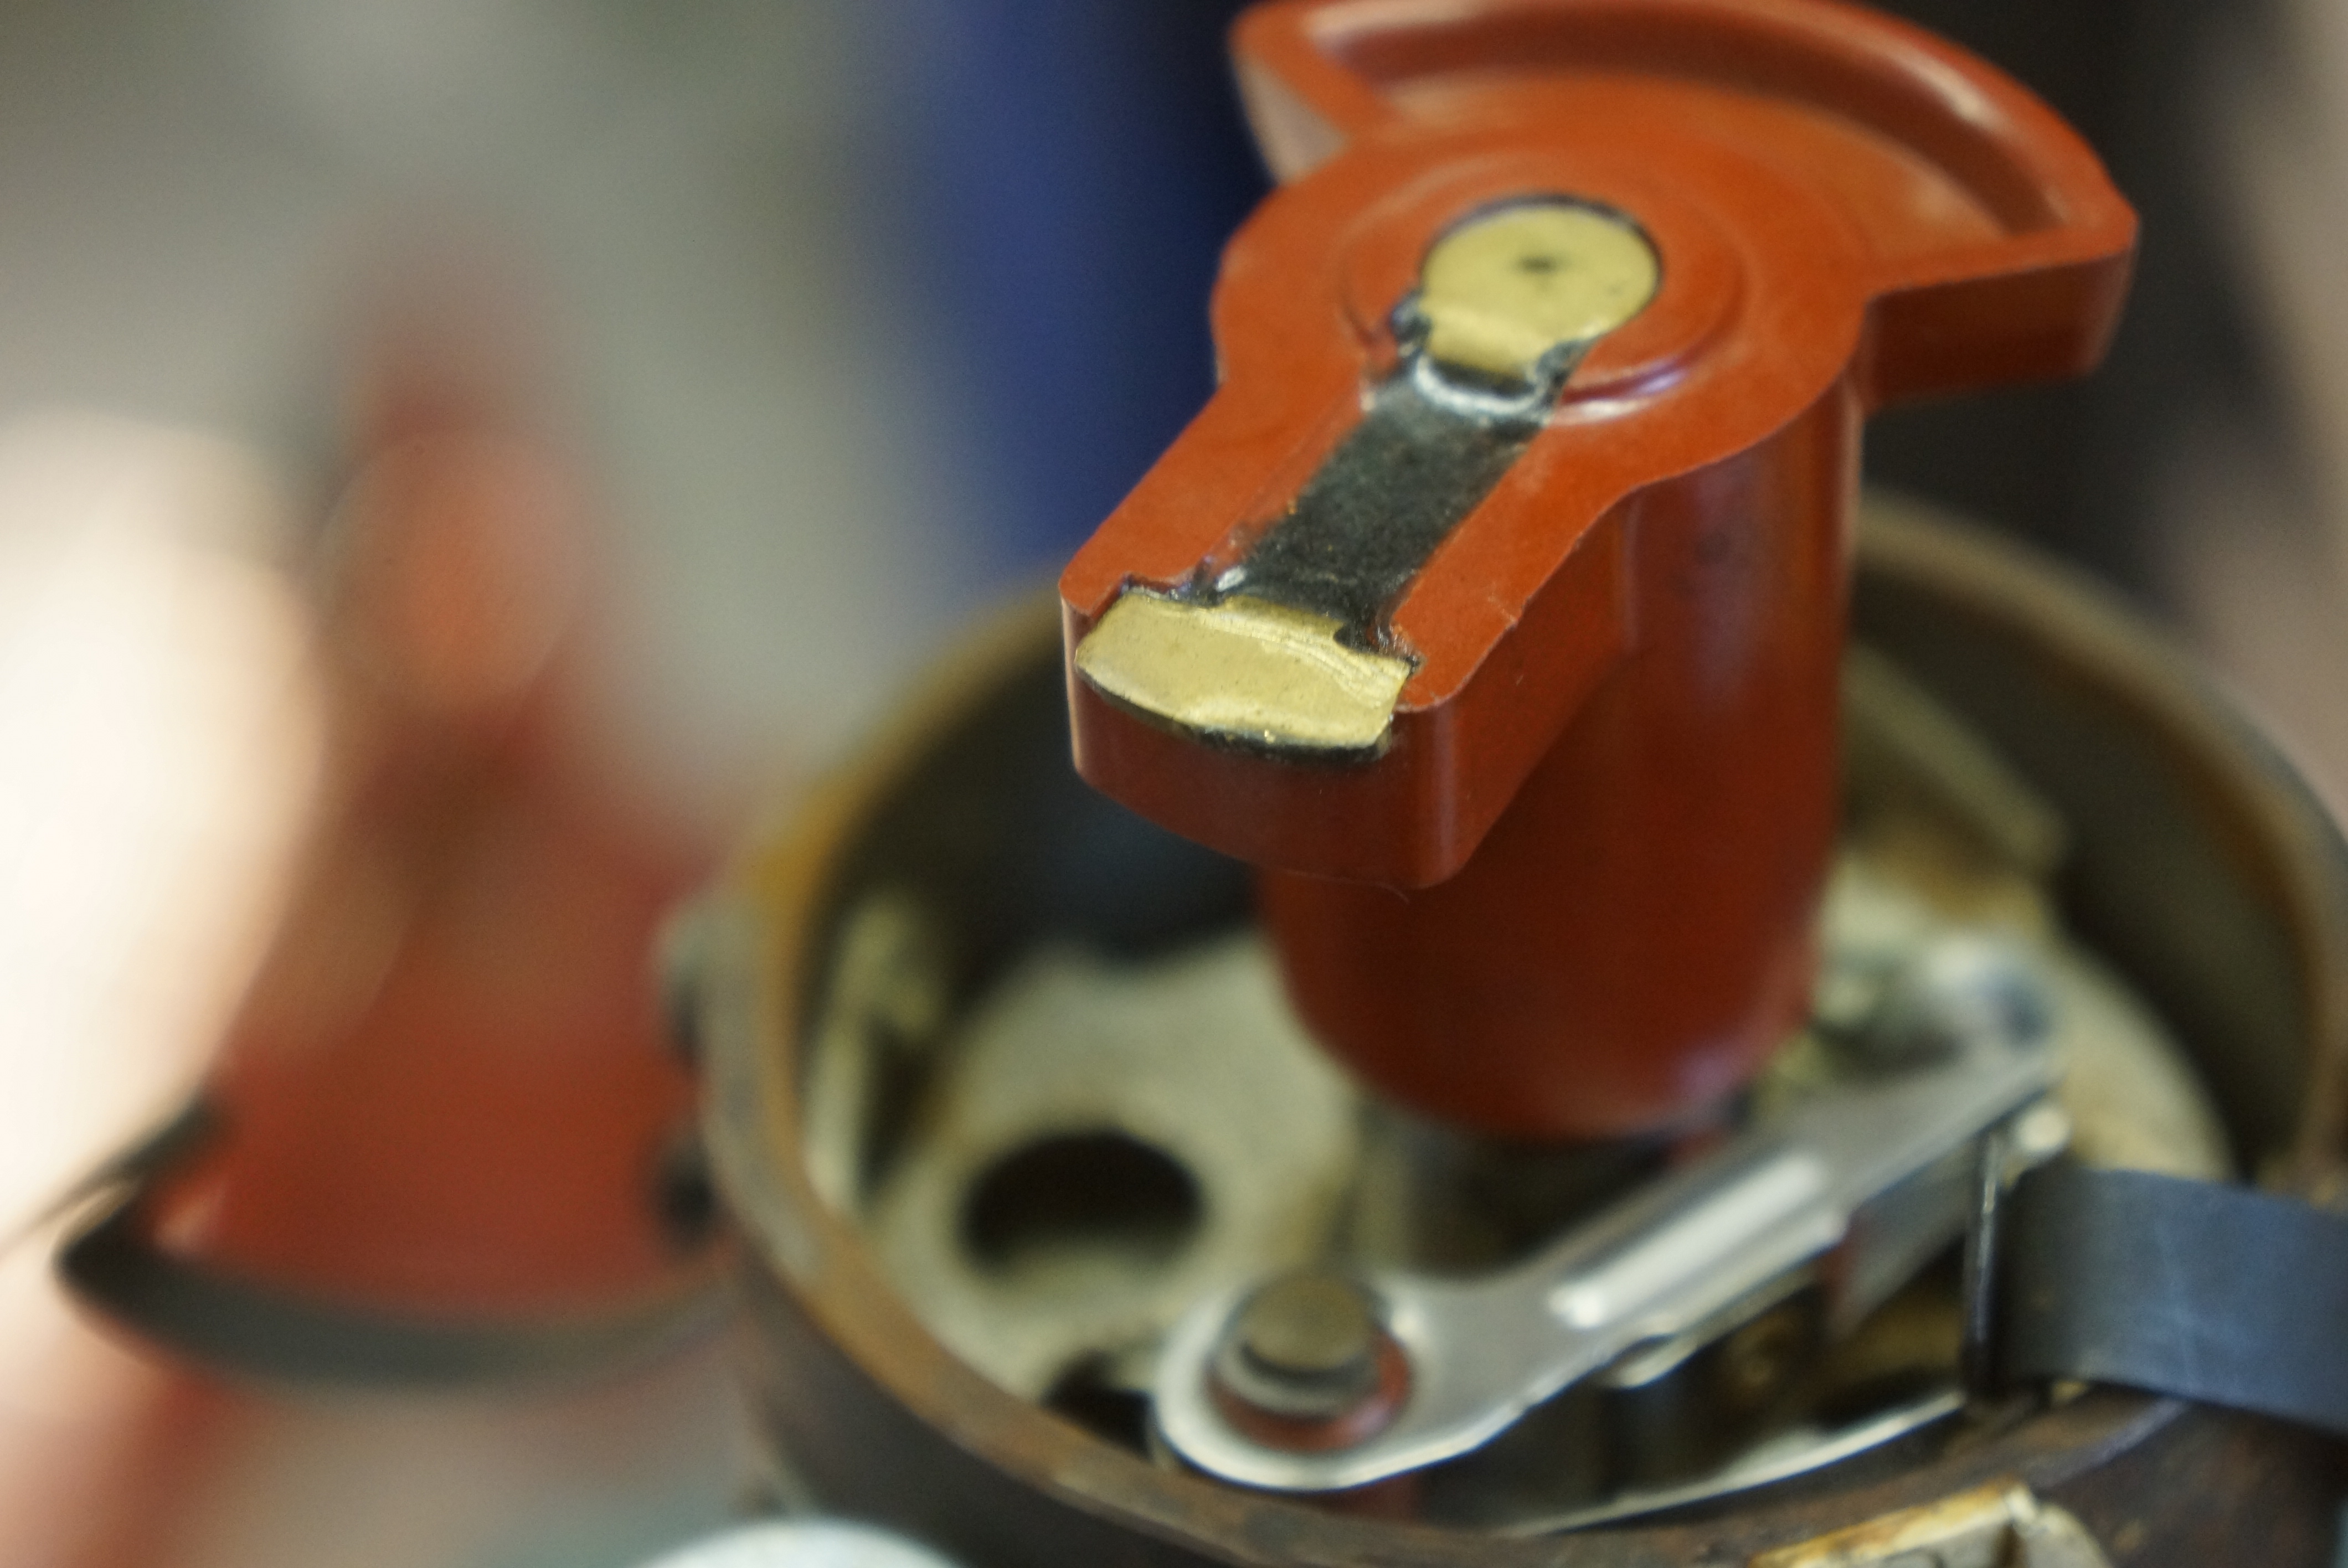
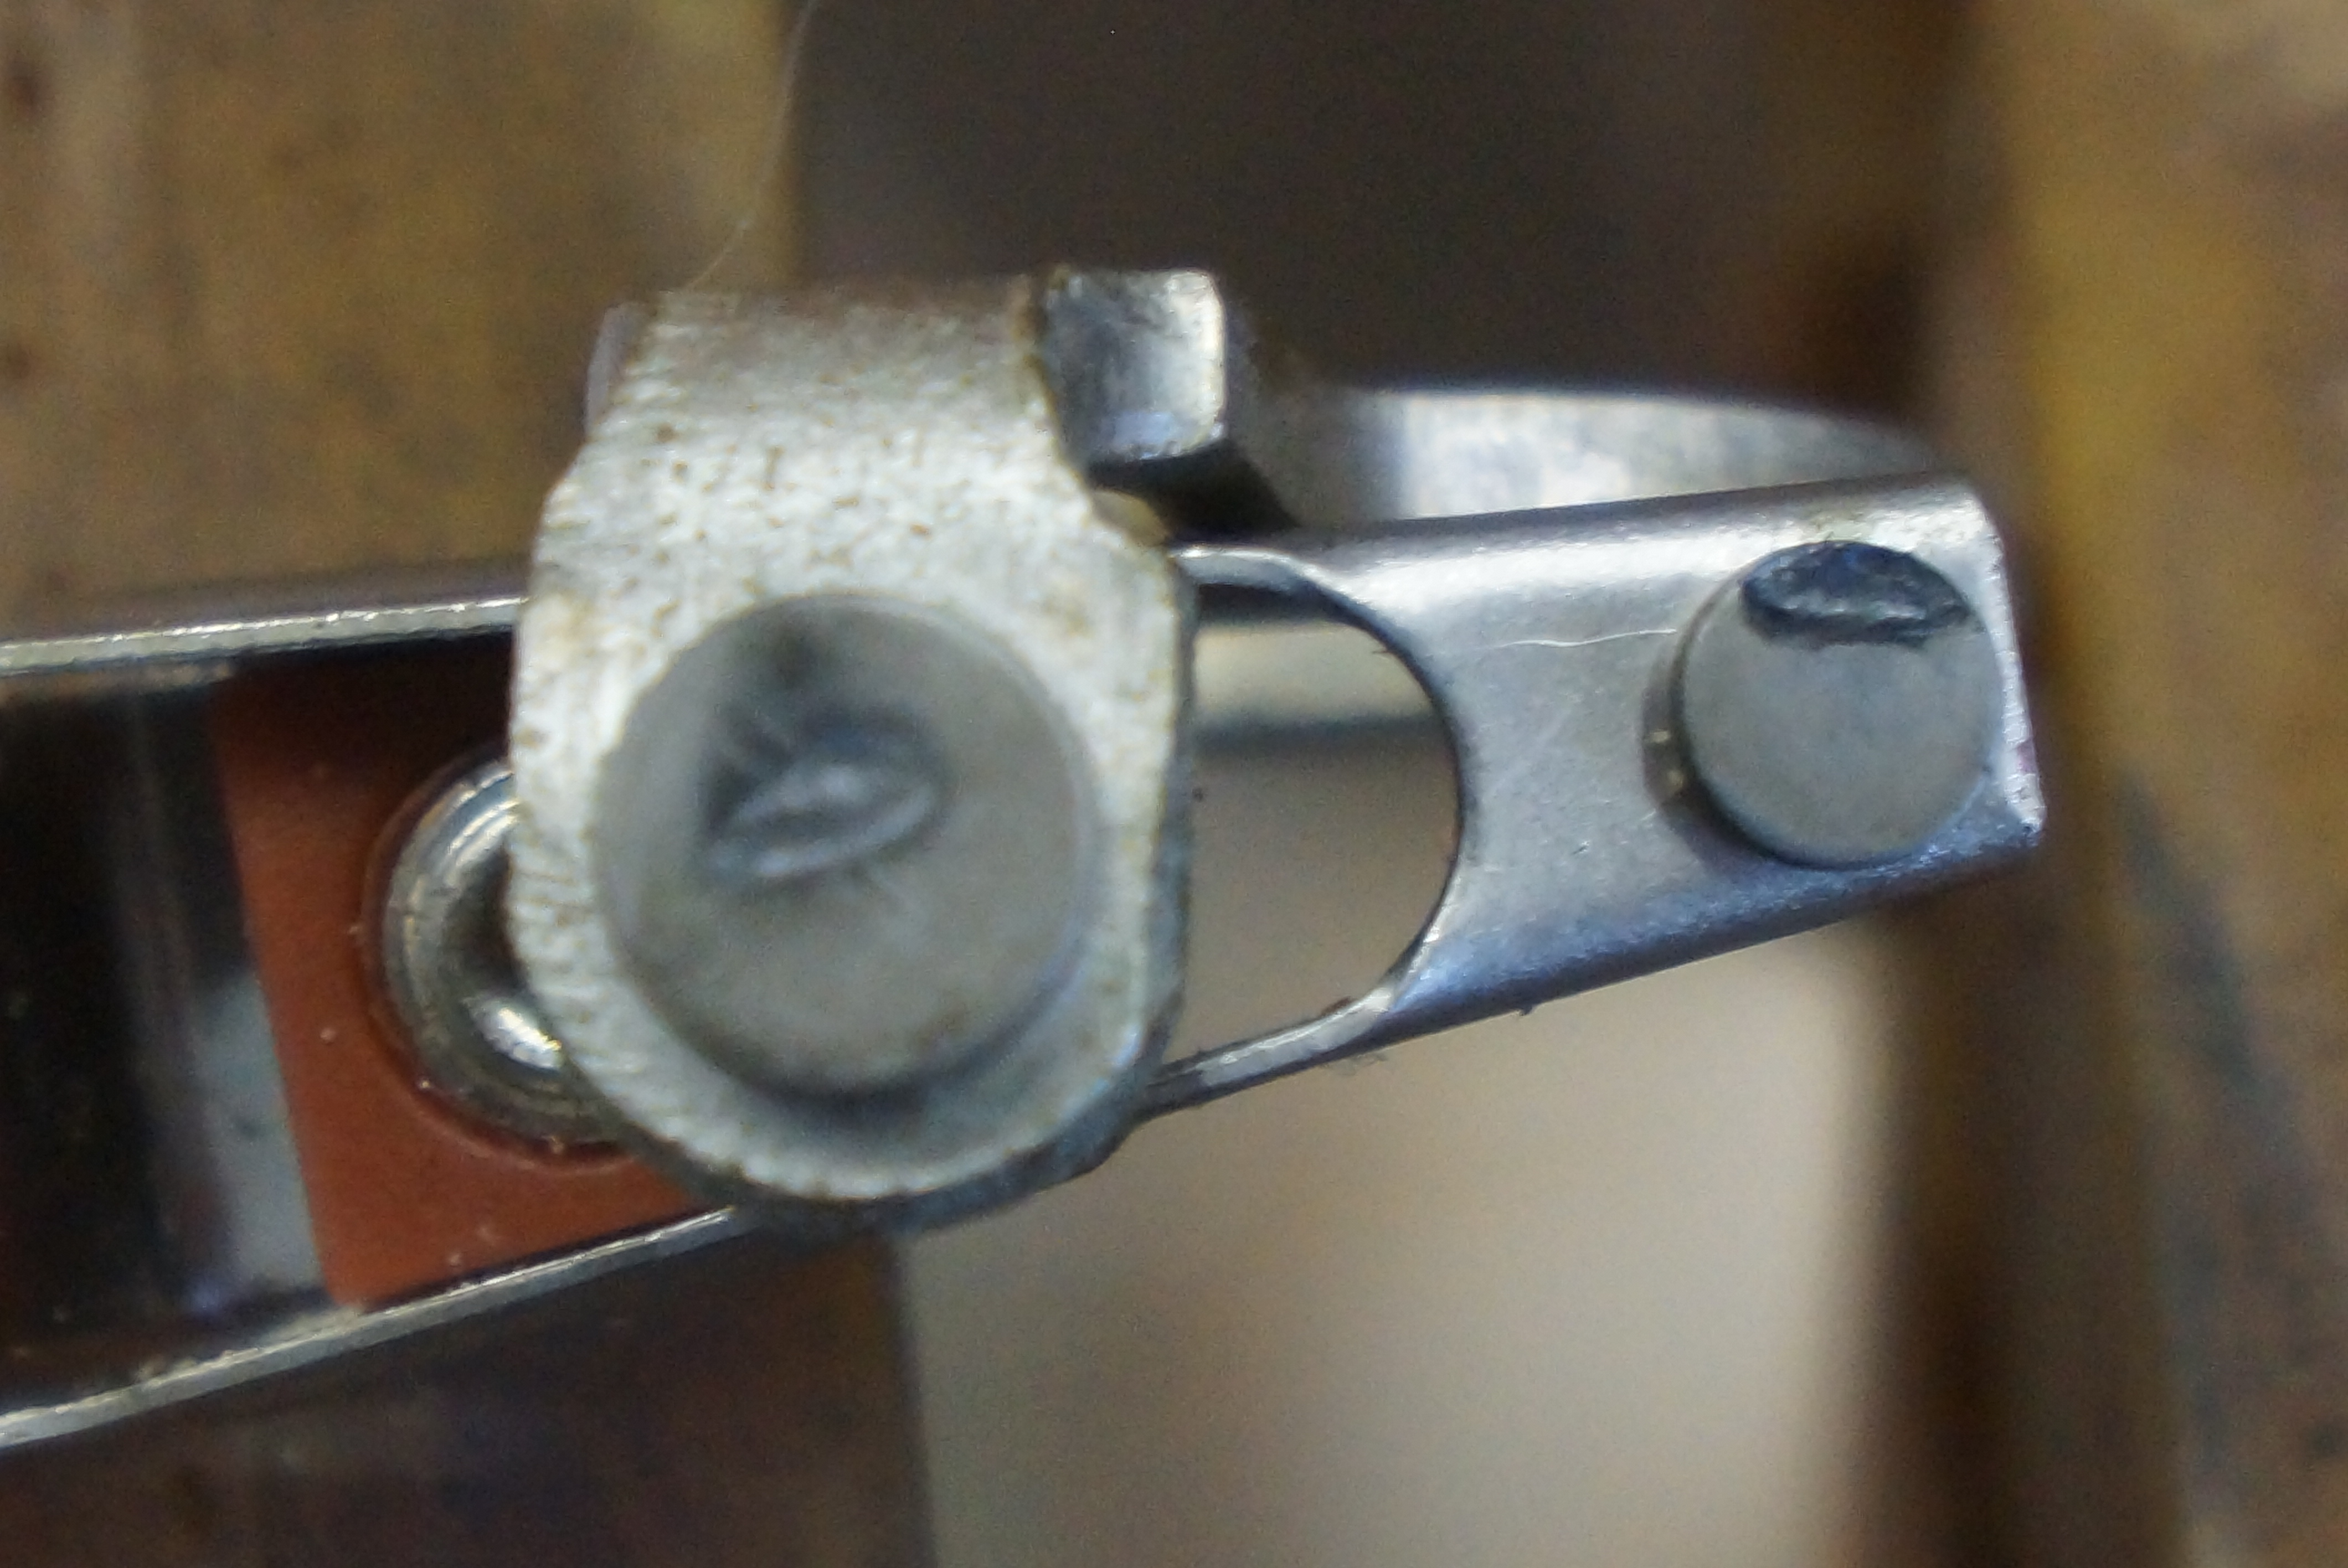
Bosch rotor, unlike ones I serviced on Volvos, uses a set screw to hold it in place.
Old rotor showed tip wear, but appeared normal to me
Alfas, and Italian cars in general get a bad rap as “unreliable”. That’s not been my experience. Except for a dead battery right after purchase, and a failed alternator on the ’18 NE1000, those 11,000 miles have been trouble-free. I’ve mentioned to those who ask that the more I drive the car, the better it seems to run. The other side of that coin is that, as a ‘60s European thoroughbred, the car’s mechanical state of tune must be strictly looked after; indeed, the Alfa maintenance schedule, which requires more frequent service than an American car of similar vintage, should be followed as closely as possible. This is where ability to work on your own vehicle becomes a significant advantage compared to needing to pay someone to do what is in essence straightforward service work.
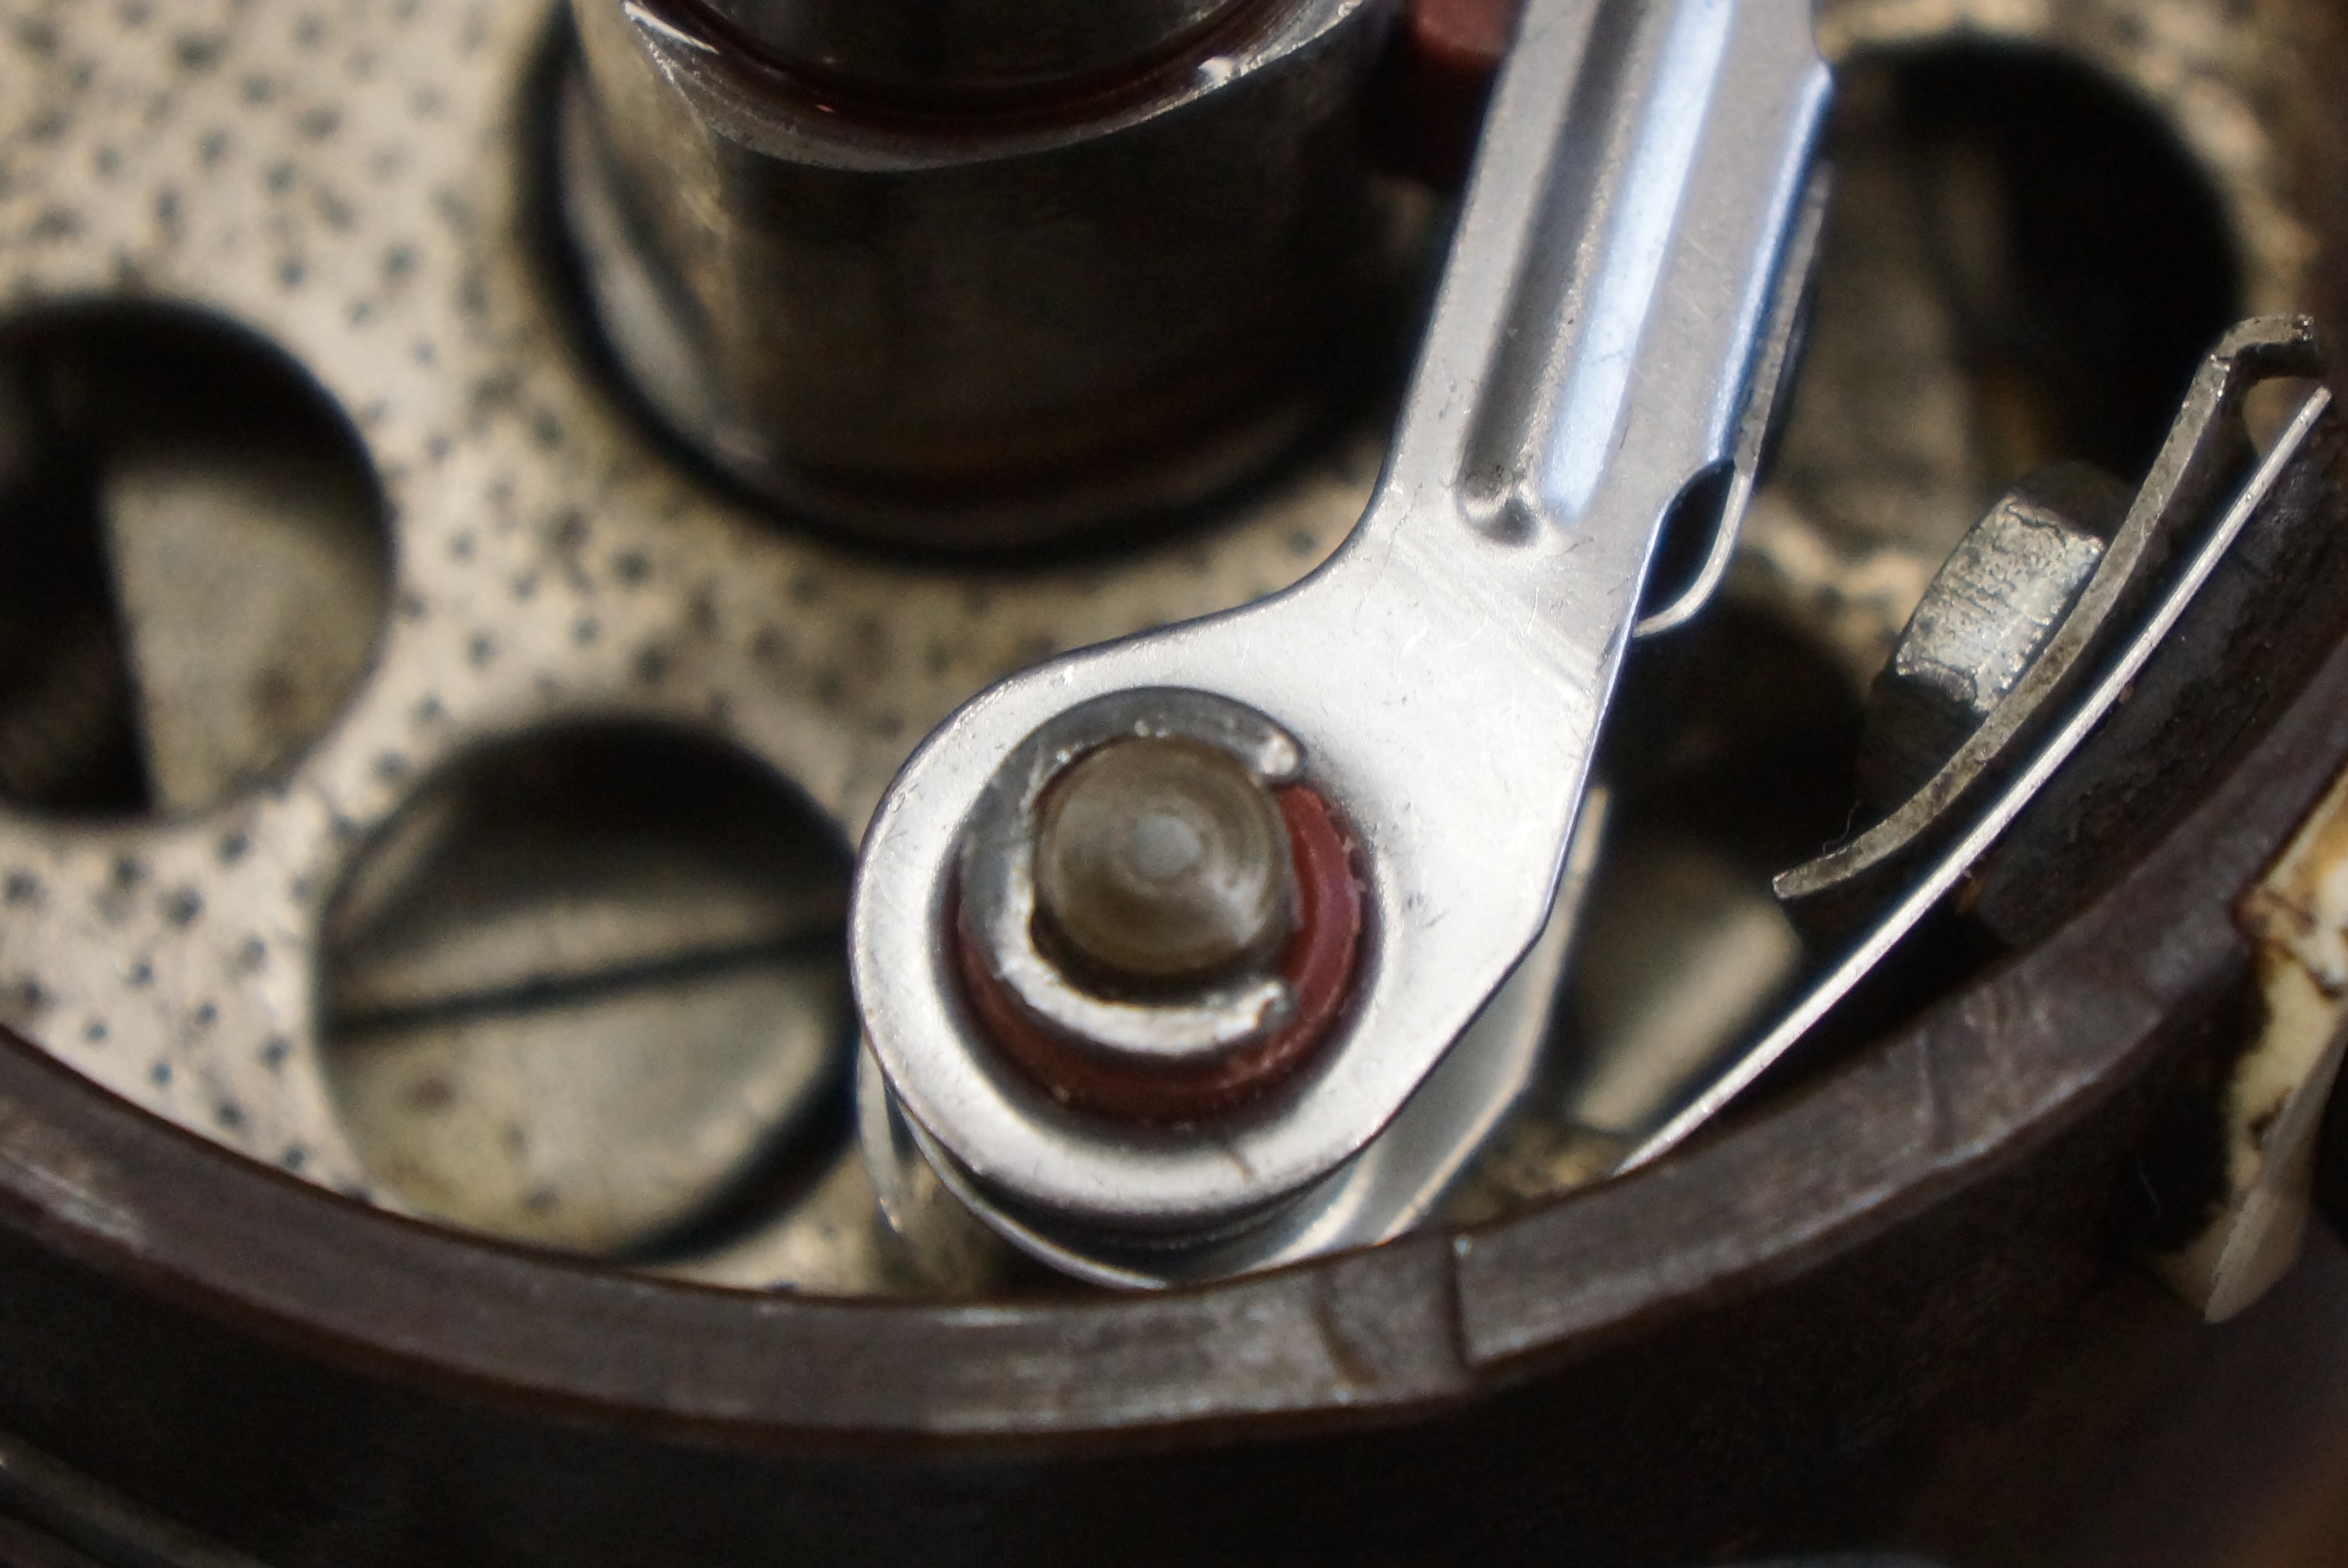
C-clip holds points in place; tricky to remove and hold onto
Points showed rather severe pitting
After I finished the valve adjustment a few weeks ago, I noted that the idle was terrible, and in fact, it was difficult to get the engine to consistently respond to accelerator inputs. My first suspicion was the car’s ignition system, so an order was placed with Classic Alfa for the suite of tune-up parts. (And they spoiled me again, with the package on my front porch is less than 48 hours.)
Bosch rotor is different part number for 1300 compared to US-spec cars- note German “OEL” (oil)
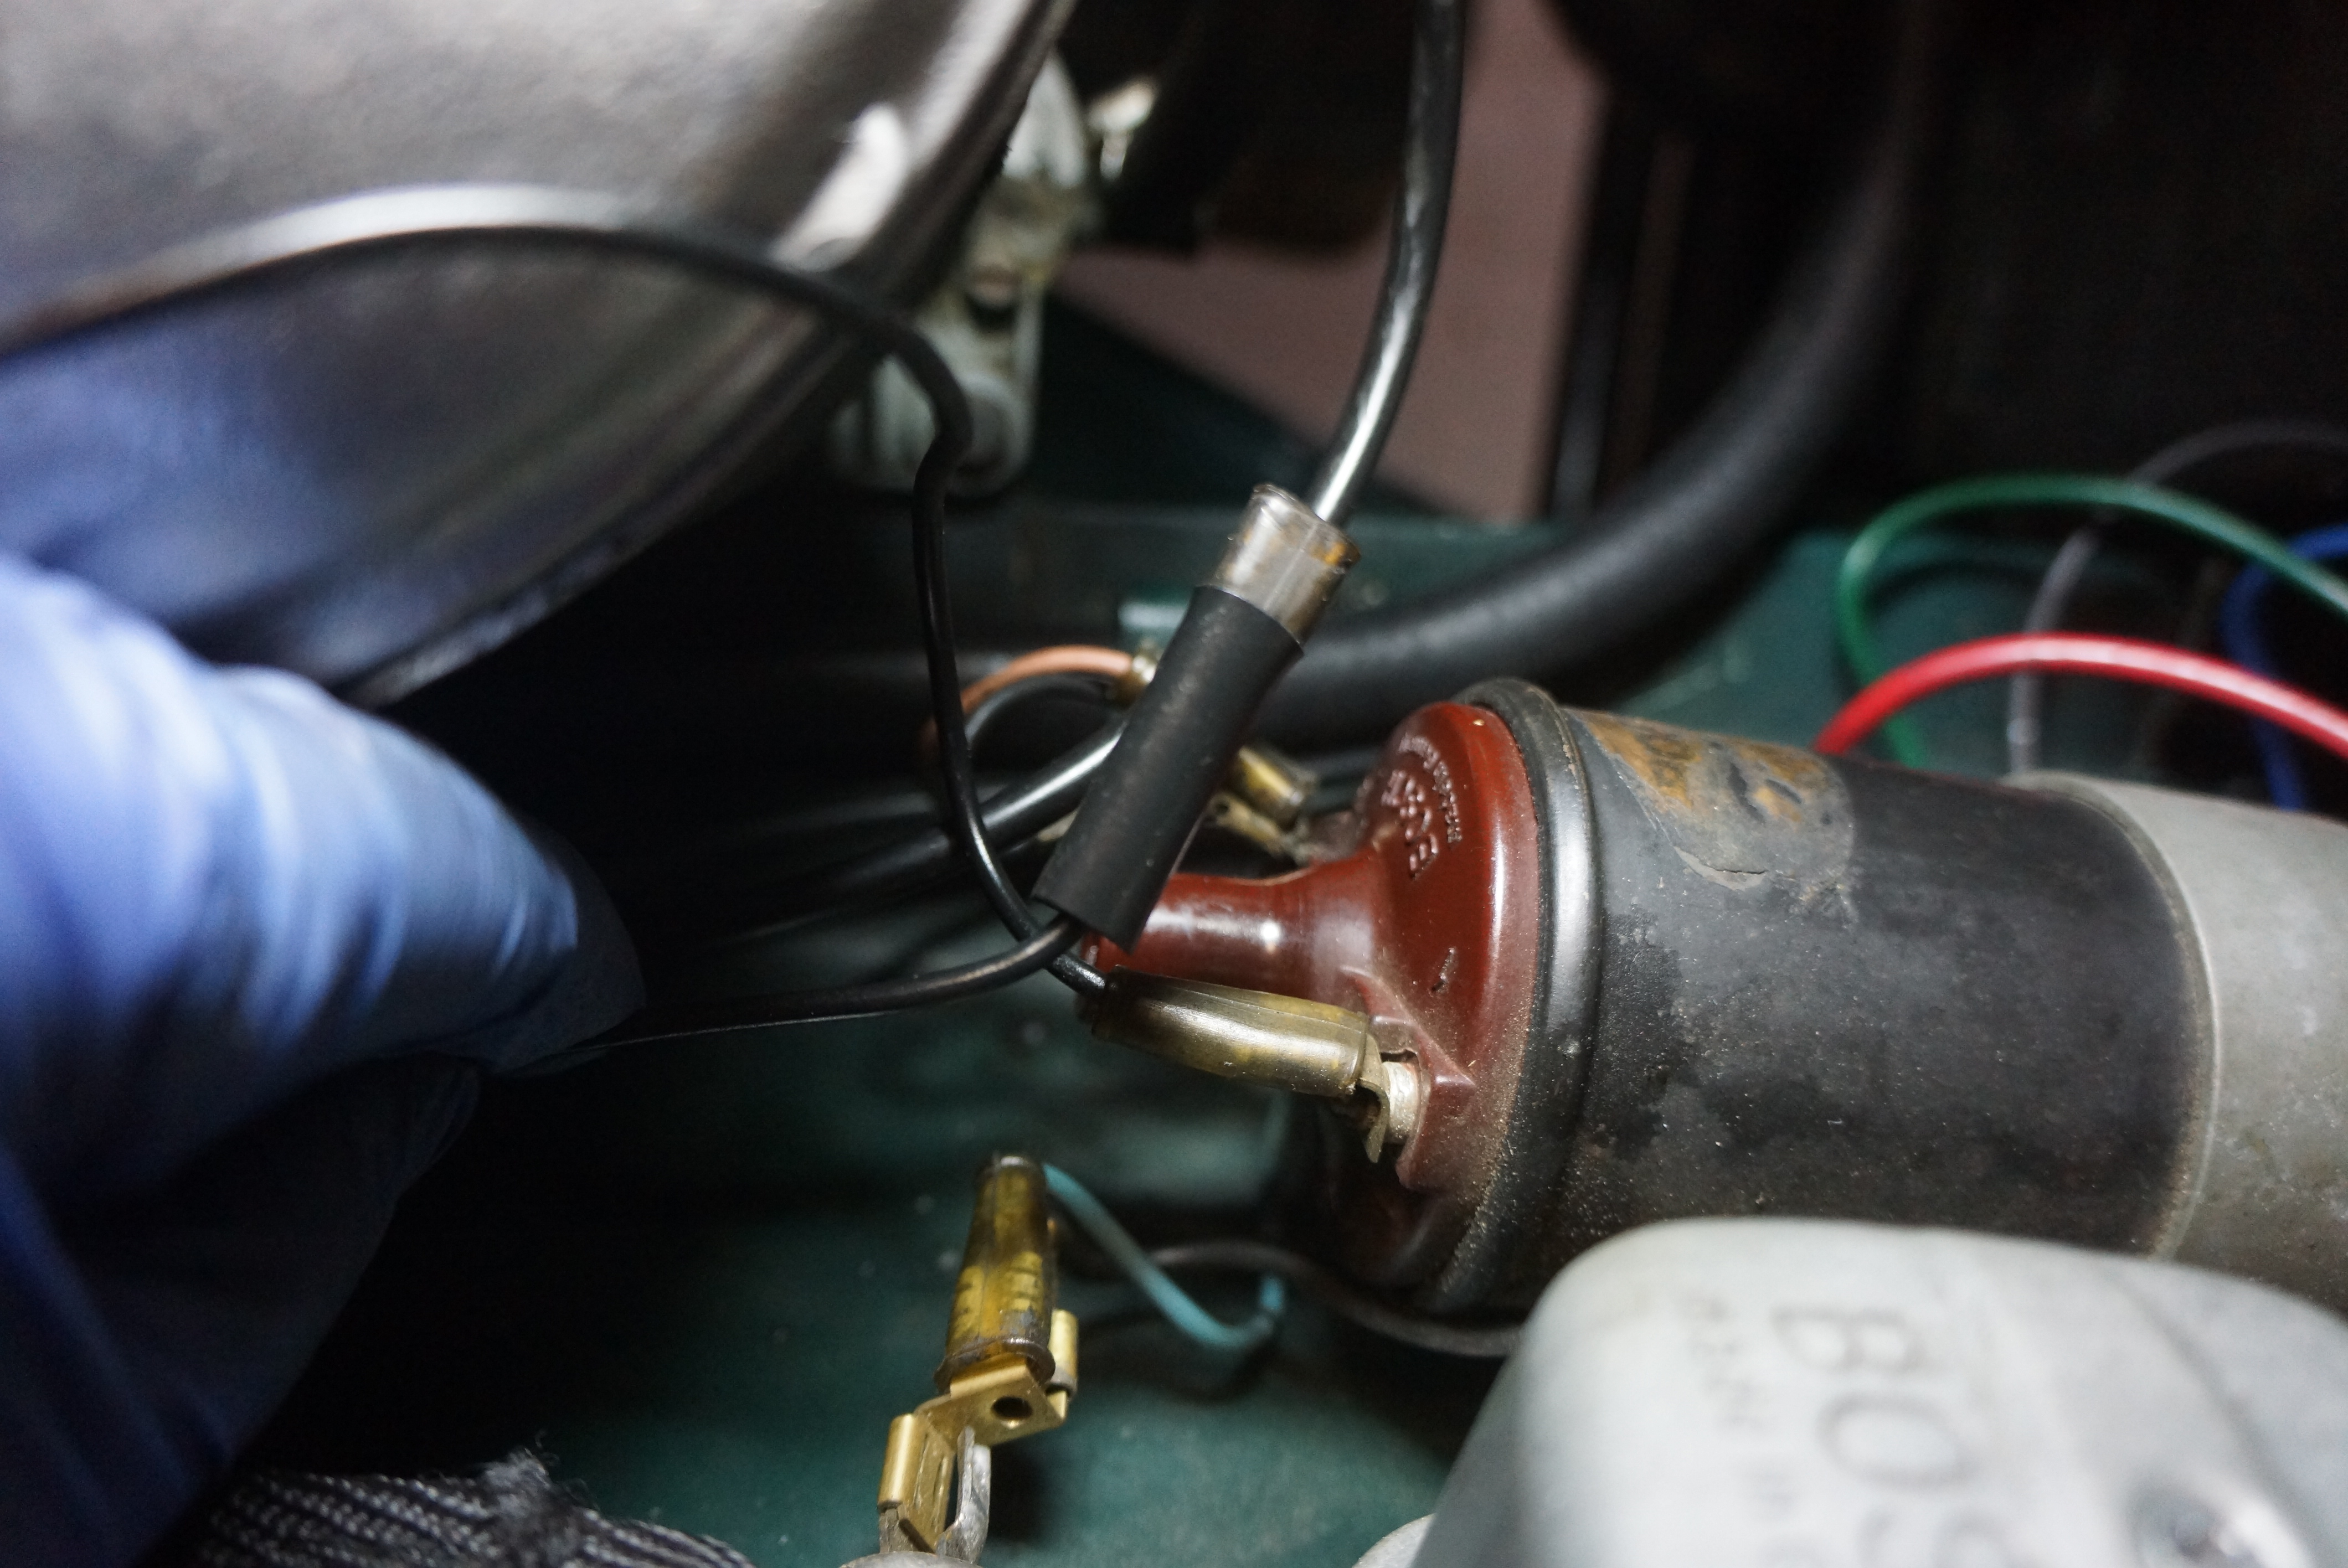
The service books recommend removal of the distributor for service work, and it’s held in place by a single 10mm-headed bolt, so it’s easy to pop it out. Checking the usual suspects for wear, I didn’t see anything severely out of the ordinary, although the points were badly pitted, and the gap was too small.
Freshly-serviced distributor, with new points, condensor, and rotor
I ended up replacing the spark plugs, plug wires, cap, rotor, points, condenser, and, for the first time under my ownership, the coil, which looked original. The car fired right up, and as I’ve noticed immediately after prior tunes, the tip-in is magnificent. I took the car for an all-too-brief run around the neighborhood, and felt infinitely better about all the driving I’ve got planned for the Alfa for this year, especially the Alfa Club Convention in Pittsburgh in July.
In addition to replacing coil (old one here), I fabricated a new coil-to-distributor wire
The one remaining item on the tune-up to-do list is the ignition timing. If I’m reading the books correctly, the best way to set the distributor timing for utmost performance is by checking it at 5,000 rpm. At that engine speed the “M” (for “massimo” or maximum) should line up with the timing pointer. The books also recommend NOT adjusting the distributor while at 5,000 rpm, and that’s good advice.
Note to self: every year, the ignition system needs to be checked, adjusted, and renewed as necessary at the start of every driving season.
As you read in “Alfa Romeo Valve Adjustment, Part 1” (or if you skipped your reading assignment, you can find it here), the valve gaps on my 1300 engine were out of whack, especially on the intake side. With cams temporarily removed, I measured all the existing shims, did the algebra to calculate the sizes of the needed shims, and placed my order with Classic Alfa in the UK. I was not the least bit surprised when the order I placed at 10 p.m. on a Saturday night landed on my front stoop before I got home from work on Tuesday. (I need to email them and enquire what happens after Brexit, presuming that Brexit happens.)
This magnet was very helpful in encouraging the slippery follower to come out
The following weekend, all the old shims came out, and the new shims went in, again following the “one cylinder at a time” rule I established so as not to cross-install the followers which must remain with their original cylinders. When reinstalling the cams, I could not get the timing marks between the cams and front bearing caps to line up. It made me nervous enough that I removed and reinstalled the cams a second time (remember that the timing chain remained attached to the sprockets). I finally convinced myself that once I released the bolt holding back the spring tension in the timing chain tensioner, all would return to sync, and that is exactly what happened. With the tensioner pressing against the chain, I rotated the crank and cams through two complete revolutions, and then tightened the bolt in the spring tensioner. The marks were still aligned, thankfully.
Valve stem without shim
and with shim in place
I double-checked and wrote down all the new valve clearances, and all seemed good (but read on). Since I had the spark plugs out, a new set of NGK B7ES plugs, which are in stock at my local Advance Auto Parts store, went in. With plug wires, intake plenum, and air filter hose back in place, it was time to attempt to start this baby, remembering that the engine had not been run since the car went to sleep the previous autumn. The engine started on the second try, however, there was an unhealthy miss at idle. I shut it down, and made plans for a complete tune-up, which was next on the Alfa’s to-do list anyway.
Never-seize coating on plug threads
Postscript: I jotted down all the “new” valve clearances, and really didn’t give them a second glance, undoubtedly presuming that everything was done correctly. Today, while composing this blog post, I noticed that my spec for intake valve #3, .450mm, was unchanged from its original measurement, yet I have no doubt that the 2.15mm shim which had been in there was replaced with a 2.10mm shim, which means that the new measurement should have been .500mm. For now, I’m leaving this alone for several reasons: valve #3 was the closest to spec of all the intake valves during the original check; testing the thicknesses of the new shims revealed that how tightly I cranked on my micrometer made a difference in the measurement (including the effect of residual oil on the shim); and I’m not yanking that cam again for 0.05mm!
The owner’s manual for my 1967 Alfa Romeo GT 1300 Junior calls for the engine valve clearances to be checked every 18,000 kilometers. According to Google Calculator (before Google Calculator I would have used my slide rule), that’s every 11,185 miles. Coincidentally, I’ve put almost exactly 11,000 miles on the Alfa since purchasing it in March 2013. So in part to prepare for what is anticipated to be a very busy 2019 driving season, and in part because I really don’t know when this was last done, I decided to check all 8 valve clearances (4-cylinder engine, 2 valves per cylinder equals 8 valves).
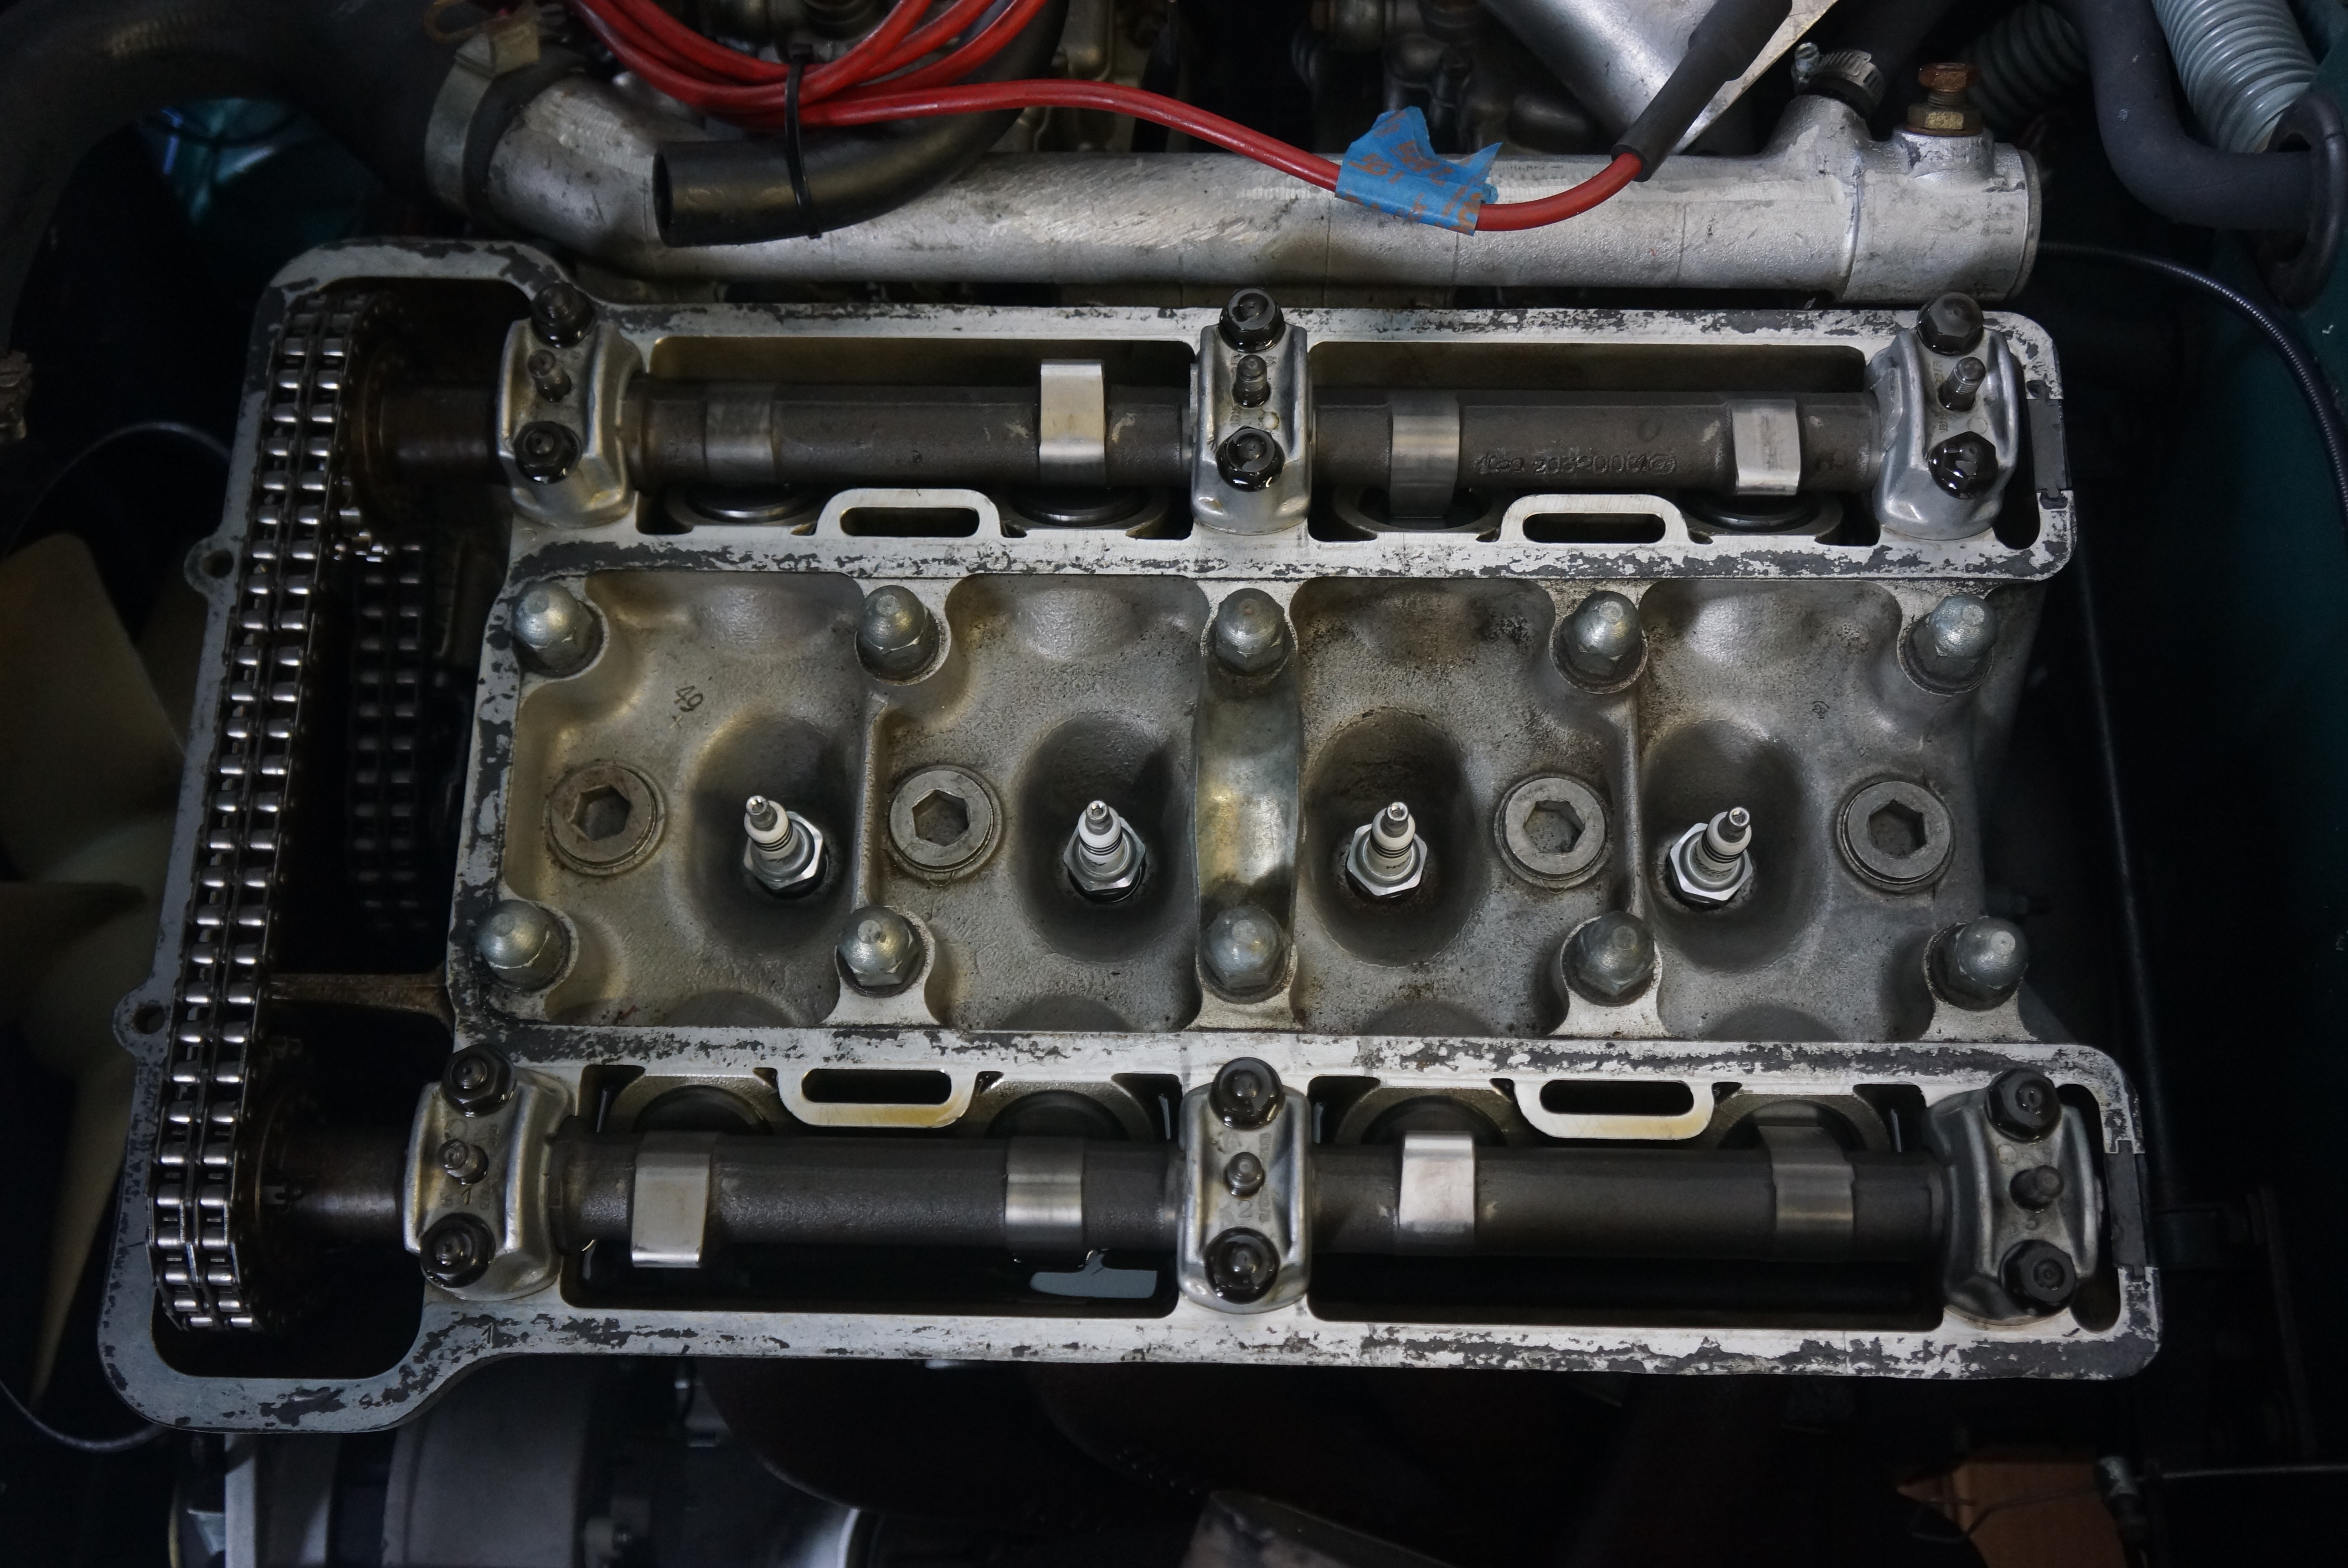
The Alfa engine, before any disassembly
Accessing the valves and followers is the simple part. This overhead-cam engine has its two camshafts at the very top. The valve cover can be removed once the spark plug leads, air hose, and the top of the intake plenum are out of the way, which is a 10-minute affair. The valve cover is held in place by 6 large Allen screws along the top, and two bolts at the front. I had never had the valve cover off this engine before, and my first reaction was one of pleasant surprise at how clean the engine looked.
Valve cover removed
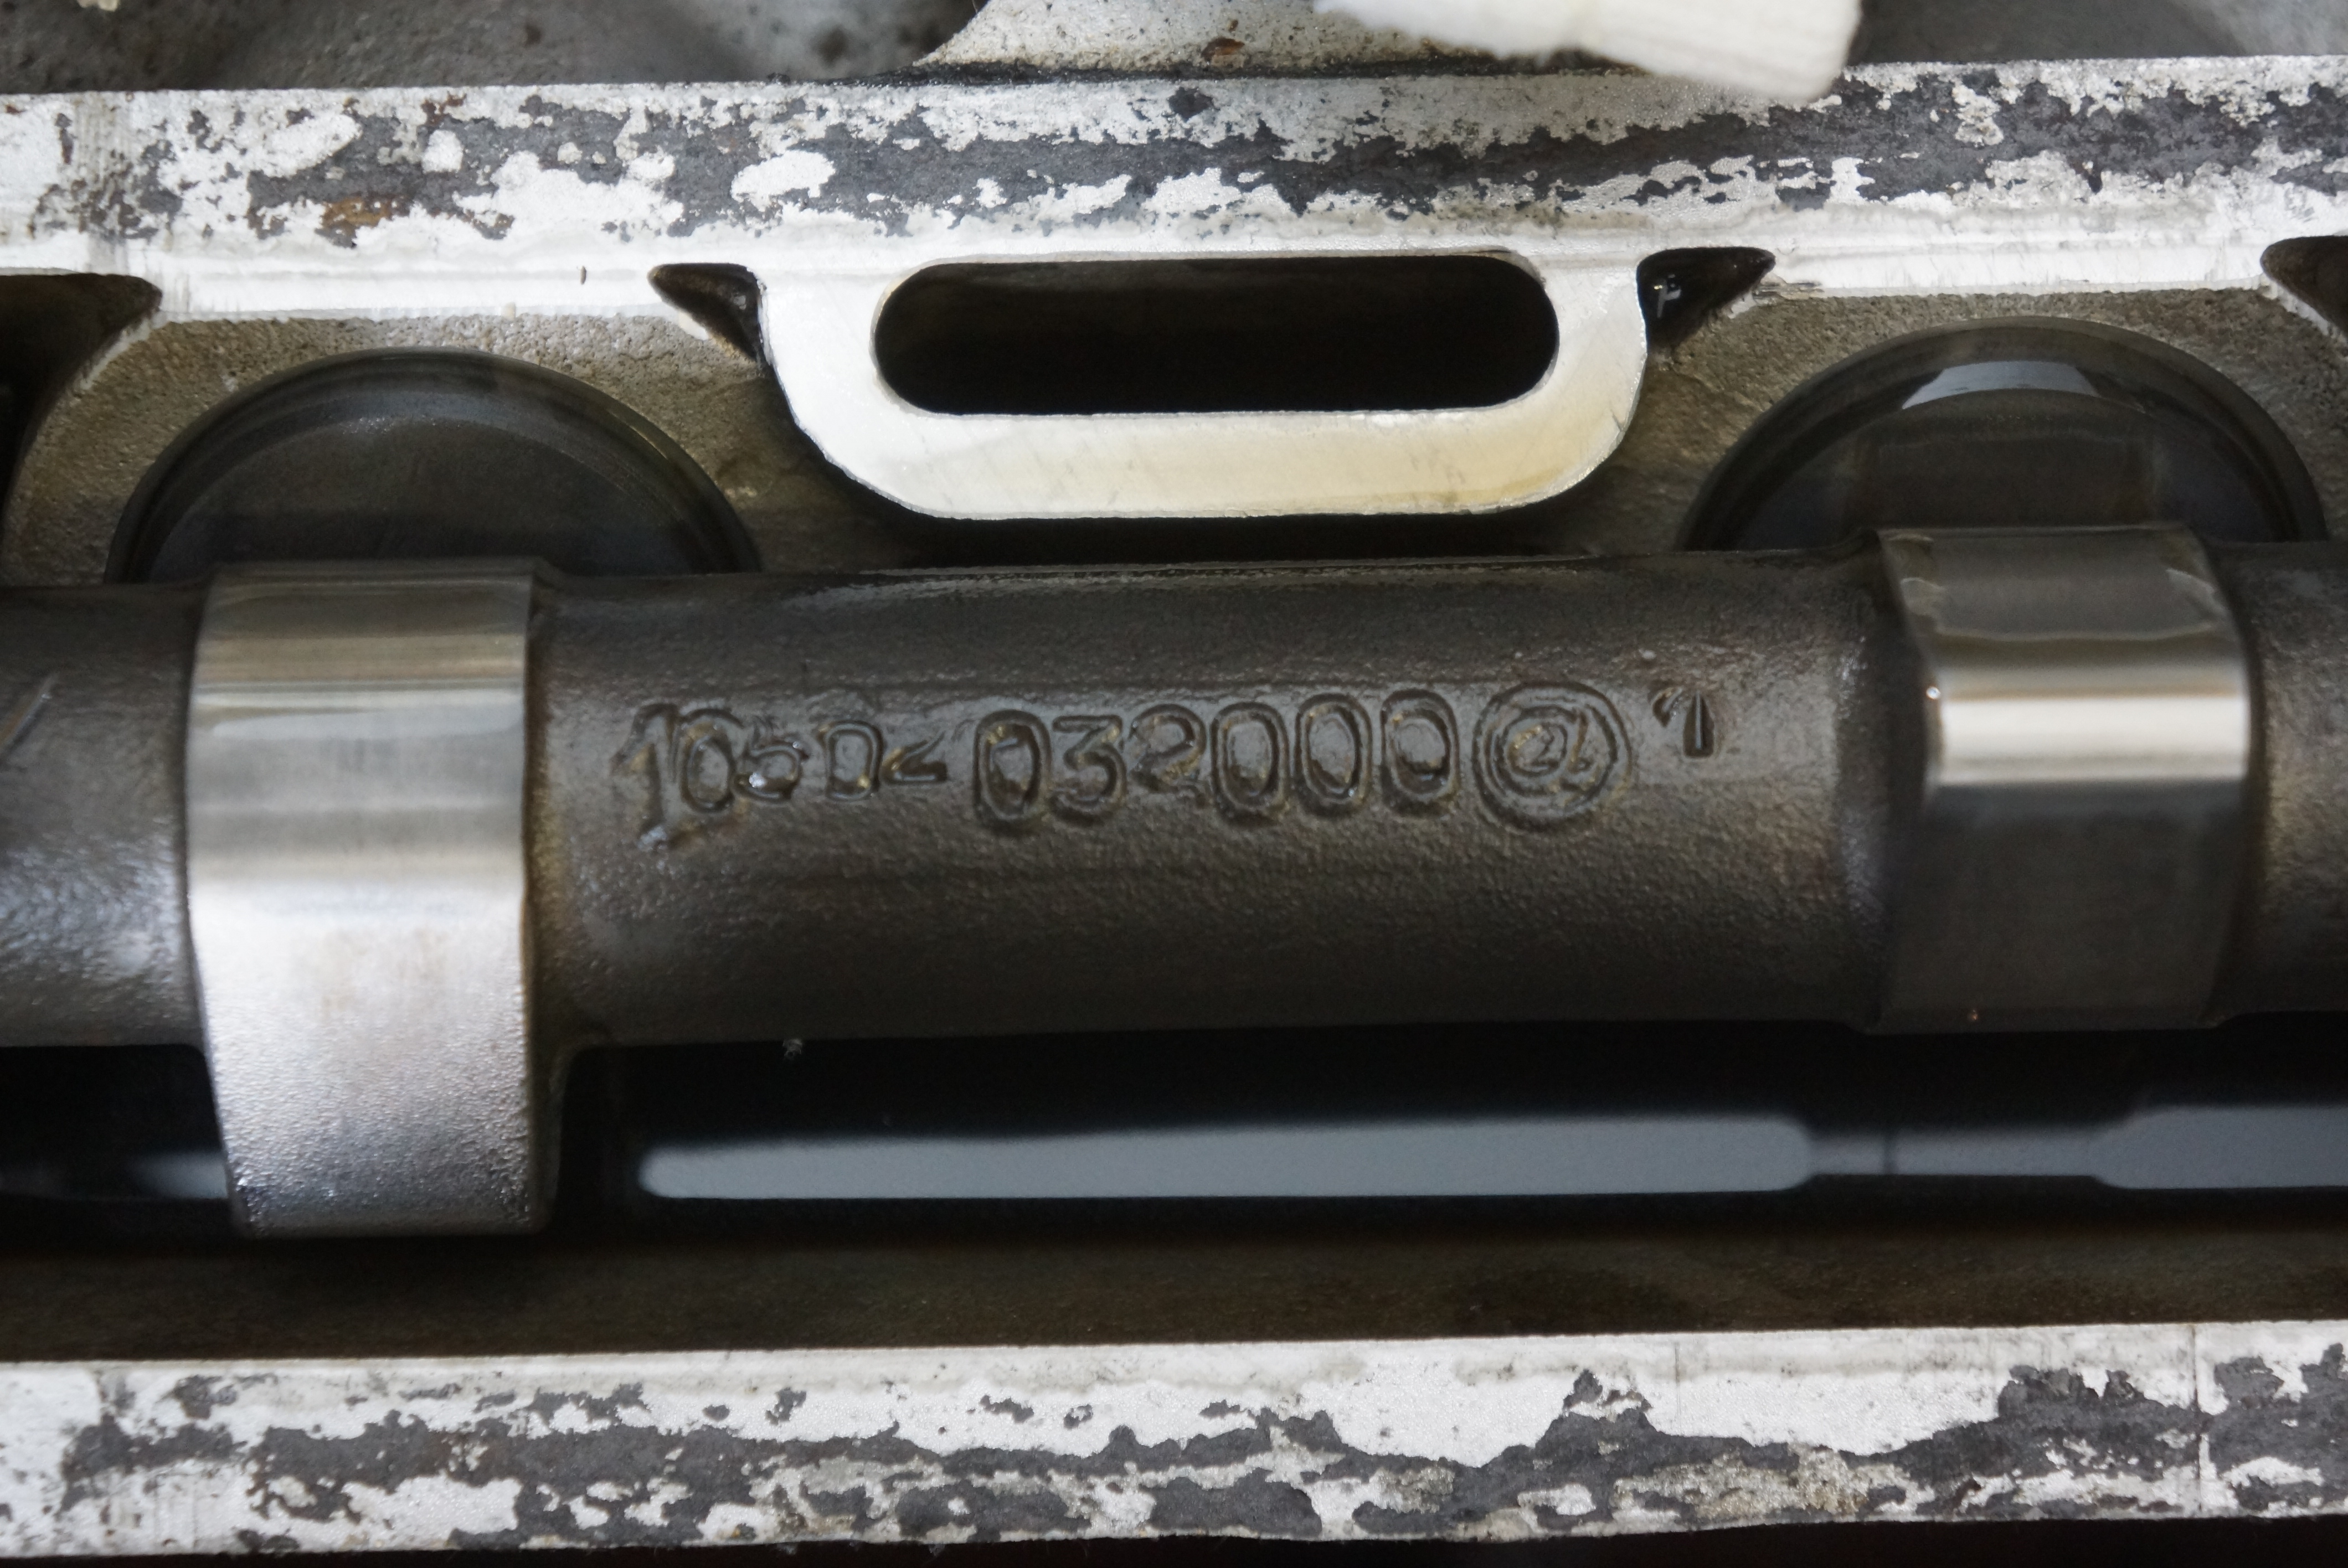
My first task was to find the camshaft part numbers, to verify that these were Alfa Romeo cams and not some hot aftermarket replacements (in which case the clearance specs would be different). A prior conversation with Pete, the family friend who sold me the car, revealed that he wasn’t sure what cams were in it. The part numbers of both cams were readily visible, and verifying them against my technical literature confirmed that these are indeed the factory cams.
This is the correct part number for a 105-platform 1300 Junior engine (105020320001)
Now it was onto the actual clearances. To rotate the engine, I first tried getting a socket on the crank pulley bolt, but the fan shroud blocked that. The next-easiest way to spin the engine was via the nut on the front of the alternator. Popping out the plugs provided less compression resistance, and some moderate thumb pressure on the alternator belt was all that was needed to get the crank and cams to spin.
Paper and pencil at the ready, the valve clearances were checked in firing-order order (1-3-4-2) and recorded. While my owner’s manual provides specs in both millimeters and inches, I decided to stick with the metric measurements – I have metric feeler gauges, and the needed shims are sold in metric sizes.
The spec for the intake valves is 0.475-0.500 mm, and the exhaust spec is 0.525-0.550 mm. Six of the eight valves were out of spec: all 4 intakes and 2 exhausts, and, all 6 showed too little clearance, meaning the valves were not seating completely, subjecting them to less cooling since they were not making full contact with the valve seats.
The worst measurement was #4 intake: 0.350 mm, meaning it was 0.150 mm too tight compared to a correct outer range of 0.500 mm. Yes, we’re talking fractions of a millimeter, but specs are specs, and I felt that the clearances should be corrected.
Here is where it got interesting. My Alfa engine was originally designed in the early 1950s. It’s a very sophisticated layout, with not only overhead cams, but all-aluminum block, wet cylinder liners, hemispherical combustion chambers, etc. However, like most other OHC engines of its time, adjusting the valves requires removing the cams to allow access to the followers (buckets) and shims which are under the buckets. Most friends to whom I mentioned this procedure looked at me with a combination of horror and pity. “It’s really easier than it sounds” I would retort, which did nothing to alleviate their sympathy for me.
(As a complete aside, the first OHC engine to incorporate a valve design which allowed for adjustments with cams in place was the Fiat twin-cam engine, introduced in 1966. My 1970 Fiat 124 Coupe used this design, although I never did adjust those valves!)
The timing chain’s master link is to the left of center
The official Alfa procedure calls for locating the timing chain’s master link, disconnecting it, and swinging the two chain ends out of the way. This method opens the possibility that the cam timing would need to be adjusted at reassembly. Of course, some very clever people have devised a work-around. One of the service books I own is the Alfa Romeo Owner’s Bible, written by the late Alfa expert Pat Braden. He describes a method that does not involve unhooking the chain. Instead, he suggests loosening the chain tensioner, pushing the tensioner all the way IN (making for a loose chain), locking the tensioner in this position, and then lifting the cams toward the center of the engine without disturbing the cam sprocket/chain connection. In this way, on reassembly, the cam timing does not change at all. Ideally, this is done with both cam timing marks lined up with the bearing cap marks.
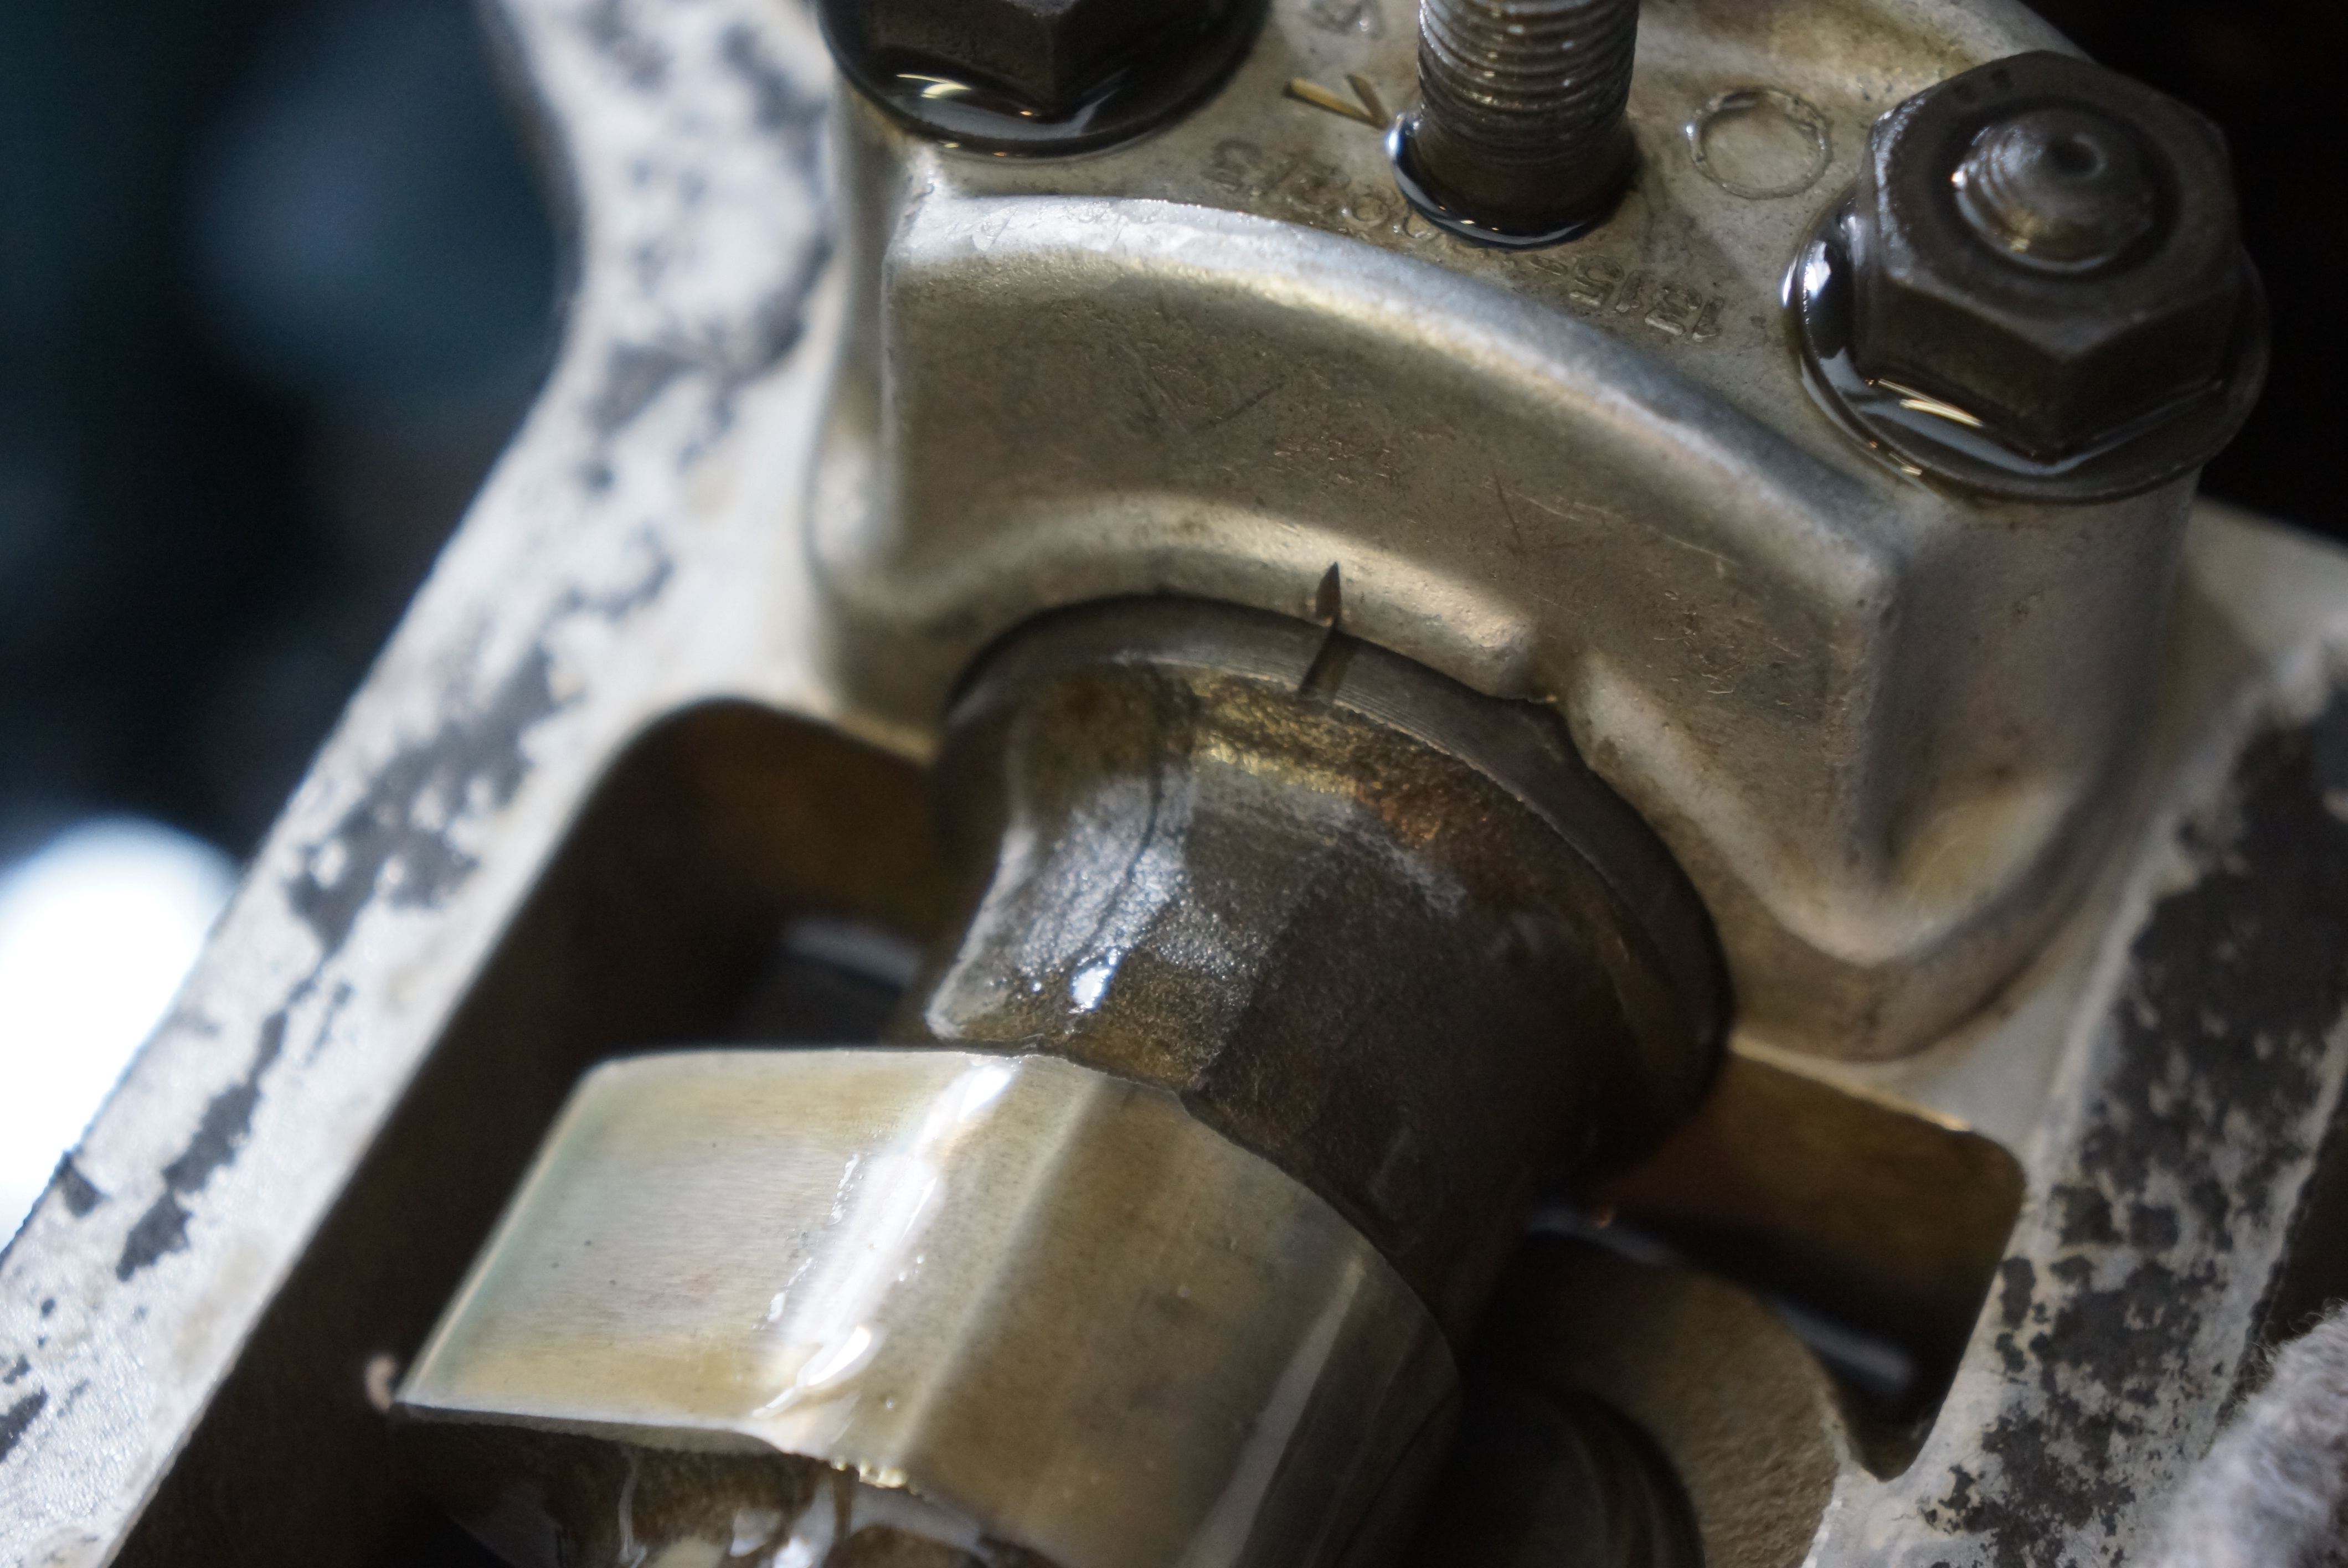
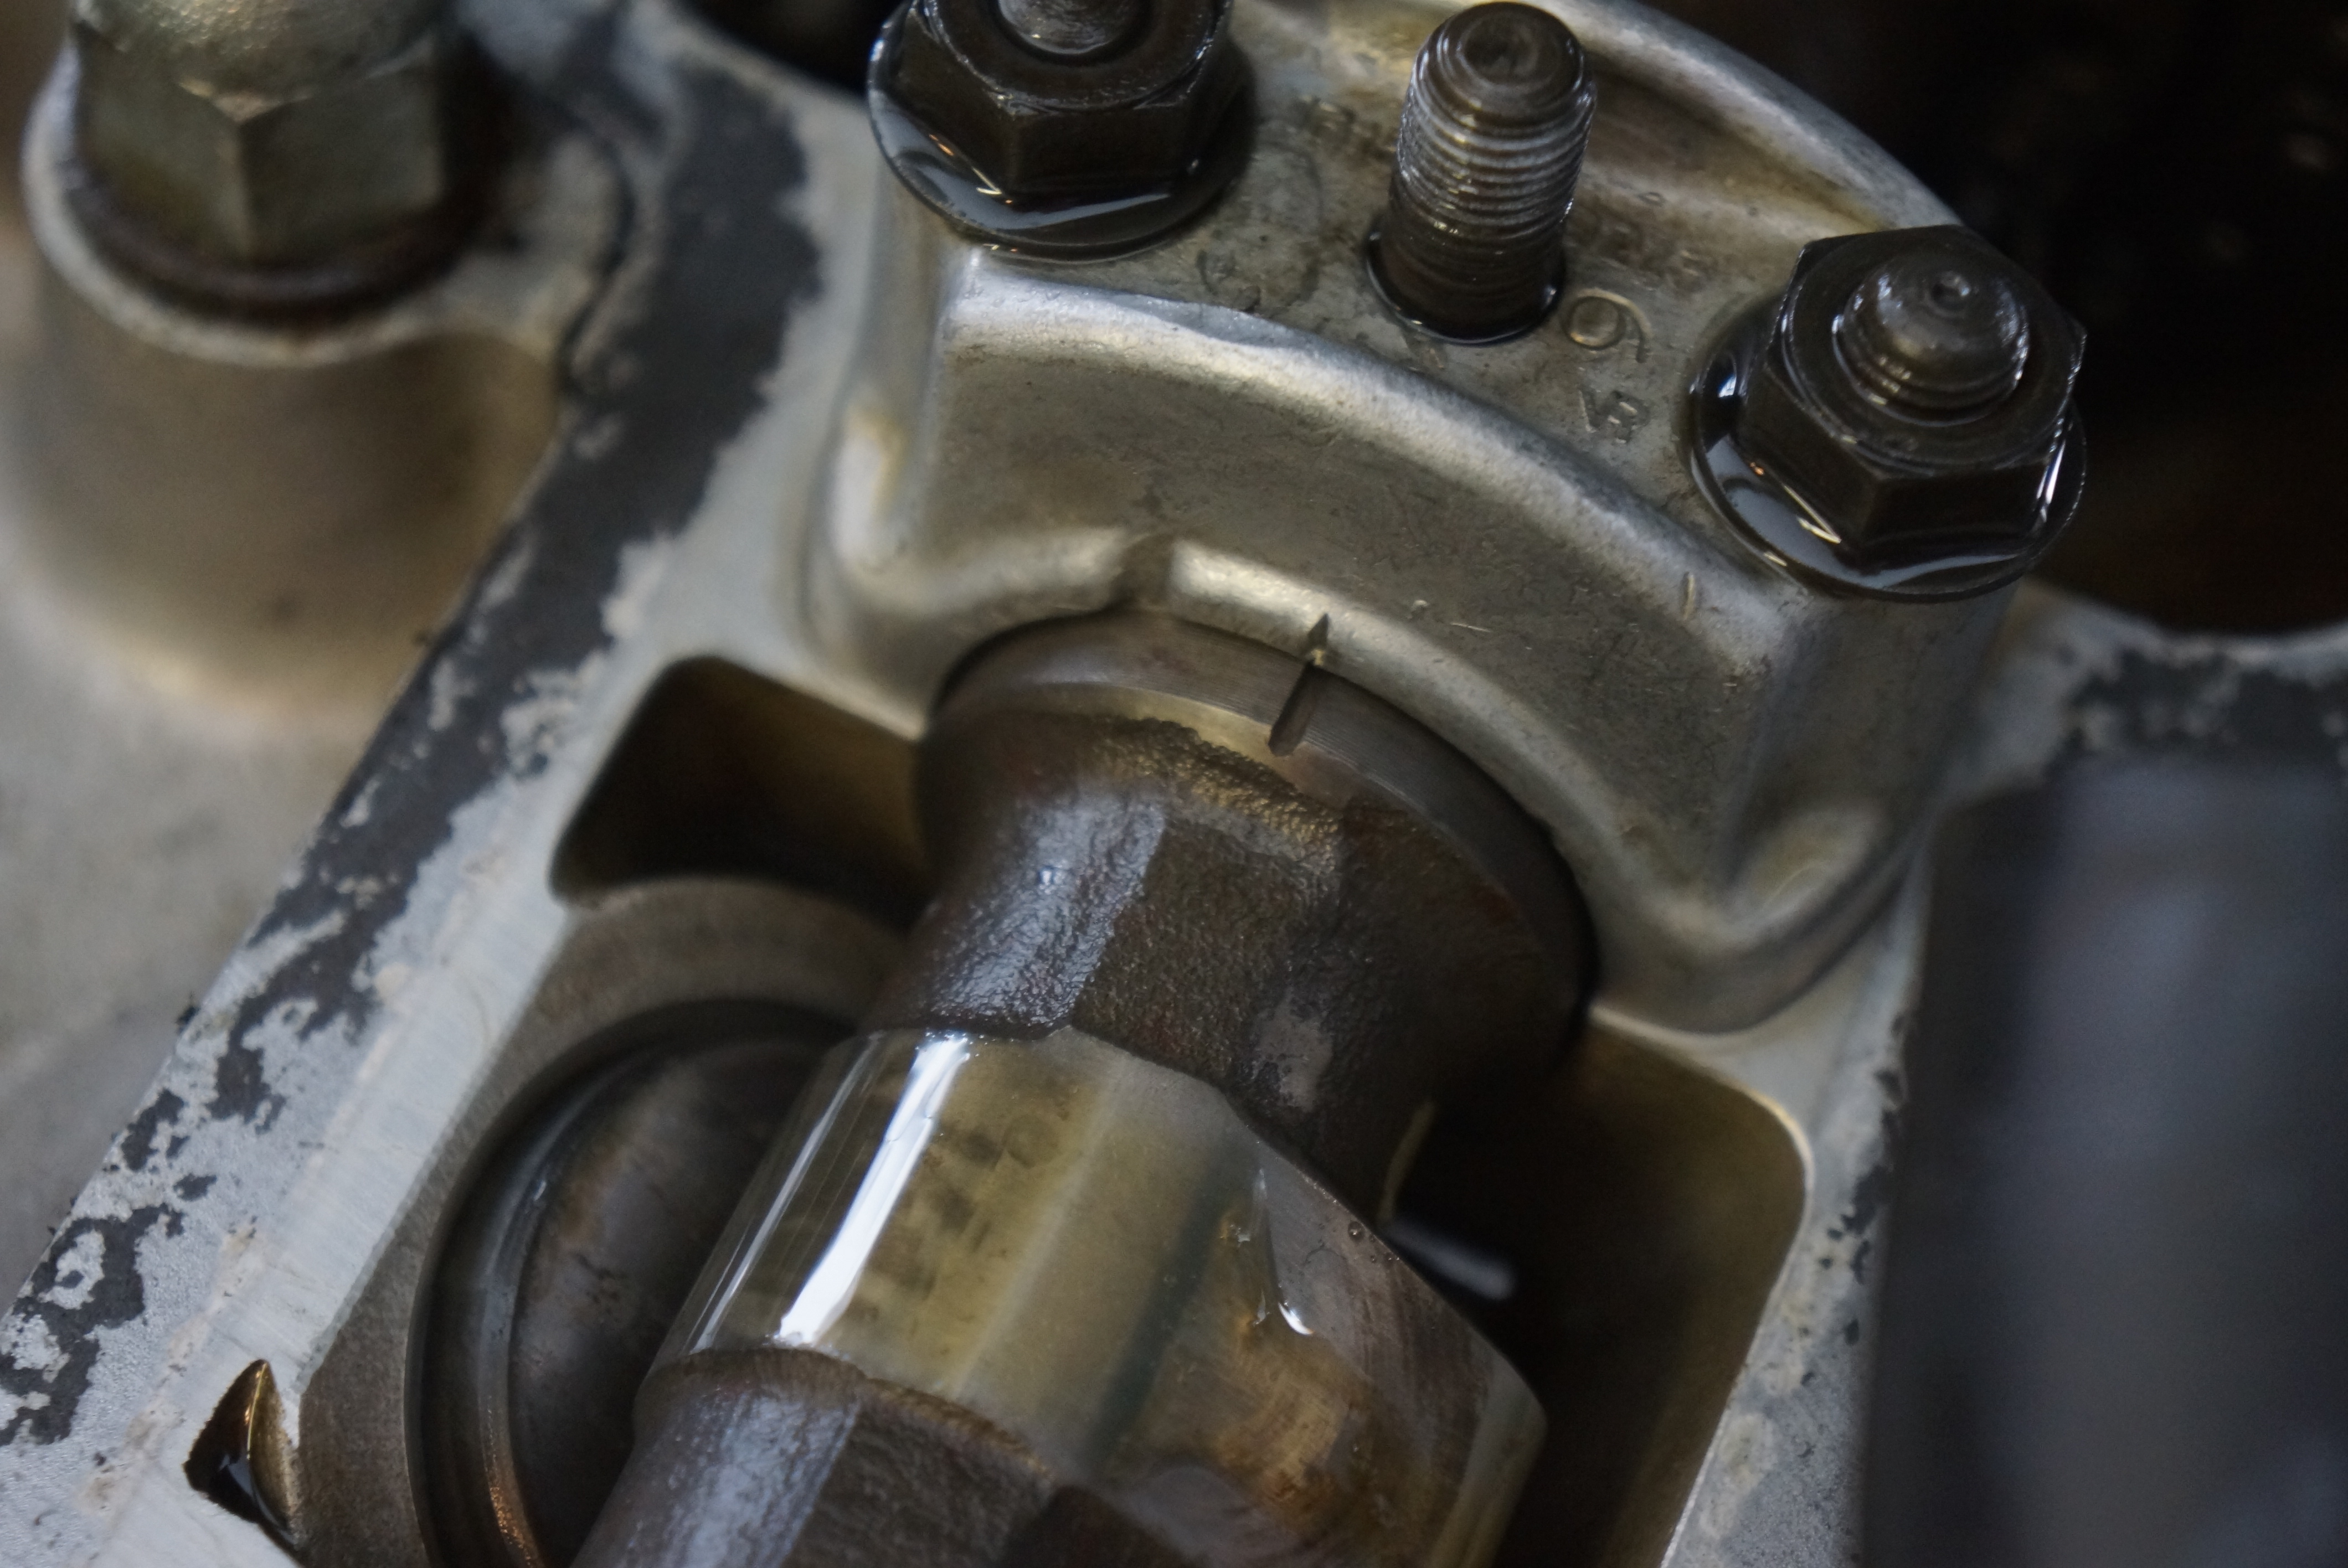
Exhaust cam timing mark
and intake cam mark
This is exactly what I did. With the tension off the timing chain, I started on the intake side and removed the 3 cam bearing caps (Alfa thoughtfully numbers the caps 1 through 6, and I documented everything with photos before turning the first nut). The intake cam was lifted and placed over the spark plug holes (which were protected with clean rags). The chain remained on the cam sprocket.
Cam bearing cap #3 – cap nuts were loosened gradually
Intake cam lying over spark plug holes- note timing chain still on cam sprocket
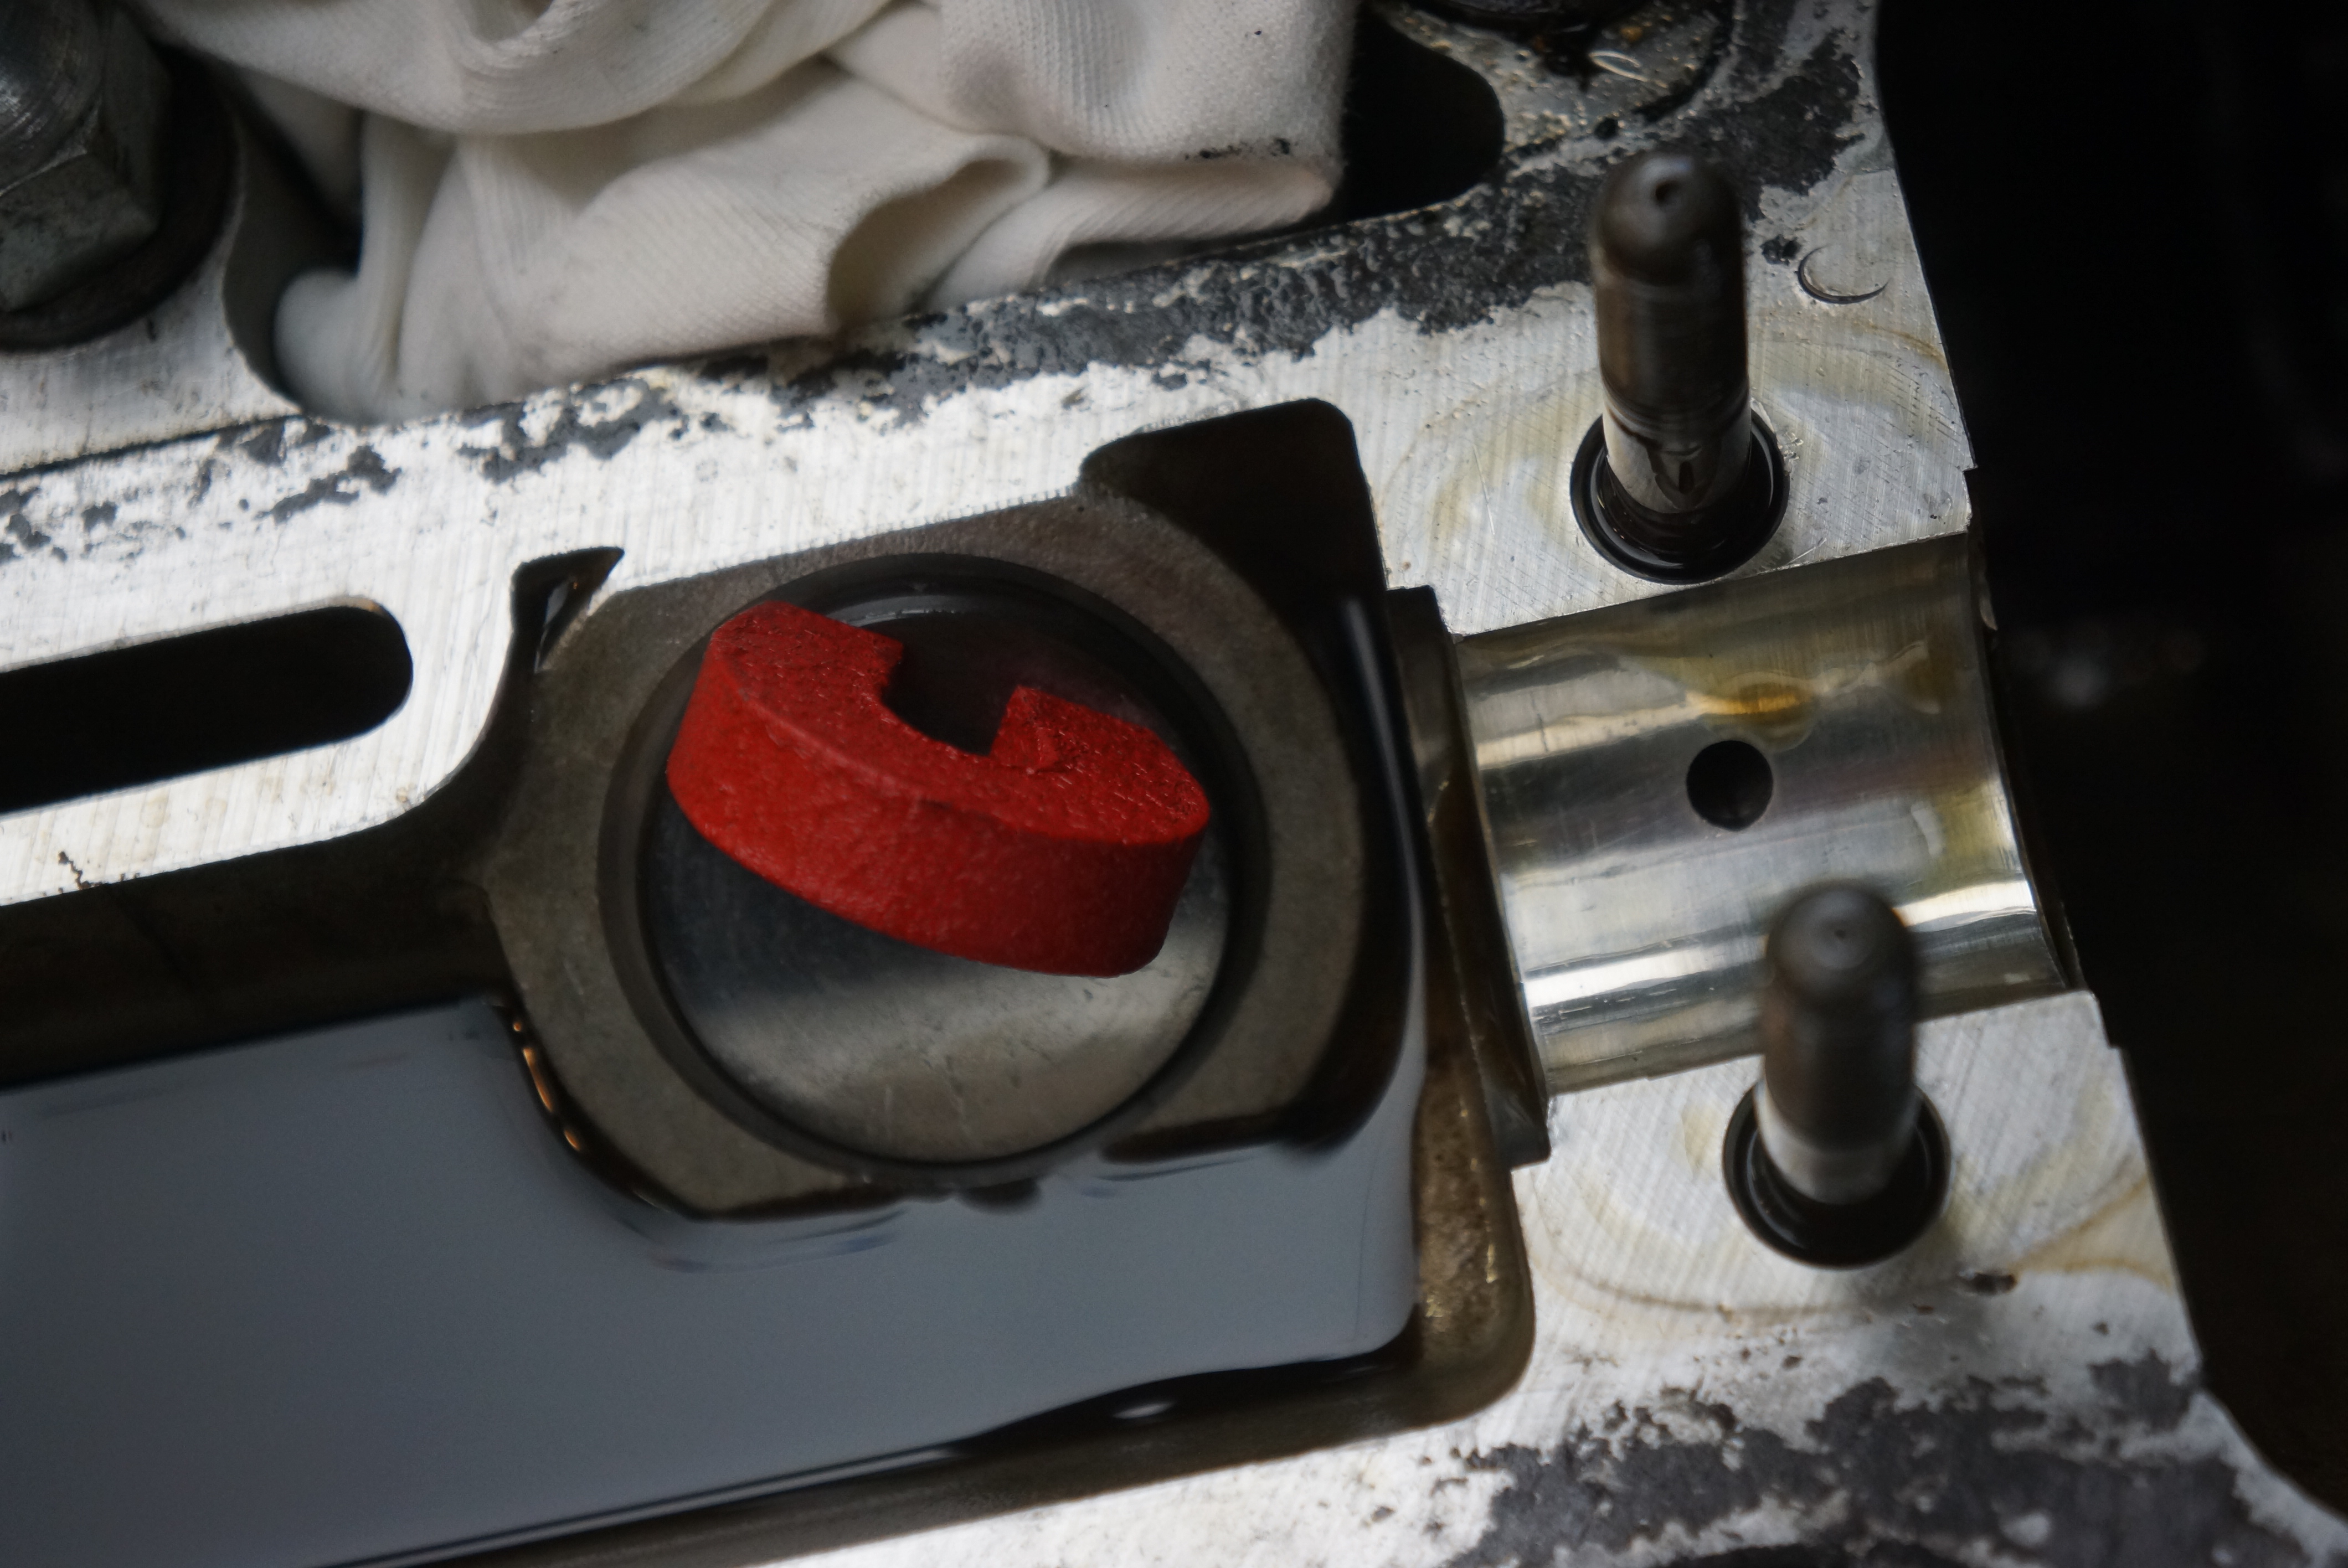
The next trick was getting the buckets out, as they were oil-covered and lacking a way to grab them. I realized that a magnet might do the trick, and it did. The bucket came out, and under it was the shim, which was also removed.
These slippery guys were tricky to remove!
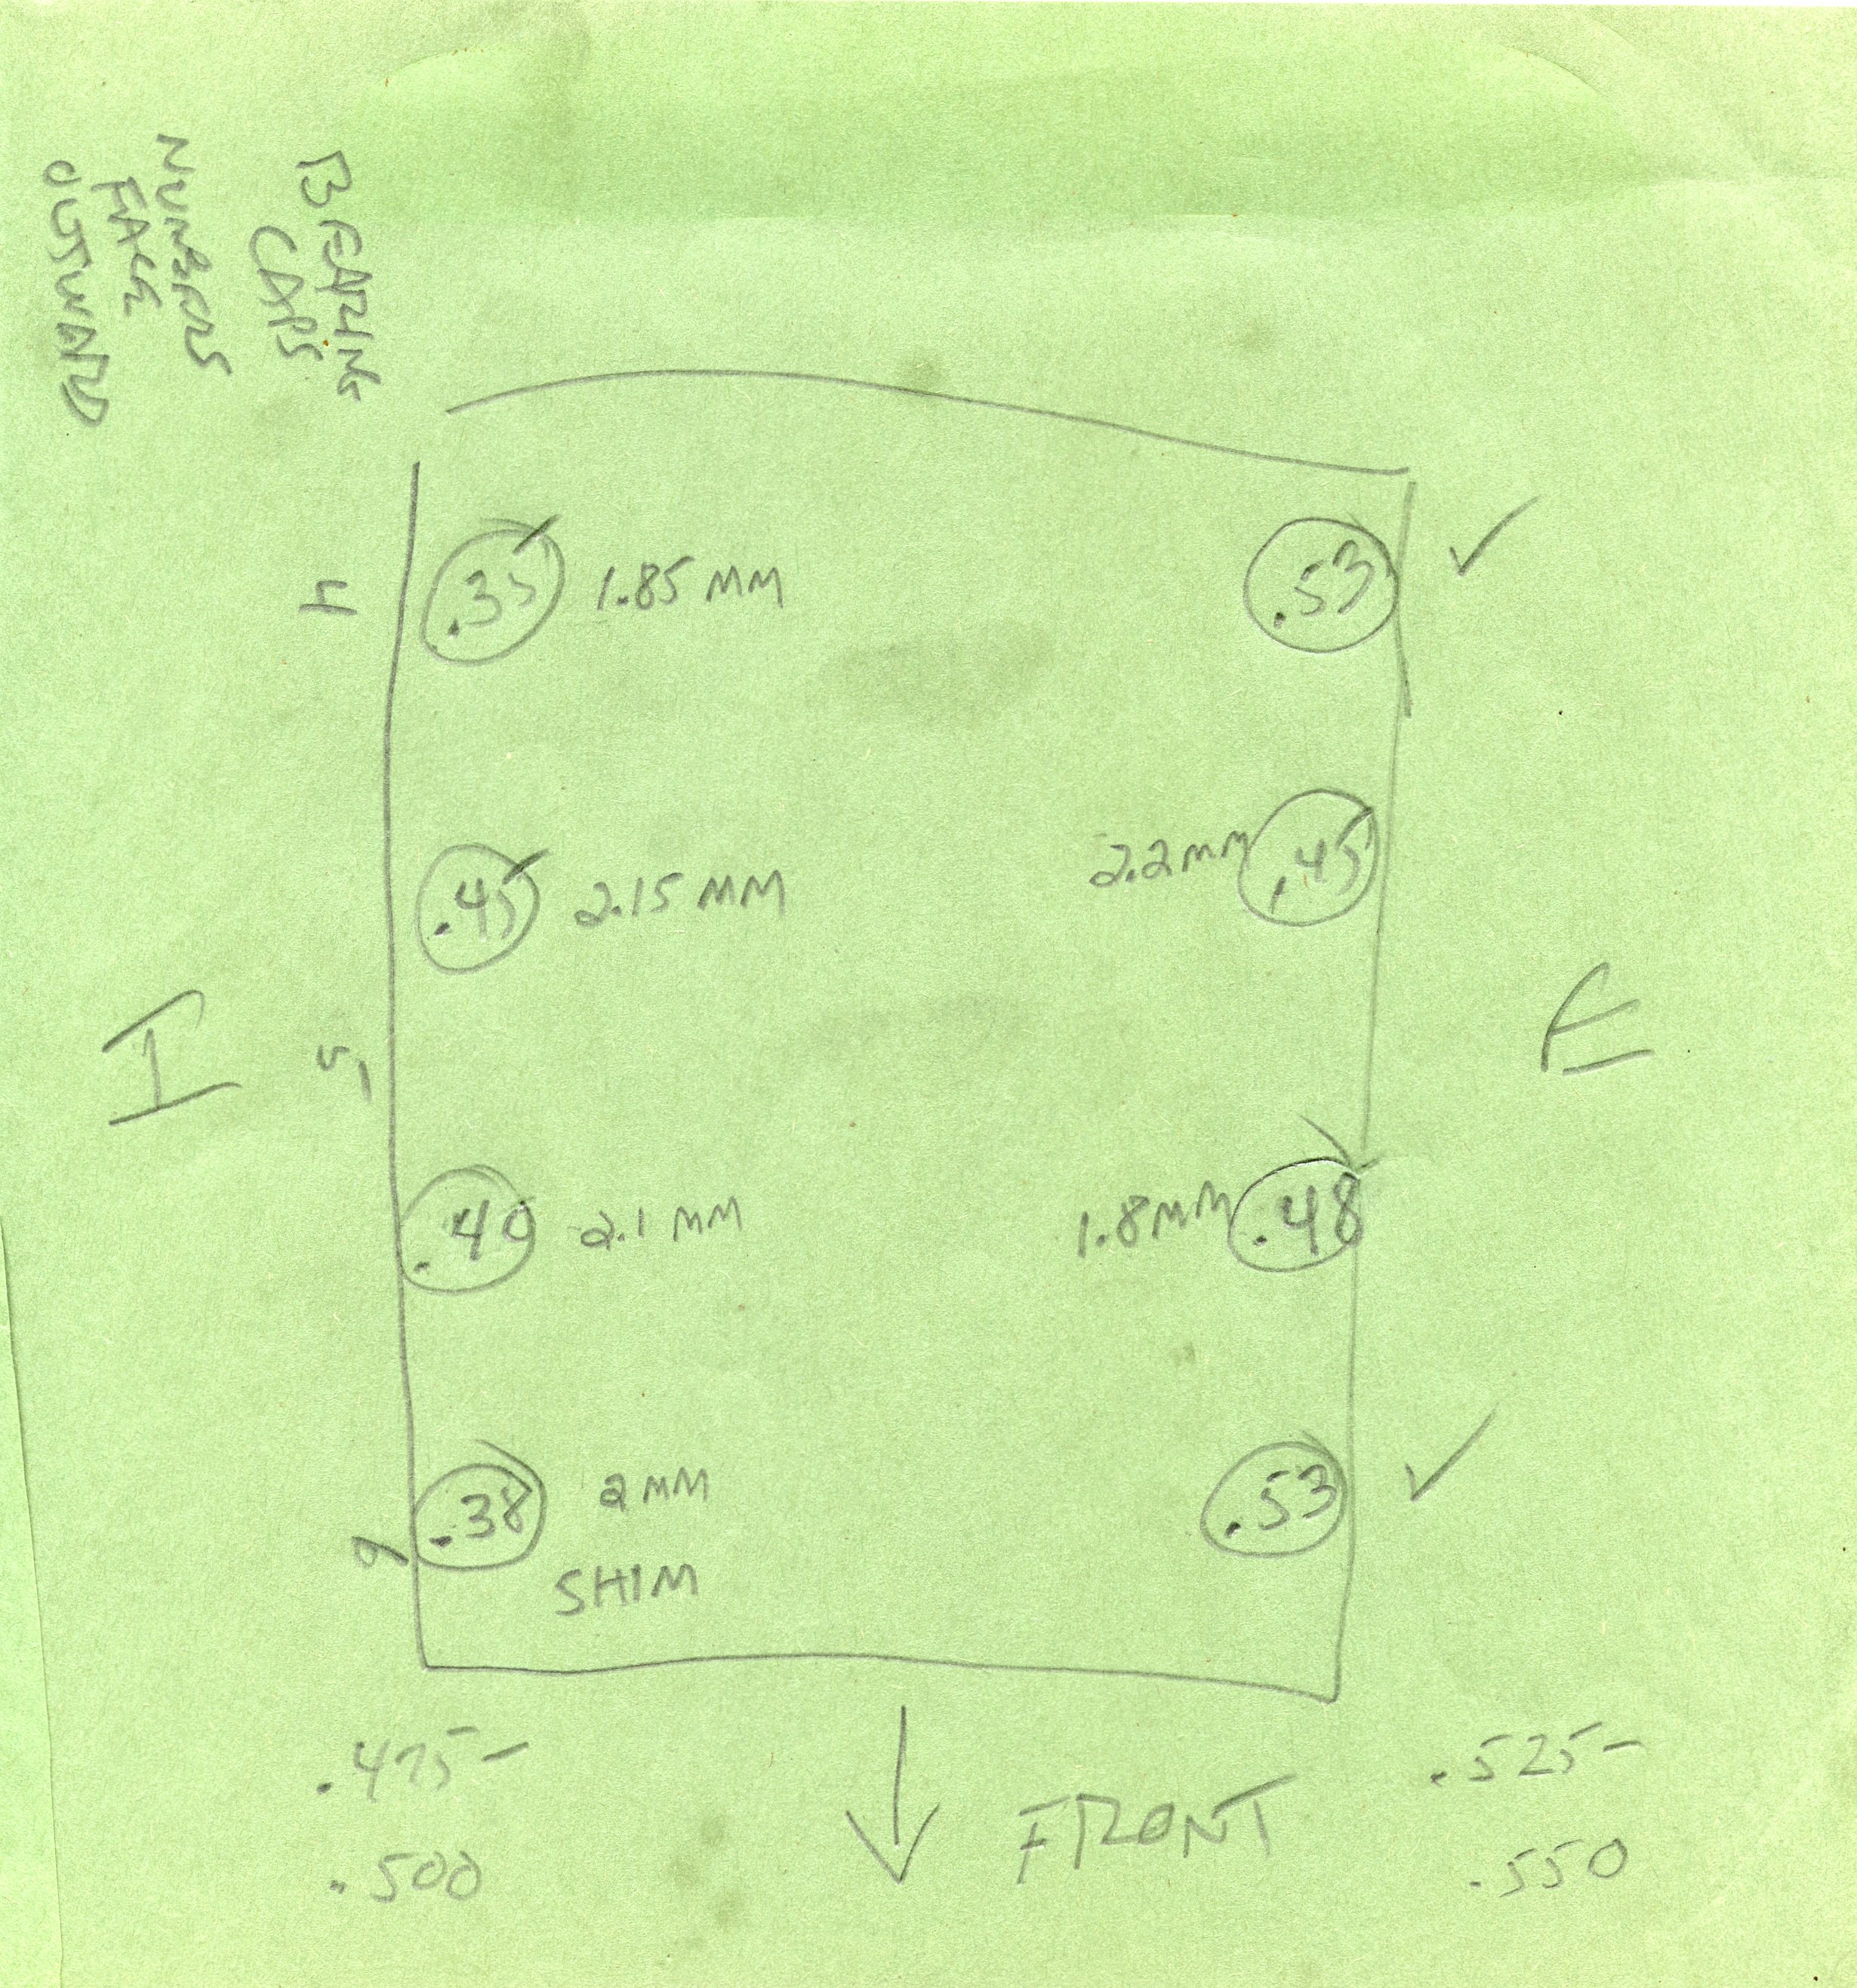
Working on just one cylinder at a time so as not to mix up any of the locations, I measured each shim with a digital metric micrometer. The value was recorded on the same sheet of paper as the clearances. I started on the #1 intake valve, went down the line to the #4 intake valve, then did the same thing on the exhaust side. Once all these measurements were taken, the shims and buckets were back in place on the engine. I gently placed the valve cover on top of the engine, lowered the hood, and took my measurements inside so that the ‘new’ shim sizes could be calculated.
Bucket/follower (top) and shim (left) pose with micrometer
Starrett No. 216 records a shim value of 2.15 mm
I knew that all the out-of-adjustment valves were tight, so I needed greater clearance, so all the new shims needed to be thinner than the current shims. I found an online “Alfa shim calculator” someone built in Excel, and I used it, but I also checked all my numbers two more times. I aimed for the higher end of the spec, figuring that if the valves are tightening up over time, I had best start by providing the maximum clearance while remaining in spec.
Documentation of initial clearances and shim thicknesses
My go-to Alfa supplier, Classic Alfa in the UK, sells shims in increments of 0.125 mm, so it was a fairly easy task to calculate my needed shim sizes. The order was placed, and now I just needed to wait for the shims to show up. But it certainly felt like the hard work was behind me!
The Bubble Party was intended to serve as a grand celebration of a singular automobile. The Bubble Party was meant to be a culmination of many years’ effort. The Bubble Party was an excuse to smile, and laugh, and cheer, and have fun. The Bubble Party was a (gentle) poke in the eye to those who thought that the concept of restoring a 13 horsepower car was a silly exercise. The Bubble Party was an excuse to have a party.
The Bubble Party was all this and more.
For once, it wasn’t about the car; well, of course it was about the car, but really it was about the human endeavor. Sometimes I thought that a celebration centered on reaching the finish line was selfish, and egotistical, and boastful, and perhaps there were elements of that. There was honest effort, though, to take the focus away from me, and away from the fact that “the Isetta did drive in ‘95”.
What I knew then, and what I know more than ever now, is that this could not be accomplished by one person. There were so many people, individuals who were already friends, and those who became friends through my dealings with them, who needed to be counted among the co-achievers. And not all of them necessarily touched the car. My father, to name one significant example, had been a lifelong inspiration to me, and helped me in uncountable ways with my technical knowledge and understanding.
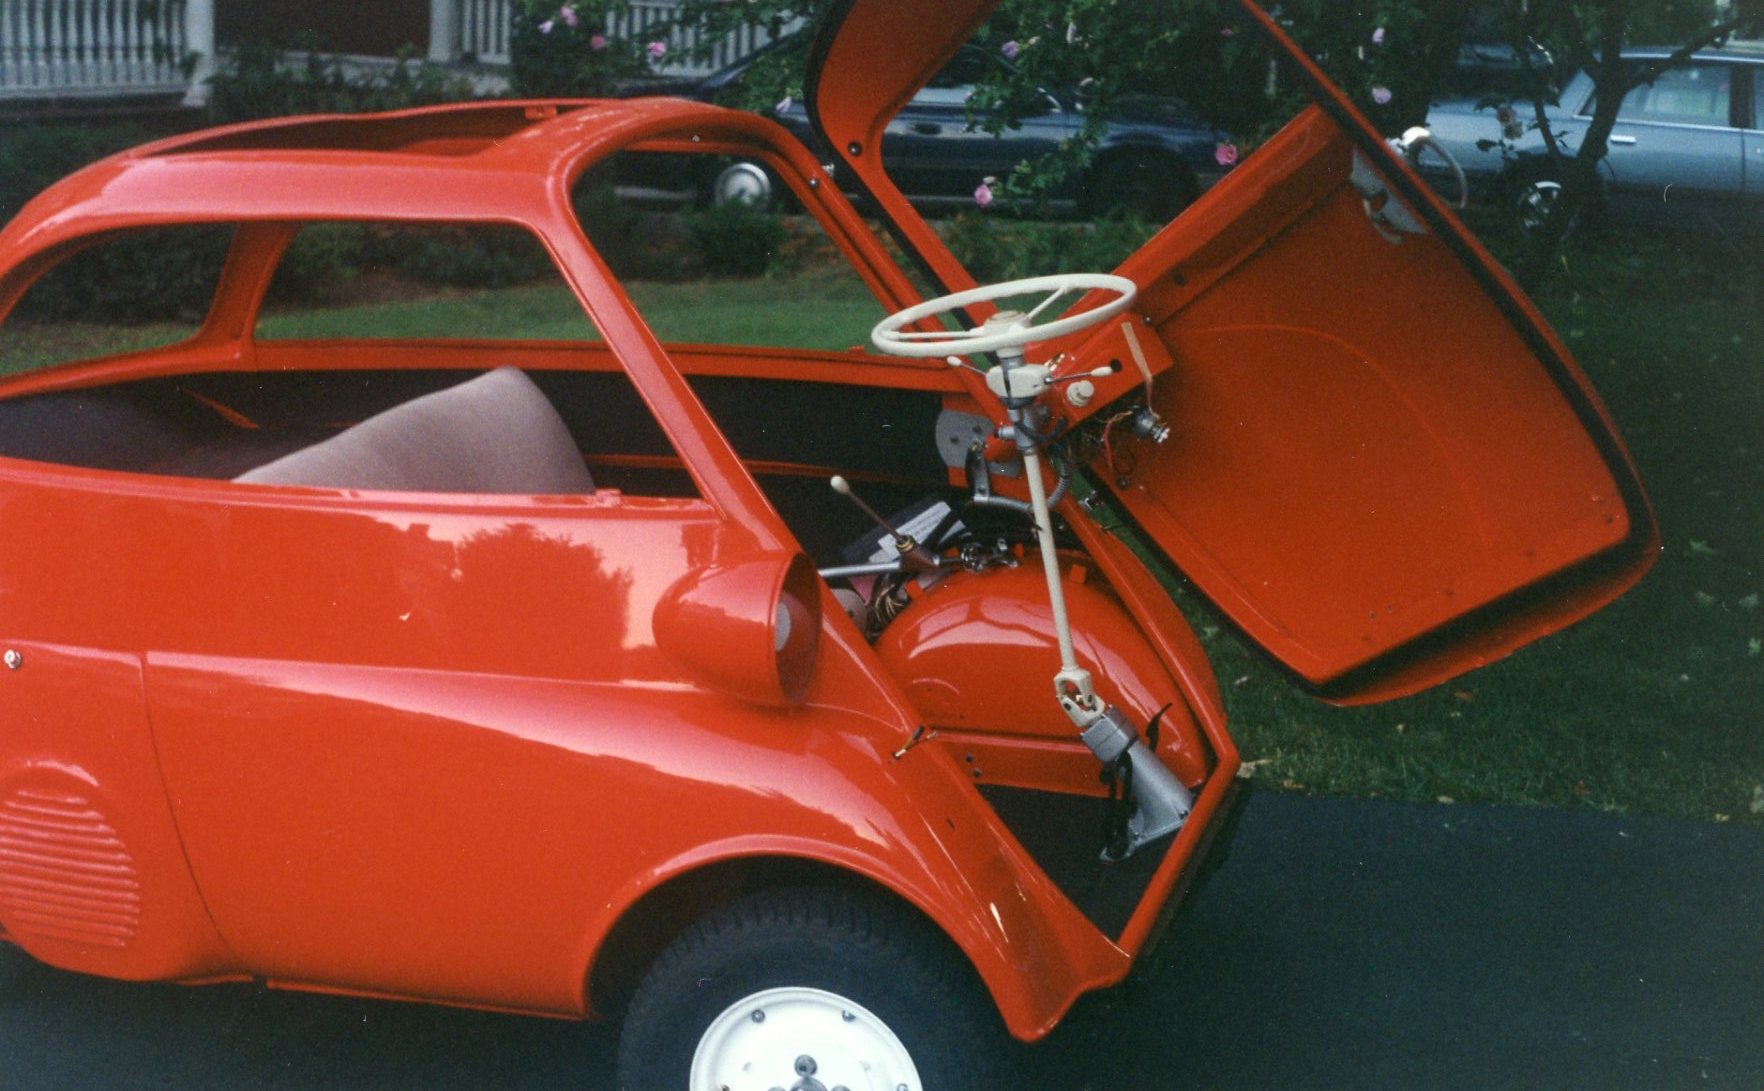
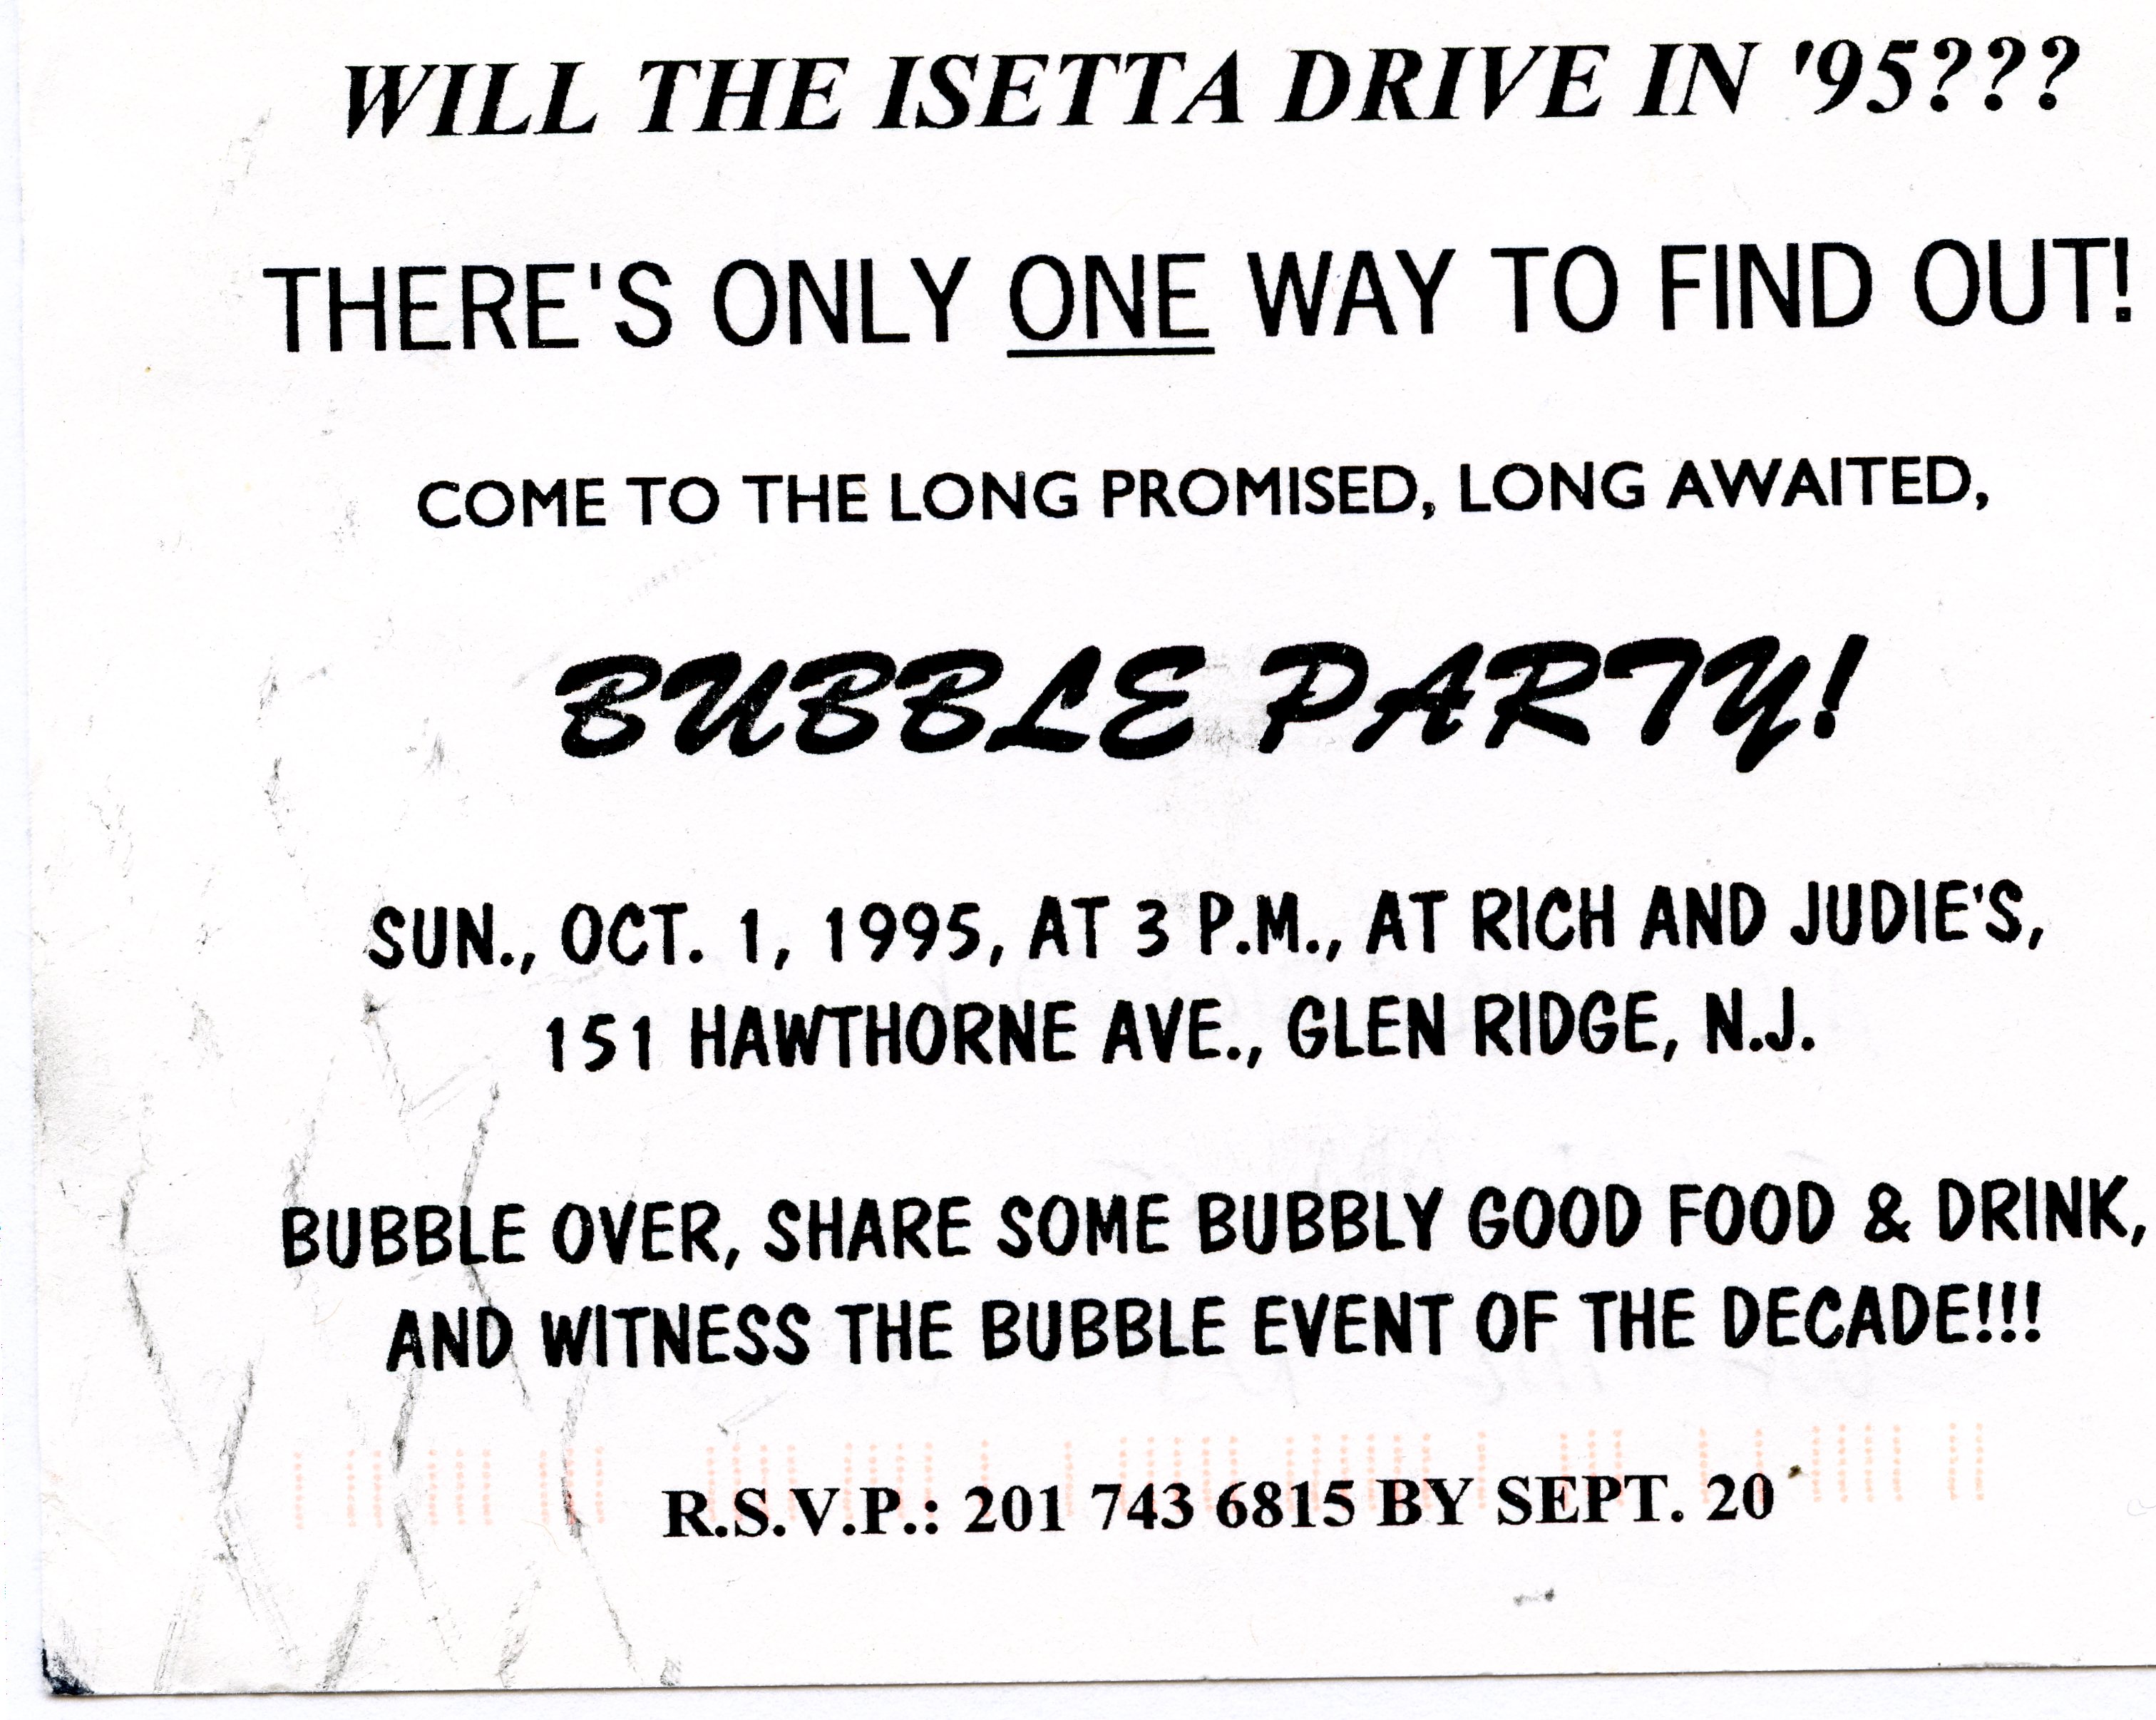
So we spent most of September in planning mode. The house was cleaned; the yard was trimmed. Food and drink aplenty were brought in. Bubble Party invitations were sent. We invited everyone: neighbors, co-workers, relatives, friends. We made a point of ensuring that children were included. The town agreed to close the street for the afternoon. The car was set on the front lawn, and covered with a red cloth.
We asked for a beautiful day, and we were given that too. The car was unveiled, and it was the children, more than the adults, who oohed and aahed (after all, it’s sized like a kid’s plaything). I was more than happy to let the parents watch while I offered rides to every child in attendance. I can only hope that some of them remember, and perhaps some of them grew to appreciate old machinery.
This 3-minute video highlights the moment the Isetta was revealed to the crowd:
Then it was over. And autumn arrived, and I was exhausted from the mental effort of getting the Isetta to this point. It wasn’t finished, but it certainly was close. By the end of 1995, I had accomplished what I set out to accomplish.
After the Bubble Party, the car was not touched for four years. Final restoration work began anew in 1999, and the car was entered into its first shows in 2000. We will resume the Isetta Saga later this year.
In the meantime, with spring literally a few days away, Richard’s Car Blog will turn its attention to what promises to be a very busy 2019 show season. The next blog post will be a technical treatise on the Alfa Romeo valve adjustment procedure. Stay tuned!
With its initial drive event behind me, further work on the Isetta slowed. The notebook I kept to track my progress has very few entries for September 1995. The notes which are there make scant reference to exterior lighting and door adjustments. My time and effort was directed to planning a party.
Every milestone of the Isetta’s progress had been marked with a celebration: the first running of the engine, and the body and chassis wedding, to cite two examples. This time, the festivities would be on a much larger scale. The car was as ready as it was going to be for its public unveiling, known as The Bubble Party. The date was set: Sunday, October 1, 1995. We went so far as to petition the town to close our street to vehicular traffic so that the bright red Bubble Machine could be buzzed from one corner to the next without interference. The mayor agreed (I think a small donation helped).
I did take the car out for several more reconnaissance runs, and my ear-to-ear grin gave it away every time: I never imagined that a 13 horsepower car could be so much fun to drive. The only variable not in our control, the weather, was simply ignored. The Isetta was ready, and we would be too.