The last post on this topic was three weeks ago. What have I been doing? The remaining tasks seemed easy; they were easy. But they took time to do correctly. And several events occurred in the interim (like our first breakfast run of the year, and the Carlisle auction) which I refused to ignore in spite of the looming deadline – more about THAT below.
Remember that clicking on the photos enlarges them.
By sub-assembly:
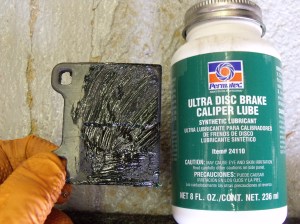
BRAKES: Truth be told, I love working on brakes, especially disc brakes. Deceptively simple. Brakes were the first real mechanical job I did on my own, on my 1970 Fiat, while I was in college. On the Alfa, once both front hoses were bolted into place, the new pads were installed, and the two front calipers bled. I saw no need to bleed the rear brakes, even though the master cylinder reservoir had drained dry. My wife agreed to enter the garage just long enough to endure the oft-repeated litany of “press; hold; release”. She actually inquired this time as to “what exactly are you bleeding when you say you’re bleeding the brakes?”. I tried to explain. She left the garage. I went back to work.
New pads and hardware from Centric.
A favorite tool in action: this caliper piston tool pushes the piston back into its bore.
A little brake grease in the proper location works wonders.
New pads and hardware installed in the caliper.
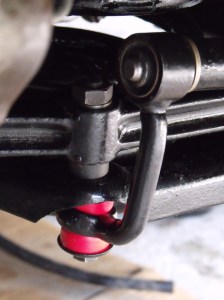
FRONT SWAY BAR: Once the end links were pressed on, it was just nuts and bolts to get this bad boy back into its rightful location. Except the sway bar is heavy. And it’s balanced in such a way that it does not want to behave when you need to run the bolts up. Jack stands were enlisted to serve as an alternate set of hands. Which sort of worked. A pry bar was engaged too. Once the bolts were started, it went back on nicely.
Front sway bar, freshly painted and ready for its end links.
Use of jack stands was the only way to get the sway bar up where it needed to be when working by myself.
Sway bar end link bolted to the lower control arm, with polyurethane bushings.
CASTER ARMS: Perusing an online Alfa spare-parts catalog shocked me into the realization that I never had ordered the rubber bushings which fit in the junction between the caster arm and upper control arm. The real reason I had not ordered them at the same time I ordered everything else is that there were NO RUBBER BUSHINGS when I disassembled the parts. The rubber left the car long ago. The parts were inexpensive; fitting them involved another opportunity to use a BFH to bring everything in line. I also find that use of the BFH increases in direct proportion to the anxiety one feels as one nears the end of a project.
The new replacement for the missing bushing.
Caster arm bolted to upper control arm, with bushing in place.
STEERING LINKS: In an earlier blog post, I mentioned that the 6 steering link tie rod ends were replaced as a “might as well do this while I’m here” job. It seemed simple enough, and if the front suspension were to be like new, the steering rods should be too. Six steering ends were duly ordered and threaded into the sleeves. The sleeves were then bolted back onto the Pitman arm, idler arm, and spindles.
Three steering sleeves, with all 6 new tie rod ends in place.
In my haste, I reinstalled them without giving a thought to steering wheel location. This was a mistake. (Isn’t this what I’m supposed to do in a blog? Confess my sins?) I found that A) with front tires pointed straight ahead, the steering wheel was upside-down; B) I had a different number of turns to left lock compared to right lock; and C) the two front tires had toe-out of about 30 degrees (probably 5 degrees, but I was so frustrated that it may as well have been 90 degrees).
As I learned during the Isetta restoration, when you get to this point, get the largest BFH you have walk away from the car and return to it the next day. Not only did I do that, I consulted my more-knowledgeable friends (thanks, Mike and Larry), and the next day, was able to disconnect the Pitman arm linkage, center the wheel, rotate all the sleeves in the correct direction, reconnect everything, and perform an approximate front alignment. Hooray, as it was time to drive the car.
For the first time this year, all parts were back on the car, with no tools on the floor.
FIRST TEST DRIVE: This past Saturday, for the first time in five months, the Alfa left the garage, and was driven several miles. The steering felt great, ALL prior knocking and squeaking noises from the front end were gone, the car tracked straight, and the steering wheel was almost centered. Brakes worked too. Upon return, I performed a final torque, complete with insertion of cotter pins in all the ball joints. Ed at my corner garage does alignments, and I will endeavor to get that done this week.
THE UPCOMING RALLY: Two weeks from today, I leave in the Alfa to begin this year’s running of the New England 1000 old-car rally. Home base for the rally this year is Mohunk Mountain House in New Paltz, NY, a scant two hours from my home. I would still like to put about 100 maintenance miles on the car, but I’m fully confident that the Alfa will get me there, run the rally, and get me home. My rally brother Steve Hansen is flying east AGAIN to co-drive with me. This marks the 7th time we will have shared a car in this event.
So I got it done just in time – isn’t that how it’s supposed to work?
The New Jersey Region of the AACA (Antique Automobile Club of America) held its 64th annual Spring Meet on Sunday, May 3, 2015, in Florham Park NJ. The location was the immense parking lot of the Automatic Switch Company, the same spot it’s been for the past 50 years. We had tremendous spring weather for a car show: temps in the low 80s, with lots of sunshine and low humidity.
Vehicle registration into the show is not limited to club members; the general public is invited, and they do turn out in force. While adherence to AACA rules (25-years-old and older vehicles in “stock” condition) is encouraged, there is a special custom class, and no one turns away vehicles that have mild modifications. This approach helps bring in the traffic, both vehicular and pedestrian.
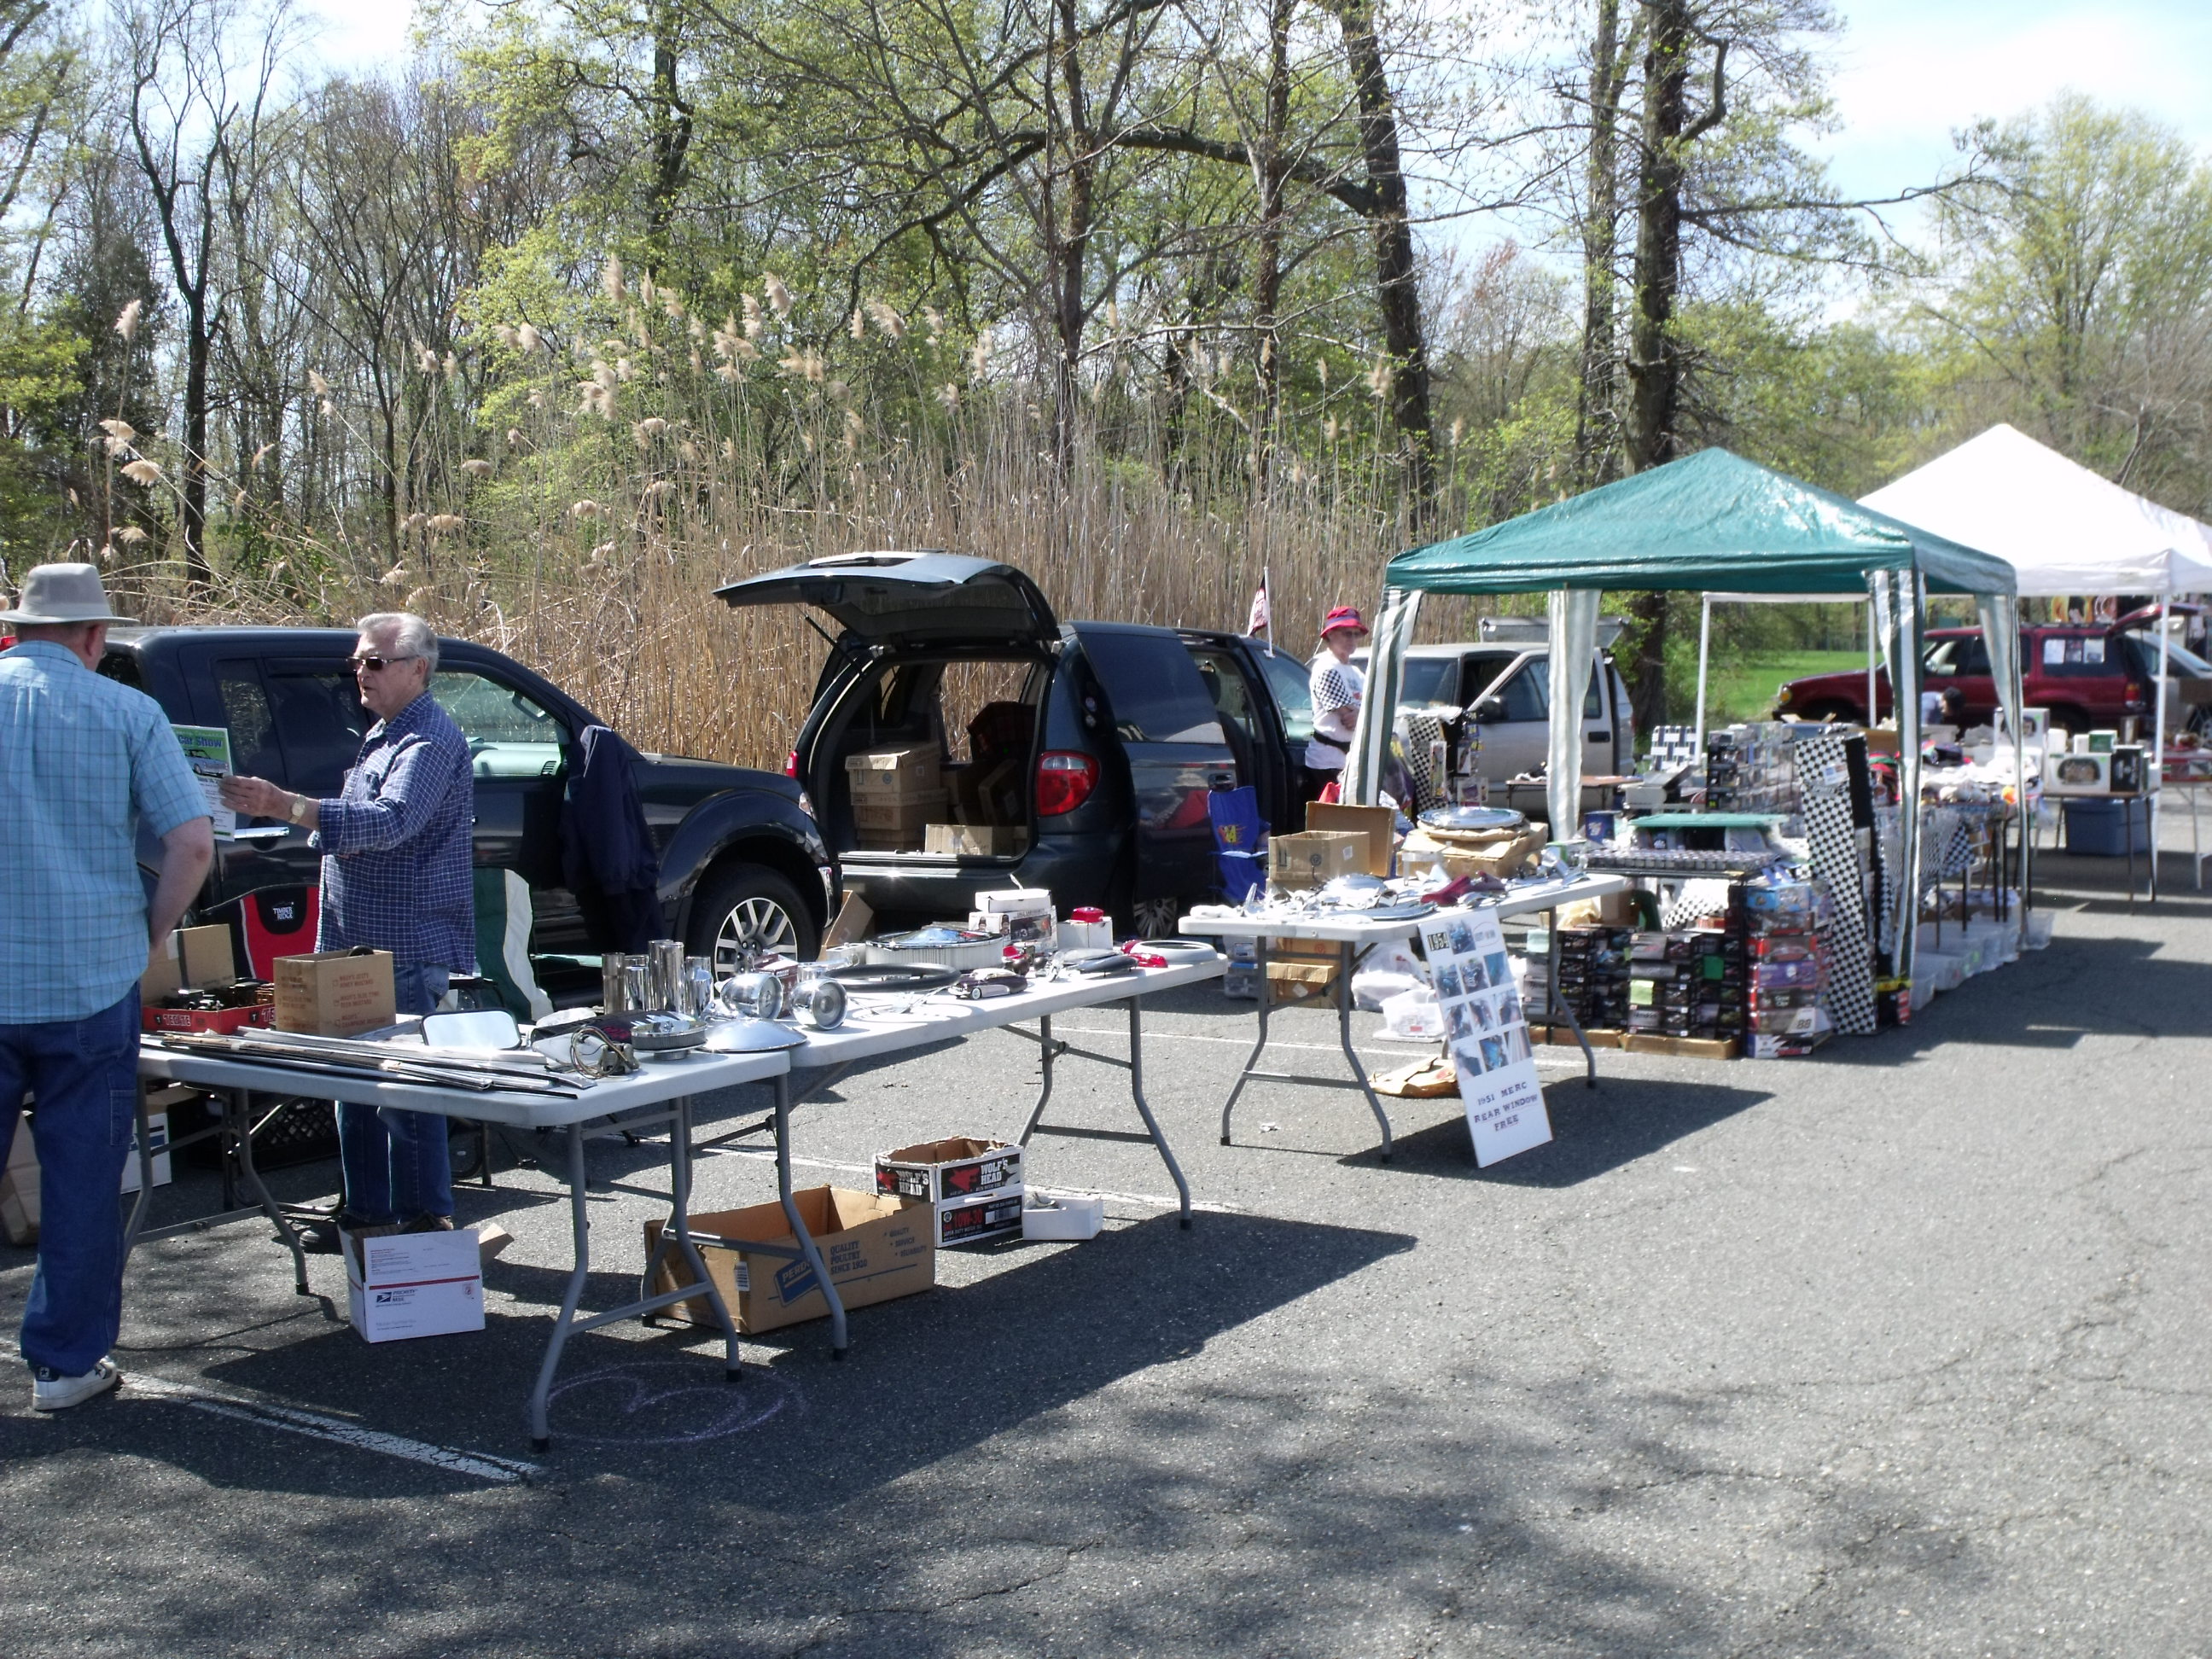
Flea market vendors lined the perimeter of the show field.
In addition to the judged field, the NJ Region has a car corral, flea market, and food vendors on site. While small compared to Hershey (what am I saying? We could fill this lot with vendors and it would be small compared to Hershey), it provides some variety and encourages show-goers to mingle for the day.
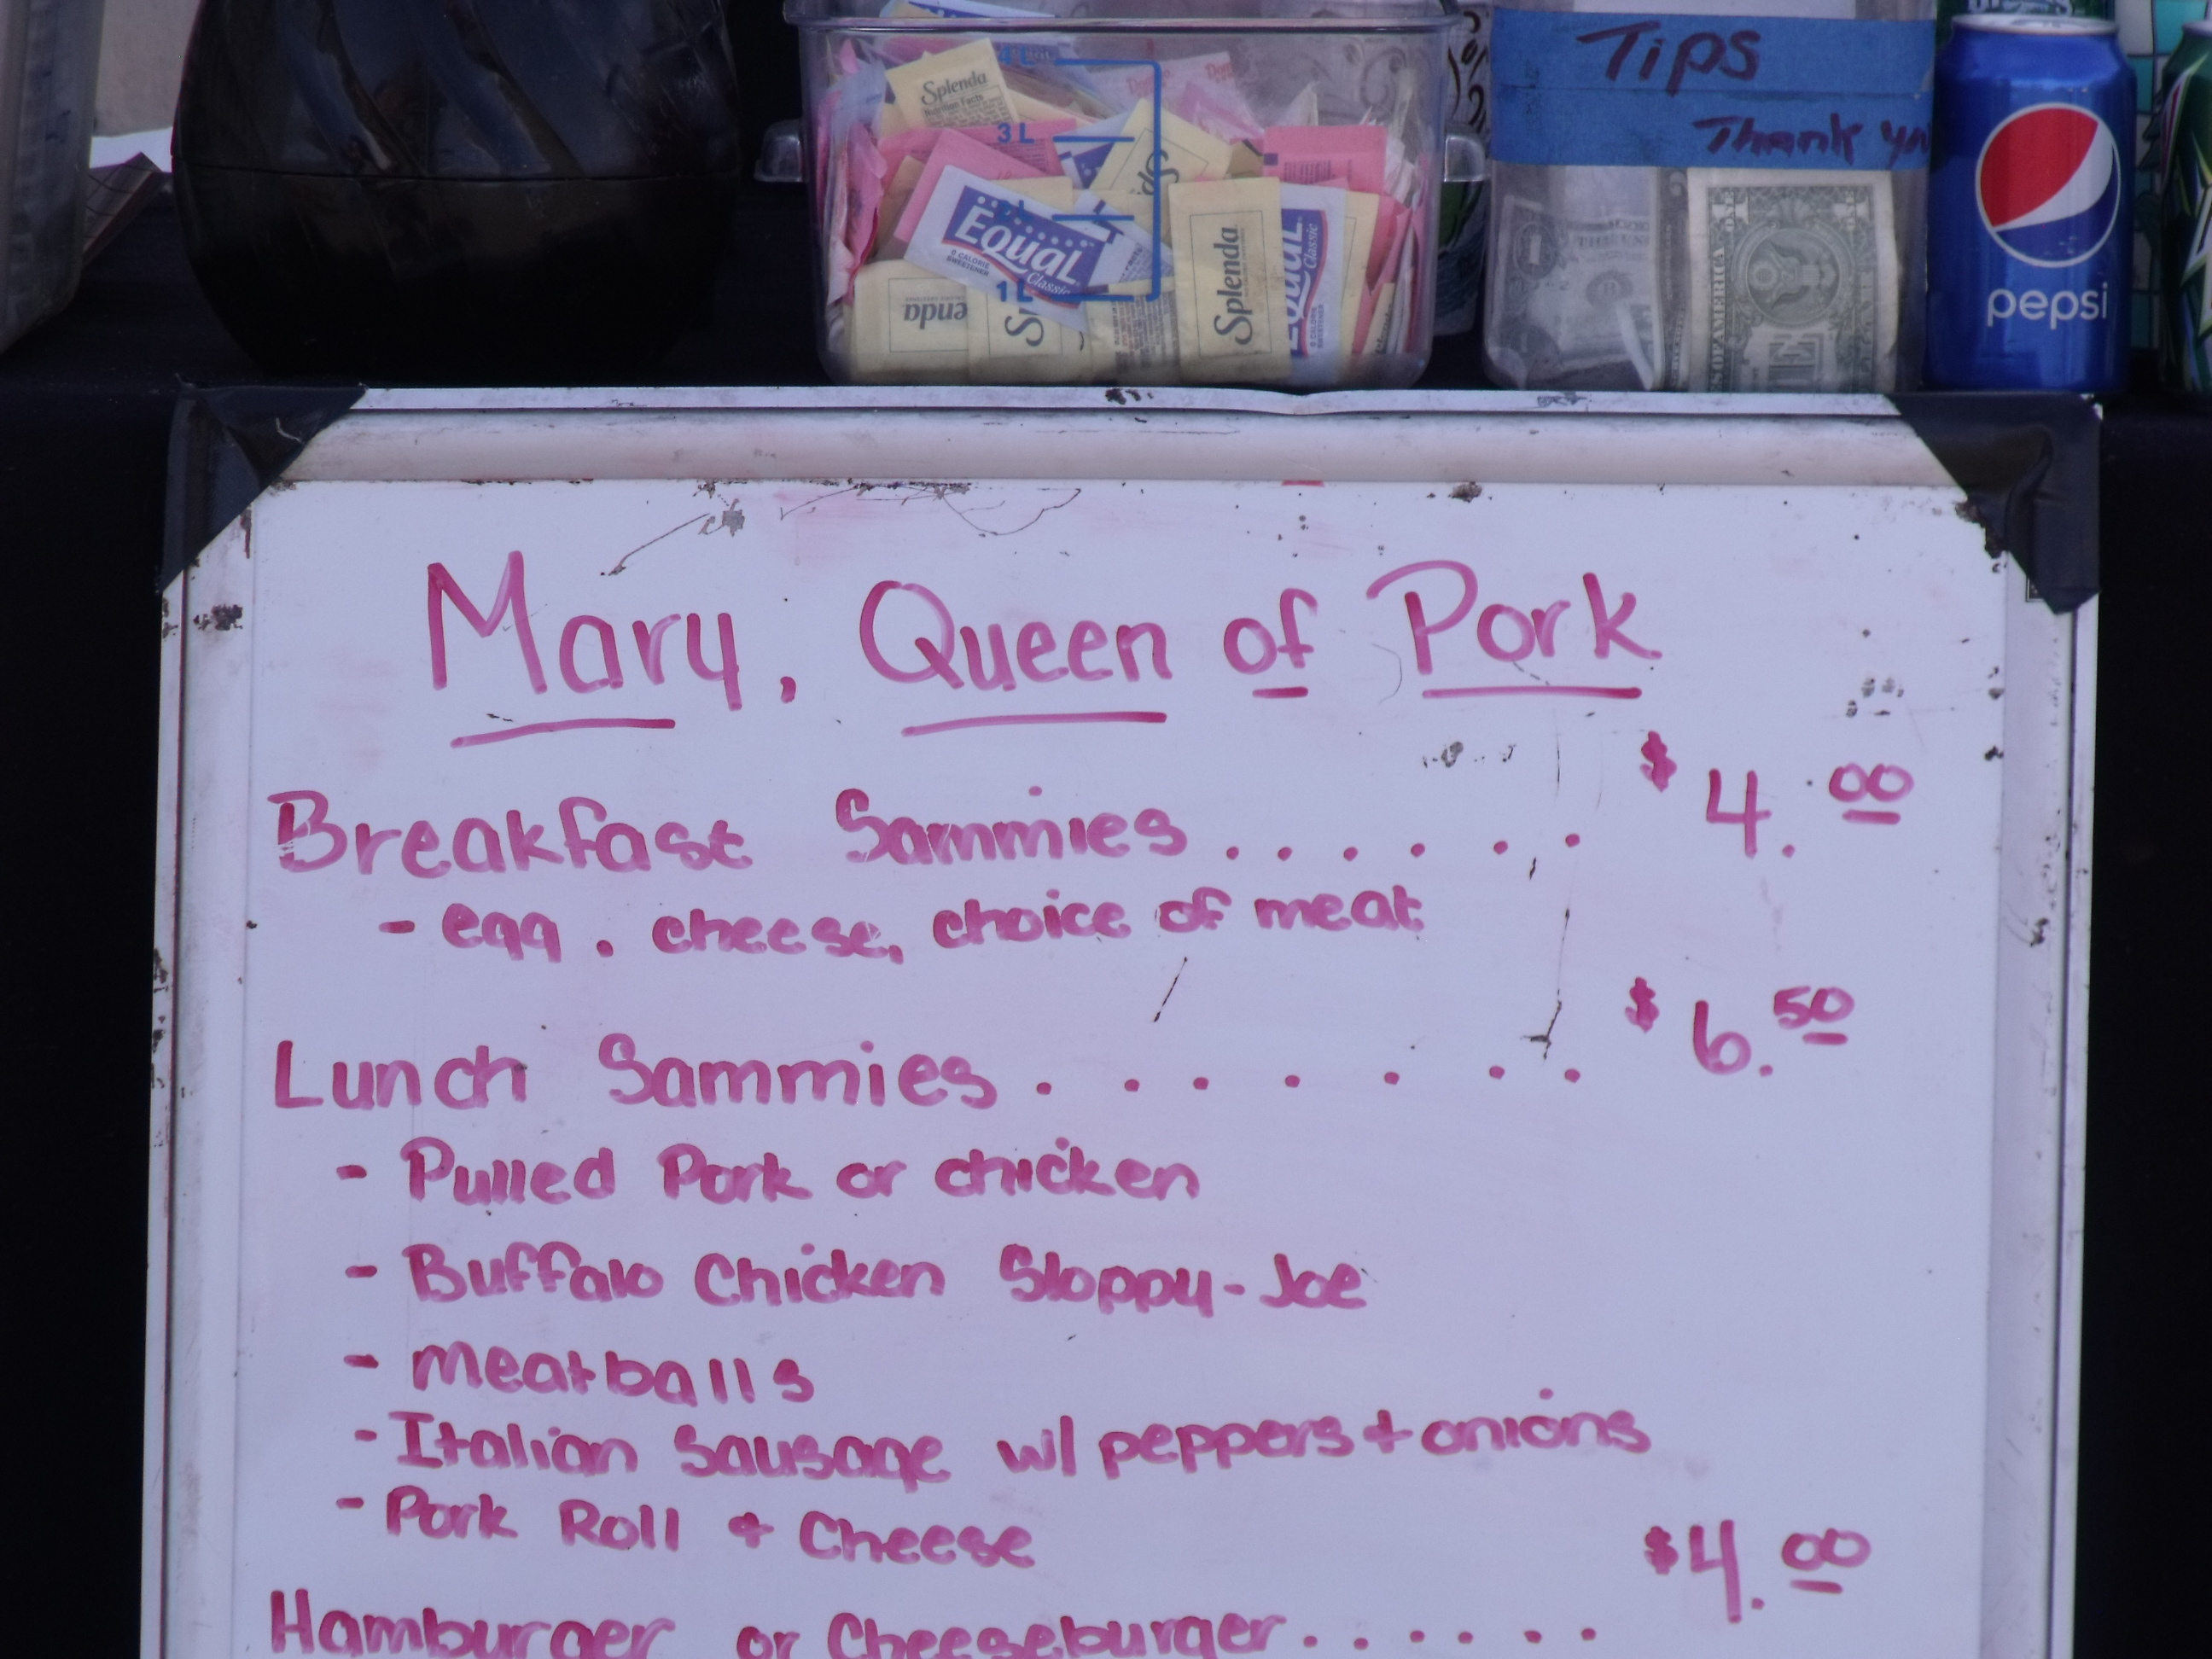
The food truck was run by Mary, Queen of Pork. Her chicken was good too.
This blog entry will focus on the photos, and you’ll see the very broad range of cars on display: pre-war and post-war, domestic and import, trailer queens and daily drivers. Remember that clicking on the photos will enlarge them.
The meet committee members were efficient as usual; judging was completed shortly after lunch, trophy award presentations commenced before 2pm, and we were packed up and outta there by 3pm. Car show season has officially begun!
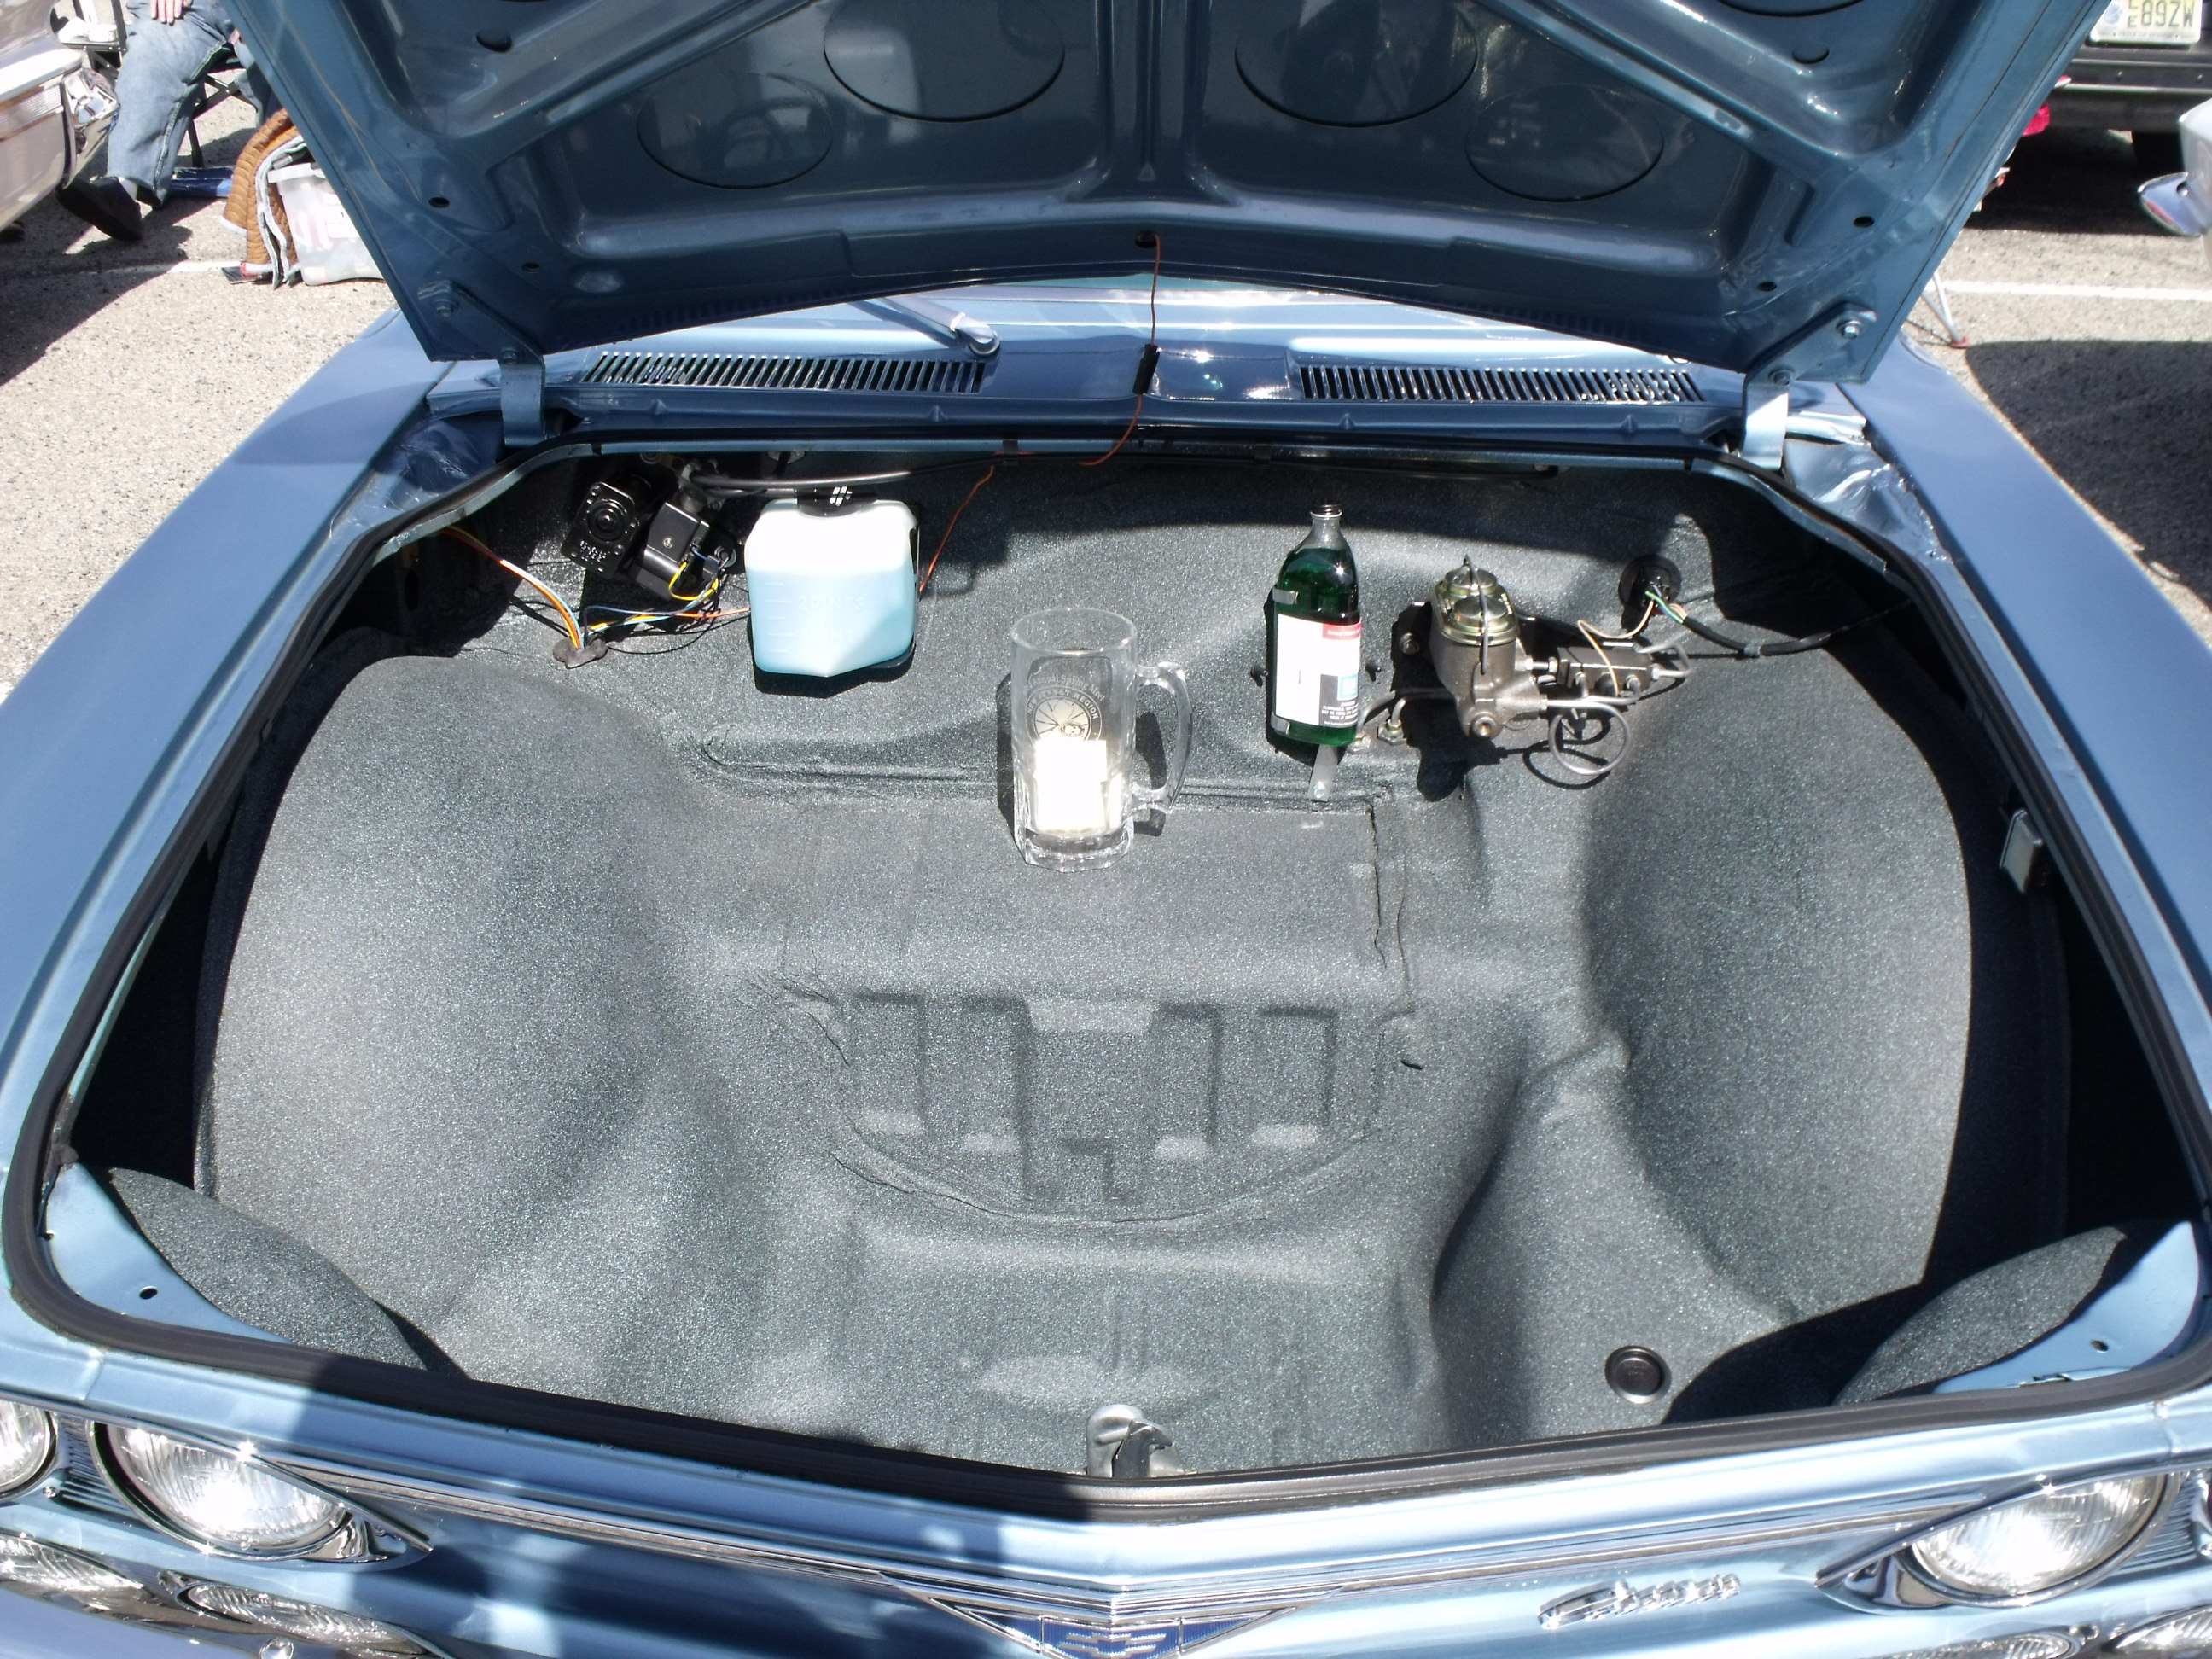
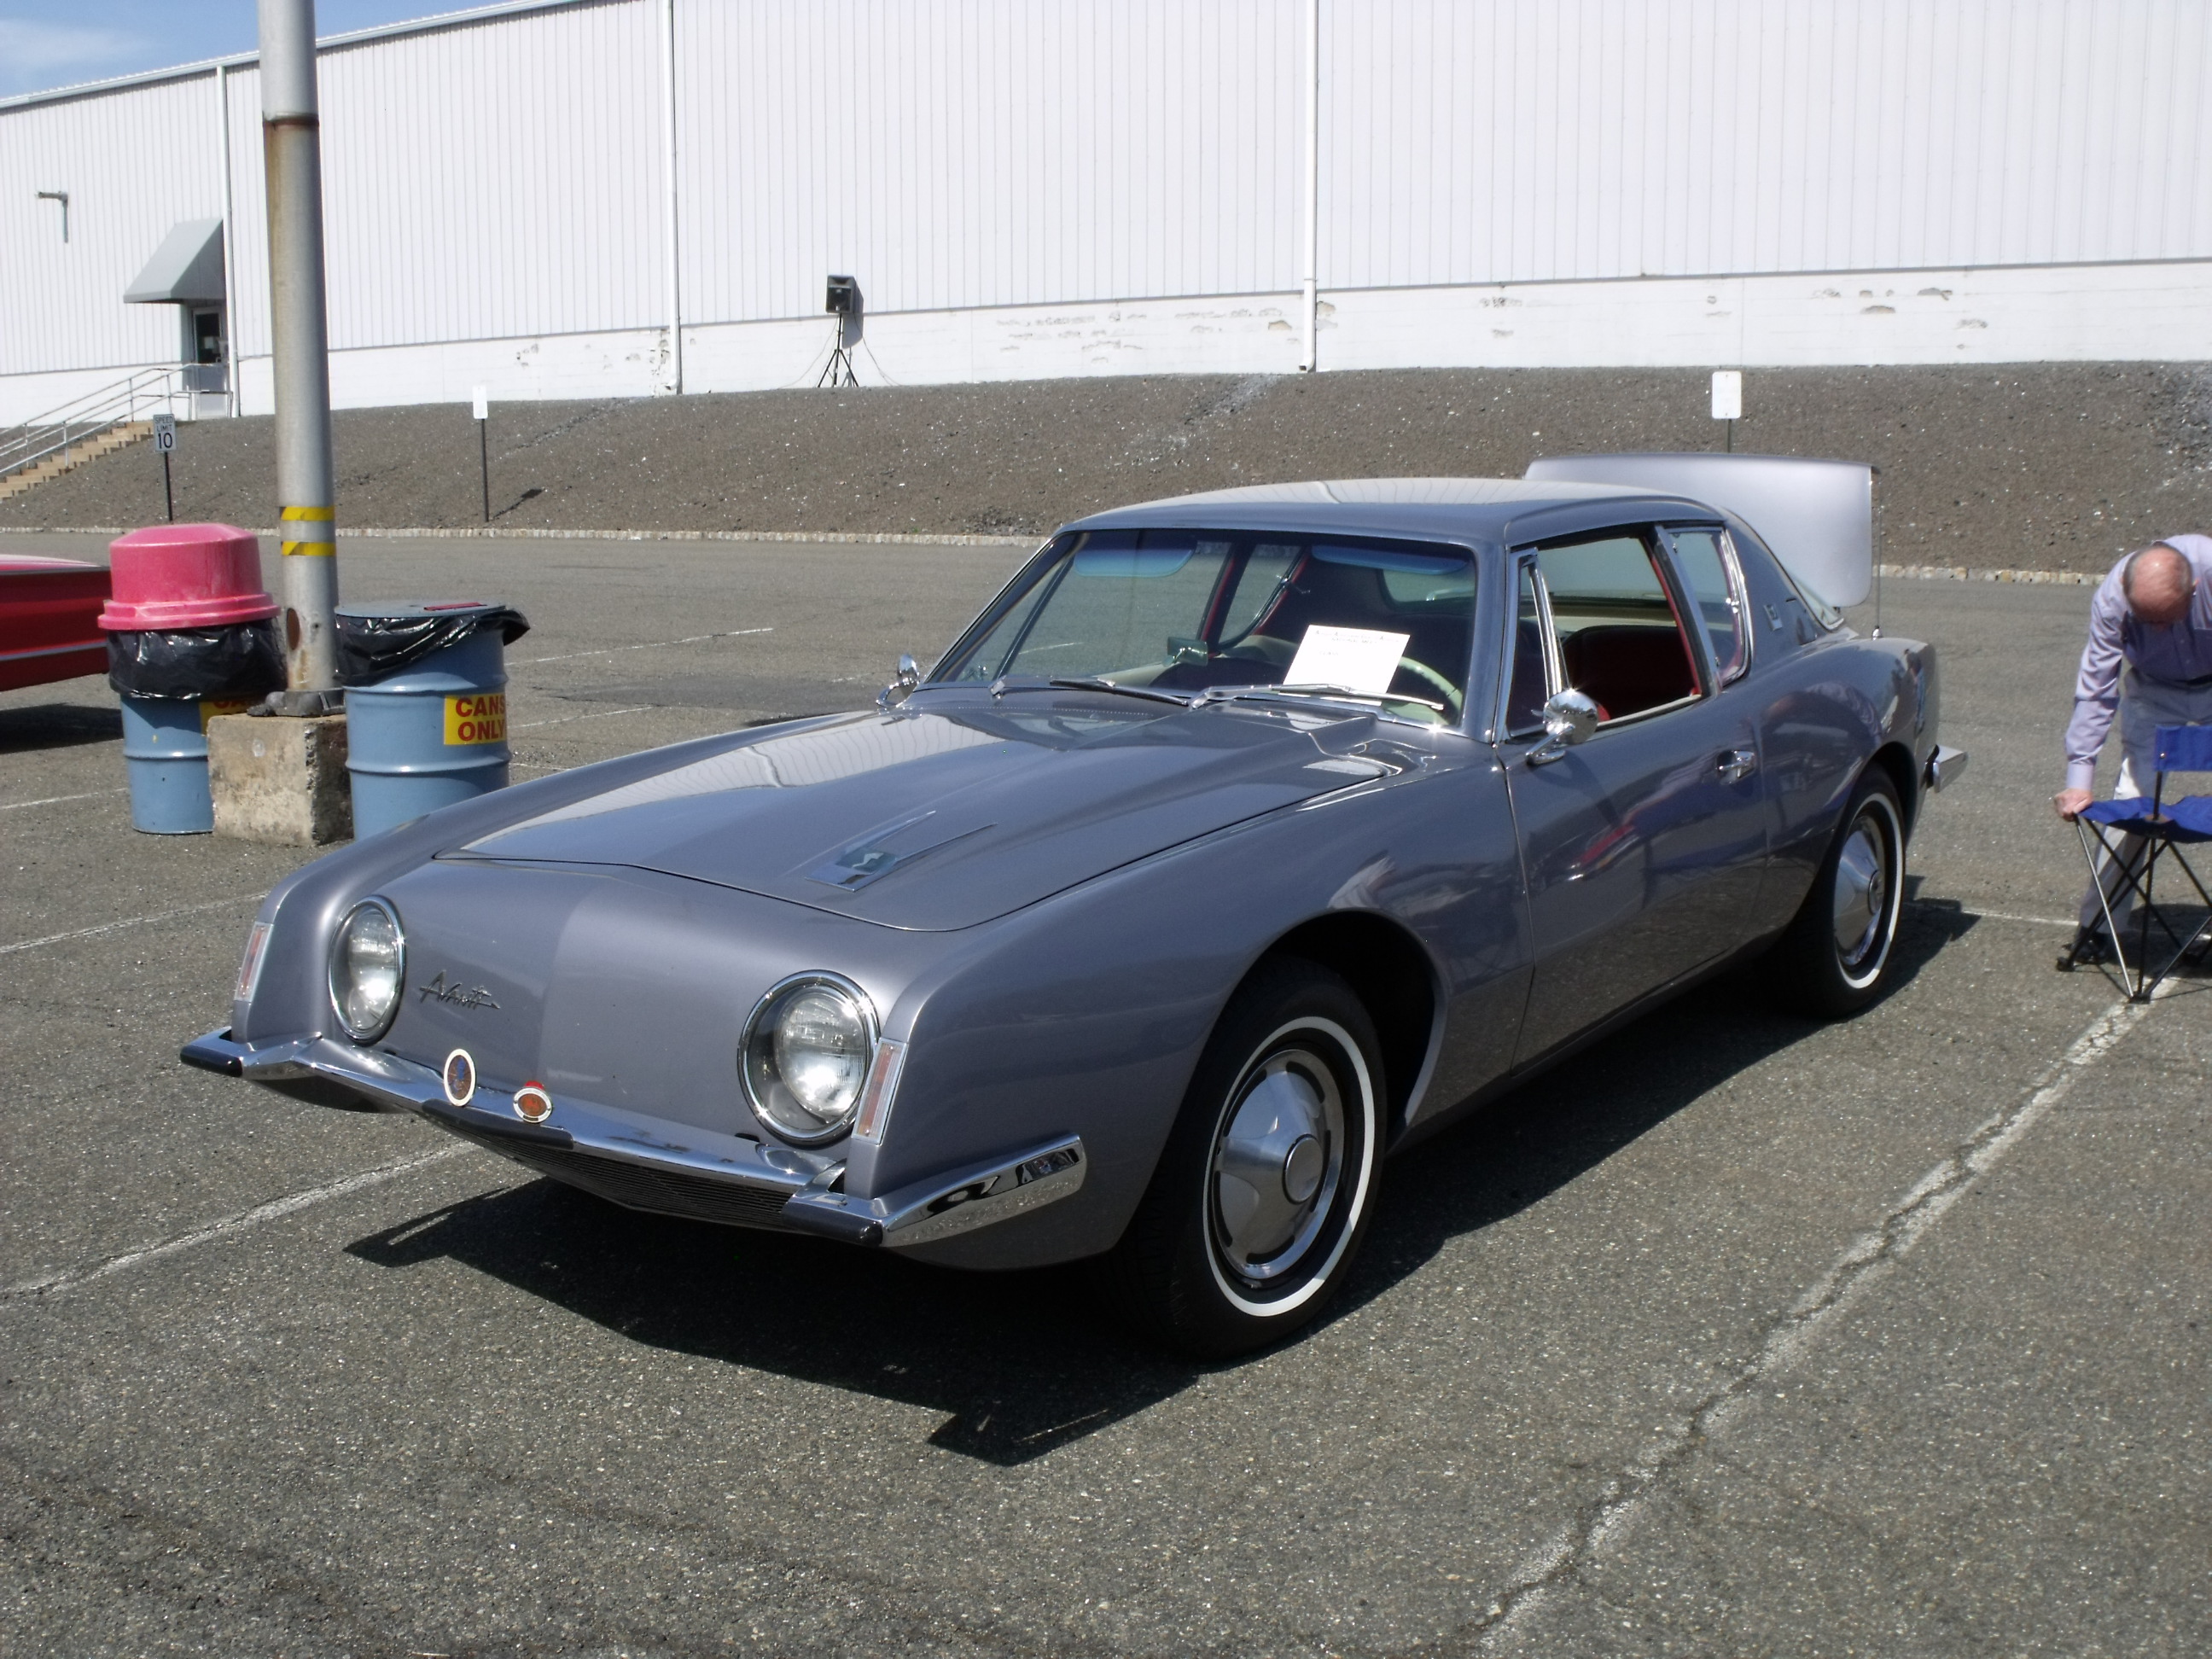
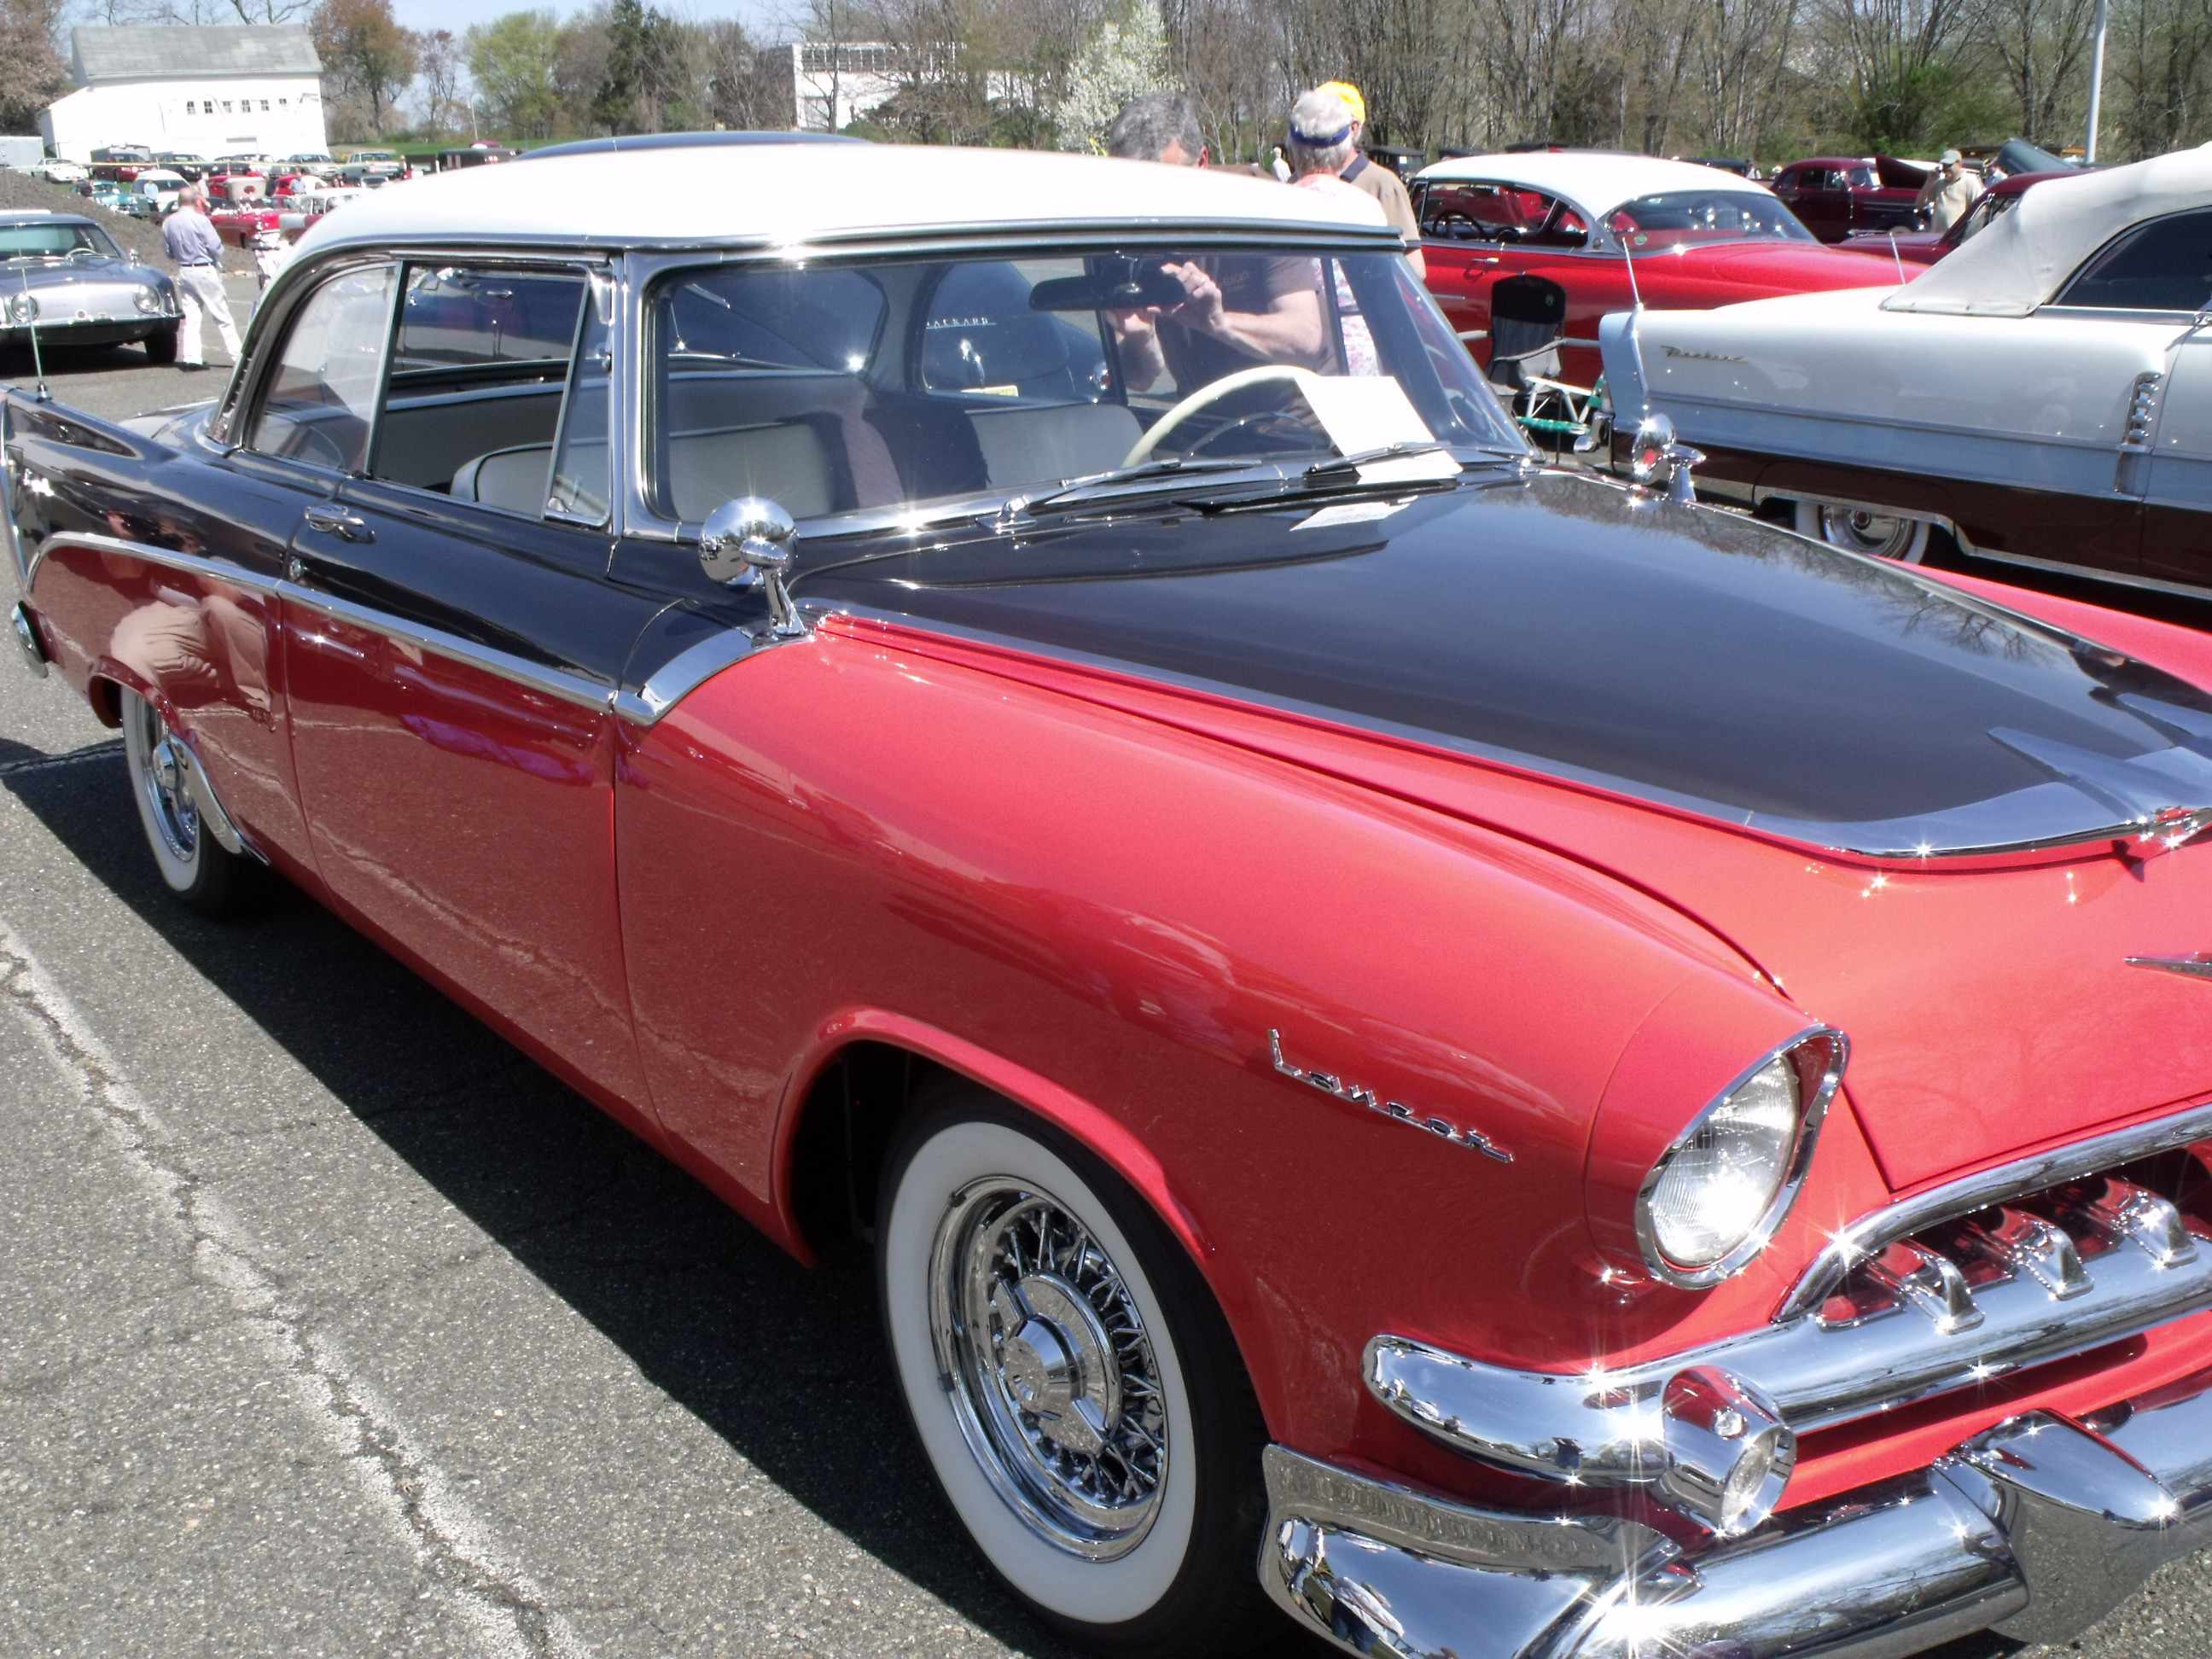
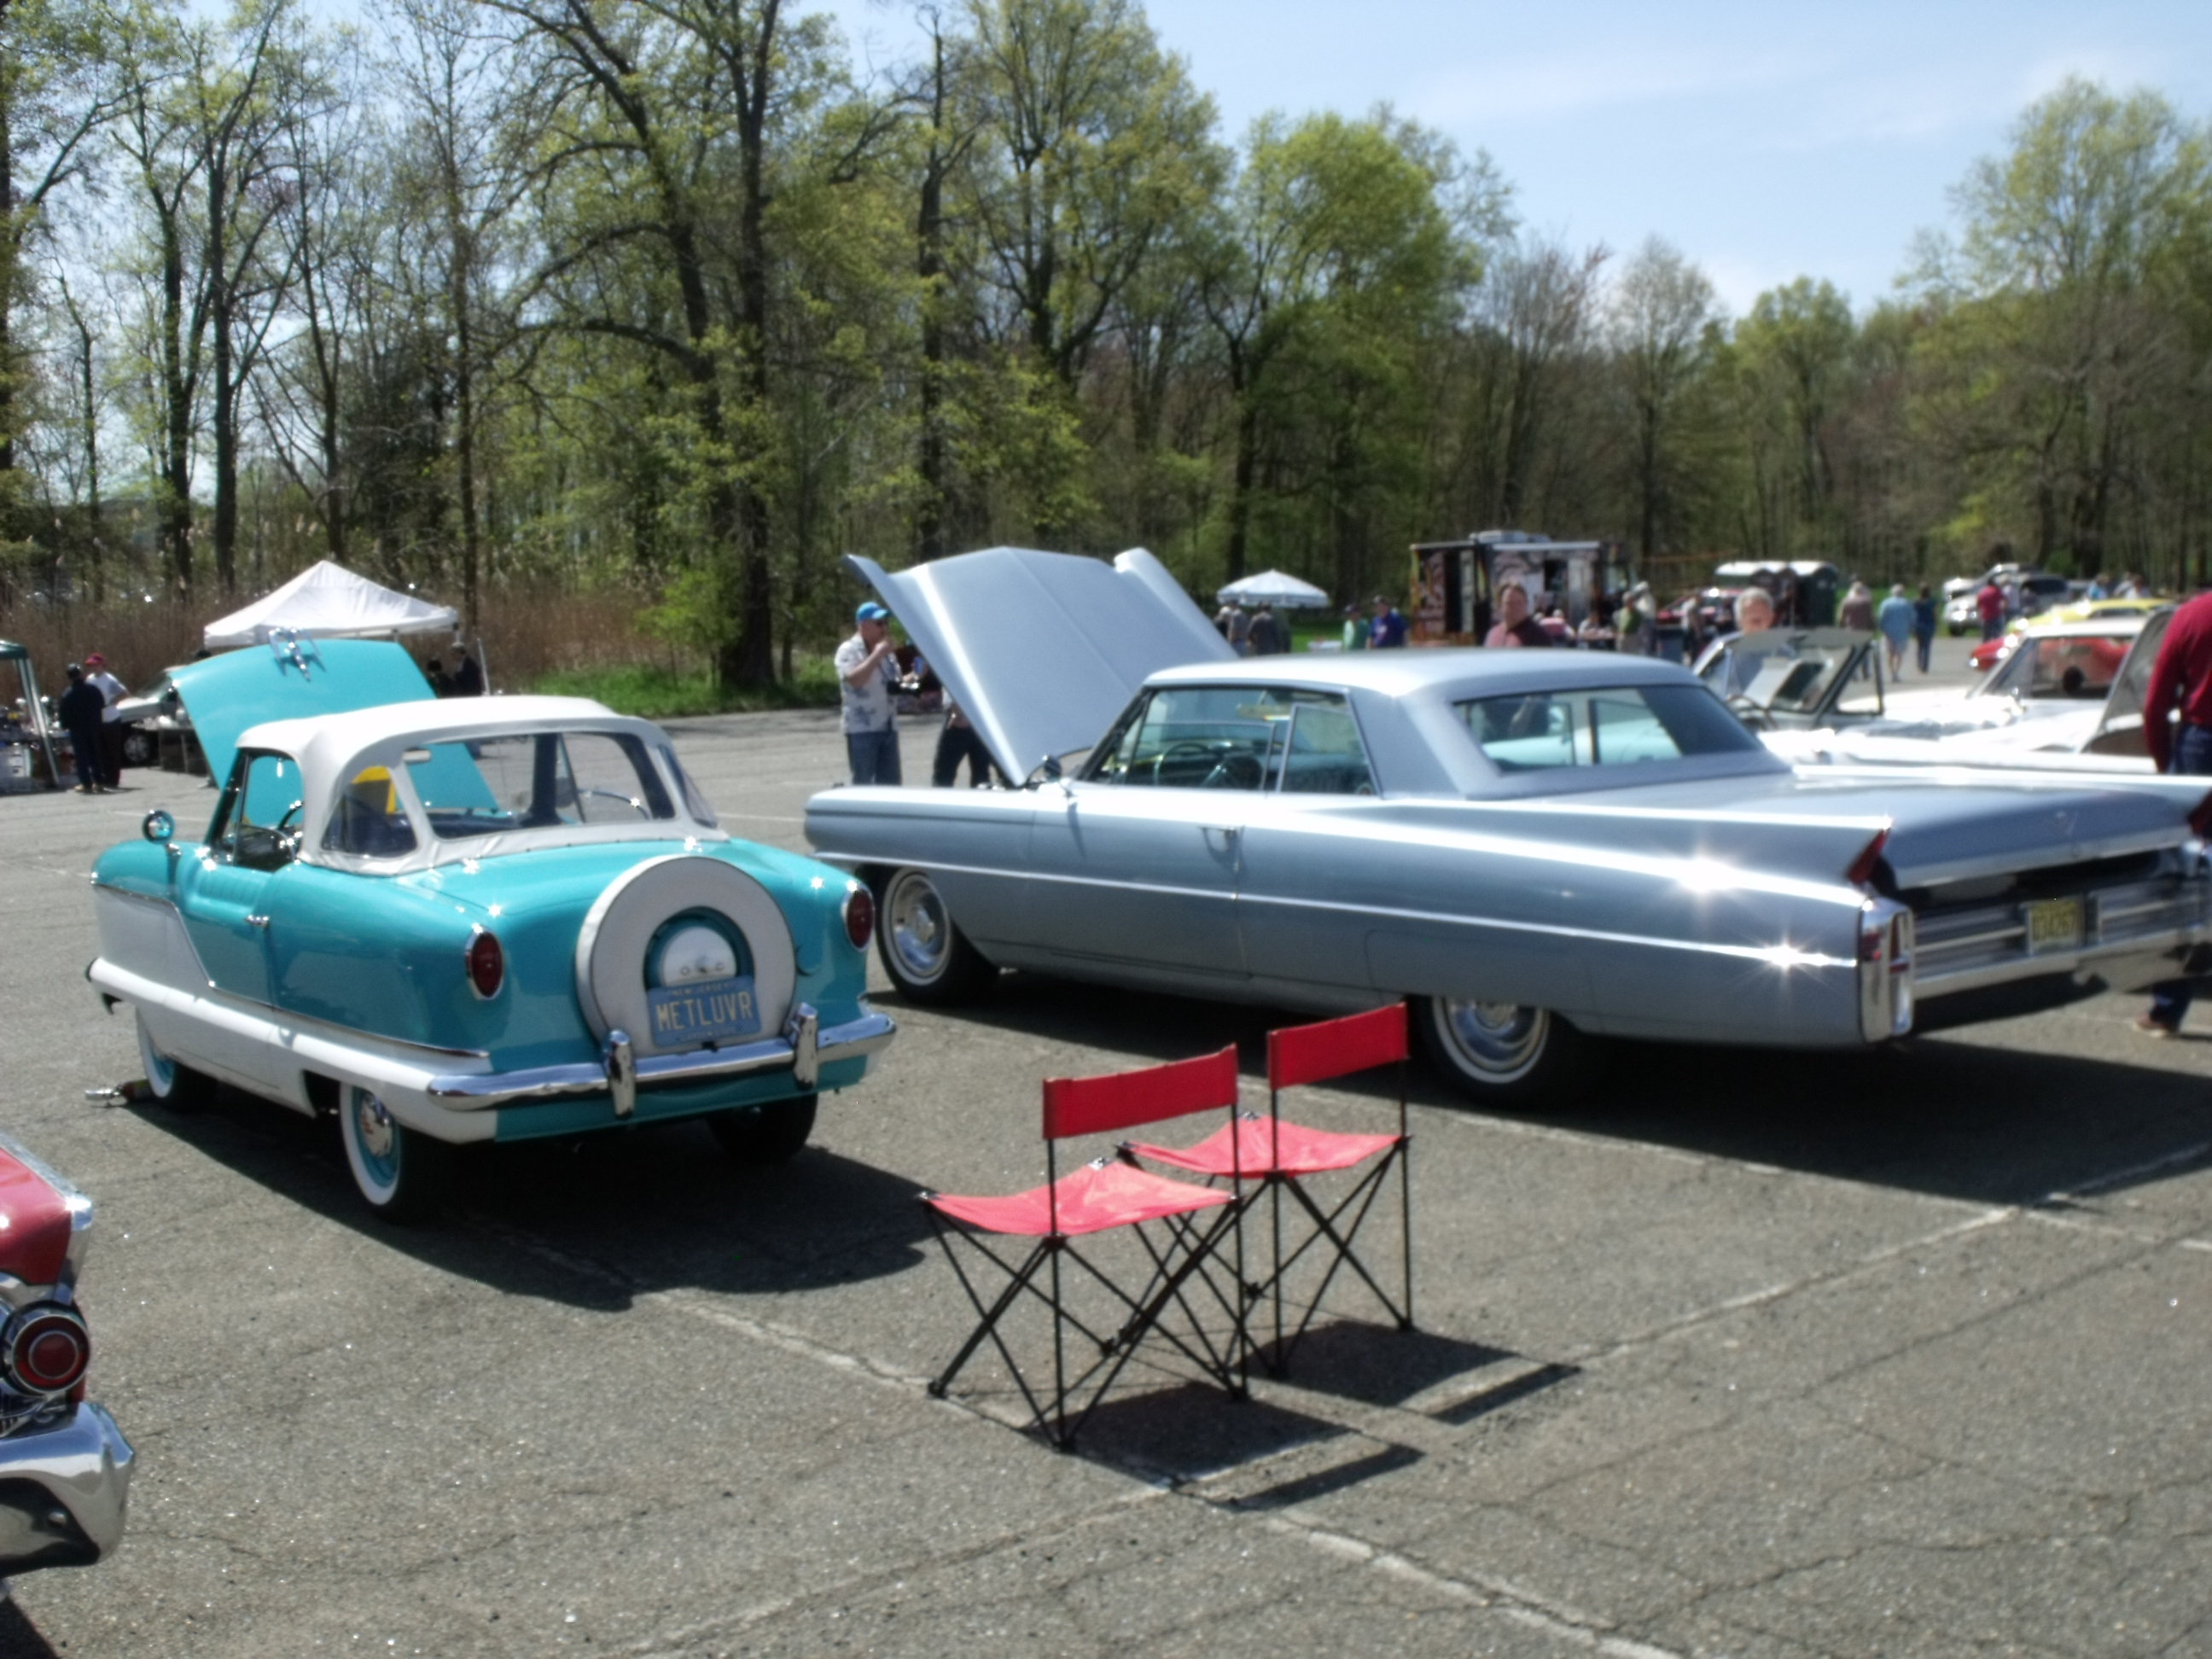
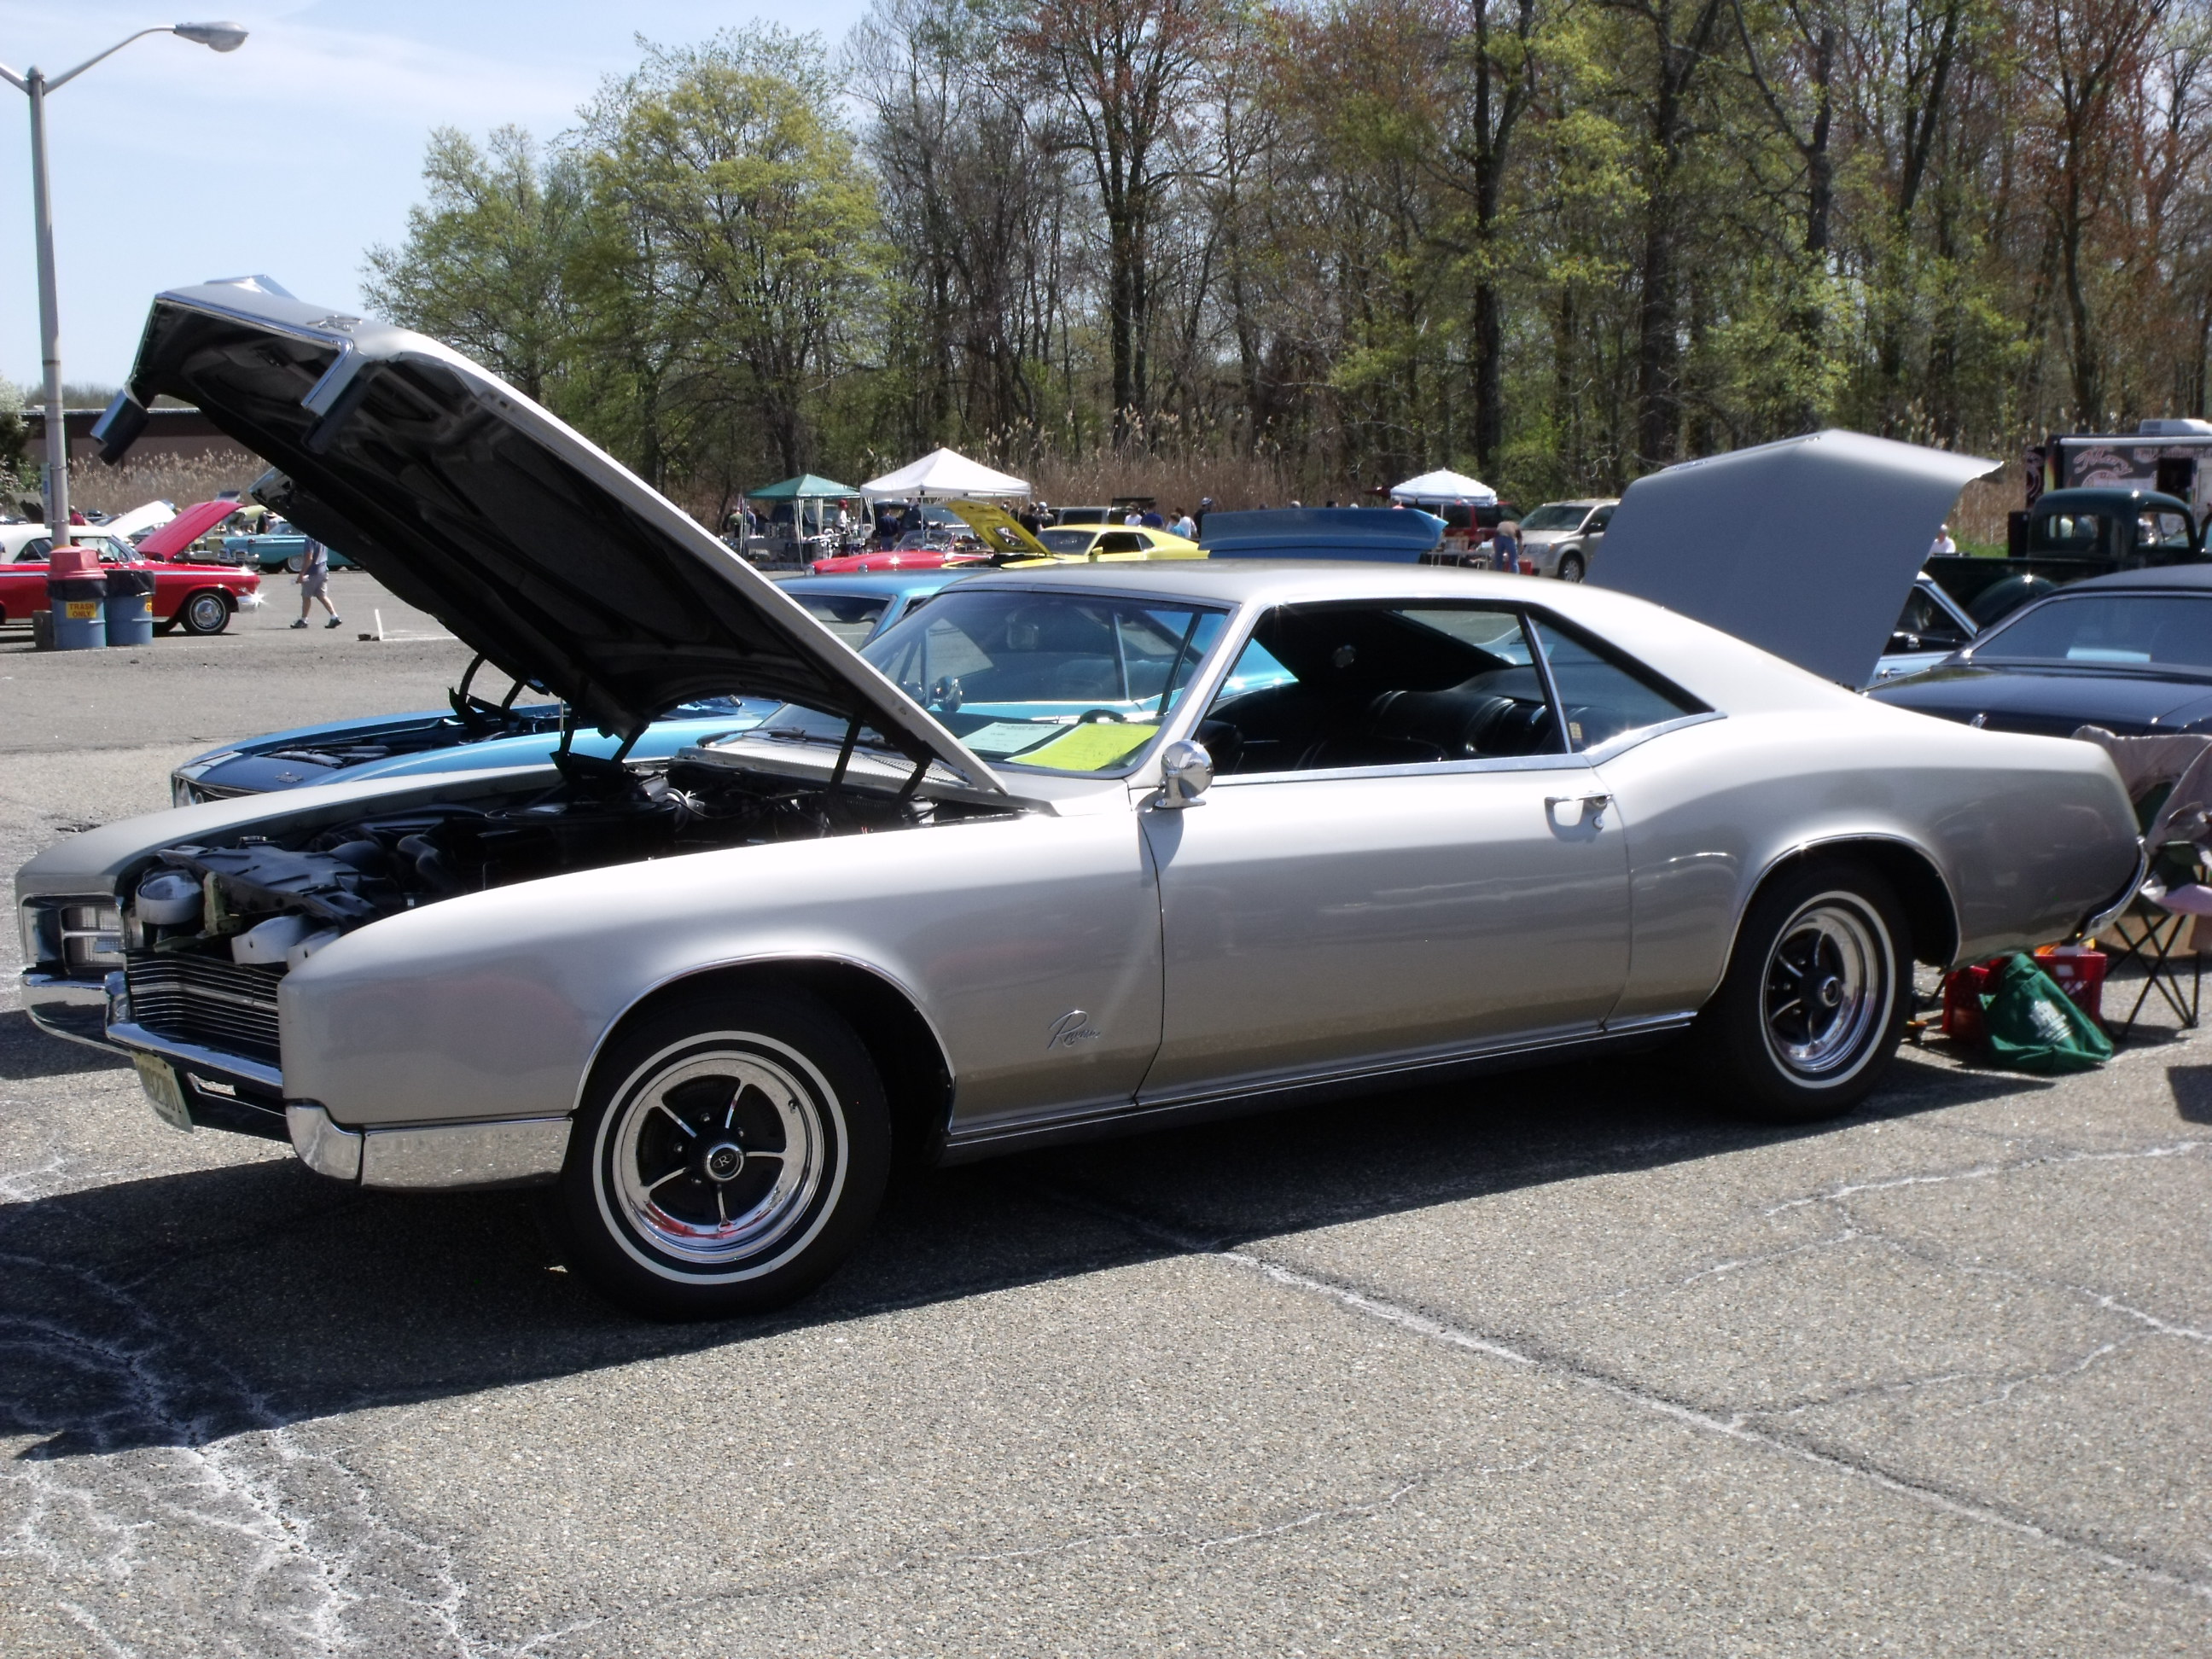
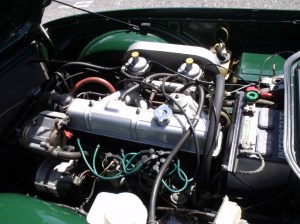
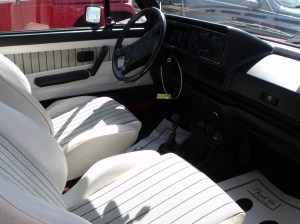
1968 Ford Mustang convertible.1969 Alfa Romeo 1750 Spider.The front trunk (“frunk”) on a 2nd generation Chevrolet Corvair.The iconic rear glass of a 1963 Chevrolet Corvette split-window coupe.Mercedes Benz 190SL roadster.Early ’60s Lincoln Continental convertible, the last domestically-produced 4-door car with “suicide” rear doors.A beautifully restored VW bus, lowered and wearing Porsche wheels.The VW bus engine compartment never looked this good from the factory.A Packard Caribbean convertible, featuring tri-tone paint.The “gunsight” tail light of a 1955 Chrysler Imperial.The unique sliding door arrangement on a Kaiser Darrin (one of THREE at the show!).T-Bird tails.A 1937 Packard convertible (owned by my friend Ron Novrit).A 1963 (first year) Studebaker Avanti. Note the round headlight bezels, found only in ’63.A 1959 Ford Skyliner, with the retractable hardtop in the “display” position.In the 1950s, Dodge was one of several car companies offering three different colors on one vehicle.There was a time when a “continental kit” was an item of necessity, not of decor!At one time, one could choose a luxury car like a Cadillac, or a compact car like a Metropolitan (which might fit in the Caddy’s trunk).A first-generation Mercury Capri, rarely seen in the East, as they all rusted away.A Lancia Beta Zagato.A 1966 Buick Riviera.A 1927 LaSalle, a GM nameplate that would not survive but a few more years.
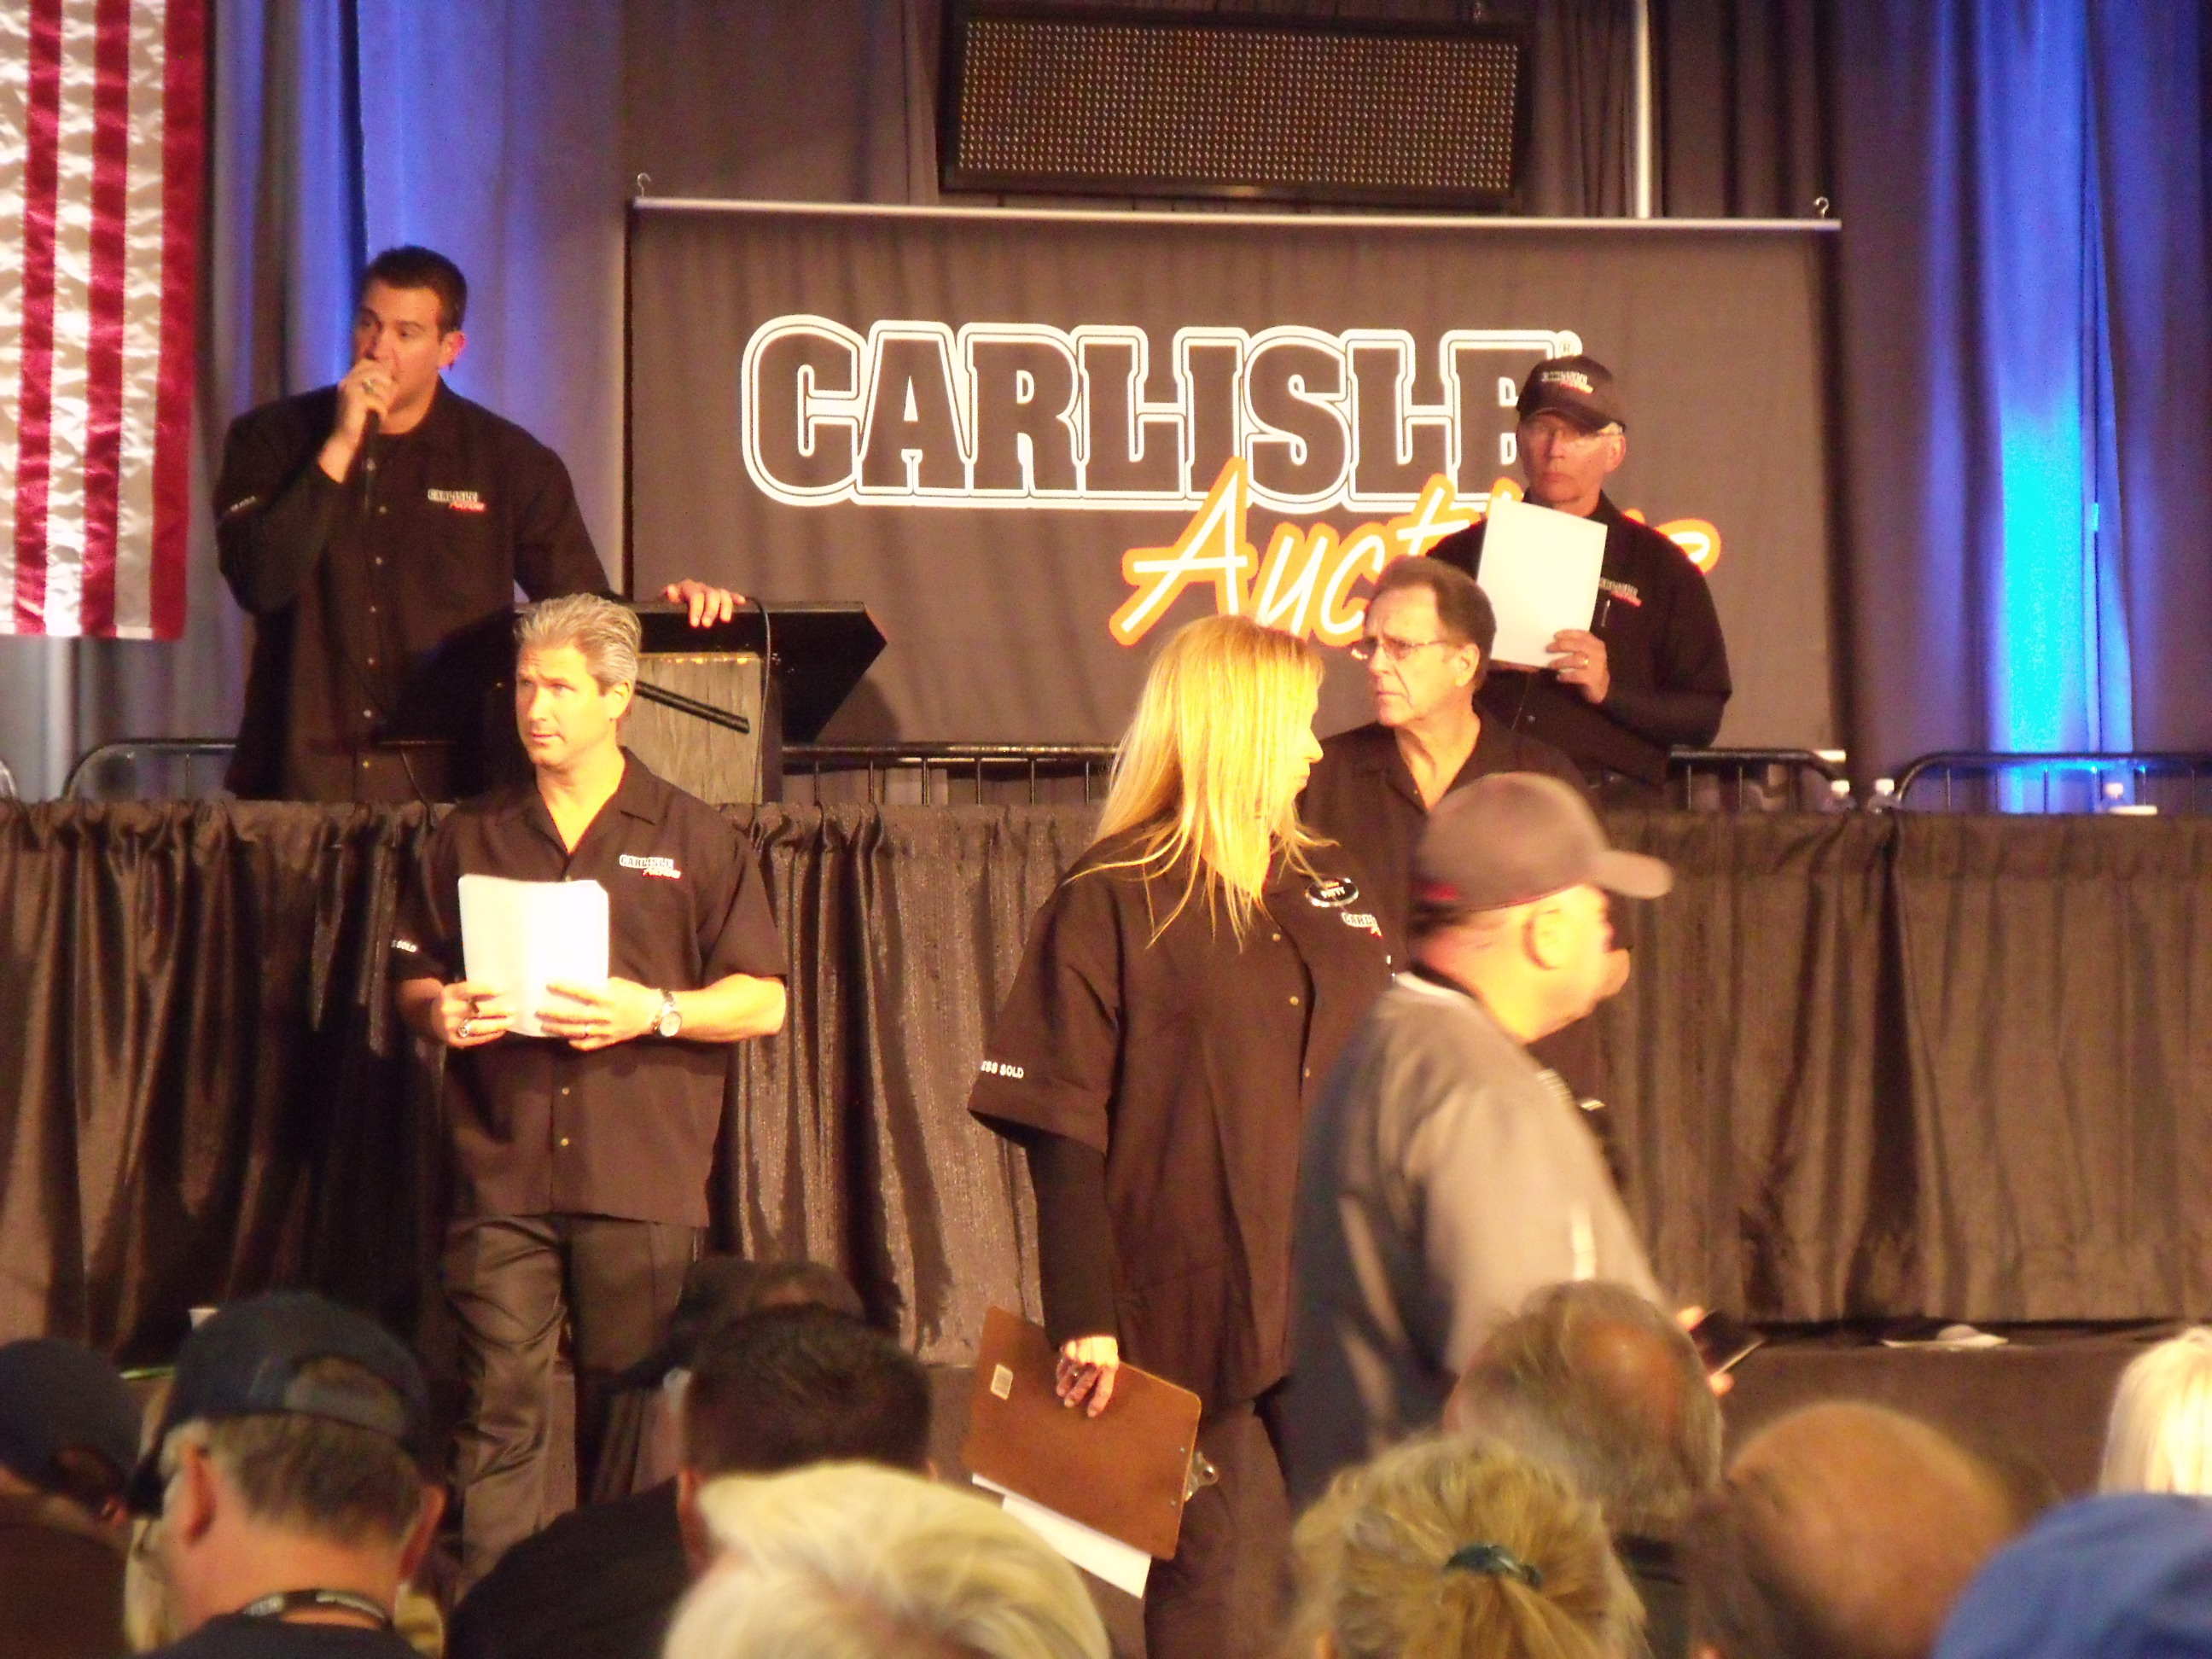
“Carlisle” held its Spring 2015 collector car auction on Thursday and Friday, April 23 & 24, at the Expo Center across from the Carlisle Fairgrounds in Carlisle, PA. For the uninitiated, “Carlisle” is classic car slang for Carlisle Events. What started in 1974 as a single flea market for post-war cars has grown in the ensuing decades into one of the biggest old car enterprises on the east coast, if not in the country. Today, in addition to the all-makes Spring and Fall events, there are marque-specific shows for GM, Ford, Chrysler, and Corvette. Imports are covered once a year at the Import-Kit Car Show. A number of years ago, auctions were added to the calendar. At first the Carlisle group ran their own auctions. They then partnered with Auctions America, the U.S. arm of RM Auctions. Most recently the auctions are again independently run.
The auction block at the Carlisle Expo Center
This is not Mecum. Approximately 400 cars ran across the block over two days, and based on lot numbers, it was about 250 cars on Thursday and 150 on Friday. The vast majority of vehicles are the Chevrolets (Corvettes, Camaros, Malibus, Impalas) and Fords (Mustangs, T-Birds, Rancheros, pickups) you see at other auctions, in other words, the usual suspects. Unlike AACA, there is no model year cut-off. I witnessed a 2008 Ford F-550 truck attempt to maneuver its way onto the block (it didn’t make it, nor did it sell), so sometimes you feel like you’re sitting in Manheim at a late-model auction.
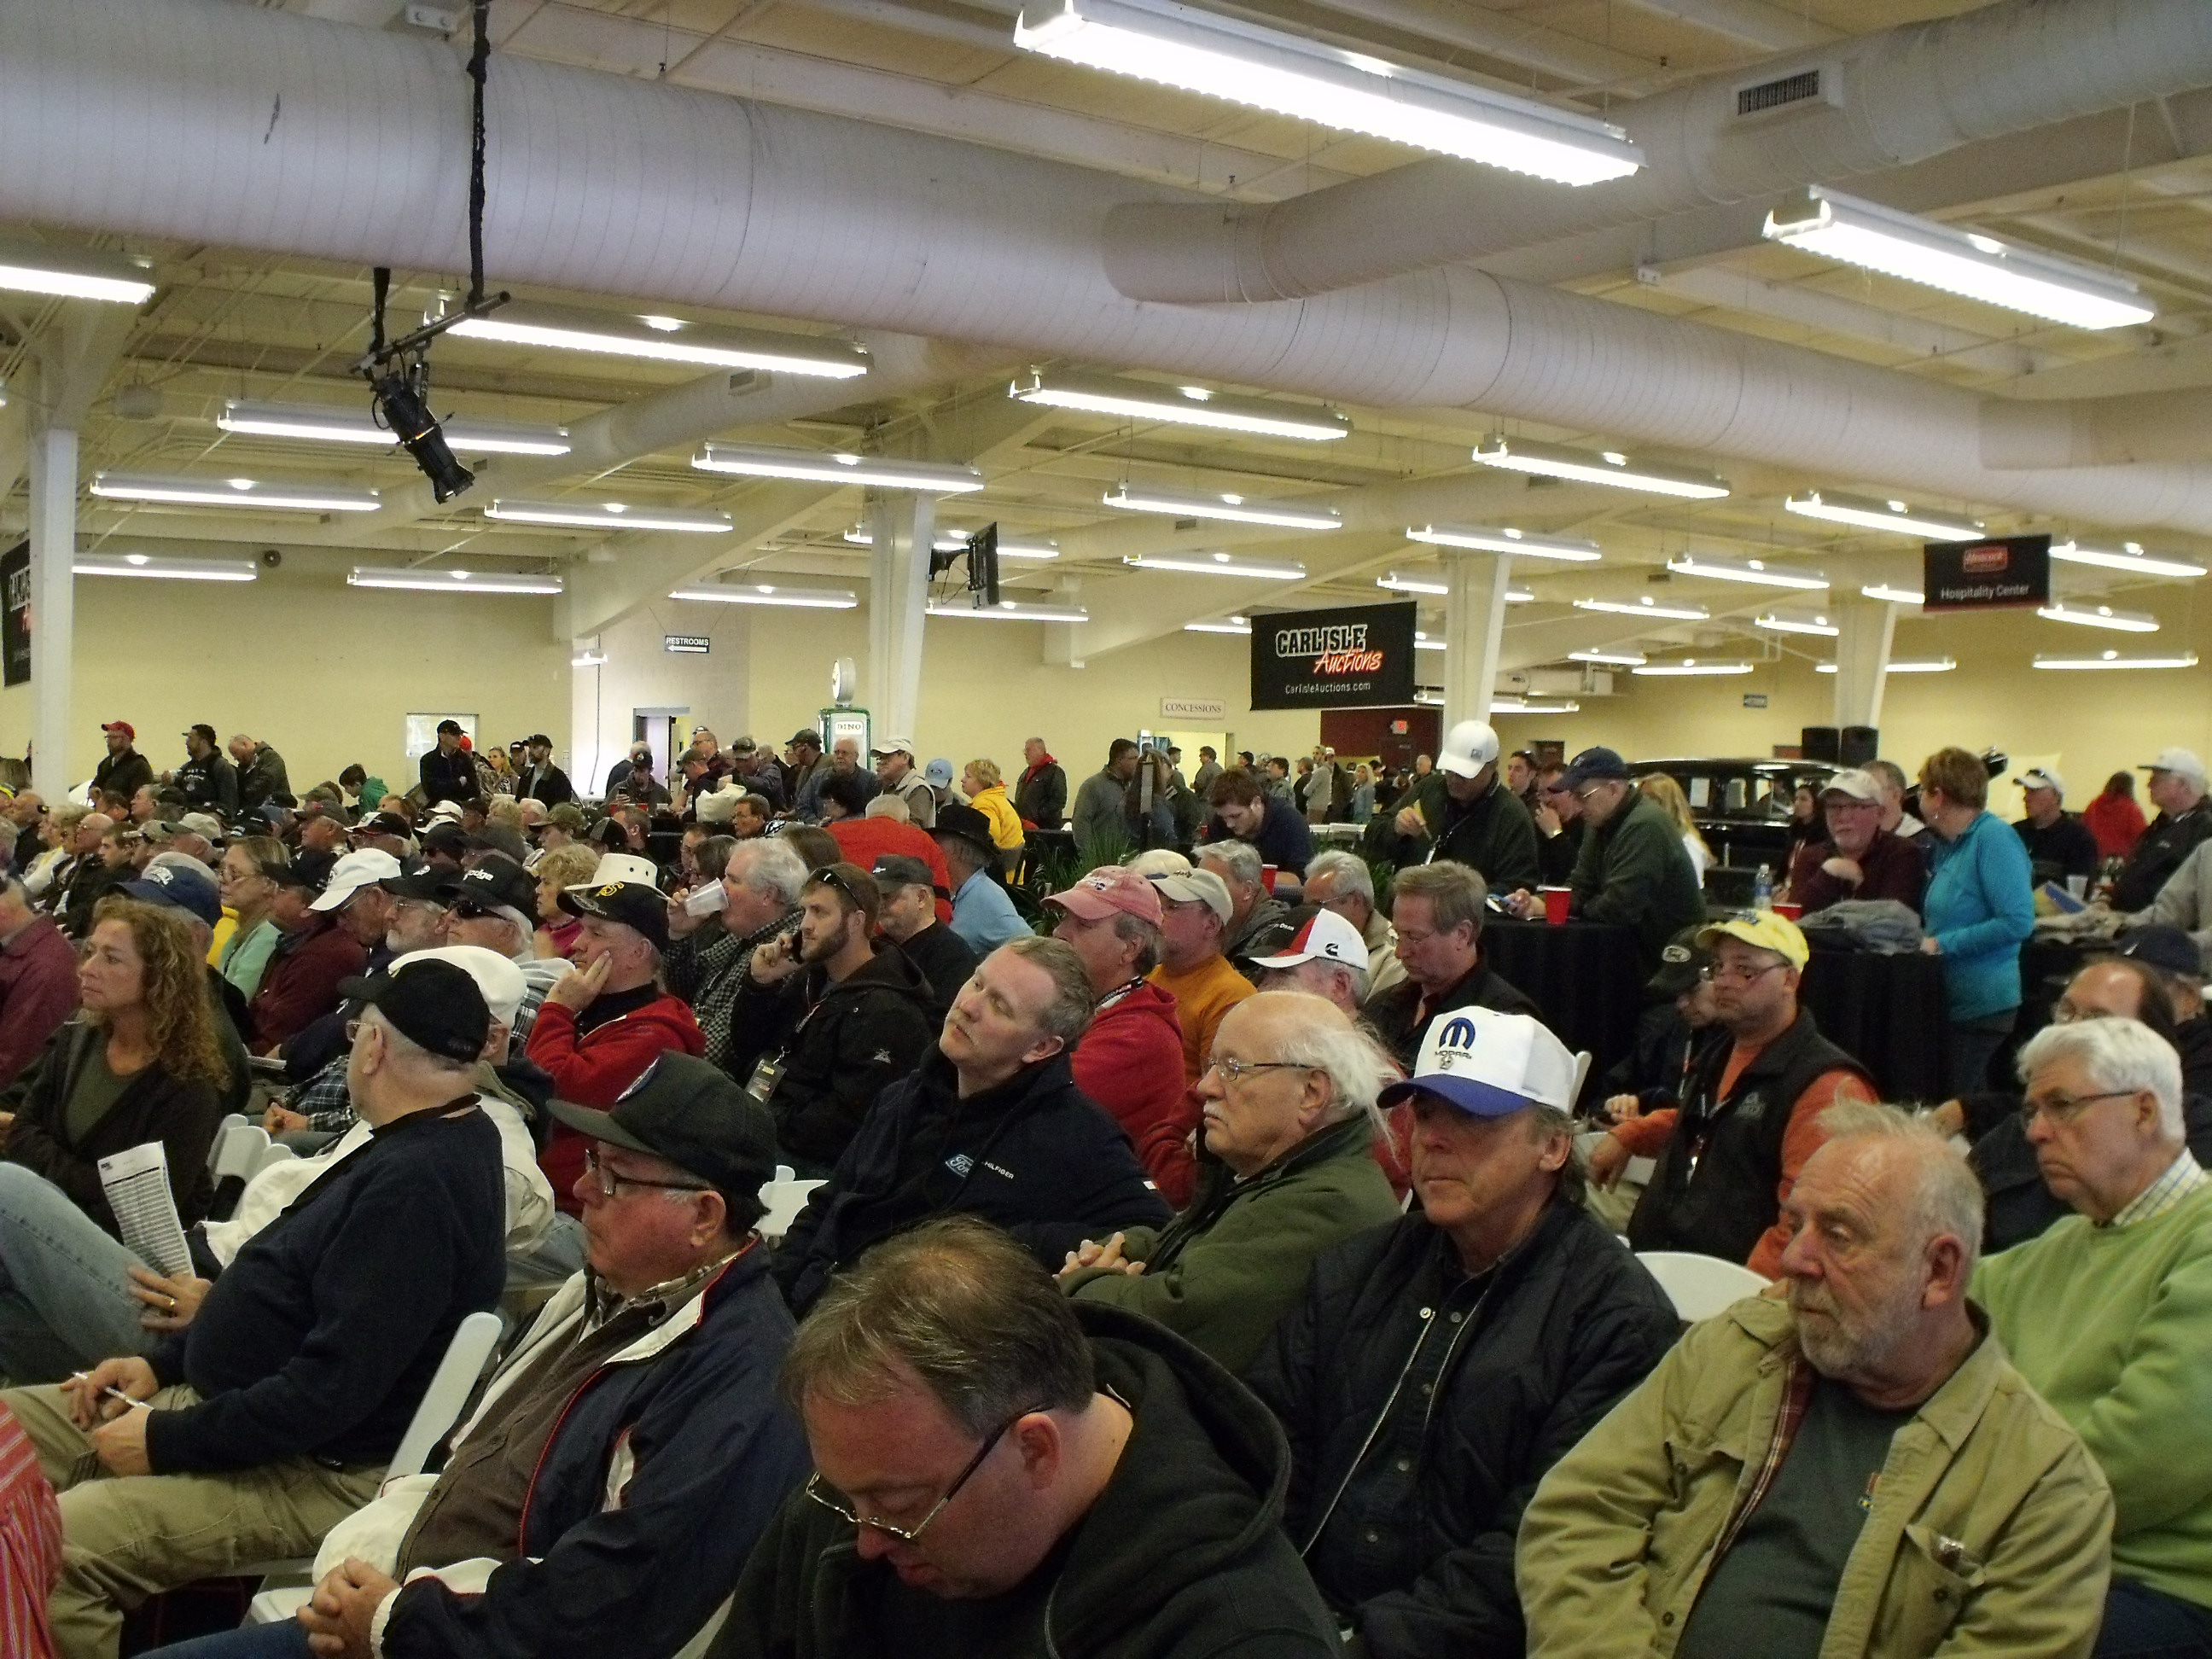
The seating area was just about filled to capacity.
Reserves are up to the consigners, and based on my most unscientific observations, many reserves were high and kept the sell-through rate down. Thursday seemed to be a better day for sales than Friday, with a sales rate perhaps approaching 70%, dropping to 50% on Friday. One attraction for consigners is the “you don’t pay unless you sell” policy. The consignment fee ranges from $100 to $400, and Carlisle states that if your car does not sell, they will refund your fee. Both days, the Expo Center was standing room only, with plenty of active bidders crowding the block. There was not a seat to be had in the bidders’ area, likely helped by the free food and booze offered as part of the consignment package.
The crowd patiently waits until it’s their turn to spend money.
Again, this is not Mecum. While I give the Carlisle staff full marks for their efforts, there were times when the proceedings had a true mom-and-pop feel to it. More than once, the auctioneer lost his place, and could not find his current two highest bidders. At least one of those times he had to wind the bidding back by a grand. Another vehicle had its mileage misstated on the screen (it showed 19k when the car had 99k) and all bids were struck while the auctioneer started again. On the other hand, it was nice that TV monitors scattered throughout the room clearly showed the car, the lot number, and the current bid. There was no such luxury in Atlantic City this past February.
My specific vehicle coverage below is all-import; first, this is where my heart is in the hobby; second, I find that many European cars get ignored at a domestic-heavy event like this, and some potentially good deals can be had. I would be remiss, though, if I didn’t mention the weekend’s star car: a 1977 Pontiac Firebird Trans-Am, owned by the actor Burt Reynolds, and modified into a “Smokey & The Bandit” tribute car, crossed the block around 7 p.m. on Friday. It STAYED on the block for about 30 minutes, or 10 times longer than the typical auction car. My personal guess was that the car would sell for $70,000. Add a one in front, as the car hammered for $170,000. Burt had signed the hood AND the dash, so that must have made the difference….
In model year order:
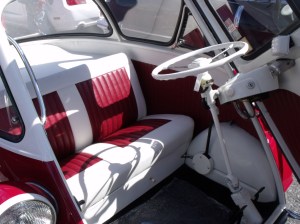
Lot #F395, 1957 BMW Isetta. Chassis #493993. Mileage: 10,000. Bubble window coupe, not the more common sliding window. Dark red and white two tone, black vinyl sunroof, red and white interior. Beautiful workmanship inside and out. Having owned one for 35 years, I know these cars. Outside restoration is almost 100% authentic, except for painted headlight trim rings (should be chrome). Rare to see someone get all the outside details correct. Interior modified as most are, with vinyl-covered panels (factory gave you painted fiberboard panels). This interior is relatively understated, looks professionally done, and complements outside colors well. Overhearing attendees’ reactions is priceless. One fellow said “this is not a car. This is almost a car”. Although Isetta market has cooled slightly, high bid was light by $5,000-10,000. CONDITION: 1- SALE PRICE/HIGH BID: $29,500 NOT SOLD PRICE BOOK RANGE: $28,000-53,000 (CPI)
1957 BMW Isetta front
1957 BMW Isetta rear
1957 BMW Isetta interior
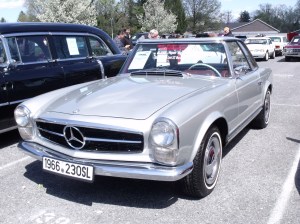
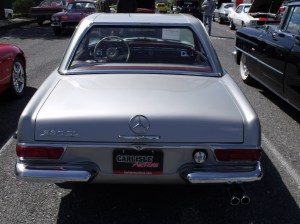
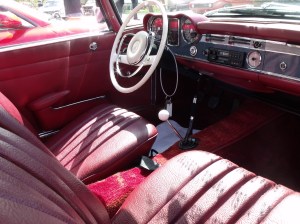
Lot #F399, 1966 Mercedes Benz 230 SL roadster, warm silver with red vinyl interior, stick shift. Mileage is 70,936. Optional hard top. Unknown if soft top is included. Striking color combo, very clean overall. Nothing to fault with interior. Only glaring misstep is aftermarket exhaust, with tips extending about 4 inches past rear bumper. Sign says same owner last 20 years. If it runs well, this was well bought, especially with the stick, and will only appreciate. CONDITION: 2 SALE PRICE/HIGH BID: $39,000 SOLD PRICE BOOK RANGE: $40,000-76,000 (CPI)
MB 230 SL front
MB 230 SL rear
MB 230 SL interior
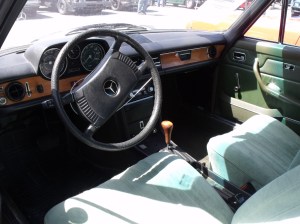
Lot #F443, 1973 Mercedes Benz 280 CE coupe, green and white with green velour interior. Mileage is 53,380. Automatic. Sign says “barn find”. Odd two-tone, with white paint across center section of roof. White hub caps. Outside is rough, with both doors not shutting well, poor paint, rust bubbles everywhere. EPA label verifies this is US spec car, but upholstery looks odd. Cheap sale price reflects an attractive body style on a car that will need serious work before becoming drivable. CONDITION: 4 SALE PRICE/HIGH BID: $3,000 SOLD PRICE BOOK RANGE: $5,000-12,000 (CPI)
1973 MB 280 coupe front.
1973 MB 280 coupe rear
MB 280 coupe interior
Lot #412, 1976 Triumph TR 6, bright green, black top, tan interior. Odometer just over 56,000. Sign claims car is rust free and it looks it. Red line tires and trim rings add elegant air to exterior; clean upholstery, unmarked wood dash, and coco mats do same for interior. Convertible top has correct reflective stripe. Overall strong presentation. Sale price is fair to buyer and seller. CONDITION: 2+ SALE PRICE/HIGH BID: $18,000 SOLD PRICE BOOK RANGE: $12,000-20,000 (Sports Car Market)
Triumph TR6 rear
Triumph TR6 interior
Triumph TR6 engine
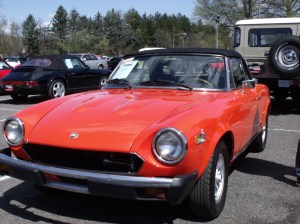
Lot #T199, 1977 Fiat 124 spider, orange, black top and interior. Mileage not noted. Quality repaint but overspray on windshield frame. No signs of rust. Front bumper crooked. Nice looking Fiat alloy wheels. Interior looks straight with no rips or tears. Lots of eyeball but would need to look at floors and underside to ensure solid metal was underneath. CONDITION: 3+ SALE PRICE/HIGH BID: Not sold, high bid not noted PRICE BOOK RANGE: $7,000-10,500 (Sports Car Market)
1977 Fiat 124 front
1977 Fiat 124 rear
1977 Fiat 124 interior
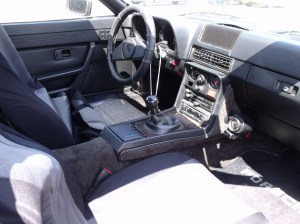
Lot #T150, 1981 Porsche 924, silver with black interior, bra on front, mileage not noted (it doesn’t matter). Sad and tired looking thing. Silver paint worn, faded, scratched. Factory sunroof, Porsche alloys. Interior no better than outside. Seat covers with driver’s cover pulled back to reveal black electrical tape on seat bolster. Wires running through door jamb from hood into interior for aftermarket gauge. Aftermarket exhaust looks too large for car. Trailer hitch! Bid to $2000 and did not sell. Car is living proof that Porsche is not infallible. CONDITION: 4– SALE PRICE/HIGH BID: $2,000 NOT SOLD PRICE BOOK RANGE: $3,000 (Sports Car Market)
Porsche 924 front
Porsche 924 rear
Porsche 924 interior
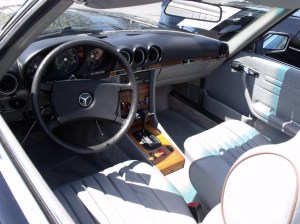
Lot #F339, 1983 Mercedes Benz 380 SL roadster, black with gray interior, hard top, sign says mileage is 50k. Sign also says light blue interior which is wrong. Straight body, aftermarket fog lights, exterior bright work dull, Benz alloys look scruffy, black paint shows every wash/wipe/buff mark. Interior good except for driver’s seat with blue pen marks. Car looks no better and no worse than any other of the dozens of 70s-80s era SLs for sale. Sold for a bit of a steal considering mileage, as many of these cars have over 100k on them. A good detail will do it wonders. CONDITION: 3- SALE PRICE/HIGH BID: $7,500 SOLD PRICE BOOK RANGE: $7,000-16,000 (Sports Car Market)
MB 380SL front
MB 380SL rear
MB 380SL interior
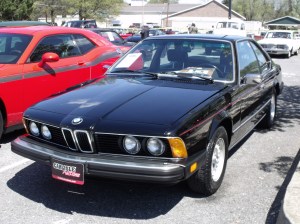
Lot #F447, 1984 BMW 633 CSi coupe, black on black, 80k original miles, sunroof, automatic. BMW alloys. Black looks well maintained but still shows swirl and buff marks. Trunk roundel chipped, aluminum bumpers dull and scratched. Clean underhood. Sold near mid-price guide number, should provide many more enjoyable miles. CONDITION: 3+ SALE PRICE/HIGH BID: $5,250 SOLD PRICE BOOK RANGE: $3,700-7,600
BMW 633 front
BMW 633 interior
BMW 633 engine compartment
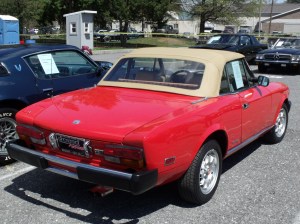
Lot #F434, 1984 Fiat 2000 spider, badged as Pininfarina, 47k original miles, red, tan top and interior. Fiat alloy wheels, Repaint looks quality and shines up well. Little to fault on exterior. Sign on car claims original interior and chrome, new tan top. Interior very clean. Overall very attractive presentation. Really good Fiat spiders are gaining traction, as witnessed here with this result. CONDITION: 2 SALE PRICE/HIGH BID: $9,300 SOLD PRICE BOOK RANGE: $6,800-16,000 (CPI)
Fiat 2000 spider rear
Fiat 2000 spider interior
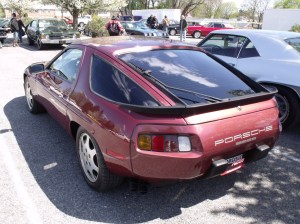
Lot #F402, 1986 Porsche 928 S4, automatic, 155k miles, garnet red metallic with brown leather interior. Car looks clean for mileage. No sign of overspray, could be well maintained original paint. Factory sunroof. Interior likewise appears like a good used car with no signs of typical 928 interior breakdown. Sign claims one owner car. Car appears more like an example with half the miles. Mileage did not scare away bidders. Only question is what maintenance and repairs are in the immediate future. CONDITION: 3+ SALE PRICE/HIGH BID: $6,900 SOLD PRICE BOOK RANGE: $9,700-19,000 (CPI)
Porsche 928 front
Porsche 928 rear
Porsche 928 interior
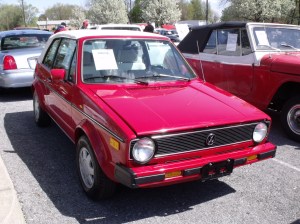
Lot #F451, 1987 VW Cabriolet, bright red, white top, white pinstripe cloth interior, stick shift. Mileage is 86,736. Exterior looks sharp as does interior. Sign says original paint and miles. As clean as the exterior and interior are, the engine compartment is a disaster. A valve cover repaint and power wash would transform it. Air cooled VWs are hot, water cooled VWs are not. This “chick car” has long been ignored in the marketplace except by a few who correctly see it as inexpensive top-down fun. Sold well above high price guide number, likely due to overall presentation. Most of these Cabrios are shot by now. CONDITION: 2- SALE PRICE/HIGH BID: $6,200 PRICE BOOK RANGE: $2,300-4,600 (CPI)
VW Cabrio front
VW Cabrio rear
VW Cabrio interior
VW Cabrio engine compartment
Lot #F401, 1999 Jaguar XK8 roadster. Red, tan top, ivory interior. Chrome wheels. Automatic. Looks like a clean 15 year old used car (meant as a compliment). Mileage is 79,258. Driver’s seat has some leather cracking and wear, but still serviceable. Sign claims upgraded stereo and heated seats. At this sale price (10% of its MSRP), car could be a daily driver AND a weekend cruise night car. CONDITION: 2- SALE PRICE/HIGH BID: $7,500 SOLD PRICE BOOK RANGE: $10,000-14,000 (CPI)
Nine cars + eleven people = a very successful inaugural 2015 Breakfast drive. After the winter we had endured in the Northeast, those of us with collector cars were itchin’ to drive, so we managed to organize a Sunday run a bit earlier in the season than usual. We typically don’t get out for the first run until May or sometimes June.
Bright early sun at our Mahwah Sheraton meeting place.
The usual pre-breakfast fish stories.
The weather cooperated: blue sky and plenty of sunshine, although with temps in the 50s, it was cooler than it had been on Saturday, when we had mid-to-upper 70s. Almost everyone (Ted!) in a convertible drove top-down, and with a slight twist of the heater dial, it was plenty comfortable.
Destination today was Granny’s Pancake House on Route 23 in Hamburg NJ. We’ve been there before, and the ample parking combined with a waiting table (nothing like calling ahead) had us gulping coffee within minutes of arriving.
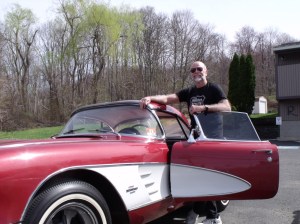
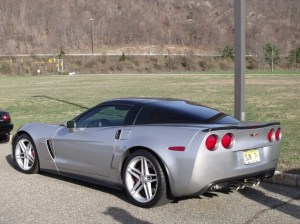
To the cars: if we’re counting (we are), GM product ruled the day, and Chevrolet ruled within there. We had two Corvettes: the marvelously original C1 driven by Burton Hall (who I believe has owned this car for close to 50 years), and the silver C6 of Bill Whited’s (who somehow seems to bring a different ‘Vette to every run). The other Chevys were both Camaros: Paul Dohrmann’s beautiful ’69 which he completely restored himself, and Larry Mihok’s 1994 Camaro, which serves him equally well as daily driver and collector car. Larry had plenty of company with Steve Sargent riding shotgun.
Burton’s C1 Corvette.
Bill’s C6 Corvette.
Paul’s ’69 Camaro.
Larry’s ’94 Camaro.
“Ralphie from Englewood” drove his ’67 Buick Skylark convertible, a solid-looking survivor and a model you do not see with any frequency. Ted Kadala (with neighbor Julio along for the ride) drove his ’66 Cadillac Eldorado convertible, a car so big I had to jog a quarter mile away to get it all on camera.
Ralph’s ’67 Buick.
Ted’s ’66 Cadillac.
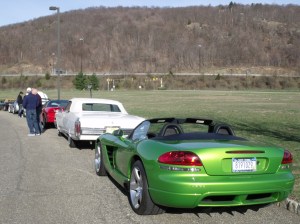
One FoMoCo product was present, and Nick Dragone proudly waved the Blue Oval flag with his 2014 Mustang. Nick was all too happy to show us his new Borla exhaust and Airaid cold air intake. The one MoPar car wasn’t a car: it was a GREEN Viper. Rich Stavridis looked splendid behind its wheel, and claims he would have driven his ‘new to him’ Alfa had it not just gotten off the truck the other night. The only import car on the drive today was your author’s 1993 Mazda Miata; he had every intention to drive his Alfa (still would have been the only import) but the front suspension rebuild is not quite completed.
Nick’s ’14 Mustang.
Rich’s Dodge
Viper.
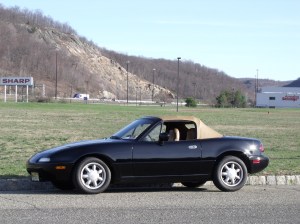
The author’s ’93 Miata.
Despite occasional harassment from a few of the hungry old men, the waitress service at Granny’s was top-notch. Breakfast was pretty good too. We parted ways by 11 a.m., and promised we would make every effort to drive again as soon as we can get our collective acts together. Perhaps next month.
Part 5? How many “parts” are there going to be? Given the progress made this week, it is my fervent hope that there will be ONE more part. We’re that close. The end is near, er, a road test is imminent.
The week started with assistance from my step-son who worked with me to bolt the right side spindle/control arm assembly into place. Once that was hung, install of the backing plate and steering link was quite straightforward.
Right side spindle/control arm assembly about to be reinstalled.
Right side spindle/control arms installed on car.
Close-up of right side spindle/control arms immediately after re-installation.
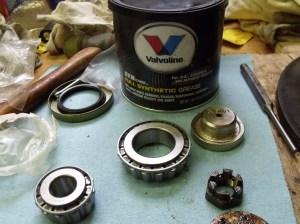
It was time to pay attention to the hub/brake disc assemblies, both of which have sat, ignored, since I removed them. In quick succession, the old bearings and seals were removed, the races knocked out, new races hammered in, the hub surfaces painted, new bearings packed and dropped in, and the bearing seals installed.
I used Valvoline full-synthetic wheel bearing grease for the first time. The stuff is black, and if possible, even nastier than the dino-based grease. It is supposed to tolerate higher temps (for those times when I’ll be driving the Death Valley 1000 old-car rally).
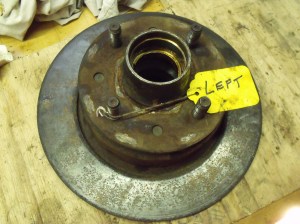
Left side hub/rotor before work on it began.
Hub after painting with Eastwood Chassis Black.
New bearings and seals laid out and about to be smothered in grease.
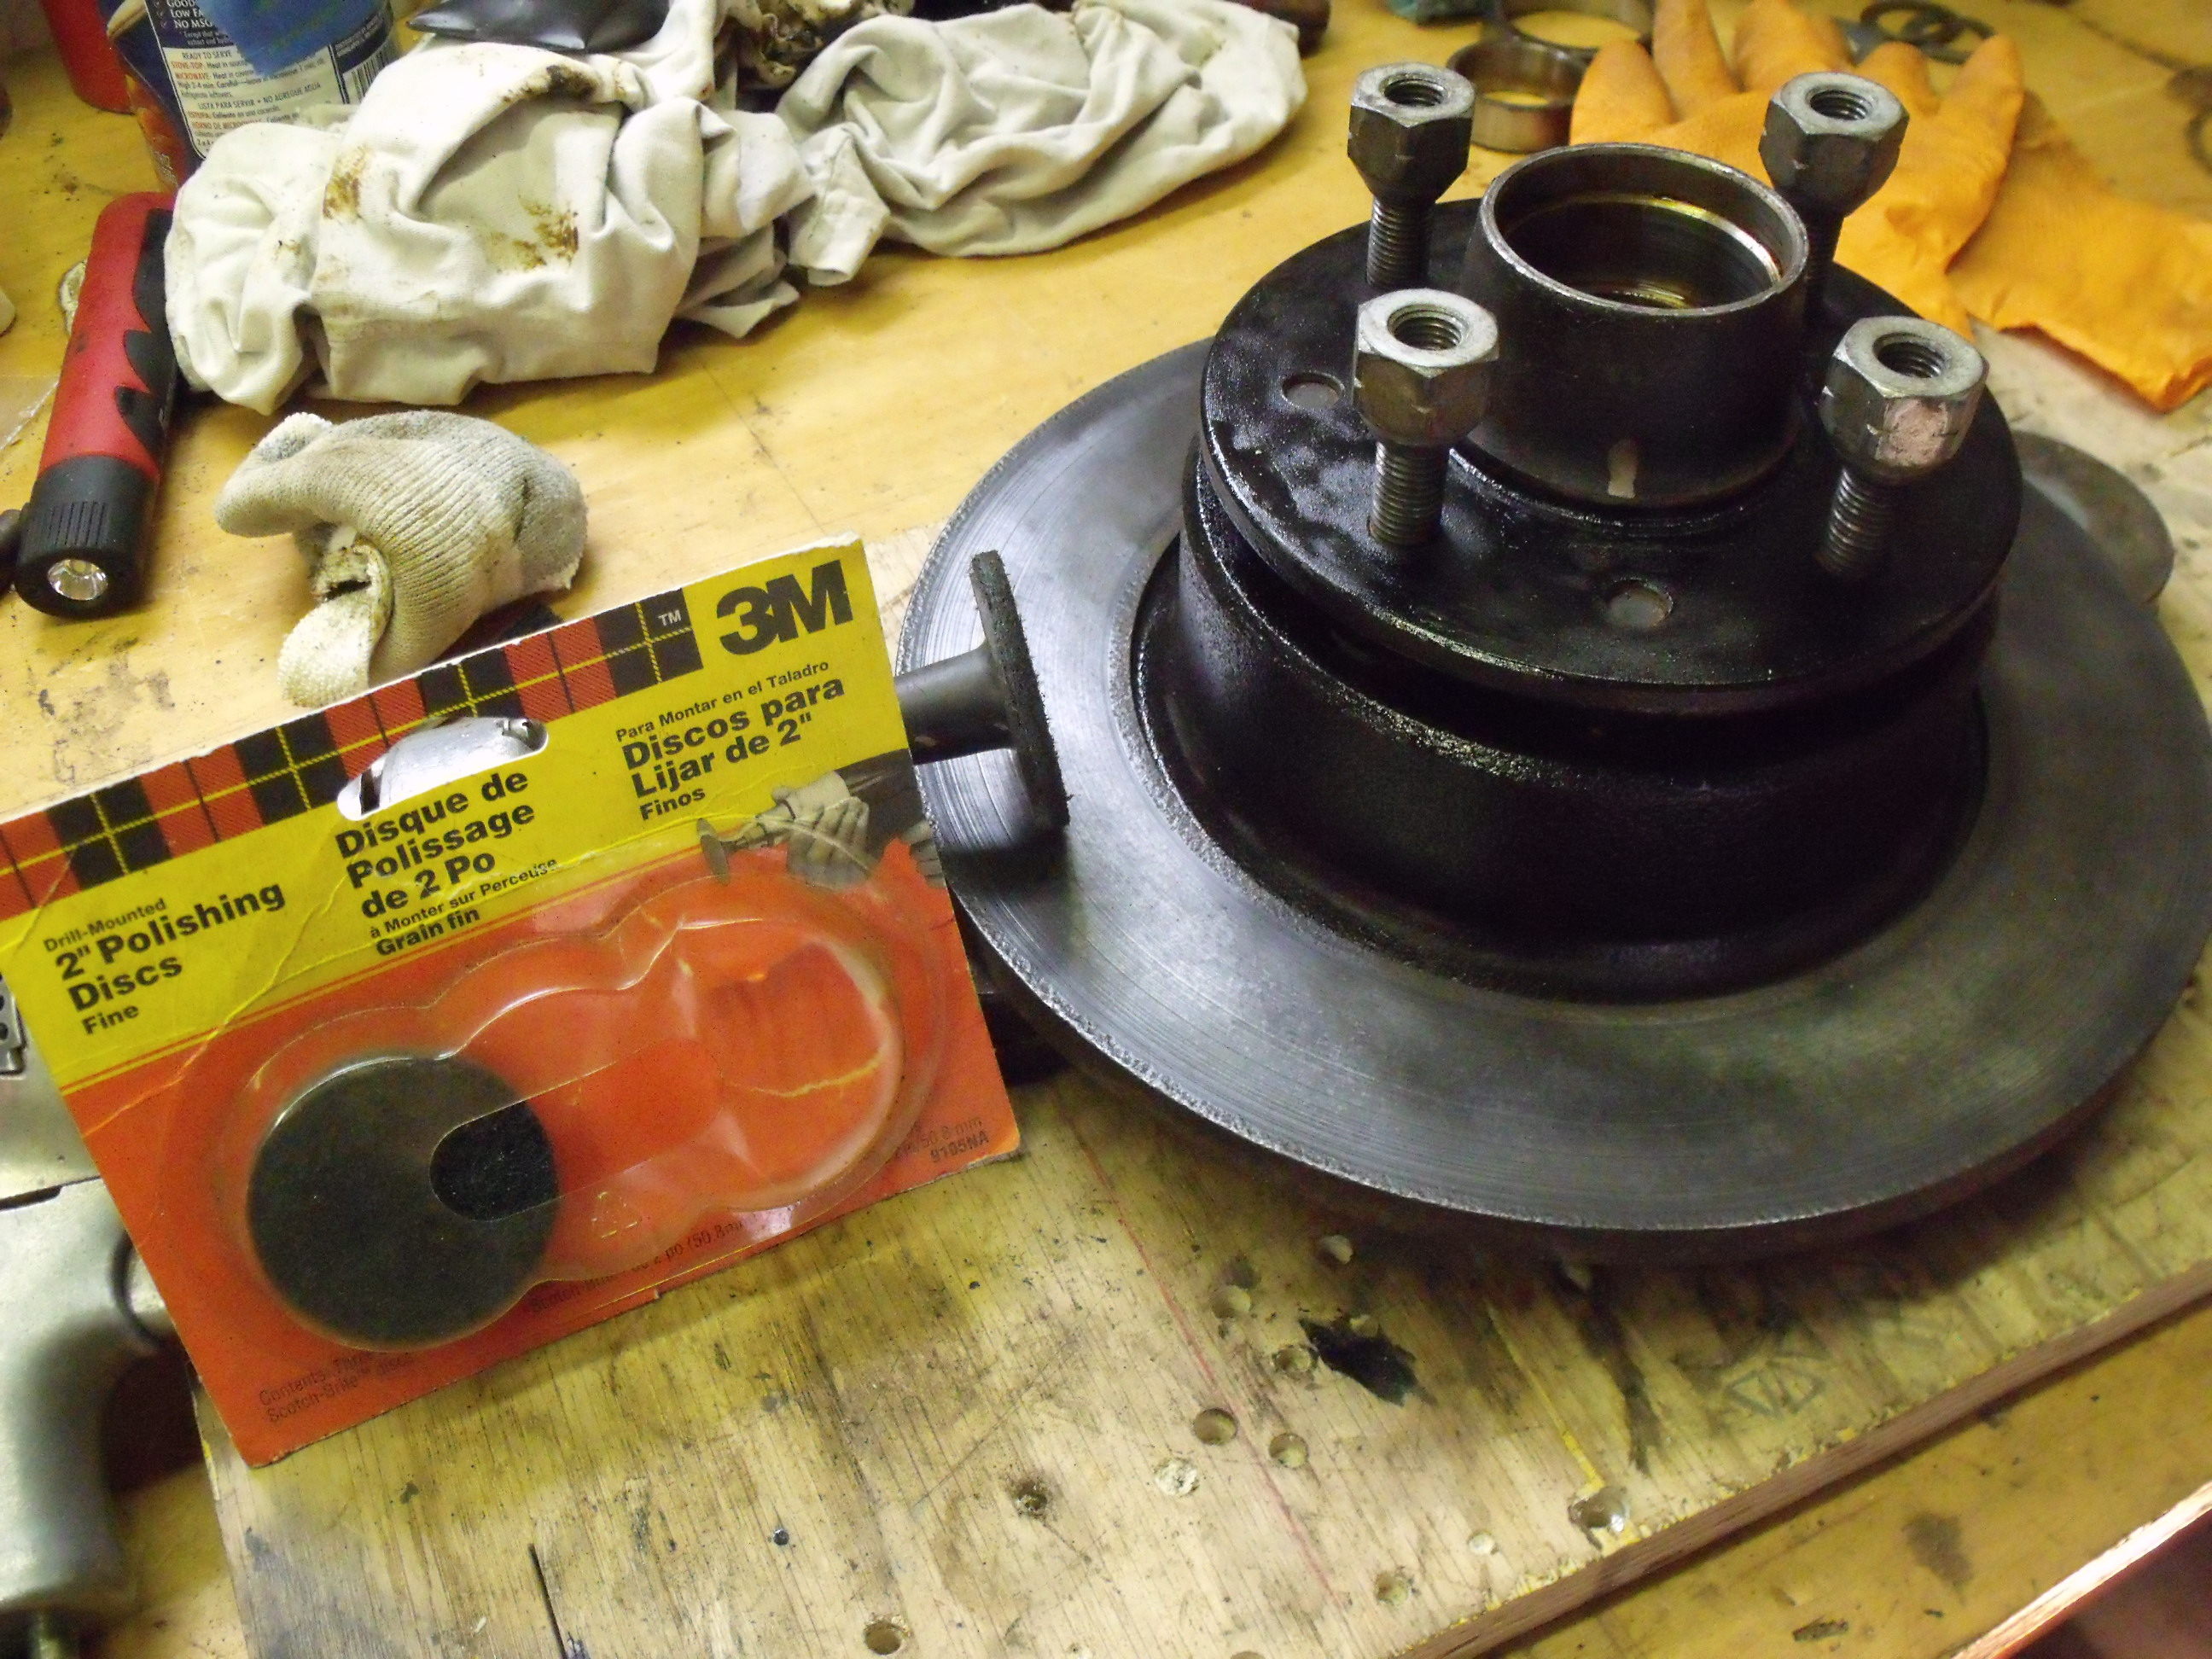
As an additional step, I used a 3M fine polishing disc in my trusty Black & Decker electric drill to remove the fine layer of rust on the rotor surfaces. Doing this removed no metal, and left the surface ready for the new brake pads.
The 3M fine polishing disc was used to clean up the rotor surface.
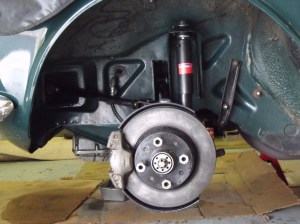
The hub/disc assemblies were reinstalled on the spindles, and a preliminary seating of the new bearings was done by spinning the hub and tightening the spindle nut, then backing off and repeating that process two or three times. I had forgotten that the LEFT side spindle nut has LEFT-HANDED threads. Once I relearned that, we were good. The brake calipers were then bolted back on. On the left side, the new hose was connected, and new pads and hardware put into the caliper.
New pads and hardware installed in the left side caliper.
Left side suspension with hub/rotor and caliper installed.
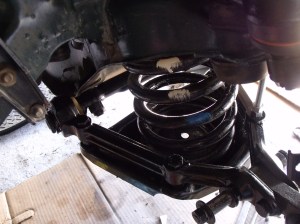
There are some jobs for which you need that second set of hands. My brother-in-law Kevin happened to be visiting this past weekend, and I pressed him into service to help me install the coil spring on the right side. Just like the left side, a series of threaded rods were used to join the lower control arm and the spring seat. By alternately tightening the nuts under the spring seat, we were able to safely compress the spring to the point where the proper bolts could be installed.
Threaded rods used to bring lower control arm and spring seat together by compressing coil spring.
Correct bolts between lower control arm and spring seat reinstalled. Note factory paint marks on coil spring which were not painted over.
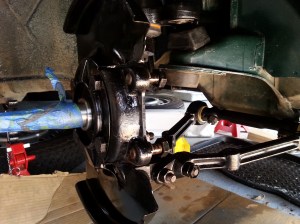
Right side hub/rotor assembly and caliper back in place.
What’s left? The devil is in the details: right side brake hose and pads, bleeding of both front brakes, right front shock, sway bar, and steering links. Bolt the tires on. Torque the suspension with the vehicle’s weight on the ground. That’s it. I think. Then we drive.
Another productive week has gone by, and with most of the painting finished, some reassembly has begun. It certainly feels like huge progress has been made.
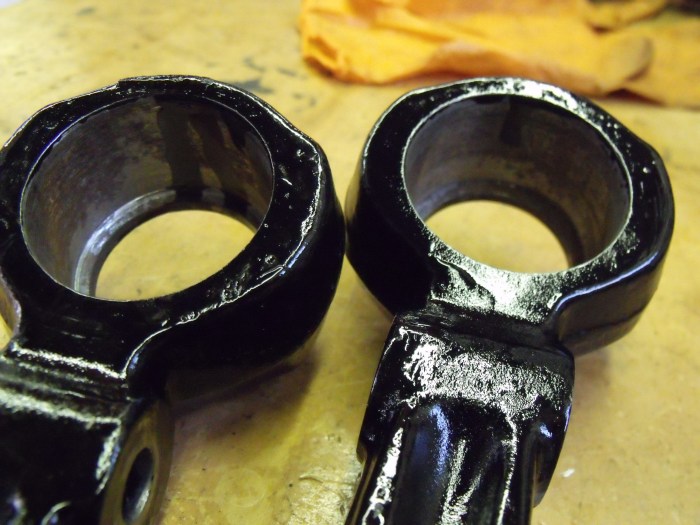
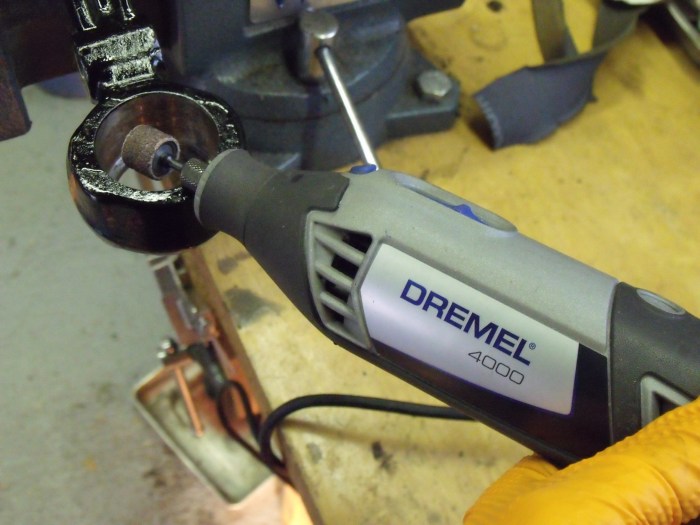
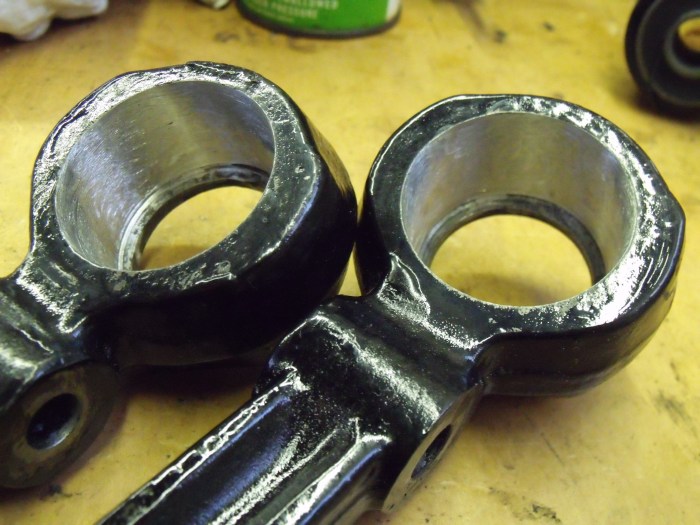
In our last installment (Part 3) just about all of our right side suspension components had been painted. I patiently waited the recommended 48 hours for the Chassis Black to dry, and then it was time to have some fun. First order of business was the installation of the new lower control arm bushings. “Bushings” is actually misleading, as I have attempted to describe before. These more closely resemble bearings, as there is a grease-filled spherical joint inside the casing. (The price reflected this too, as these were about $40 for the pair.) My Dremel tool was used with a sanding drum to clean up the inside of the control arm. A light coating of wheel bearing grease was applied to all surfaces, both to ease the installation and to also make it easy for the poor guy who will take these apart for the car’s restoration in 2067.
Control arms had rust and paint on inside surfaces
Dremel tool with sanding drum gets the job done
Nice and shiny and ready for new bushings
The bushings/bearings are not symmetrical; a foam ring fits on one side to help prevent the ingress of water and dirt, so I needed to pay attention when pressing these in. The hydraulic press did a beautiful job of driving them home into the control arms.
Bushings old and new, side by side
Appropriate-sized sockets were used to press the bushings into place
New bushings installed into the control arms
Next, the spindle was prepped for the upper and lower ball joints to be similarly pressed into place. I recalled from the left side work that one must press the lower ball joint in first, as the drift to do that needs to pass through the opening for the upper joint. The upper ball joint is actually integral with the upper control arm.
Using the bench-top press to drive the upper control arm/ball joint into the spindle.
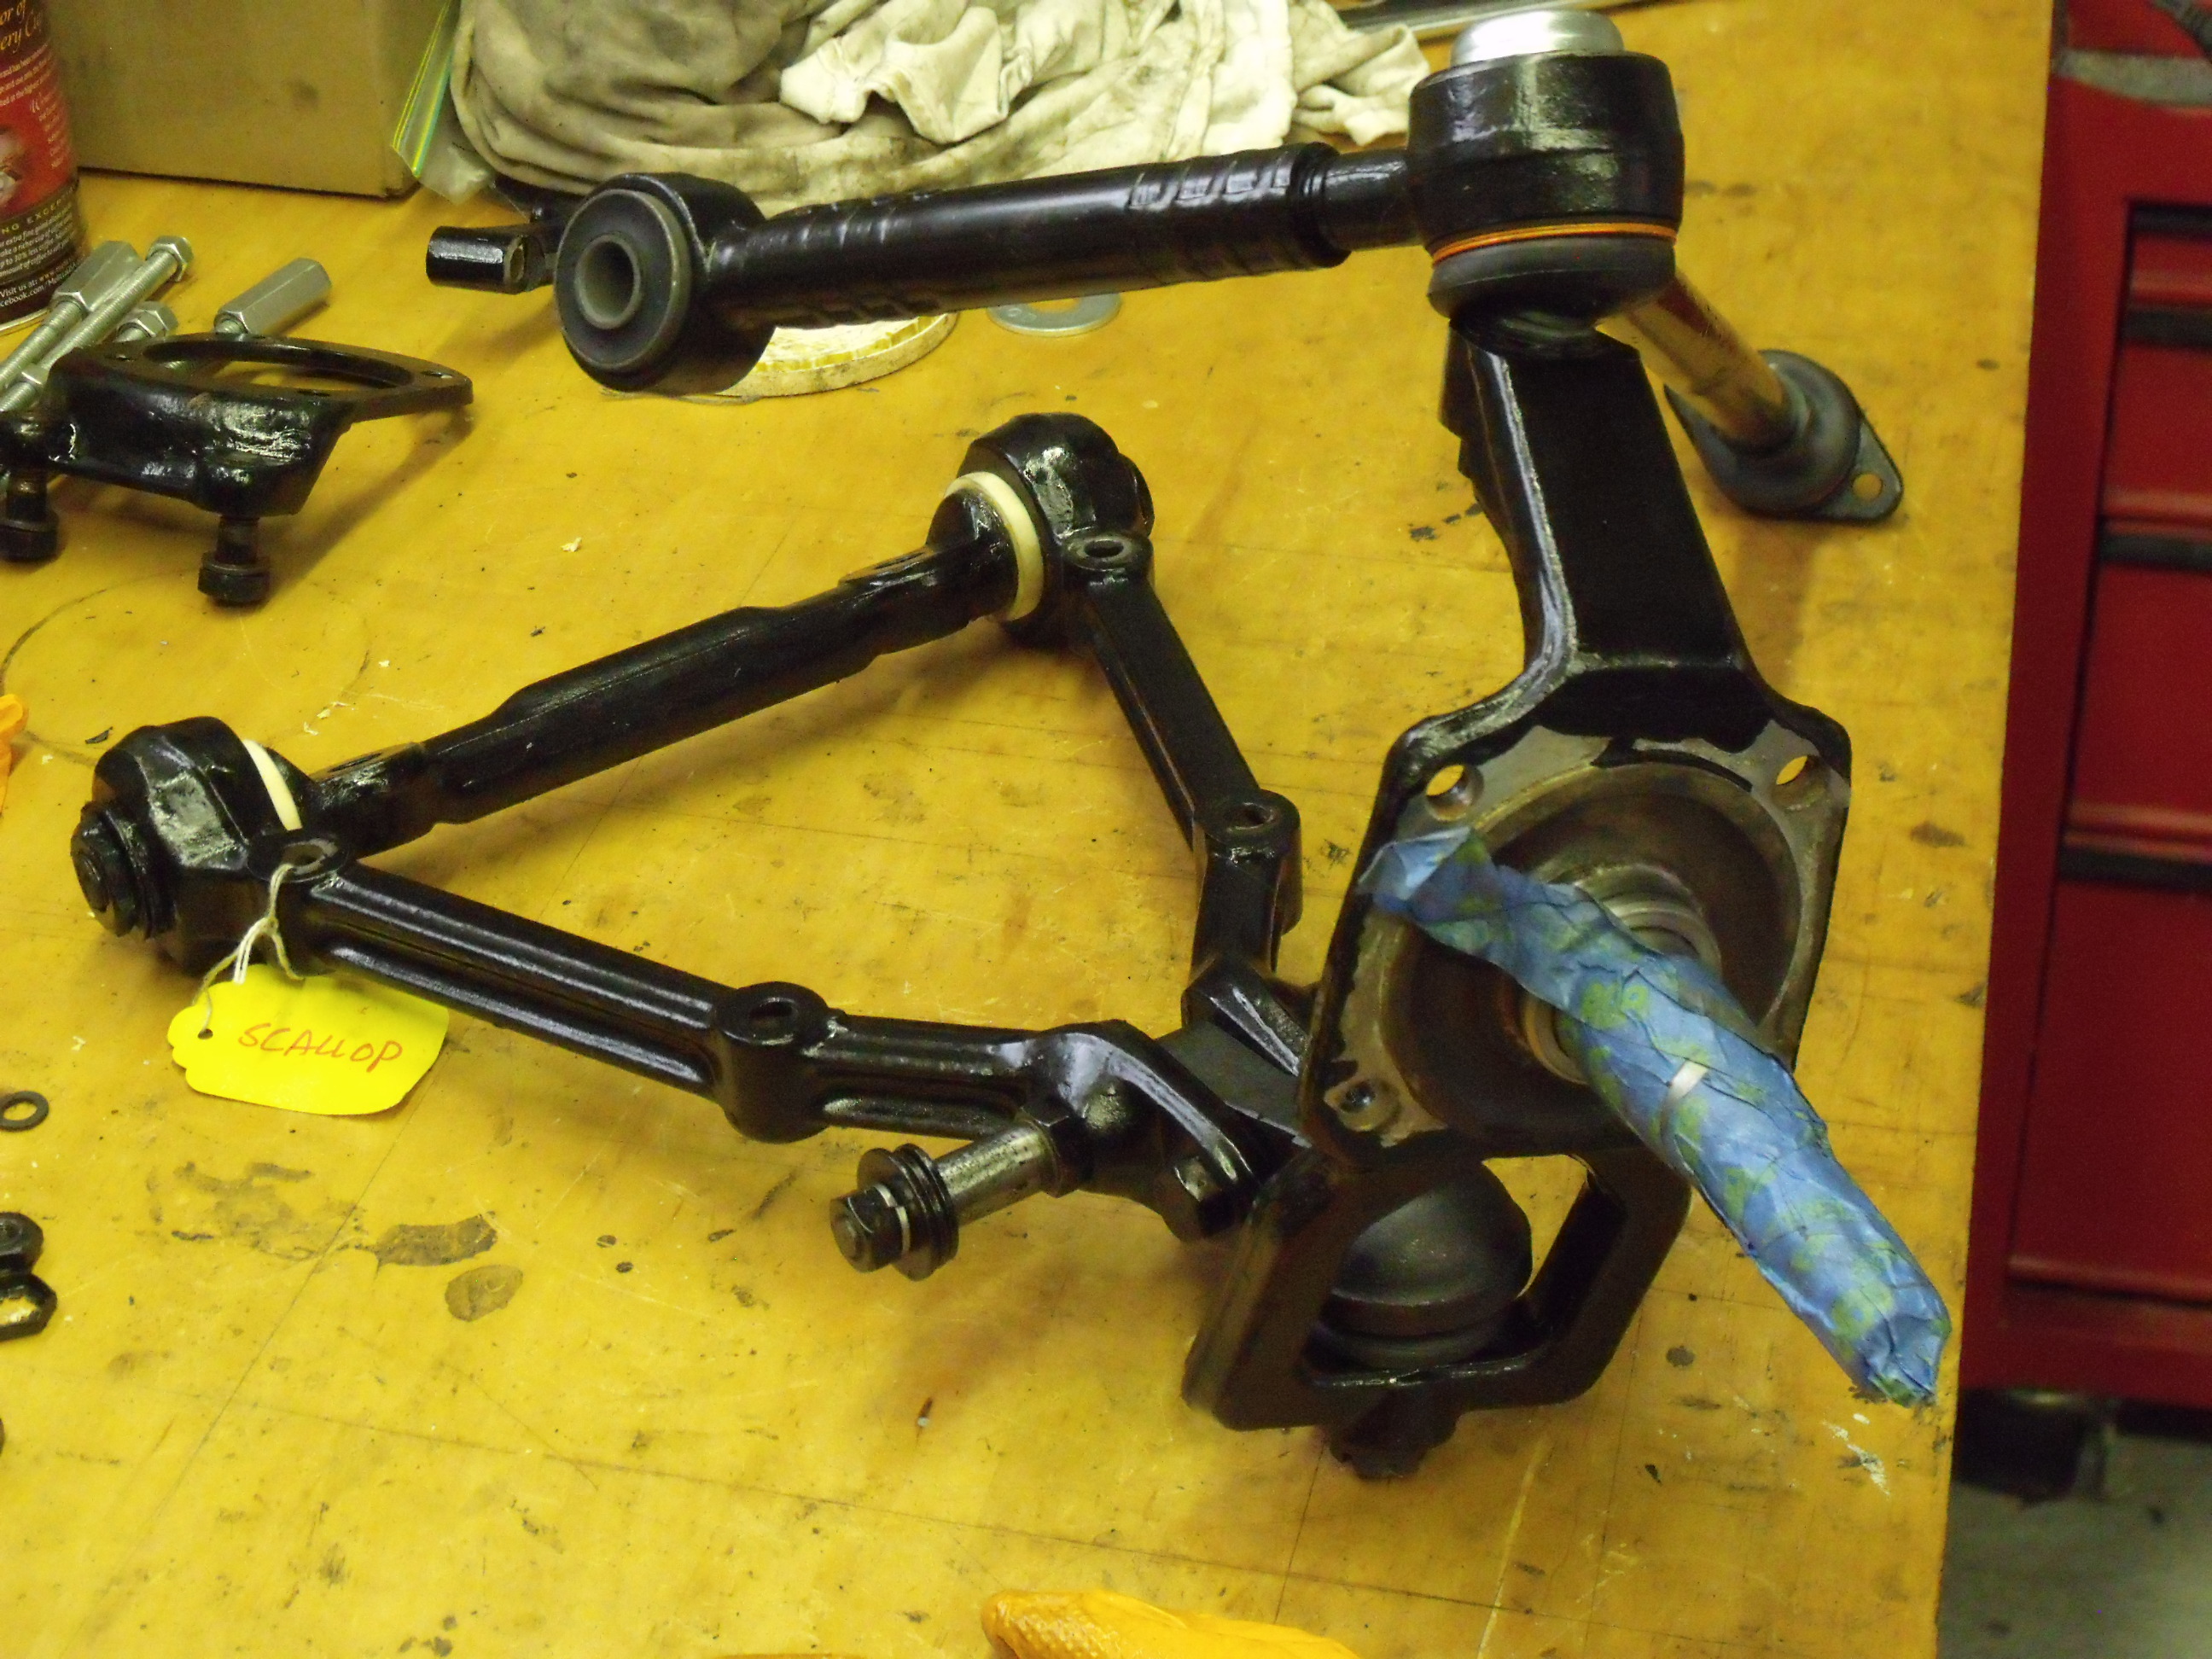
Once these pieces were pressed into place, completion of the spindle/control arm subassembly was a simple matter of bolting the lower ball joint to the control arms, and control arms onto the dogbone. The bushings slide onto the dogbone, so no press-fitting was required. In the photo below, note the foam rings (in white) between the control arms and dogbone.
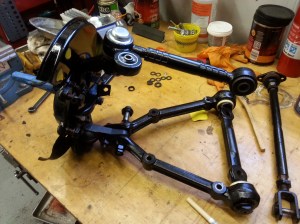
Spindle, upper and lower control arms, and caster arm all bolted together and ready to go back onto the car.
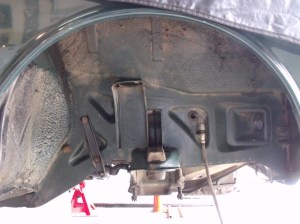
With this subassembly ready to be reinstalled, I needed to wash the inner wheel housing while everything was removed. Using Oil Eater and a cleaning brush, I did the best I could. At some point in the future, I’d like to do a more thorough job on the underside, probably when the car is outside and I can use a hose.
Right side wheel housing before washing.
Right side wheel housing after washing.
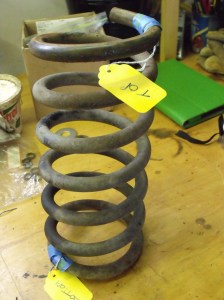
The final job for this week was the cleaning and painting of the right side coil spring. As on the left side, the factory paint marks were found and masked so that they would not be obliterated during the repaint. The spring was washed, dried, and given one coat of Chassis Black with a disposable foam brush. Earlier, I had built a spring holder from a 2×4, a couple of L-brackets, and a piece of plywood. It worked like a charm, keeping the spring upright while I dabbed on the paint. And to think it was less than two weeks ago that we took this spring out!
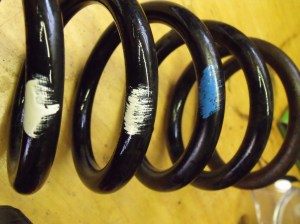
The unwashed spring, tagged “top” and “bottom”.
The factory paint marks. I also know that the top coil gap is 5mm larger than the bottom coil gap.
Grunt work. That’s what I call what I’ve been doing with the car the last seven days. It’s the degreasing, cleaning, sanding, and painting of all the various components while they’re apart, to prepare them for reassembly. It’s mindless, repetitious work. However, it’s not difficult, it moves along quickly, and it has a beginning, middle, and end which are quite close together, so there is large sense of satisfaction for me in its accomplishment.
In Suspension Rebuild Part 2, we left off with just about all the right front pieces broken down to their individual elements. Just about, but not quite. There remained the task of driving out the two large bushings from the lower control arms. Just like the left side, these bushings were shot, perhaps worse than the others. The only way these were coming out was with that specialty tool, the BFH (Big Frank’s Hammer). The shape of the control arm dictated building up support under it, with a metal cup large enough for the bushing to be able to be driven down into it. An appropriate sized socket and short extension bar were used. It took many dozens of blows with the BFH before the bushings would begin to move. The sound changed: at first, it was a high-pitched clang; once the bushing was on the move, the sound shifted to a lower-pitched thud. Finally, both were out, but not before I mushroomed the head of the 1/2″ extension!
Lower Control Arm In Position for Bushing Removal
Now all the parts were ready for the grunt work. As I have no running water in the garage, and the garden hoses have yet to come out from winter slumber, the various components were washed in the kitchen sink. I did this in front of my spouse, and somehow got away with it. Perhaps she understands the sense of urgency under which I’m working. Here are the ‘before’ and ‘after’ cleaning shots of the spring seat, control arm cross bar, and steering linkage. BTW, Dawn brand dish detergent, a powerful degreaser, is one of the best solutions I’ve used to clean car parts.
Spring Seat, Control Arm Cross Bar, and Steering Knuckle Before Washing
Spring Seat, Control Arm Cross Bar, and Steering Knuckle After Washing
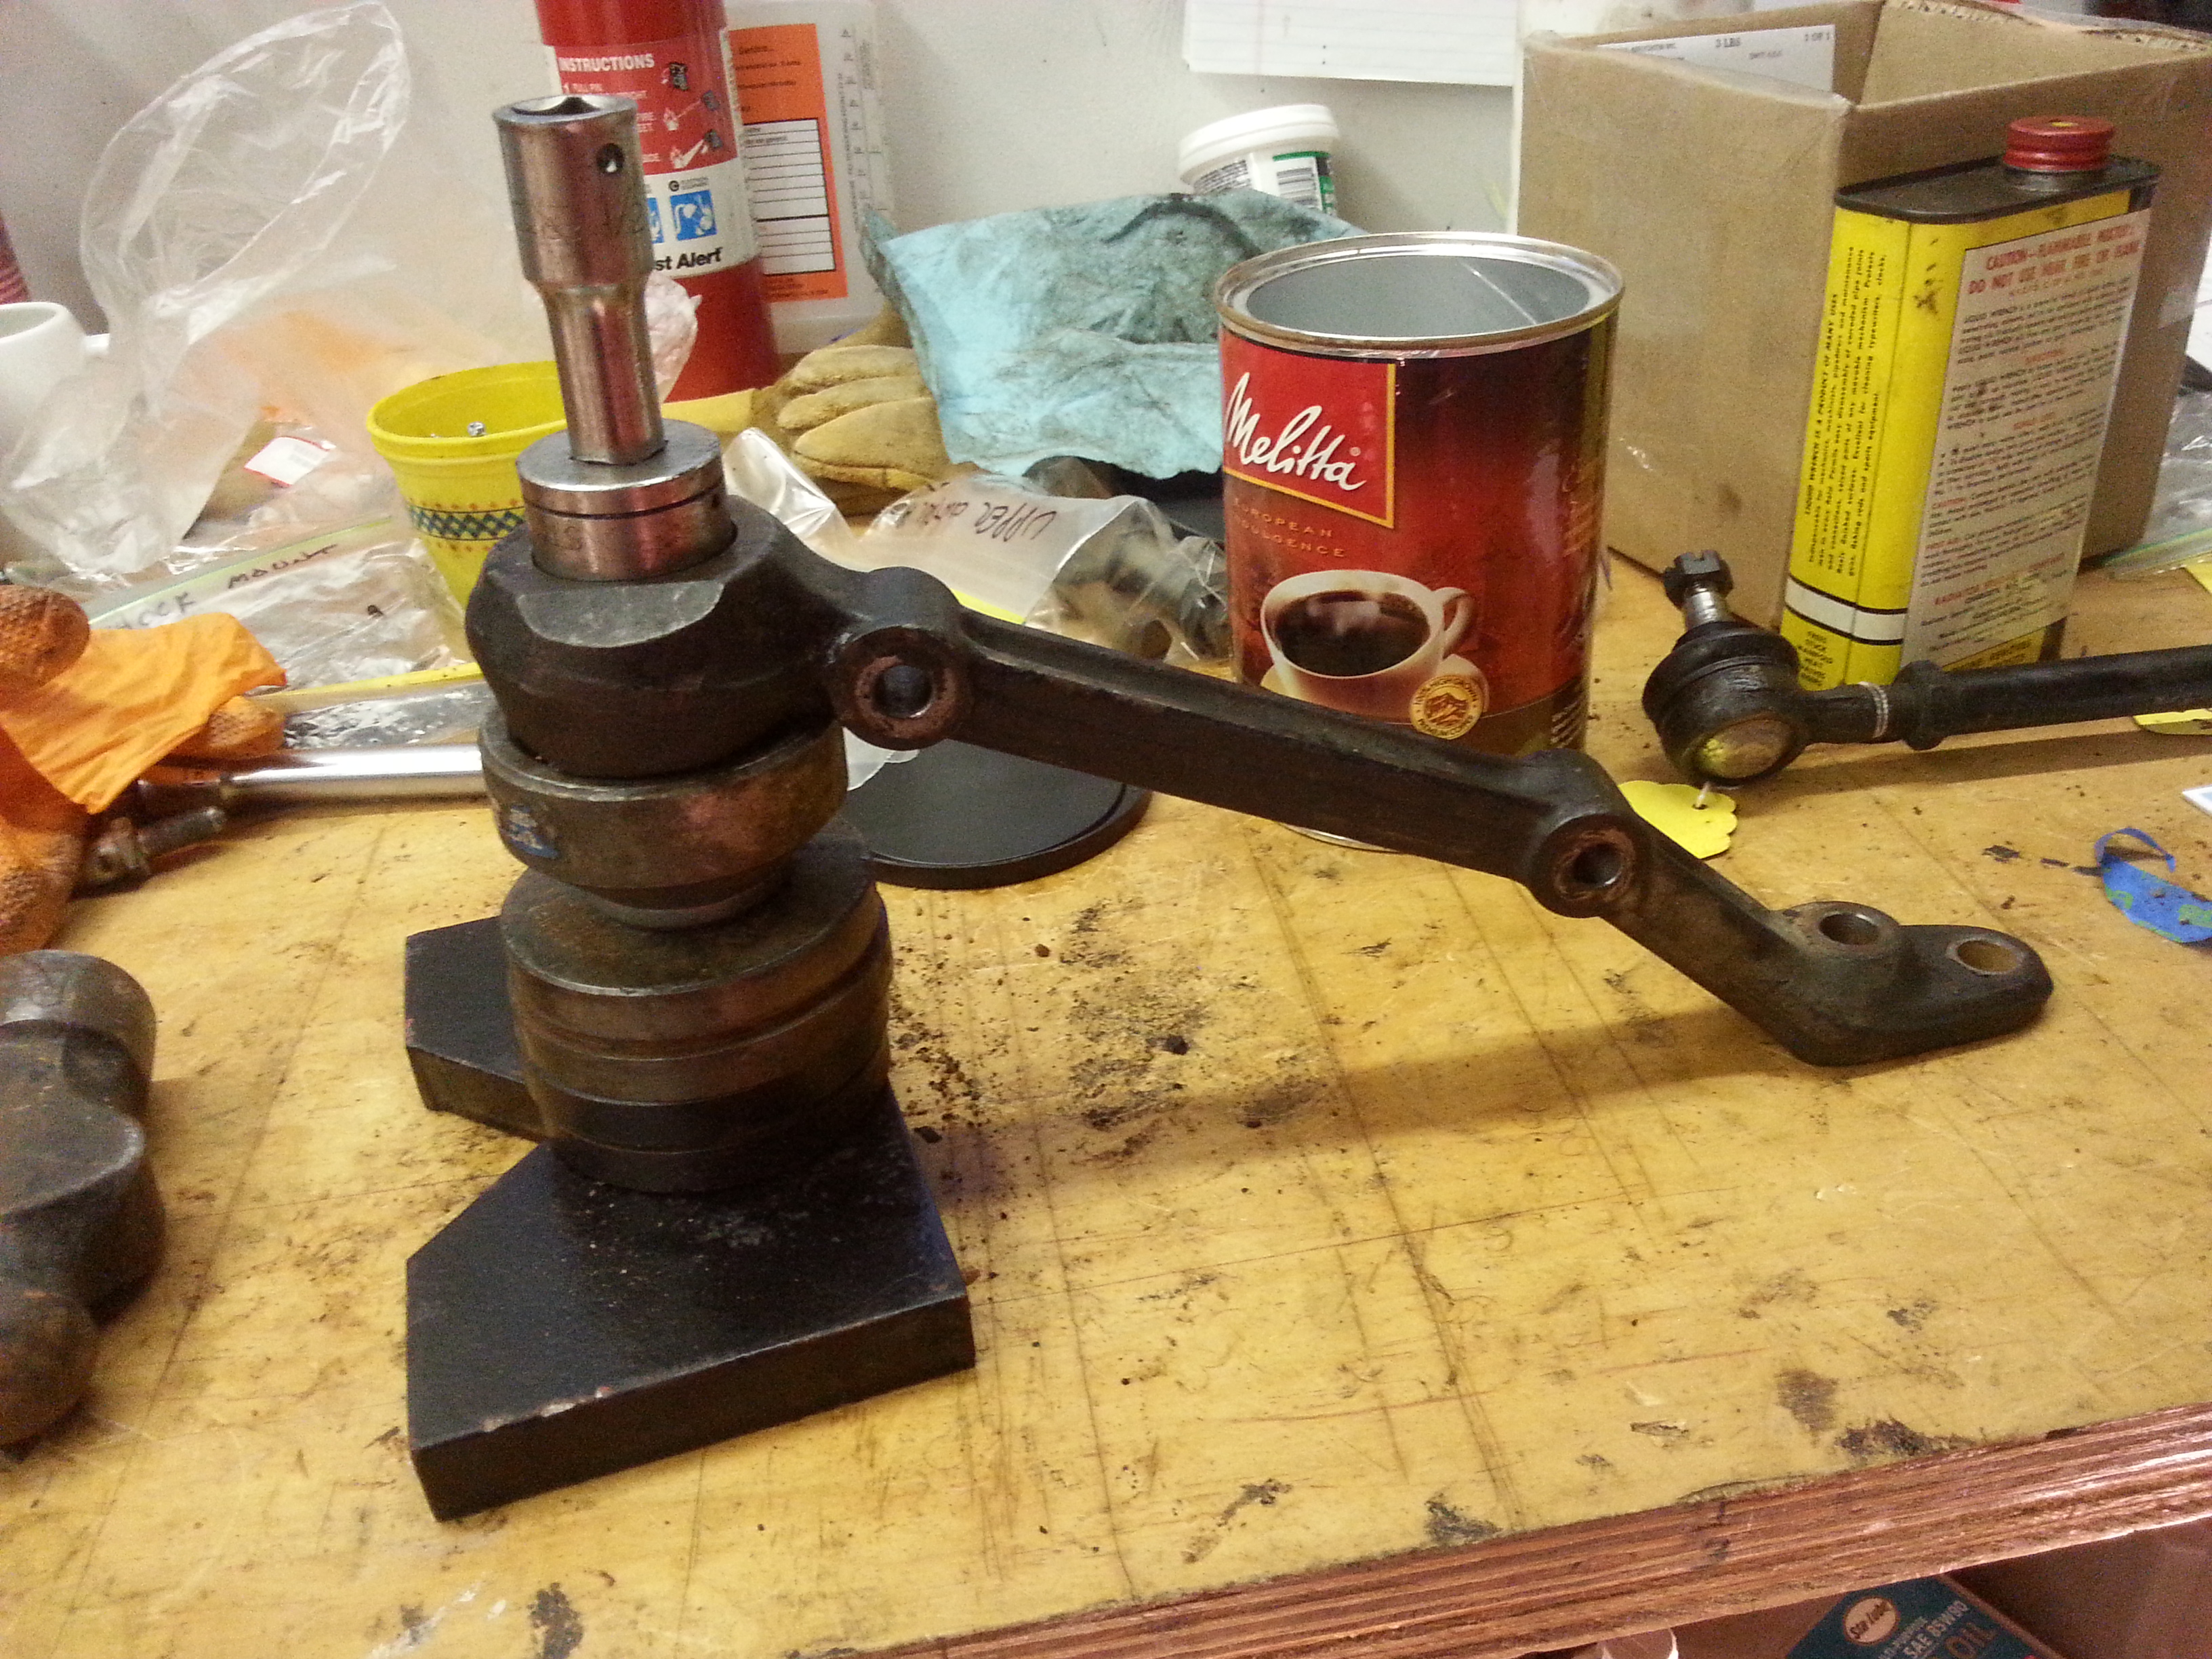
Although a vehicle’s steering system is, strictly speaking, separate from the suspension, the two are closely linked. Since I had both tie rod ends off anyway, I decided to replace all 6 steering ball joints. The Alfa uses a conventional recirculating-ball steering system, with a Pitman arm off the steering box, and an idler arm on the passenger side. The center drag link has a ball joint at each end, and so do both tie rod ends. Each of the 3 tubes has one right-hand-thread ball joint and one left-hand-thread ball joint. In this way, toe can be set, with each tie rod acting like a turnbuckle, either increasing or decreasing in length as it’s rotated.
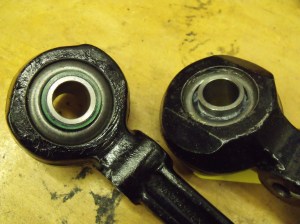
Before removing all these ball joints, I took macro photos so that I can count the threads on reassembly and approximate the alignment setting before taking the car to Eddie, my front end guy, for a proper alignment.
The three steering linkages
A close-up of one of the tie rod ends
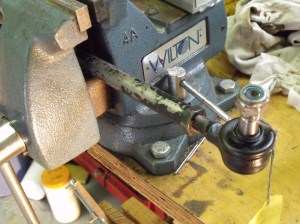
Aside from the locknuts being tight, I needed to be mindful that half of them would loosen when turned to the RIGHT. Having a table-mounted vise with a pipe clamp (my trusty Wilton bench vise) was handy. Once everything was apart, it was back to the sink.
Steering linkage in bench vise.
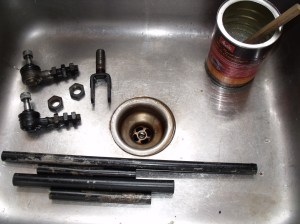
Various steering components to be washed in the sink.
See the ball joints in the above right-side photo, each with 3 nuts threaded onto them? These are the old, to-be-discarded ball joints. By doing this, I can paint the nuts without getting paint on their threads, and have no worries about the threads on the ball joint. A large part of the fun this week was devising ways to suspend the parts for painting.
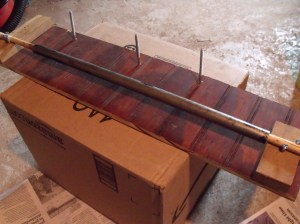
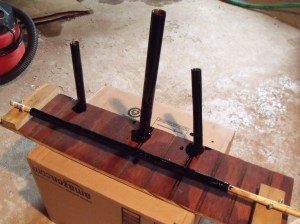
When it came time to paint the tubes, I decided that long wood screws could support the 3 shorter ones upright. The longest tube had a dowel passed through it, which was then attached to two scraps of wood. All the tubes could be spun while painted.
Building the board to hold the steering tubes for painting.
The steering tubes, painted with Eastwood’s Chassis Black.
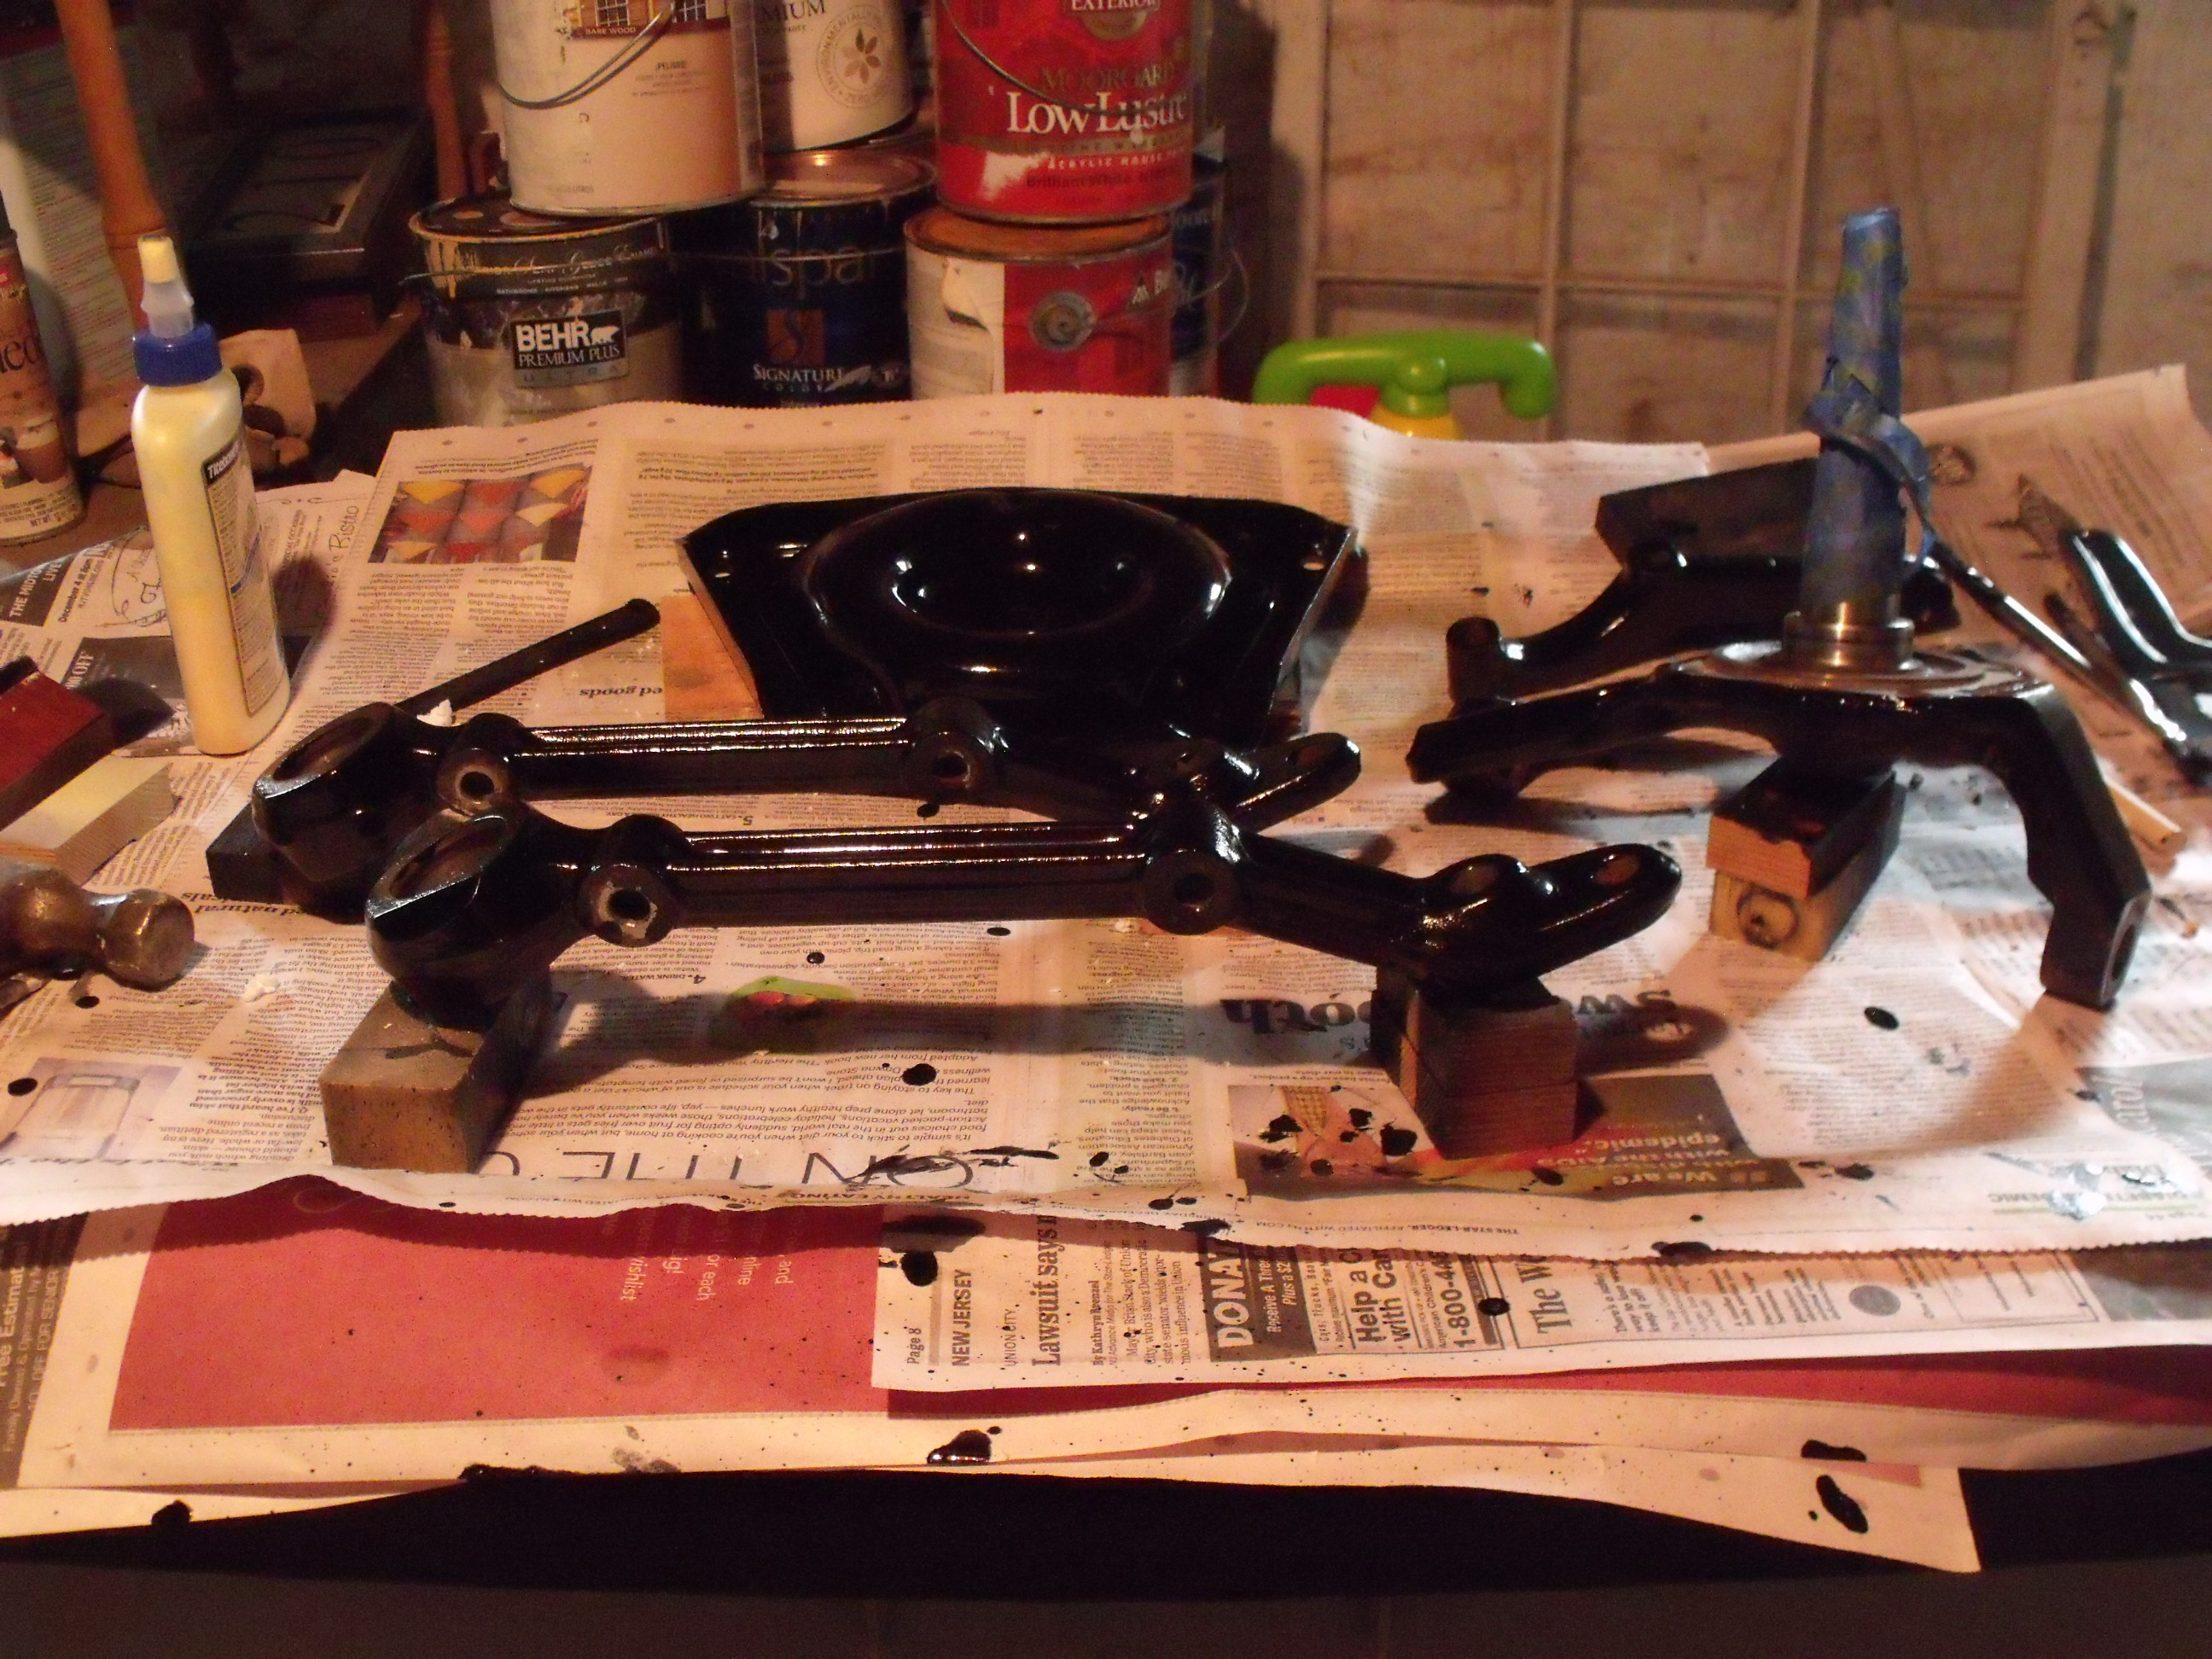
Another nice element about grunt work is that I can do 30-60 minutes in the evening, such as put a coat of paint on several parts, and progress is made. Below you can see the table set-up in my basement, with various parts arrayed. I will typically paint one side of a component, wait a day, then flip it to paint the other side.
Alfa suspension pieces in various stages of paint
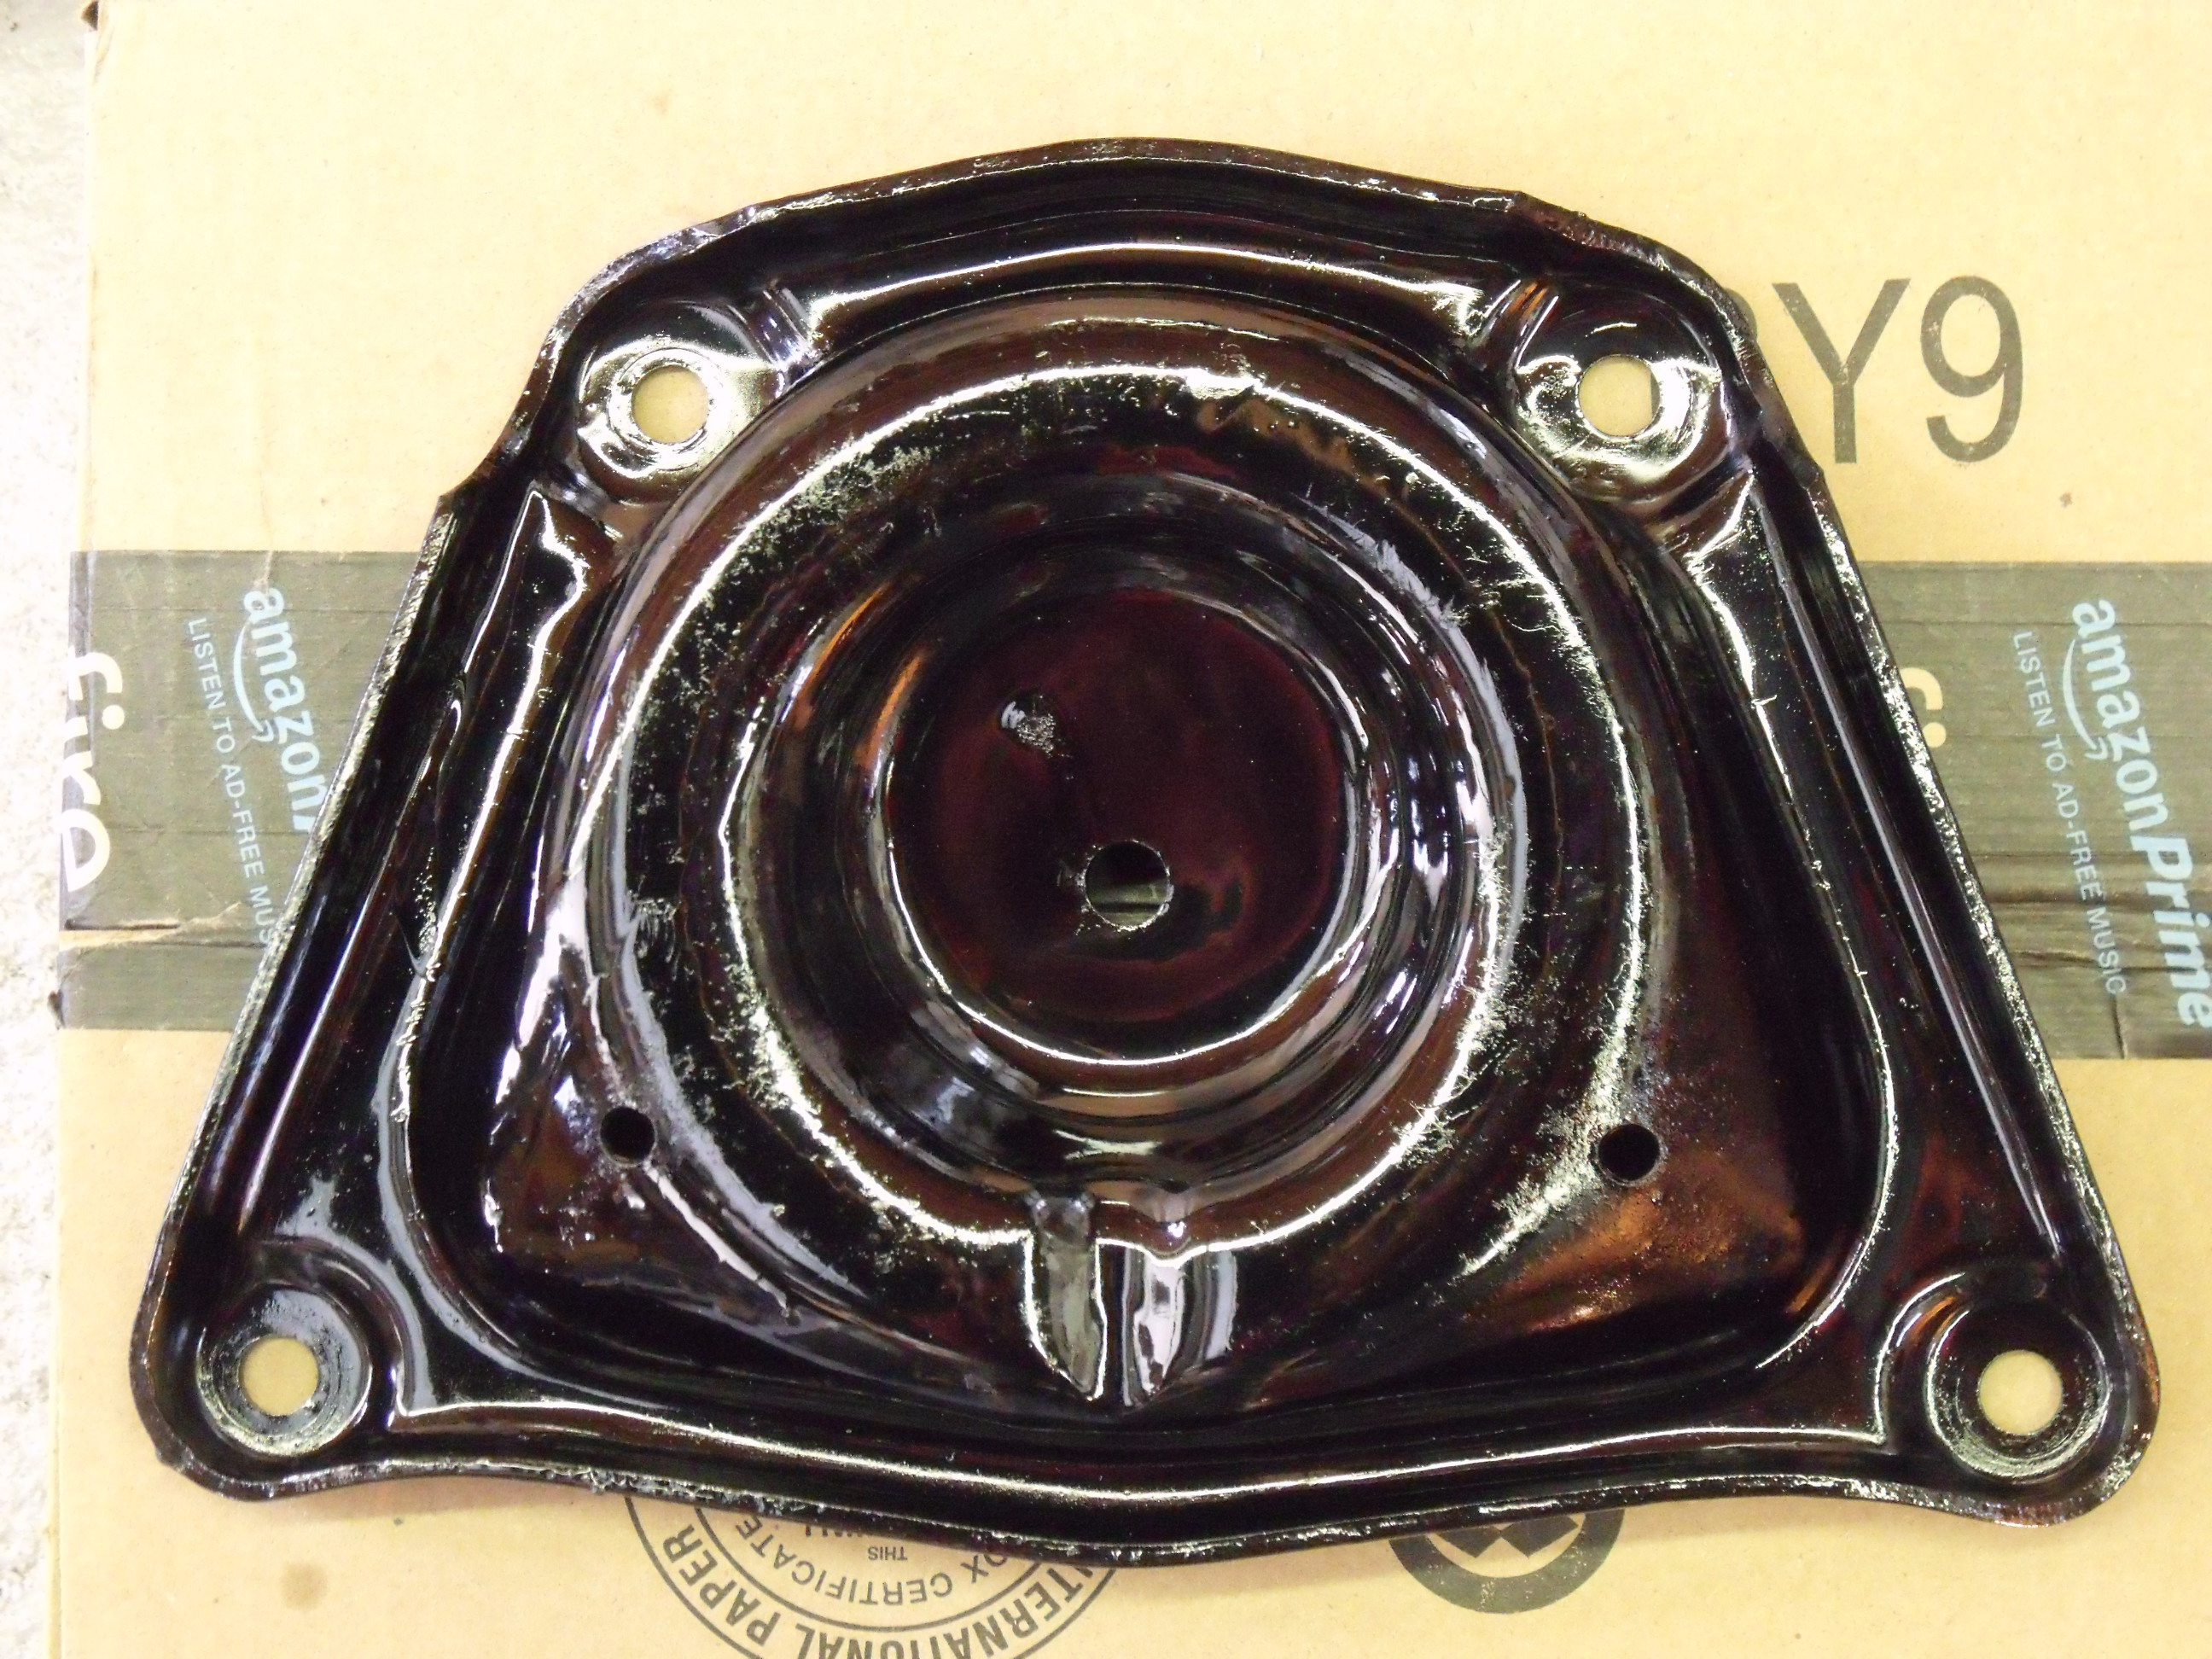
The Eastwood Chassis Black is being brushed on with disposable brushes, either foam or ‘acid’. They’re cheap, and lots of time is saved by skipping brush clean-up. As my friend Larry says, “this is not being done for Pebble Beach, these cars are drivers!”. Yet the Chassis Black, even brushed on, does have a smooth, high-gloss finish. Look at this spring seat.
Spring seat after brush painting with Eastwood Chassis Black.
Two more words from our sponsors (kidding, there’s nothing in it for me by mentioning products I’m pleased with): when parts are particularly dirty, before I bring them inside (or for parts which will not be washed in the sink), I like this Oil Eater cleaner-degreaser. Easy to use, safe, biodegradable, and water-soluable.
Oil Eater Cleaner Degreaser
As I reassemble parts, threads get a light coating of “Kopr-Kote” by Jet Lube. If this can looks old to you, it’s because it is old. My dad gave me this stuff 35 years ago, and I thought the can was old then! I looked them up on the Internet; Jet Lube is still around, and they still make this stuff among other things. However, the formula has changed. If you look at the bottom right of the label below, you’ll see “metallic lead” listed as one of the ingredients. For some reason, they’re dropped that from the current formulation. It’s true, they don’t make ’em like they used to.
Jet Lube Kopr-Kote, with metallic lead.
Eastwood states that Chassis Black fully dries in 48 hours. Once all the paint is dry, reassembly begins.
Today was a big day: the first Sunday of spring, with temps in the low 40s (almost balmy!), and two good friends willing to travel a distance to come to my garage and help with the front suspension work.
Mike G. and Larry M., veteran car guys with collector cars of their own, gave up a good chunk of their Sunday to help me turn wrenches. No progress had been made on the Alfa in over two weeks, and the unofficial start of the 2015 driving season is four weeks away. Time to kick it into high gear.
The first order of business was to install the coil spring on the left side of the front suspension. As you may have read in Part 1 of this project, the left side was rebuilt first. Except for the spring and shock, it is complete. Following along with a forum entry on the Alfa BB, I had purchased some threaded rod and nuts. The concept was to connect the lower control arm and spring seat via the rods, and with spring in place, slowly and alternately tighten the nuts, thereby compressing the spring. Once the spring seat met up with the control arm, the rods could be removed one at a time, and the factory bolts could be installed. It took some time, but it worked like a charm.
With that under our belts, we moved to the right side and reversed the process. The factory spring seat bolts were removed one at a time, the threaded rod was installed and tightened with nuts, then the nuts were alternately loosened, lowering the spring seat until there was no tension on the spring. This seemed to go twice as fast as the spring install. And to be efficient, while Mike and I (mostly Mike) worked on the spring, Larry tackled removal of the steering tie rod ends and drag link, as I had just purchased six new tie rod ends to install.
Alfa left front suspension: spring about to be reinstalled
Alfa right front suspension removal
Alfa right front suspension, spring removed
A word here about our sponsor. I have almost exclusively been purchasing my spare parts from a UK vendor, Classic Alfa. Their website is user-friendly, their prices are fair, their parts quality is very good, and their shipping speed is unbelievable. Most recent case in point: this past Wednesday night, at about 9pm EDT, I ordered the tie rod ends and wheel bearing kits from them online. Thursday morning, I received a confirmation email that my shipment was on its way to Heathrow Airport. Friday afternoon at 5:30pm, DHL had the package at my front door. That is less than 48 hours, from across the big pond! With service like that, they will continue to get my business.
Back to our front end. As Mike began removal of the first spring pan bolt, he said “Uh oh, Richard, we forgot to install the spacers on the other side”. I said “what spacers?” Mike then showed me that all 4 spring pan bolts had thick spacer washers between the pan and control arm. At first I thought I had made a mistake, but a check of my hardware bags showed that no spacers came off the left side. Mike and Larry almost didn’t believe me, and this is where photos are invaluable. A glance at the pictures I took late in 2014 confirmed that the left side did not use spacers while the right side did. Who can figure out those Italians?
With the spring and spring seat out, we had only the upper and lower control arms, spindle, and caster arm in place. The approach would be to unbolt these from the unibody and remove them as one assembly. Two bolts at the lower arm (impact gun), one at the upper (with tricky access from inside the engine compartment), and two at the caster arm-to-body, and we gave birth to all the remaining pieces.
Alfa front suspension, upper control arm bolt removal
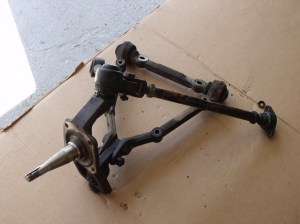
Alfa right front suspension completely removed
Alfa right front wheel housing
Mike and Larry needed to move on, and after profusely thanking them, I continued a bit on my own. The 3-piece lower control arm was separated, and the arms with bushings as well as the caster arm were left soaking in penetrating fluid, so that the next steps in the disassembly could be accomplished. From here, it enters the phase I call “grunt work”: simple, almost mindless tasks that need to be done, and can be tackled an hour at a time after work during the week. Bushings need to be pressed out, threaded connections broken, then all components will be washed, prepped, and painted. Once that is done, it’s on to reassembly.
When I took the Alfa off the road at the end of the 2014 driving season last November, I decided that this year’s winter project would be a complete rebuild of the front suspension. Although the car drove and handled remarkably well, there were clunks and squeaks from the front which left me uncomfortable. A quick check with Pete, the previous owner, confirmed that he had not rebuilt the front end during his stewardship. Convinced that all bushings and ball joints were original to the car, I decided it was time.
Having done this kind of work on previously-owned collector cars, most recently my 1968 Mustang, the same approach was used: disassemble only ONE side of the suspension, so that in the worst-case scenario of “how the #$&% does this go back together again?”, I would always have the assembled OTHER side to use for reference. With the Alfa, there was also the admittedly minor concern that since the shop manuals I owned did not describe the procedure in detail, some or most of the work might fall to “figuring it out as I go”.
Some technical words about the 1967 Alfa Romeo Giulia Sprint front suspension: on the surface, this is a conventional suspension design, with upper and lower control arms, coil springs situated between the lower arm and crossmember, tube shocks, caster arms, and sway bar. The spindle rides on upper and lower ball joints connected to the respective control arms. In detail, there are some unique and fascinating design elements. The lower control “arm” is actually three pieces, joined by bushings and a ball joint. The bushings are not conventional rubber bushings, but are heim joints (like a ball and socket) enclosed in a steel casing and pressed into two of the arms. The lower spring seat bolts to the lower control arm and so can be removed and reinstalled separately. The caster arm serves as a fore-aft locating arm for the suspension, and is attached to the body of the car with a heim joint. The overall effect is a suspension which has an almost perfect combination of suppleness and control, with very little lean.
As I write this in March of 2015, let me explain that the first side I tackled (left side) is now almost completely done. That was the side to learn on – components were not always disassembled in the best order, I did not always give complete attention to the way things came apart, and so on. This is typical for old-car work that stretches out over a number of weeks. This blog entry, entitled “Part 1”, will pick up for the most part at the beginning of the second (right) side of the suspension. In this way I hope to better capture the logical order of performing the rebuild, now that I’m making my sophomore effort.
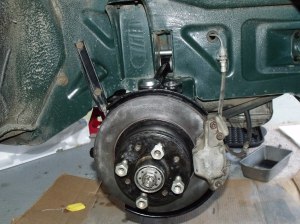
Early in the month of March, we finally had a winter day of temperatures reasonable enough to spend a few hours in the garage. One habit I’ve practiced with all my restorations is to take as many ‘before’, ‘during’, and ‘after’ photos as possible. In today’s digital world, it’s too easy to accomplish. So on Day One of this suspension rebuild, I dutifully took as many photos as I could of the pieces I was about to remove. I also decided it would be prudent to remove the brake caliper, disc, backing plate, and hub as a first step (I had left them in place when working on the first side, and they only got in the way).
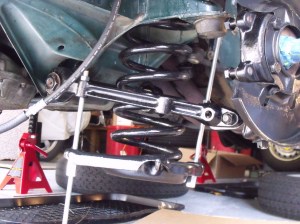
Alfa right front suspension before disassembly, from the side
Alfa right front suspension before disassembly, from the front
Alfa right front suspension before disassembly, from the rear
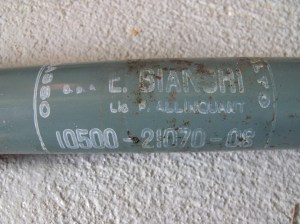
Alfa front shock, off the car
Alfa front shock, off the car
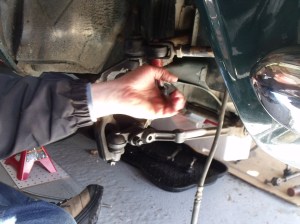
Alfa right front suspension, brake lines
Alfa right front suspension, caliper, disc, hub, and backing plate removed.
Alfa right front hub and wheel bearing
The impact gun made short work of this effort. Once those were off, the front shock was unbolted, and I photographically documented the markings on it, as I believe these shocks are original to the car. At this point I had some components which could be cleaned and prepped for painting. The next step would be the somewhat tricky removal of the front spring. This would wait until one or two friends could join the party and provide some needed assistance.
My wife and I just returned from a long weekend (5 day) trip to Los Angeles and its surrounding environs, primarily to visit her brother, whom we see all too infrequently. For me, it was another chance to immerse myself in southern California car culture. As a lifelong resident of the NY/NJ metro area, California has always been a car lover’s heaven. From my first visit here in 1977, through many subsequent business and personal trips, I have been in awe of “the land where cars don’t rust”. Walking down the street is analogous to attending an old car show back east. Car models which disappeared from my local streets eons ago have always seemed to be in plentiful supply in the Golden State.
Except this time, it was different. Perhaps because we stayed in a more concentrated and wealthy area (West Hollywood and Beverly Hills), the number of old daily drivers (informally defined by me as cars and trucks between 15 and 30 years old) was low. What stood out more was the incredible number of high-end cars. I’m not speaking of Mercedes Benzes, which were as common as Toyotas and Hondas are at home. I’m referring to Rolls Royces (3 while sitting in one restaurant), Ferraris (so common that people don’t turn their heads), Teslas (easily a dozen+ per day), BMW i8s, and Audi R8s. Topping this list was a Bugatti Veyron being driven down Sunset Blvd. Although I’ve seen the car at car shows, this was the first time I saw one moving under its own power on a public thoroughfare.
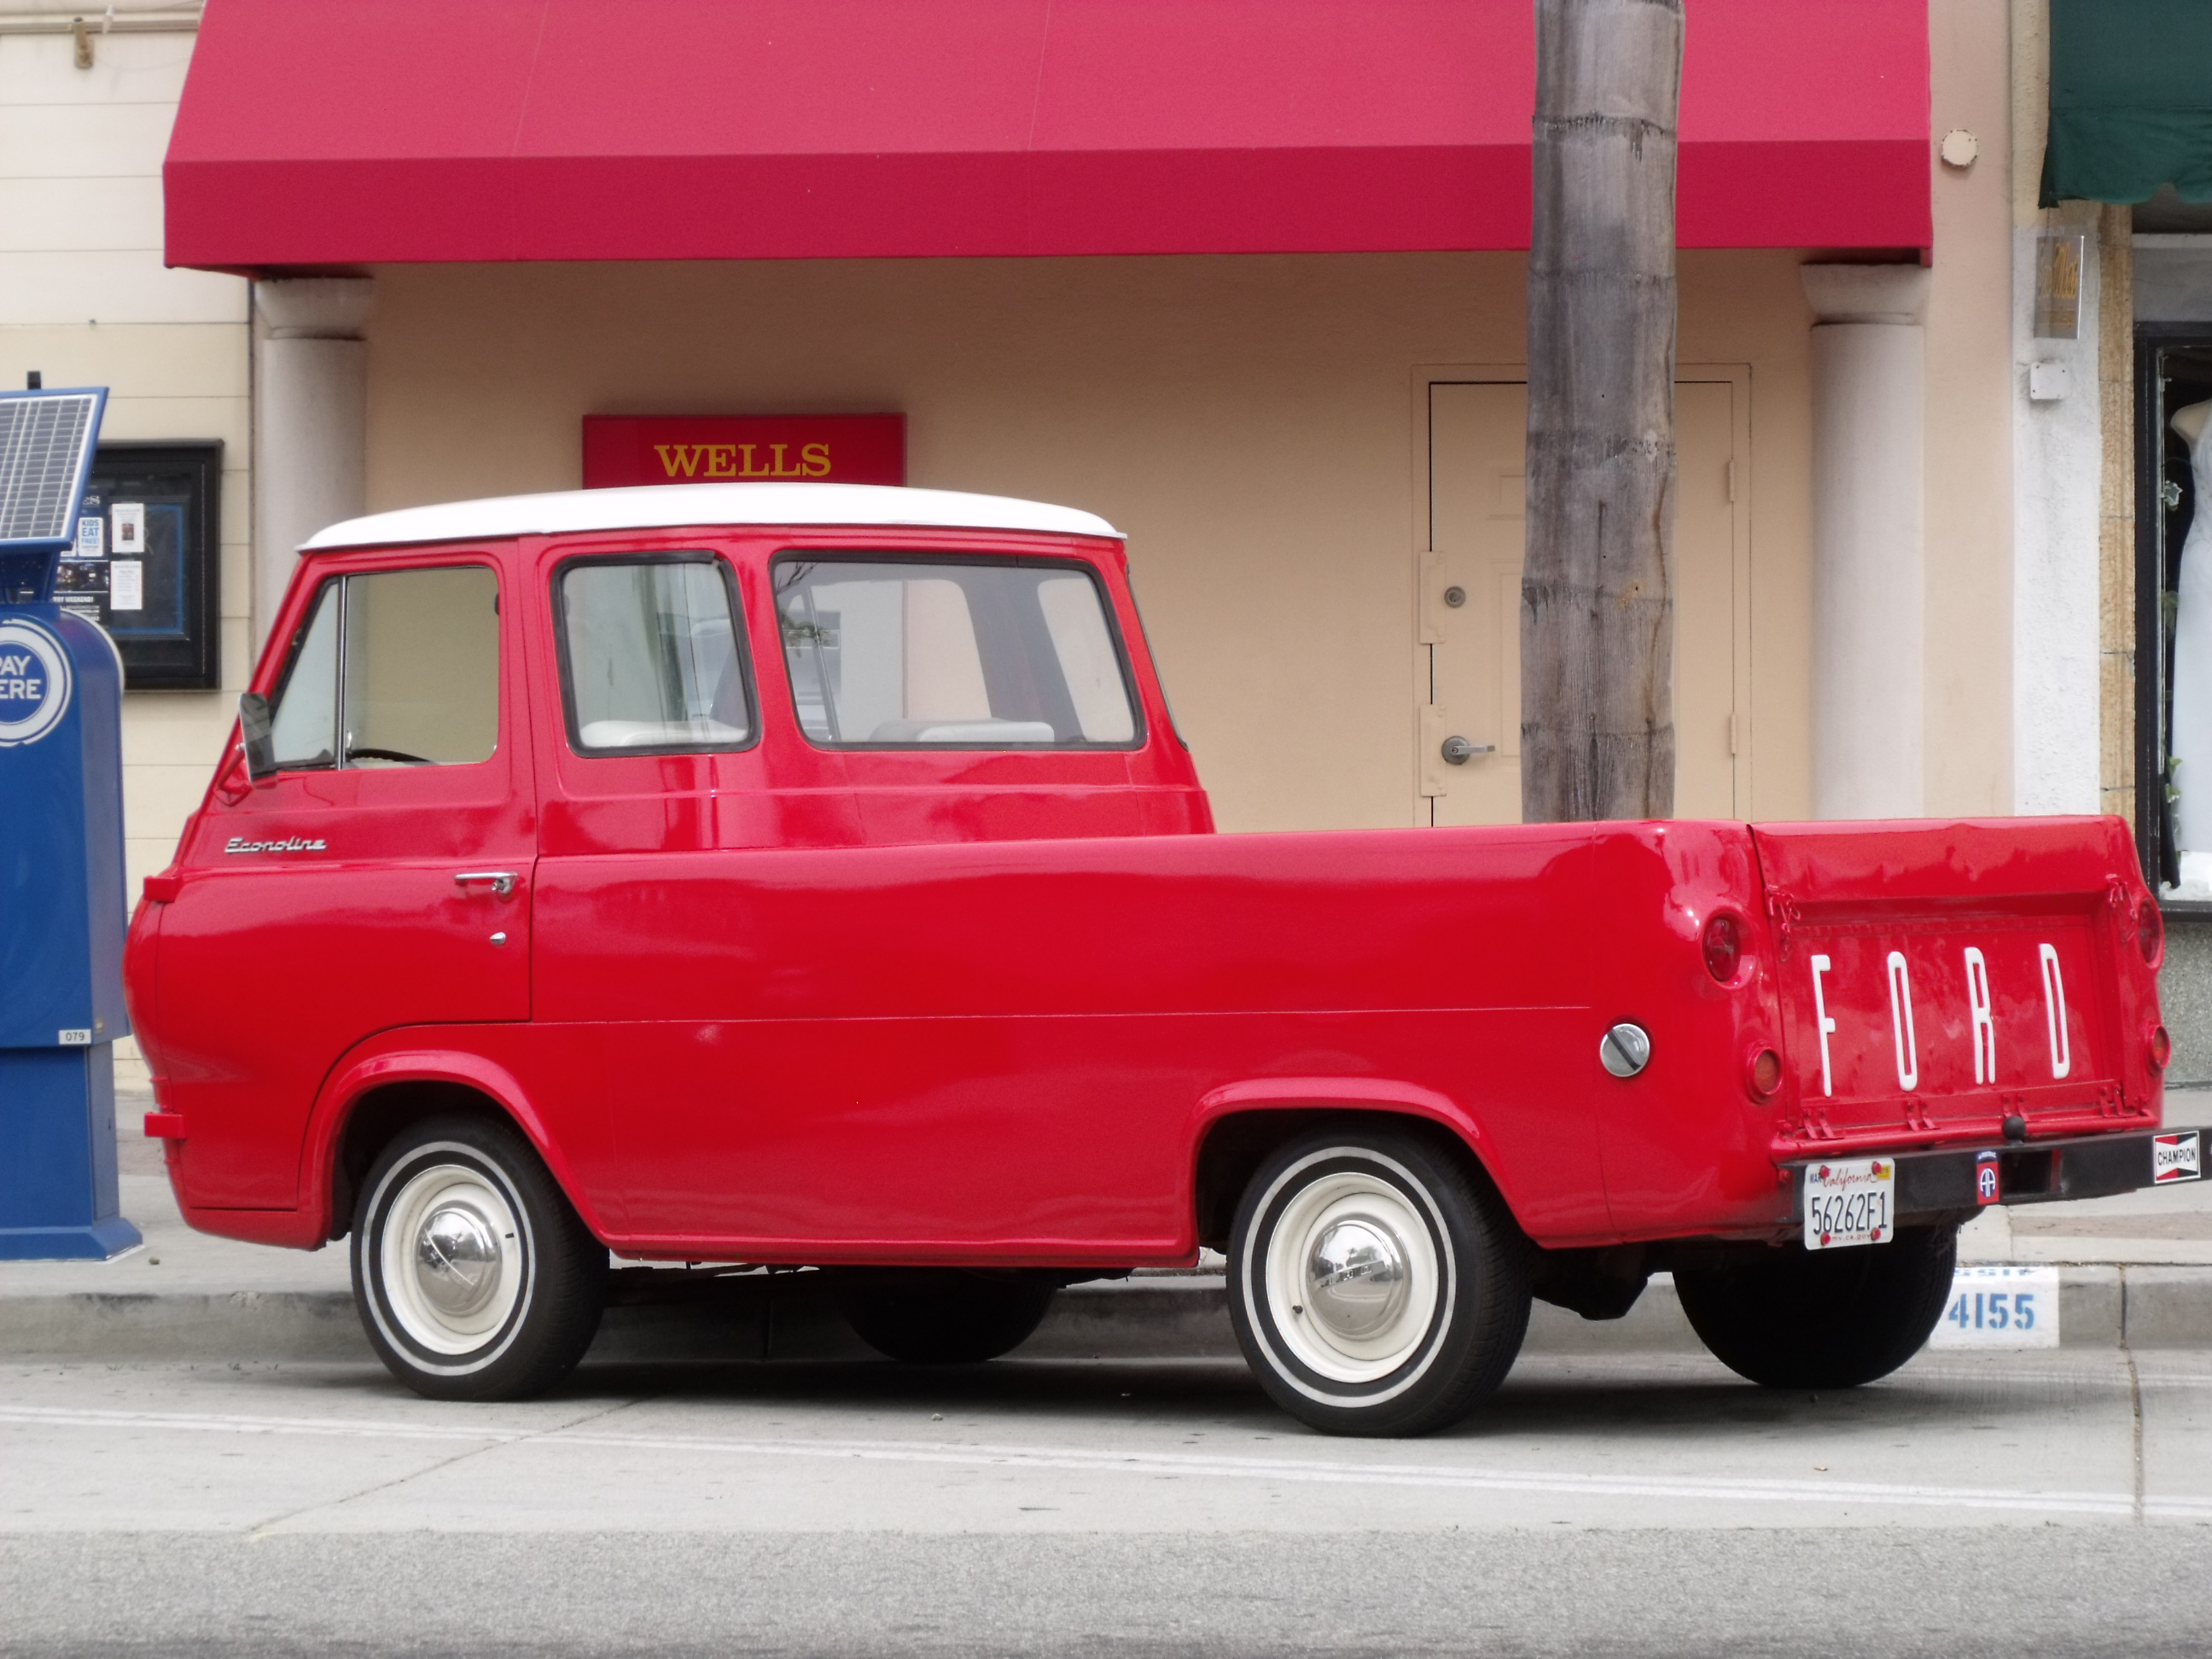
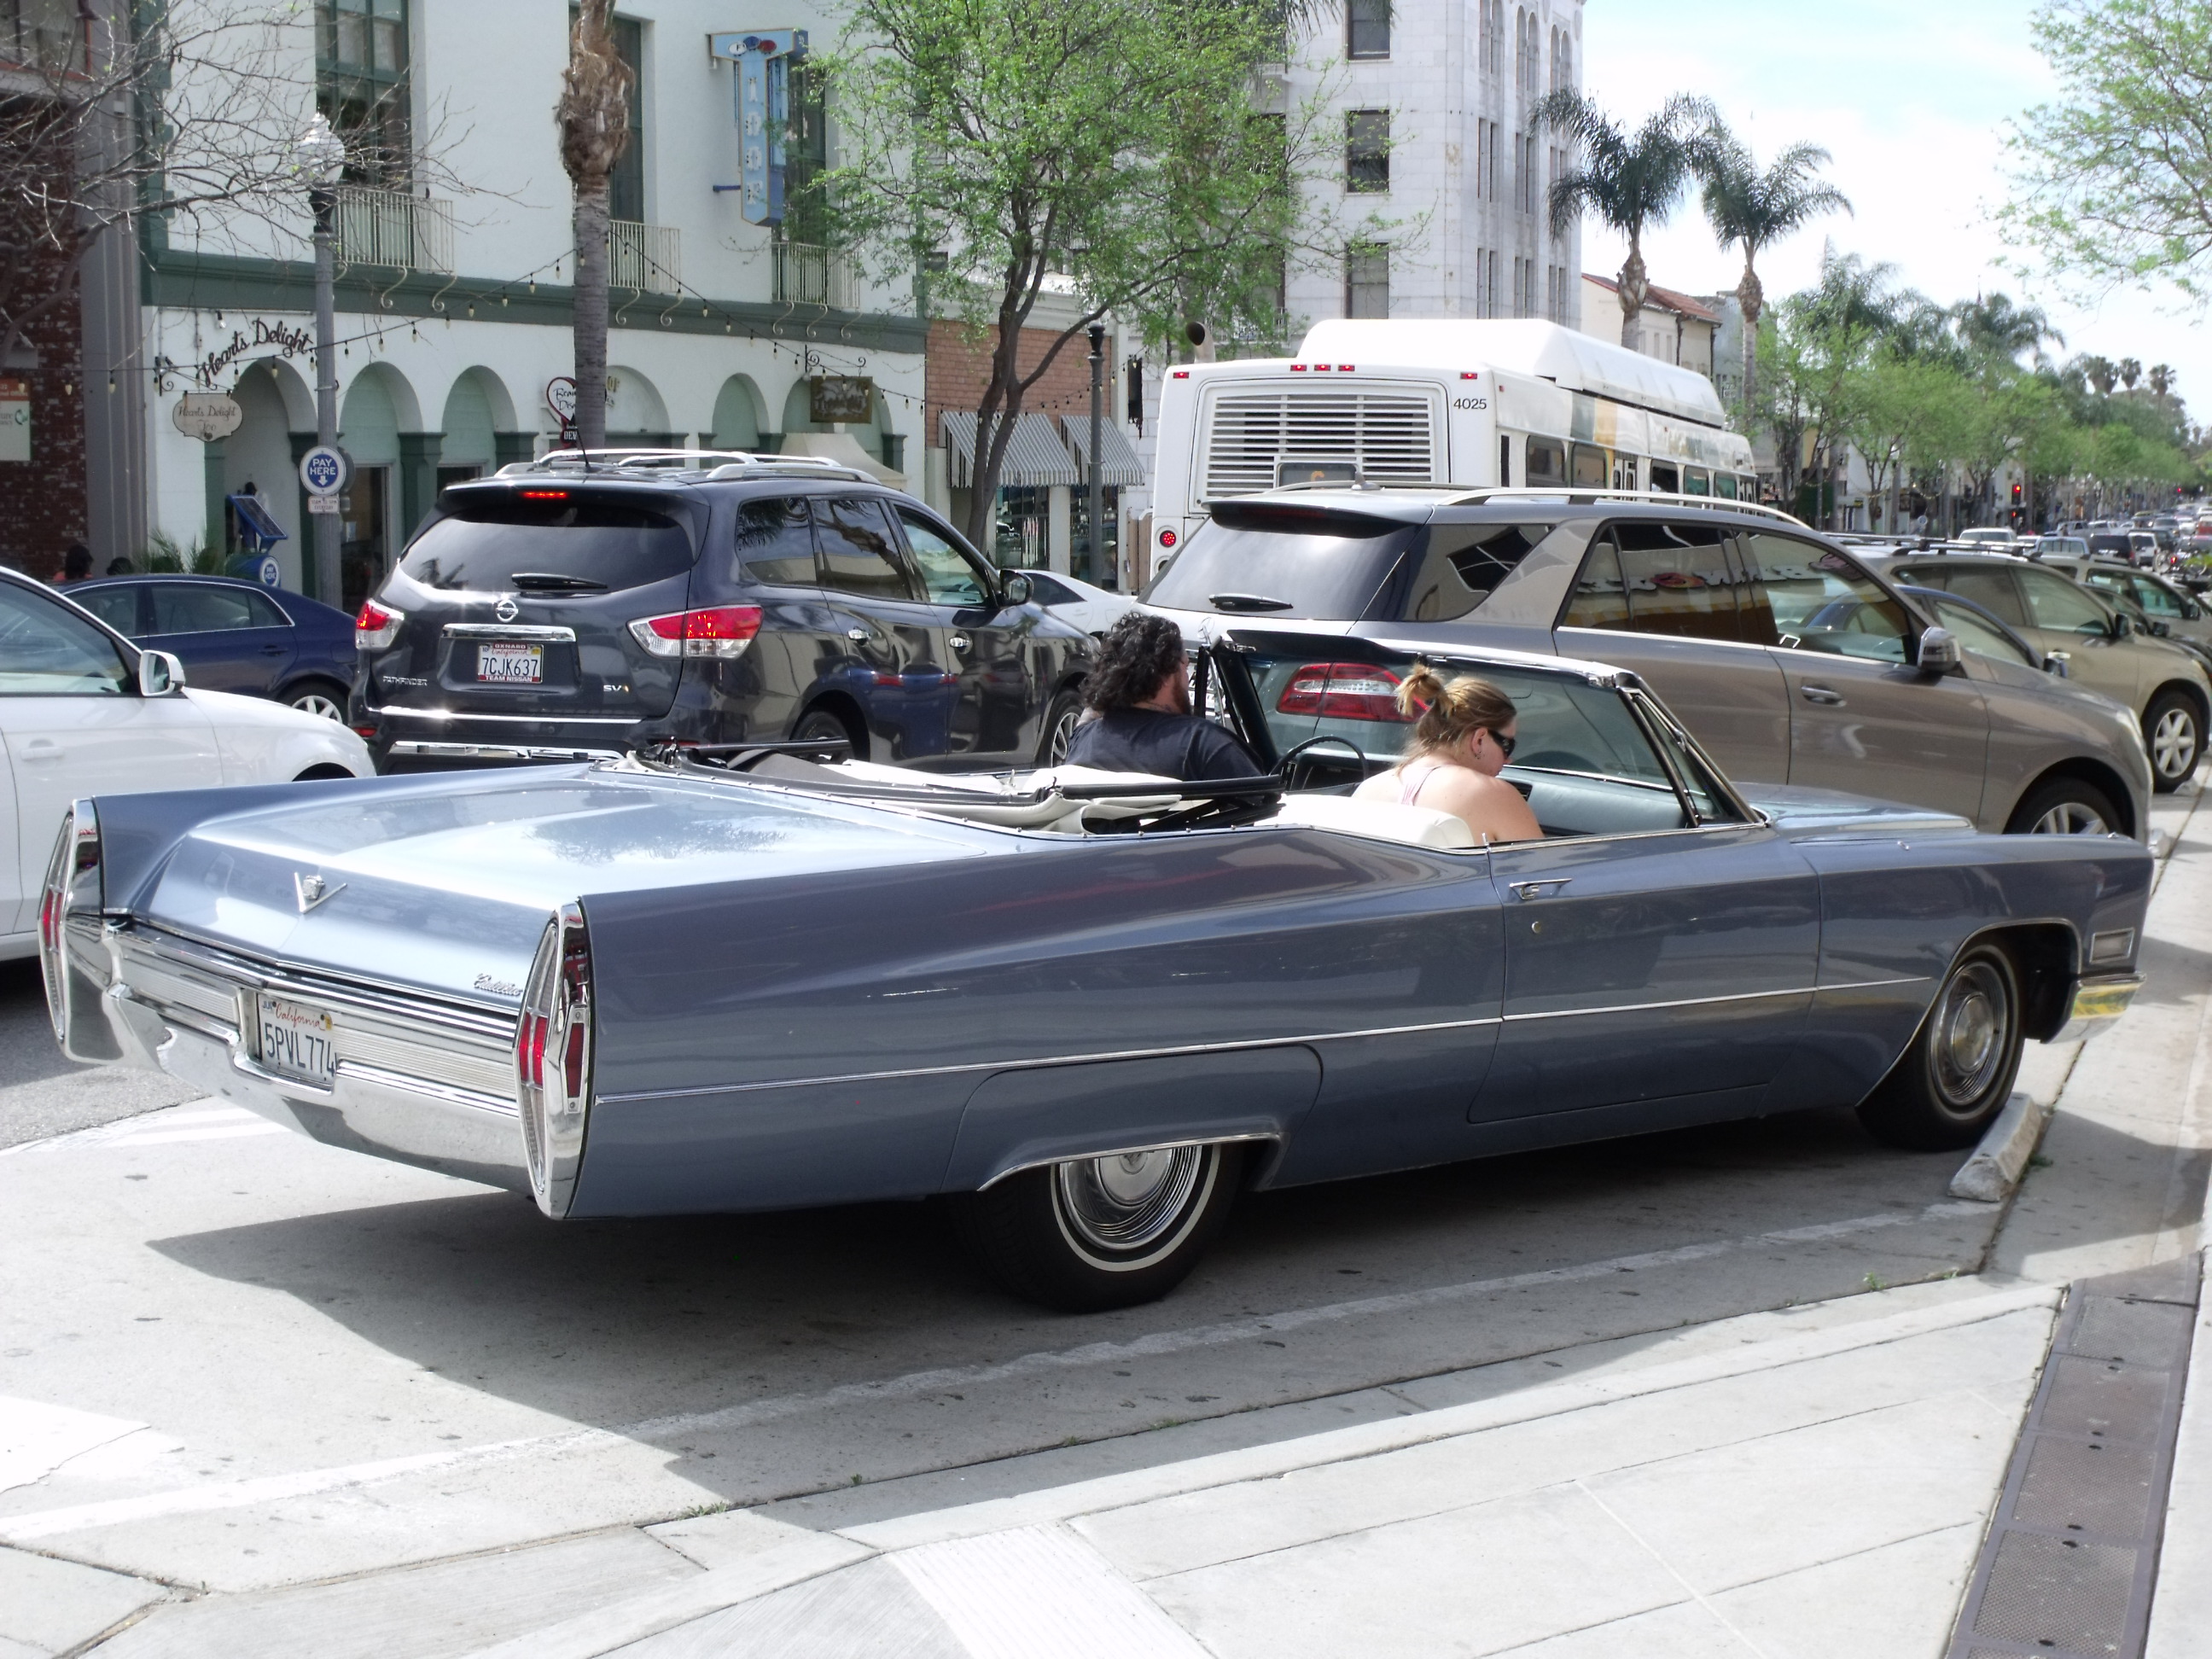
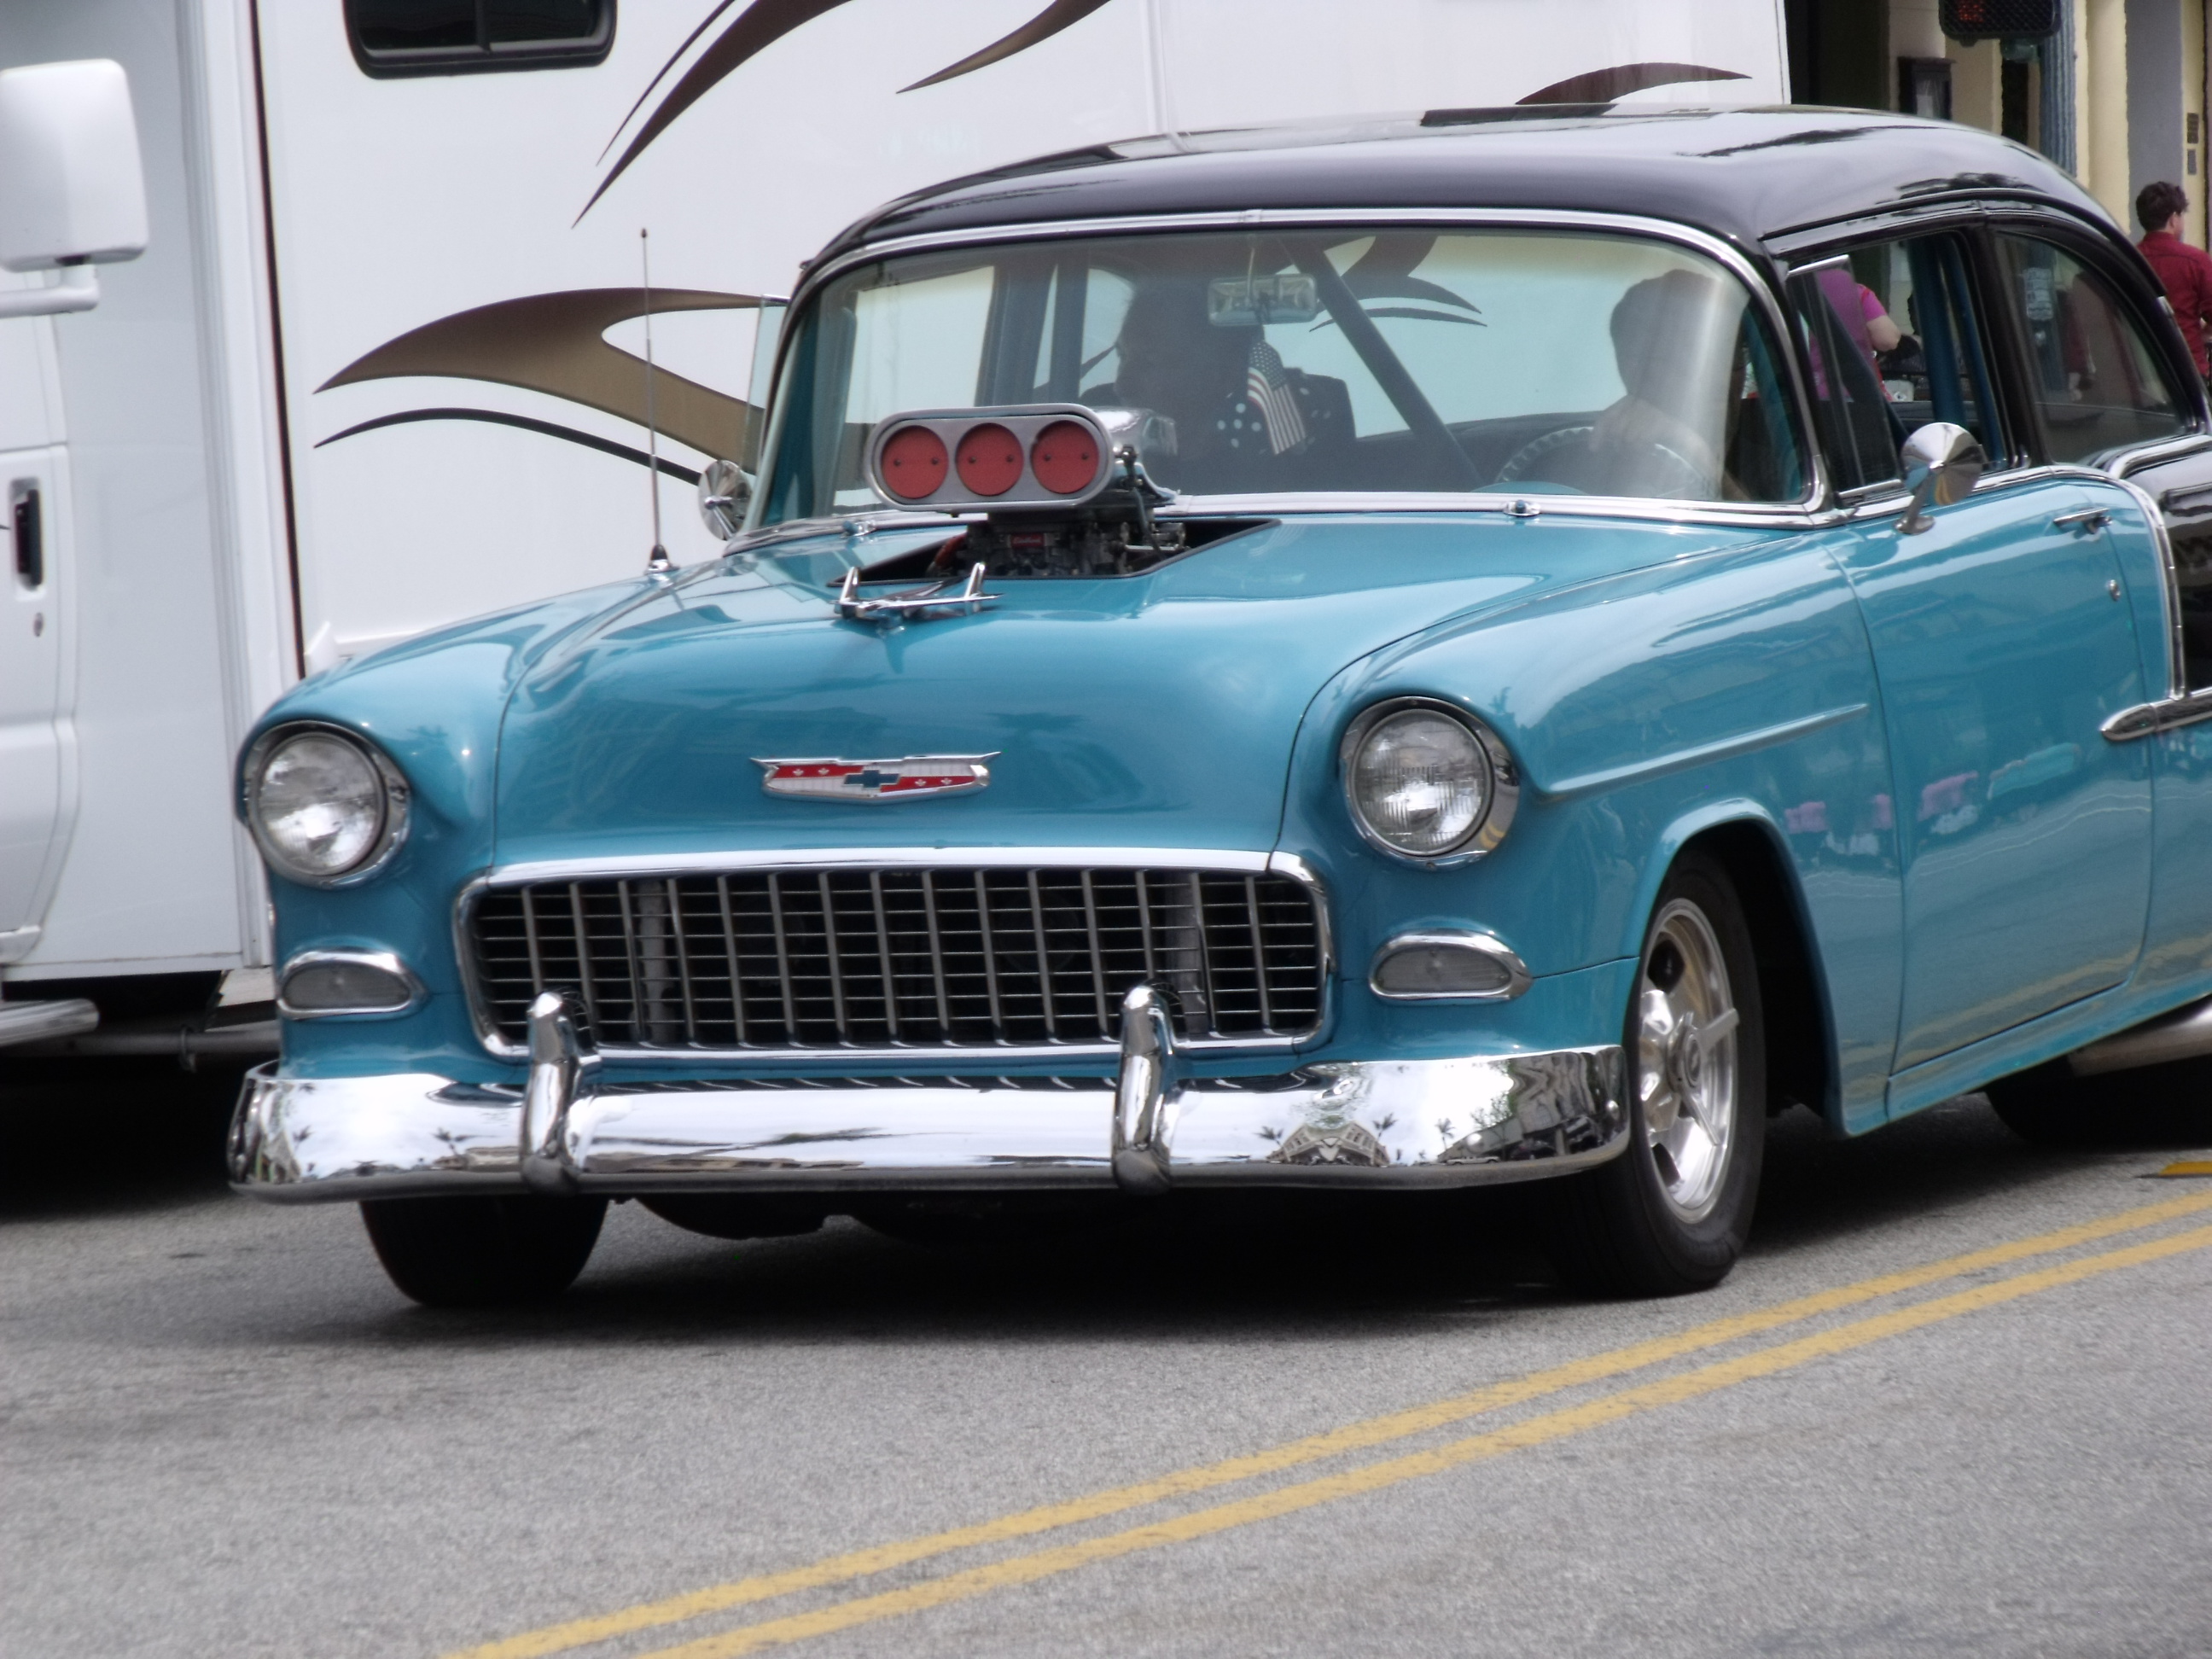
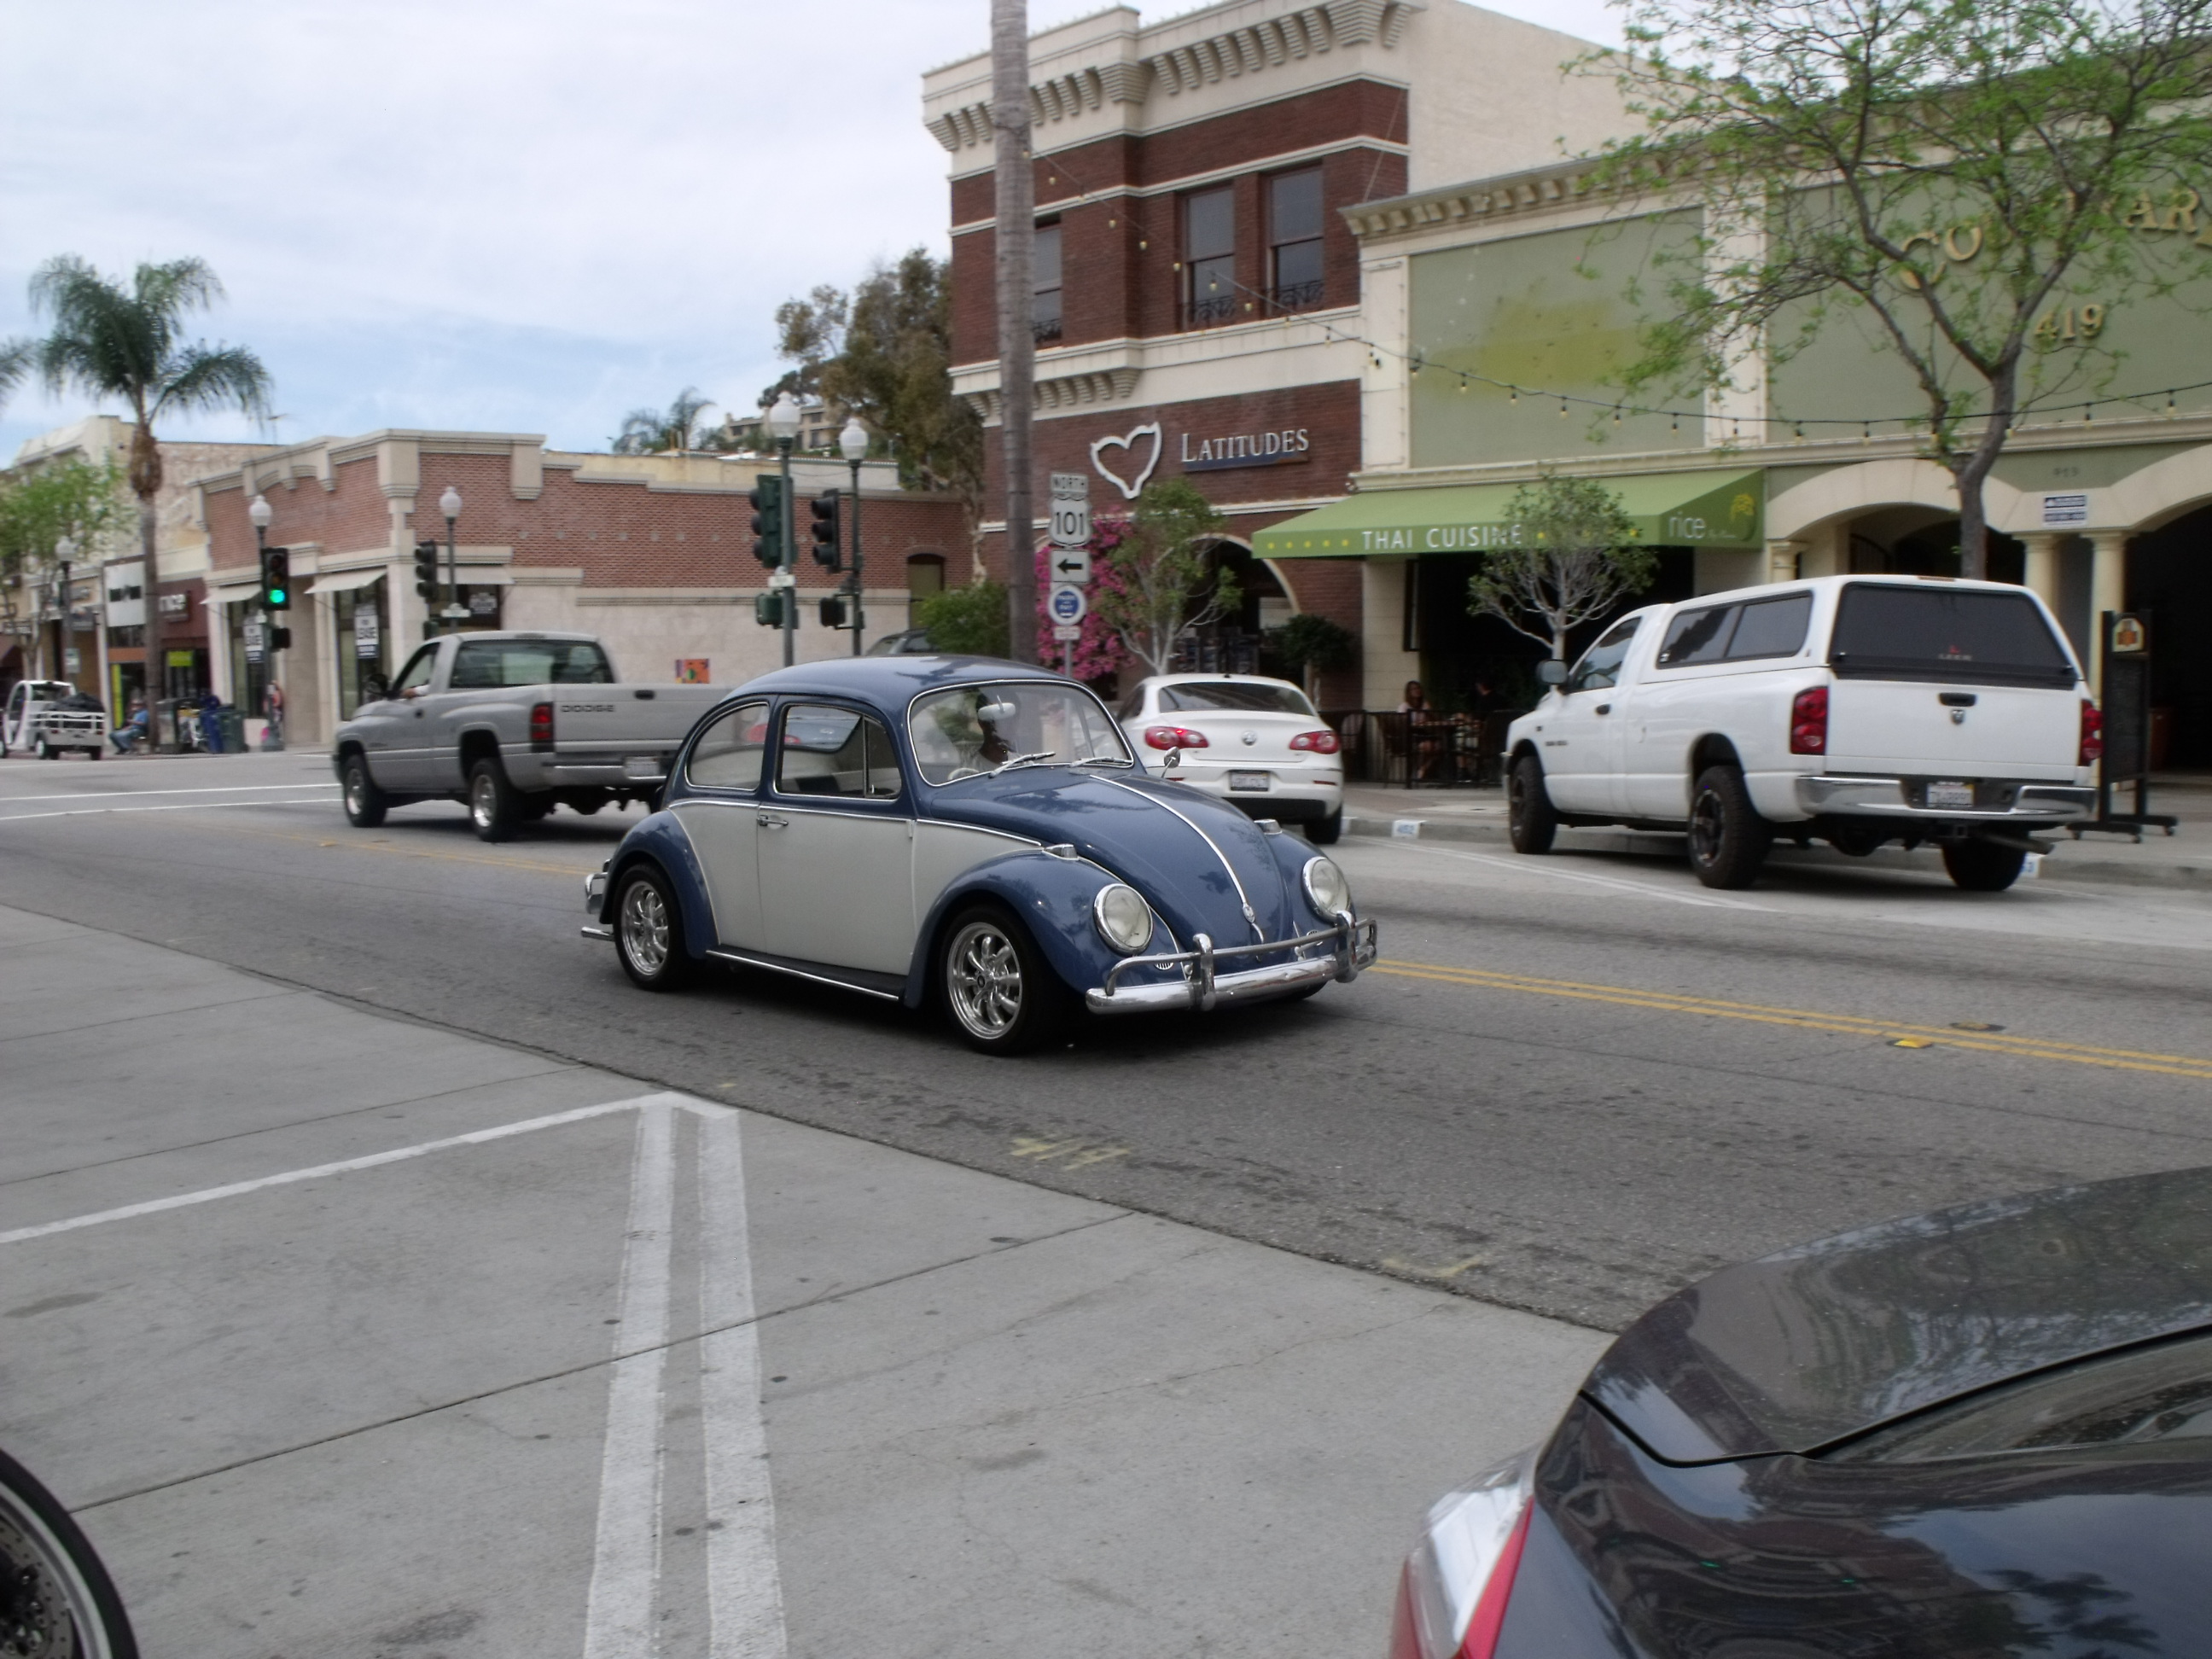
On Sunday, we drove to the charming shore town of Ventura (memorialized in the song “Ventura Highway” by America). As it was a weekend, I had the opportunity to see vehicles which likely were taken out for cruising. Parked on the street were a Ford Econoline COE (cab-over-engine) pickup, a Porsche 914, and a 1968 Cadillac convertible. Cruising the streets were two ’55 Chevrolets, several VW bugs (kids, these were the original Beetles with rear-mounted air-cooled engines), and a Toyota Land Cruiser which, in spite of its original-looking CA plate, disproved my idea that these things don’t suffer from the tin worm out here.
Ford Econoline pickup in Ventura CA
Porsche 914 in Ventura CA
1968 Cadillac convertible in Ventura CA
1955 Chevrolet wagon in Ventura CA
1955 Chevy hot rod in Ventura CA
’60s era VW Beetle in Ventura CA
’70s era VW Beetle in Ventura CA
A quite rusty Toyota Land Cruiser in Ventura CA
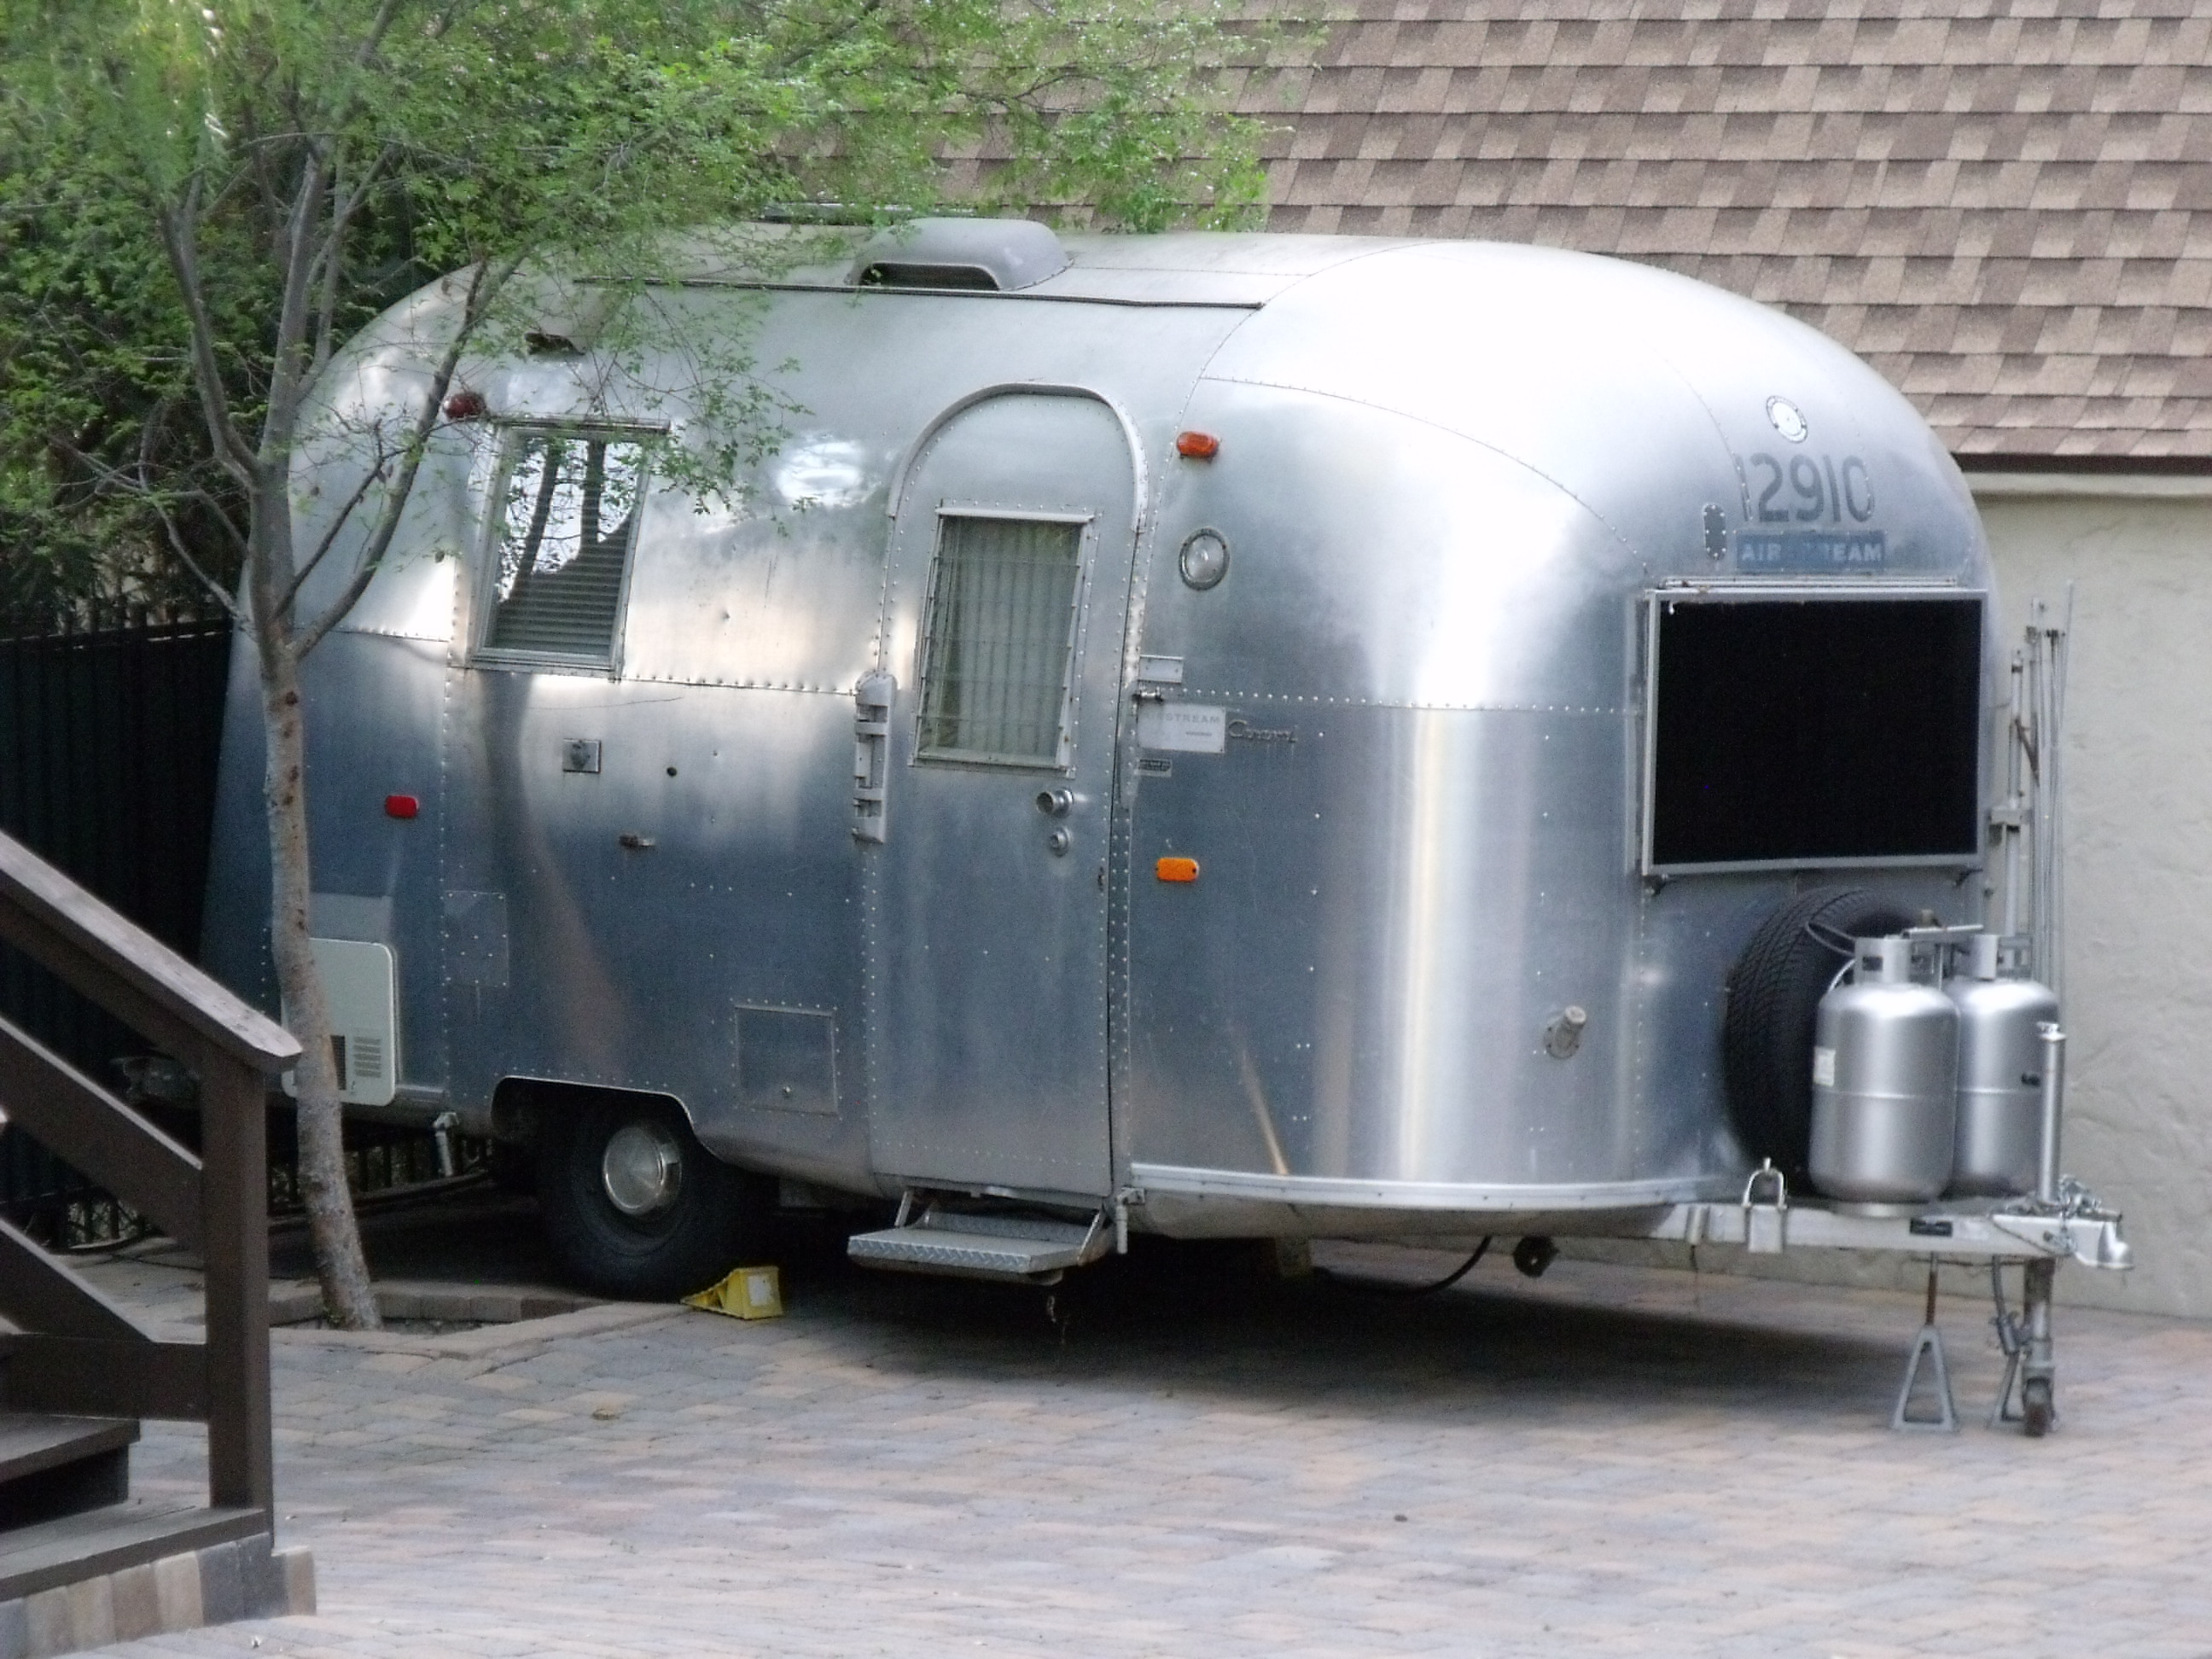
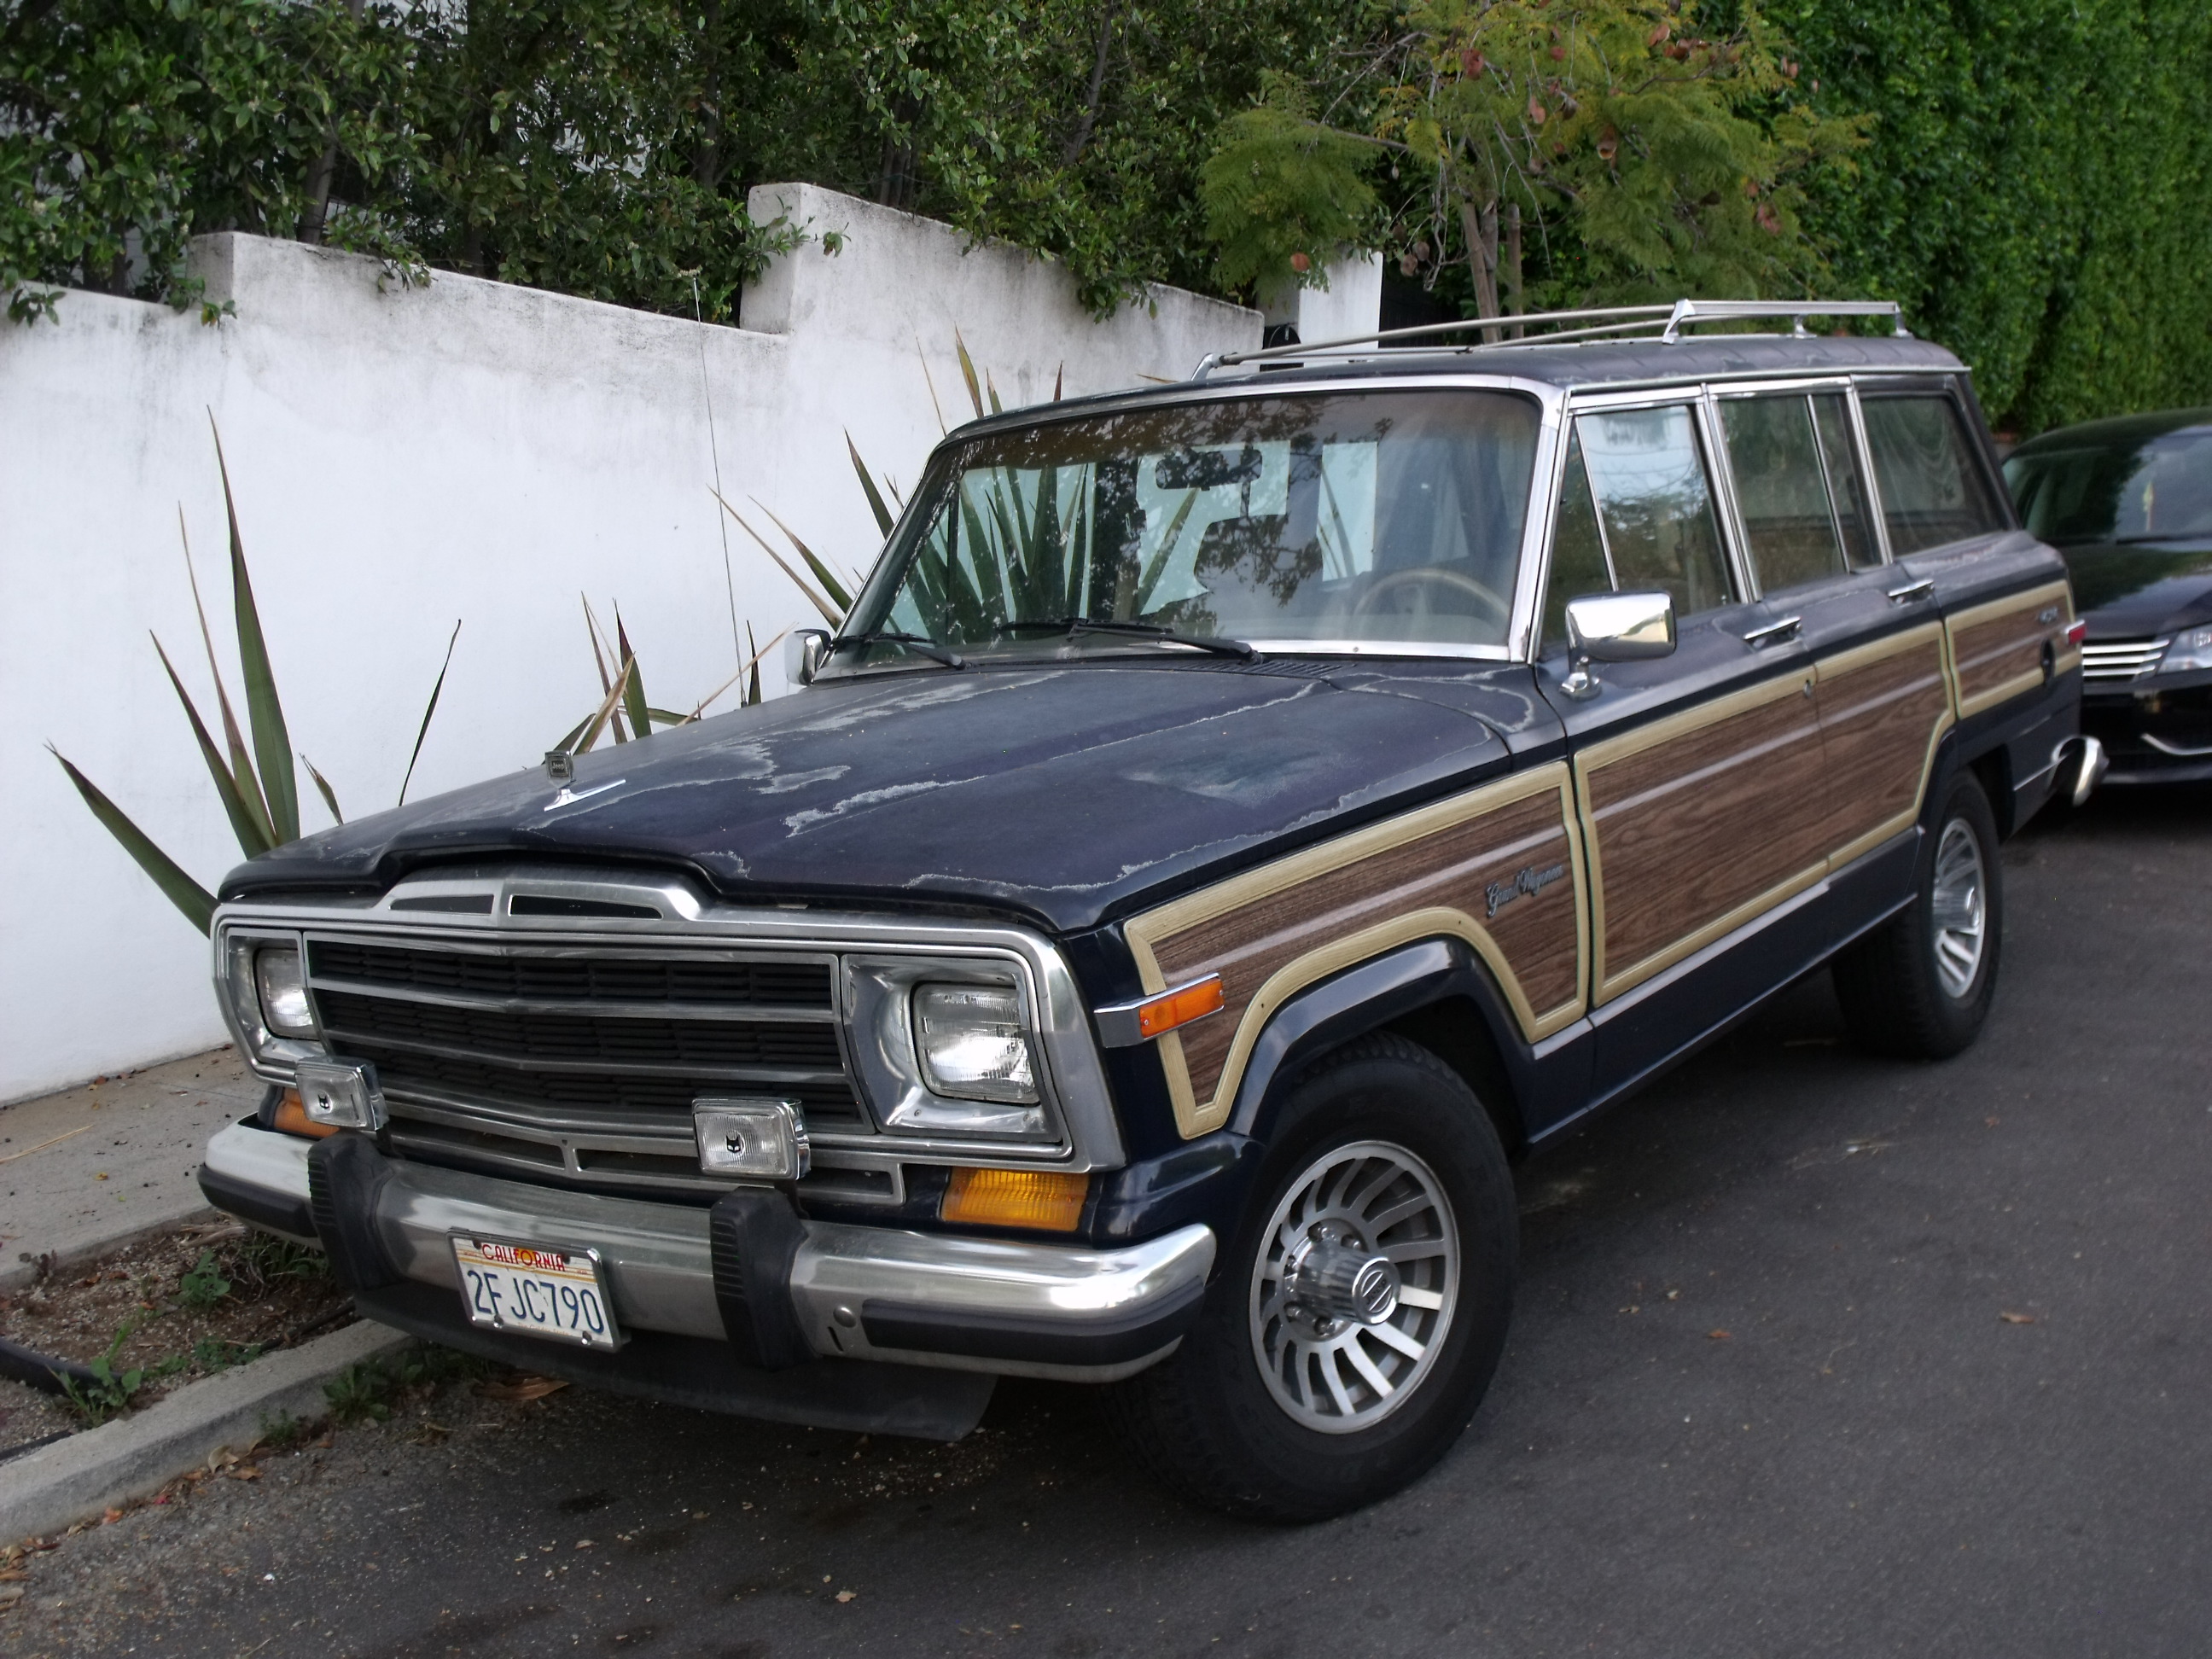
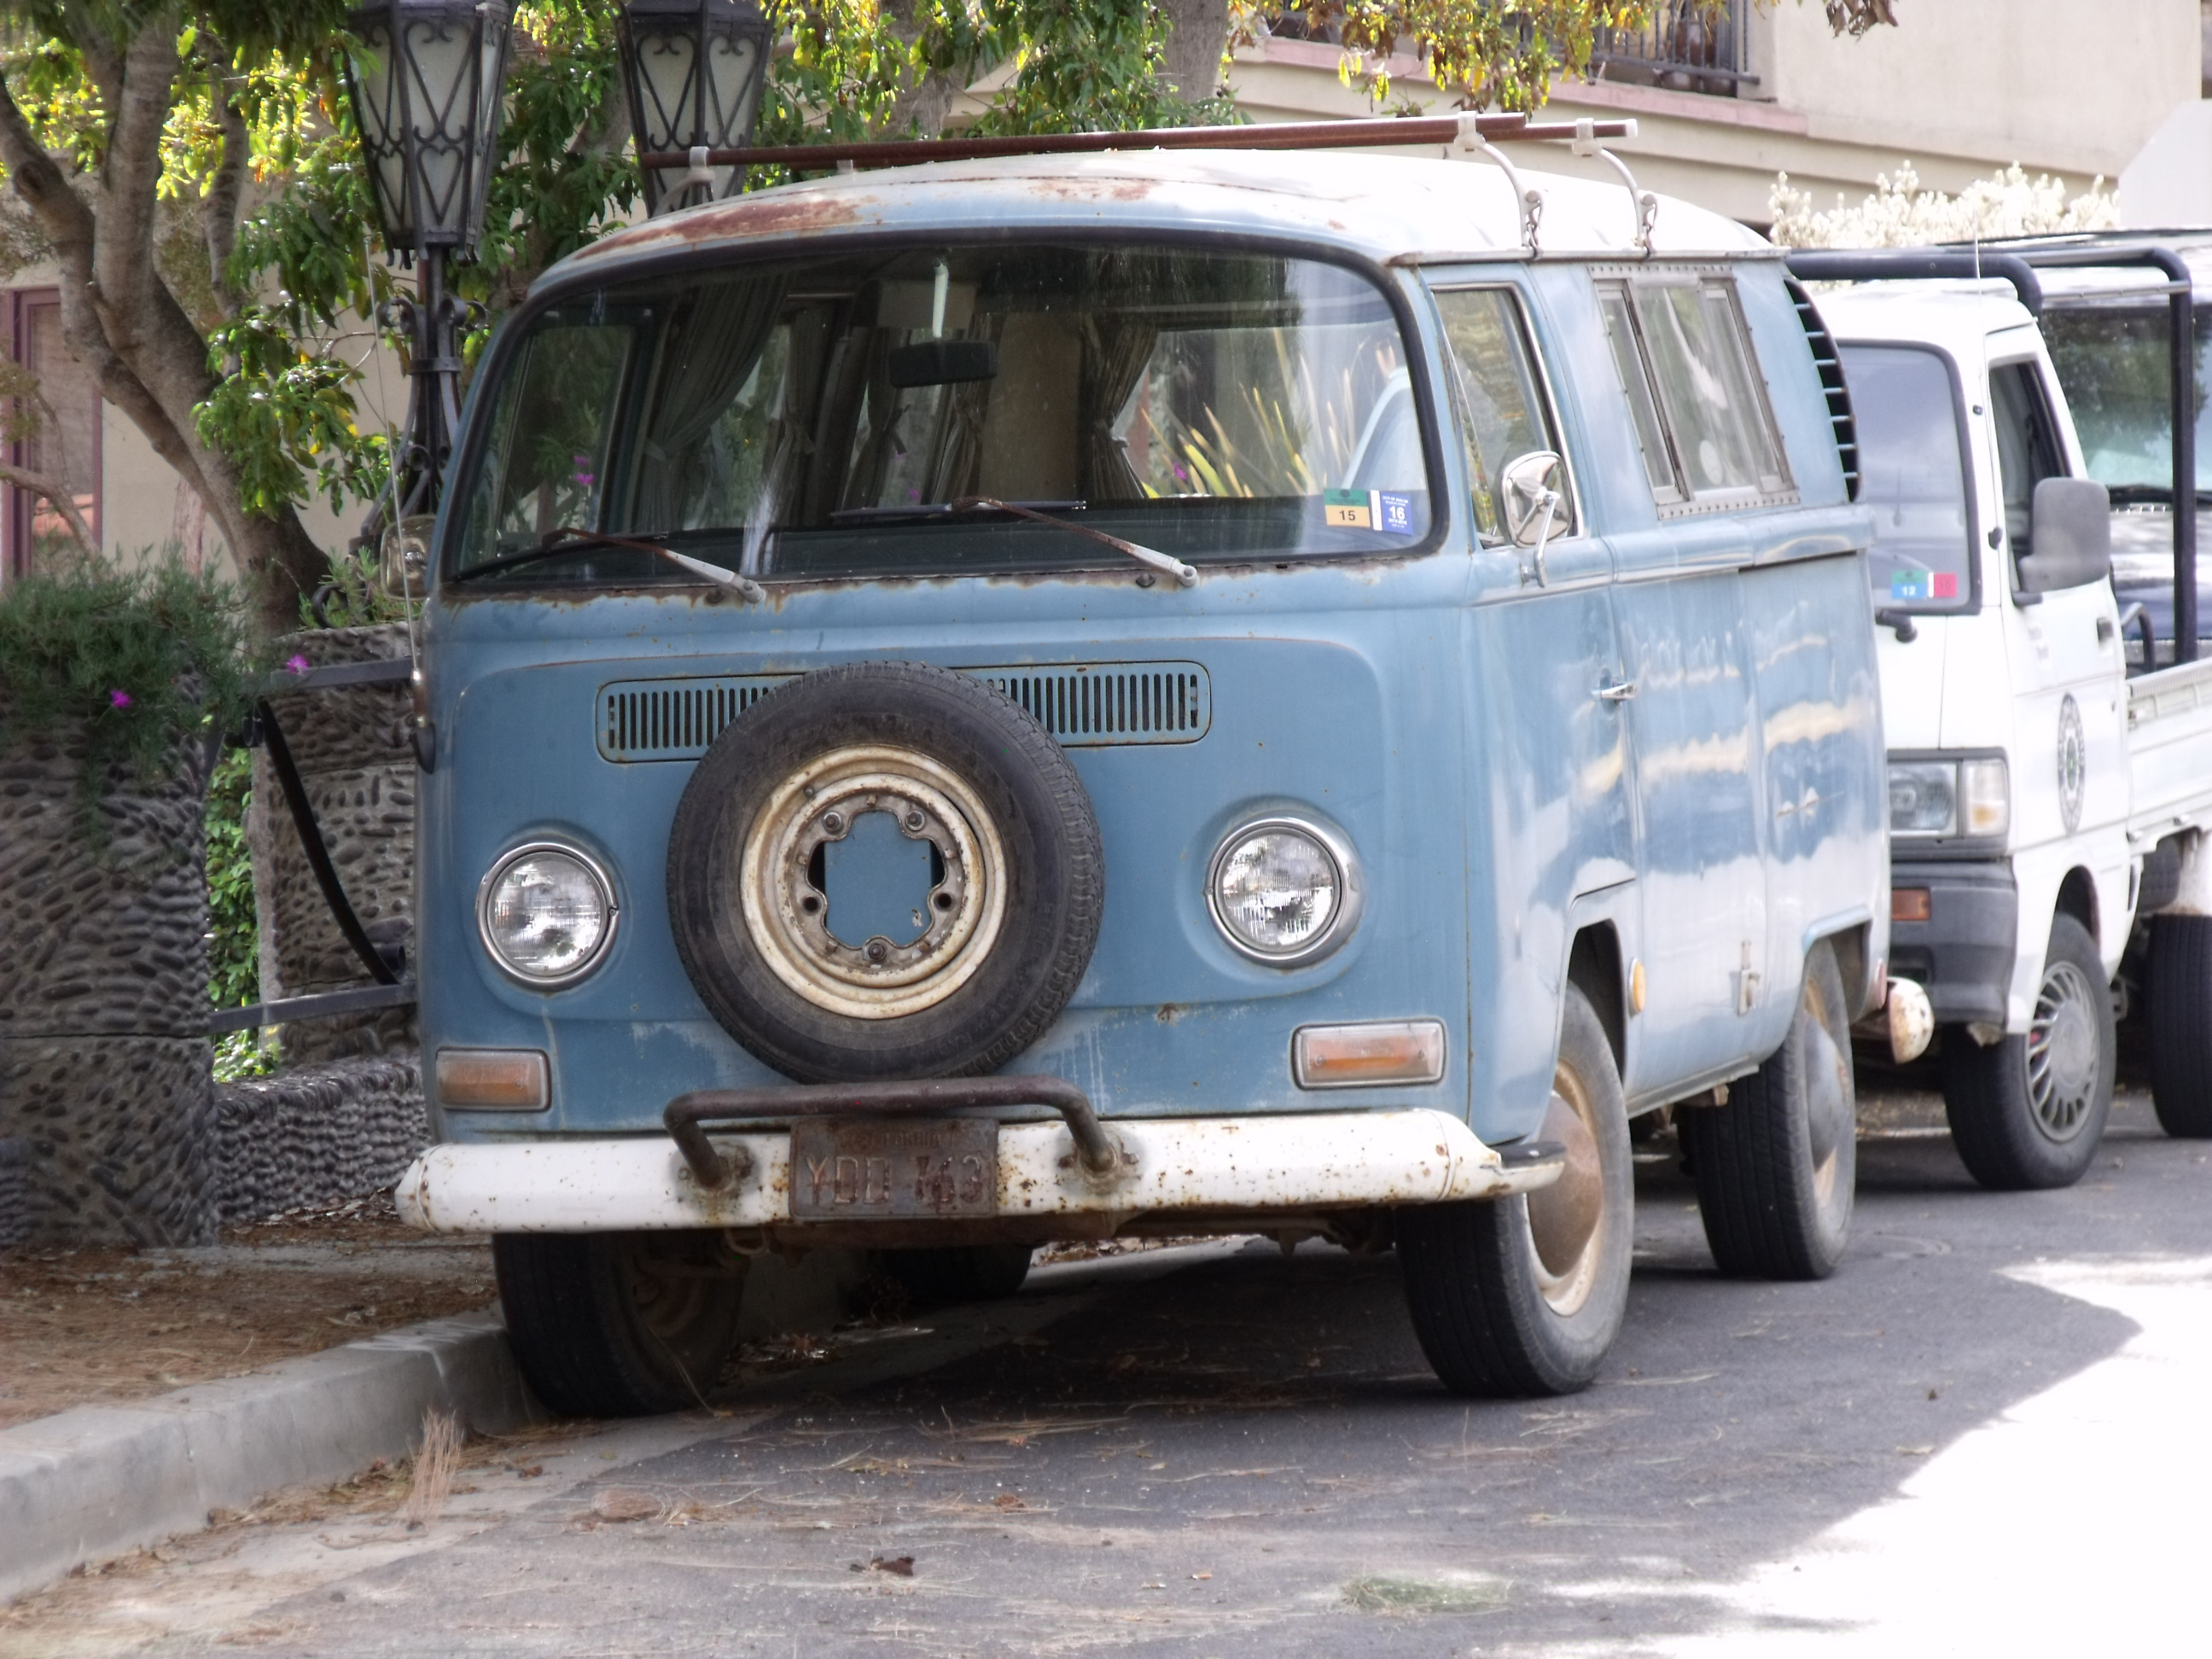
There were other cars to be found, although opportunities to photograph them were slim as we always seemed to be in a vehicle and on the go ourselves. Around the corner from my brother-in-law’s apartment was this gorgeous Airstream trailer, patiently waiting until it was time to hit the road again. One block from there was a Jeep Grand Wagoneer. Its paint was shot but its sheet metal looked solid. It caught my eye because I had just seen one sell in Atlantic City less than a month ago. And on Catalina Island was a VW Transporter, almost as rusty as the Toyota. I guess living near the ocean will eventually take its toll, even here.
While there were other vehicles of interest to be seen, there was no chance to photograph them all. Alas, the long weekend came to an end all too quickly. I’m back home in NJ, where the weatherman is predicting several inches of snow for the first day of spring! Hmm, need to plan that return visit to L.A.