Rich’s Repair Ramblings #9: Ten Steps to a Better Oil Change

Rich’s Repair Ramblings #9: Ten Steps to a Better Oil Change

Changing the engine oil and oil filter is one of the easiest and most straightforward maintenance jobs you can perform on your collector car. What’s easier than “pull the drain plug, swap out the filter, and add new oil”? Would it surprise you if I said that I might be able to offer up to 10 suggestions to improve the process? The following 10 Best Practices are from my own experiences. Read through the list and see if there isn’t at least one step which you can incorporate to make the next oil change a better one for your buggy.

#1. SAFETY FIRST!

It bears constant repetition: Never work under a car that isn’t properly supported. Do not use the vehicle jack (or worse, some cinder blocks) to support a car off the ground. Use quality jack stands or drive-up ramps with sufficient weight ratings when doing any work that involves sliding under something that weighs upwards of several tons. Make sure that the transmission is either in “Park” or for stick shift cars, in a forward gear. Always set the parking brake. Chocks on the rear wheels are a good idea too.

Ramps are great for oil changes, as there is no need to remove front tires
#2. DRAIN THE OIL WHEN THE ENGINE IS WARM.

Yes, “cold” (room temperature) oil will flow out the oil pan. But warm oil flows more quickly, and more importantly, takes more contaminants out with it. The engine doesn’t need to be hot – you increase the risk of burning yourself from scalding oil or a hot exhaust pipe. But if the car is cold, let it idle at least until the temperature gauge starts to move. If you don’t have a gauge, 5 minutes on a warm day should do it. If you’ve just driven the car and everything is too hot to touch, wait 20 to 30 minutes so that the oil is warm but not burning hot.

Let the temp gauge move off “C” before draining oil
#3. REMOVE THE FILLER CAP BEFORE YOU REMOVE THE DRAIN PLUG.

You’ll get faster flow (and again, remove more of the bad stuff) if you take off the oil filler cap and allow air into the engine during the drain. The cap needs to come off anyway! This is the same as punching a 2nd hole in a can when you’re trying to pour out liquid.

#4. REPLACE THE DRAIN PLUG WASHER.

The drain plug has a gasket or washer, typically made of copper or aluminum, which serves as a seal. The softer metal is designed to be crushed when you tighten the plug. But the washer can stand being crushed only so many times before it’s no longer effective at stopping leaks. The trick in replacing the drain plug washer is having a spare one on hand. (I buy them by the dozen.) And a tip to avoid a problem that even trips up the pros: make sure that the OLD washer is removed, and is not stuck to the drain plug or oil pan. If you put a new washer on the drain plug with the old one there, you’ll almost certainly have a leak.

Old washer on left shows crush marks; new washer on right
#5. ALWAYS REPLACE THE OIL FILTER.

I continue to be amazed at the number of times that someone has told me that they completed an oil change and left the old filter in place. What is the issue? Is the filter difficult to access? Is it too expensive? Do you think that the old filter has some service life left in it? If it’s hard to get to, watch some YouTube videos and figure it out. Others have. How much does a new filter cost? Stop being so cheap. Leaving the old filter in place recirculates about a quart of dirty oil directly into your fresh clean oil. It also runs the risk of the filter becoming so full of contaminants that it can no longer do its job. Always be sure to have a new filter on hand before you start the job.

#6. PRE-FILL THE OIL FILTER BEFORE INSTALLING IT.

This is one ‘best practice’ that isn’t always practical to do. I do this for one car, but not the other, simply because of the filter’s location. If the filter attaches from the bottom, I can add oil to it and keep it right-side-up, avoiding any spills when reinstalling it. However, if the filter attaches horizontally, it’s trickier. Sometimes I can add a little oil and get it on there without any spills. We’ll need to qualify this best practice with the caveat “it depends”. See Tip #9 below.

#7. TIGHTEN THE OIL FILTER CORRECTLY.

A while back, my neighbor had to return her car immediately after an oil change, and she was told that the tech had left the filter loose. (The person performing the job also needs to make sure that the rubber gasket from the old filter is not stuck to the engine block, for if it is, the new filter will never seal properly.) It’s just as bad, however, to overtighten the filter. I have personally witnessed technicians resort to hammering a long screwdriver through an old filter to act as a pry bar to remove an overtighened one. For most cars, oil filters should be tightened by hand, without the use of any tool. Tighten until the gasket contacts the engine, then turn the filter another 1/8 to ¼ of a turn. That’s it!

Rubber seal on old filter on left came loose; new filter on right. Box holds extra drain plug washers
#8. USE THE CORRECT VISCOSITY OIL.

Your owner’s manual will identify the specified viscosity. For most cars built in the last 50 years, vehicle manufacturers have recommended a multi-weight oil good for year-round use, with numbers like “10W-30”. The lower the number, the thinner the oil, necessary in cold weather. The higher the number, the thicker the oil, needed in hot climates. The “W” stands for winter. Using the incorrect viscosity oil can damage the engine in your old car. My Alfa Romeo calls for 20W-40 oil, but that was printed in 1967. It runs very happily (and uses no oil between changes) on 20W-50. At the other extreme, my modern iron specifies 0W-20. It would be a disaster if I were to switch these viscosities between the old and new cars! As a special note for much older AACA cars, the called-for viscosity may no longer be readily available. If your engine has been rebuilt, you may need to adjust the viscosity you use compared to what was recommended 70 or 80 years ago. Speak to other owners with similar cars to see what they use or recommend.

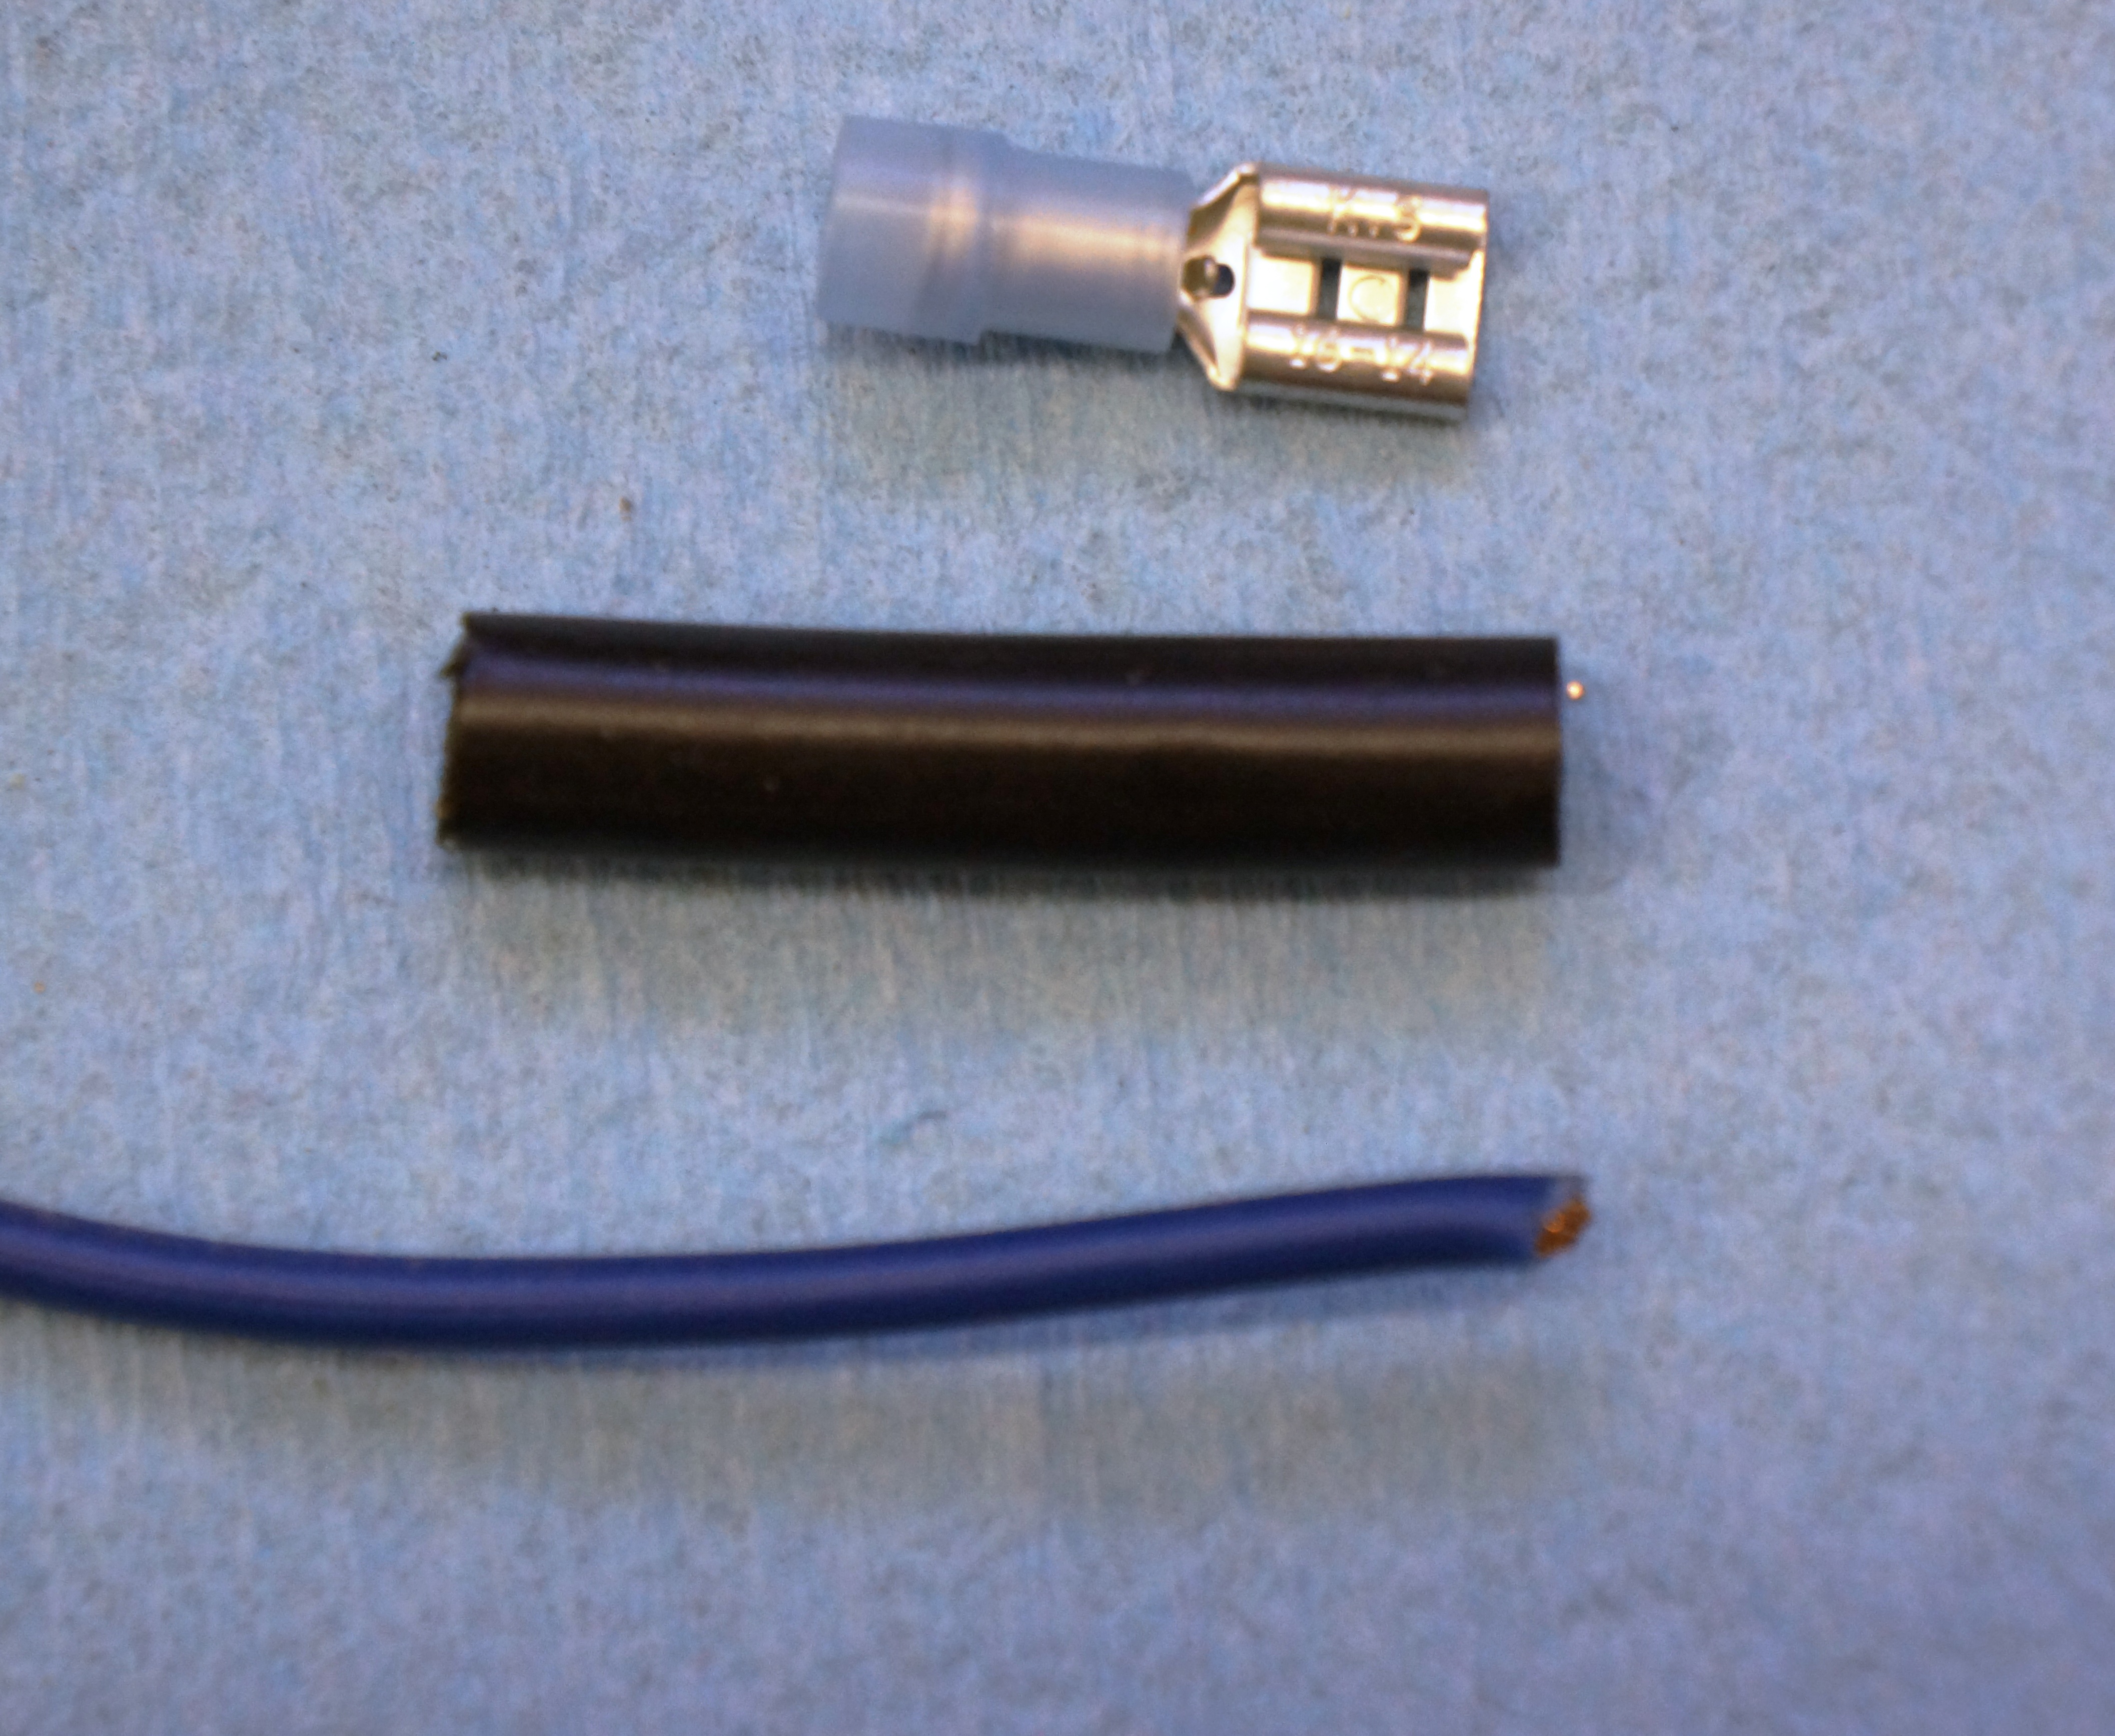
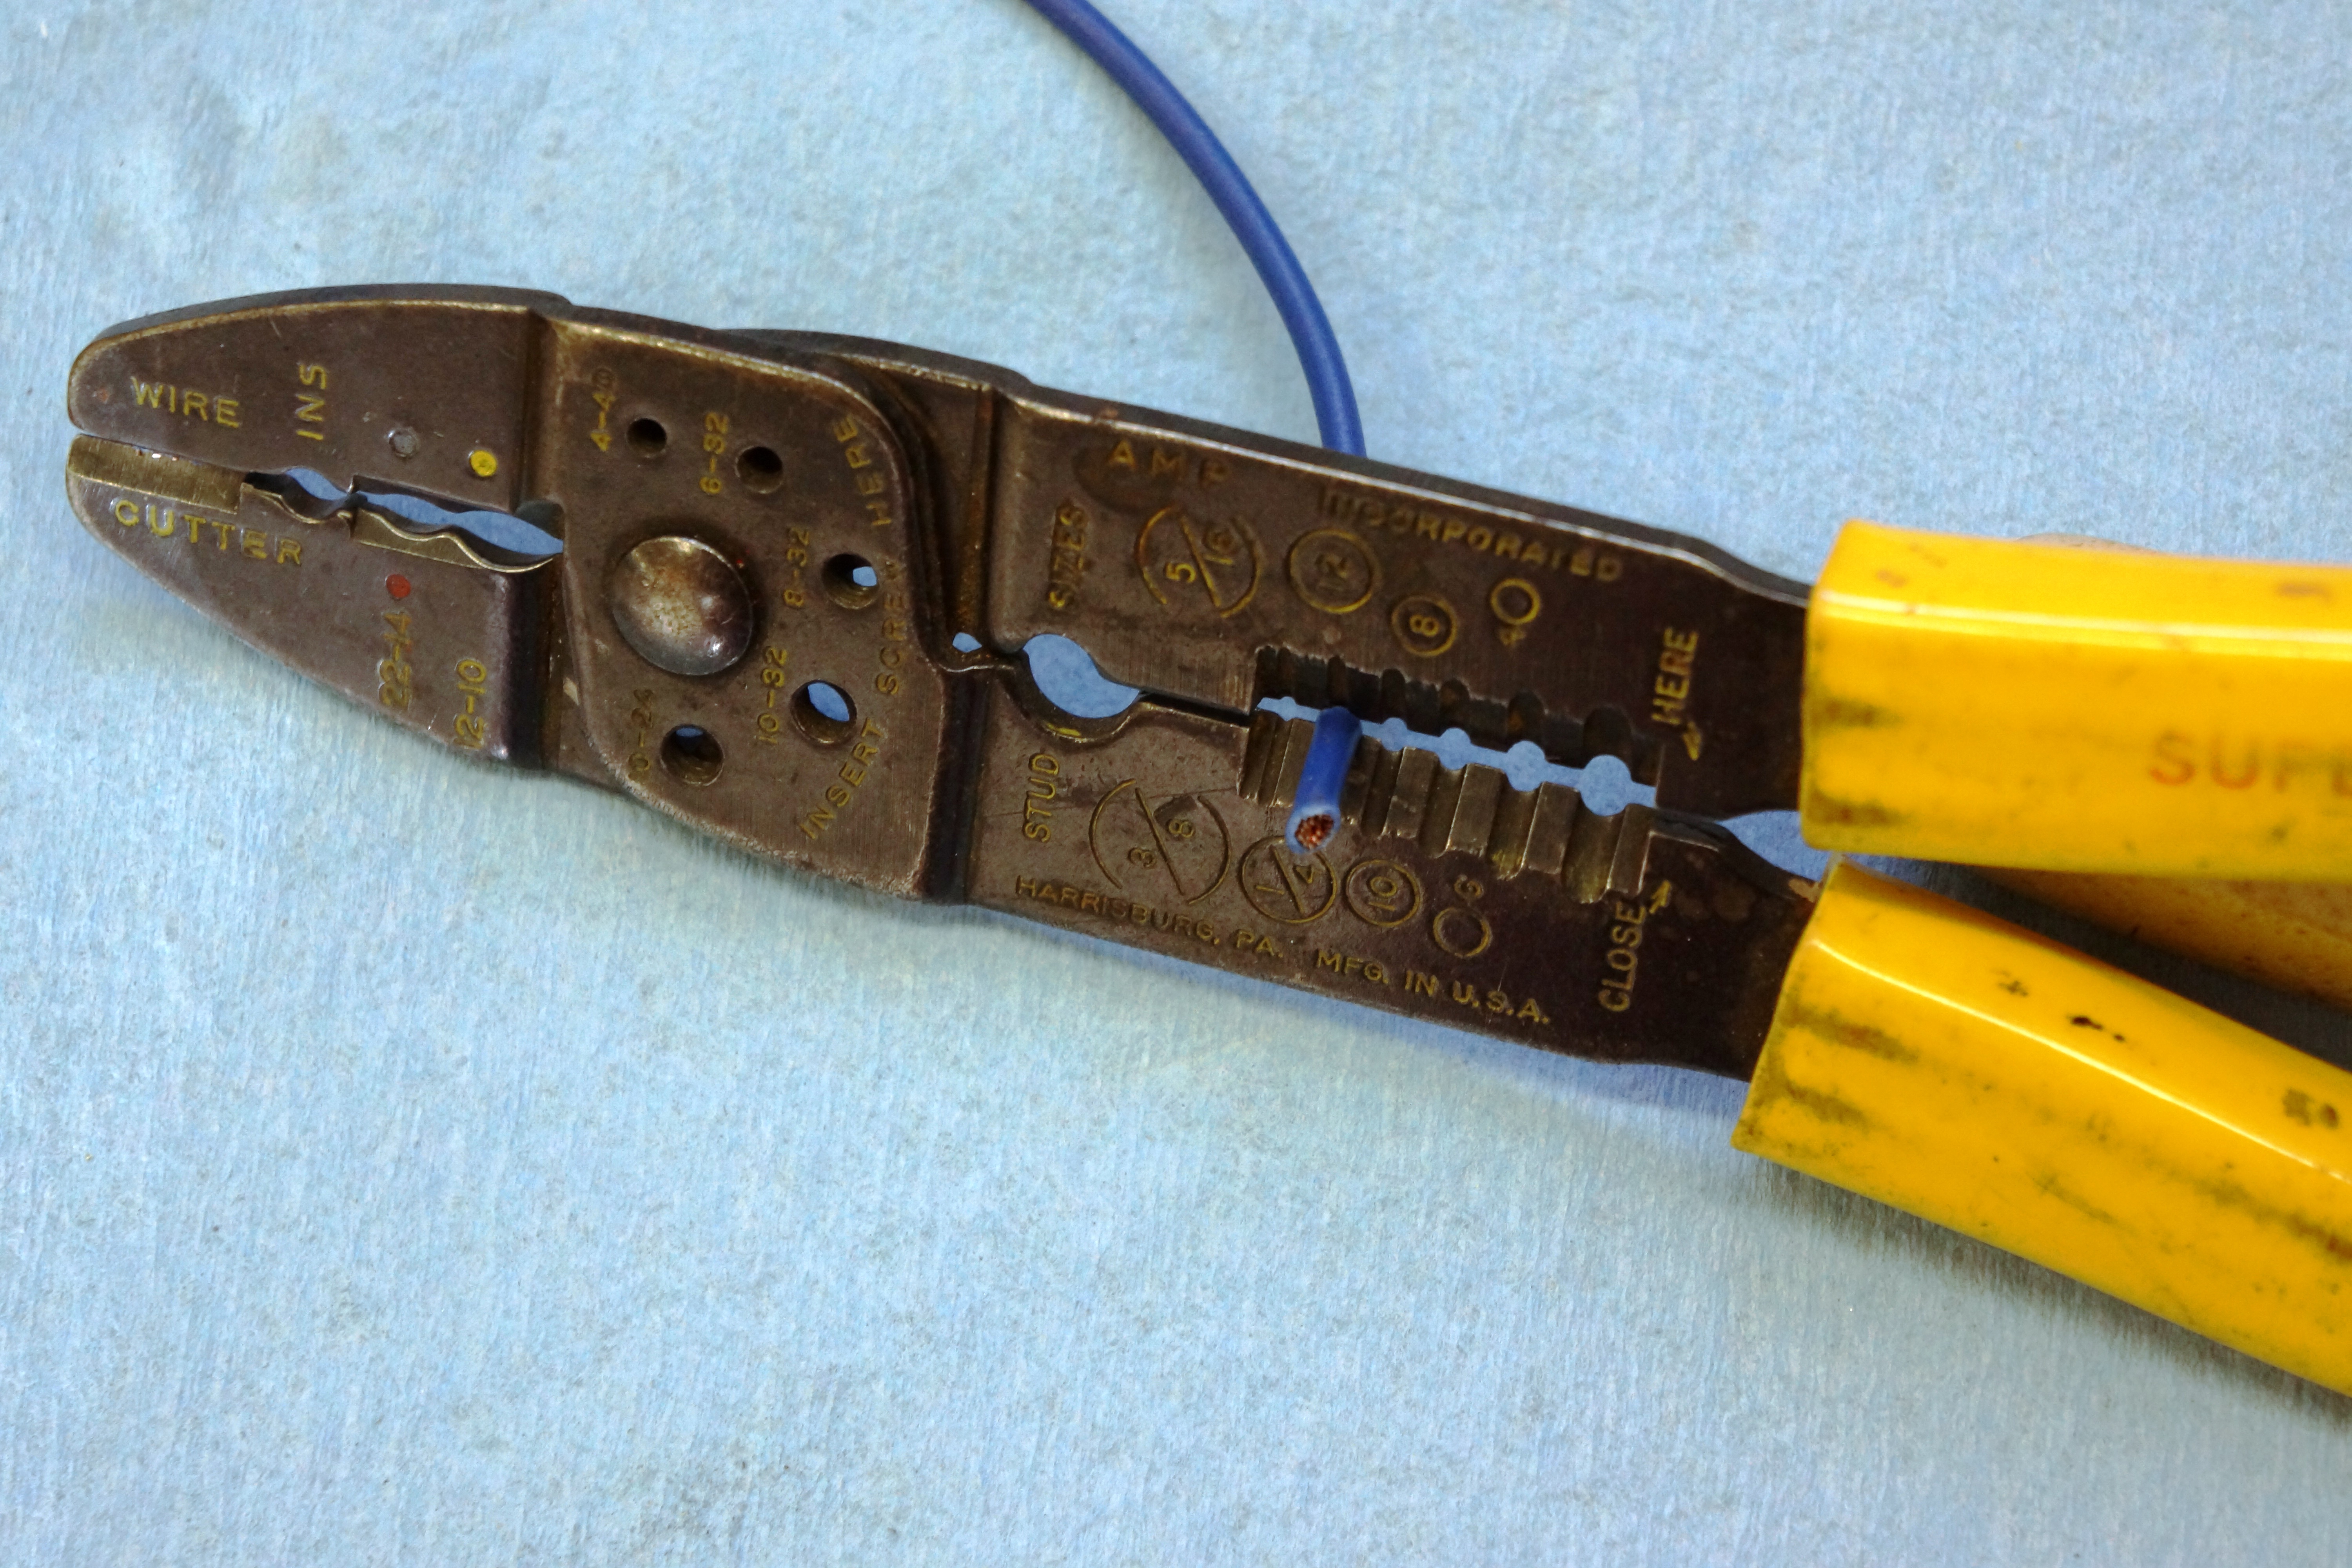
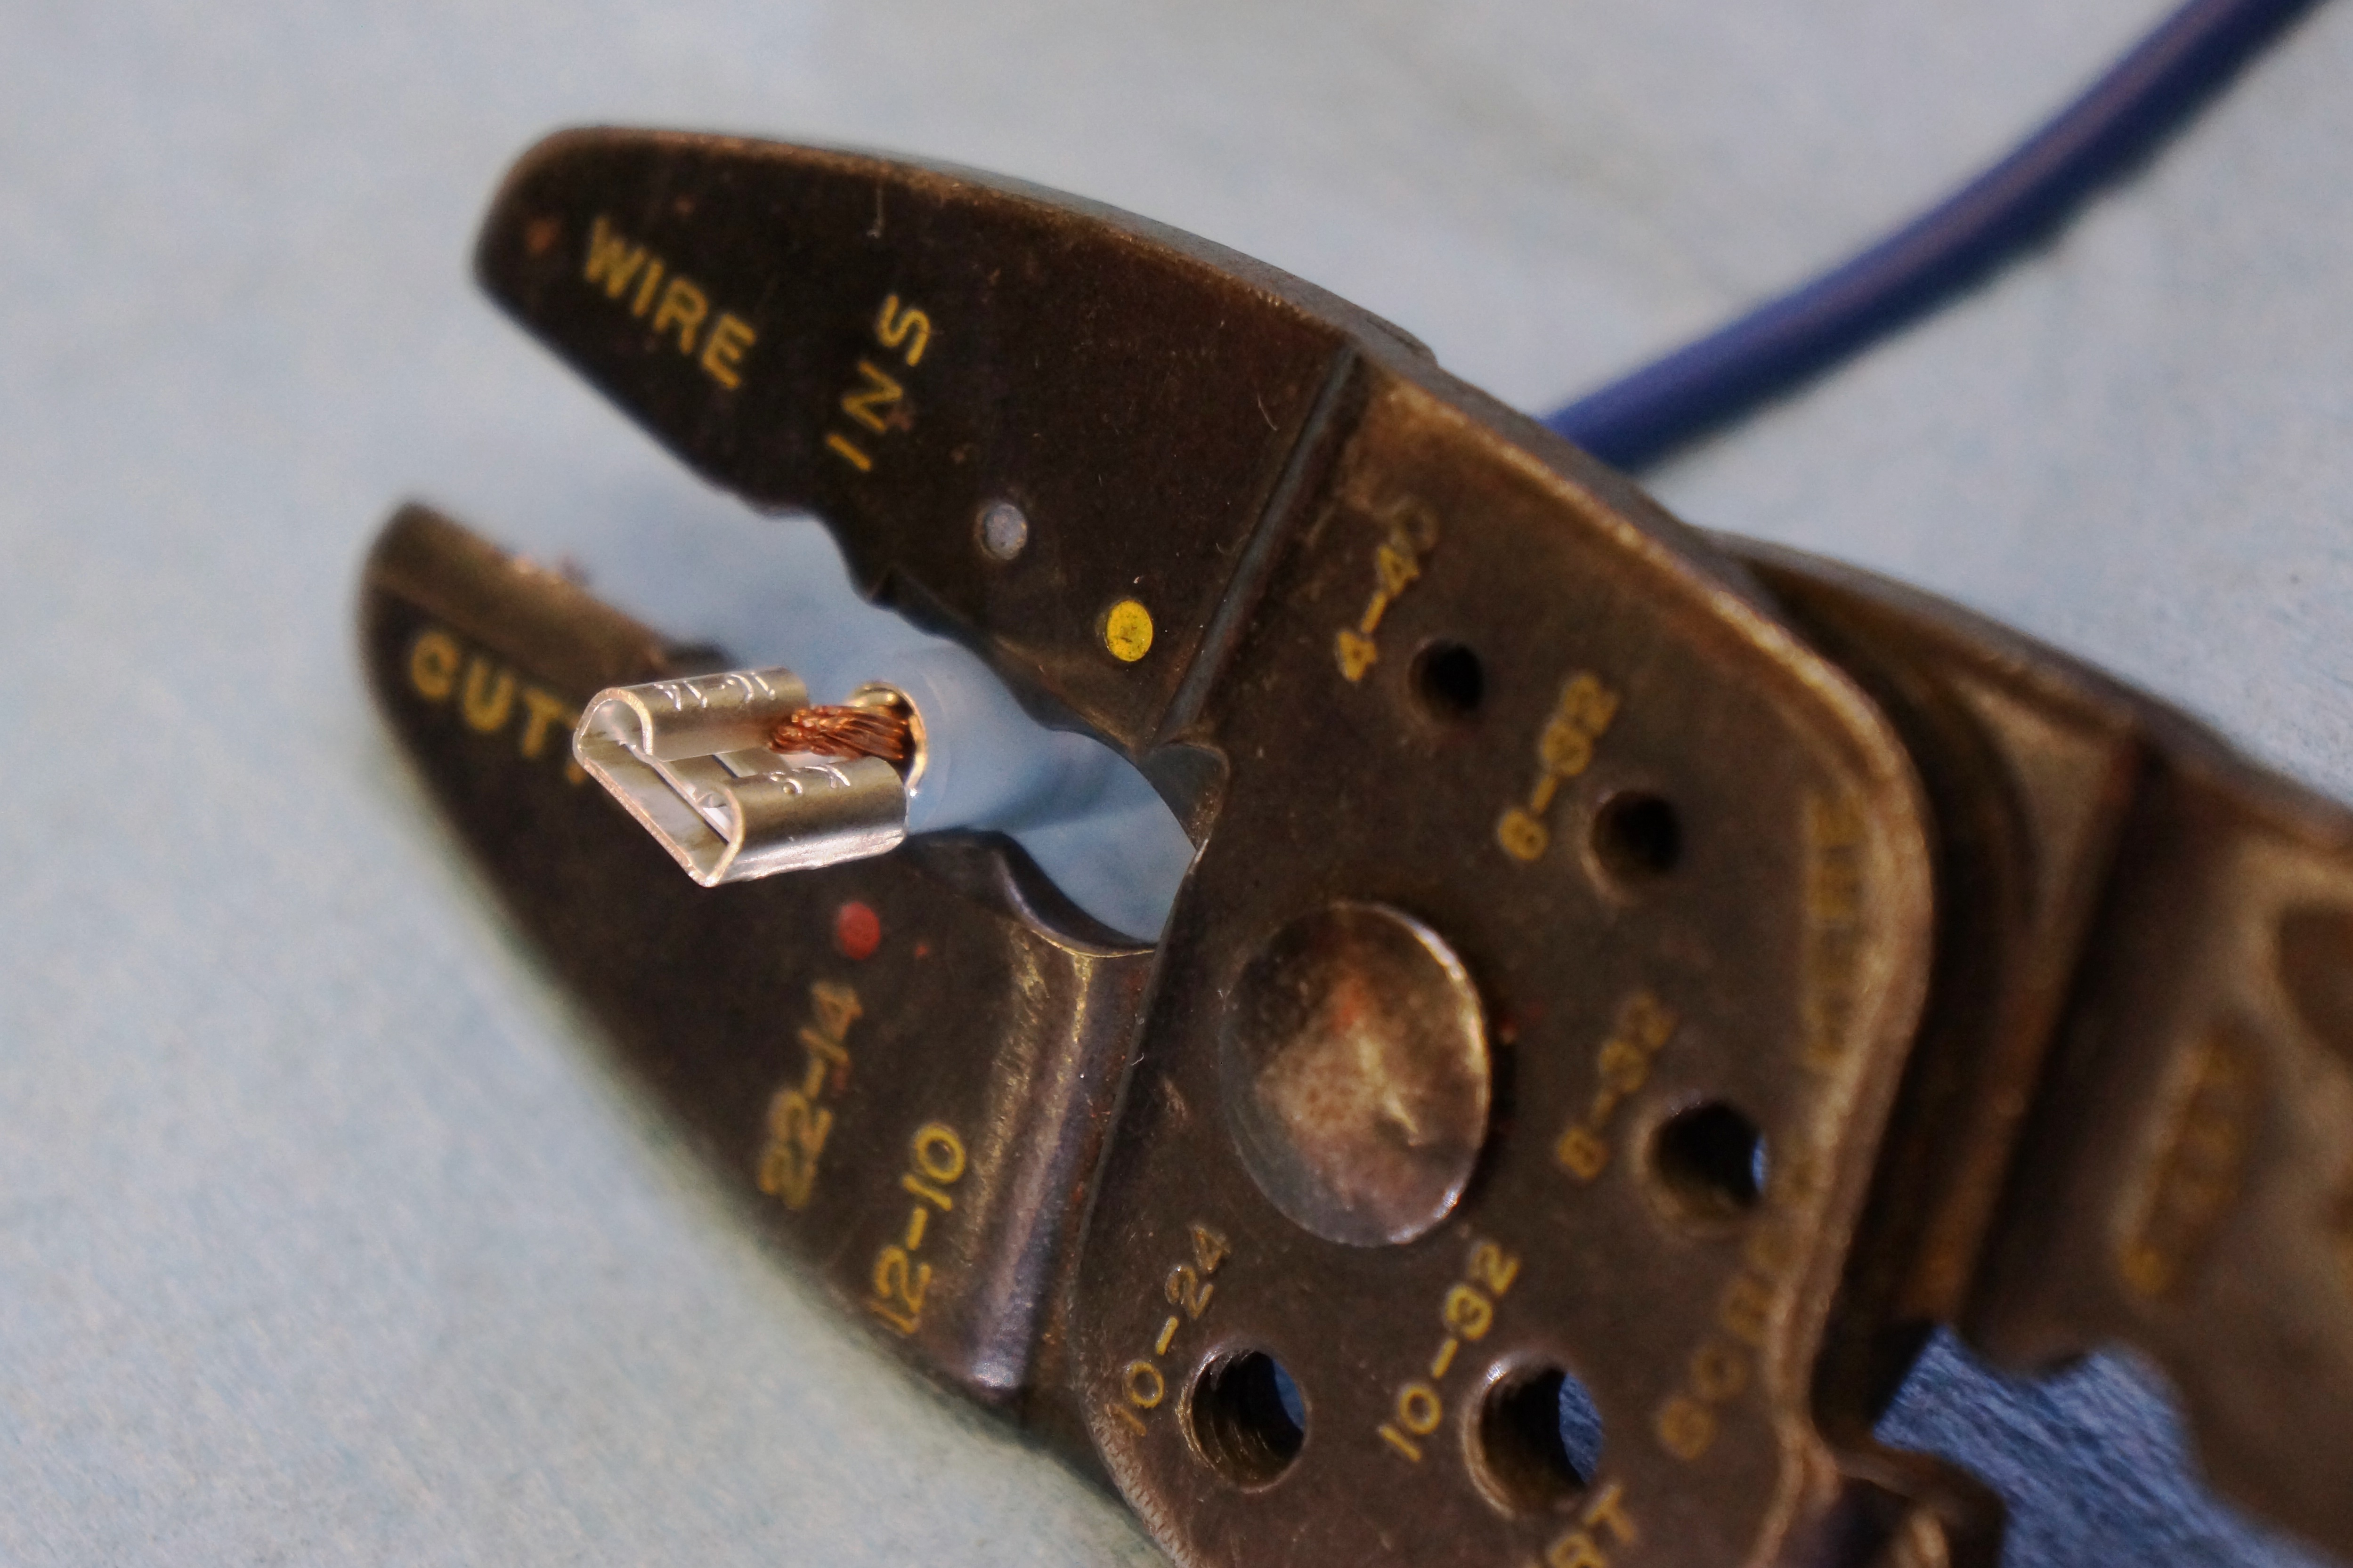
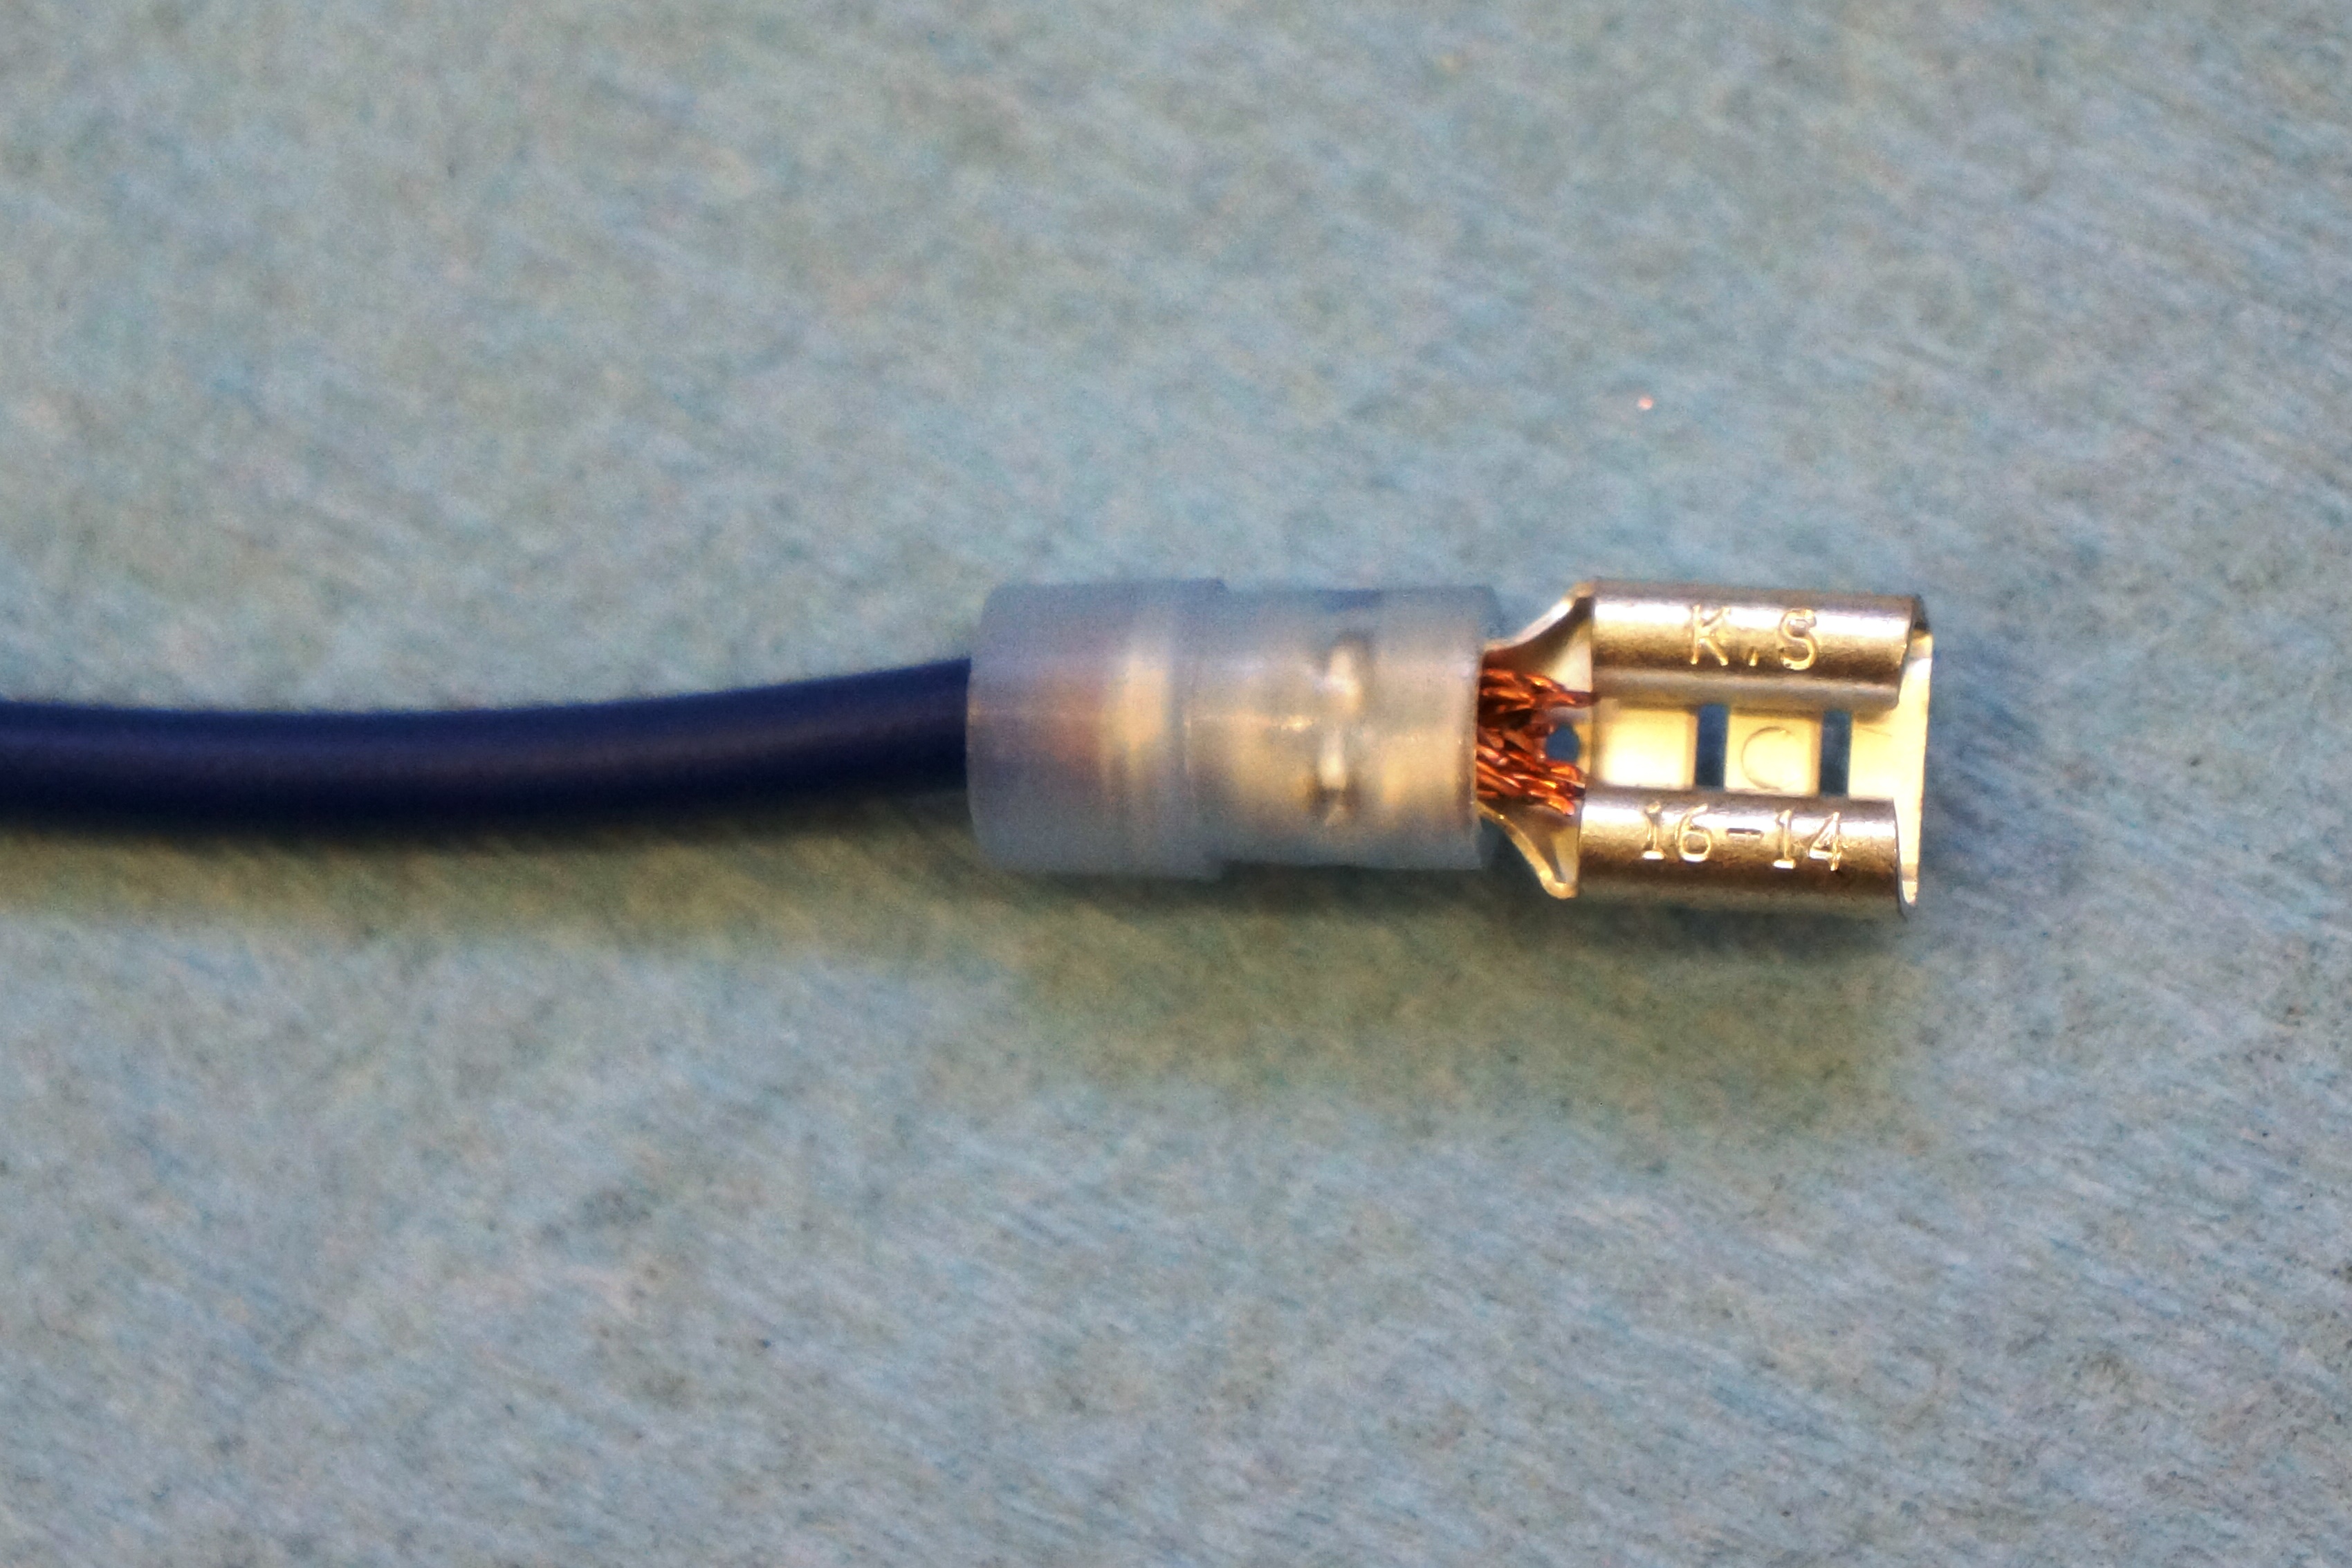
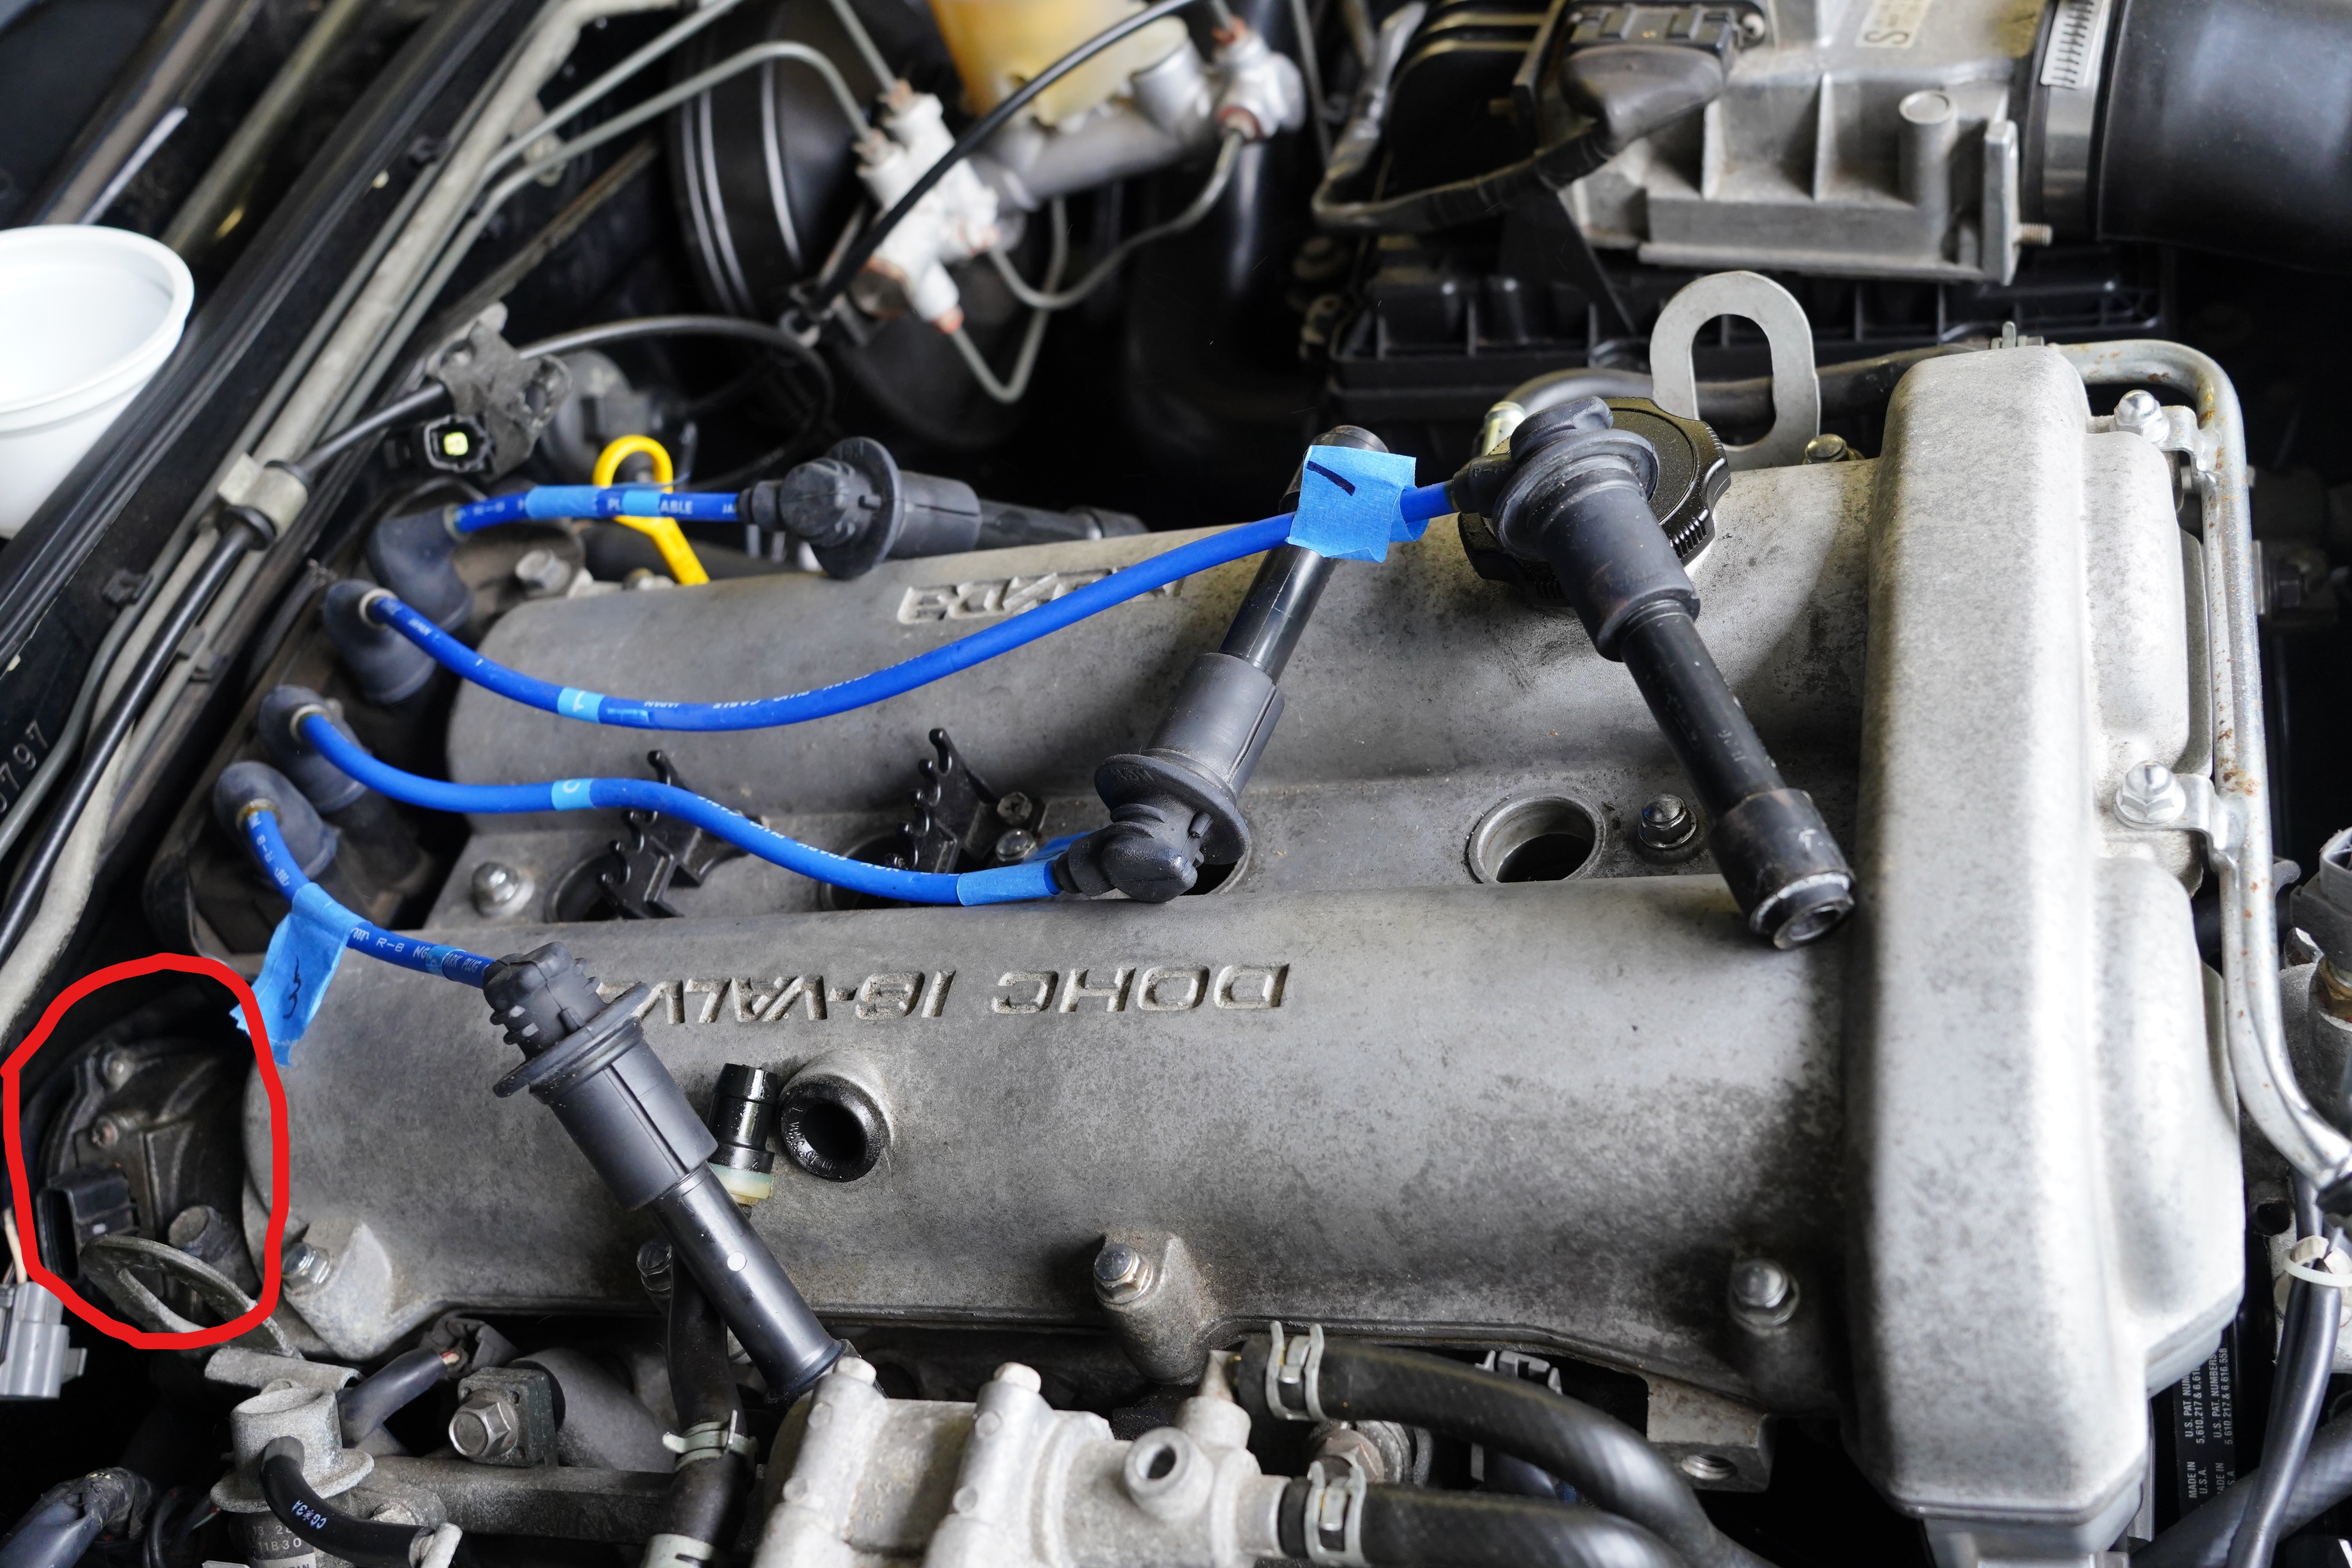
#9. CRANK, BUT DON’T START, THE ENGINE TO BUILD UP OIL PRESSURE.

Starting an engine immediately after an oil change runs the risk of starving critical components like bearings of needed oil. A best practice is to disable the ignition (easy on old cars by simply pulling the secondary coil wire) and cranking the engine until oil pressure builds, usually in about 5 to 8 seconds. Taking this small step helps ensure the longevity of internally lubricated engine parts.

#10. RECHECK THE OIL LEVEL 5 MINUTES LATER.

The manual states “five quarts with filter”, and that’s what you put in. But I don’t rely solely on the number of quart bottles I’ve poured. After running the engine for a few minutes, I shut it down, wait 5, then pull the dipstick (with the car on level ground). If it needs a smidgen more, now’s the time to do it.  I want the peace of mind of knowing that, after an oil change, the level is exactly at the ‘full’ mark on the stick.

All photographs copyright © 2023 Richard A. Reina. Photos may not be copied or reproduced without express written permission.

Rich’s Repair Ramblings #8: Repairing a ground wire

Rich’s Repair Ramblings #8, Repairing a ground wire

In our most recent previous Ramblings, we stated that “the number one cause of automotive electrical problems is loose, dirty, or corroded connections”. In this installment we’ll show you how to fix a loose or broken terminal connection. On our AACA cars, many electrical terminals are universal, or a standardized size; they have self-described names like ring, spade, blade, and bullet. Making a repair typically involves replacing a short piece of wire, or attaching a new connector to a wire, or both.

The best way to make such a repair is by soldering. However, soldering requires dedicated tools and equipment, and some practice. An alternate method is using solderless terminals, aka crimp terminals, which are quicker and easier than soldering. I’ve been successfully using them for years. They get a bad rap as unreliable, but like most repairs, there’s a correct way, and an incorrect way, to complete the job. Let’s dive in.

First, you’ll need these tools and supplies: wire stripper, terminal crimper, wire, appropriate terminal, and electric tape or shrink wrap. There are some very fancy stripping and crimping tools on the market, but I’ve had the same pair of yellow-handled combo cutters/strippers/crimpers forever, and they still get the job done. For wire, you’ll want the same gauge as the existing wire (gauge number DECREASES as wire thickness INCREASES- if in doubt, bring a sample to the store). For most of my car repairs, 16- or 14-gauge suffices.

L to R: stripping/crimping tool, terminal assortment, homemade test wire

Crimp terminals are color-coded for size: the smallest are red (18-22 gauge wire), then blue (14-16 gauge), and the largest, yellow (10-12 gauge). Again, for cars, blue connectors cover almost all my needs. When buying electrical tape, stick to name brands; I like 3M, which costs a bit more, but makes better repairs. In the example below, I use shrink wrap, which comes in different diameters. You want a diameter which will fit OVER the end of the terminal.

Top to bottom: female spade connector, shrink wrap, 14-gauge wire

For my sample repair, I need a 2-ft length of 14-gauge wire, and need to crimp a (blue) female spade terminal to one end of the wire. Note that I’ve correctly matched the 14-gauge wire to a blue-coded terminal. THE FIRST MOST COMMON MISTAKE IS INCORRECTLY MATCHING THE WIRE AND TERMINAL SIZES. I’ve verified that the shrink wrap fits over the barrel end of my terminal. I will strip about 3/8” of insulation from the wire – enough so that when the stripped end is inserted into the terminal, a tiny bit peeks out, and bare copper is under the barrel where I will be crimping. THE SECOND MOST COMMON MISTAKE IS STRIPPING TOO LITTLE INSULATION SO THAT BARE COPPER IS NOT UNDER THE TERMINAL BARREL.

Stripping the wire

When using the stripping tool, select the opening which is just slightly smaller than the wire diameter. Your goal is to cut the insulation so that you can pull it off without also removing any copper strands. I took the photo using the 2nd-smallest size, but then ended up moving the wire to the next larger size. This takes some practice – try it out on several different wire gauge sizes.

Before crimping the terminal, slide the shrink wrap onto the wire; if you’re repairing an existing wire on the car, this may be your only chance to get it into position! With the terminal placed over the bare copper strands, verify that copper is under the barrel, Use the crimping part of the tool to firmly crush the barrel onto the wire. THE THIRD MOST COMMON MISTAKE IS CRIMPING THE TERMINAL NEAR ONE OF ITS ENDS SO THAT THE CRIMP DOESN’T FIRMLY GRASP THE WIRE. A COROLLARY MISTAKE IS USING A HAMMER & CHISEL, OR PLIERS TO MAKE THE CRIMP. USE A CRIMPING TOOL, PLEASE. In the photo, note that the barrel is crushed almost directly in the middle. Using moderate force, pull on the terminal; it should feel securely attached and should not slide off. If it does, the crimp is inadequate, and you’ll need to repeat the process.

Crimping the terminal

Slide the shrink wrap over the terminal, and heat it with a heat gun. (A match or propane torch also works, but don’t let the flame touch the material!) Within seconds, the shrink wrap reduces to less than half its original diameter, and the final repair looks very professional. You can use electric tape here also. The point of the shrink wrap or tape is to insulate your repair. THE FOURTH MOST COMMON MISTAKE IS USING TAPE TO CONNECT THE TERMINAL TO THE WIRE. IT’S THE MECHANICAL CRUSH OF THE BARREL ON THE WIRE WHICH MAKES THE CONNECTION.

Note that crush is in center of barrel


Heat gun on shrink wrap

I’m not kidding about these common mistakes. I’ve seen everything from copper wire twisted around a crimp terminal to Scotch tape used as an attempt to hold the wire and terminal together. Installing crimp terminals takes some practice; buy some wire and a terminal assortment, and practice before you need to make a repair to your car. I’ve also used solderless terminals to make up my own test wires, whether it’s to run temporary grounds, or run 12V from the battery to the rear of the car. These test wires may have alligator clips or spade terminals or some other combination; I have several, and they come in handy!


All photographs copyright © 2023 Richard A. Reina. Photos may not be copied or reproduced without express written permission.

NJ Region AACA Spring Meet Car Show, May 7, 2023

The New Jersey Region of the Antique Automobile Club of America (AACA) held its 70th annual Spring Meet on Sunday, May 7, 2023. The show, traditionally hosted on the first Sunday of May, was in a new location this year: Nielsen Dodge/Chrysler/Jeep/Ram on Route 10 in East Hanover NJ.

The last few years for our Spring Meet have been rocky, to put it mildly. After literally 60 years at the same location, the club was forced to move, and we spent a few years holding our show at the Mennen Arena in Morristown NJ. (These links will take you to those shows in 2016, 2017, 2018, and 2019.) But between unbelievably bad luck with the weather, combined with Covid shutdowns, we never had a good show there. Last year, we were at a school (link here), which had its positive points, but many didn’t care for the parking layout. This dealer offered us a spacious lot emptied out for us, and we finally had the weather on our side, with a sunny, warm, and slightly breezy day. There was a great turnout of show cars (my extremely unofficial count putting it at around 150), and a large number of spectators helped by our location along a busy 4-lane Jersey thoroughfare.

Music, like last year, provided by Gup

For reasons having nothing to do with the car, I was unable to bring the Alfa to the show, even though I had registered it. I did drive up in modern iron, though, because I had volunteered to be a judge. This task needs to be completed because many owners still are in love with the concept of placing 1st, 2nd, or 3rd, and bringing home a trophy (what I’ve come to call a dust collector). All cars are placed in classes based on decade of manufacture, vehicle type, or make/model, done at the discretion of the club. There are 4 areas of the car which are examined: exterior, interior, engine compartment, and undercarriage. Each of those areas is scored on a scale of 1 to 10, 10 being the best. Maximum score is 40. Ideally, the judging team consists of 4 judges, with each judge taking on the same area for all cars in the class. In reality, we only had enough judges to form teams of 2. I was teamed with a club member who said that he is an experienced Hershey judge, although he also said he knew pre-war cars better than post-war. I thought we made a good team as we balanced each other out. He took exterior and interior, and I took engine compartment and undercarriage.

Not as many pre-war cars this year; this is a ’29 Packard
Bob Smith’s Dodge roadster

First class we judged: 2-seat sports cars. We had quite a few Corvettes (C1 through C4), a few 2-seat T-Birds, a Triumph TR-6 and a Porsche 912. We are judging to AACA standards: the car should appear as it would have when delivered as a new car by a dealership. The 912 had a number of mods to it, which knocked it down. All the Corvettes were nice, but the ’54 C1 was close to perfect and took first place.

Porsche 912
’54 Corvette which took 1st in its class

Next class was a tough one: “pony cars”, which in this case was 5 Mustangs and a ’70 Cougar. Mustang owners tend to be meticulous in their attention to detail, especially if they have ever been judged by the Mustang Club, where the judging is much stricter than it is at AACA. My personal fave was a ’67 Shelby GT-500 fastback with inboard lights. As stunning as that car was, it only took 3rd! Two other Mustangs were that much nicer.

My co-judge and I tallied our scores and handed our sheets back to the Chief Judge. I sat down for a quick lunch, thinking we were done. We were not. Somehow, “Class 6” got missed and some of the owners were peeved. We were asked if we could tackle it and we said yes. This too was a tough class, as it was American cars of the 1960s. First place went to a ’67 Cadillac convertible, and 2nd place to a supercharged Studebaker Avanti. But my personal favorite which came in 3rd was a ’63 T-Bird convertible with the roadster package, in triple black. With gleaming wire wheels and white walls, it was gorgeous. But again, the competition can really be challenging.

’67 Caddy which took 1st in class
’63 T-Bird
’66 Olds 442

To give you some further insight, most cars that we judged scored somewhere between a total of 25 and 38. It would be very rare indeed to score any one area below a “5”, and even if we did, another area might still score an 8 or a 9. No car that we judged scored a “40”, although 2 or 3 did score “39”. Provided there are at least 3 cars in the class (and for us, there always was), we need to deliver a 1st, 2nd, and 3rd place score back to the Chief Judge. What if there was a tie? That happened twice. In those cases, my co-judge and I looked at our judging sheets, and one of us adjusted one score either up a point or down a point. We did it as fairly as possible, although we also thought about the overall impact that the vehicle made on us.

ABOVE: Baby Bird parade: a ’56 and two ’57s

Again, I thought I was done. The Chief Judge, Ed, whom I’ve known for 20 years, asked me to accompany him as we still needed to judge cars for “Membership Trophies”. Let me explain: these awards, open only to NJ Region members, are for special categories, including the 3 best unrestored cars in 3 different year ranges. During registration, owners must request that their cars be considered. There are only 2 or 3 candidates in each category, and truthfully we were just giving them a quick eyeball. The problem was that these cars were in their respective classes, and therefore, scattered from one end of the show field to the other, so we had a lot of walking to do to locate them. But we eventually did, and finally, judging was done. Looking back at my photos, I see that I was not able to take as many shots as I would have liked! Including my brief lunch break, I was walking the field and judging cars (four different classes in total) for about 4 hours! I’m sorry that I missed photographing some of the stunning cars that I judged.

This mostly-unrestored Imperial took a Membership trophy

ABOVE: Two of the many Cadillacs at the show: a ’58 and a ’73

The awards ceremony started a bit late, probably around 3pm, but most owners stuck around, and I must admit that I did enjoy seeing their grins of satisfaction as they collected their trophies. It takes many, many volunteers from our club to make this show happen, and I was happy to be part of the team which pulled it together. I overheard that the Region hopes to use the same location next year, so my fingers are already crossed that the weather will cooperate in 2024.

My friend Sean with his ’75 Pontiac
’70 Fiat 500
’56 Dodge
’66 Chrysler
’53 Hudson
’71 Camaro
Hillman Minx
Lotus Elan
’64 Chevy II
’56 Ford


All photographs copyright © 2023 Richard A. Reina. Photos may not be copied or reproduced without express written permission.

Replacing the Miata’s Cam Angle Sensor O-ring

My 1993 Mazda Miata has been one of the most reliable vehicles I have ever owned. Since purchasing it in 1996 with 34k on the clock, I have put 75,000 miles on it and it has never left me stranded. Aside from maintenance (which to me includes normal wear-and-tear items like brakes, shocks, tires, and batteries), the only “repairs” I’ve made to the car in 27 years have been a clutch secondary cylinder, a heater core, a power antenna, and one headlight bulb. So when I discovered a minor engine oil leak a while back, I ignored it until recently. I finally decided to tackle the leak last week, which involved replacing the rubber o-ring on what Mazda calls the CAS, or Camshaft Angle Sensor.

I always take a “before” photo in case I mess up; the circled plug is 1 of 3 to be unplugged.

The CAS sits at the back of the cylinder head, and engages with the intake camshaft. This is how the ignition timing is changed: the CAS is adjustable, and by slightly rotating it in one direction or another, the ignition timing (in relation to the cams) is changed. It’s a DOHC engine, but it is not variable valve timing. Doing some research on the Internet, I found multiple sources identifying the CAS o-ring as the #1 cause of Miata engine oil leaks. The oil drips down the back of the engine onto the transmission, and from below, it can be difficult to pinpoint the cause. A quick check with a flashlight directly under the CAS confirmed this as the leak’s source.

Chat forums and YouTube videos are great places to find repair information, but in this case, there were two distinctly different approaches to the job. On one hand, the “book” method is to remove the valve cover, remove the C-shaped cap over the CAS, and lift it from the car. The alternate, and supposedly less time-consuming approach, is to leave the valve cover in place and only remove the CAS adjustment hold-down bolt. One can then wiggle the CAS out of the engine compartment, with the acknowledgement that re-engaging the “dogs” or teeth which fit into the back of the cam is tricky because it’s a blind operation. At least one commenter admitted that getting the new and unworn o-ring past the CAS hold-down cap can require severe muscular exertion. In either case, viewers were strongly advised to mark the position of the CAS so that re-timing the car would not be necessary. I marked it with a black Sharpie.

Plug wires tagged and about to be removed; CAS is circled in red

After watching 3 or 4 videos and then examining my car, I was not convinced that the savings in time was worth it. Removing the valve cover is not at all difficult, but it takes about 20 minutes. I actually had a more difficult time removing the 3 electrical plugs (which needed unplugging whether I followed method #1 or #2) because these plugs had not been touched in 30 years. But I eventually got them, and followed that by removing the spark plug wire set, the PCV hose, and the 11 bolts holding down the valve cover. I had ordered the CAS o-ring (63 cents) and a new valve cover gasket from Rock Auto; with tax and $9 shipping, I was into the job for twenty bucks in parts.

I had an ulterior motive for removing the valve cover: I had never done so, and I wanted to see how clean things were underneath, and they were clean indeed! Frequent oil changes, almost exclusively with Castrol oil, certainly has played a part. Going this route, the CAS was quickly free from the camshaft, but even with the valve cover out of the way, there was precious little clearance between it and the firewall, so I was doubly glad I went for the “longer” method.

Underside of valve cover, old gasket still in place.
Miata engine, 30 years old, 109,000 miles, looks clean to me


CAS on my workbench, the old o-ring was so dried out that it snapped like a piece of plastic. The new one slipped on very easily, helped by a little motor oil. Then the job was like it says in the repair manuals: reassembly is the reverse of disassembly.

CAS on my bench, old o-ring still in place

Again, I was glad to have the valve cover out of the way, as engaging the dogs into the cam was a cinch. I rotated the CAS to where I had marked it, locked it down, put the new valve cover gasket in place, and reinstalled everything which had been removed. The car started on first try, and while it was too wet today to go for a test drive, I plan to clean off the underside as best possible, then drive the car to confirm the leak is fixed.

Clear shot of CAS about to reengage with cam

I guess I need to add this repair to my list of “non-maintenance fixes” to my Miata!


All photographs copyright © 2023 Richard A. Reina. Photos may not be copied or reproduced without express written permission.


Carlisle Auctions, Spring 2023

Carlisle Auctions’ Spring 2023 event took place over two days this year, with the auction running on Thursday and Friday, April 20 and 21. This was a particularly fun event for me because of the number of lots in which I had great personal interest. Before we get to the particulars, though, a few words (as always) about this auction and the state of the hobby as we begin the car show season in the Northeast.

There is no doubt that transaction prices, in general, are up. The high-quality cars continue to be in demand and continue to bring good money. At the same time, for beginners, or bottom feeders, or anyone for whom a bargain price is a deal, there are still choices. Case in point: Thursday’s auction, which actually began about 15 minutes early (and caught me off-guard, as I was still outside), got off to a roaring start by anyone’s measure. Of the first 31 cars to cross the block, 26 of them sold (the 5 that did not meet reserve were an eclectic lot, and included a ’29 Nash, a ’62 Bonneville, a 2005 BMW 3-series, and most bizarrely, a ’66 Fiberfab). Now, of the 26 that did sell, 23 of them hammered for less than $10,000 each (I stress “hammered”, as all referenced sale prices are exclusive of an 8% buyer’s premium). Many of these early cars were true projects, but some were vehicles for which there isn’t great demand, like an ’87 Corvette ($6500), a 1996 RHD MG-F ($4250), and a 2008 Saturn Sky ($9000). In other words, something for everyone.

Once past this initial surge, things slowed down a bit, though, with many cars not meeting reserve. A rough guess is that the remainder of Thursday’s auction had around a 50% sell-through rate, not a great performance. As Friday’s auction started, one of the announcers stated “we had a good day yesterday, but frankly we’re hoping for a better day today”. Based on my notes from the first 70 or so cars to cross the block, Friday’s sell-through rate was up significantly to decent 67%. I also found it interesting that to my eye, the room was less crowded on Friday than it was on Thursday.

Compared to Mecum, and certainly compared to the “catalog” auctions run by RM, Sotheby’s and the like, Carlisle is still a mom-and-pop operation, with a large number of dealers in the audience. They are there to buy and to sell, and they’re expecting to pay wholesale. So you do see bargains, but you also see cars that don’t meet reserve. Over these past few days, I began to realize that in a situation like this, a published book value is not very meaningful. The audience isn’t dumb, and they will buy the car if they feel the price is fair. However, some sellers still have inflated concepts of the values of their own vehicles, and that is outside the control of the bidders. For a sale to occur, the reserve must be reasonable, and the bidders must see the worth. That is all that matters, and that is what it takes for a successful auction transaction.


Sold lots are listed first, and as always on Richard’s Car Blog, are listed in hammer price order, from low to high. Following this is a selection of interesting lots which did not meet reserve.


Lot T121, 1996 MG-F, green paint, grey interior. RHD, mid-engine 1.8L 4-cylinder, 5-speed manual, A/C.

SOLD FOR $4250

I don’t think I’ve ever seen one in the metal before. Obviously is old enough to be legally imported under the “25-year-old” rule. Given how popular JDM RHD cars are, I would imagine that there are enough people out there willing to embrace the quirkiness of this one. You might have the only one at the next MG meet.


Lot T140, 1982 Buick Riviera, tan paint, vinyl roof, and leather upholstery. Five-digit odometer reads 53, 328. Engine is 307 V8, driving front wheels through an automatic transmission. Wire-wheel hub caps, whitewall tires. Buckets and center console, which I believe are rare in this generation Riviera. One of the cleanest cars at the auction. Only flaw of note is that plastic bumper filler pieces are warped, but they are not cracked.

SOLD FOR $8500.

While you may see this as a typical ‘80s-era GM luxo-barge, these have a following among Riviera fans. I’ve read some of the contemporary road tests where it has been claimed that they are actually nice driving and riding cars. This sale may have been one of the truly good deals of the auction.


Lot T171, 1987 Ford Mustang GT convertible, white paint, white top, red plaid cloth interior. Odometer (5-digit) reads 68,308, 5.0 V8, 5-speed manual. Looks great from afar as well as close up. No major flaws noted, could be original paint. Interior has held up well; obvious that car was not left outside with the top down. Biggest flaw noted was 2001 date codes on tires.

SOLD FOR $14,000

Fox-body Mustangs continue to be some of the best performance bargains out there. While a few bring bigger bucks, here is a great example of a very usaable driver with lots of life left in it. A friend texted me the day after this sale to report that the new owner had this car online for sale with an ask of $20k, and he was using the Carlisle auction photos!


Lot T194, 1951 Kaiser Club Coupe, 2-door sedan. Deluxe trim model, Continental flathead 6, 4-speed GM-sourced Hydramatic transmission, one high quality repaint in copper, copper colored interior is stated to be original to the car. Upholstery looks ok, but carpet in rear is worn. Headliner very deteriorated, especially where it meets the windshield and door tops. Five-digit odometer reads 44,021. Whitewall tires, full wheel covers, AM radio, clear vinyl cover on front bench seat.

SOLD FOR $14,500

I saw this online a week before the auction and was totally smitten. Seeing it in person did not disappoint. What a rare sight, and this “Club Coupe” is different from the 2-door sedan, as it features a shortened greenhouse and an extended deck lid. Styled by Howard “Dutch” Darrin, as all the ’51 Kaisers were, this must have stood out when new as much as it stands out today. I thought that this one might fly under the radar, but someone really wanted it and paid a price fair to both buyer and seller.


Lot F484, 1966 Ford Thunderbird convertible, emberglo paint, emberglo interior. Full wheel covers, whitewall tires, fender skirts. Sign says 390 V8 and 3-speed auto. I did not note if the car has A/C. Some flaws: paint damage on left side of convertible top cover, filler strip between rear bumper and body completely missing, upholstery damage on driver’s seat and driver’s door panel. Displayed with top down at all times. Online photos show a white convertible top.

SOLD FOR $15,000

The car was declared a “no sale” at $15,000, and 5 minutes after it left the block the auctioneer announced “we sold the Thunderbird”. Carlisle’s website confirms the $15,000 number. I am a sucker for emberglo, which was a one-year-only color for Ford. Even with the flaws, that wrap-around back seat is a killer look. Drive it and fix it as you go.


Lot F550, 1966 Ford Mustang hardtop, emberglo, emberglo/parchment pony interior. Mustang wheel covers, whitewall tires, dual exhaust. Odometer reads 51,753. Engine is “A code” 289 4-barrel, with 3-speed manual gearbox. Manual steering and brakes. Woodrim steering wheel missing a big chunk.

SOLD FOR $17,000

Was bid on the block to a $16,000 no-sale; website indicates sale price, so it sold after. One of the oddest combination of options I’ve seen on a Mustang. Basically, the A code engine is the only option. The interior trim code indicates “emberglo” but there is another trim code for “emberglo/parchment” so I suspect the pony interior was added after. Like the ’66 T-Bird, I really like this one-year-only color.


Lot T119, 1991 Mitsubishi 3000GT VR-4, 2-door coupe, turquoise, grey leather interior, 3.0L V6 mounted transversely, AWD, 5-speed manual, 6-digit odometer reads 034434, underhood shows aftermarket hoses and pipes, giving modded “boy racer” vibe, exterior undamaged but not clean, interior the same. Clutch pedal was one of the stiffest I have ever tried, my left leg would be worn out in 5 minutes of city driving.

SOLD FOR $23,250

This was the first big sale of the day, and the bidding action was frantic. I presume that some of the value was driven by the low mileage, but the entire car will need a serious detailing before it can be resold.


Lot 546.1, 1959 Cadillac Sedan de Ville, 4-door hardtop, dark blue, blue and grey interior. Full wheel covers, whitewall tires. Write-up claims California car, factory A/C, 57,000 miles.

SOLD FOR $38,000

Most cars which cross the block at Carlisle are up there for less than two minutes. The auctioneers are consistently able to run 30-35 cars an hour. Sometimes, though, they let the bidding linger, which is what happened with this Caddy. Bidding stalled at around $36,000, but they didn’t close the lot. Instead, I saw the owner up there, as he was pressured by a ringleader to lower his reserve. After about 4 minutes of this, he got a disgusted look on his face, and the auctioneer intoned “the reserve is off!” Two bids later, it hammered for $38k. The paint on this car was stunning. There is nothing more I can say about these fins that hasn’t already been said. Let’s hope the new owner has a large garage.


CARS WHICH DID NOT MEET RESERVE:


Lot T108, 1929 Nash Standard Six 4-door sedan, black, brown mohair interior, wooden wheels, blackwall tires, unmounted spare at rear, inline 6, manual gearbox. Body shows no obvious damage, black paint is ok, probably a repaint from many years ago. Interior might be original. Driver’s door shows both pot-metal handles for window winder and door release are broken. Like so many cars at the auction, car looks like no one bothered to clean or detail it for the auction.

HIGH BID: $8,000

This was one of several cars being sold on behalf of the AACA Museum, and as such, it is fair to presume that this car was donated to the Museum, but they decided to sell it rather than show it (a statement to the car’s condition). The other Museum donations sold. I am lacking an explanation as to why this high bid was not accepted.


Lot F402, 1982 Toyota Celica Supra, blue paint, blue interior, Toyota alloys with raised white letter tires. Inline six, 5-speed manual, 126,669 miles on odometer. Owner claims California car. Paint shows significant wear and fading on most horizontal surfaces.

HIGH BID $8500

The owner was really hawking this car, doing his best to distract viewers from the paint by pointing out the positives. It didn’t help its block performance. It’s a shame because the car looked decent other than the paint, which could only be remedied by a complete respray.


Lot F556, 1985 Ford Mustang GT hatchback, Canyon red, grey cloth interior. Carbureted 5.0L V8, 5-speed manual, Mustang alloy wheels with blackwall tires. Odometer reads 68,976. Sign claims one family-owned since new. Very clean car given age and mileage. Biggest drawback: no A/C.

HIGH BID: $14,000

I overheard the son of the owner as he was detailing the car talking about his dad’s thought process when ordering it: “He didn’t want A/C because it would have added weight and made the car slower”. Such was the thinking in 1985. I had my eye on this one as a potential purchase, but lack of A/C was a dealbreaker. I asked at the resale desk about the reserve: $18,000 which seems a bit high to me.


Lot T193, 1991 Mazda Miata, silver, black cloth interior, Mazda daisy alloys with blackwall tires, 1.6L inline 4, 5-speed manual, odometer reads just under 9,000 miles. Except for mileage, an otherwise unremarkable NA Miata.

HIGH BID: $16,000

It continues to amaze me how many early low-mileage Miatas were seemingly salted away, and are now coming out of the woodwork and in some cases, bringing the bucks. High bid had to have been close.


Lot T209.1, 1971 Jaguar E-Type 2+2 Coupe, silver, red interior, V12/automatic. Aftermarket Minilite-style wheels. Silver paint and red upholstery look decent, but entire looks of vehicle marred by Jaguar “leaper” hood ornament and completely unnecessary “V12” emblems behind quarter windows.

HIGH BID: $37,500

From a distance, this looked like a presentable Series III Coupe, even with the automatic, as many of them had. But the “custom touches” ruined the car for me, and likely for the bidders too. High bid was fair for equipment and condition (just imagine trying to repair those holes in the hood from that emblem!).


All photographs copyright © 2023 Richard A. Reina. Photos may not be copied or reproduced without express written permission.

Servicing the Alfa’s Fuse Box

The calendar said that spring arrived almost 4 weeks ago, but here in central New Jersey, the weather had remained stubbornly cloudy and cool until a few days ago. This delayed me from uncovering the Miata and the Alfa so that I could begin enjoying the new driving season. I finally got both cars out of the garage and running under their own power last week. I have a list of maintenance tasks that I want to perform on the Alfa, as that car is my short-term focus because of all the events on the calendar.

First up is a show which is new to me: The Roebling Museum in Roebling NJ is hosting its 13th annual car show on Saturday April 29th. Registration is day-of-show only, and I’ve seen the grounds: it was a stop for the Glidden tour this past September, and it’s a lovely place for a car show. Next, the Alfa is already registered for the NJ Region AACA Spring Meet on Sunday May 7, at a new location: the Dodge dealer on Route 10 in East Hanover, NJ. Also on the calendar is the Carlisle Import Show on May 12 and 13; the Delaware Valley Alfa Club will be there and I plan to join them. I’m also honored that I have been personally invited to show the Alfa at this year’s Greenwich Concours d’Elegance. It’s a two-day show as always, and this year it’s on Saturday and Sunday June 3 and 4. Alfa Romeo is a featured marque on Sunday, and Rich Taylor, he of the infamous New England 1000 rallies, reached out to me with the invitation, so we (the Alfa and I) will be there. That’s a busy start to the car show season!

The fuse box cover: descriptions in Italian and English

Last week, I tackled a simple maintenance task: the servicing of the fuse box. You won’t find this procedure in many shop manuals. But I know from experience that fuse boxes, especially ones located in the engine compartment as it is for my Alfa, are subject to dirt, grime, vibration, and other external forces that can mess with the simplest electrical connections. I also know that the ceramic fuses that the Alfa uses (which are identical to the fuses in a Volvo 240) can weaken over time. Given that each fuse is less than 50 cents, it is a no-brainer to occasionally replace the fuses, and clean and tighten the contacts while I’m there. The simple fact is, the failure of any one fuse can bring the car to a stop, so I want to minimize that possibility.

Pre-servicing: you can see some dirt on the fuses and tabs

I bought the fuses from my reliable supplier, Classic Alfa in the UK, and again, they did not disappoint. An online order placed with them late Tuesday night was on my front porch at 3 p.m. Thursday. That’s less than 48 hours. Did I mention that they are in the UK? Anyway, I started the process by removing all 10 fuses, then spraying down the entire fuse box using a spray can of electronics cleaner. I used a brass bristle brush on all the tabs, then installed 10 new fuses, gently bending the tabs inward for a tight fit. As a final test, I got out my digital multimeter (DMM) and tested continuity across both tabs. I had good continuity at all the fuses. The entire job took less than 30 minutes.

The brass tabs after cleaning: the metal looks bright, which will provide the best contact

With that out of the way, I also plan to refresh the cooling system by replacing all hoses and flushing the system (the hoses are now 10 years old!) and also plan to replace the rear shocks, which are likely original to the car (making them 56 years old). I keep telling myself, I’ve got time! Tempus fugit.

All new fuses in place (note that Alfa provides places to carry spares; clever!)


All photographs copyright © 2023 Richard A. Reina. Photos may not be copied or reproduced without express written permission.

The 2023 New York Auto Show

With Covid shutdowns in their rearview mirrors, the organizers of the New York International Auto Show (NYIAS) were back on track this year. As has been their scheduling regimen, there were two press days on the Wednesday and Thursday before Good Friday, with the public days running from Good Friday through the Sunday after Easter. I was again able to attend on a press pass (issued to “Richard of Richard’s Car Blog” for the first time), and unlike my previous experiences, the show was completely set up on Wednesday. (Previously, attending on a press day meant dodging cars and displays being maneuvered into place by NYC union workers.)

As was noted in the blog post from the 2022 NYIAS, the traditional in-person auto show is dead, but only for some manufacturers. Notable by their absence were BMW, Mercedes-Benz, Volvo, and Mazda. Surprisingly, some corporate nameplates were there while sister brands were not. So we had Chevrolet, but not Buick, Cadillac, or GMC; Honda, but not Acura; Nissan, but not Infiniti; VW, but not Audi or Porsche; and Ford, but not Lincoln. Yet big splashes were made by Stellantis (Dodge, Chrysler, Jeep, Ram, Fiat, and Alfa Romeo), Toyota (including Lexus), and Subaru. The Koreans were there in full force, with cars from Hyundai, Kia, and Genesis. (It is worth noting that Audi and Porsche each had a small four-car display provided not by the manufacturer but by a local dealer.)

Compared to last year, there was a dearth of EV start-ups. INDI and VinFast, both with vehicles on display in 2022, were MIA this year. However, both the main level and lower level had more real estate devoted to EV test tracks, where willing attendees could hitch a ride in an EV. It is, of course, their lack of an emissions-spewing tailpipe that makes it possible to run them indoors.

The show was a case of extremes, with a significant segment of the wares devoted to our EV future, while large pickups and SUVs were also dominant. Many of the trucks showcased the outdoor lifestyle, equipped as they were with tents, cargo boxes, and bike carriers. Subaru was the leader this year in promoting this theme, as their press conference began with an overview of Subaru’s dedication to AWD, enabling owners to take their cars far off the beaten path.

Additional detail from the show is included as part of the photo displays below.


FORD

The F-150 Lightning was a large part of Ford’s display, as were both Mustangs: the ICE coupe, and the EV SUV. Various Broncos and pickups showed off their rugged, off-road personalities


CHEVROLET

Chevy did their best to make it look like it was the domestic EV leader, with many soon-t0-be-released EV trucks on display. The problem: these vehicles are not for sale yet. The EV Silverado was there, same as last year, but still isn’t in any showrooms. However, the one Camaro on the floor represented an end to an era, as the Camaro pony car will soon be no more. Not to be outdone, the Corvette E-Ray was there, looking identical to its ICE siblings. For those who crave maximum size on a body-on-frame platform, the Suburban continues to exist.


STELLANTIS

As the only domestic manufacturer with a full lineup of its brands on display, Stellantis stood out. It helps that the Ram and Jeep brands have great products and are selling well. A surprise to me was the Dodge Hornet, which I knew to be a brand-engineered version of the Alfa Romeo Tonale. The Hornets on display looked great, and even better, had impressive interiors with inviting seats I hadn’t expected to find in a Dodge. I predict that the Hornet will do well and will handily outsell the Tonale, especially given how little Alfa seems to market its cars in this country.

The RAM REV EV pickup is a disappointment, looking almost nothing like the stunning concept truck which had been shown at the CES a few months prior.

My vote for best-looking vehicle at the show: the Charger Daytona EV concept:


HYUNDAI

The Hyundai Ioniq 6 is a striking-looking four-door sedan in a world full of SUVs.


VW

The I.D. Buzz, looking like the same one I saw last year, was here again. One of the more clever displays was the lifted I.D. 4, exposing the EV battery “skateboard”.

J

JDM DISPLAY

A large section of the bottom floor was devoted to what looked like a club-sponsored display of JDM (Japanese Domestic Market) cars, perhaps three dozen in all. They were segregated by decade, and it was clearly some of the older ones which grabbed my attention.

Lexus SC Coupe
Mitsubishi Pajero
Datsun 510
’80s Toyota Corolla, RWD, known by its “AE86” internal platform code.
1970 Mazda R100, which predated the RX-2 in this country.


EMBLEMS AND BADGES


THE GRILLE WARS CONTINUE


WHAT I DREADED TO SEE IN MY REARVIEW MIRROR IN 1972:


All photographs copyright © 2023 Richard A. Reina. Photos may not be copied or reproduced without express written permission.


Simeone Museum Demo Day, March 2023

If my own blog posts are to be believed, I have visited the Simeone Museum in Philadelphia five times: October 2011, October 2012, December 2015, June 2016, and February 2022. This most recent Saturday, March 25, 2023, can now be counted as visit #6. Any visit to the Simeone, with its collection of historic racing and sports cars, is special. Saturday was a Demo Day, and Demo Days are extra special because a small theme-based collection of vehicles is chosen, and they are taken outside to the back lot so that attendees may delight to the sights and sounds of them motorvatin’ (a Chuck Berry coinage) under their own power.

Crowd surrounds cars before show begins

The theme this time was “Sebring ‘65”, an infamous race because of the deluge which caused cars to plow through what was described as up to 8 inches of standing water on the track. For this Demo, the museum selected its ’64 Shelby Cobra Daytona Coupe and ’66 Ford GT40 Mk II. The program listed the ’63 Corvette Grand Sport, but in lieu of that, a stock ’66 Corvette 427 roadster was chosen (nice to have such illustrious machinery as backup). Last but not least, on loan from Luigi Chinetti Jr. was a ’63 Ferrari 250P. (The Ferrari was not part of the driving portion of the day’s festivities – one can only presume that the loan arrangement excluded such an option.)


My friend Terry, whose idea it was to visit on this particular Demo Day, accompanied me. We arrived about 30 minutes before showtime, and to my pleasant surprise, all four cars were arranged at the front of the seating area; they were not roped off (as I’ve seen done previously) so guests were free to get up close and personal with the cars. Soon enough, the program started and we were treated to a slide show, including technical specs of the cars and film footage of the actual 1965 Sebring 12-hour race. The variety of vehicles racing that day, American and foreign, was huge, and the race stood out because 1st and 2nd place overall were taken by two American teams. The Chevy-powered Chaparral of Jim Hall and Hap Sharp came in first, followed by a GT40 driven by Ken Miles and Bruce McLaren. To Enzo’s chagrin (he had earlier threatened to boycott the race), his 250LM finished third.

BELOW: RED FERRARI AND YELLOW FORD GT DURING SLIDE SHOW PRESENTATION:

After the slide show, it was Ford vs. Chevy in the back lot. I should not have been amazed that all three cars started up on first attempt. They were slowly driven out of the building, and once on pavement, the drivers picked up a little bit of speed, but not too much! These vehicles are too valuable to put them at risk. (The Cobra Daytona, in particular, as one of the most singularly-famous cars in the world, must have an incalculable monetary value.)

After the show, we toured the rest of the static display within the museum, and promised each other that this would not be the last time we’d visit the Simeone in 2023.

All photographs copyright © 2023 Richard A. Reina. Photos may not be copied or reproduced without express written permission.

AACA Hershey Meet, 2006

My 2006 visit to the AACA Fall Eastern Meet, better known as “Hershey”, was likely the 5th consecutive year I attended. Before that, most of my trips to eastern PA car shows were to Carlisle. However, Hershey’s focus on original cars which were 25 years and older was becoming a more attractive proposition to me.

Hershey has had a long history with mud. Ask any oldtimer, and they can regale you with stories of mud up to the knees, and classic cars buried in mud up to their axles. While more and more of the field area was gradually becoming paved, in 2006, not all of it was on asphalt yet. One photo in particular documents what appear to be Car Corral vehicles parked across the street from Hershey Park, on the lawn in front of the Hotel Hershey. There’s lots of sunshine as well so the infamous and soon to be gone Hershey mud was not a factor that year.

Ever since my rally brother Steve and I discovered it in the late 1990s, the spectacle of witnessing the Saturday morning parade of show cars has been a must-see part of the Hershey visit. Several of these photos capture that parade, as disorganized as it may appear! Take a note of all the spectators alongside the cars, enjoying the same sights as I was.

The big surprise of 2006 was the special display trucked in by General Motors. They dipped into their “GM Heritage Vehicle Collection” and brought a number of cars and trucks which were set up in a special area near the Giant Center. The most outstanding of them, in several ways, was the GM Futurliner. I had been reading articles about these massive vehicles for years. In January of 2006, a Futurliner sold at a Barrett-Jackson auction for $4 million. More shocking to me was their size, something difficult to capture in photographs. It makes me wonder how GM was able to move it; but of course, being GM, they have all kinds of vehicles and equipment at their disposal. And if you’re asking yourself “why is there a Saab near the Futurliner?”, it is because GM had purchased Saab and included several of the Swedish brand’s models in its display. A stretch? I thought so then, and still think so now.


The Car Corral drew a nice crowd of tire-kickers
A couple of Ford “Squarebirds”, aka 2nd gen T-Birds, sit side-by-side


A Jaguar E-Type heads toward the show field – Note the Futurliner in the background


A bullet-nose Studebaker


A 1968 Ford Mustang California Special, similar to the one I owned


The VW Bug can be seen between the Cadillac and Buick


Orphans: the green Studebaker Lark and the red AMC Marlin


The GM Futurliner; the man by the rear wheel gives some sense of scale


GM decided they had the right to include Saab in their Heritage Display – note the windshield decal


All photographs copyright © 2023 Richard A. Reina. Photos may not be copied or reproduced without express written permission.


The 2012 AACA NJ Region Annual Car Show

In 2012, the NJ Region of the Antique Automobile Club of America (AACA) held its 59th annual car show on its traditional date, the first Sunday in May. The show was held in the parking lot of the Automatic Switch Company in Florham Park, NJ. The Region had been using this location as far back as anyone could remember, possibly since the 1960s. However, just a few years after these shots were taken, the Automatic Switch lot was no longer available and the Region was forced to find a new locale.

These photographs were taken with a film camera, and since I don’t have any record of digital pictures from this event, the ones below are the only photos I have of the show (see sidebar if you’re interested in details about the camera and film used).

At its peak, the NJ Region’s annual show was known to attract between 250 and 300 automobiles. Without knowing the time of day my photos were snapped, don’t be too judgmental about the ‘gaps’ in the parking lot. It may well be that I took my photos in the morning as cars were still arriving. Since I was in charge of setting up and running the PA system for the club at these shows, I had work to do and did not have the luxury of wandering the show field all day.

As the scanned photos are smaller than the digital photos you’re used to seeing here, you many find it especially helpful to click on each photo, then click on it again to enlarge it to fill your screen.


From this vantage point, we can see mainly cars from the 1960s and ’70s.


I don’t exactly recall the point of the doodled-up truck, but it may have served as an attraction for any children in attendance.


This out-of-focus shot features what look like Ford Model A’s.


1967 Buick Wildcat convertible


Mercedes-Benz 190 SL roadster


Alfa Romeo 1750 Spider


Detail of 1958 Mercury tail light


Detail of wood on a Chrysler Town & Country


Jump seats in what I recall was a stretched-wheelbase early ’50s Chrysler


Huppmobile (note the “H” on radiator shell and as hood ornament), early ’30s?


My friend Ron with his 1936 Packard convertible


The trophy table, awaiting the announcement of the day’s winners


SIDEBAR: The Ciro-flex 120 film camera and Kodak VC160 film

I’ve been collecting film cameras for about 15 years, and I actually take pictures with the ones in my possession. This Ciro-flex camera, made in Delaware, Ohio, is the only non-Kodak U.S.-made camera I own, and luckily, it takes the readily-available 120 film size, rather than the 620 film that Kodak forced consumers to use (Kodak made out because they were the ones producing the 620 film).

I bought the camera at the Rose Bowl flea market in California, I think in 2009, and paid $25 for it. It’s a dual-lens reflex camera. The top opens, and one gazes into a ground glass while holding the camera at about waist level. It can be manually focused, and both the aperture and shutter speed are adjustable. The focal length is set at 85 mm.

For these shots, I used Kodak’s VC160 film. “VC” stands for “vivid color” (as opposed to “NC” film, or “neutral color”). It’s a bright film, and while I’ve read that some photographers find the colors to be over-saturated, I like the look. The 160 in the film name refers to the film speed. When I was shooting 35mm almost exclusively, most film I used was either 100 or 200 speed, so the 160 is almost exactly in between.

Focusing the Ciro-flex is tricky. The ground glass is hazy, and you get a clear image in it only in the brightest lights. As you can see, the focus is better in some photos than in others. In a perfect world, I’d use the camera often enough to become more accustomed to it, when in fact I use this one sporadically. Overall, though, I greatly enjoy shooting with film, because it forces me to slow down the process, think before pushing the shutter button, and delivers photos with that old-world quality look which I just don’t get from digital.


All photographs copyright © 2023 Richard A. Reina. Photos may not be copied or reproduced without express written permission.