NJ Region AACA Spring Meet Car Show, May 7, 2023

The New Jersey Region of the Antique Automobile Club of America (AACA) held its 70th annual Spring Meet on Sunday, May 7, 2023. The show, traditionally hosted on the first Sunday of May, was in a new location this year: Nielsen Dodge/Chrysler/Jeep/Ram on Route 10 in East Hanover NJ.

The last few years for our Spring Meet have been rocky, to put it mildly. After literally 60 years at the same location, the club was forced to move, and we spent a few years holding our show at the Mennen Arena in Morristown NJ. (These links will take you to those shows in 2016, 2017, 2018, and 2019.) But between unbelievably bad luck with the weather, combined with Covid shutdowns, we never had a good show there. Last year, we were at a school (link here), which had its positive points, but many didn’t care for the parking layout. This dealer offered us a spacious lot emptied out for us, and we finally had the weather on our side, with a sunny, warm, and slightly breezy day. There was a great turnout of show cars (my extremely unofficial count putting it at around 150), and a large number of spectators helped by our location along a busy 4-lane Jersey thoroughfare.

Music, like last year, provided by Gup

For reasons having nothing to do with the car, I was unable to bring the Alfa to the show, even though I had registered it. I did drive up in modern iron, though, because I had volunteered to be a judge. This task needs to be completed because many owners still are in love with the concept of placing 1st, 2nd, or 3rd, and bringing home a trophy (what I’ve come to call a dust collector). All cars are placed in classes based on decade of manufacture, vehicle type, or make/model, done at the discretion of the club. There are 4 areas of the car which are examined: exterior, interior, engine compartment, and undercarriage. Each of those areas is scored on a scale of 1 to 10, 10 being the best. Maximum score is 40. Ideally, the judging team consists of 4 judges, with each judge taking on the same area for all cars in the class. In reality, we only had enough judges to form teams of 2. I was teamed with a club member who said that he is an experienced Hershey judge, although he also said he knew pre-war cars better than post-war. I thought we made a good team as we balanced each other out. He took exterior and interior, and I took engine compartment and undercarriage.

Not as many pre-war cars this year; this is a ’29 Packard
Bob Smith’s Dodge roadster

First class we judged: 2-seat sports cars. We had quite a few Corvettes (C1 through C4), a few 2-seat T-Birds, a Triumph TR-6 and a Porsche 912. We are judging to AACA standards: the car should appear as it would have when delivered as a new car by a dealership. The 912 had a number of mods to it, which knocked it down. All the Corvettes were nice, but the ’54 C1 was close to perfect and took first place.

Porsche 912
’54 Corvette which took 1st in its class

Next class was a tough one: “pony cars”, which in this case was 5 Mustangs and a ’70 Cougar. Mustang owners tend to be meticulous in their attention to detail, especially if they have ever been judged by the Mustang Club, where the judging is much stricter than it is at AACA. My personal fave was a ’67 Shelby GT-500 fastback with inboard lights. As stunning as that car was, it only took 3rd! Two other Mustangs were that much nicer.

My co-judge and I tallied our scores and handed our sheets back to the Chief Judge. I sat down for a quick lunch, thinking we were done. We were not. Somehow, “Class 6” got missed and some of the owners were peeved. We were asked if we could tackle it and we said yes. This too was a tough class, as it was American cars of the 1960s. First place went to a ’67 Cadillac convertible, and 2nd place to a supercharged Studebaker Avanti. But my personal favorite which came in 3rd was a ’63 T-Bird convertible with the roadster package, in triple black. With gleaming wire wheels and white walls, it was gorgeous. But again, the competition can really be challenging.

’67 Caddy which took 1st in class
’63 T-Bird
’66 Olds 442

To give you some further insight, most cars that we judged scored somewhere between a total of 25 and 38. It would be very rare indeed to score any one area below a “5”, and even if we did, another area might still score an 8 or a 9. No car that we judged scored a “40”, although 2 or 3 did score “39”. Provided there are at least 3 cars in the class (and for us, there always was), we need to deliver a 1st, 2nd, and 3rd place score back to the Chief Judge. What if there was a tie? That happened twice. In those cases, my co-judge and I looked at our judging sheets, and one of us adjusted one score either up a point or down a point. We did it as fairly as possible, although we also thought about the overall impact that the vehicle made on us.

ABOVE: Baby Bird parade: a ’56 and two ’57s

Again, I thought I was done. The Chief Judge, Ed, whom I’ve known for 20 years, asked me to accompany him as we still needed to judge cars for “Membership Trophies”. Let me explain: these awards, open only to NJ Region members, are for special categories, including the 3 best unrestored cars in 3 different year ranges. During registration, owners must request that their cars be considered. There are only 2 or 3 candidates in each category, and truthfully we were just giving them a quick eyeball. The problem was that these cars were in their respective classes, and therefore, scattered from one end of the show field to the other, so we had a lot of walking to do to locate them. But we eventually did, and finally, judging was done. Looking back at my photos, I see that I was not able to take as many shots as I would have liked! Including my brief lunch break, I was walking the field and judging cars (four different classes in total) for about 4 hours! I’m sorry that I missed photographing some of the stunning cars that I judged.

This mostly-unrestored Imperial took a Membership trophy

ABOVE: Two of the many Cadillacs at the show: a ’58 and a ’73

The awards ceremony started a bit late, probably around 3pm, but most owners stuck around, and I must admit that I did enjoy seeing their grins of satisfaction as they collected their trophies. It takes many, many volunteers from our club to make this show happen, and I was happy to be part of the team which pulled it together. I overheard that the Region hopes to use the same location next year, so my fingers are already crossed that the weather will cooperate in 2024.

My friend Sean with his ’75 Pontiac
’70 Fiat 500
’56 Dodge
’66 Chrysler
’53 Hudson
’71 Camaro
Hillman Minx
Lotus Elan
’64 Chevy II
’56 Ford


All photographs copyright © 2023 Richard A. Reina. Photos may not be copied or reproduced without express written permission.

Replacing the Miata’s Cam Angle Sensor O-ring

My 1993 Mazda Miata has been one of the most reliable vehicles I have ever owned. Since purchasing it in 1996 with 34k on the clock, I have put 75,000 miles on it and it has never left me stranded. Aside from maintenance (which to me includes normal wear-and-tear items like brakes, shocks, tires, and batteries), the only “repairs” I’ve made to the car in 27 years have been a clutch secondary cylinder, a heater core, a power antenna, and one headlight bulb. So when I discovered a minor engine oil leak a while back, I ignored it until recently. I finally decided to tackle the leak last week, which involved replacing the rubber o-ring on what Mazda calls the CAS, or Camshaft Angle Sensor.

I always take a “before” photo in case I mess up; the circled plug is 1 of 3 to be unplugged.

The CAS sits at the back of the cylinder head, and engages with the intake camshaft. This is how the ignition timing is changed: the CAS is adjustable, and by slightly rotating it in one direction or another, the ignition timing (in relation to the cams) is changed. It’s a DOHC engine, but it is not variable valve timing. Doing some research on the Internet, I found multiple sources identifying the CAS o-ring as the #1 cause of Miata engine oil leaks. The oil drips down the back of the engine onto the transmission, and from below, it can be difficult to pinpoint the cause. A quick check with a flashlight directly under the CAS confirmed this as the leak’s source.

Chat forums and YouTube videos are great places to find repair information, but in this case, there were two distinctly different approaches to the job. On one hand, the “book” method is to remove the valve cover, remove the C-shaped cap over the CAS, and lift it from the car. The alternate, and supposedly less time-consuming approach, is to leave the valve cover in place and only remove the CAS adjustment hold-down bolt. One can then wiggle the CAS out of the engine compartment, with the acknowledgement that re-engaging the “dogs” or teeth which fit into the back of the cam is tricky because it’s a blind operation. At least one commenter admitted that getting the new and unworn o-ring past the CAS hold-down cap can require severe muscular exertion. In either case, viewers were strongly advised to mark the position of the CAS so that re-timing the car would not be necessary. I marked it with a black Sharpie.

Plug wires tagged and about to be removed; CAS is circled in red

After watching 3 or 4 videos and then examining my car, I was not convinced that the savings in time was worth it. Removing the valve cover is not at all difficult, but it takes about 20 minutes. I actually had a more difficult time removing the 3 electrical plugs (which needed unplugging whether I followed method #1 or #2) because these plugs had not been touched in 30 years. But I eventually got them, and followed that by removing the spark plug wire set, the PCV hose, and the 11 bolts holding down the valve cover. I had ordered the CAS o-ring (63 cents) and a new valve cover gasket from Rock Auto; with tax and $9 shipping, I was into the job for twenty bucks in parts.

I had an ulterior motive for removing the valve cover: I had never done so, and I wanted to see how clean things were underneath, and they were clean indeed! Frequent oil changes, almost exclusively with Castrol oil, certainly has played a part. Going this route, the CAS was quickly free from the camshaft, but even with the valve cover out of the way, there was precious little clearance between it and the firewall, so I was doubly glad I went for the “longer” method.

Underside of valve cover, old gasket still in place.
Miata engine, 30 years old, 109,000 miles, looks clean to me


CAS on my workbench, the old o-ring was so dried out that it snapped like a piece of plastic. The new one slipped on very easily, helped by a little motor oil. Then the job was like it says in the repair manuals: reassembly is the reverse of disassembly.

CAS on my bench, old o-ring still in place

Again, I was glad to have the valve cover out of the way, as engaging the dogs into the cam was a cinch. I rotated the CAS to where I had marked it, locked it down, put the new valve cover gasket in place, and reinstalled everything which had been removed. The car started on first try, and while it was too wet today to go for a test drive, I plan to clean off the underside as best possible, then drive the car to confirm the leak is fixed.

Clear shot of CAS about to reengage with cam

I guess I need to add this repair to my list of “non-maintenance fixes” to my Miata!


All photographs copyright © 2023 Richard A. Reina. Photos may not be copied or reproduced without express written permission.


Carlisle Auctions, Spring 2023

Carlisle Auctions’ Spring 2023 event took place over two days this year, with the auction running on Thursday and Friday, April 20 and 21. This was a particularly fun event for me because of the number of lots in which I had great personal interest. Before we get to the particulars, though, a few words (as always) about this auction and the state of the hobby as we begin the car show season in the Northeast.

There is no doubt that transaction prices, in general, are up. The high-quality cars continue to be in demand and continue to bring good money. At the same time, for beginners, or bottom feeders, or anyone for whom a bargain price is a deal, there are still choices. Case in point: Thursday’s auction, which actually began about 15 minutes early (and caught me off-guard, as I was still outside), got off to a roaring start by anyone’s measure. Of the first 31 cars to cross the block, 26 of them sold (the 5 that did not meet reserve were an eclectic lot, and included a ’29 Nash, a ’62 Bonneville, a 2005 BMW 3-series, and most bizarrely, a ’66 Fiberfab). Now, of the 26 that did sell, 23 of them hammered for less than $10,000 each (I stress “hammered”, as all referenced sale prices are exclusive of an 8% buyer’s premium). Many of these early cars were true projects, but some were vehicles for which there isn’t great demand, like an ’87 Corvette ($6500), a 1996 RHD MG-F ($4250), and a 2008 Saturn Sky ($9000). In other words, something for everyone.

Once past this initial surge, things slowed down a bit, though, with many cars not meeting reserve. A rough guess is that the remainder of Thursday’s auction had around a 50% sell-through rate, not a great performance. As Friday’s auction started, one of the announcers stated “we had a good day yesterday, but frankly we’re hoping for a better day today”. Based on my notes from the first 70 or so cars to cross the block, Friday’s sell-through rate was up significantly to decent 67%. I also found it interesting that to my eye, the room was less crowded on Friday than it was on Thursday.

Compared to Mecum, and certainly compared to the “catalog” auctions run by RM, Sotheby’s and the like, Carlisle is still a mom-and-pop operation, with a large number of dealers in the audience. They are there to buy and to sell, and they’re expecting to pay wholesale. So you do see bargains, but you also see cars that don’t meet reserve. Over these past few days, I began to realize that in a situation like this, a published book value is not very meaningful. The audience isn’t dumb, and they will buy the car if they feel the price is fair. However, some sellers still have inflated concepts of the values of their own vehicles, and that is outside the control of the bidders. For a sale to occur, the reserve must be reasonable, and the bidders must see the worth. That is all that matters, and that is what it takes for a successful auction transaction.


Sold lots are listed first, and as always on Richard’s Car Blog, are listed in hammer price order, from low to high. Following this is a selection of interesting lots which did not meet reserve.


Lot T121, 1996 MG-F, green paint, grey interior. RHD, mid-engine 1.8L 4-cylinder, 5-speed manual, A/C.

SOLD FOR $4250

I don’t think I’ve ever seen one in the metal before. Obviously is old enough to be legally imported under the “25-year-old” rule. Given how popular JDM RHD cars are, I would imagine that there are enough people out there willing to embrace the quirkiness of this one. You might have the only one at the next MG meet.


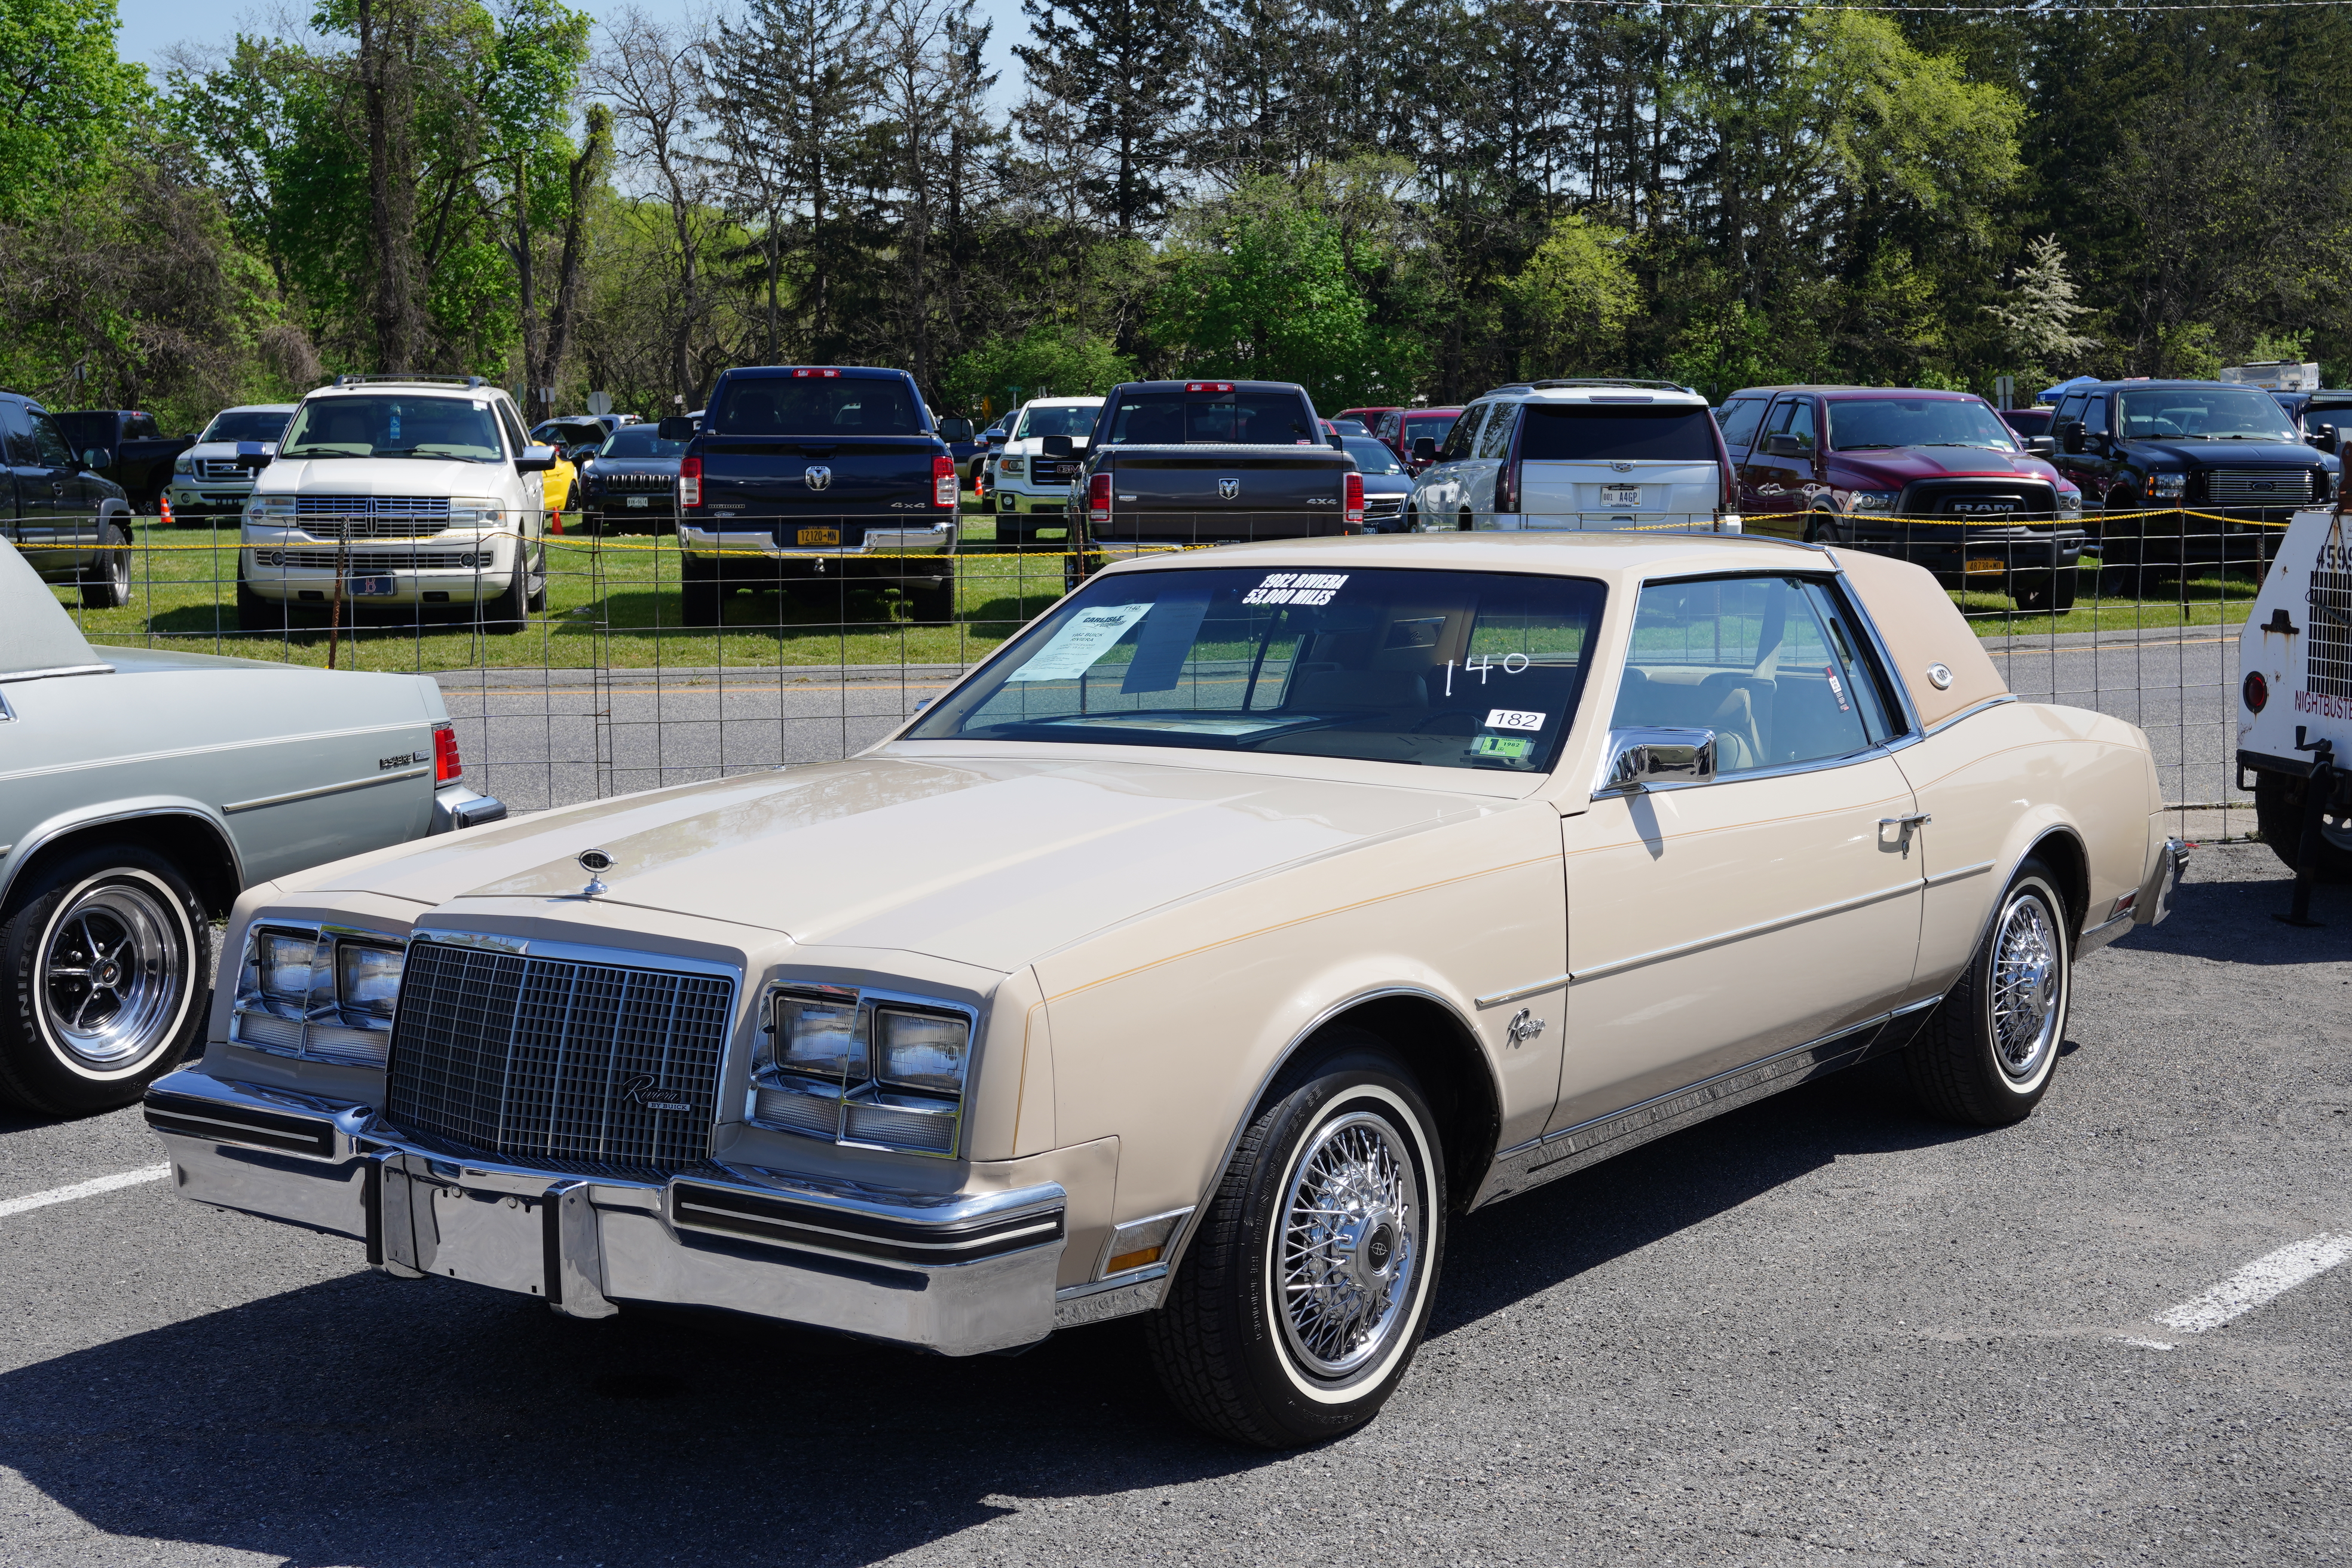
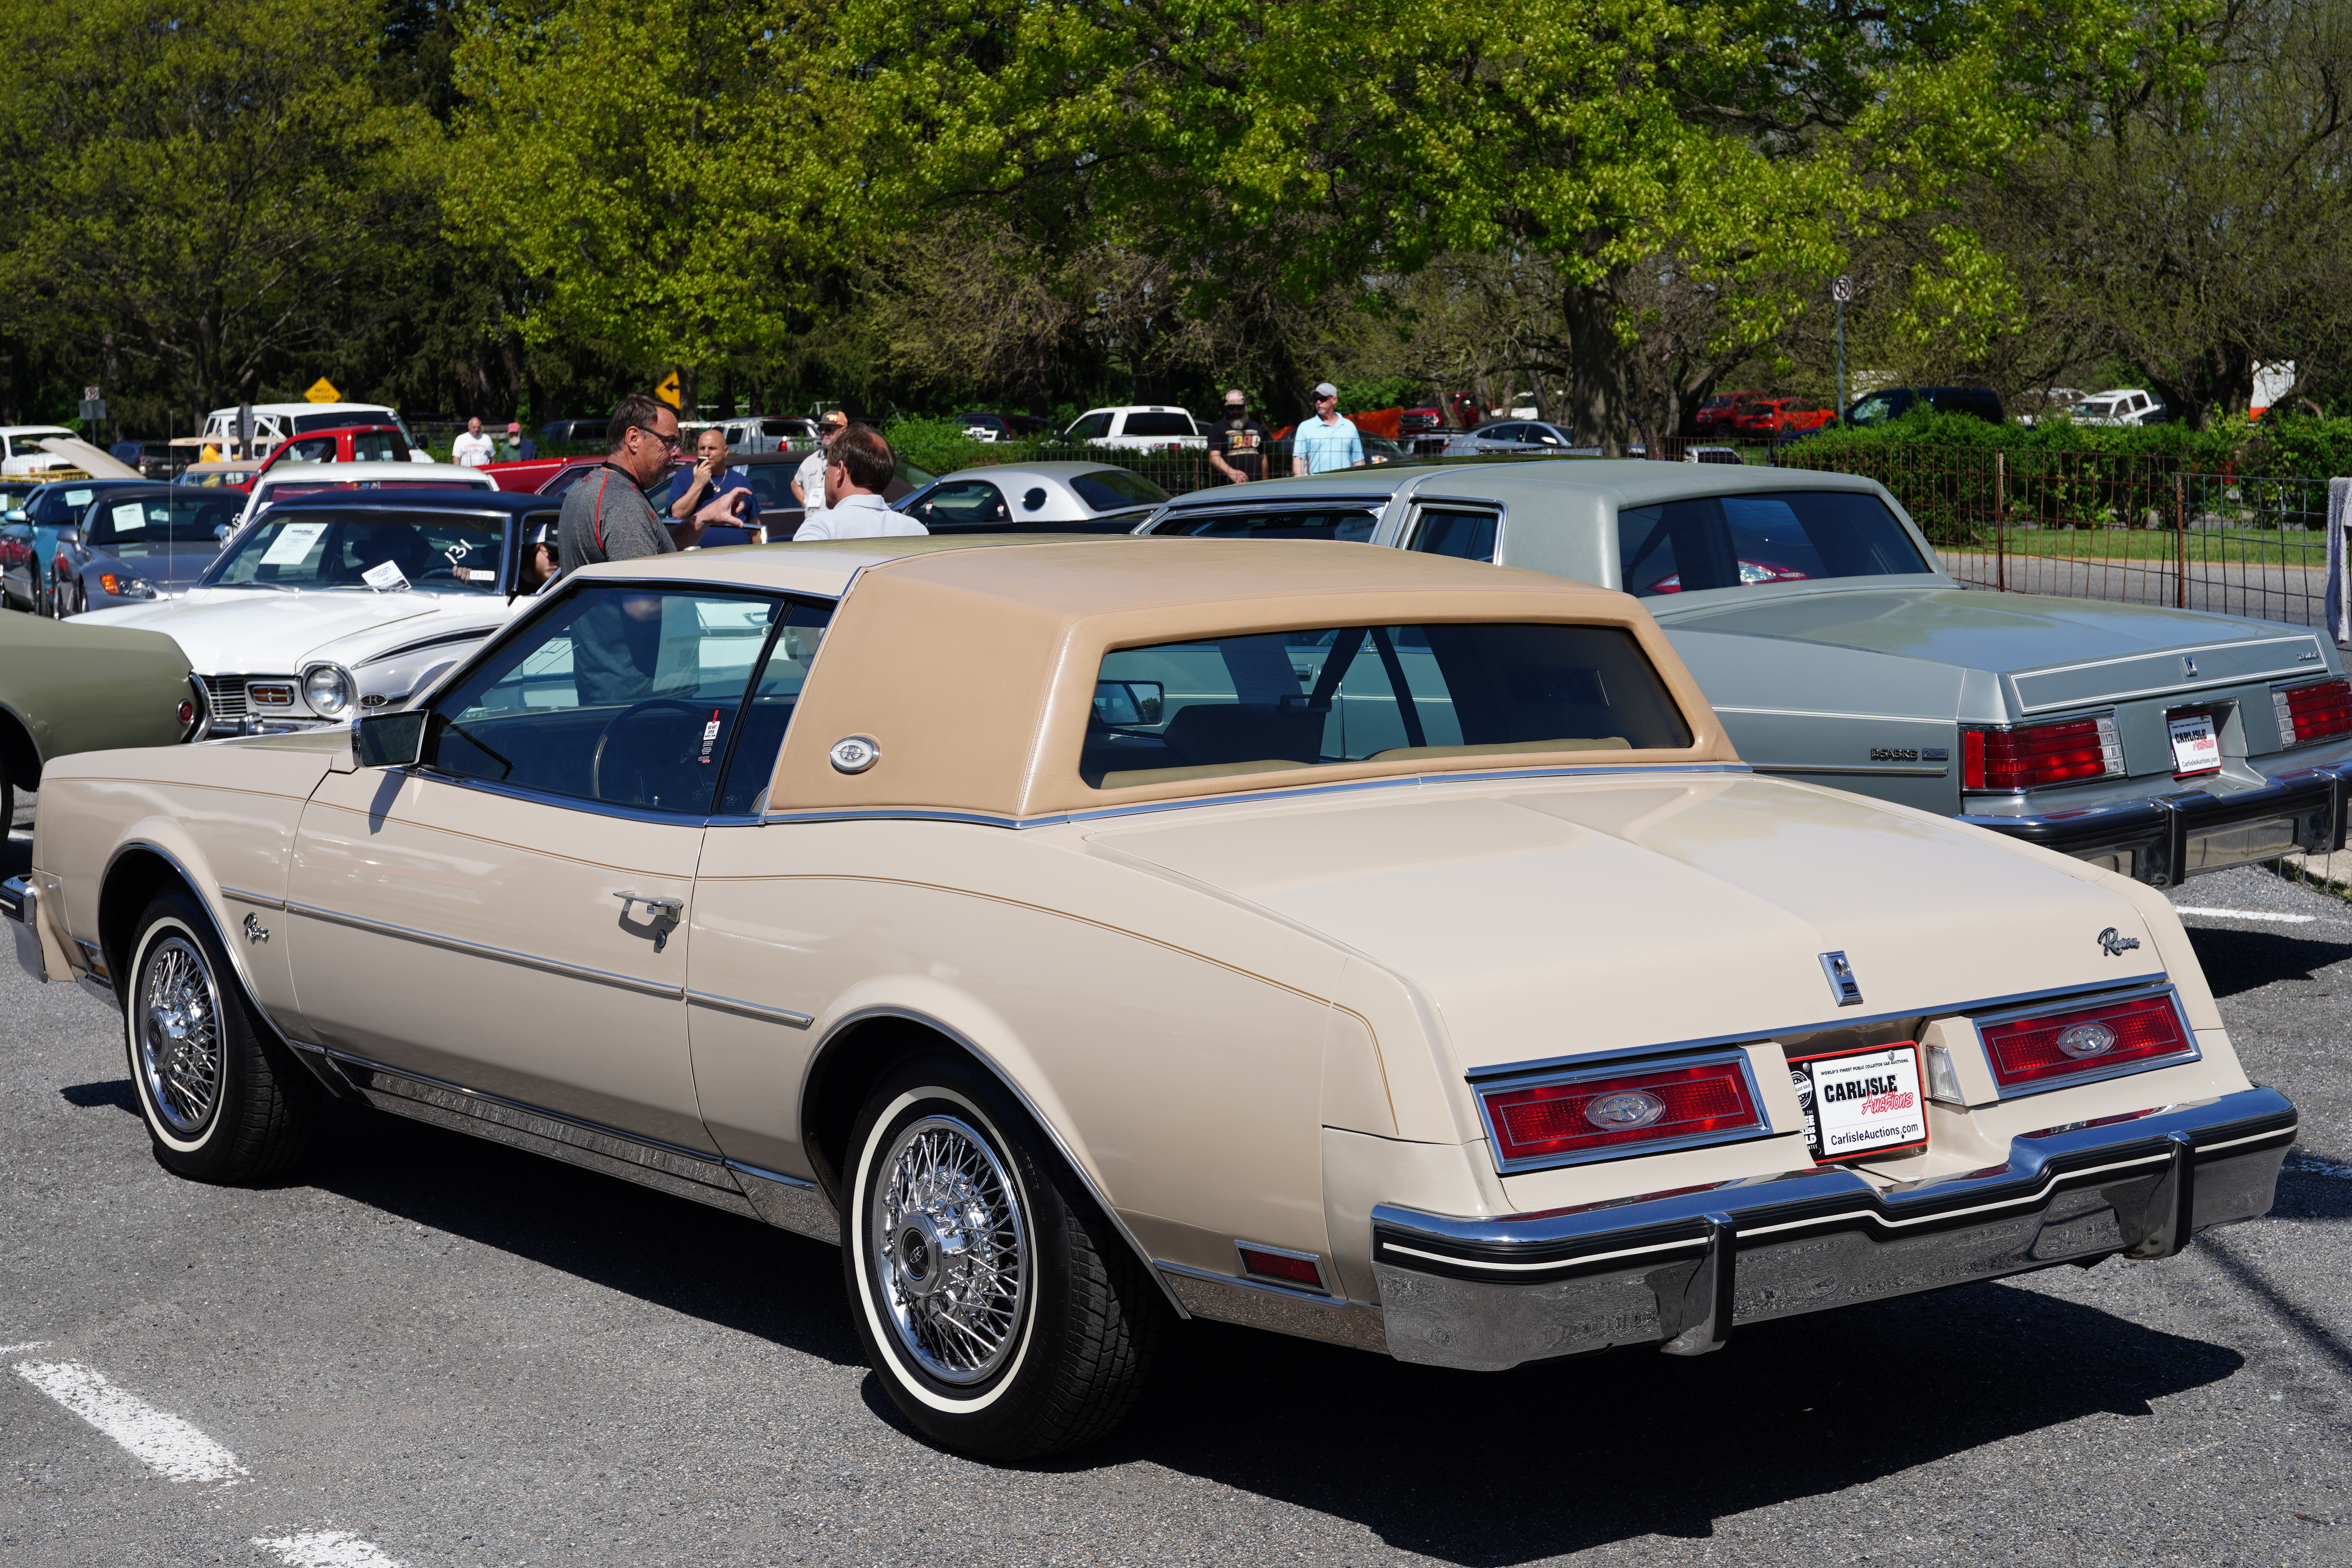
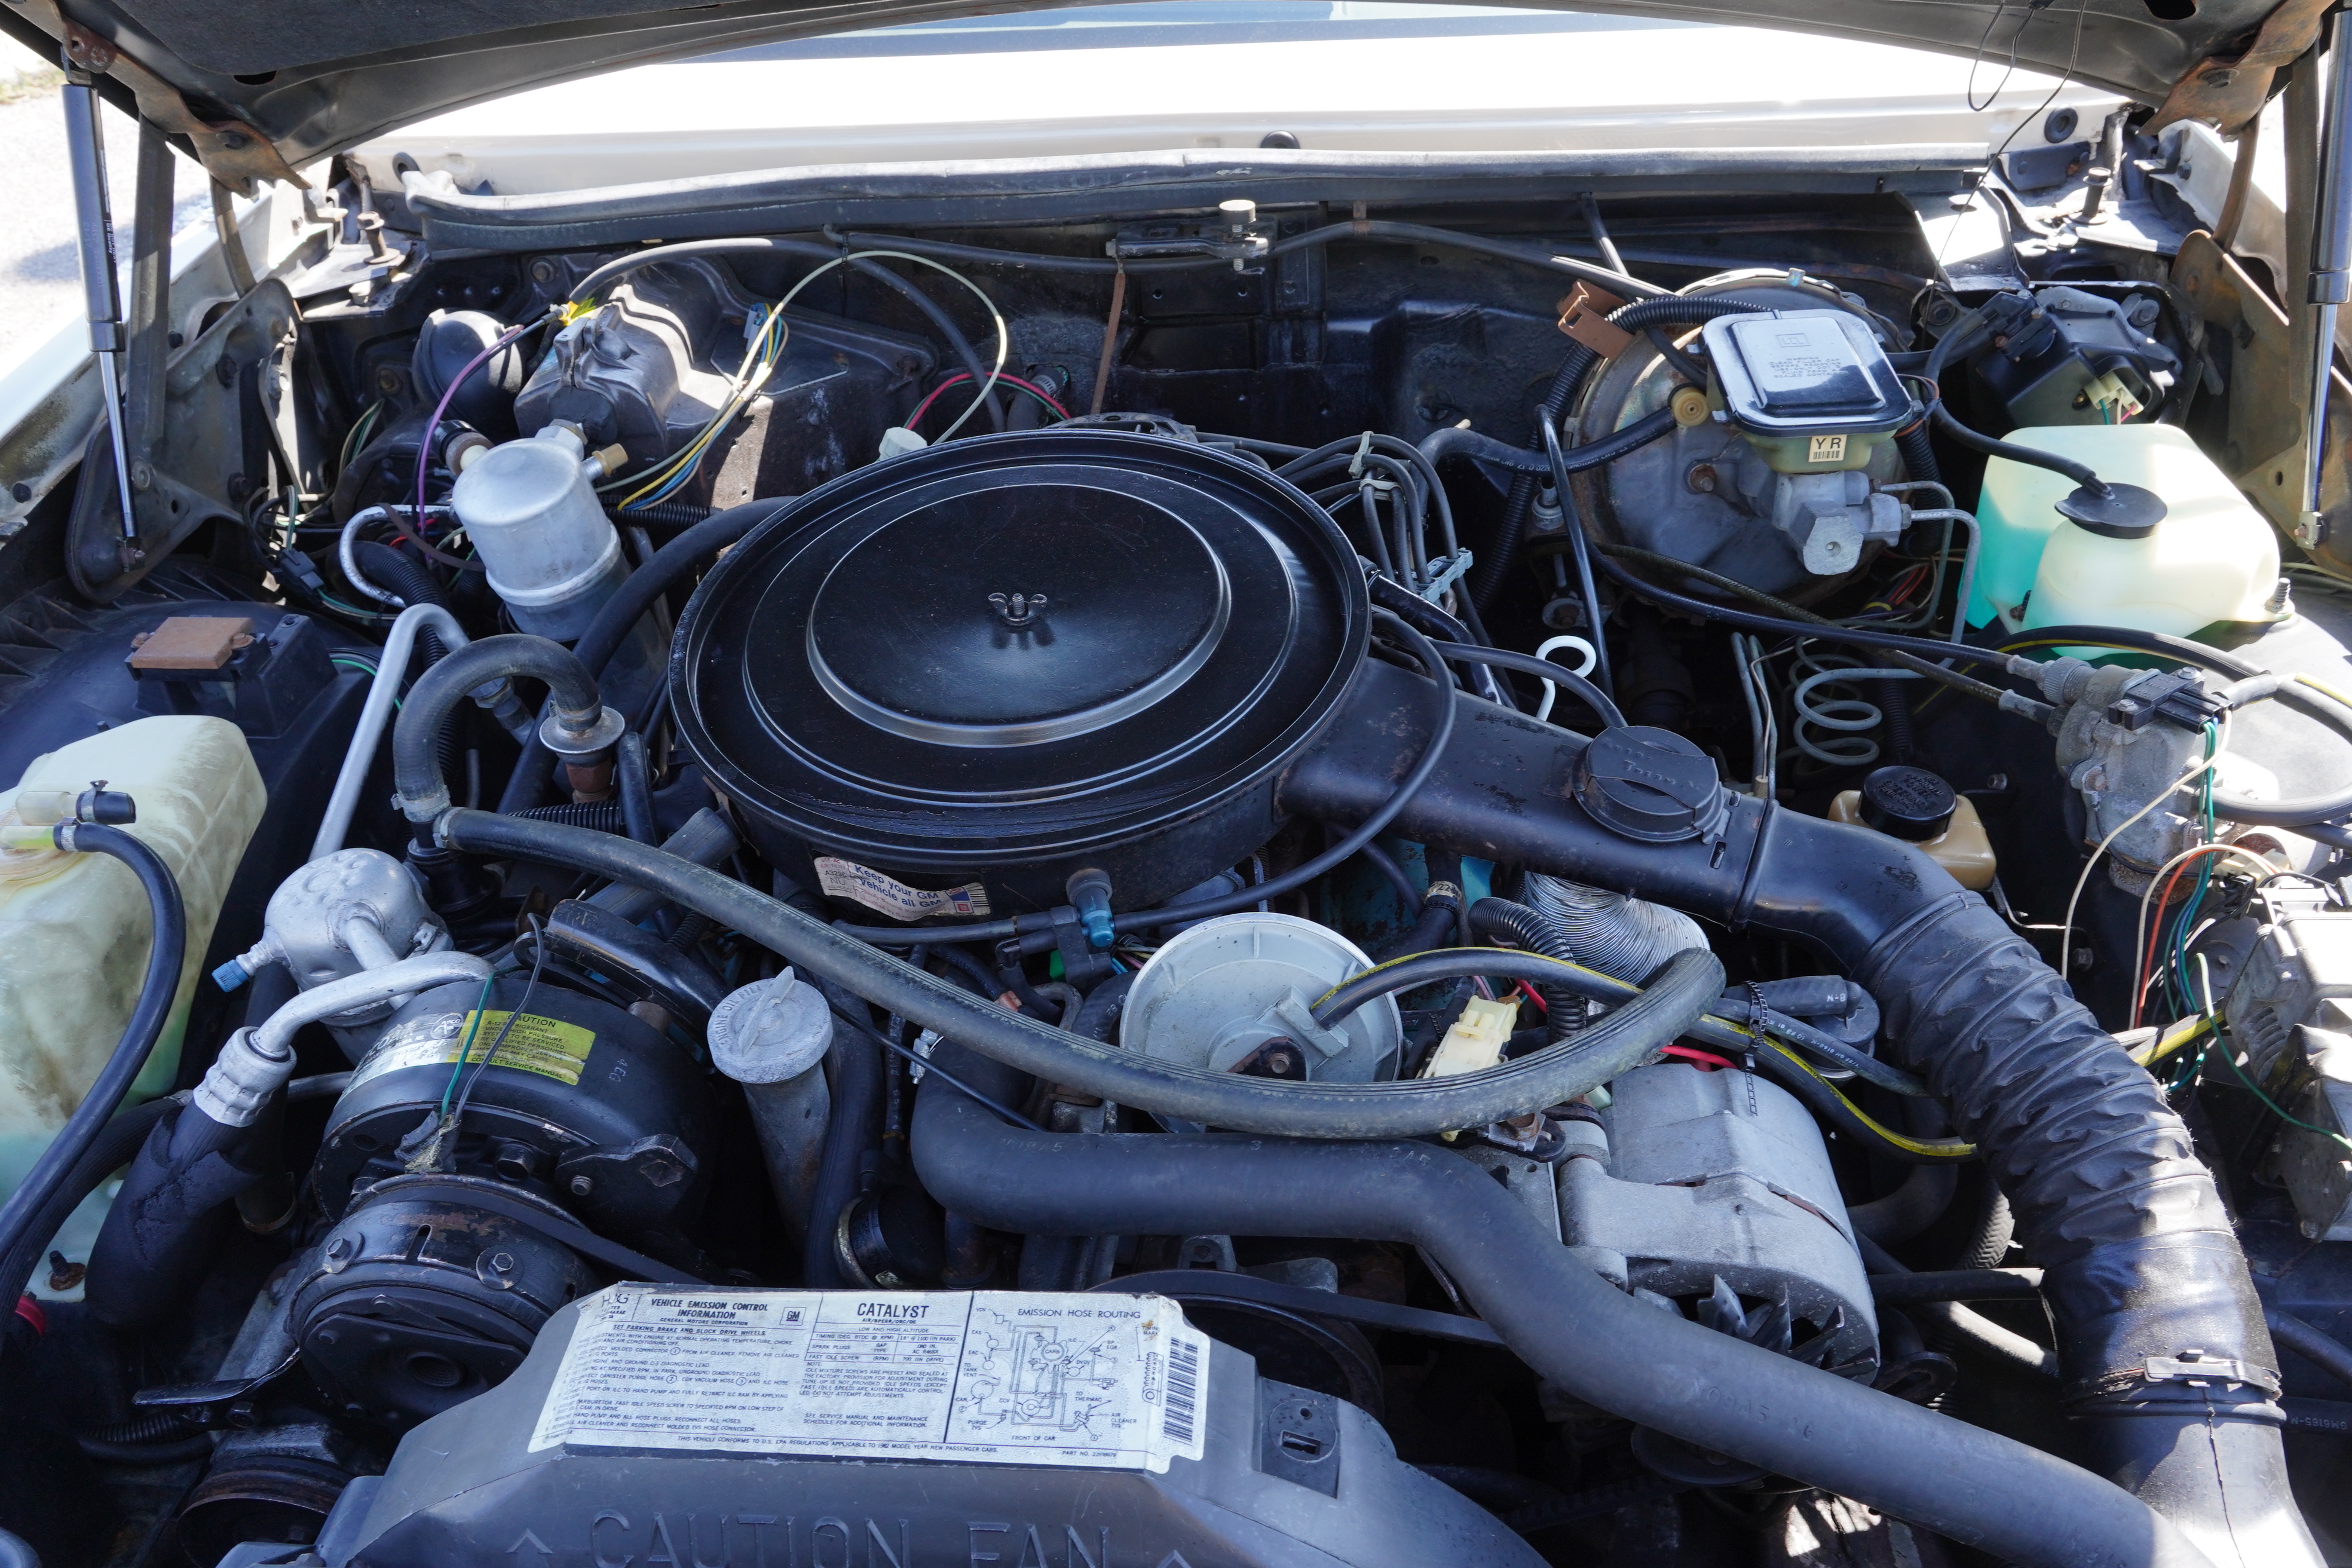
Lot T140, 1982 Buick Riviera, tan paint, vinyl roof, and leather upholstery. Five-digit odometer reads 53, 328. Engine is 307 V8, driving front wheels through an automatic transmission. Wire-wheel hub caps, whitewall tires. Buckets and center console, which I believe are rare in this generation Riviera. One of the cleanest cars at the auction. Only flaw of note is that plastic bumper filler pieces are warped, but they are not cracked.

SOLD FOR $8500.

While you may see this as a typical ‘80s-era GM luxo-barge, these have a following among Riviera fans. I’ve read some of the contemporary road tests where it has been claimed that they are actually nice driving and riding cars. This sale may have been one of the truly good deals of the auction.


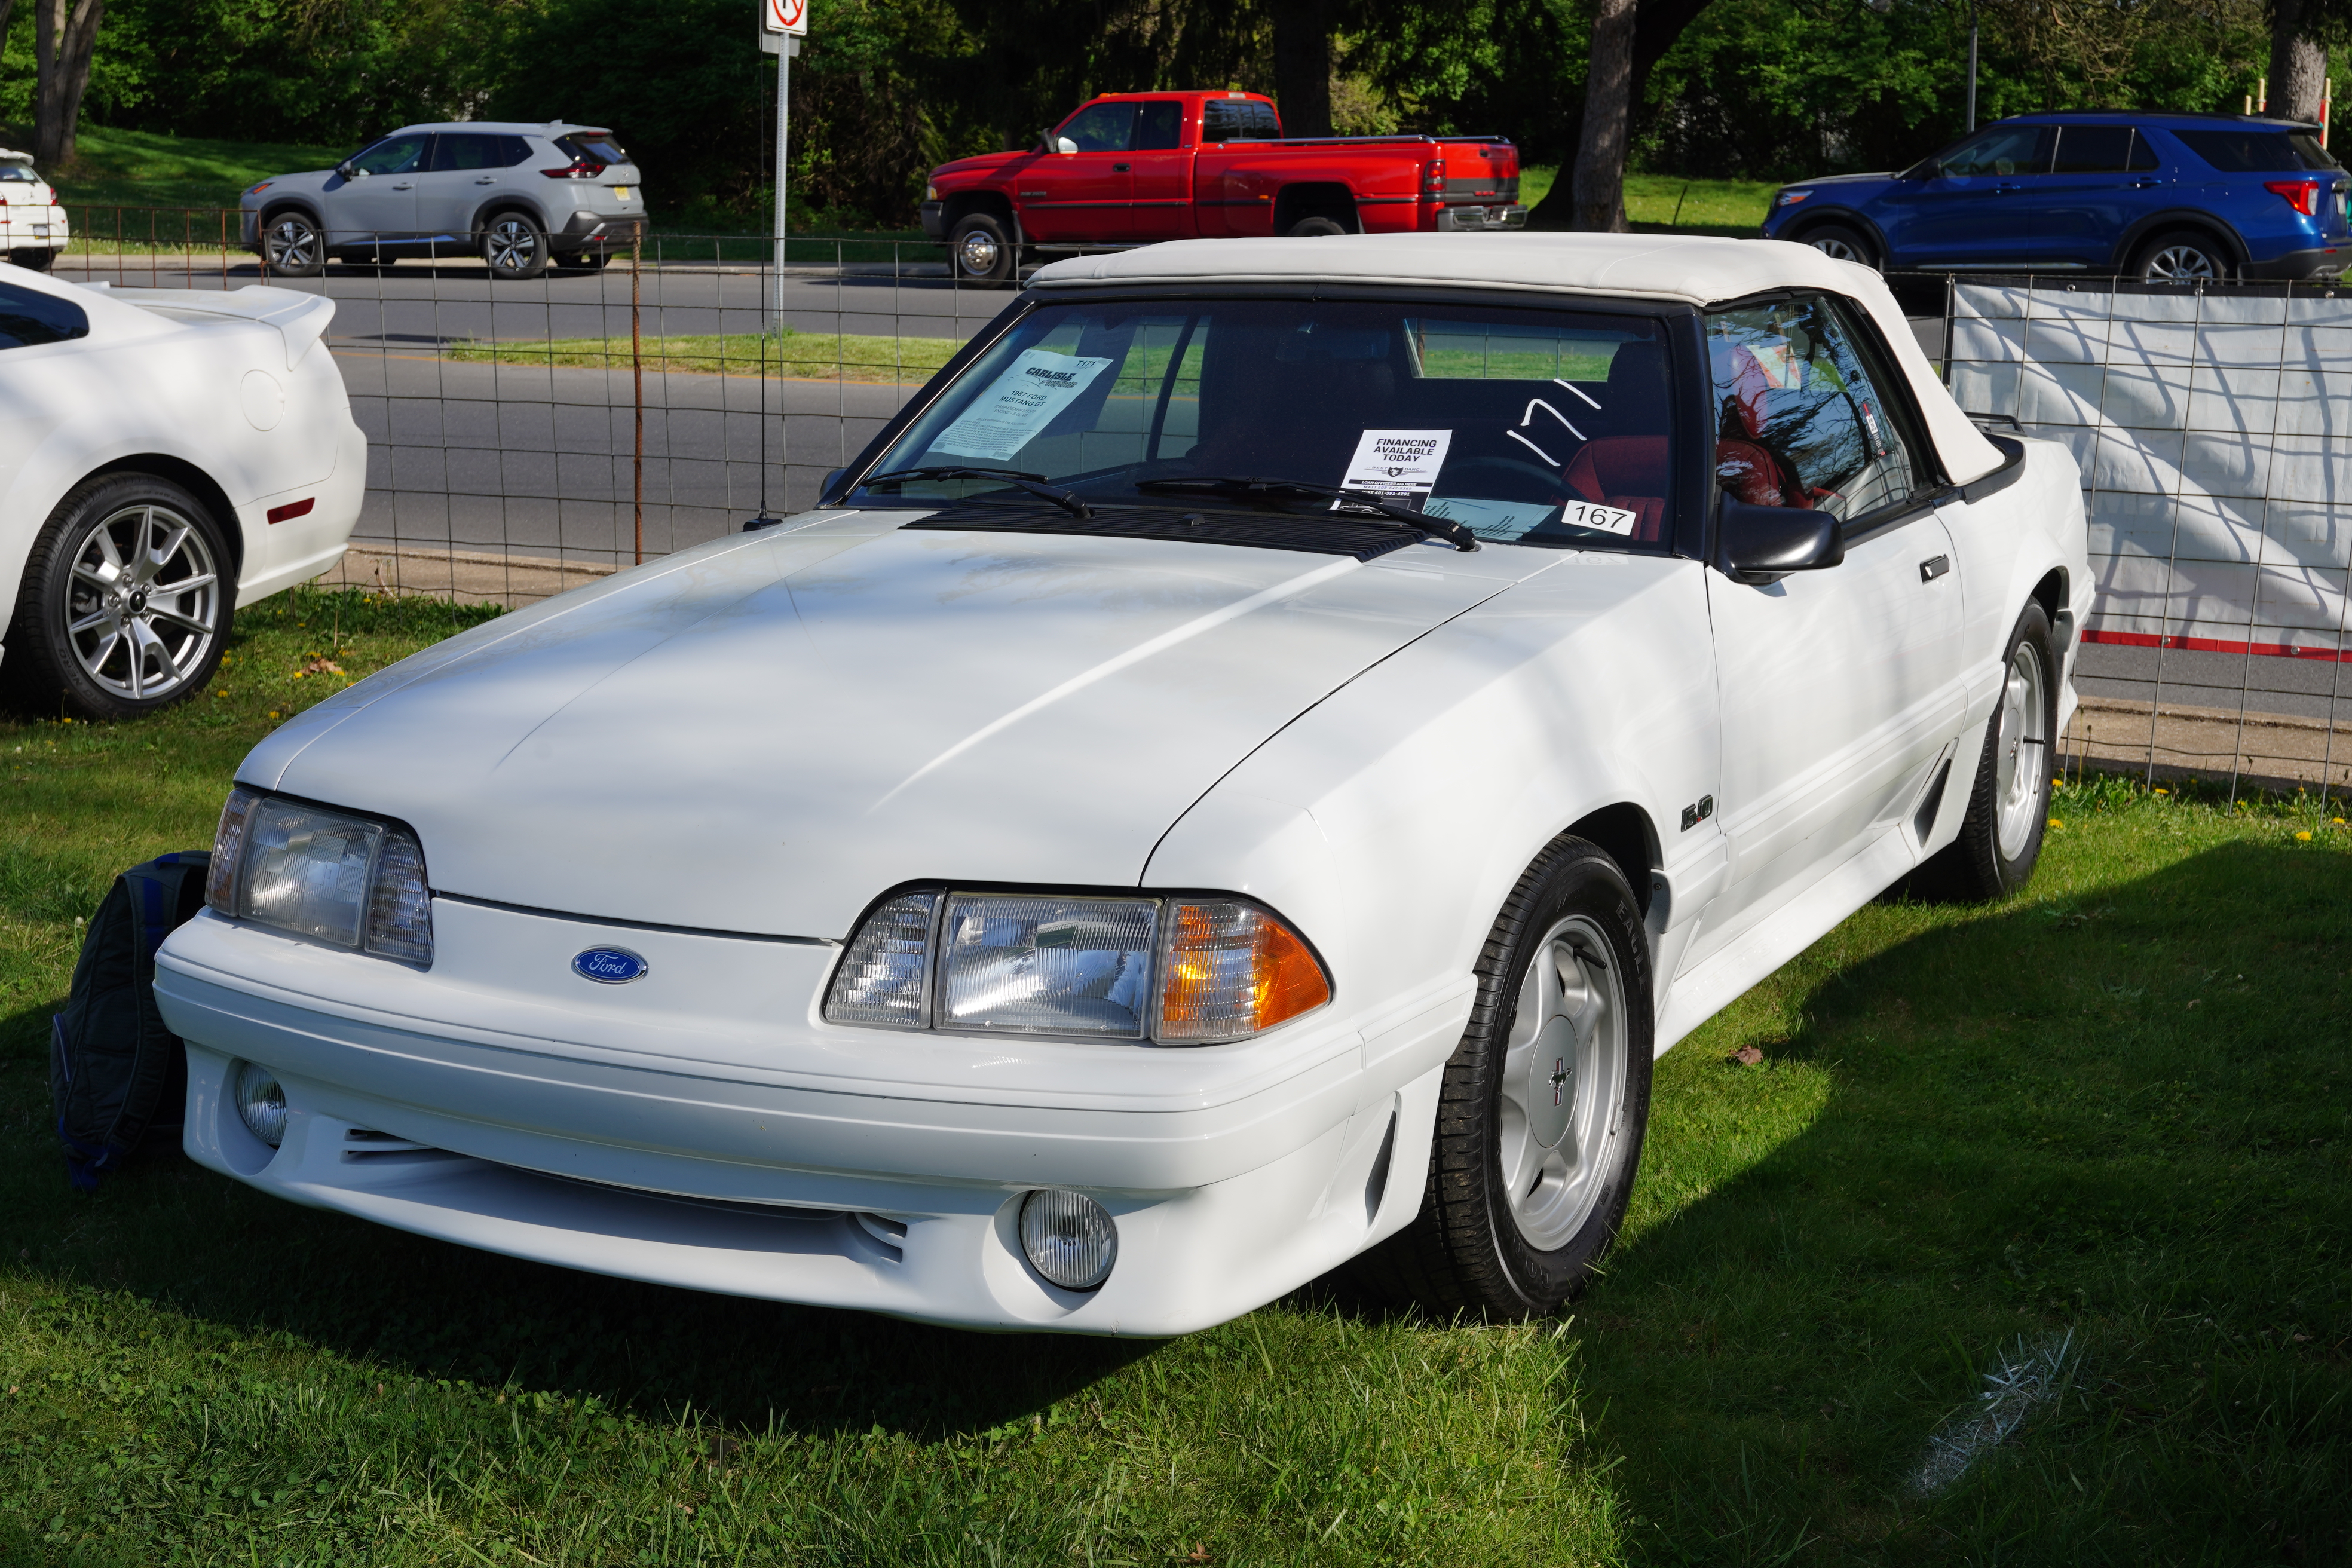
Lot T171, 1987 Ford Mustang GT convertible, white paint, white top, red plaid cloth interior. Odometer (5-digit) reads 68,308, 5.0 V8, 5-speed manual. Looks great from afar as well as close up. No major flaws noted, could be original paint. Interior has held up well; obvious that car was not left outside with the top down. Biggest flaw noted was 2001 date codes on tires.

SOLD FOR $14,000

Fox-body Mustangs continue to be some of the best performance bargains out there. While a few bring bigger bucks, here is a great example of a very usaable driver with lots of life left in it. A friend texted me the day after this sale to report that the new owner had this car online for sale with an ask of $20k, and he was using the Carlisle auction photos!


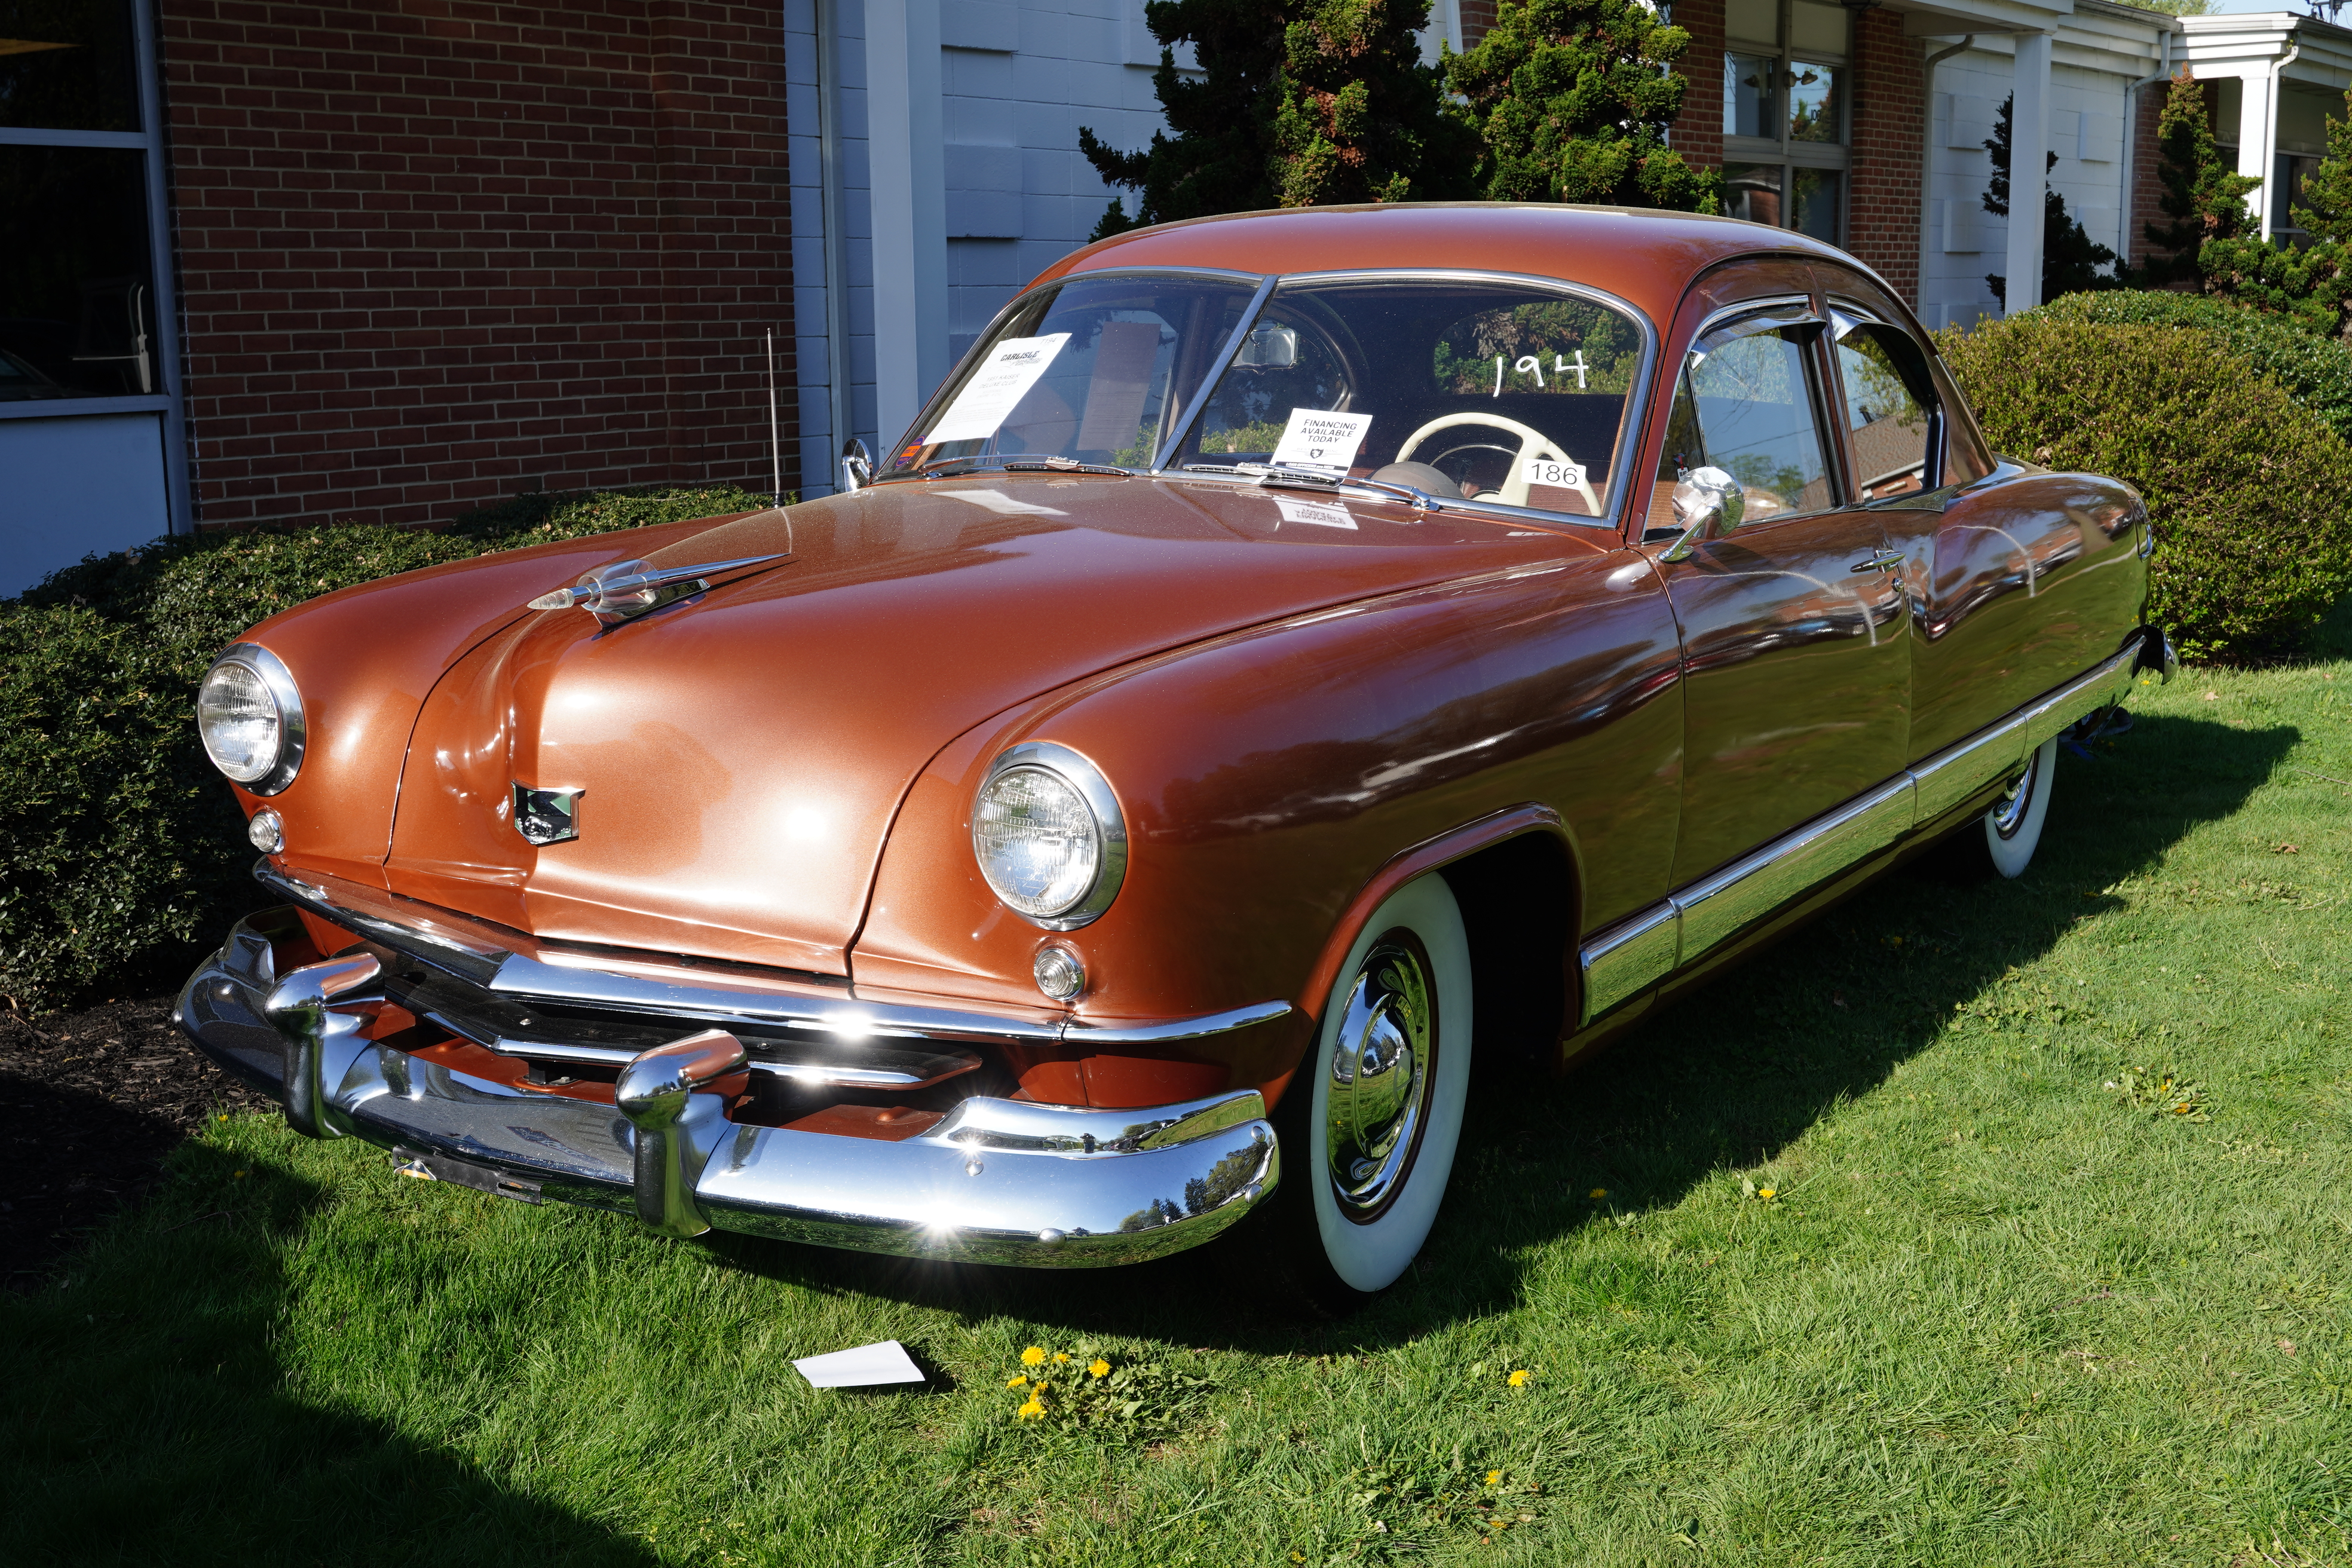
Lot T194, 1951 Kaiser Club Coupe, 2-door sedan. Deluxe trim model, Continental flathead 6, 4-speed GM-sourced Hydramatic transmission, one high quality repaint in copper, copper colored interior is stated to be original to the car. Upholstery looks ok, but carpet in rear is worn. Headliner very deteriorated, especially where it meets the windshield and door tops. Five-digit odometer reads 44,021. Whitewall tires, full wheel covers, AM radio, clear vinyl cover on front bench seat.

SOLD FOR $14,500

I saw this online a week before the auction and was totally smitten. Seeing it in person did not disappoint. What a rare sight, and this “Club Coupe” is different from the 2-door sedan, as it features a shortened greenhouse and an extended deck lid. Styled by Howard “Dutch” Darrin, as all the ’51 Kaisers were, this must have stood out when new as much as it stands out today. I thought that this one might fly under the radar, but someone really wanted it and paid a price fair to both buyer and seller.


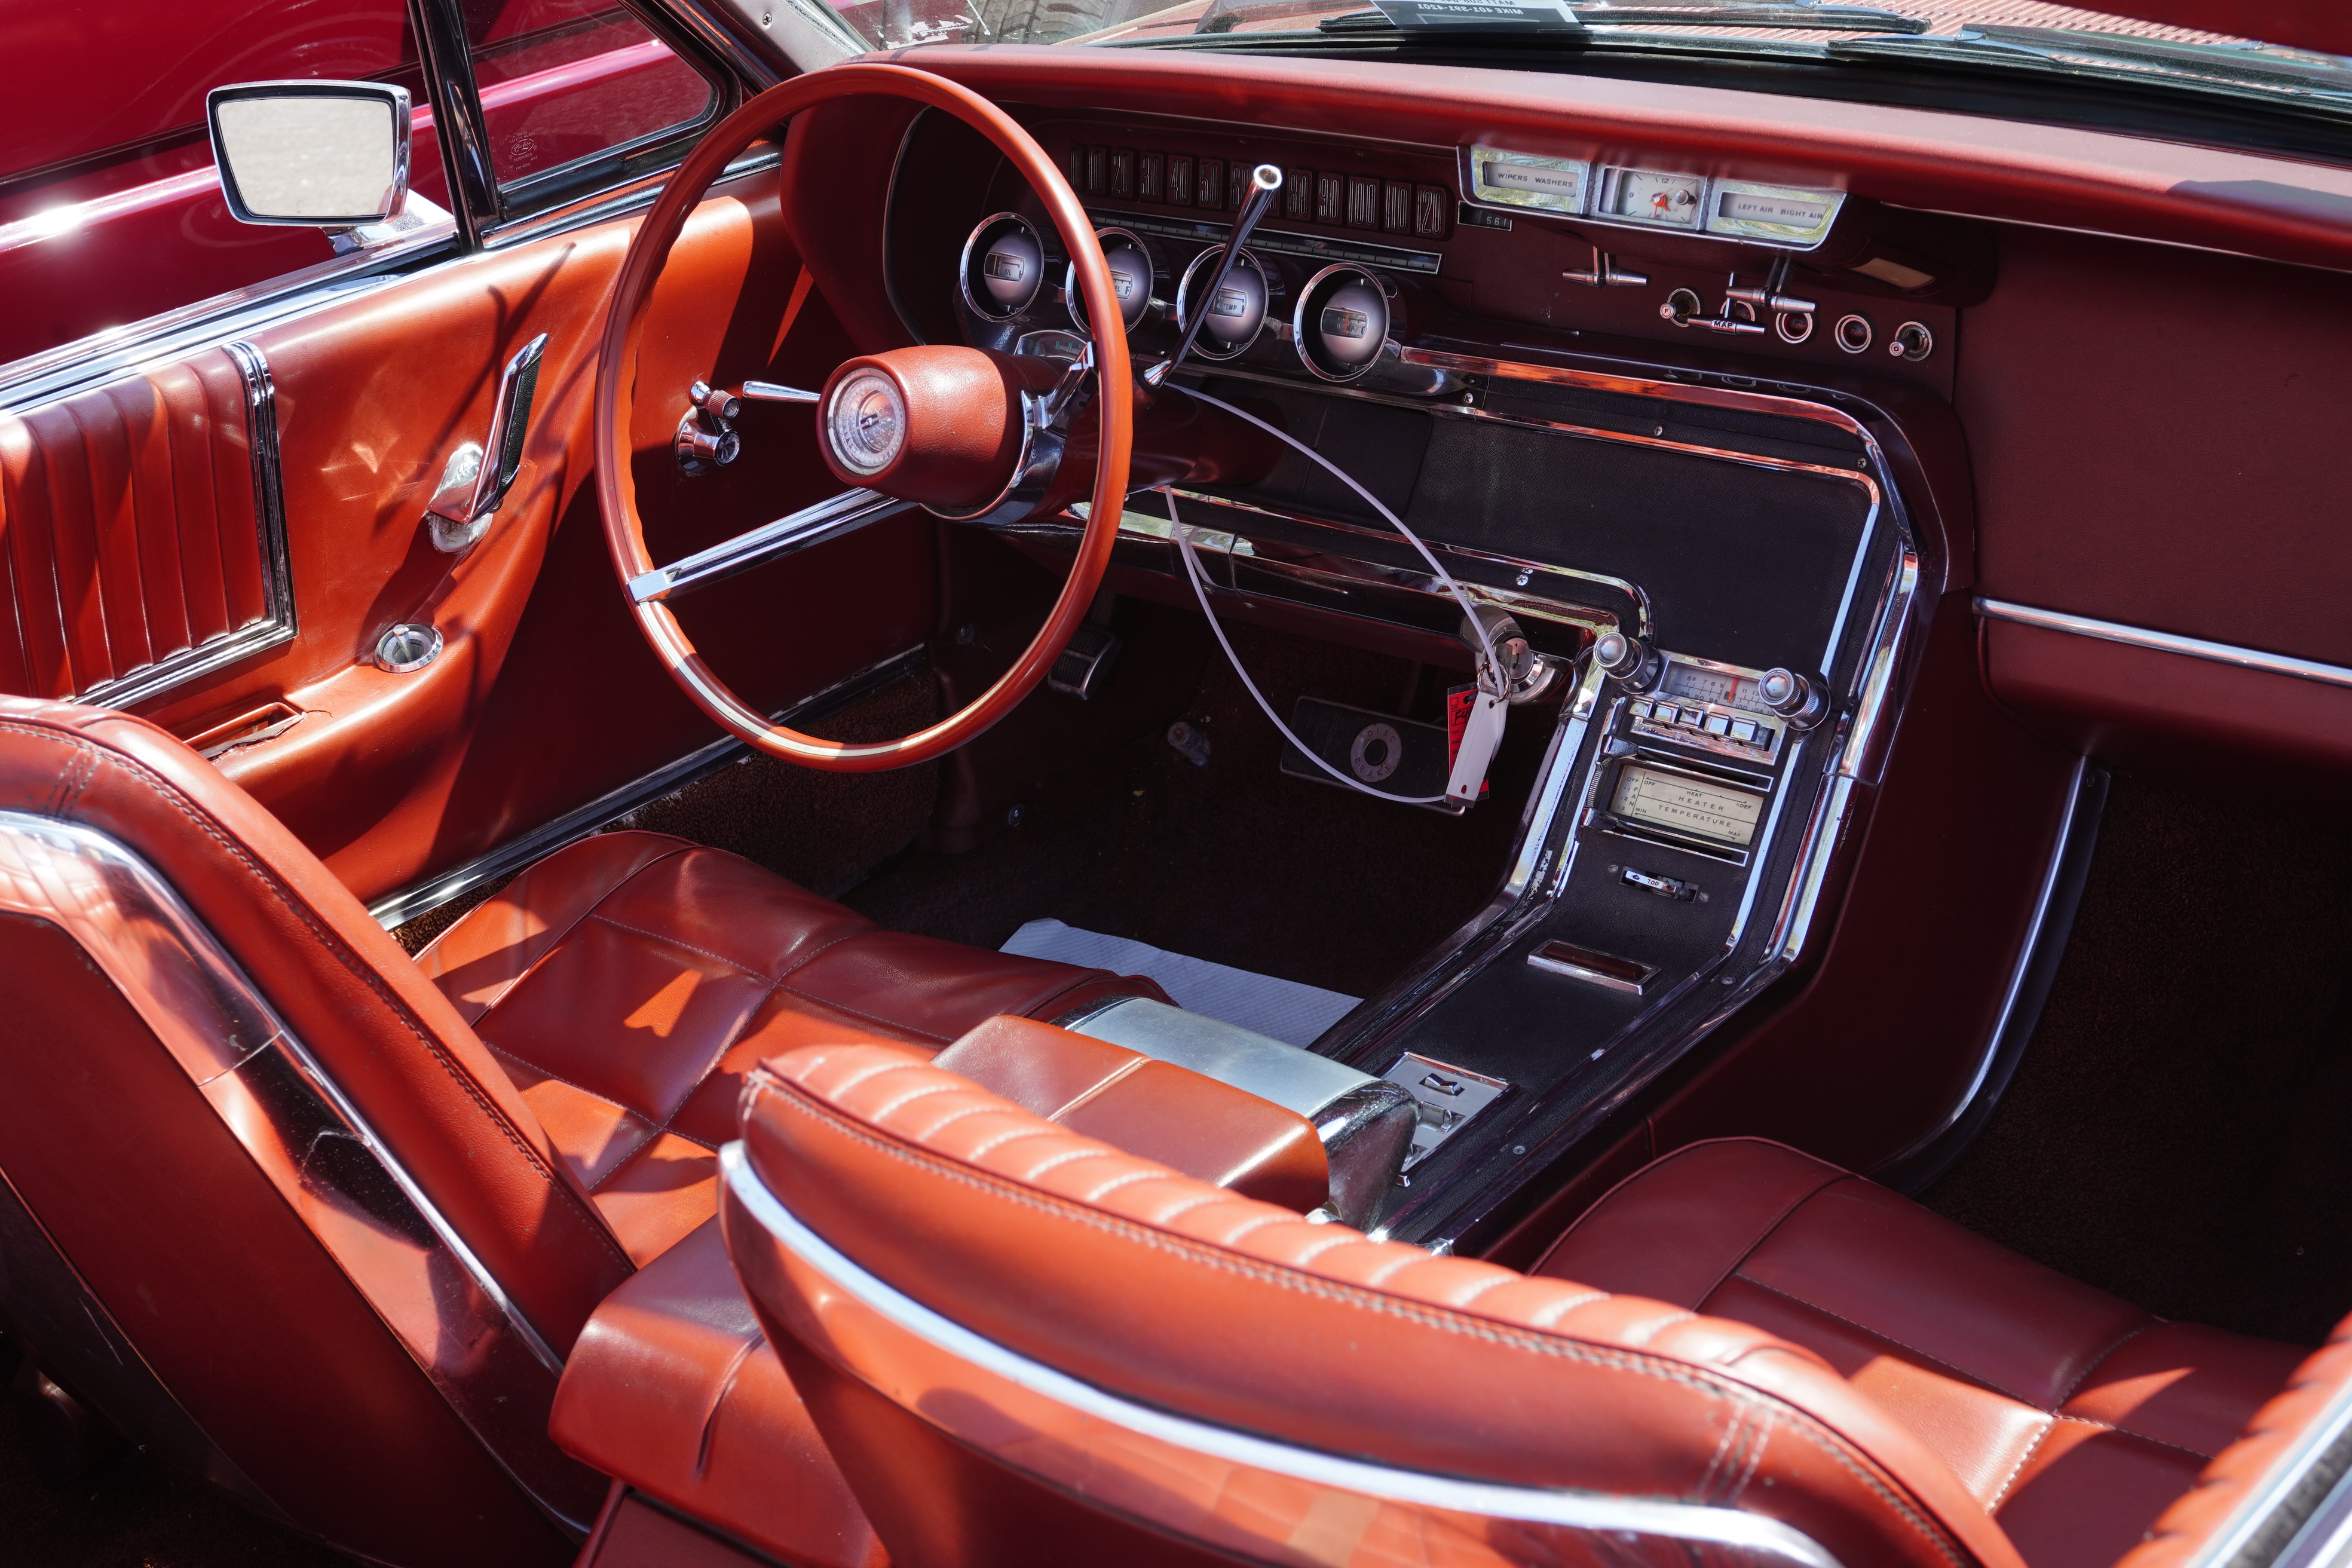
Lot F484, 1966 Ford Thunderbird convertible, emberglo paint, emberglo interior. Full wheel covers, whitewall tires, fender skirts. Sign says 390 V8 and 3-speed auto. I did not note if the car has A/C. Some flaws: paint damage on left side of convertible top cover, filler strip between rear bumper and body completely missing, upholstery damage on driver’s seat and driver’s door panel. Displayed with top down at all times. Online photos show a white convertible top.

SOLD FOR $15,000

The car was declared a “no sale” at $15,000, and 5 minutes after it left the block the auctioneer announced “we sold the Thunderbird”. Carlisle’s website confirms the $15,000 number. I am a sucker for emberglo, which was a one-year-only color for Ford. Even with the flaws, that wrap-around back seat is a killer look. Drive it and fix it as you go.


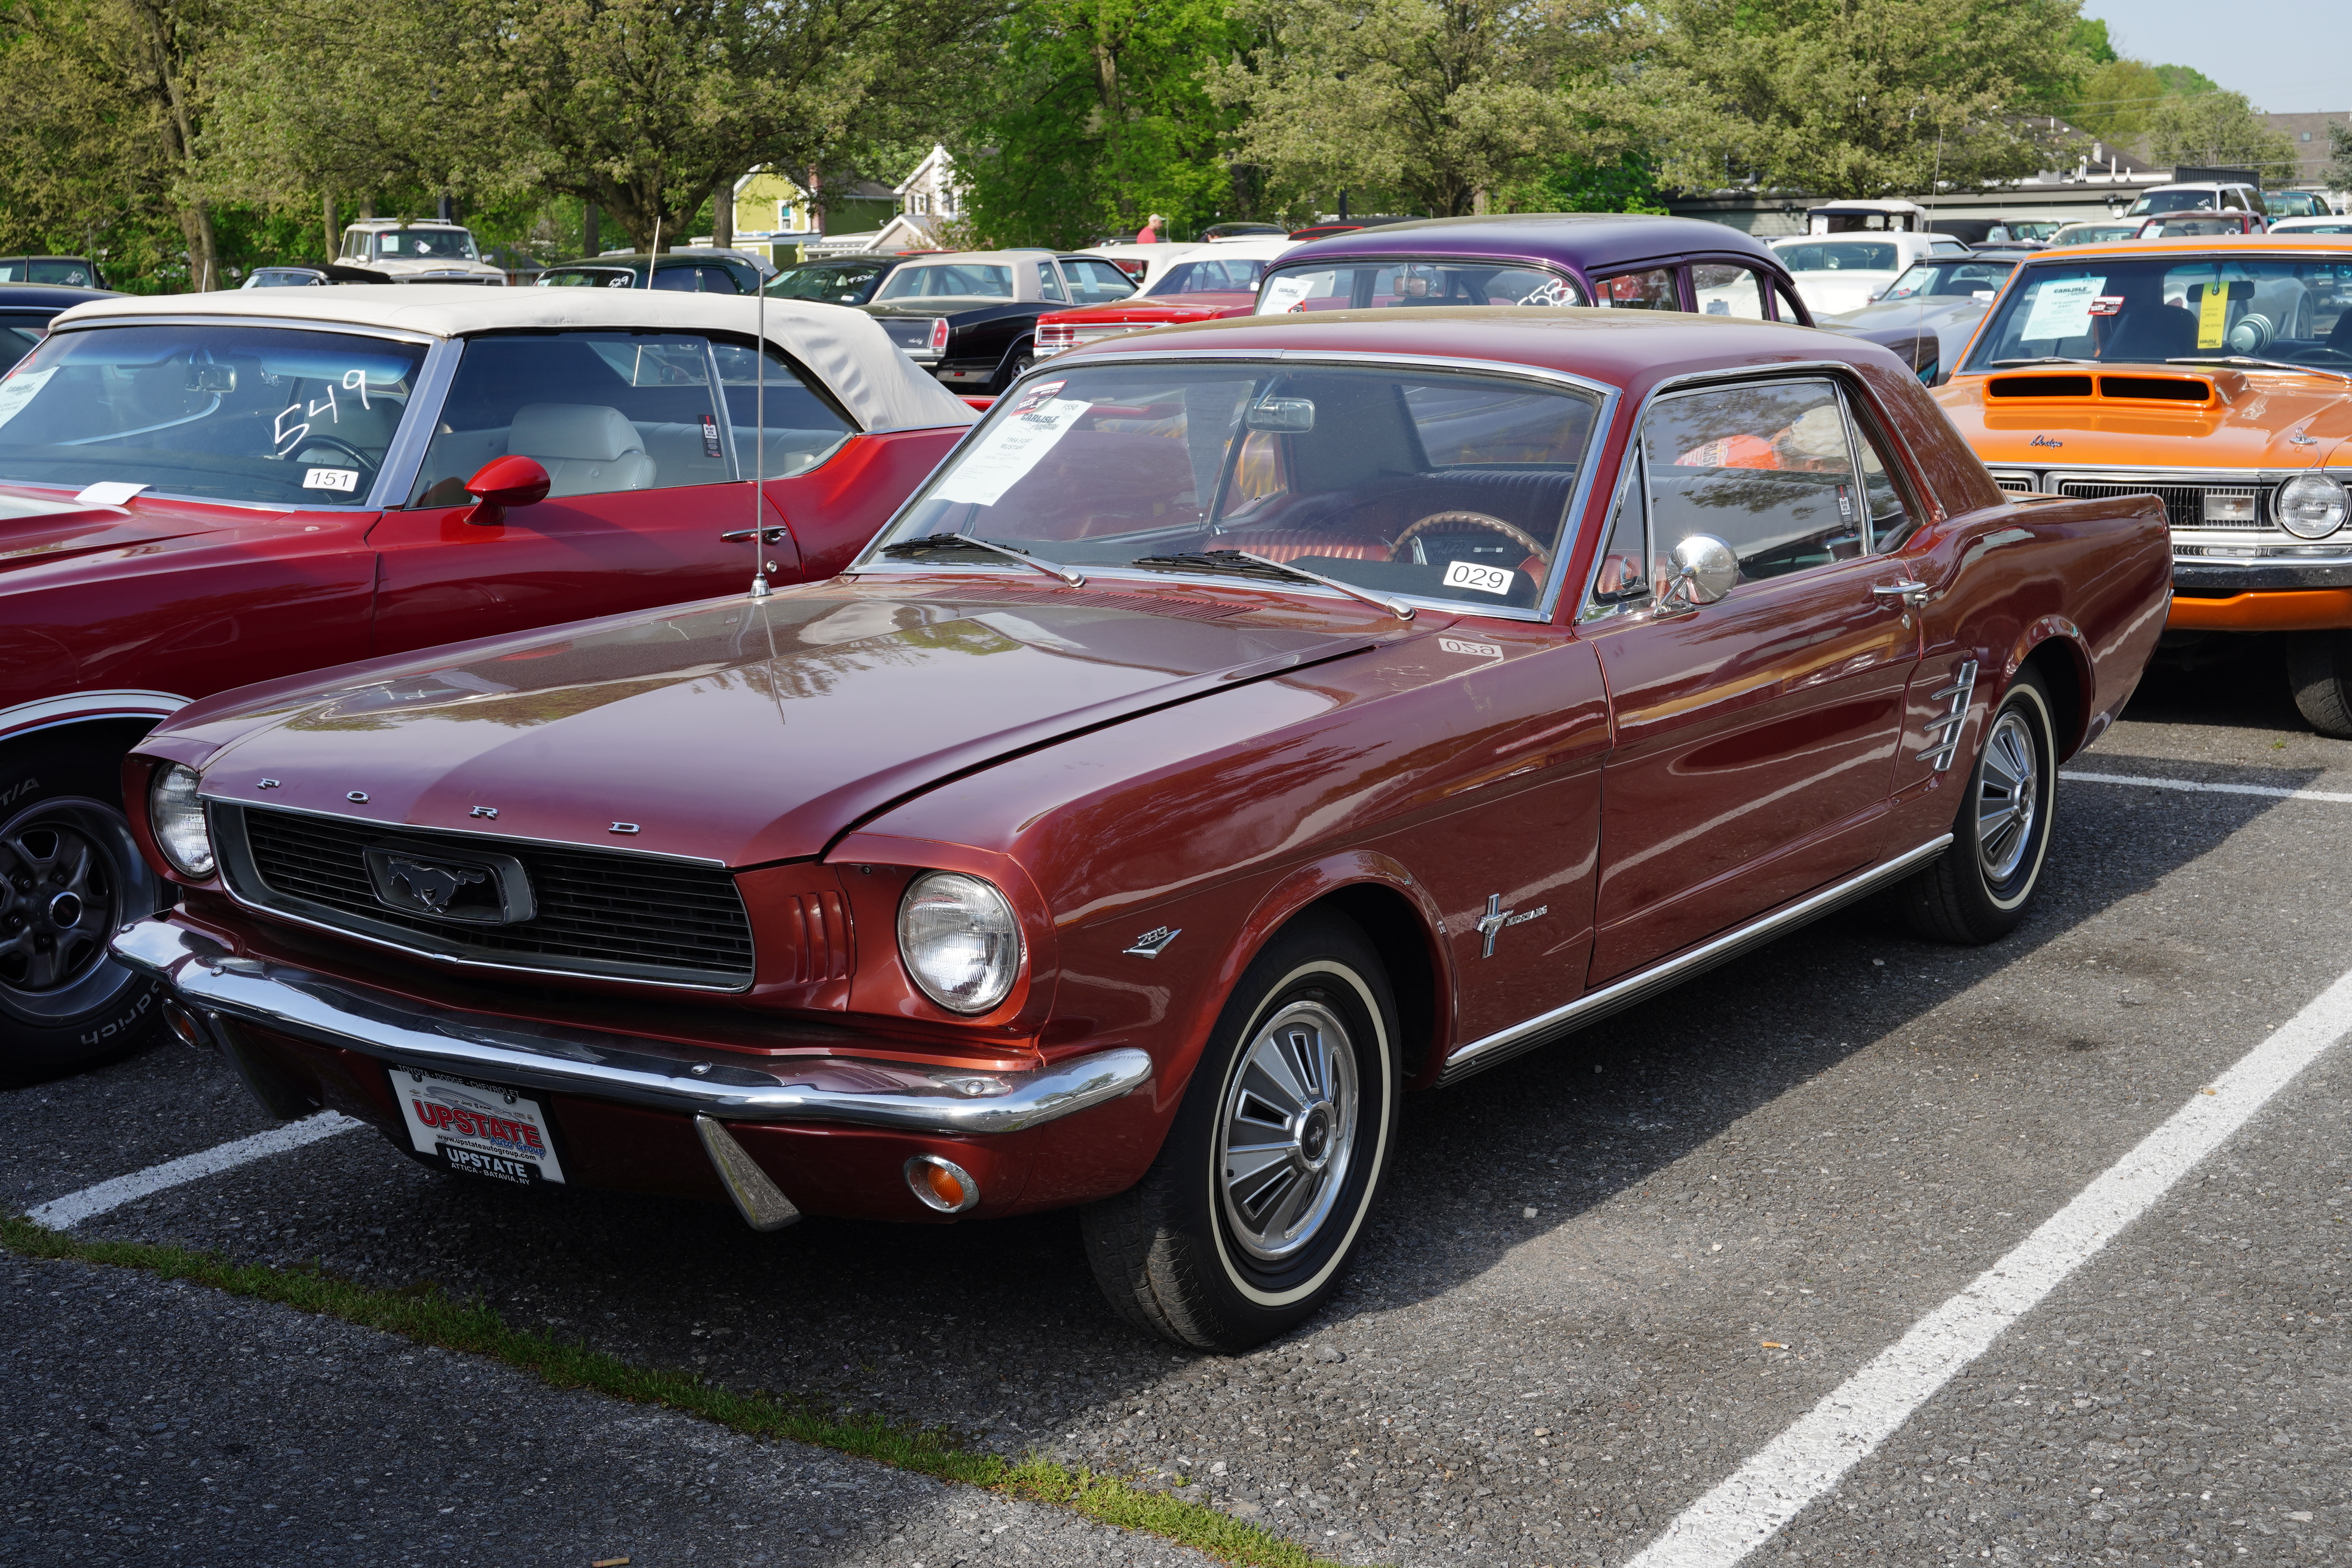
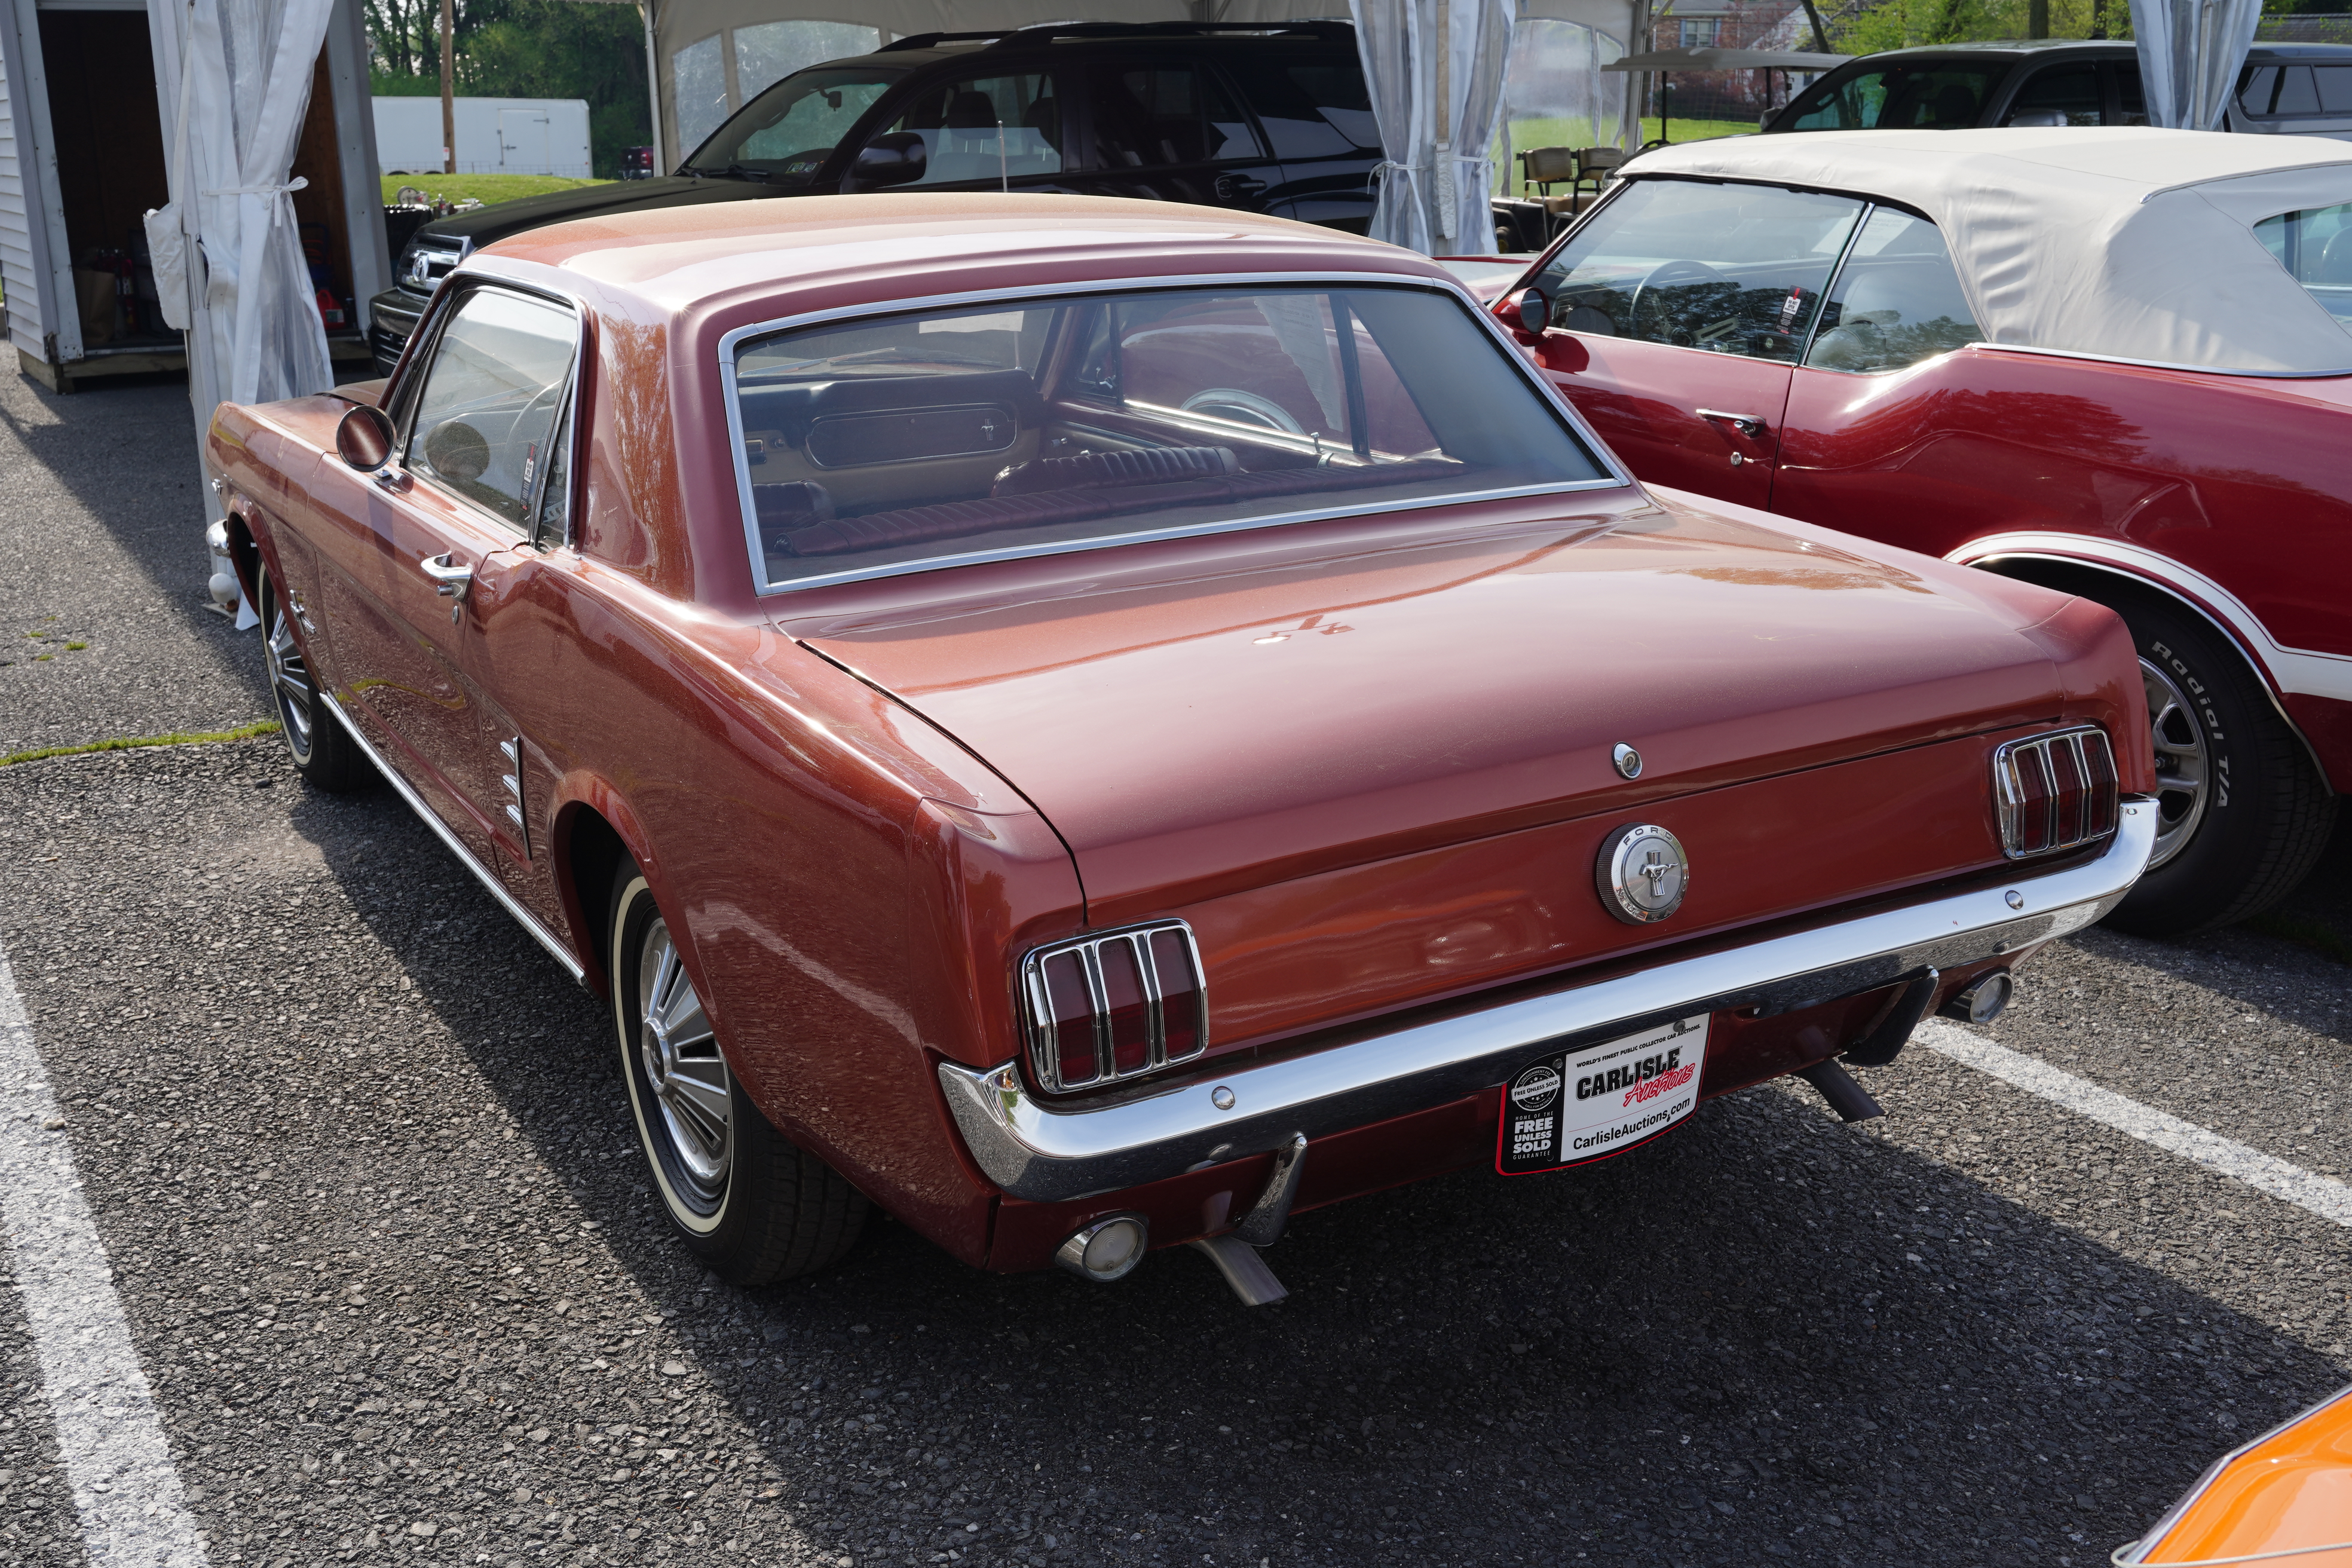
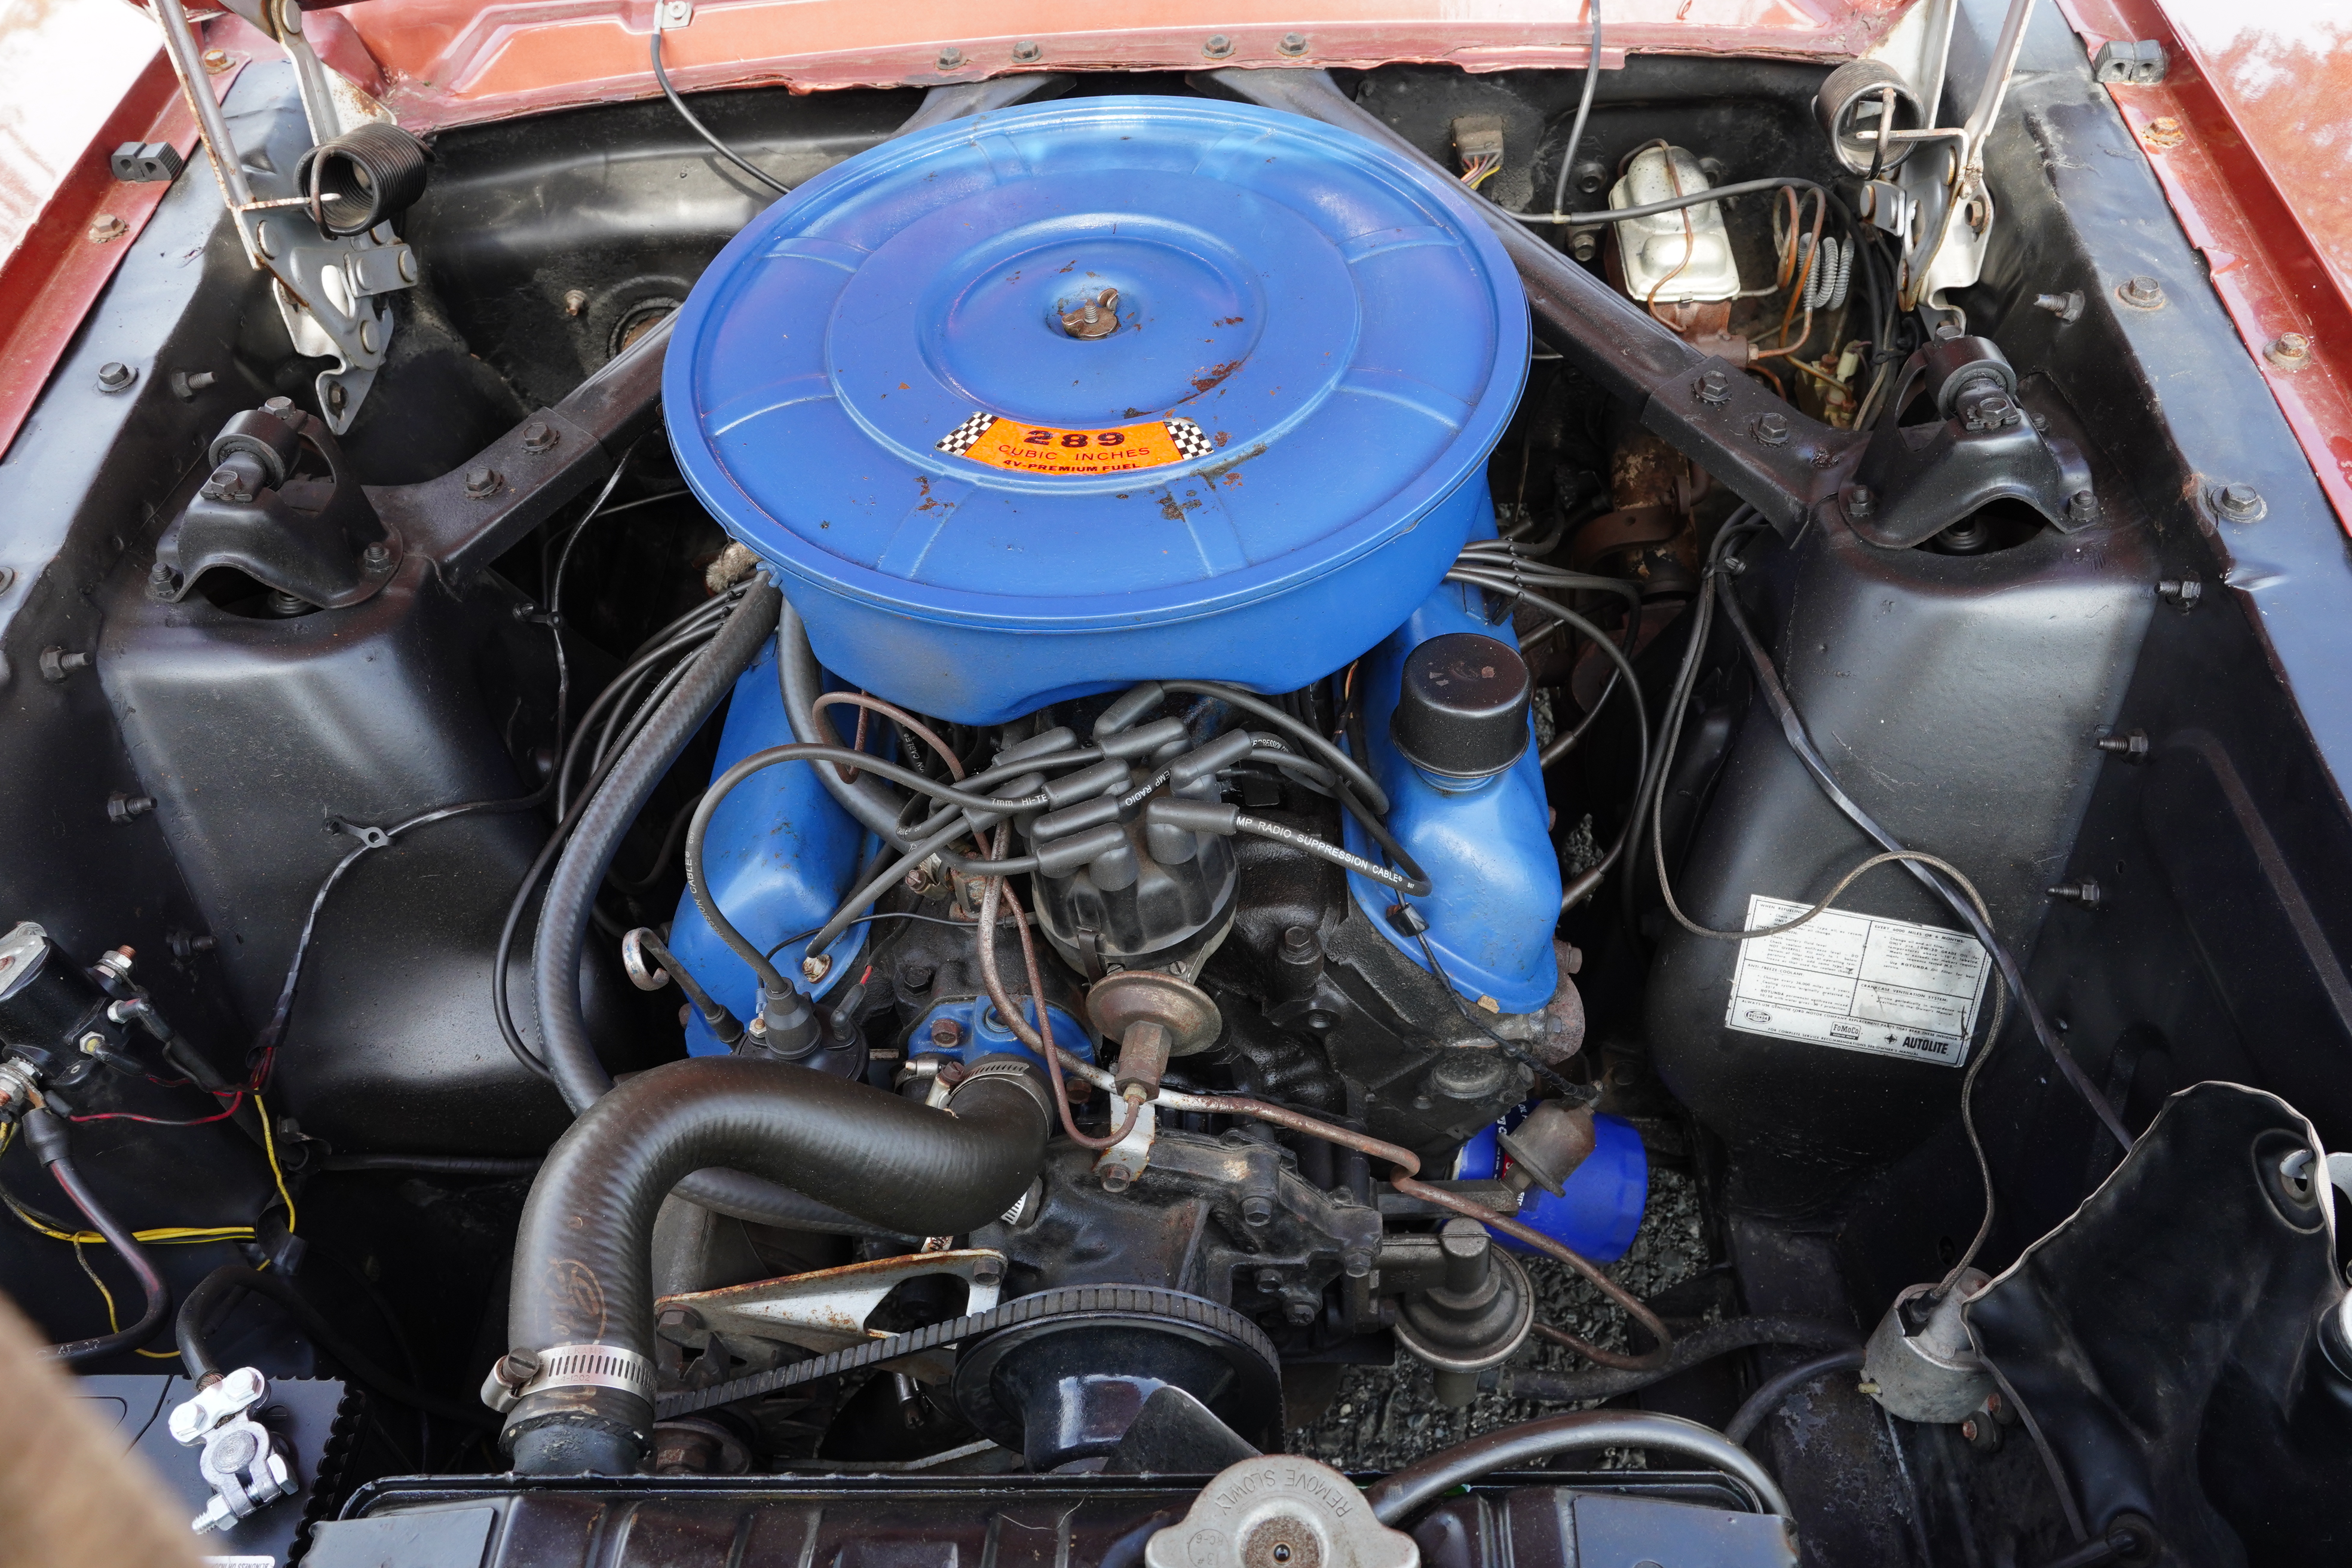
Lot F550, 1966 Ford Mustang hardtop, emberglo, emberglo/parchment pony interior. Mustang wheel covers, whitewall tires, dual exhaust. Odometer reads 51,753. Engine is “A code” 289 4-barrel, with 3-speed manual gearbox. Manual steering and brakes. Woodrim steering wheel missing a big chunk.

SOLD FOR $17,000

Was bid on the block to a $16,000 no-sale; website indicates sale price, so it sold after. One of the oddest combination of options I’ve seen on a Mustang. Basically, the A code engine is the only option. The interior trim code indicates “emberglo” but there is another trim code for “emberglo/parchment” so I suspect the pony interior was added after. Like the ’66 T-Bird, I really like this one-year-only color.


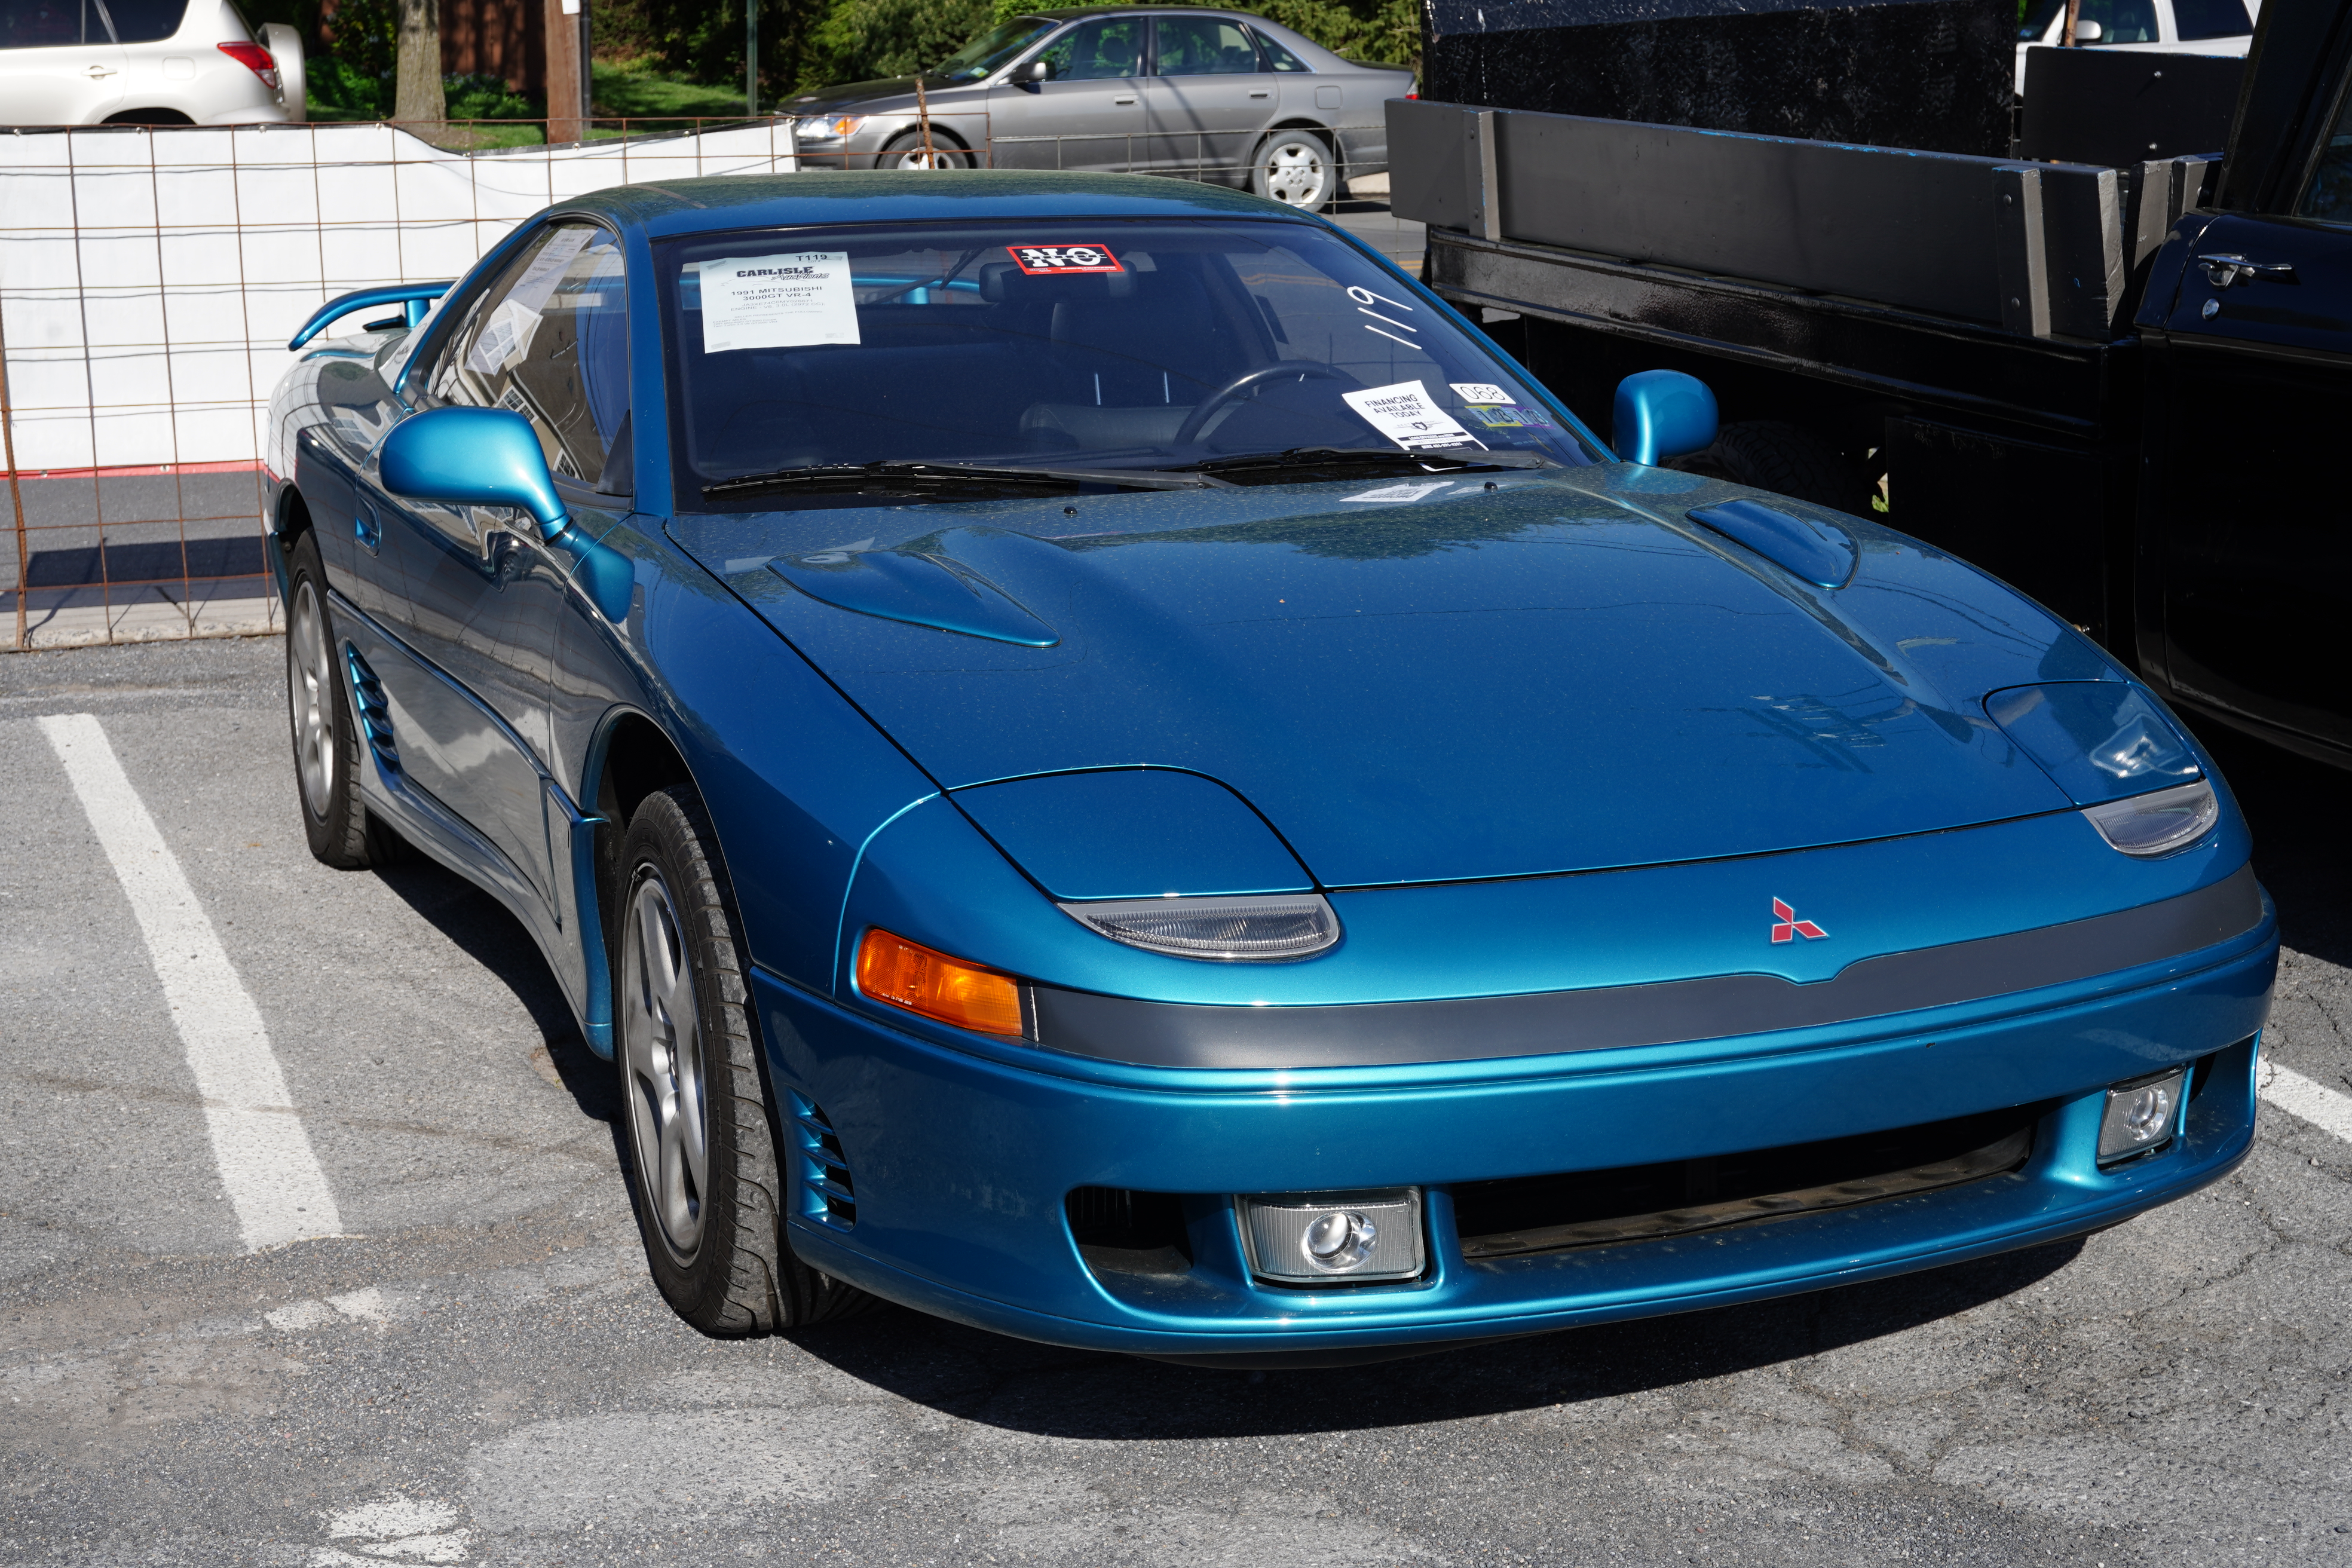
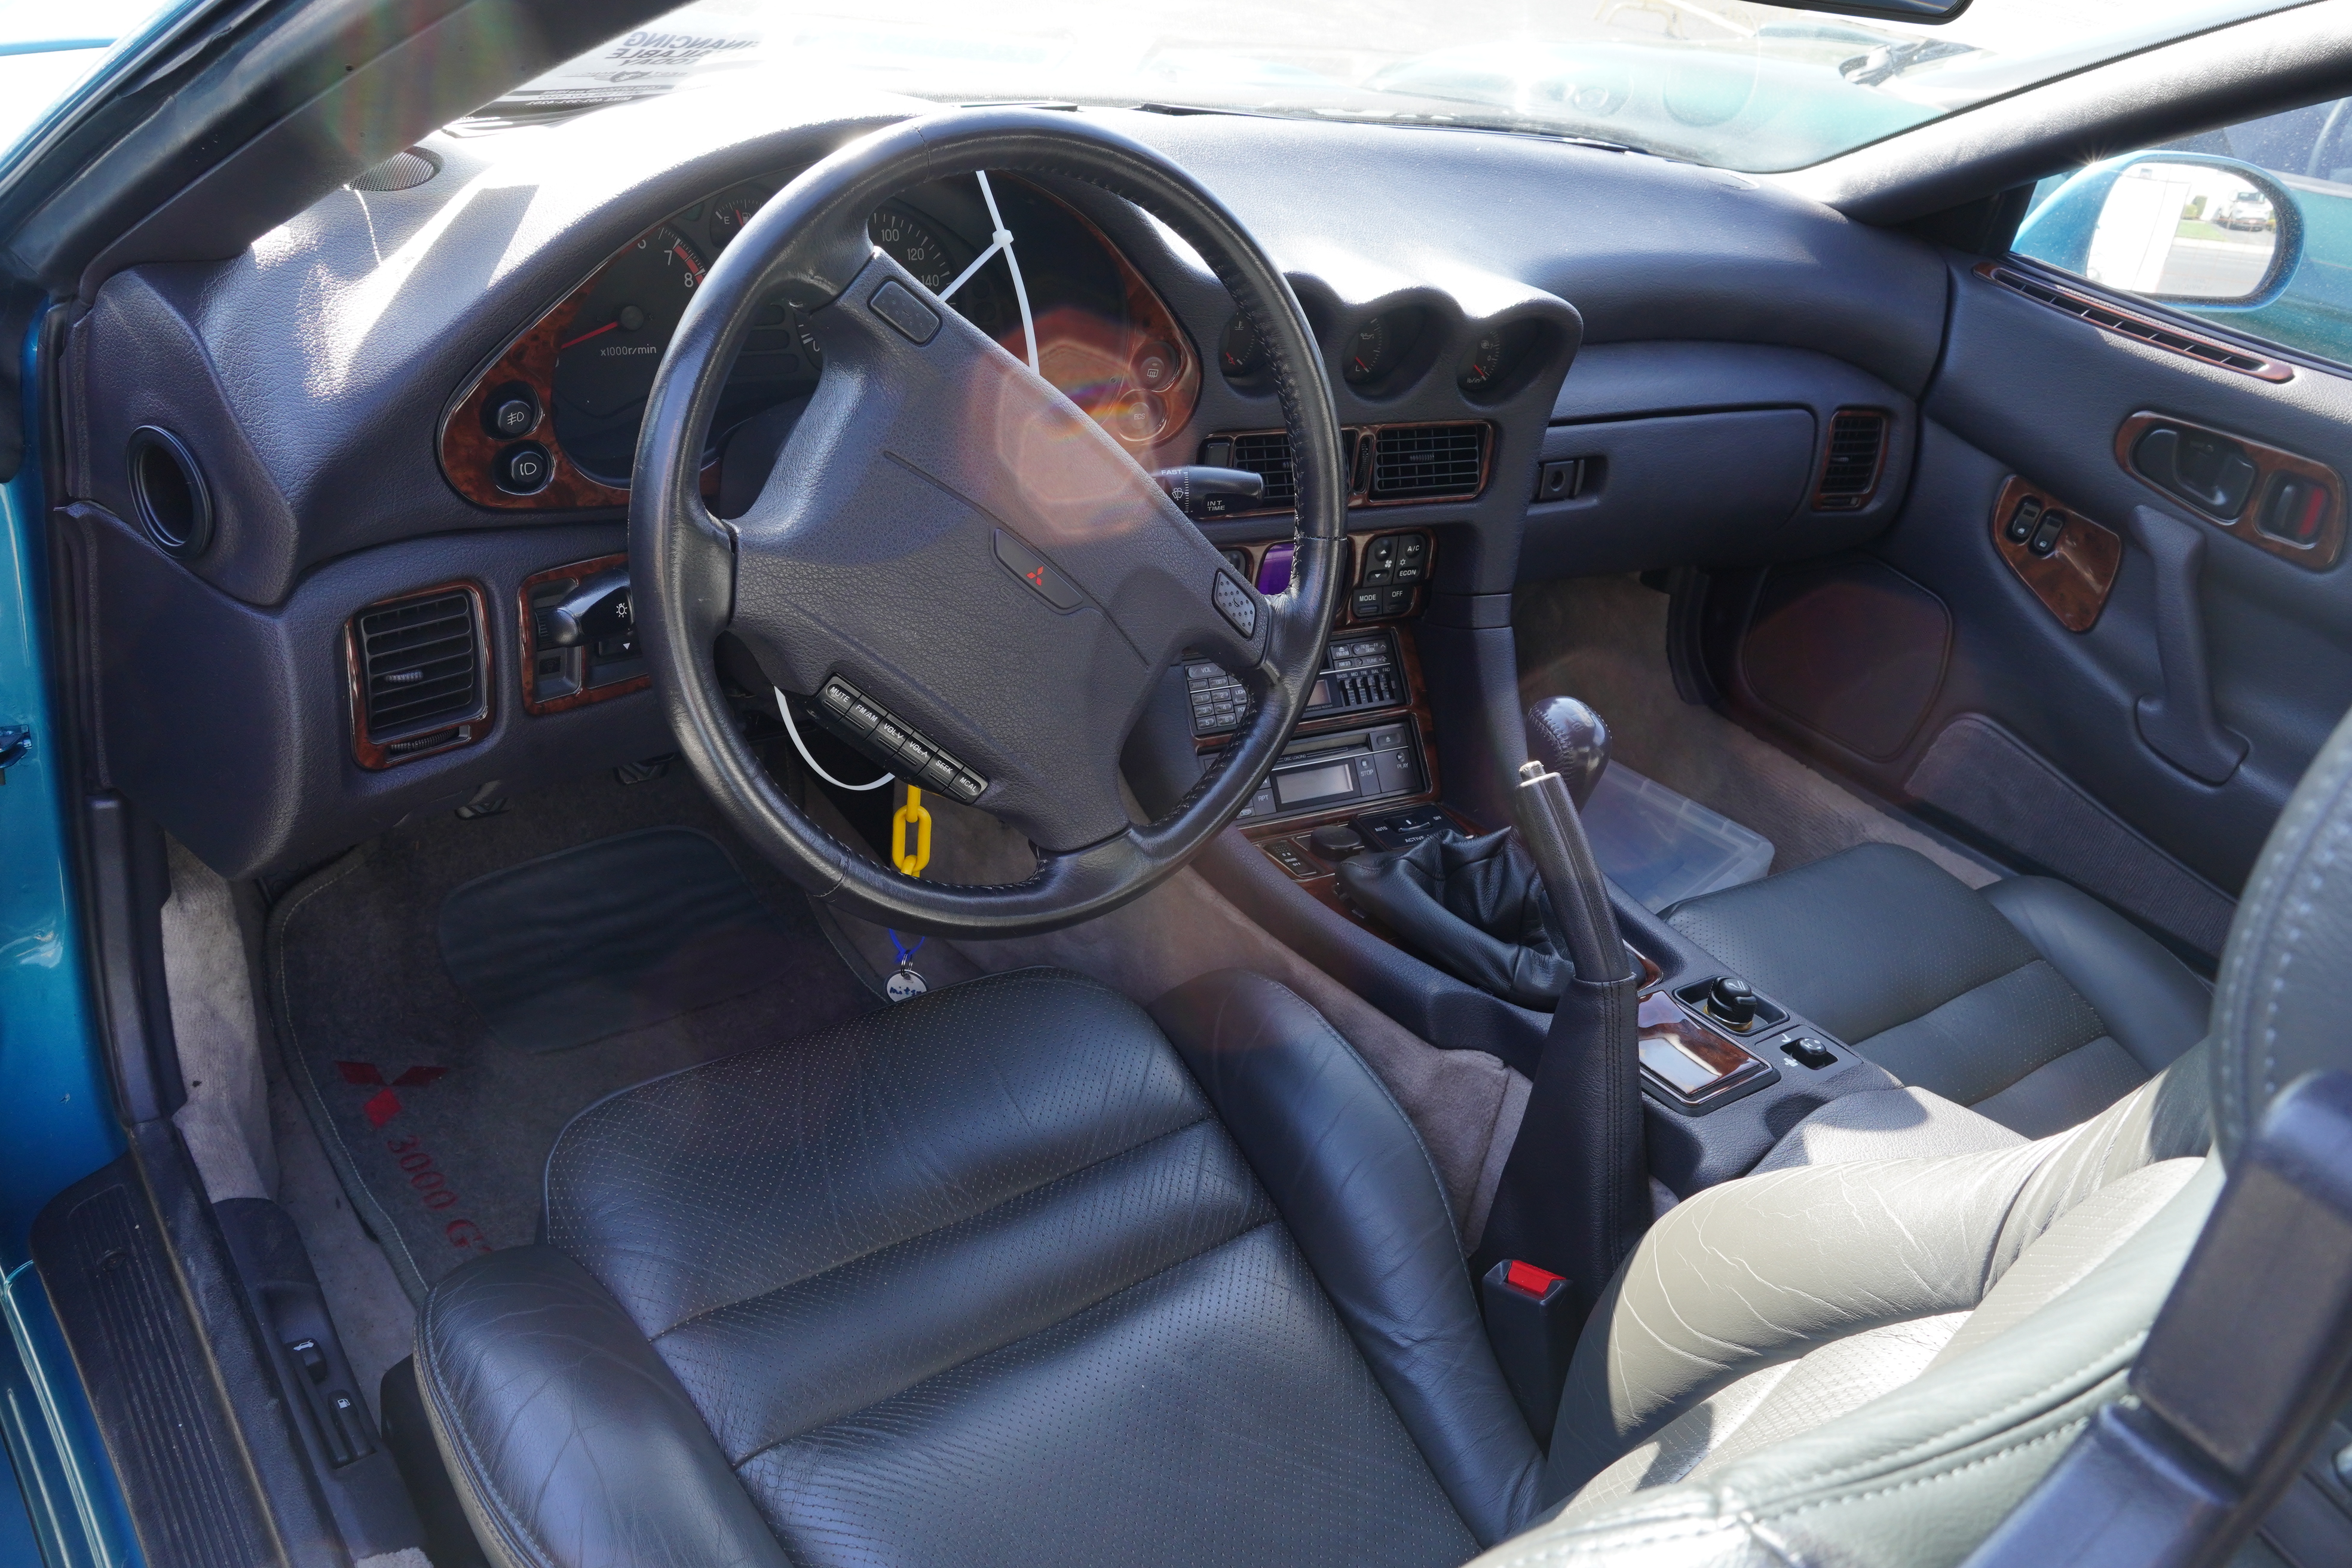
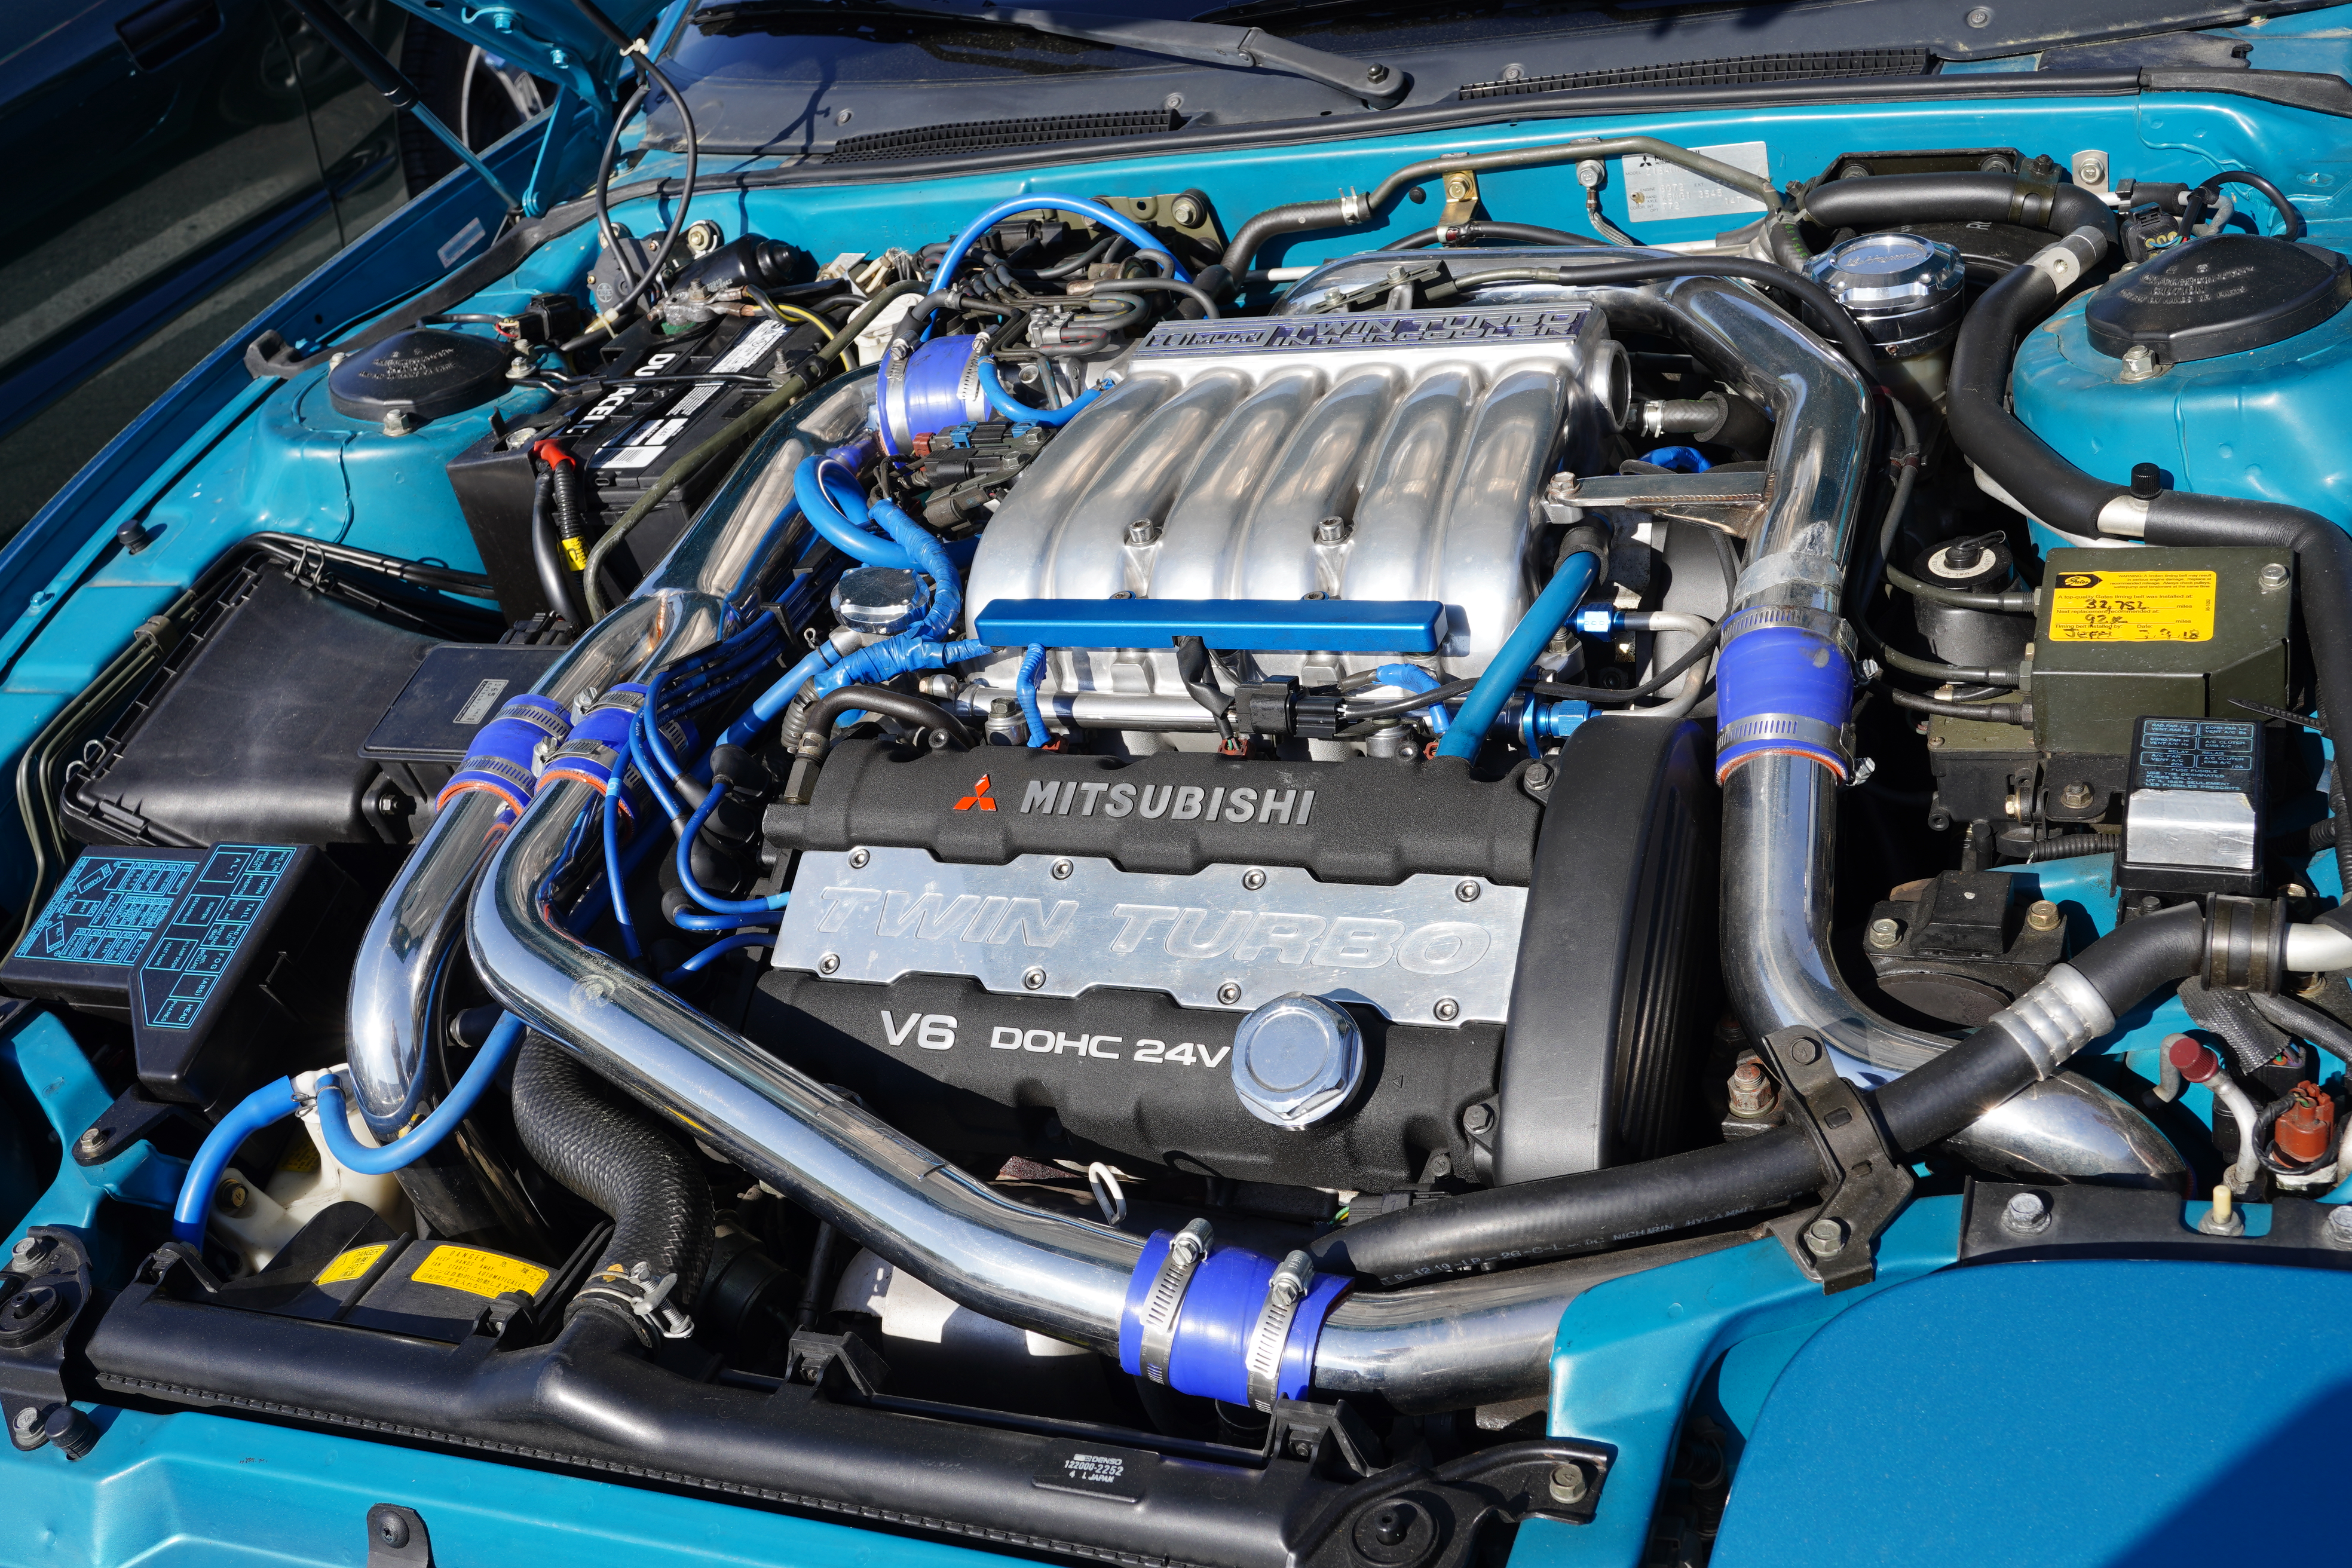
Lot T119, 1991 Mitsubishi 3000GT VR-4, 2-door coupe, turquoise, grey leather interior, 3.0L V6 mounted transversely, AWD, 5-speed manual, 6-digit odometer reads 034434, underhood shows aftermarket hoses and pipes, giving modded “boy racer” vibe, exterior undamaged but not clean, interior the same. Clutch pedal was one of the stiffest I have ever tried, my left leg would be worn out in 5 minutes of city driving.

SOLD FOR $23,250

This was the first big sale of the day, and the bidding action was frantic. I presume that some of the value was driven by the low mileage, but the entire car will need a serious detailing before it can be resold.


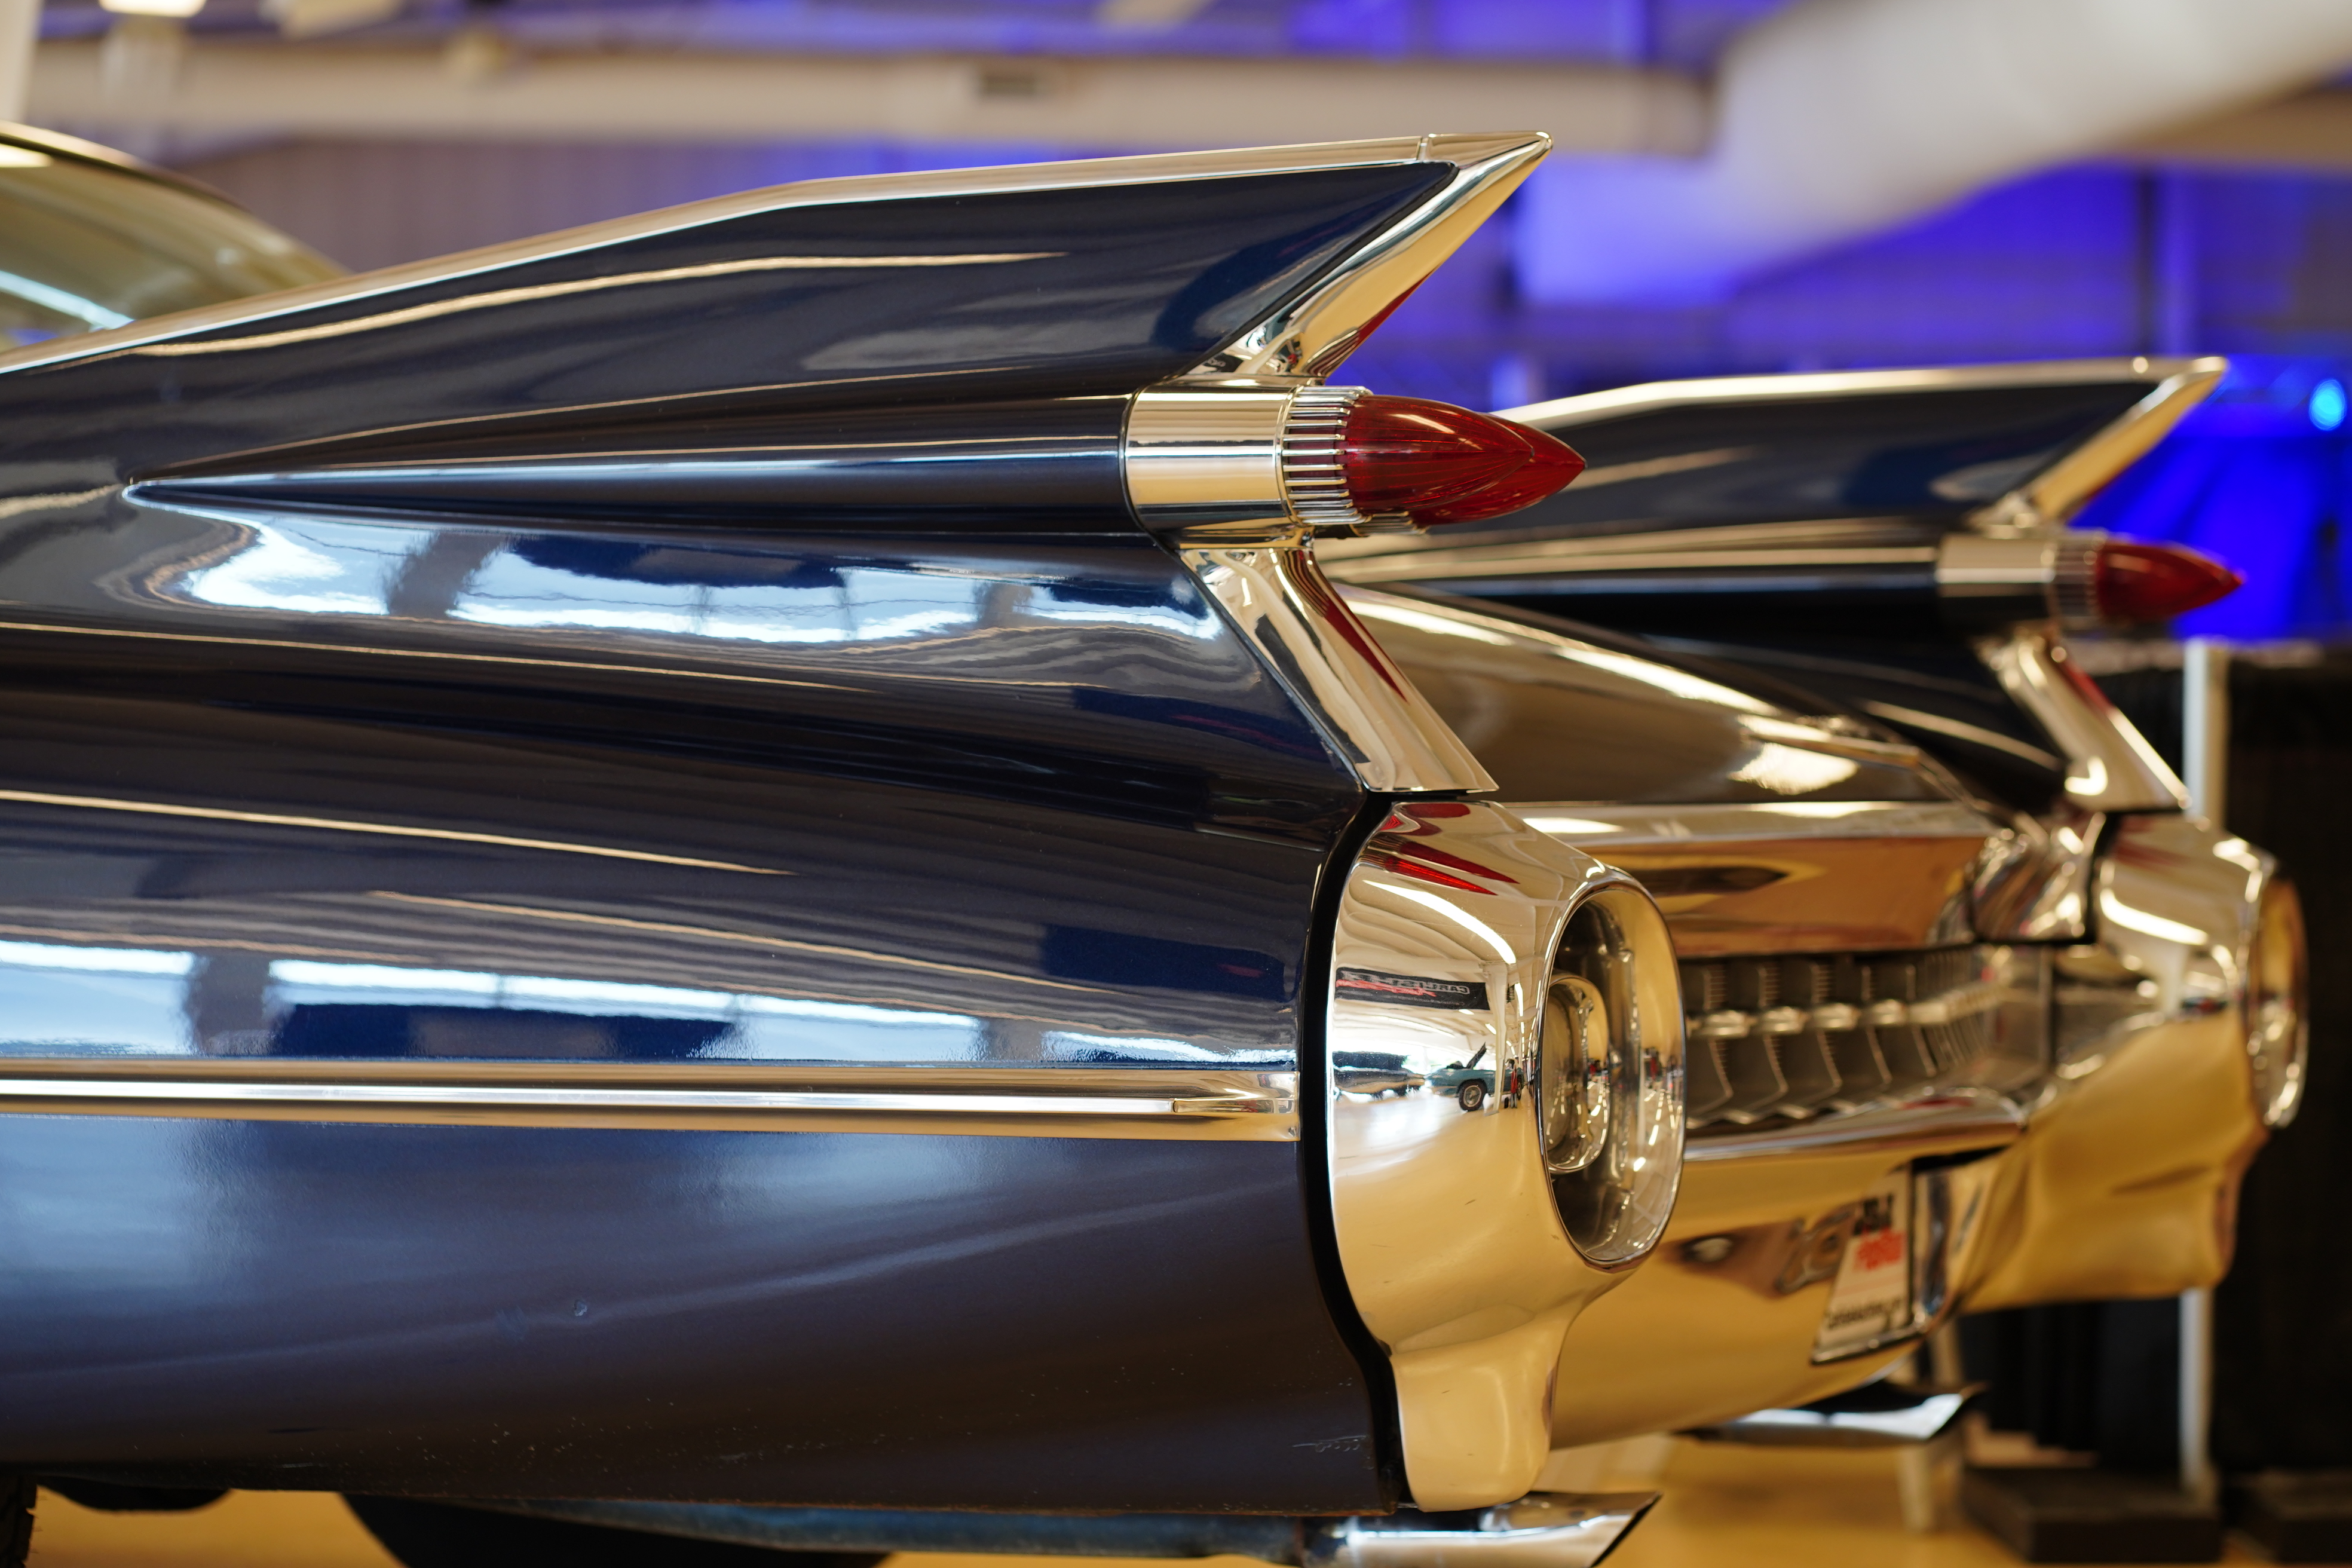
Lot 546.1, 1959 Cadillac Sedan de Ville, 4-door hardtop, dark blue, blue and grey interior. Full wheel covers, whitewall tires. Write-up claims California car, factory A/C, 57,000 miles.

SOLD FOR $38,000

Most cars which cross the block at Carlisle are up there for less than two minutes. The auctioneers are consistently able to run 30-35 cars an hour. Sometimes, though, they let the bidding linger, which is what happened with this Caddy. Bidding stalled at around $36,000, but they didn’t close the lot. Instead, I saw the owner up there, as he was pressured by a ringleader to lower his reserve. After about 4 minutes of this, he got a disgusted look on his face, and the auctioneer intoned “the reserve is off!” Two bids later, it hammered for $38k. The paint on this car was stunning. There is nothing more I can say about these fins that hasn’t already been said. Let’s hope the new owner has a large garage.


CARS WHICH DID NOT MEET RESERVE:


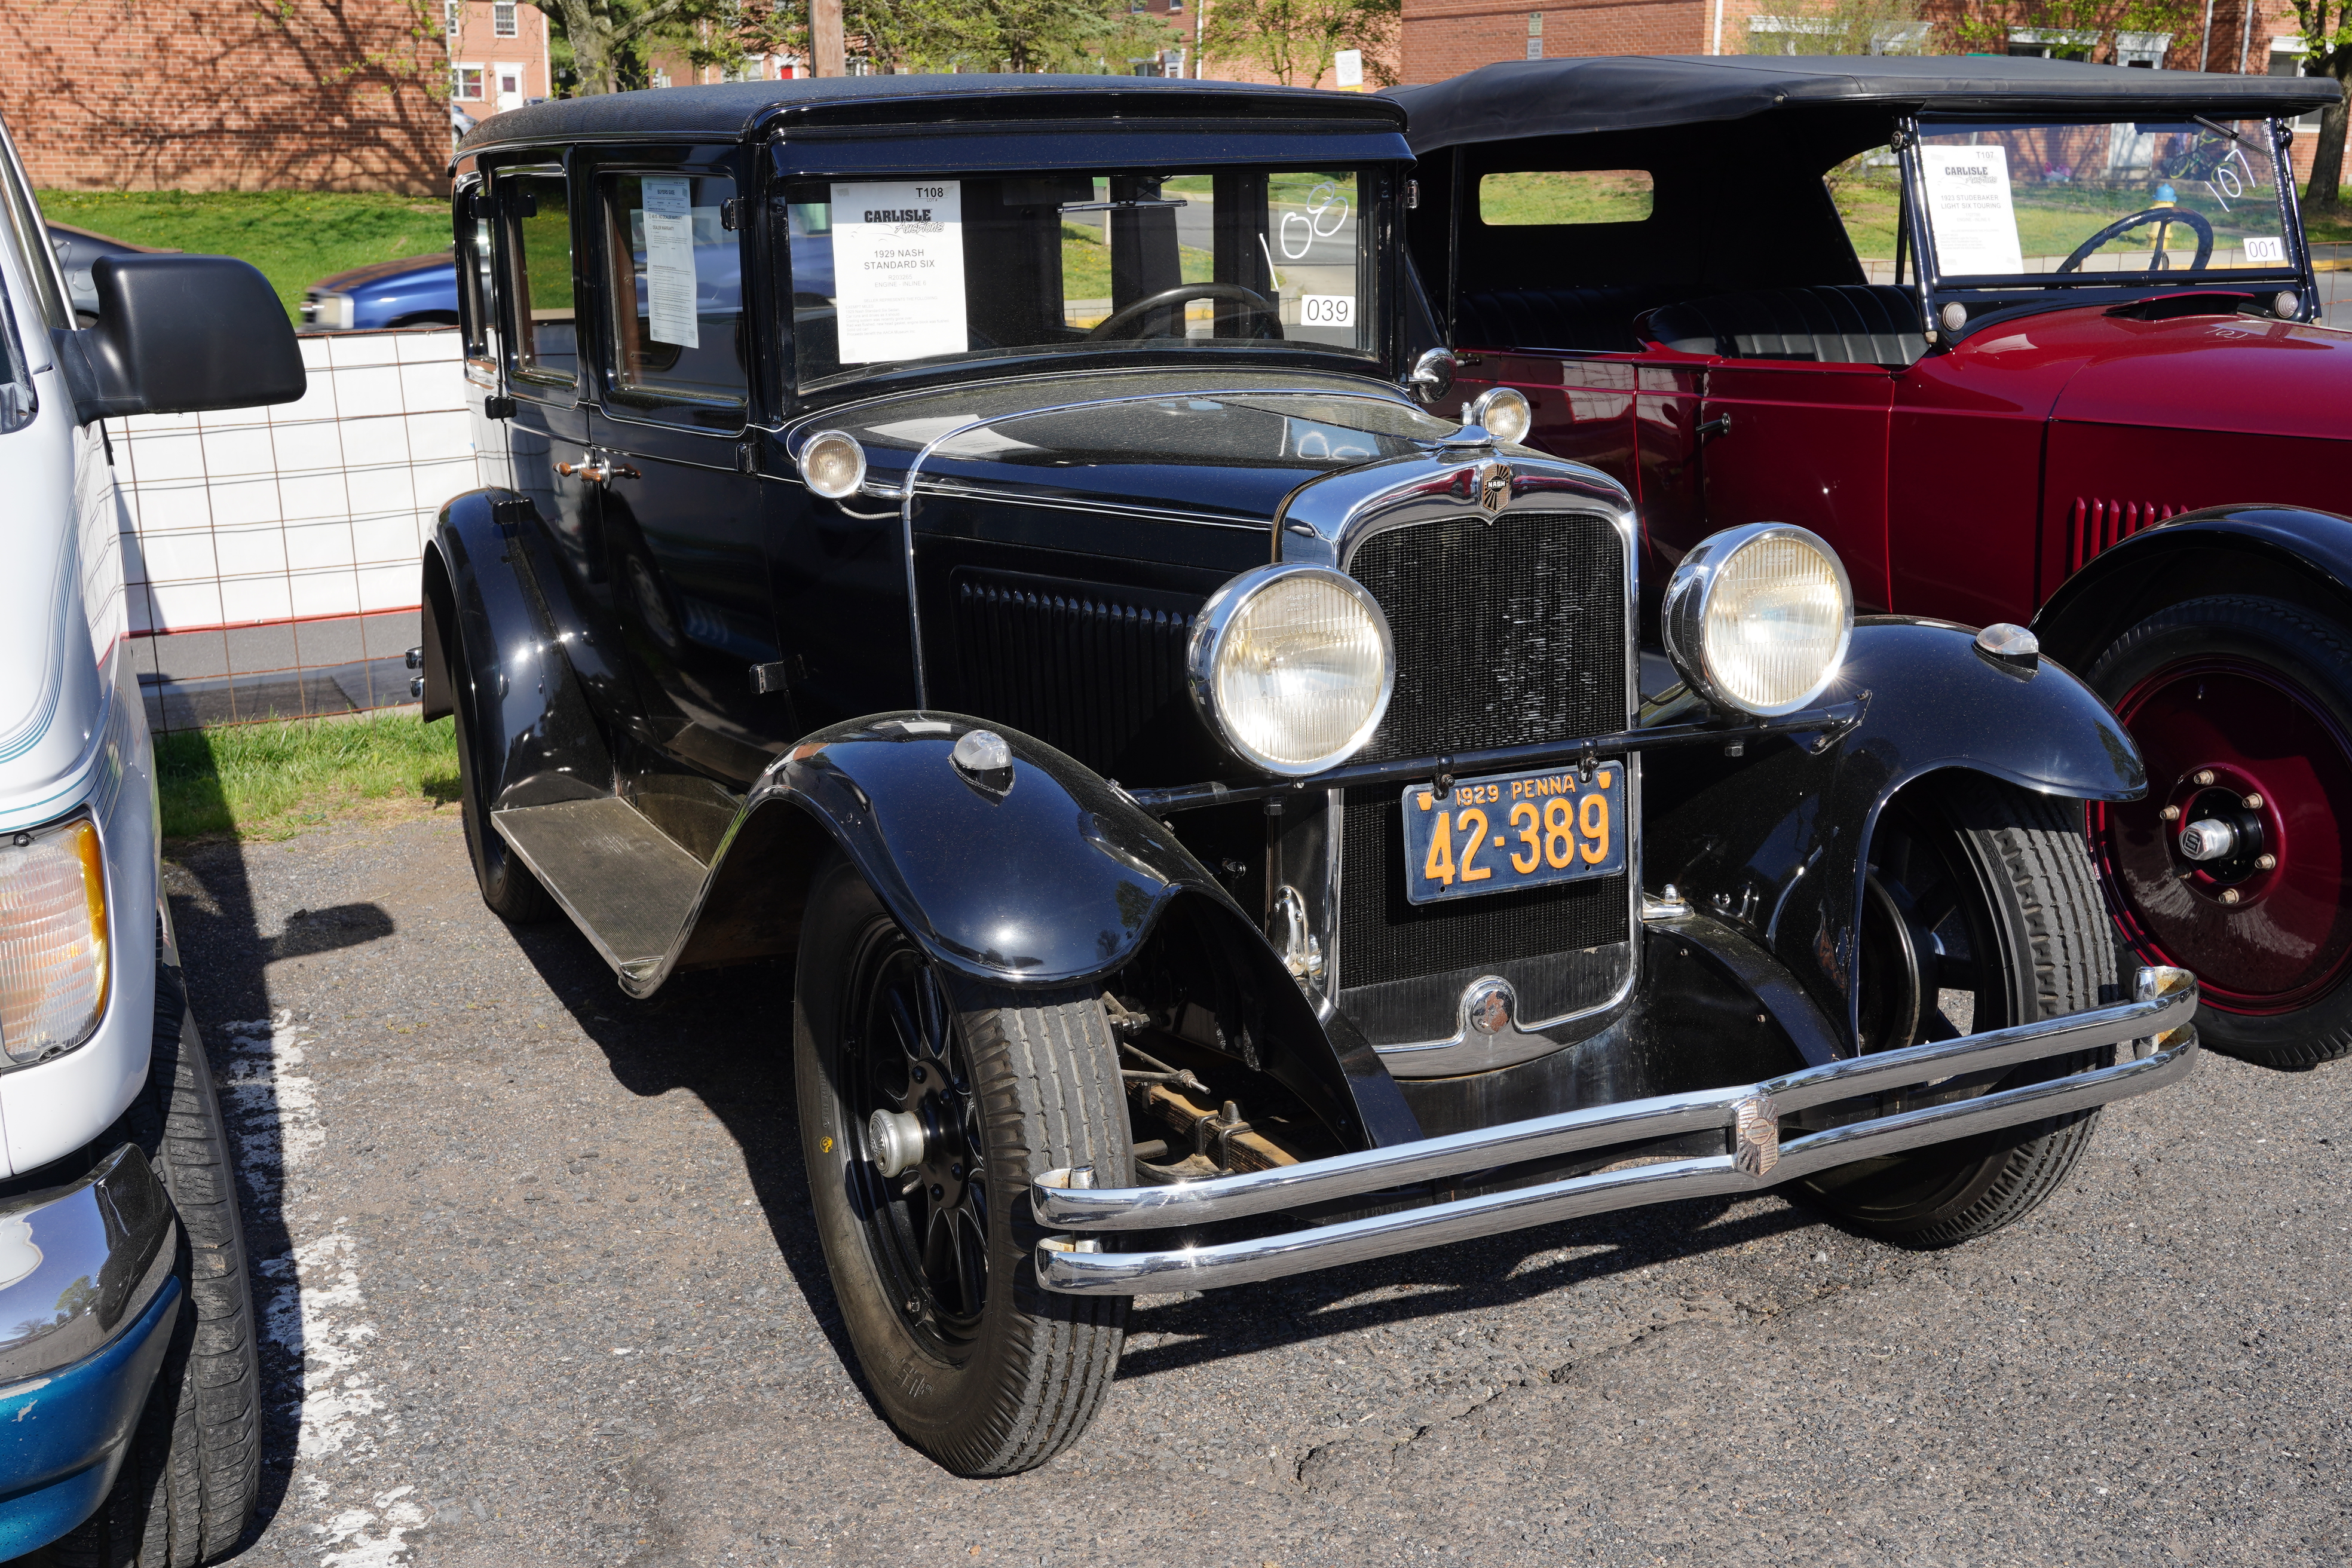
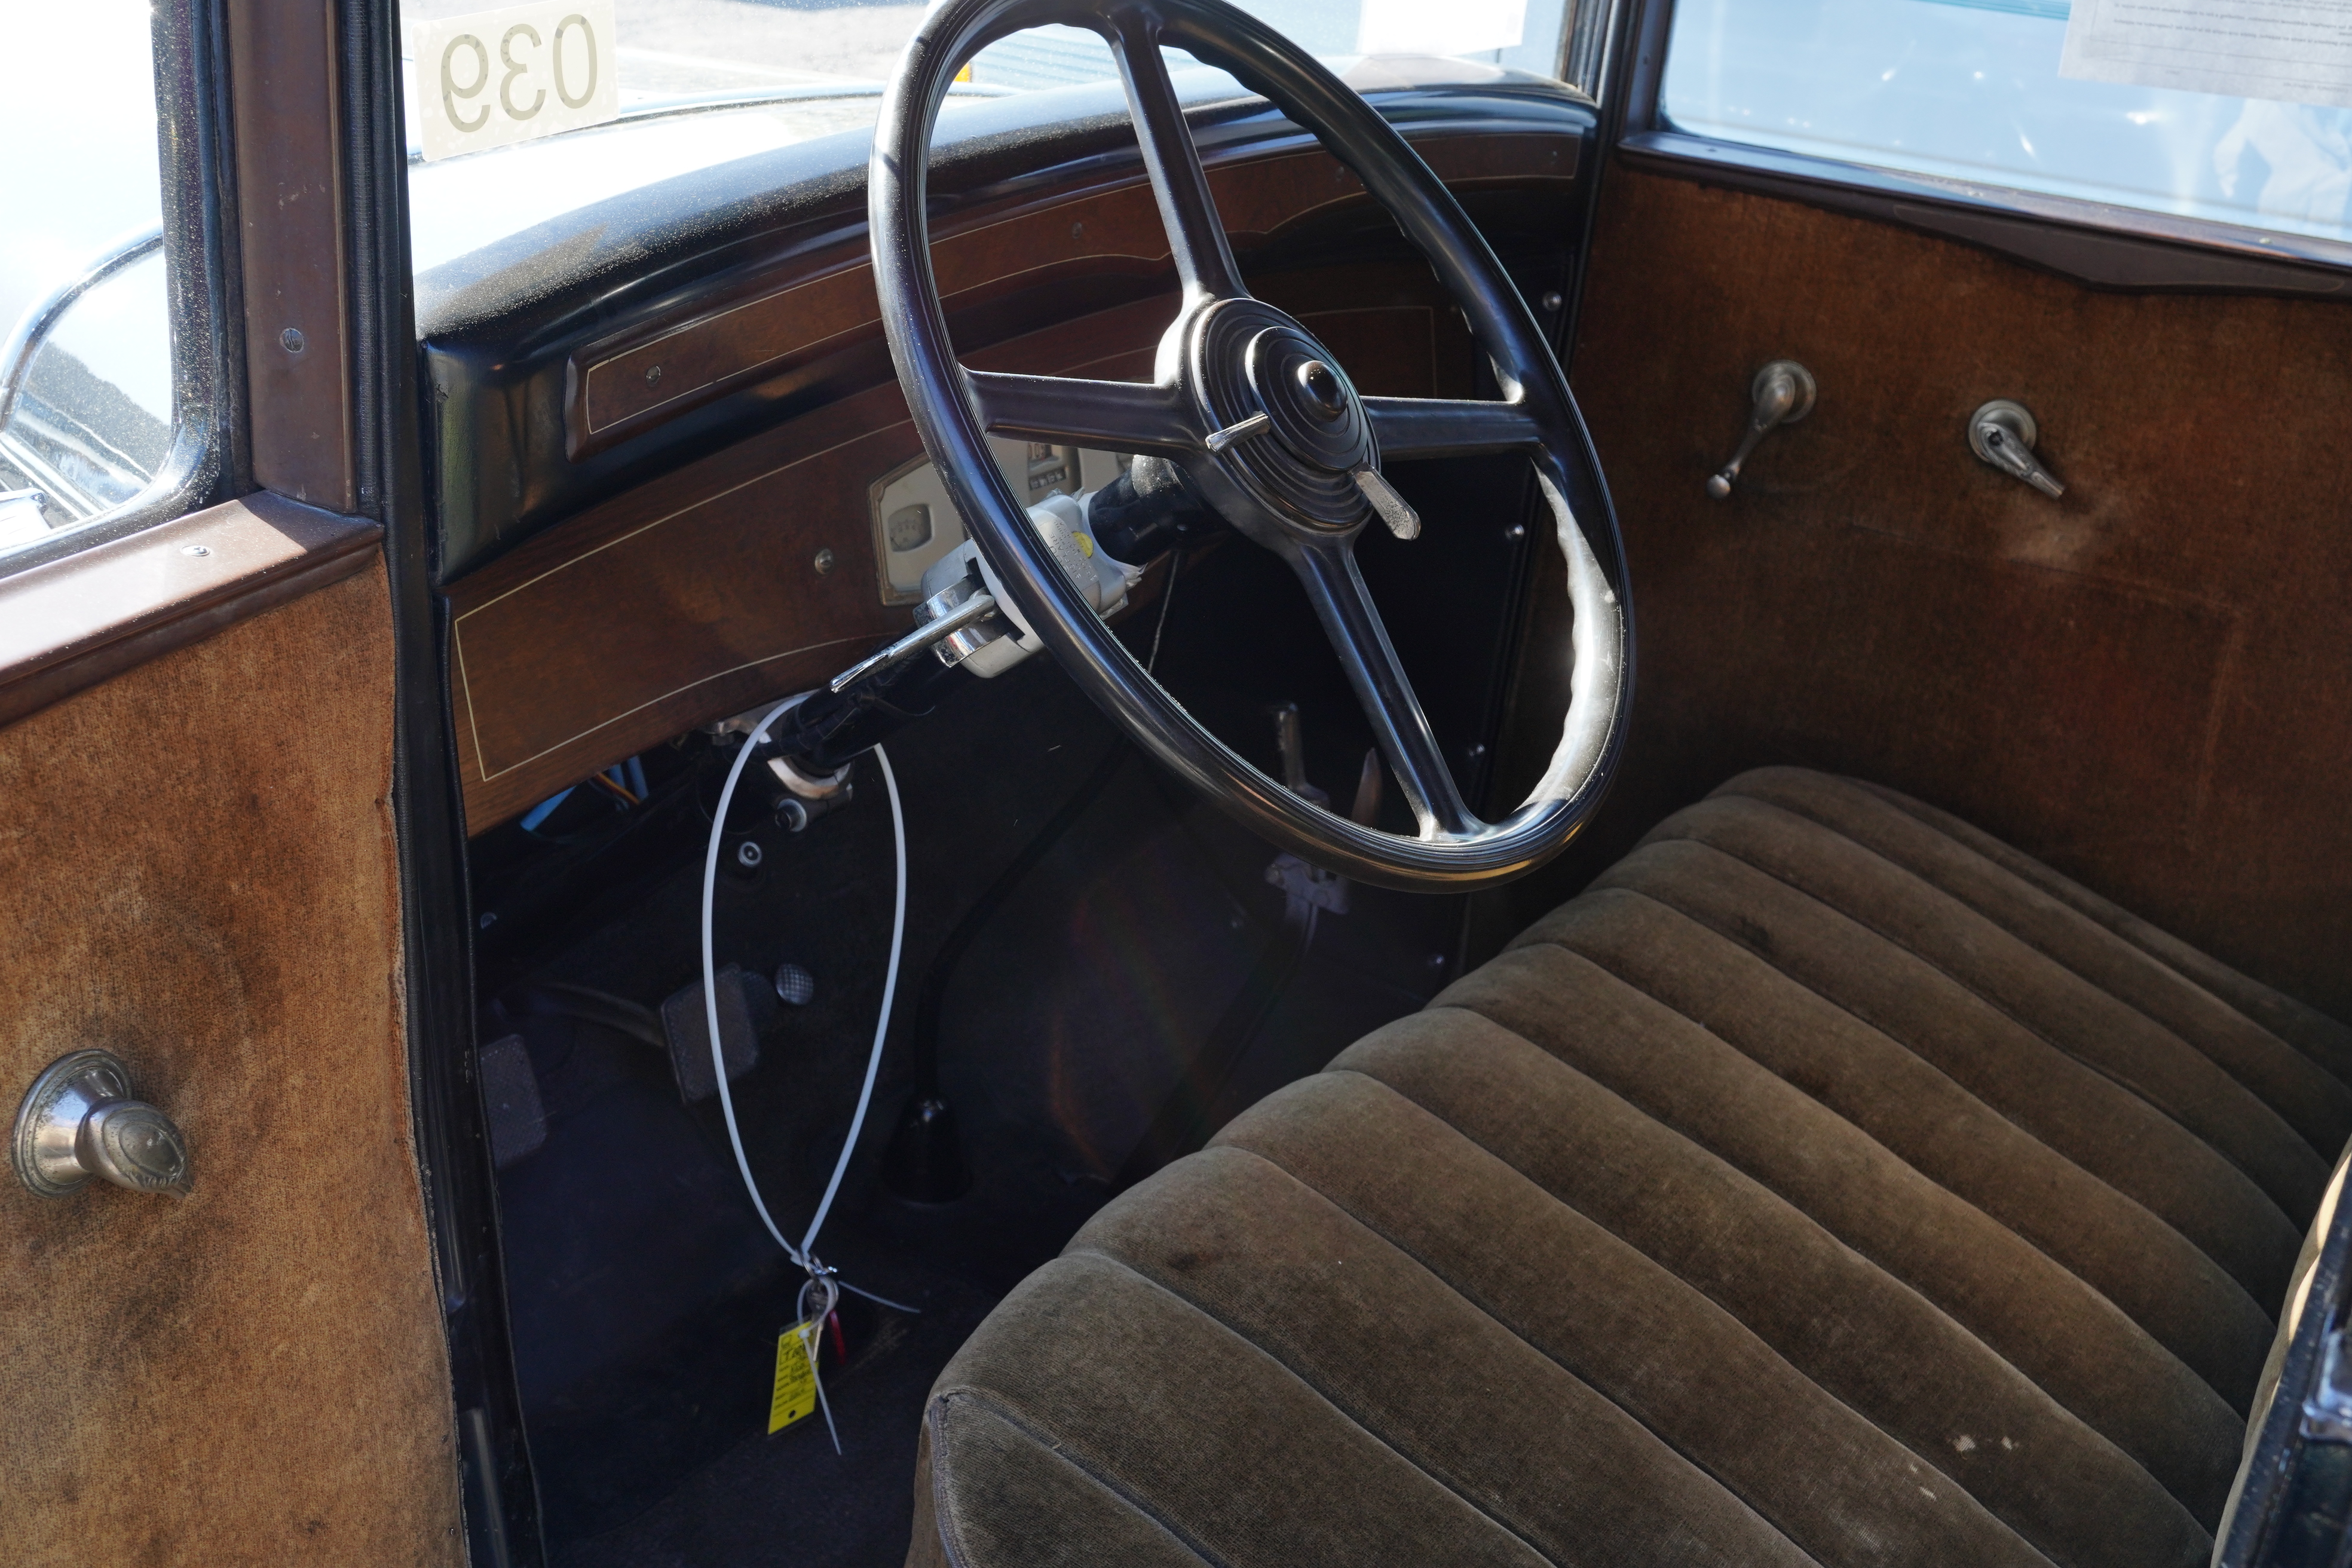
Lot T108, 1929 Nash Standard Six 4-door sedan, black, brown mohair interior, wooden wheels, blackwall tires, unmounted spare at rear, inline 6, manual gearbox. Body shows no obvious damage, black paint is ok, probably a repaint from many years ago. Interior might be original. Driver’s door shows both pot-metal handles for window winder and door release are broken. Like so many cars at the auction, car looks like no one bothered to clean or detail it for the auction.

HIGH BID: $8,000

This was one of several cars being sold on behalf of the AACA Museum, and as such, it is fair to presume that this car was donated to the Museum, but they decided to sell it rather than show it (a statement to the car’s condition). The other Museum donations sold. I am lacking an explanation as to why this high bid was not accepted.


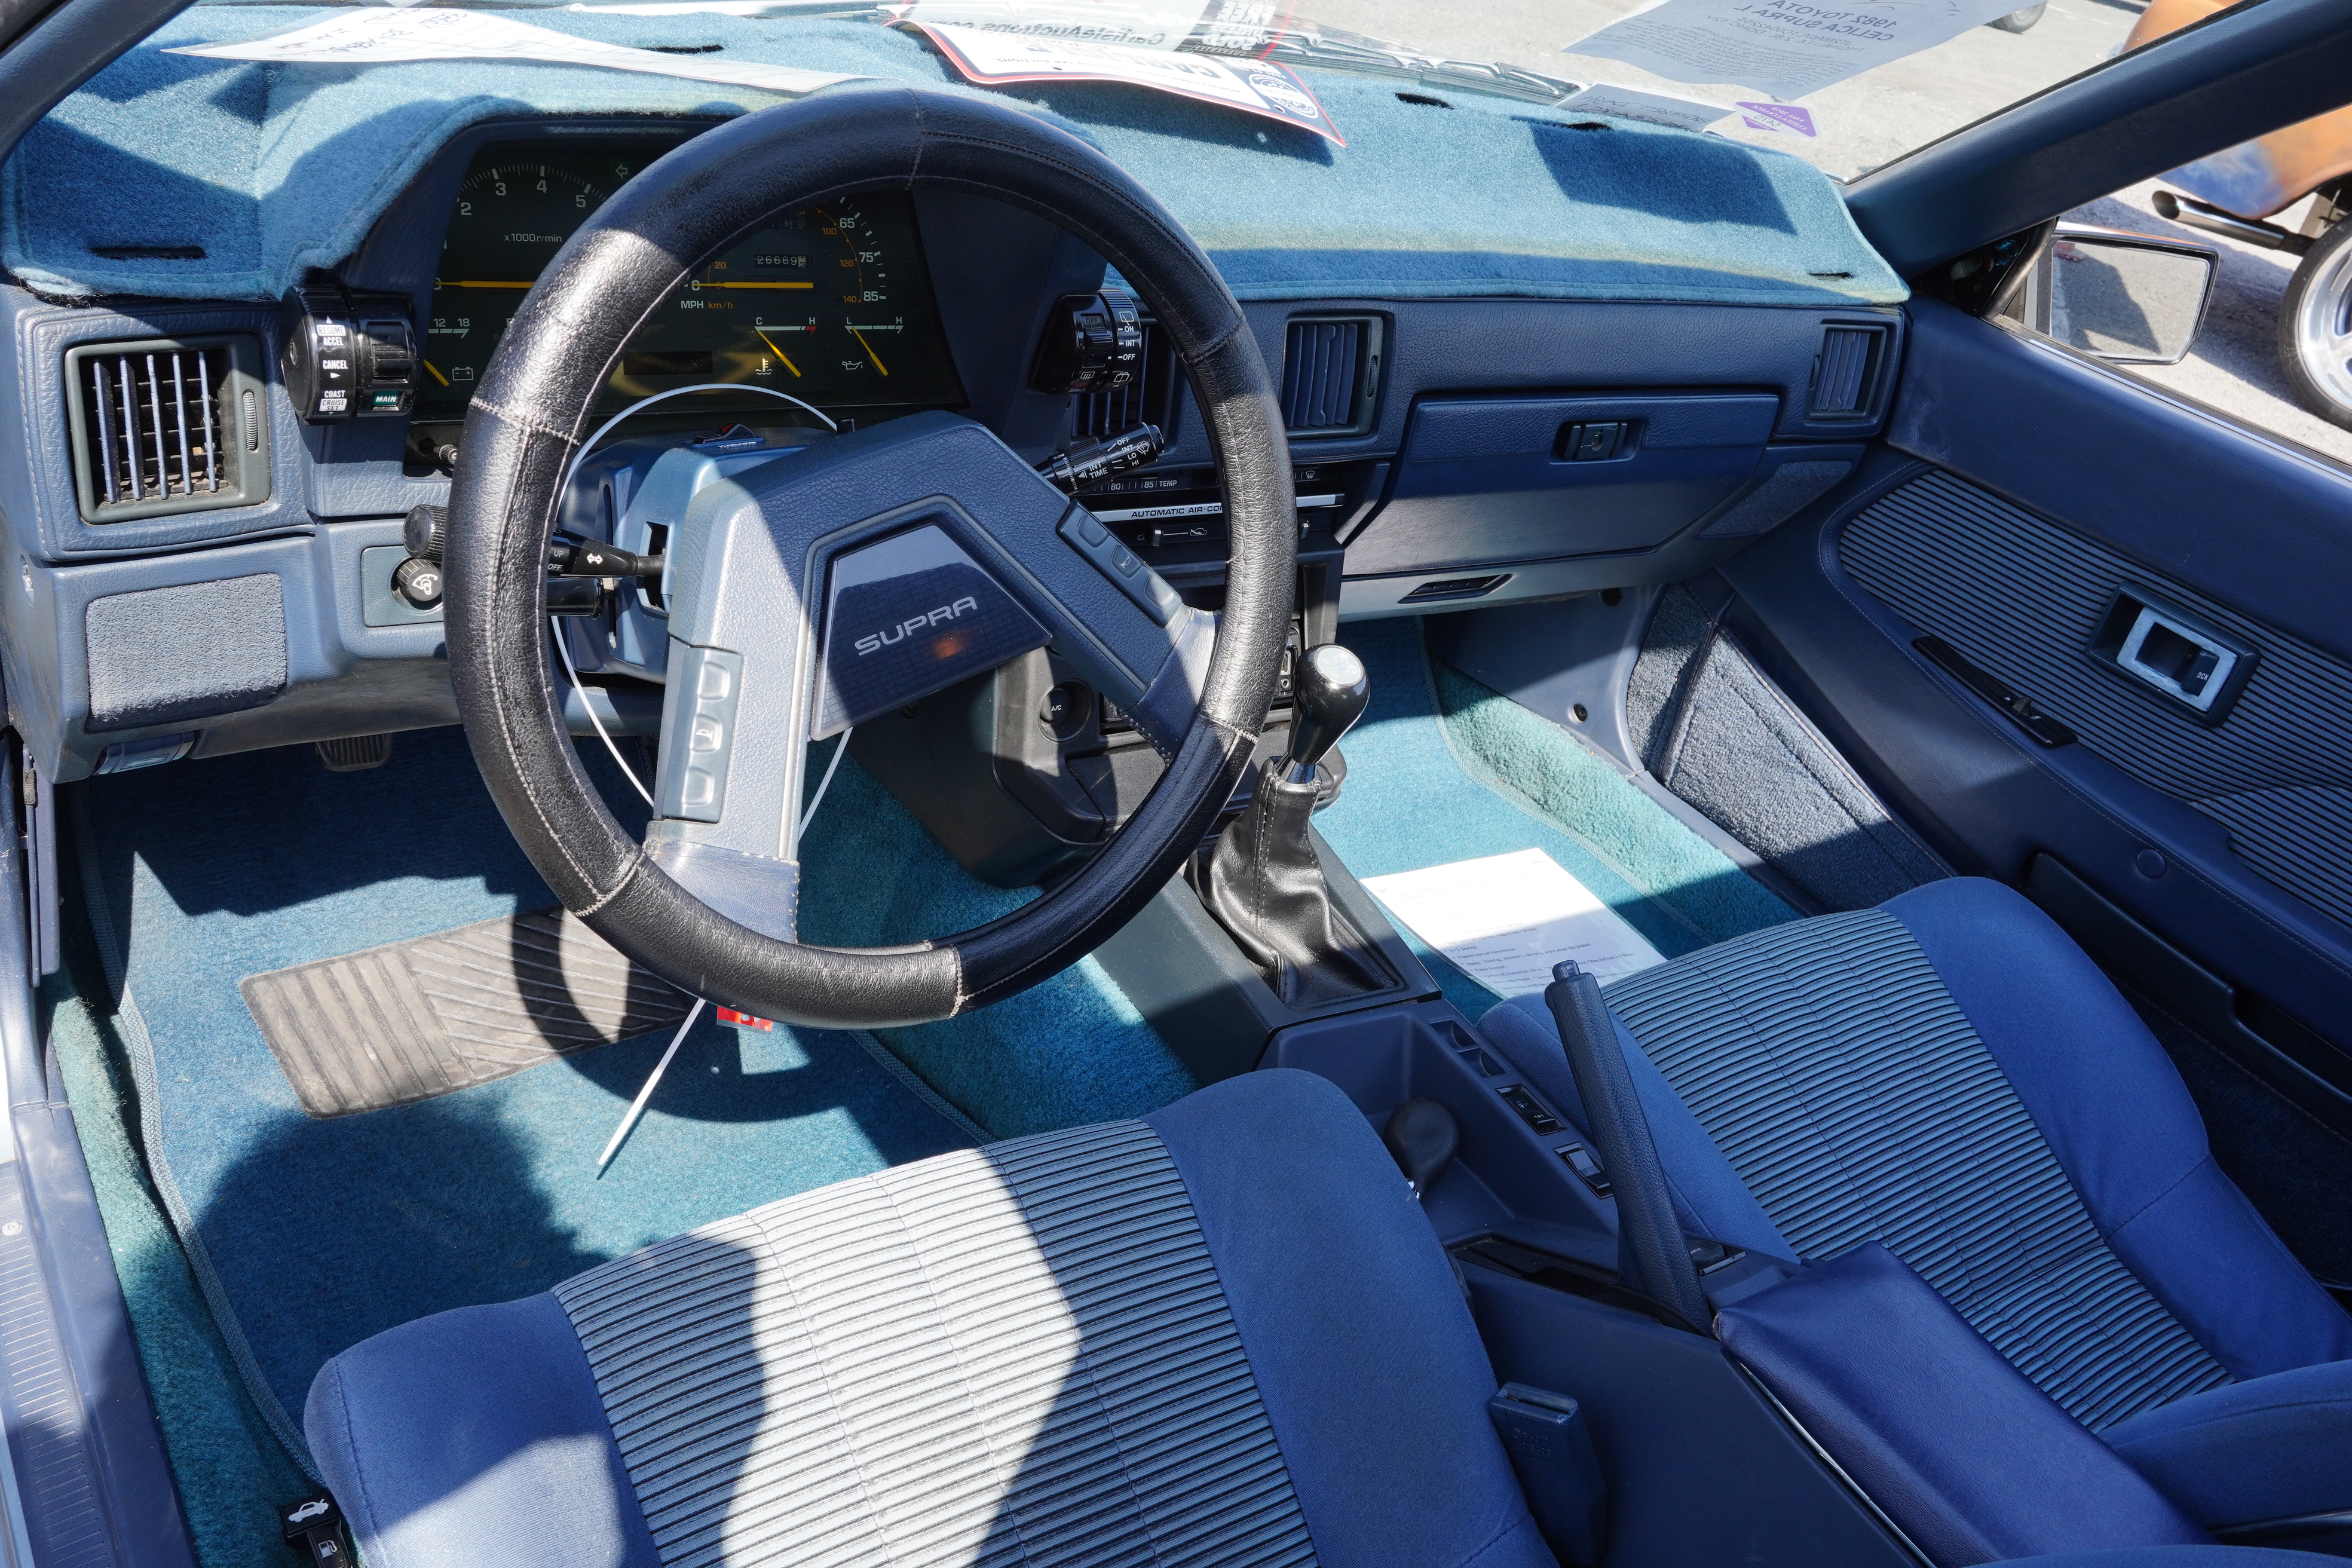
Lot F402, 1982 Toyota Celica Supra, blue paint, blue interior, Toyota alloys with raised white letter tires. Inline six, 5-speed manual, 126,669 miles on odometer. Owner claims California car. Paint shows significant wear and fading on most horizontal surfaces.

HIGH BID $8500

The owner was really hawking this car, doing his best to distract viewers from the paint by pointing out the positives. It didn’t help its block performance. It’s a shame because the car looked decent other than the paint, which could only be remedied by a complete respray.


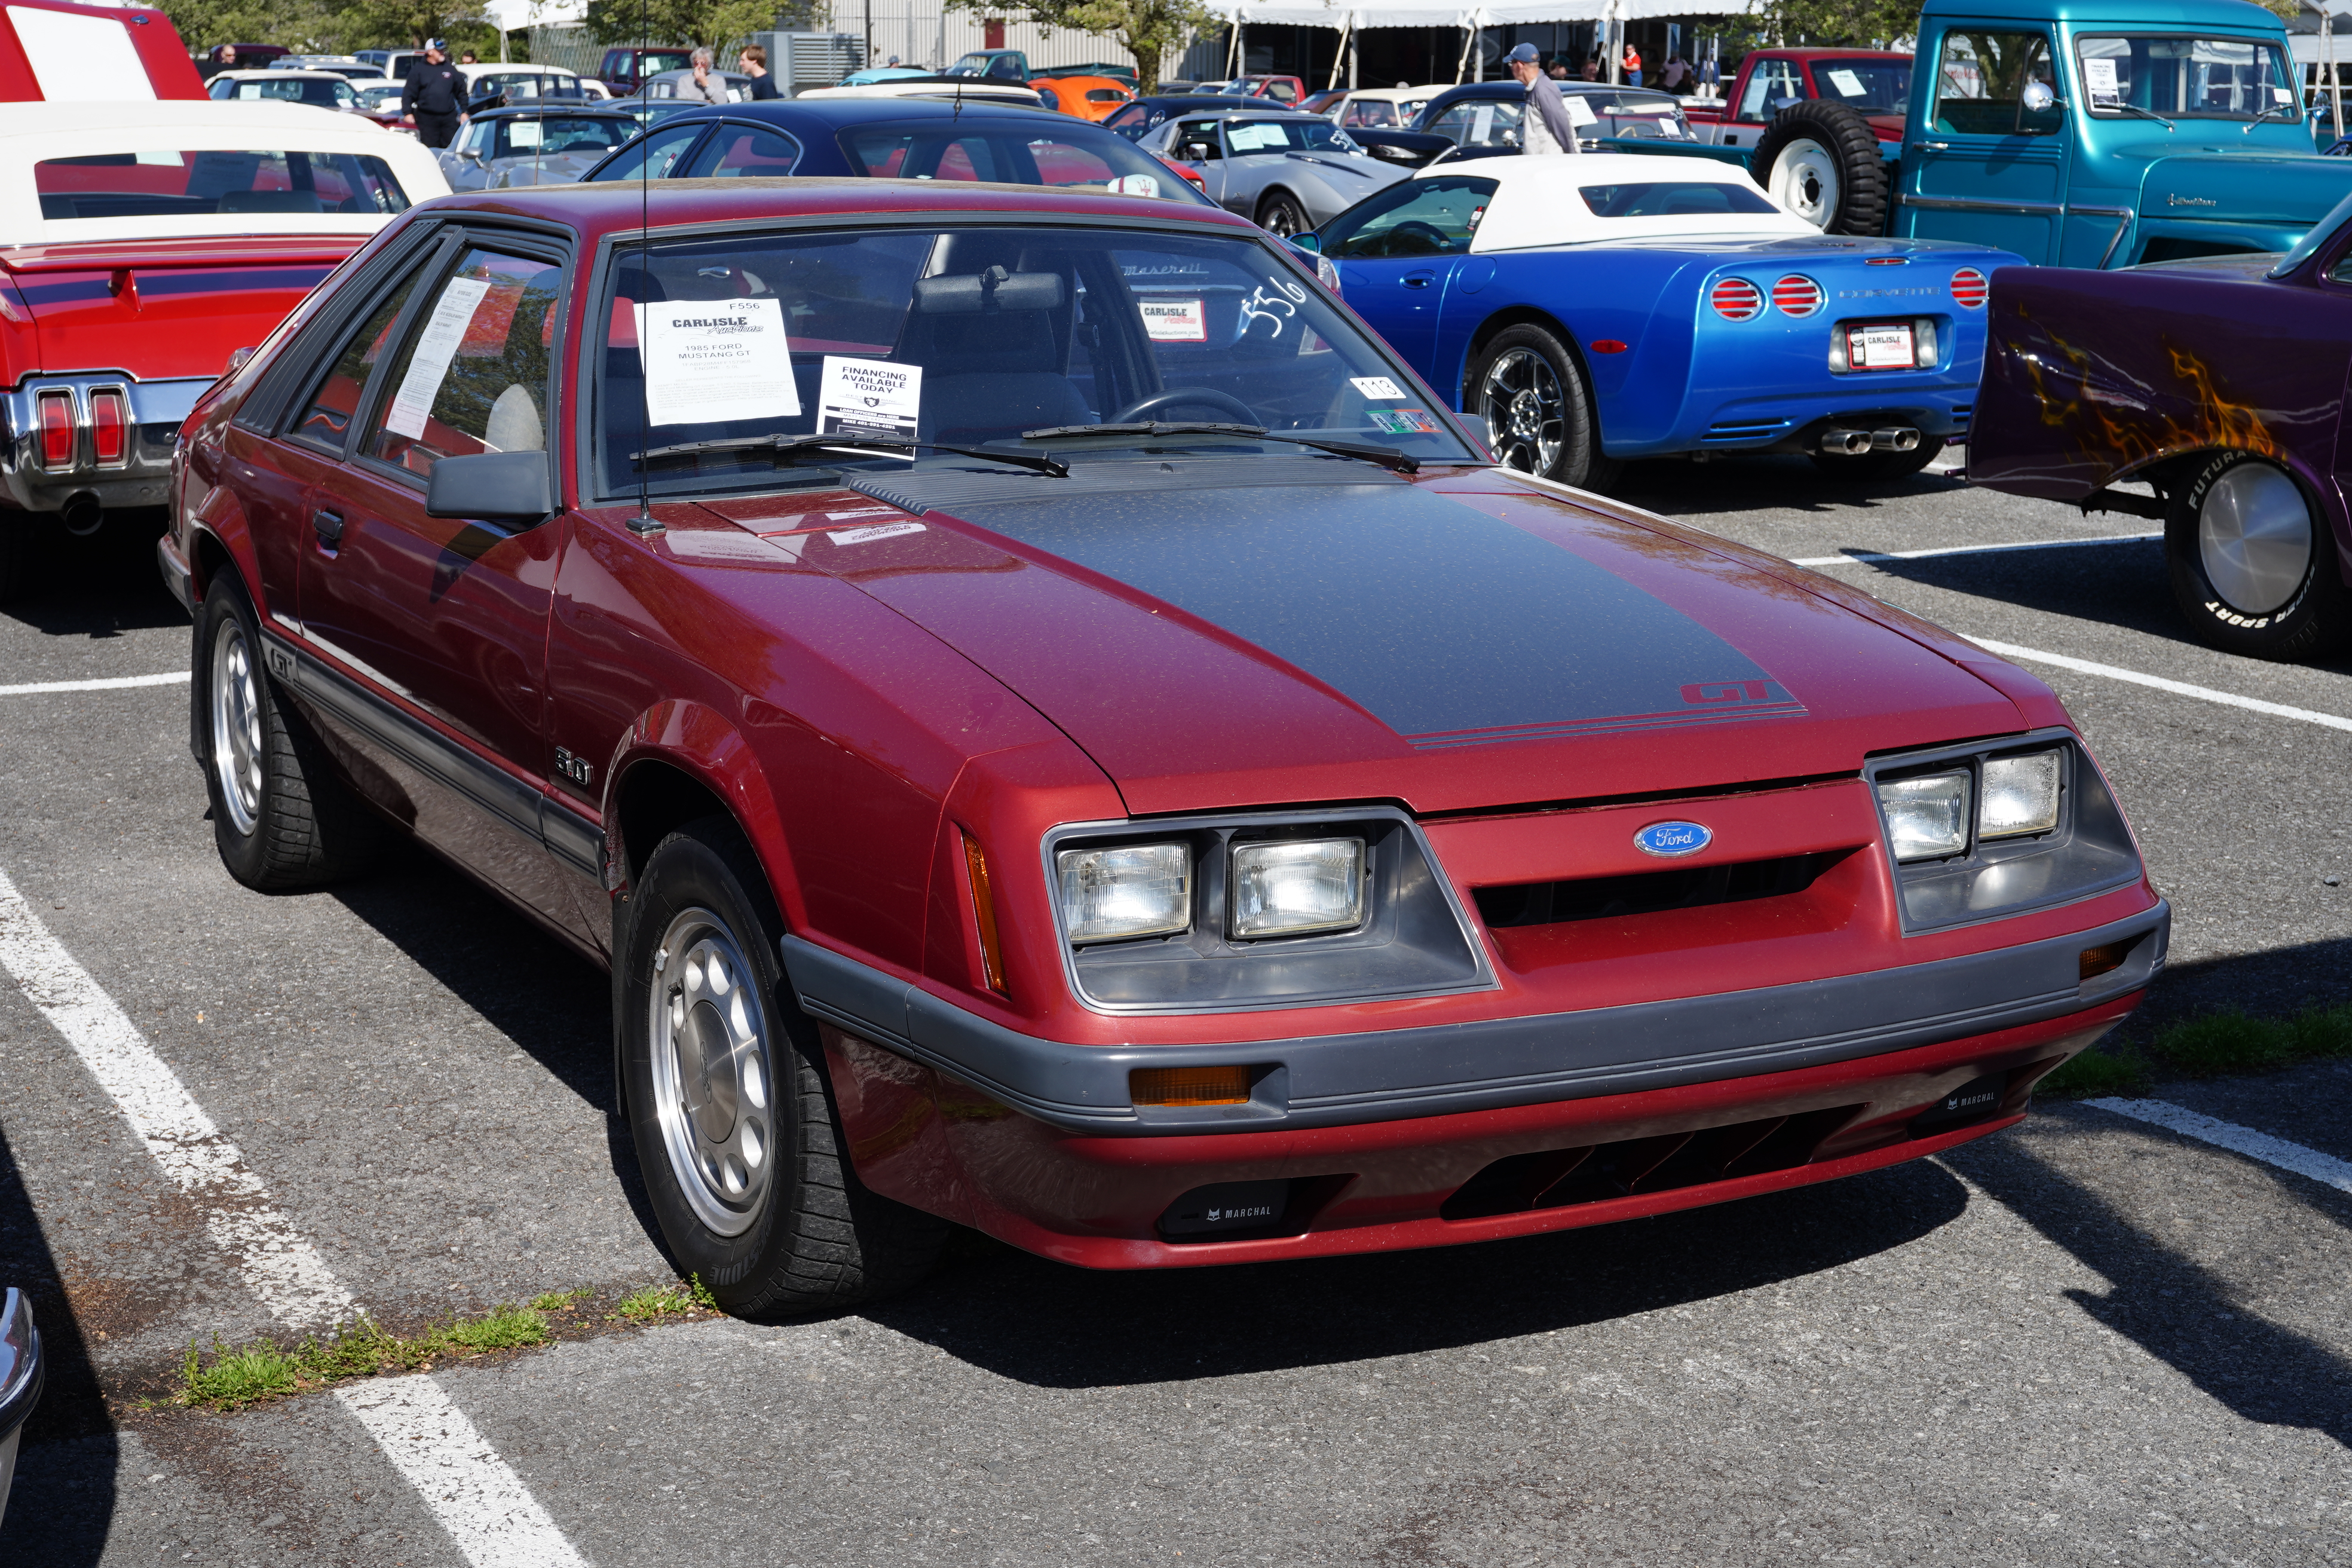
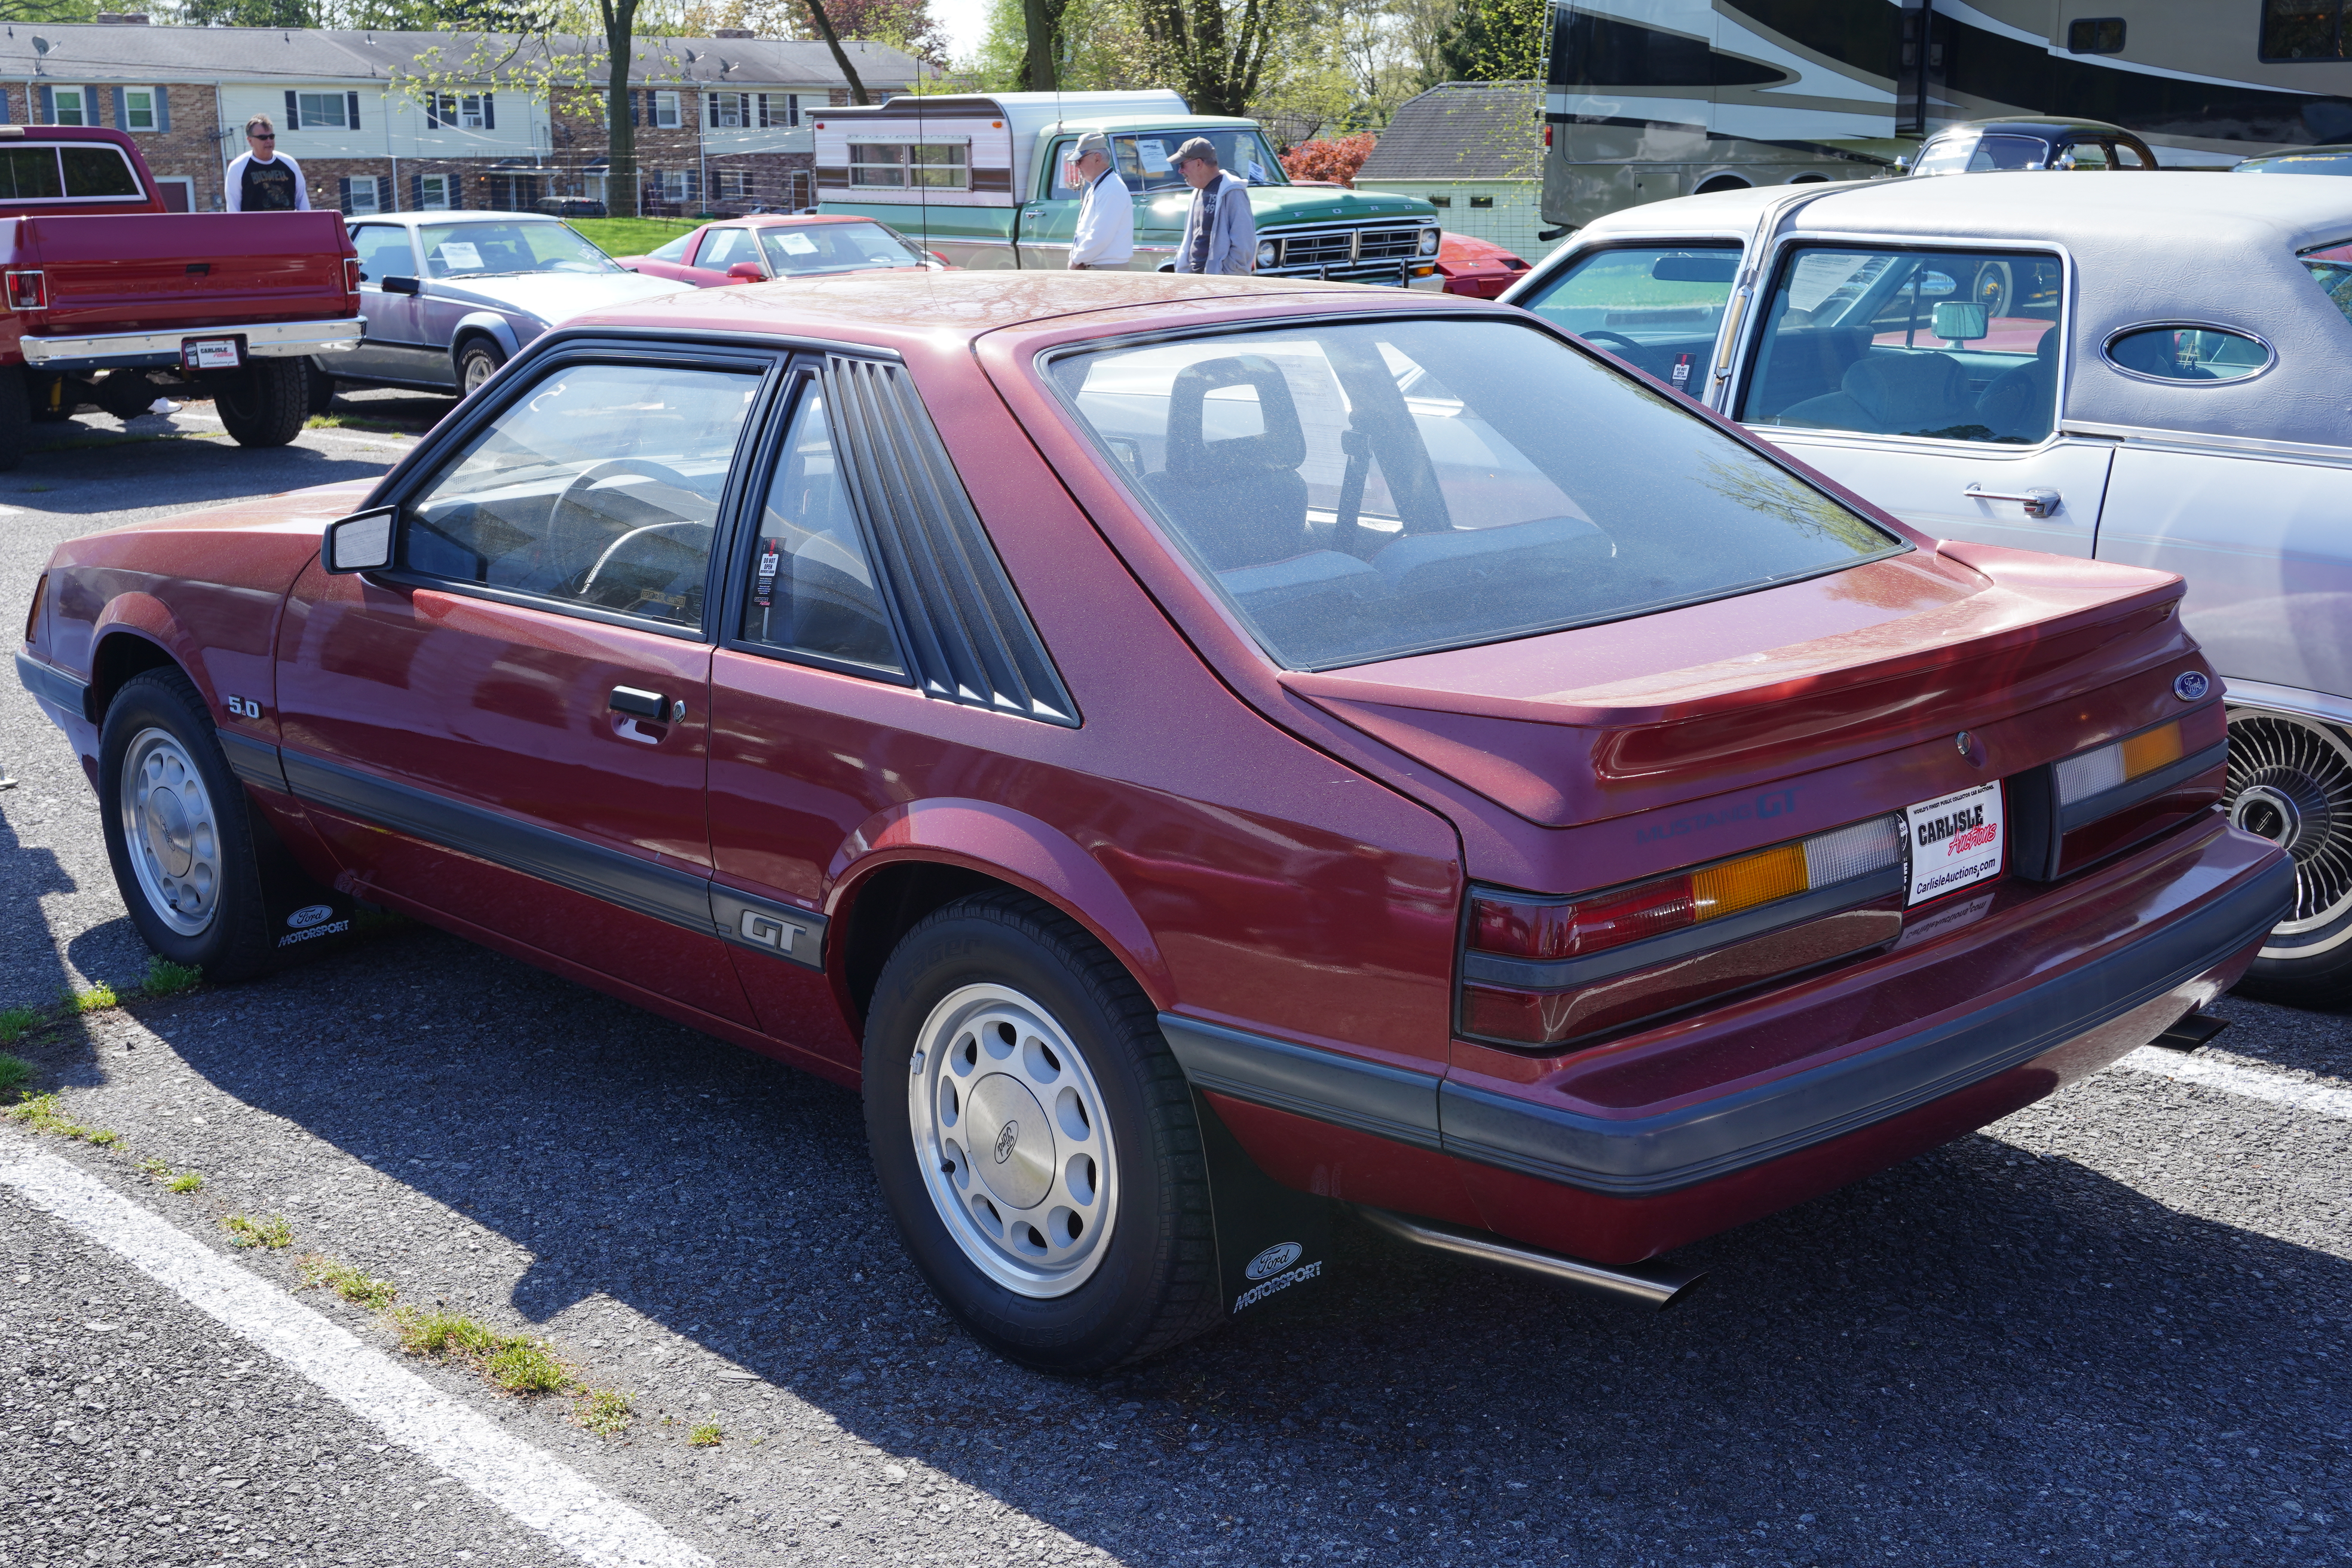
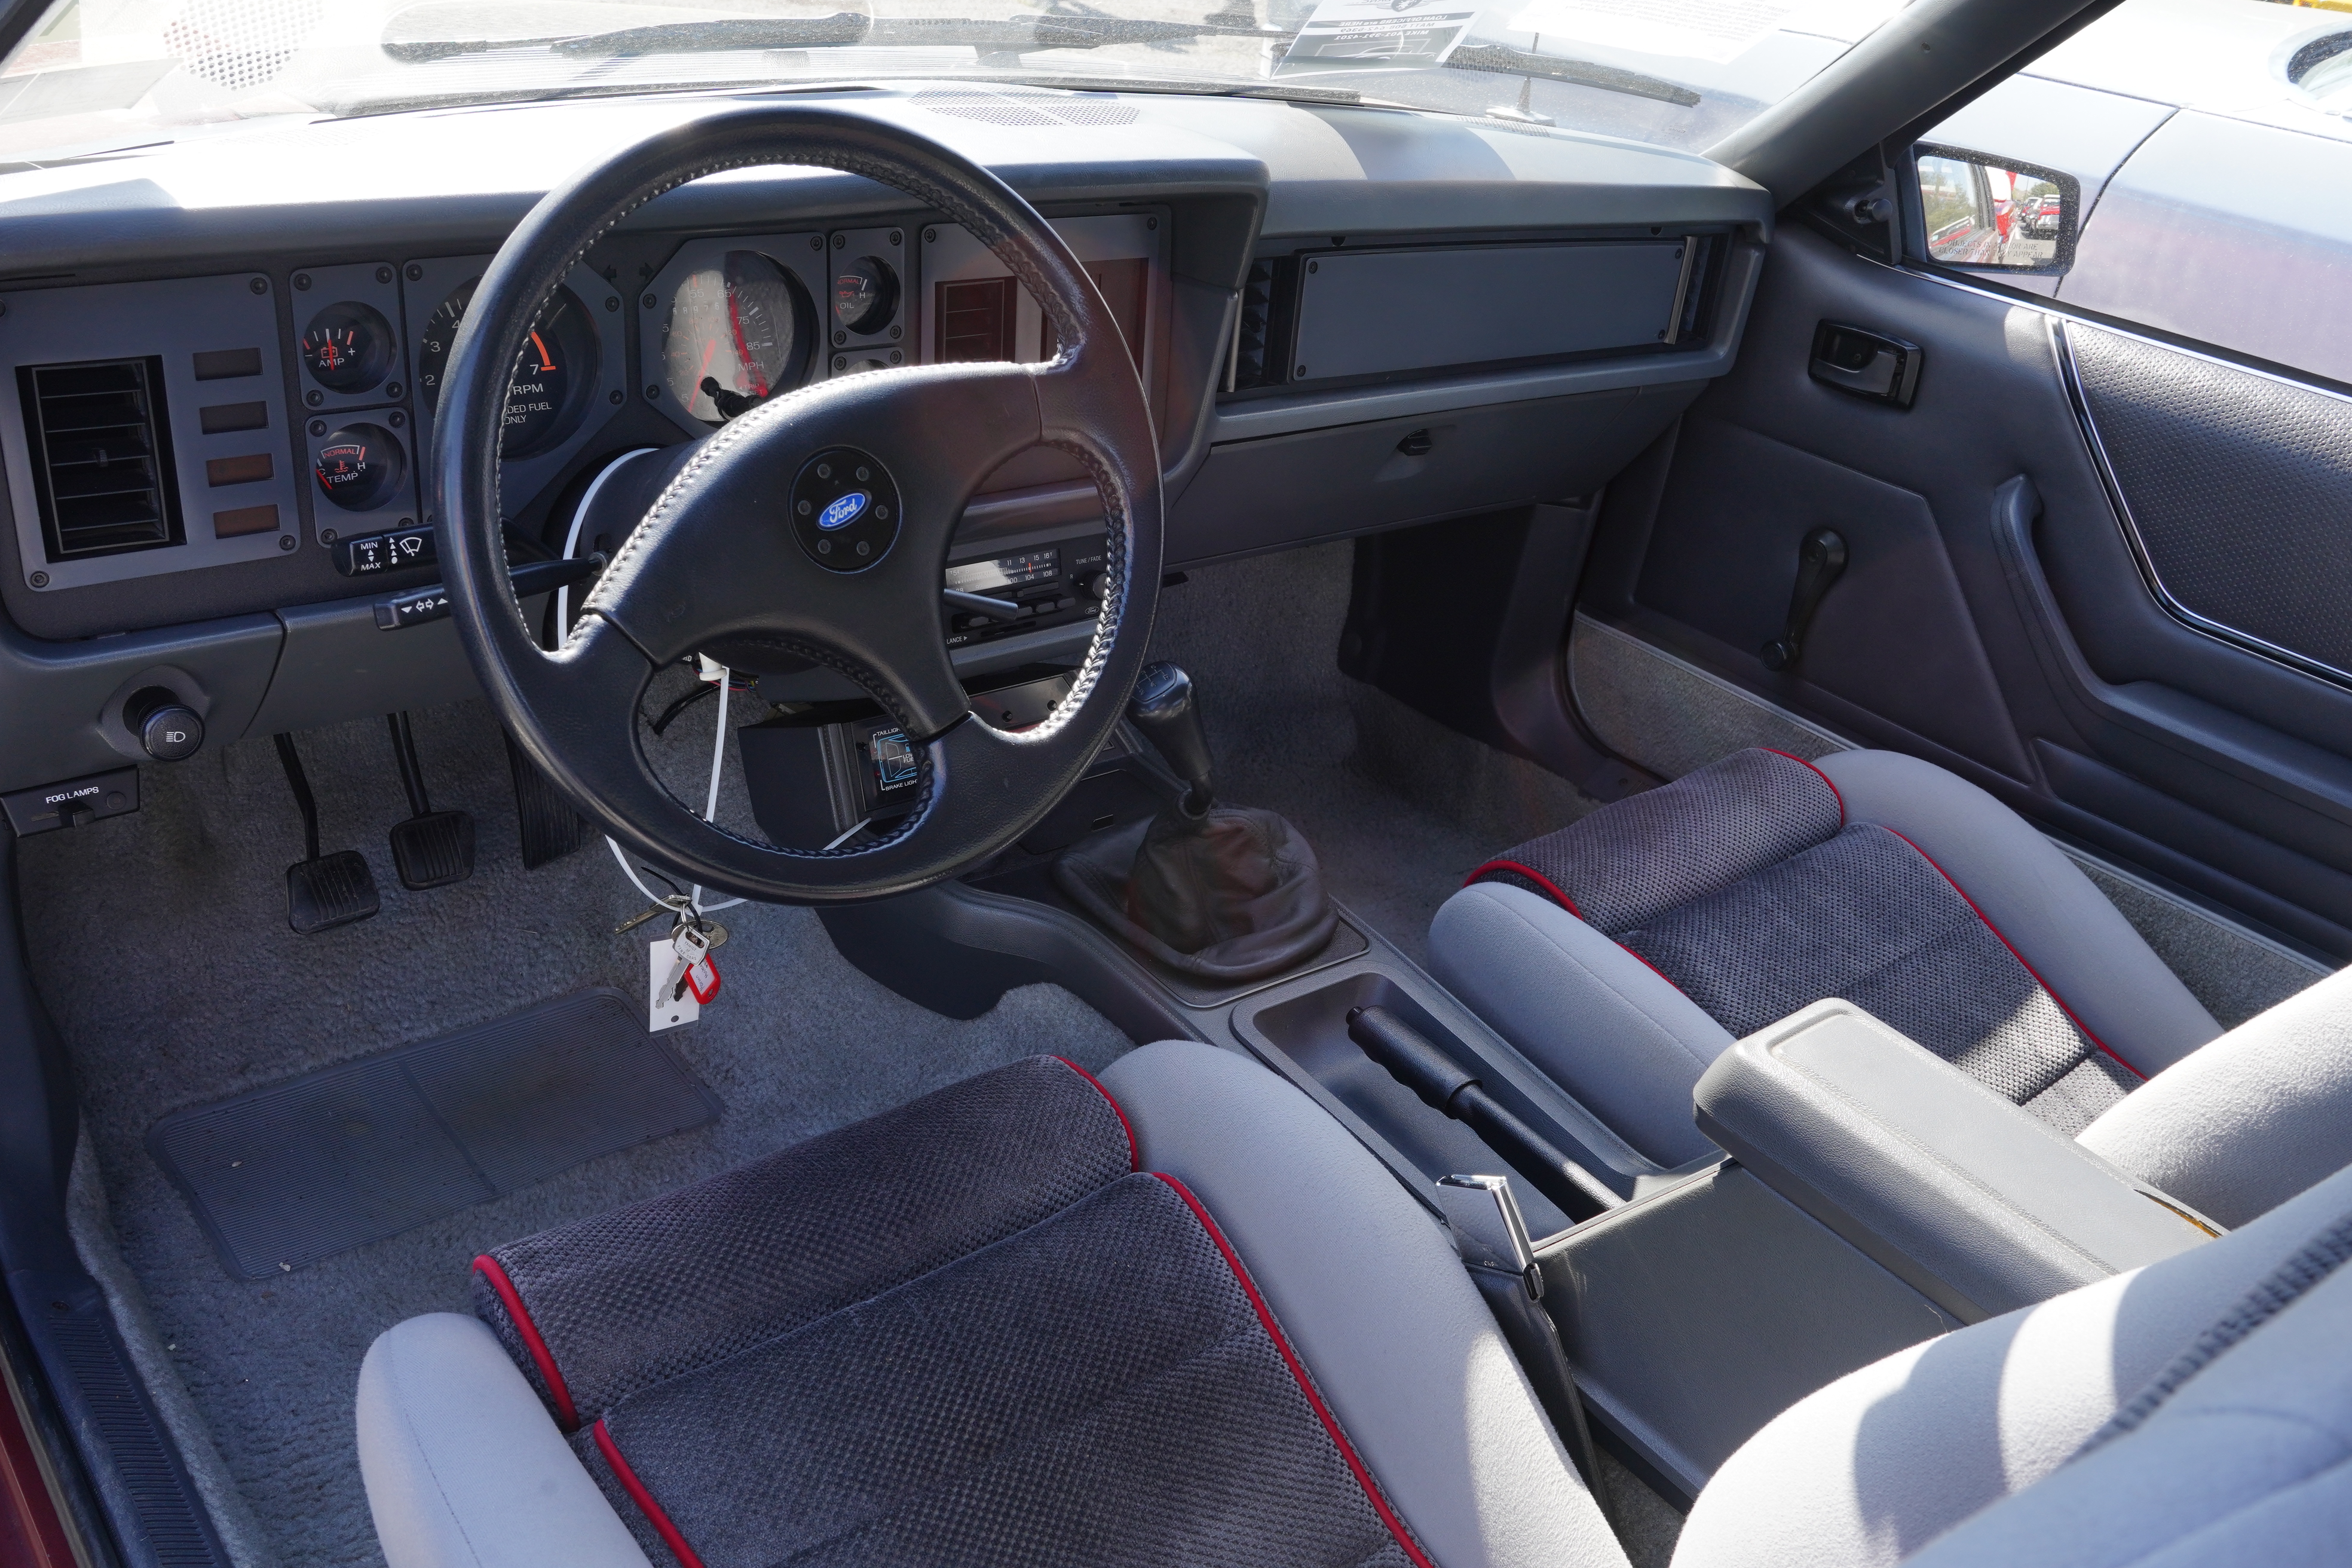
Lot F556, 1985 Ford Mustang GT hatchback, Canyon red, grey cloth interior. Carbureted 5.0L V8, 5-speed manual, Mustang alloy wheels with blackwall tires. Odometer reads 68,976. Sign claims one family-owned since new. Very clean car given age and mileage. Biggest drawback: no A/C.

HIGH BID: $14,000

I overheard the son of the owner as he was detailing the car talking about his dad’s thought process when ordering it: “He didn’t want A/C because it would have added weight and made the car slower”. Such was the thinking in 1985. I had my eye on this one as a potential purchase, but lack of A/C was a dealbreaker. I asked at the resale desk about the reserve: $18,000 which seems a bit high to me.


Lot T193, 1991 Mazda Miata, silver, black cloth interior, Mazda daisy alloys with blackwall tires, 1.6L inline 4, 5-speed manual, odometer reads just under 9,000 miles. Except for mileage, an otherwise unremarkable NA Miata.

HIGH BID: $16,000

It continues to amaze me how many early low-mileage Miatas were seemingly salted away, and are now coming out of the woodwork and in some cases, bringing the bucks. High bid had to have been close.


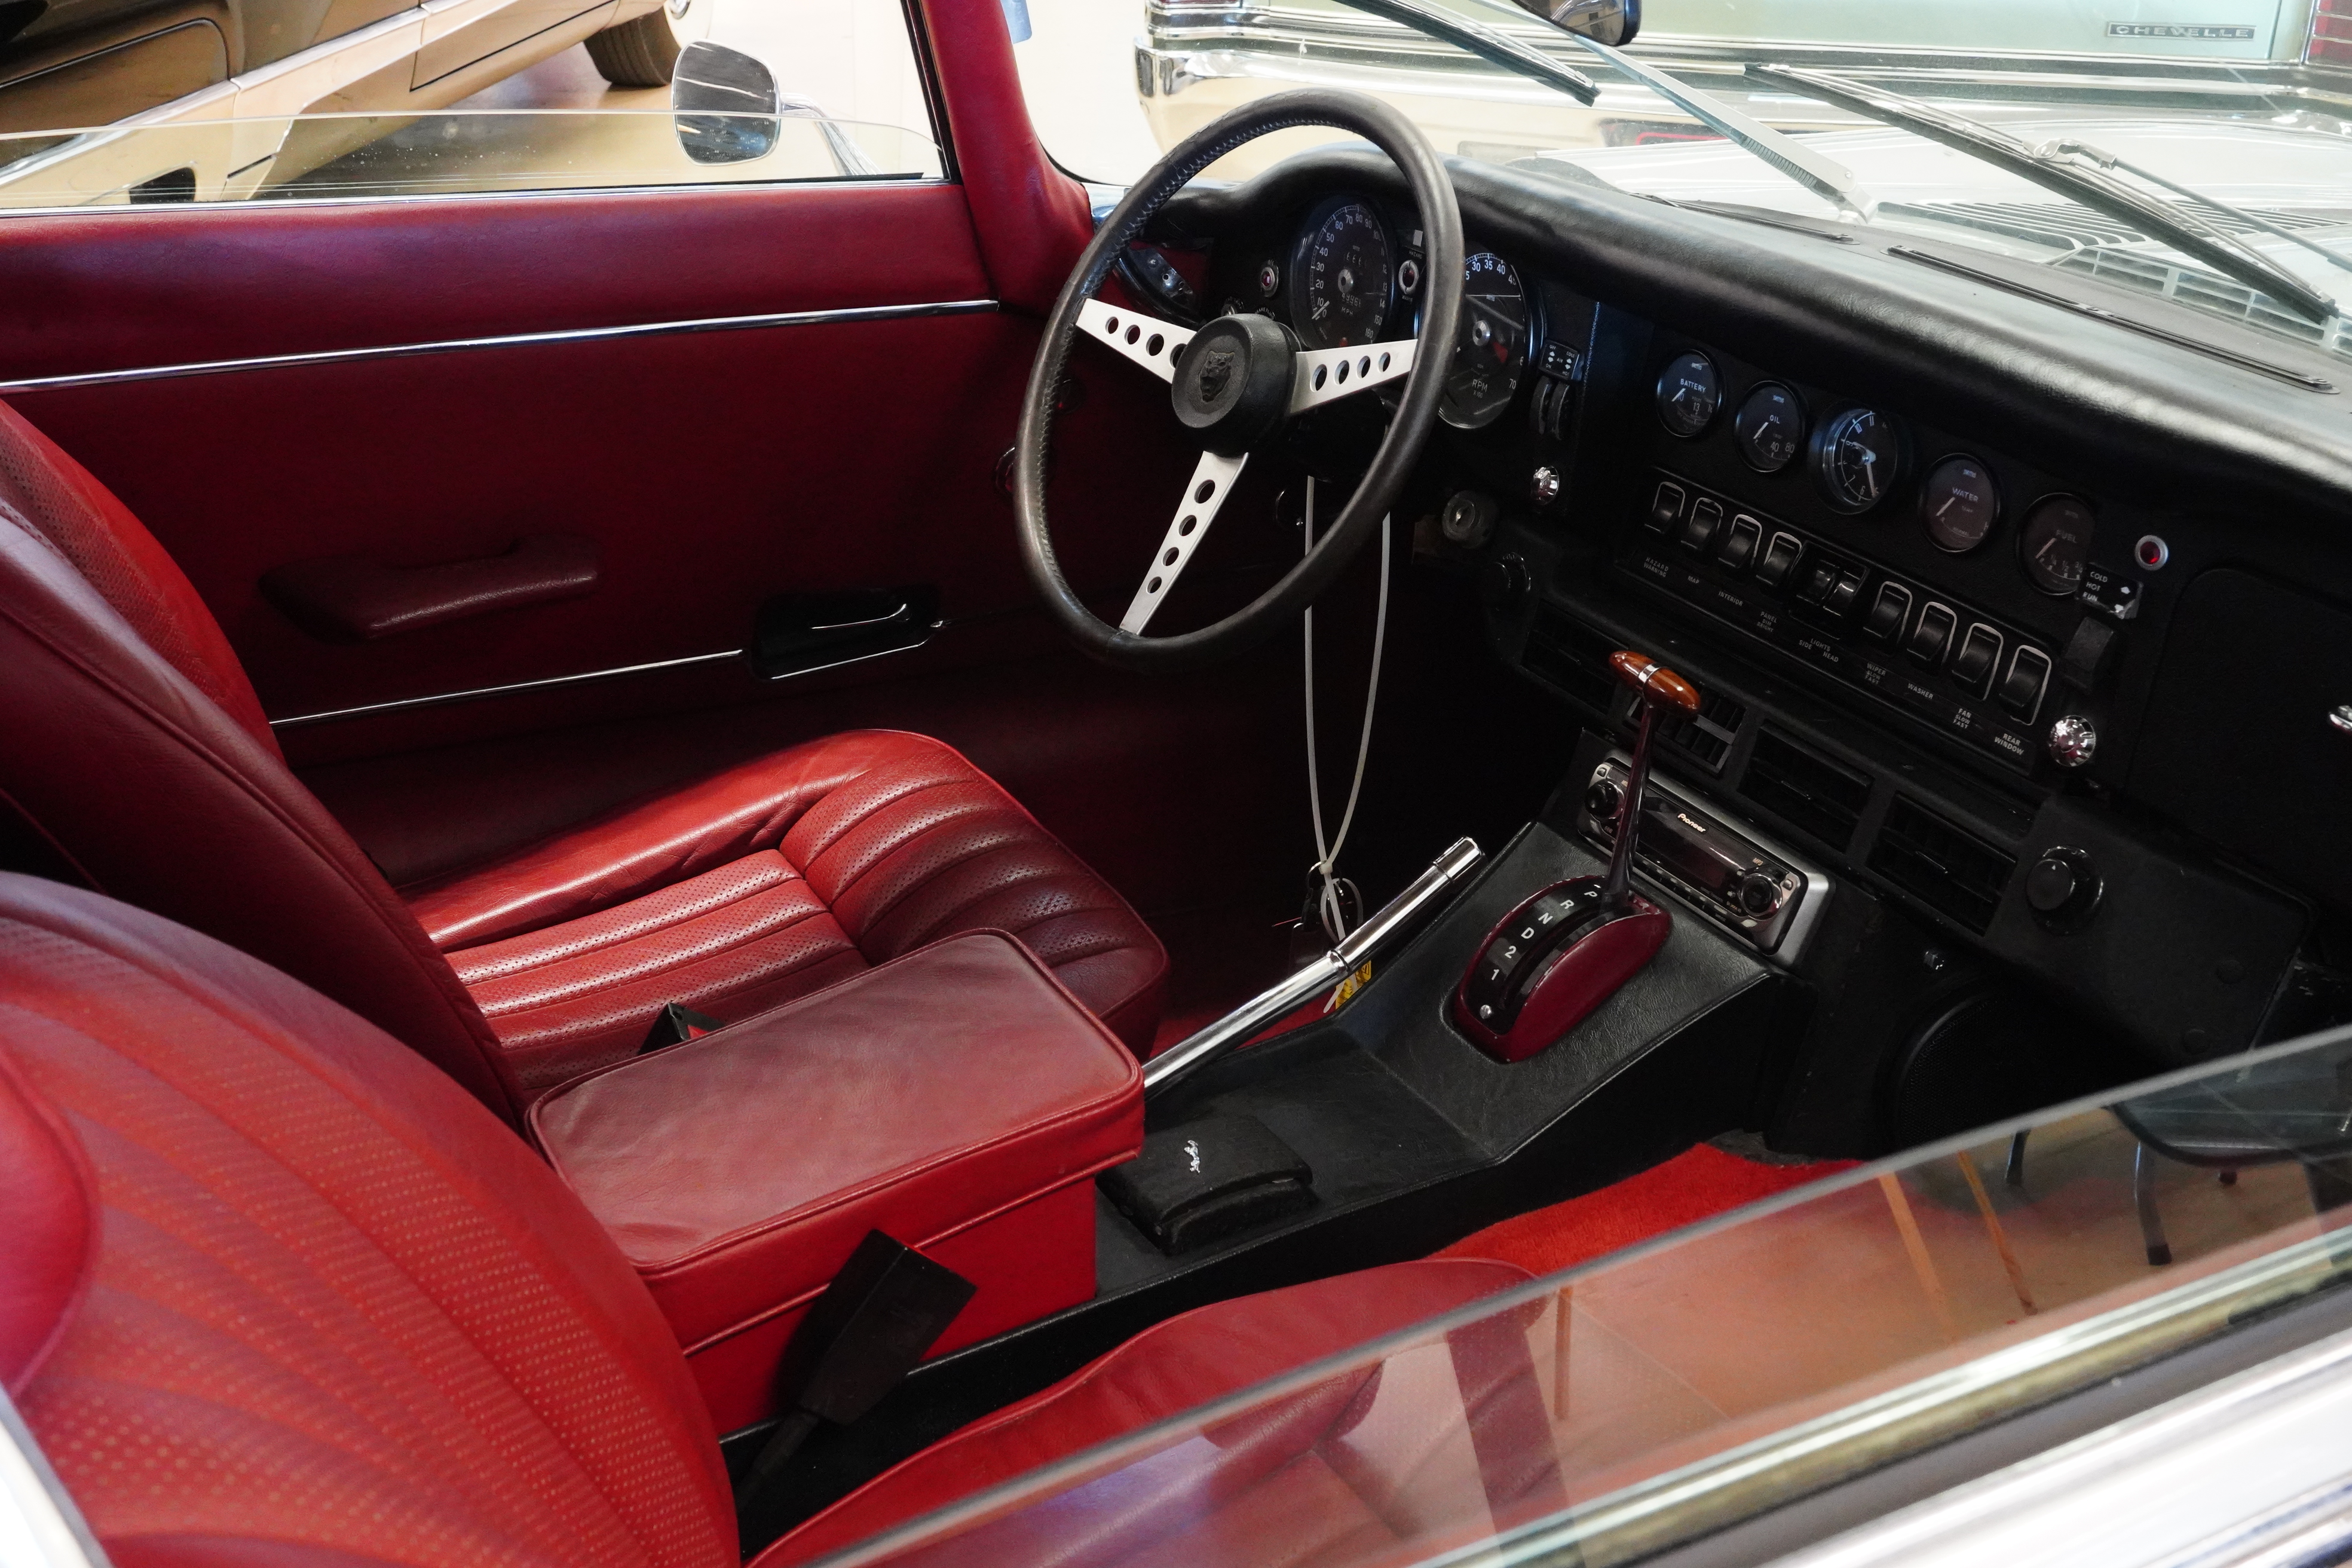
Lot T209.1, 1971 Jaguar E-Type 2+2 Coupe, silver, red interior, V12/automatic. Aftermarket Minilite-style wheels. Silver paint and red upholstery look decent, but entire looks of vehicle marred by Jaguar “leaper” hood ornament and completely unnecessary “V12” emblems behind quarter windows.

HIGH BID: $37,500

From a distance, this looked like a presentable Series III Coupe, even with the automatic, as many of them had. But the “custom touches” ruined the car for me, and likely for the bidders too. High bid was fair for equipment and condition (just imagine trying to repair those holes in the hood from that emblem!).


All photographs copyright © 2023 Richard A. Reina. Photos may not be copied or reproduced without express written permission.

Servicing the Alfa’s Fuse Box

The calendar said that spring arrived almost 4 weeks ago, but here in central New Jersey, the weather had remained stubbornly cloudy and cool until a few days ago. This delayed me from uncovering the Miata and the Alfa so that I could begin enjoying the new driving season. I finally got both cars out of the garage and running under their own power last week. I have a list of maintenance tasks that I want to perform on the Alfa, as that car is my short-term focus because of all the events on the calendar.

First up is a show which is new to me: The Roebling Museum in Roebling NJ is hosting its 13th annual car show on Saturday April 29th. Registration is day-of-show only, and I’ve seen the grounds: it was a stop for the Glidden tour this past September, and it’s a lovely place for a car show. Next, the Alfa is already registered for the NJ Region AACA Spring Meet on Sunday May 7, at a new location: the Dodge dealer on Route 10 in East Hanover, NJ. Also on the calendar is the Carlisle Import Show on May 12 and 13; the Delaware Valley Alfa Club will be there and I plan to join them. I’m also honored that I have been personally invited to show the Alfa at this year’s Greenwich Concours d’Elegance. It’s a two-day show as always, and this year it’s on Saturday and Sunday June 3 and 4. Alfa Romeo is a featured marque on Sunday, and Rich Taylor, he of the infamous New England 1000 rallies, reached out to me with the invitation, so we (the Alfa and I) will be there. That’s a busy start to the car show season!

The fuse box cover: descriptions in Italian and English

Last week, I tackled a simple maintenance task: the servicing of the fuse box. You won’t find this procedure in many shop manuals. But I know from experience that fuse boxes, especially ones located in the engine compartment as it is for my Alfa, are subject to dirt, grime, vibration, and other external forces that can mess with the simplest electrical connections. I also know that the ceramic fuses that the Alfa uses (which are identical to the fuses in a Volvo 240) can weaken over time. Given that each fuse is less than 50 cents, it is a no-brainer to occasionally replace the fuses, and clean and tighten the contacts while I’m there. The simple fact is, the failure of any one fuse can bring the car to a stop, so I want to minimize that possibility.

Pre-servicing: you can see some dirt on the fuses and tabs

I bought the fuses from my reliable supplier, Classic Alfa in the UK, and again, they did not disappoint. An online order placed with them late Tuesday night was on my front porch at 3 p.m. Thursday. That’s less than 48 hours. Did I mention that they are in the UK? Anyway, I started the process by removing all 10 fuses, then spraying down the entire fuse box using a spray can of electronics cleaner. I used a brass bristle brush on all the tabs, then installed 10 new fuses, gently bending the tabs inward for a tight fit. As a final test, I got out my digital multimeter (DMM) and tested continuity across both tabs. I had good continuity at all the fuses. The entire job took less than 30 minutes.

The brass tabs after cleaning: the metal looks bright, which will provide the best contact

With that out of the way, I also plan to refresh the cooling system by replacing all hoses and flushing the system (the hoses are now 10 years old!) and also plan to replace the rear shocks, which are likely original to the car (making them 56 years old). I keep telling myself, I’ve got time! Tempus fugit.

All new fuses in place (note that Alfa provides places to carry spares; clever!)


All photographs copyright © 2023 Richard A. Reina. Photos may not be copied or reproduced without express written permission.

The 2023 New York Auto Show

With Covid shutdowns in their rearview mirrors, the organizers of the New York International Auto Show (NYIAS) were back on track this year. As has been their scheduling regimen, there were two press days on the Wednesday and Thursday before Good Friday, with the public days running from Good Friday through the Sunday after Easter. I was again able to attend on a press pass (issued to “Richard of Richard’s Car Blog” for the first time), and unlike my previous experiences, the show was completely set up on Wednesday. (Previously, attending on a press day meant dodging cars and displays being maneuvered into place by NYC union workers.)

As was noted in the blog post from the 2022 NYIAS, the traditional in-person auto show is dead, but only for some manufacturers. Notable by their absence were BMW, Mercedes-Benz, Volvo, and Mazda. Surprisingly, some corporate nameplates were there while sister brands were not. So we had Chevrolet, but not Buick, Cadillac, or GMC; Honda, but not Acura; Nissan, but not Infiniti; VW, but not Audi or Porsche; and Ford, but not Lincoln. Yet big splashes were made by Stellantis (Dodge, Chrysler, Jeep, Ram, Fiat, and Alfa Romeo), Toyota (including Lexus), and Subaru. The Koreans were there in full force, with cars from Hyundai, Kia, and Genesis. (It is worth noting that Audi and Porsche each had a small four-car display provided not by the manufacturer but by a local dealer.)

Compared to last year, there was a dearth of EV start-ups. INDI and VinFast, both with vehicles on display in 2022, were MIA this year. However, both the main level and lower level had more real estate devoted to EV test tracks, where willing attendees could hitch a ride in an EV. It is, of course, their lack of an emissions-spewing tailpipe that makes it possible to run them indoors.

The show was a case of extremes, with a significant segment of the wares devoted to our EV future, while large pickups and SUVs were also dominant. Many of the trucks showcased the outdoor lifestyle, equipped as they were with tents, cargo boxes, and bike carriers. Subaru was the leader this year in promoting this theme, as their press conference began with an overview of Subaru’s dedication to AWD, enabling owners to take their cars far off the beaten path.

Additional detail from the show is included as part of the photo displays below.


FORD

The F-150 Lightning was a large part of Ford’s display, as were both Mustangs: the ICE coupe, and the EV SUV. Various Broncos and pickups showed off their rugged, off-road personalities


CHEVROLET

Chevy did their best to make it look like it was the domestic EV leader, with many soon-t0-be-released EV trucks on display. The problem: these vehicles are not for sale yet. The EV Silverado was there, same as last year, but still isn’t in any showrooms. However, the one Camaro on the floor represented an end to an era, as the Camaro pony car will soon be no more. Not to be outdone, the Corvette E-Ray was there, looking identical to its ICE siblings. For those who crave maximum size on a body-on-frame platform, the Suburban continues to exist.


STELLANTIS

As the only domestic manufacturer with a full lineup of its brands on display, Stellantis stood out. It helps that the Ram and Jeep brands have great products and are selling well. A surprise to me was the Dodge Hornet, which I knew to be a brand-engineered version of the Alfa Romeo Tonale. The Hornets on display looked great, and even better, had impressive interiors with inviting seats I hadn’t expected to find in a Dodge. I predict that the Hornet will do well and will handily outsell the Tonale, especially given how little Alfa seems to market its cars in this country.

The RAM REV EV pickup is a disappointment, looking almost nothing like the stunning concept truck which had been shown at the CES a few months prior.

My vote for best-looking vehicle at the show: the Charger Daytona EV concept:


HYUNDAI

The Hyundai Ioniq 6 is a striking-looking four-door sedan in a world full of SUVs.


VW

The I.D. Buzz, looking like the same one I saw last year, was here again. One of the more clever displays was the lifted I.D. 4, exposing the EV battery “skateboard”.

J

JDM DISPLAY

A large section of the bottom floor was devoted to what looked like a club-sponsored display of JDM (Japanese Domestic Market) cars, perhaps three dozen in all. They were segregated by decade, and it was clearly some of the older ones which grabbed my attention.

Lexus SC Coupe
Mitsubishi Pajero
Datsun 510
’80s Toyota Corolla, RWD, known by its “AE86” internal platform code.
1970 Mazda R100, which predated the RX-2 in this country.


EMBLEMS AND BADGES


THE GRILLE WARS CONTINUE


WHAT I DREADED TO SEE IN MY REARVIEW MIRROR IN 1972:


All photographs copyright © 2023 Richard A. Reina. Photos may not be copied or reproduced without express written permission.


Rich’s Repair Ramblings #7: Electrical 103, the Ground

Rich’s Repair Ramblings #7: Electrical 103, the Ground

I may have been fixing cars for a long time, but that doesn’t mean that I still don’t make mistakes! I certainly do, and one of my most common mistakes is following that diagnostic path called “jumping to conclusions”, also known as “starting at step 4 while skipping steps 1, 2, & 3”. (Professionals who are honest with me admit to still making this mistake at times.)

In electrical repair work, it is so easy to conclude that “the component” is bad, without first diagnosing the wires and connections for that component. So what happens? You purchase a new replacement component, plug it in, and when the dang thing still doesn’t work, you end up performing diagnostic steps 1, 2, & 3 anyway.

In our previous brief overview of the basic electrical circuit, we stated that electrical flow starts at battery positive, flows through a wire to the “load” (bulb, motor, or other electrical device), and then back to battery negative through a common ground (metal chassis, body, or engine block). The test light can verify the presence of 12V on the hot side of this circuit, up to the device itself. What about the ground side? That is our topic this time.

Let me state something I was taught 40 years ago: the number one cause of auto electrical problems is loose, dirty, or corroded connections. Our AACA beauties are at least 25 years old. Many of them are two, three, or four times that old. Temperature, moisture, dirt, rust, and vibrations all wreak havoc with these connections. If you’re trying to fault-trace an electrical problem, with or without a test light, you could do worse than first checking that all connections are clean and tight.

If you are using a test light as we described last time to fault-trace a circuit, you might run into this theoretical dead-end: let’s say it’s an inoperative headlight bulb. You tried a new bulb (easy enough to do), replaced the fuse (even though the old one looked ok), and confirmed voltage at the bulb connection for both low & high beam (it’s a 7” sealed beam unit). What now? It’s not the headlight switch, because you have voltage at the bulb. Could it be the ground connection?

While there is a way to use a test light to check for ground, I find it easier to take apart the ground connection to verify that it’s clean and tight. There are several common ways that components are grounded: a separate ground wire attached to the body with a screw or bolt; a mounting screw for the device itself passing into the bare body or chassis; or a wire in a harness running to a “gang” ground some distance from the component. To check a device’s ground, you must find it.

Look at this illustration of a wiring diagram. Along the top we see the left turn indicator light and both headlights. At the bottom left we see the flasher unit. For each of these four components, I’ve drawn a red circle around “ground”; the schematic uses a triangle drawn as a series of lines. Remember, as this diagram verifies, that every electrical device must have a ground. What the diagram does not show (because of space limitations) is exactly how each component is grounded.

Ground connections are circled in red

Ground is usually not hard to find. Invariably, if the ground is bad, removing the offending screw or bolt will reveal that it was loose, greasy, or covered with rust. Cleaning and tightening the ground screw (and sometimes replacing it with a fresh one) renews ground and brings back functionality. In the field, I’ve used a flat-blade screwdriver or a pocketknife to scrape away rust. At home, I may use sandpaper, a file, or a Dremel tool. If the mounting hole has become enlarged from rust, try a larger bolt. Do not paint the area, thinking you are protecting it from further rust! You want the ground attachment to be tightly secured to bare metal.

Factory ground wire (black w/red tracers) is secured to ground via mounting bolt


My Alfa uses separate ground strap between hood and body


Aftermarket ground wires are grounded via sheet metal screw passing through crimp-on ring terminals


The photos show various grounding methods used on my own cars. Another shortcut, if you can’t find ground or want to verify that a good ground connection will make the device work, is to use a test wire to temporarily run your own ground. Beware of this potential dead-end: on some vehicles, a large metal component like an engine block is grounded to the chassis via its own separate ground strap. If that ground strap is loose or broken, your real problem isn’t the ground wire into the block; it’s the ground strap disconnecting the entire block from the car’s ground circuit. It bears repeating: the number one cause of auto electrical problems is loose, dirty, or corroded connections.


All photographs copyright © 2023 Richard A. Reina. Photos may not be copied or reproduced without express written permission.


Rich’s Repair Ramblings #6: Electrical 102, The Test Light

Rich’s Repair Ramblings #6: Electrical 102, The Test Light

Last time, we covered battery basics. Picking up from there, we will presume that your battery is charged, and the terminal connections are clean and tight. Santa has granted your biggest wish, a 12V test light! (If you got coal, you can pick one up for $15 or less.) Now you ask, how does it work, and how can you use it to diagnose an electrical problem on your old sled? Test lights are simple and effective, but first we need to understand electrical flow.

For an electrical device to work, electrical current must flow from the battery positive terminal, to the device or “load” (light bulb, dash gauge, motor, whatever), and back to the battery negative cable. The “hot” side of this path is from the positive terminal to the device; the “cold” side is from the device back to the negative terminal. Each device has a dedicated wire on the hot side; but the metal chassis and/or body of the car is used to conduct current (“juice”) on the cold side back to the battery. This is why there isn’t a separate wire for each and every electrical device running back to the negative battery terminal, which would double the size of the wiring harness. You only need to ground the load on the cold side to complete the circuit.

A switch in the circuit allows an intentional interruption, so that the device can be turned on or off. Any unintentional interruption in this flow from positive back to negative, such as a shortcut [“short circuit”] or a break in the path [“open”], will prevent the device from operating. Most circuits include fuses; the fuse acts as a fail-safe in case of a short, so that the fuse “blows” before the device can be harmed.

A test light lets you check for current at any point along the hot side of this path. It’s a go/no-go check: if the test light illuminates, you have current; if it does not, you don’t. For much electrical fault-tracing on our old cars, this is all you need. The test light has a sharp pointed probe on one end; a light bulb inside its clear case; and an alligator clip on a wire at the other end. With the clip attached to any ground point, the test light bulb will illuminate if the probe touches any positive or “hot” 12V source. Let’s see what the test light can do. (The following applies to 12V negative-ground systems only.)

Start at the battery to become familiar with the test light’s operation: attach the clip to the negative battery post; then touch the pointy end to the battery positive post; the test light should illuminate. If it does not: are you sure the battery is charged? Are the clip and the probe actually touching the posts? Are you sure the test light works? Try a different battery if necessary.

Test light clip on battery negative, probe on battery positive, test light lights

Once that test is done, move the alligator clip to a ground point other than the battery negative post. You may ask “how do I know what is ground?” This is a valid question, and it can be a matter of trial and error. In theory, any unpainted metal surface on the engine, body, or chassis should be ground. Try the engine block, an unpainted fender washer, or a bolt along the firewall. In each case, after attaching the clip, touch the probe to battery positive. If it lights up, you have found a good ground. Avoid anything that might be insulated: paint, rubber, and plastic will not conduct electricity well enough for our purposes. So avoid hose clamps, plastic shields, and any painted surface. (Guys with Corvettes and Avantis play by a different set of rules with their fiberglass bodies).

Test light clip on fender bolt, probe on battery positive, test light lights

Moving away from the battery, let’s say that a device on your car doesn’t work, and you want to check the fuse. A test light allows you to check the fuse without removing it. This also serves as a preliminary check of the circuit entering and leaving the fusebox. NOTE: you need to know if the ignition key must be “on” for the circuit to be live. I confess that I’ve tested circuits which I thought were dead only to realize that the ignition was off and needed to be on!

Exposed metal areas at top of fuse allow test light probe to touch

With the test light’s clip attached to a good known ground (re-check at the battery positive if you’ve moved the clip), touch the probe to either end of the fuse. (In the photo with the modern blade-type fuse, there are exposed metal points in the top which allow this.) The test light should light at both sides. If it lights on one side and not the other, there is a good chance that the fuse is bad. Try a new fuse. If the test light doesn’t light on either side, it is more likely that there’s an open circuit in the wiring to the fuse. Remove the fuse and touch the probe to the fuse box terminals one at a time. Power at one terminal means that you’re getting juice to that terminal. Lack of power at both terminals means that there’s a break in the circuit between battery positive and the fuse box.

Clip on fender bolt, probe on fuse, lit test light proves current is at fusebox

You may need your vehicle’s wiring diagram for the next step. Find a wire which feeds the circuit you’re testing. With the pointy end of the probe, pierce the insulation until the tip is touching copper. BE CAREFUL! That tip is very sharp, and I’ve stabbed myself more than once doing this. For practice, try a working circuit so you get a feel for how far to insert the sharp probe. If the test light lights, you have juice in the wire. If it doesn’t, you’re starting to narrow down the problem.

Probing red wire through insulation, lit test light proves there is power in wire

All photographs copyright © 2023 Richard A. Reina. Photos may not be copied or reproduced without express written permission.


Simeone Museum Demo Day, March 2023

If my own blog posts are to be believed, I have visited the Simeone Museum in Philadelphia five times: October 2011, October 2012, December 2015, June 2016, and February 2022. This most recent Saturday, March 25, 2023, can now be counted as visit #6. Any visit to the Simeone, with its collection of historic racing and sports cars, is special. Saturday was a Demo Day, and Demo Days are extra special because a small theme-based collection of vehicles is chosen, and they are taken outside to the back lot so that attendees may delight to the sights and sounds of them motorvatin’ (a Chuck Berry coinage) under their own power.

Crowd surrounds cars before show begins

The theme this time was “Sebring ‘65”, an infamous race because of the deluge which caused cars to plow through what was described as up to 8 inches of standing water on the track. For this Demo, the museum selected its ’64 Shelby Cobra Daytona Coupe and ’66 Ford GT40 Mk II. The program listed the ’63 Corvette Grand Sport, but in lieu of that, a stock ’66 Corvette 427 roadster was chosen (nice to have such illustrious machinery as backup). Last but not least, on loan from Luigi Chinetti Jr. was a ’63 Ferrari 250P. (The Ferrari was not part of the driving portion of the day’s festivities – one can only presume that the loan arrangement excluded such an option.)


My friend Terry, whose idea it was to visit on this particular Demo Day, accompanied me. We arrived about 30 minutes before showtime, and to my pleasant surprise, all four cars were arranged at the front of the seating area; they were not roped off (as I’ve seen done previously) so guests were free to get up close and personal with the cars. Soon enough, the program started and we were treated to a slide show, including technical specs of the cars and film footage of the actual 1965 Sebring 12-hour race. The variety of vehicles racing that day, American and foreign, was huge, and the race stood out because 1st and 2nd place overall were taken by two American teams. The Chevy-powered Chaparral of Jim Hall and Hap Sharp came in first, followed by a GT40 driven by Ken Miles and Bruce McLaren. To Enzo’s chagrin (he had earlier threatened to boycott the race), his 250LM finished third.

BELOW: RED FERRARI AND YELLOW FORD GT DURING SLIDE SHOW PRESENTATION:

After the slide show, it was Ford vs. Chevy in the back lot. I should not have been amazed that all three cars started up on first attempt. They were slowly driven out of the building, and once on pavement, the drivers picked up a little bit of speed, but not too much! These vehicles are too valuable to put them at risk. (The Cobra Daytona, in particular, as one of the most singularly-famous cars in the world, must have an incalculable monetary value.)

After the show, we toured the rest of the static display within the museum, and promised each other that this would not be the last time we’d visit the Simeone in 2023.

All photographs copyright © 2023 Richard A. Reina. Photos may not be copied or reproduced without express written permission.

Rich’s Repair Ramblings #5: Electrical 101, The Battery

RICH’S REPAIR RAMBLINGS #5: ELECTRICAL 101, THE BATTERY

 This article is the first in what will be a continuing series about our old car’s electrical systems. I’ve worked with automotive 12 volt (12V) electrics both as a professional and as a hobbyist for many years, and I’ve enjoyed it. I’ve also been bemused by my fellow technicians, many of whom put me to shame with their mechanical know-how, who plead ignorance or fear of their car’s electrics. It is my hope that these articles will encourage you to tackle some simple fault-tracing and repair on your own jalopies, and feel comfortable doing it.

Let’s start with the battery, the ‘heart’ of your vehicle’s electrical system. If your collectible is a U.S.-made car that pre-dates the 1950s, it most likely has a 6 volt (6V) electrical system. Domestic cars switched from 6V to 12V systems in the mid-1950s, and also almost universally changed to a negative ground system. Some foreign cars stayed with 6V and/or positive ground systems through the 1960s. For simplicity’s sake, I’m going to stay with 12V negative ground systems here, but much of what is covered is applicable to any vehicular electrical system.

Flooded-cell battery. Note electrolyte caps and hold-down clamp.

BATTERY BASICS

There are two types of batteries commonly found in today’s cars: the ‘flooded cell’ (wet) battery, and the AGM (absorbed glass mat) battery. The flooded cell battery is the older technology, and it requires checking the water level (really the electrolyte level) and topping it up as necessary. Water is ‘consumed’ as the electrolyte is released as gas through vents during the charging process. If an owner allows the electrolyte level to drop too low, the battery might not hold a charge and could be ruined.

Modern wet batteries have evolved into ‘low maintenance’ or ‘no maintenance’ versions, which theoretically don’t need top-ups. Older flooded cell batteries have removable caps to add water; low- or no-maintenance batteries have caps which require a little more effort to access, if they have caps at all.

The AGM battery holds its electrolyte in glass mats, which minimizes consumption and makes it truly maintenance-free. AGM batteries are completely sealed (no caps) and leakproof, and therefore can be mounted in almost any position. They also tend to be longer-lasting, albeit a bit more expensive than wet batteries.

AGM battery in my Alfa is mounted sideways in trunk.

Whether flooded or AGM, a 12V battery consists of 6 cells; in a fully charged battery, each cell is 2.2V, so 2.2 x 6 = 13.2V. In reality, a static car battery will usually measure around 12.5V. The battery has a positive (marked +) post and negative (marked -) post protruding from the top of the case (GM used side-case-mounted battery terminals for years). A heavy battery cable, typically red for the positive side and black for the negative side, is attached to each post with a large clamp. A hold-down clamp keeps the battery in its place while driving.

BATTERY MAINTENANCE

The following recommended battery maintenance steps should be followed for ANY car, old or new. For our classics, which are driven much more infrequently, these checks are even more critical, and will help ensure that your collector car battery is always up to the task of starting the engine and letting you take your buggy out for a spin.

  • Check the electrolyte

If you have a flooded cell battery, remove the battery caps and check the water level at least twice a year. I recommend spring and fall; every three months is even better. The electrolyte level should reach the top of the ‘ring’ so that the level looks like an oval. USE DISTILLED, NOT TAP, WATER. Buy a jug of it at ShopRite for 89 cents and keep it in the garage. Don’t overfill the battery. If you accidentally overfill and cause a spill, wipe it up with paper towels (wear gloves to avoid acid burns; even the mild electrolyte solution can sting) and discard the towels.

If the battery frequently needs topping up, the case may be cracked. Check along the sides and bottom for signs of corrosion from spilled electrolyte; a cracked case cannot be repaired. If the same cell is always low and all the others are OK, that cell may have sulfated; you may need to replace the battery.

  • Clean the battery top

I began my career working on fuel-injected Volvos, which is where I learned that a dirty battery top (covered with dust, grease, oil, whatever) can cause current flow between the positive and negative posts. The resultant voltage loss is enough to disrupt the electronic fuel injection. Cleaning the battery top would sometimes fix a poorly-running car!

Since then, I’ve been fanatic about ensuring that my cars’ battery tops are clean. One tried-and-true method is with a solution of baking soda and water. If it’s not too dirty, any mild cleaner might do. I’ve used Windex, Brakleen, or Simple Green. You don’t need a lot; again, use paper towels, wear gloves, and throw the towels away. The goal is a clean, and dry, battery top.

Note the start of corrosion at base of terminal clamp
  • Tighten the battery hold-down

On a rally many years ago, I was driving my ’68 Mustang while following a friend who was in his Austin-Healey. He hustled it at speed around a corner, immediately after which, it stalled. Dead. No crank, no nothing. I pulled up behind him to assist. By this time, he had the hood open, and it was obvious to me that the battery wasn’t there. “Ron, where’s the battery?” I asked. He replied “in the trunk”. We both saw it as soon as the trunk lid was popped: during the tight right-hander, the unsecured battery flopped over, yanking the negative cable clear off its post at the same time.

You may or may not be rallying your car, but the battery is supposed to remain securely in place. All cars have some sort of battery hold-down. Check yours. If it’s missing, replace it. If it’s loose, tighten it (but not too tight, which could crack the case). By the way, bungee cords are a poor substitute; purchase a proper hold-down. Ron and I both thank you.

  • Clean and tighten the posts and cable terminals

This one is the most important maintenance tip, and it’s also a very neglected one. We will get into electrical flow in a future article, but suffice to state that for your car’s electrical system to deliver peak performance, all connections must be clean and tight.

Battery terminals build up corrosion for a number of reasons: engine compartment dirt, arcing from dissimilar metals, electrolyte seepage. Whatever the cause, this corrosion will interfere with consistent electrical flow out of the battery and to all the electrical devices in your car. It is imperative to clean and tighten these connections on a regular basis.

Simple battery maintenance tools and supplies: petroleum jelly, brushes, dielectric grease

Start by removing both battery terminals. ON A NEGATIVE GROUND SYSTEM, ALWAYS REMOVE THE NEGATIVE CABLE FIRST, AND REINSTALL IT LAST. This will prevent possible short circuits at a ‘live’ positive terminal. Clean the battery post and both inside and outside of the cable terminals with a stiff brush (you can pick up steel or brass-bristled brushes for about a buck apiece). Use a cleaning solvent as recommended above.

REINSTALL THE POSITIVE CABLE FIRST, THEN THE NEGATIVE CABLE. Clamp them tight, then smear petroleum jelly or dielectric grease on the terminal tops. The aftermarket offers plastic “battery terminal toppers” which snap on top of the terminals. If your engine compartment is particularly messy, consider these as extra protection. They provide the added benefit of helping to prevent accidental short-circuits.

Topping up the electrolyte, washing the battery top, and cleaning and tightening the terminals are all simple maintenance steps that any vehicle owner can accomplish. Even if you’ve never wrenched on your own car before, you can do this!


Richard’s Rearview Mirror, an auto industry recap for the week ending Mar. 18, 2023

After this post, Richard’s Review Mirror column will continue, albeit on a slightly less regular basis. It will also occasionally include stories on the classic car collecting hobby. 

GM TO INTEGRATE CHAT GPT IN ITS VEHICLES

GM states that the AI software could be used, for example, to explain certain vehicle functions (in lieu of reading the owner’s manual) or could help integrate functionality with other devices.


KIA INTRODUCES ITS LATEST EV, THE EV9

The new KIA EV is the first all-electric 3-row SUV to come to market. Details are scarce right now, but photos show a cavernous space with 2nd and 3rd row seats folded (keeping in mind that there is no ICE drivetrain to take up space).


RIVIAN WANTS TO UPDATE AMAZON TRUCK DEAL

Rivian had signed a deal with Amazon whereby the online retail giant had agreed to purchase 100% of Rivian’s commercial truck output. However, Amazon now states that it intends to purchase only 10,000 EV vans this year. Rivian wants to get out of the exclusivity clause so that it can sell trucks to other customers.


PORSCHE: FUTURE CAYENNES WILL BE BUILT WITHOUT AN ICE

Porsche announced that the next generation Cayenne will be available as a pure battery-electric EV, alongside ICE and hybrid options. It will launch in Europe in 2026 and in the U.S. in 2027.


NEW CAR PRICES RETURNING TO EARTH?

Consultancy firm LMC Automotive is projecting that as new vehicle supply improves and slowly returns to something closer to what it was, new car pricing will follow by dropping back to pre-pandemic levels.


LEXUS ANNOUNCES FIRST EV

The new model, the RZ450e, shares its platform with the Toyota bZ4x. It is on sale in the U.S. in limited quantities at present. Prices start around $60,000, and the spindle grille remains, even though this was a ripe opportunity to eliminate it.


VW STILL AIMING FOR “AFFORDABLE” EV WITHIN TWO YEARS

Vw is claiming to be shooting for what they call an affordable EV (€ 25,000, or $27,000) within two years. It would be sized below the existing VW ID.3 EV. A released VW illustration shows the name ID.2ALL.


NISSAN ARIYA EV SLOW TO RAMP UP

When Nissan launched its Ariya EV, the company had planned to produce close to 150,000 units a year. However, various manufacturing issues and parts delays have cast grave doubts on Nissan reaching that number. Current projections claim that the actual number will be “significantly below” 1000,000 units.


NHTSA UNDERREPORTING DISTRACTED DRIVING DEATHS?

NHTSA’s most recent numbers show that about 10% of all driving fatalities are related to distracted drivers. However, the National Distracted Driving Coalition claims that NHTSA’s methodology, which pre-dates extensive smartphone use, is outdated, and the true number is closer to 25% to 30%.


CARFAX REPORTS MUCH HIGHER CATALYTIC CONVERTER THEFTS

You read that correctly. CarFax has the ability to track and record the number of stolen cats, and for 2022, they report as many as 153,000 were stolen. The top 5 vehicles which lost their converters is not a surprise: it’s the Ford F-150, Honda Accord, Toyota Prius, Honda CR-V, and Ford Explorer. The SUVs are all on the list because they sit higher off the ground, making access easier. And the Prius is a frequent target because its cats have a higher mineral content.


PORSCHE TO REPRODUCE AIR-COOLED 911 MAGNESIUM CRANKCASES

Porsche announced that they will begin to manufacture replacement crankcases for ‘60s and ‘70s era 911s. Up until now, new replacements have not been available from any source. No word on pricing, but given the market values of these air-cooled cars in the collector car marketplace, Porsche can probably charge whatever they want and can expect to get it.